


Picture a visitor landing on your knowledge base looking for answers around specific topics. That’s what a filter by tags option fixes.
Instead of facing a wall of 80-plus articles with no way to narrow things down, users can use a tag filter to find exactly what they’re looking for.
Sadly, WordPress does not give you a built-in way to let visitors filter knowledge base search or documentation archives by tag. But with the right plugin, you can set up powerful filters for your knowledge base.
In this article, we’ll show you how to let visitors filter your knowledge base or documentation search results by tags in WordPress.
Why Filtering Knowledge Base Search by Tag Matters in WordPress
Tag filtering adds a small widget, like a checkbox list or dropdown, tied to the tags already assigned to your knowledge base articles.
A visitor picks a tag, and the list narrows to only the articles tagged with it, no new search required.
We’ve noticed that this small addition changes how visitors experience a knowledge base.
Here’s why it’s worth setting up.
- Support tickets pile up when articles are hard to find. A visitor who can’t locate the right doc often opens a support ticket instead, and that ticket costs your team time a tag filter could have saved.
- Long, unfiltered doc lists overwhelm new users. A knowledge base with hundreds of tagged articles turns into a wall of text without a way to narrow it down.
- Keyword search alone misses topic-based browsing. A visitor scanning for a category, like “troubleshooting” or “billing,” isn’t always typing a specific keyword.
- Generic archives don’t reflect how support content is organized. Your team tags docs deliberately by topic, but WordPress doesn’t expose that structure to visitors by default.
Let’s fix that by adding a tag filter to your knowledge base with WPFilters.
Adding a Tag Filter for Your Knowledge Base
We recommend WPFilters as the easiest way to add a tag filter to any content type, including documentation, without writing code.
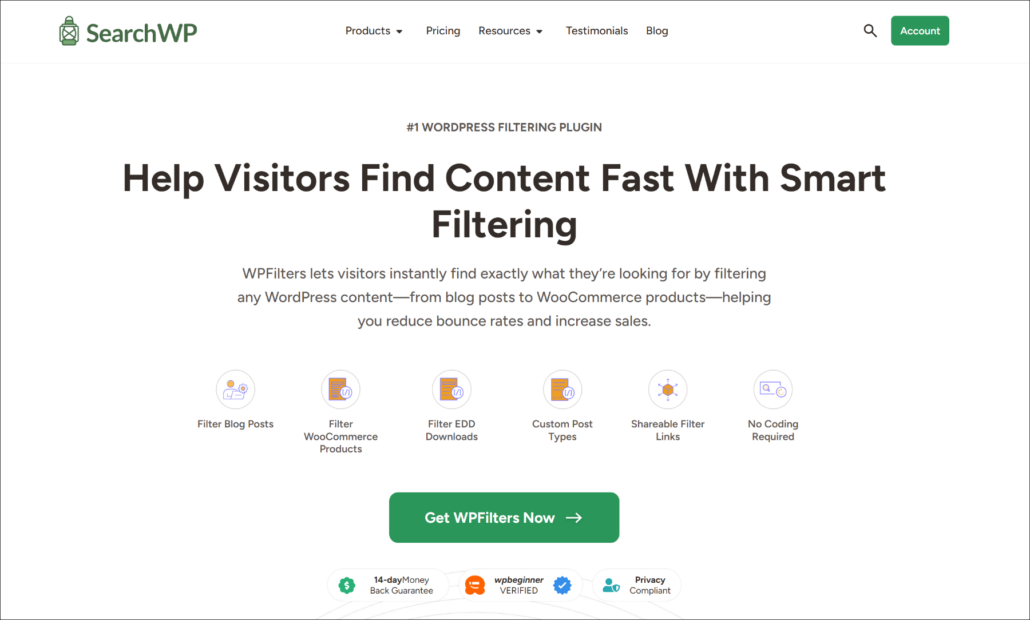
WPFilters is the best filtering plugin for WordPress, built by the same team behind SearchWP.
It lets you build custom filter widgets for any post type on your site, and connect them to data that’s already there, like tags, categories, or custom fields.
Here are a few features that make WPFilters a good fit for a documentation or knowledge base site:
- Works with any post type. WPFilters can filter custom post types like documentation or knowledge base articles, not just standard posts and pages.
- Multiple filter field types. Choose from checkboxes, dropdowns, radio buttons, and more, depending on how you want visitors to narrow results.
- Shareable filter URLs. When a visitor selects a tag, WPFilters encodes that choice in the URL, so they can share or bookmark a filtered view.
- SearchWP integration. If SearchWP is active on your site, WPFilters can add a keyword search field alongside your tag filter on the same results page.
With that, let’s see how you can use WPFilters to filter your knowledge base by tag.
Step 1: Install and Activate WPFilters
You can start by signing up for a WPFilters account.
Keep in mind that WPFilters ships with the SearchWP All Access license, so you’ll need that plan to get a license key.
Once you’re signed up, you can head to the Downloads tab in your account dashboard. From there, go ahead and click Download WPFilters to save the plugin ZIP file.
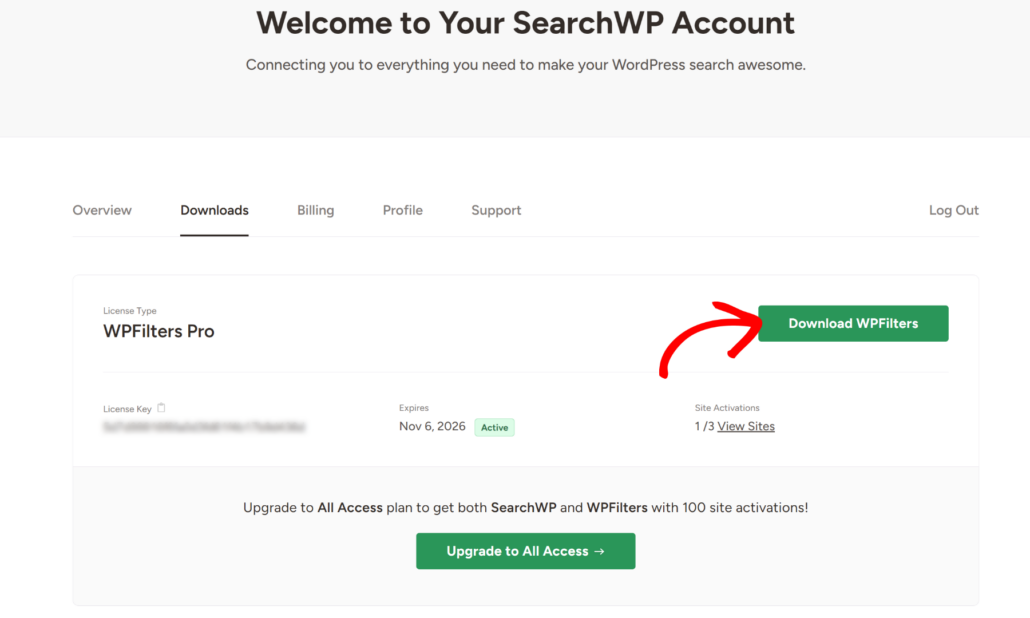
While you’re there, copy your license key too, since you’ll need it in a moment.
Next, you can log in to your WordPress dashboard and install the plugin. If you’ve never installed a WordPress plugin from a ZIP file before, WPBeginner’s step-by-step guide walks you through the process.
After it’s installed, go ahead and activate WPFilters. A Welcome to WPFilters onboarding screen will pop up. You can click Let’s Get Started and follow the onscreen prompts to enter your license key.
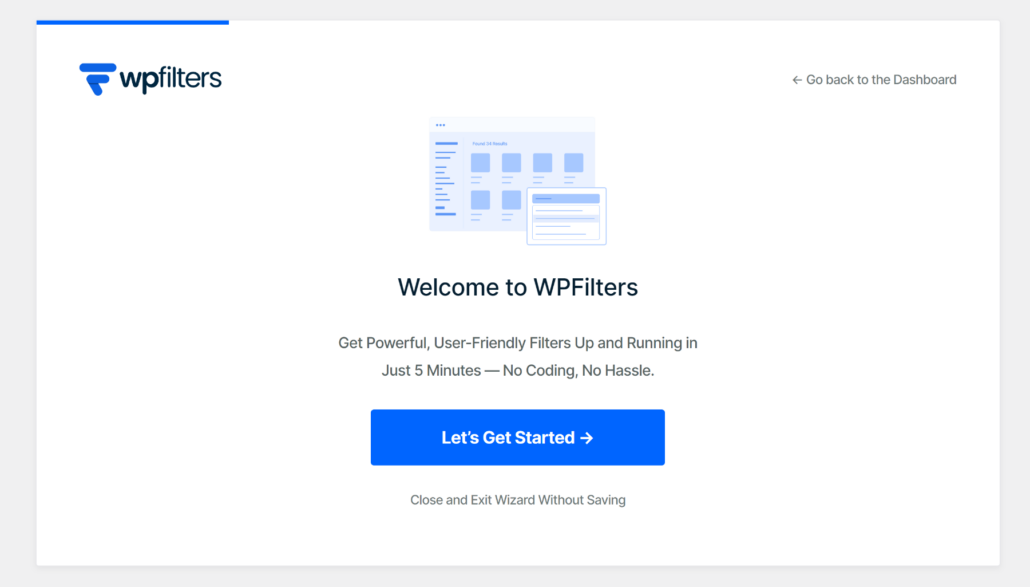
With that done, WPFilters is all set, and you’re ready to build your first tag filter.
Step 2: Add a New Filter Element
To get started, you can head to WPFilters » Elements from your WordPress dashboard.
From there, go ahead and click the Add New button near the top of the screen.
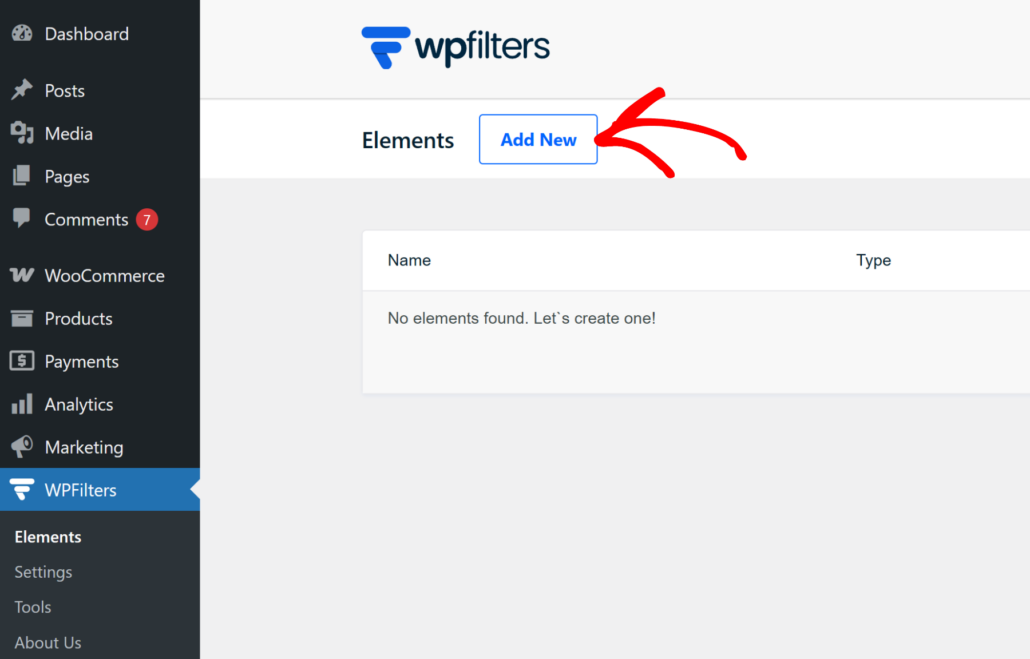
A new element will open with a default title, and you can click the pencil icon next to it to rename it to something clear, like “Filter Docs by Tag.”
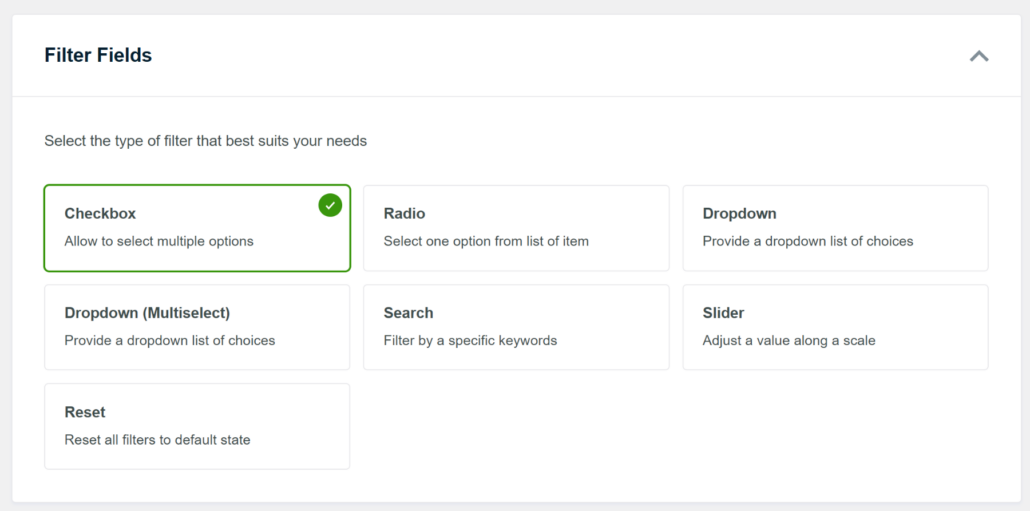
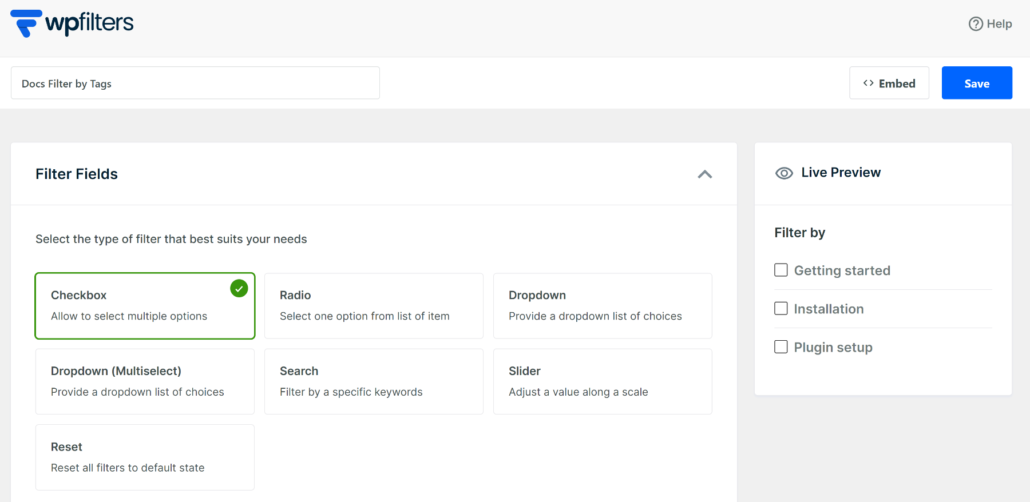
Next, you can scroll down to the Filter Fields section. We’d recommend selecting Checkbox as the field type here, since it lets visitors select more than one tag at a time.
Step 3: Connect the Tag Taxonomy as the Data Source
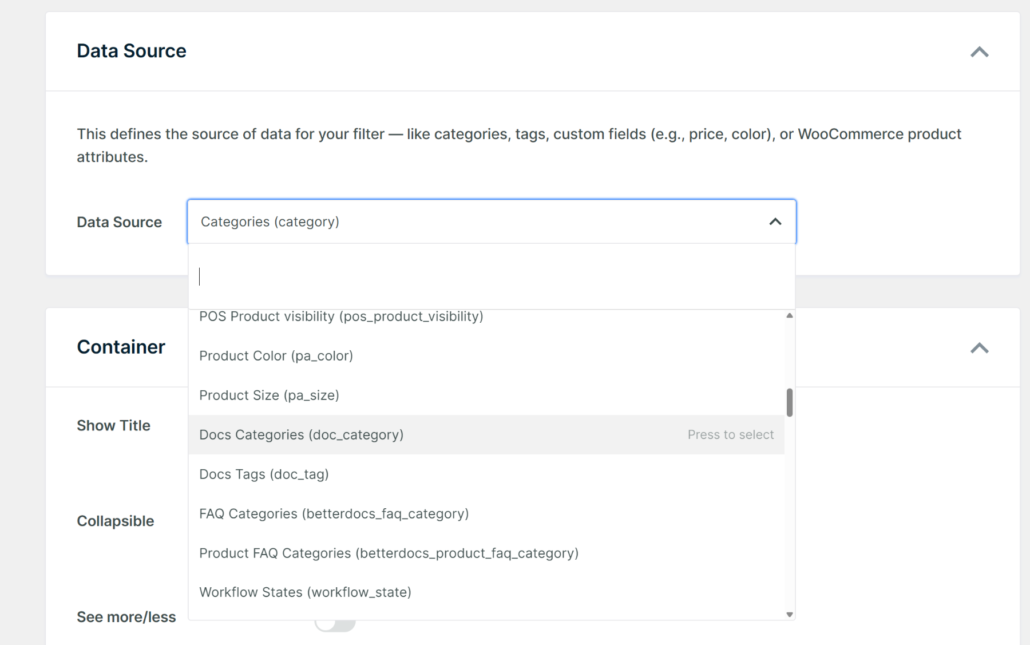
After that, you can scroll down to the Data Source section. Go ahead and click the dropdown, then look under the Taxonomies group.
You’ll notice WPFilters pulls in every taxonomy already registered on your site, so your knowledge base plugin’s tag taxonomy shows up here automatically. If you’re using BetterDocs, for example, you can look for its tag taxonomy in that same list
Once you spot it, you can select that taxonomy from the dropdown.
Keep in mind that BetterDocs is just one example of a compatible knowledge base plugin here. The same steps work for any plugin that tags its documentation, or even a plain Tags taxonomy if your knowledge base runs on standard WordPress posts.
Step 4: Customize the Filter Settings
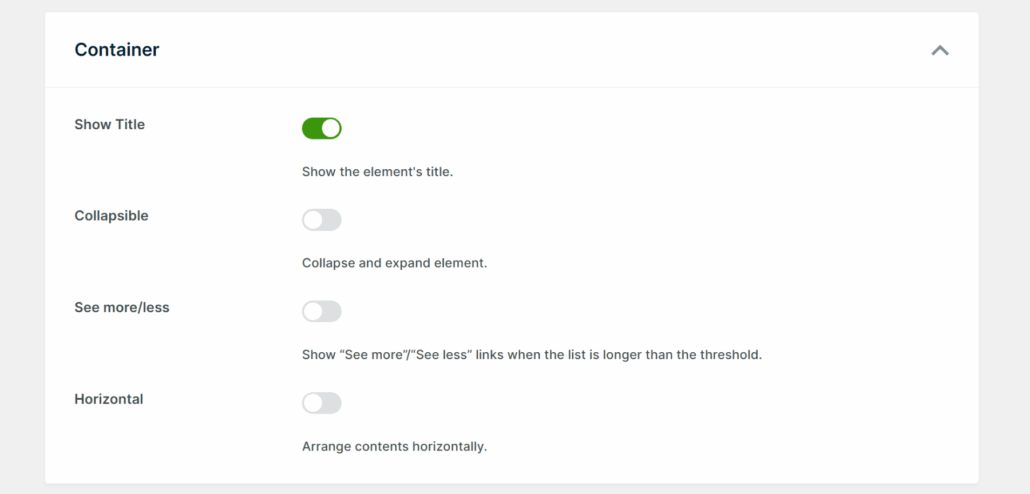
With your data source connected, you can scroll down to the Container section next.
Here, you can turn on Show Title so visitors see a label above the filter.
If you’d like visitors to be able to hide the filter on smaller screens, go ahead and turn on Collapsible too.
And if you’d rather the filter options run left to right instead of stacking, you can turn on Horizontal.
From there, you can scroll down to the Items section.
You can turn on Item Count so each tag shows how many articles match it.
We’d also recommend turning on Show Empty if you’re running a smaller knowledge base. Without it, tags with zero matching articles disappear from the list entirely, which can look like the filter is broken when it’s actually working as expected.
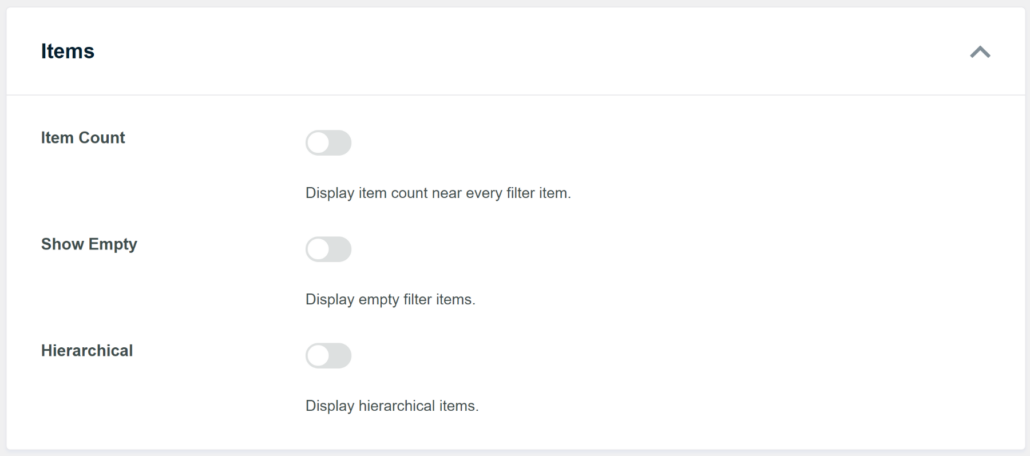
If your tags have parent and child relationships you want visitors to see, you can turn on Hierarchical as well.
Once you’re happy with the settings, go ahead and click Save, then check the live preview in the right-hand panel to see how it looks.
Step 5: Display the Filter on Your Documentation Page
Now that your filter is set up, you can click the Embed button at the top of the element editor.
This will open an Embed in a Page popup.
Under Embed Mode, you can choose Gutenberg Block if you’re editing your documentation page or template in the block editor, which is the easiest option for most site owners.
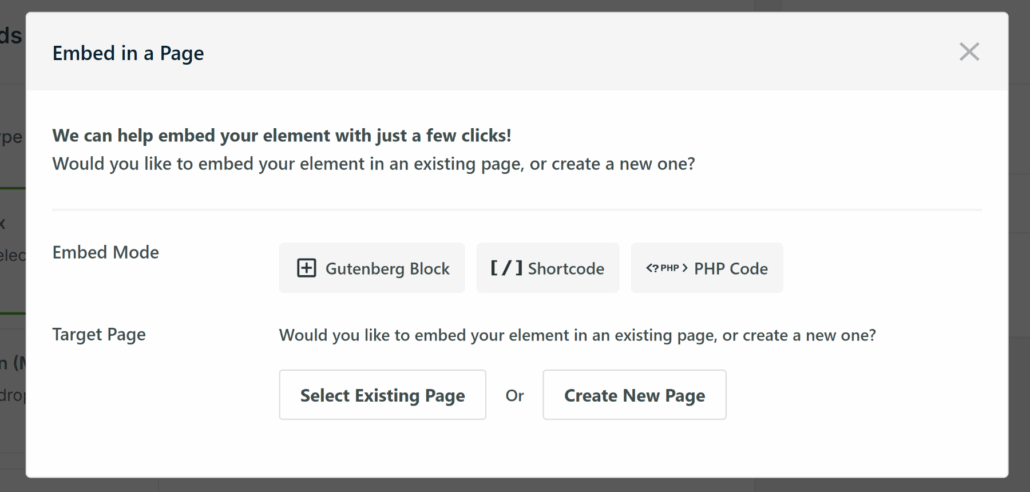
If your theme or page builder doesn’t support Gutenberg blocks, you can choose Shortcode instead.
Either option places the same filter on the page, so go with whichever fits your setup.
Just keep in mind that this step might differ slightly depending on the WordPress theme you’re using, especially if you’re adding the filter to a sidebar or widget area.
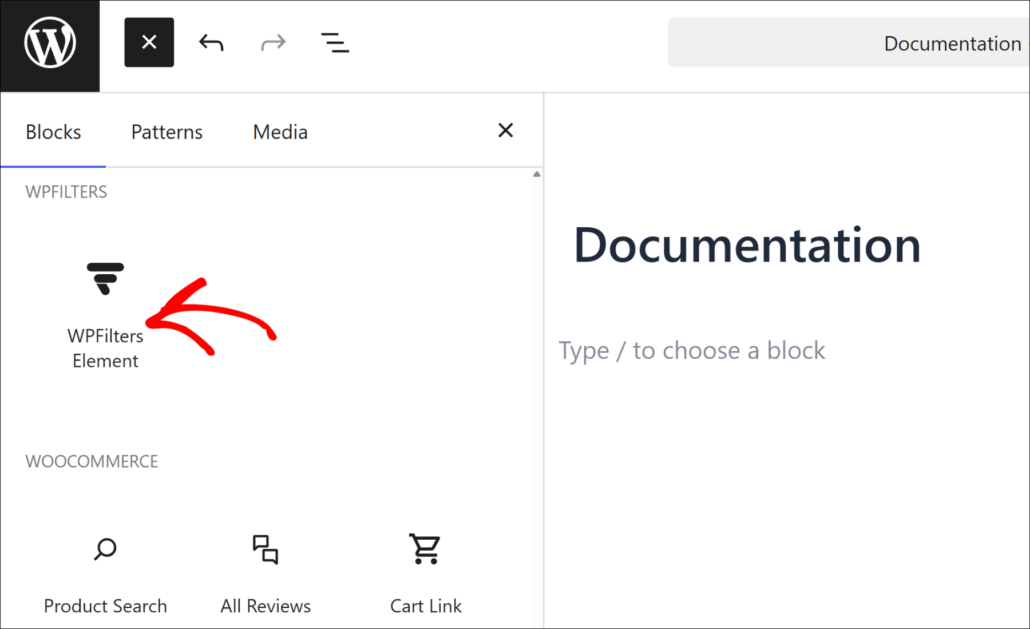
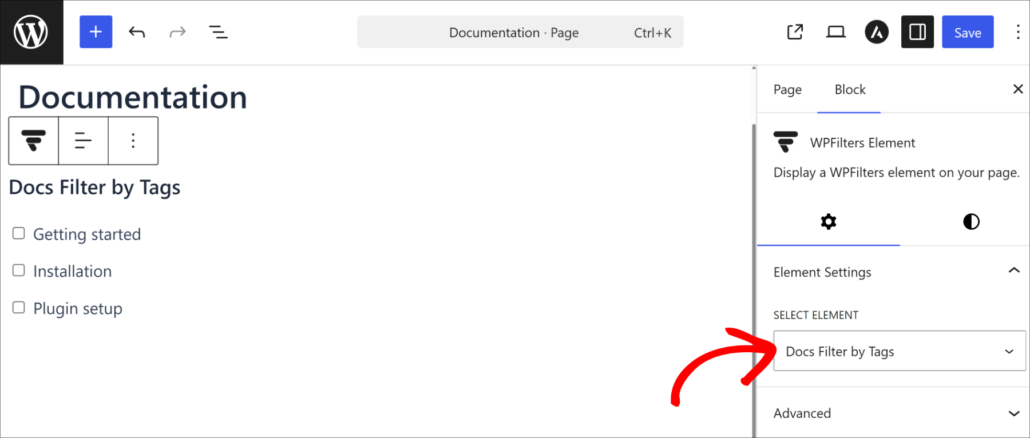
After adding the WPFilters Element block, you can then select your tags filter for your knowledge base from the settings panel on the right.
When you’re done, simply publish or update your page.
Final Step: Test Your Tag Filter
With everything in place, you can visit your documentation page on the front end to see your new tag filter in action.
Go ahead and click the Getting Started tag, then confirm that only articles tagged as ‘Getting started’ appear in the list.
Once that checks out, you can clear that selection and try combining the tag filter with a keyword search, if SearchWP is active on your site.
Bonus: Combine Tag Filtering With Keyword Search
If SearchWP is active on your site, you can add a Search field alongside your tag filter using the same Add New element process from Step 2.
WPFilters routes that search field through SearchWP automatically, so visitors can narrow by tag and search by keyword on the same results page.
This doesn’t require anything beyond WPFilters, which ships in SearchWP All Access, and an active SearchWP search engine.

Check out our guide on how to make your knowledge base searchable in WordPress if you haven’t set up SearchWP on your documentation yet.
Frequently Asked Questions
1. Can I filter documentation by tag without coding in WordPress?
Yes. WPFilters adds a tag filter to your documentation or knowledge base using a visual builder, with no coding required. You pick a field type, connect it to your tag taxonomy, and embed it with a Gutenberg block or shortcode.
2. Does WPFilters work with BetterDocs or other knowledge base plugins?
WPFilters works with any plugin that organizes content using WordPress taxonomies, since every registered taxonomy on your site shows up as a Data Source option. That includes BetterDocs and most other knowledge base plugins that tag their articles.
3. Can visitors filter by more than one tag at once?
Yes, if you choose the Checkbox field type when building your filter element. Visitors can select multiple tags at the same time, and WPFilters narrows the results to articles matching those selections.
4. Will a tag filter work alongside my existing knowledge base search?
Yes. If SearchWP is active, WPFilters can add a Search field next to your tag filter so visitors can combine a keyword search with a tag selection on the same results page.
5. Does filtering by tag slow down my documentation page?
No. WPFilters uses AJAX to refresh results without reloading the page, and it caches filter data so repeated requests stay fast even on a larger knowledge base.
What’s Next…
You’ve now given visitors a way to narrow your knowledge base or documentation results by tag instead of scrolling through everything you’ve published.
We hope this article helped you learn how to let visitors filter your knowledge base search by tag.
You may also want to see our guides on how to filter WooCommerce products in WordPress and filtering by multiple taxonomies in WordPress.
Ready to make your knowledge base easier to browse? You can get started with WPFilters here.