Letting readers filter blog posts by author is one of the easiest ways to keep them reading on a multi-author blog.
When someone finds a writer they like, they can see everything that person has written in one click, instead of digging through your archive.
WordPress gives each writer an author archive, but it shows one person per page, and most readers only find it through a byline. Your blog page doesn’t come with a way for visitors to pick writers from a list, view two writers at once, or narrow one writer’s posts to a single category.
This is where you need WPFilters, built by the same team behind SearchWP. It adds an author filter next to your posts without any code.
In this article, we’ll show you how to filter blog posts by author in WordPress, from building the filter to testing it on your blog.
How an Author Filter Differs From an Author Archive
An author filter is a set of clickable names that sits next to your list of posts.
When a reader ticks a name, the list updates to show only that writer’s posts, right on the same page.
That’s different from the author archive WordPress builds for each writer.
An archive is a separate page for one author at a time, usually at an address like /author/jamescan/, and most readers only reach it if your theme links to it. A filter also lets readers combine choices.
They can tick two writers to see both of their posts together, or pair a writer with a category like “Desserts.”
Why Let Readers Filter Blog Posts by Author?
From our experience, multi-author blogs lose readers in the gap between “I liked this post” and “show me more from this person.”
- Readers follow writers as well as topics. Someone who loved one of James’s weeknight dinners wants more recipes from James, not every recipe on the site.
- Author archives feel like a dead end. A reader who does find one has no easy way to add a topic on top, so they’re stuck scrolling through everything that writer has ever posted.
- Guest and newer writers get buried. On a busy blog, the newest posts push everyone else’s work out of view, and readers never discover the writers they’d like most.
- Long blog pages drive readers away. We’ve seen readers give up on a long page of posts and leave, when a filter would have shown them the handful they cared about.
Think of it like a bookstore that shelves every book by publication date instead of by author.
The books are all there, but nobody can find the writer they came in for.
Next, let’s look at the easiest way to add an author filter to your blog.
How to Filter Blog Posts by Author in WordPress With WPFilters
We recommend WPFilters as the easiest way to filter blog posts by author.
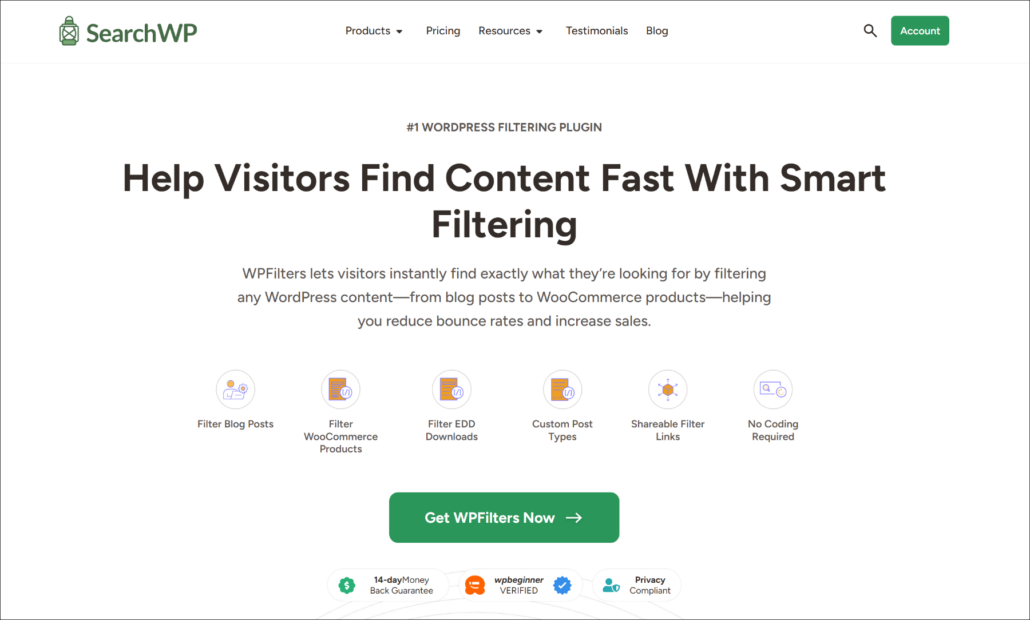
WPFilters is the best filtering plugin for WordPress, built by the same team behind SearchWP.
It lets you build filters from the authors, categories, tags, and custom fields your site already has, without writing code.
Here are some of the features that make WPFilters a good fit for multi-author blogs:
- Built-in author data source. The Post Author option lists your writers by their display name, so you don’t need to set up a custom field or taxonomy for authors.
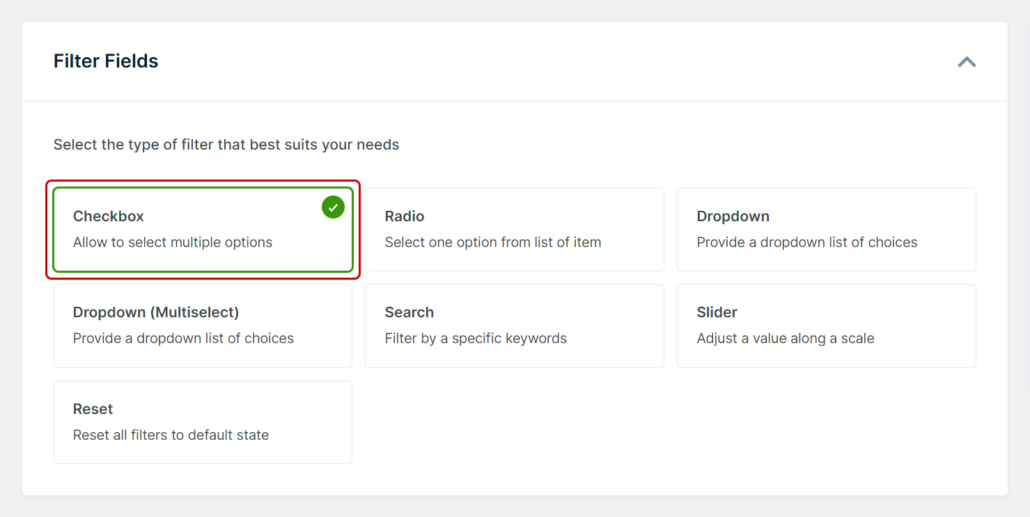
- Seven element types. You can choose from Checkbox, Radio, Dropdown, Dropdown (Multiselect), Slider, Search, and Reset, depending on how you want readers to pick writers.
- No page reloads. When a reader ticks an author, WPFilters uses AJAX to update the list of posts in place.
- Shareable filter URLs. Each selection is saved in the page URL, so a reader can bookmark or share a page of one writer’s posts.
With that, let’s see how you can use WPFilters to filter blog posts by author.
Step 1: Install and Activate WPFilters
To start, you can sign up for a WPFilters plan on the SearchWP website.
Once you’re signed up, you can head to the Downloads tab in your account dashboard. From there, go ahead and download the WPFilters plugin ZIP file.
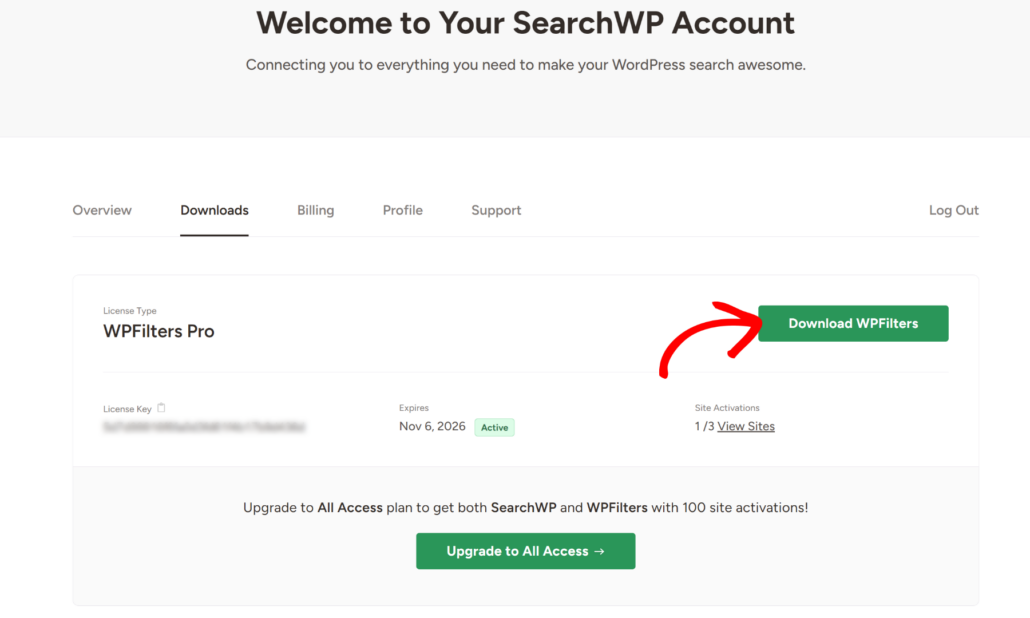
While you’re there, copy your license key too, since you’ll need it in a moment.
Next, you can upload and install the plugin on your WordPress site. If you need help, you can follow this guide on how to install a WordPress plugin.
From there, the WPFilters setup wizard will open on its own. You can click Let’s Get Started and follow the on-screen prompts.
With your license active, WPFilters is ready for your first author filter.
Step 2: Create an Author Filter Element
To create the filter, you can head to WPFilters » Elements from your WordPress dashboard.
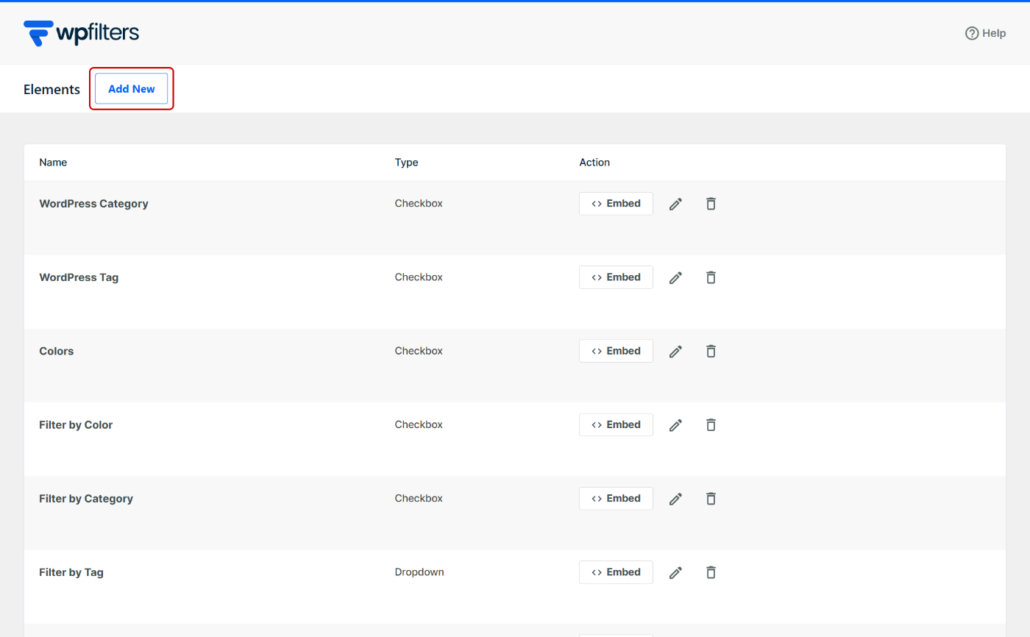
Next, click the Add New button.
At the top of the builder, give your filter a clear name, like “Filter by Author.”
Note: Avoid naming the filter just “Author.” WPFilters builds the filter’s link from its name, and WordPress already uses author in its own URLs, so the posts won’t update when a reader ticks a name.
After that, look for the Filter Fields section and select Checkbox. For this tutorial, we like Checkbox for authors because readers can tick more than one writer at a time.
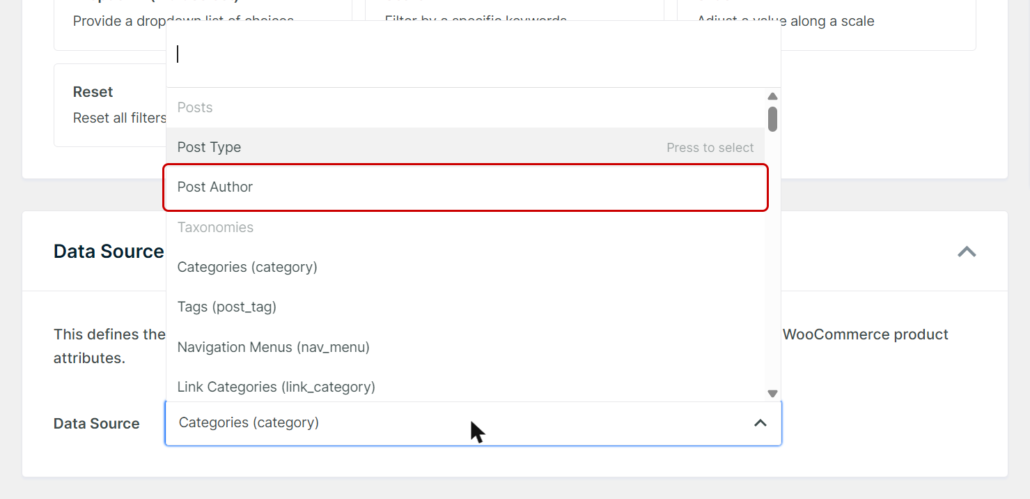
From there, scroll down to the Data Source section and open the dropdown.
The list is grouped into Posts, Taxonomies, and Custom Fields.
Go ahead and select Post Author, which sits inside the Posts group.
Next, you can choose how the filter looks.
Under Container, the Show Title toggle displays your filter’s name above the list of authors.
You can also turn on Collapsible if you’d like readers to be able to fold the filter away.
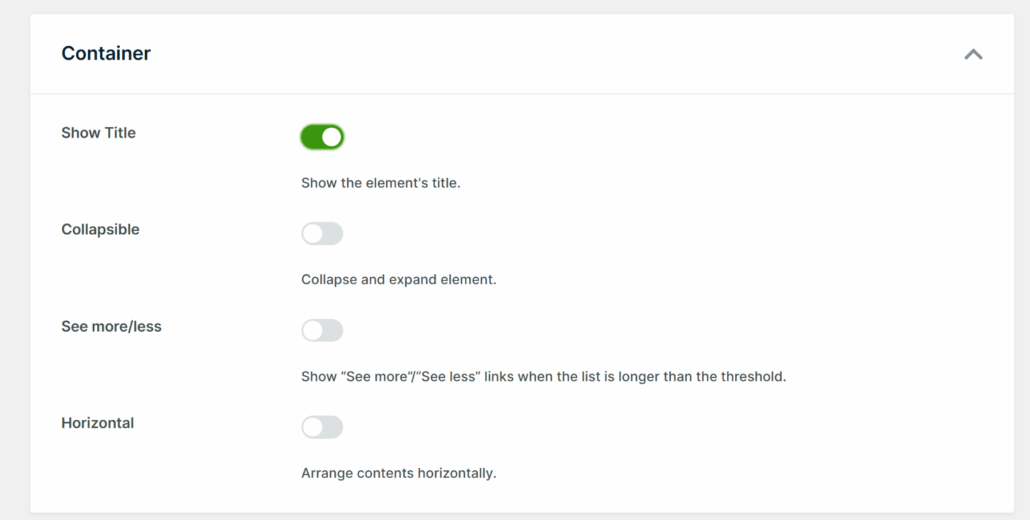
Under Items, you can turn on Item Count, which shows a post count beside each writer’s name.
There is also an option to show empty fields. But you can keep these settings at the default as well.

As you make changes, the Live Preview panel on the right shows your filter with your real author names.
Once it looks right, click Save.
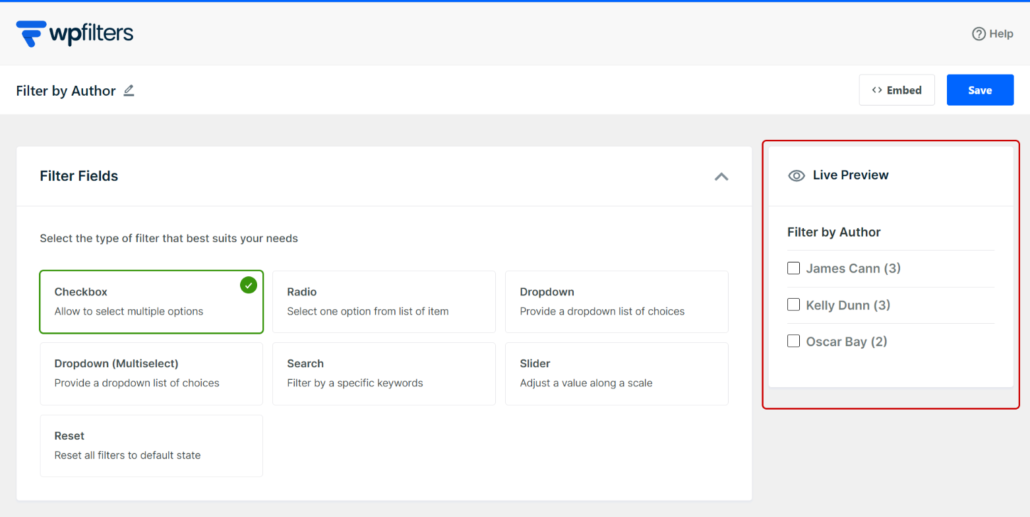
Note: WPFilters shows each writer’s display name, not their full profile.
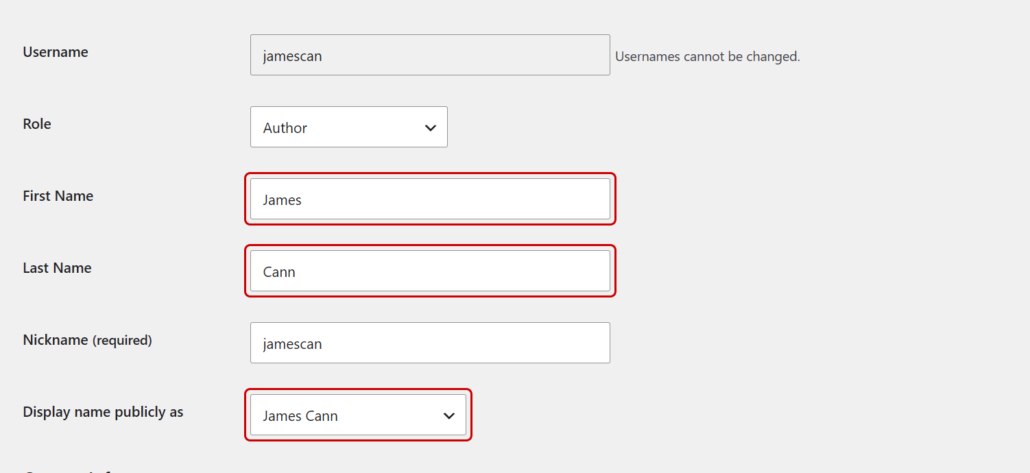
If someone’s name appears as a username like “jamescan,” you can fix it under Users » Profile for your own account, or Users » All Users for other writers.
Open the profile, fill in the First Name and Last Name fields, pick a real name from the Display name publicly as dropdown, and save.
Step 3: Add the Author Filter to Your Blog Page
Next, you can open the page that lists your blog posts in the block editor.
If your blog uses the page chosen as the Posts page under Settings » Reading, create a regular page for the filter instead, since WordPress doesn’t show that page’s own content.
This page needs a Query Loop block to show the posts, since WPFilters filters the Query Loop on the page.
After that, click the + icon where you’d like the filter to appear, such as a column beside your posts.
Search for “WPFilters” and add the WPFilters Element block.
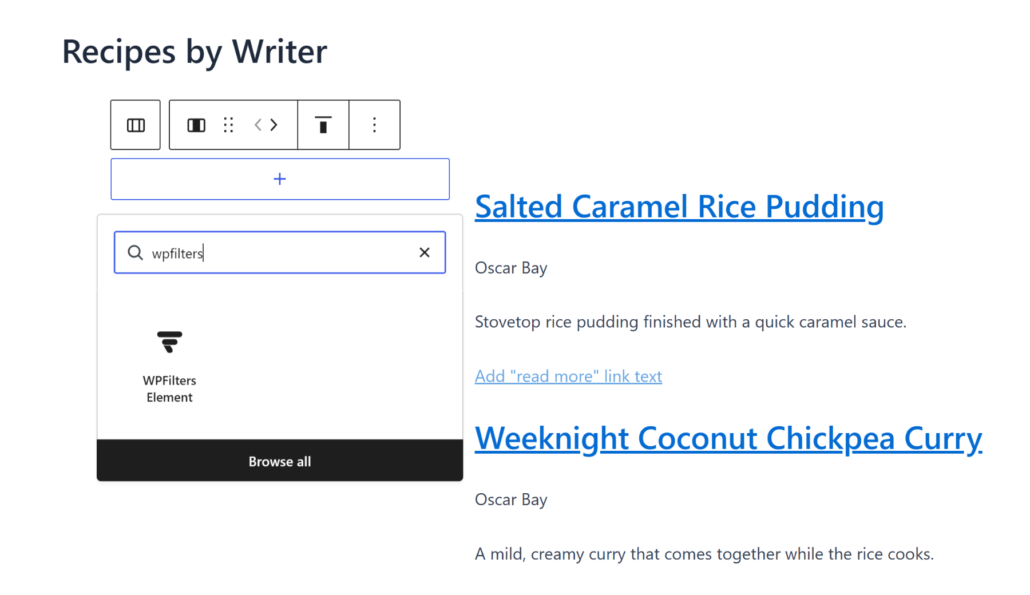
From there, choose your “Filter by Author” filter from the Select Element dropdown in the block settings.
There’s no extra setting to connect the filter to your posts. Simply save or update your page.
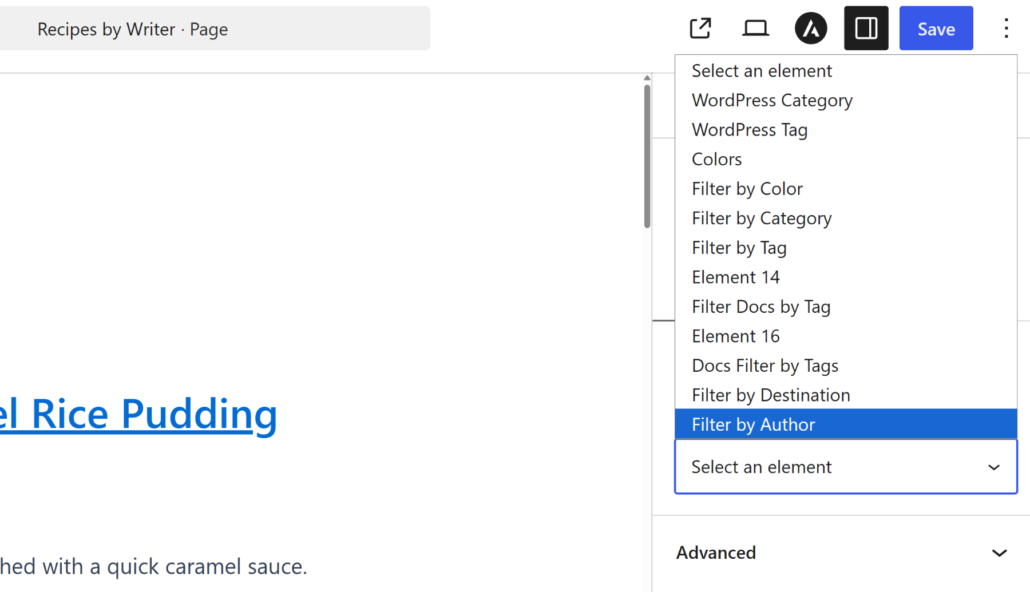
WPFilters finds the Query Loop block on the page and links the two automatically.
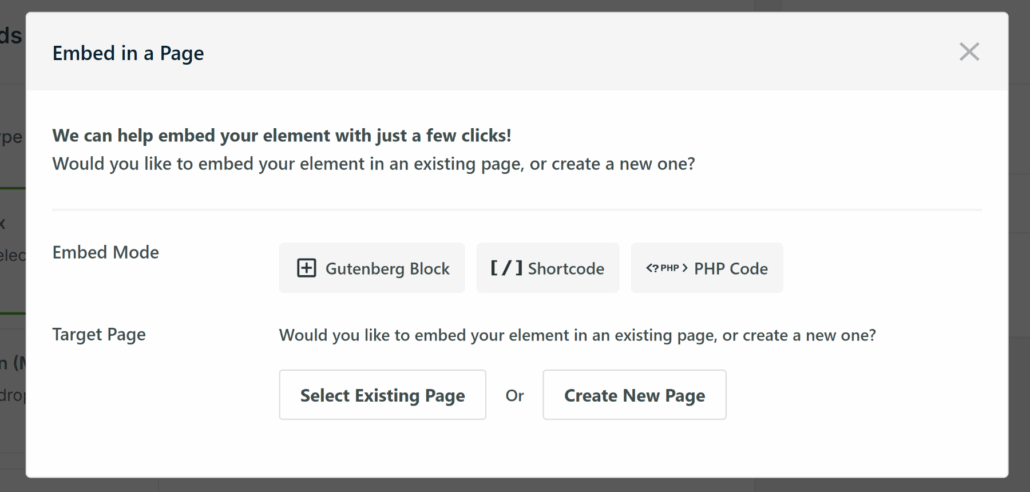
If you’d rather not use the block, the Embed button in the filter builder gives you a Shortcode and PHP Code option too. The shortcode is handy for placing the filter in a sidebar widget area, though this step might differ depending on the WordPress theme you’re using.
Step 4: Test Your Author Filter
With the page published, you can visit it in a new browser tab to test the filter.
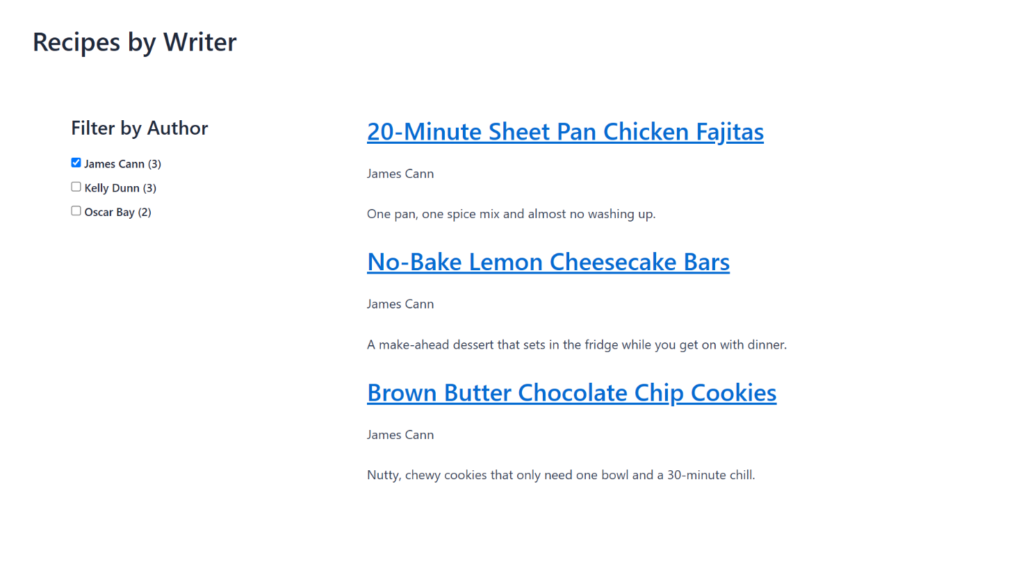
For the first test, tick one writer, like “James Cann.”
The list of posts should update in a moment, without a page reload, and show only James’s posts.
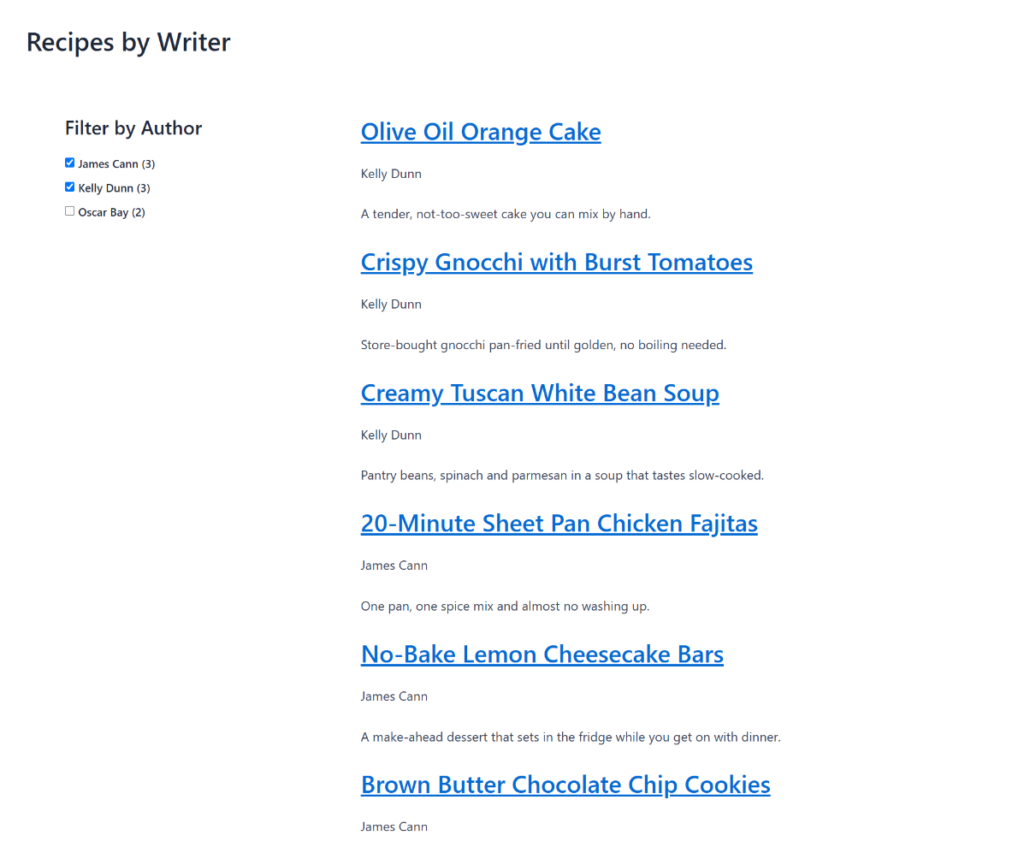
For the second test, tick a second writer, like “Kelly Dunn,” while James is still selected.
This time, the list should show posts by either writer, mixed together.
You’ll also notice the page URL changes as you tick names.
You can copy that URL and open it in a private window to check that the same writers are still selected.
Bonus: Combine Author and Category Filters
Once your author filter works, you can let readers narrow things down even further.
To do that, create a second element in WPFilters » Elements, and pick Categories (category) from the Taxonomies group in the Data Source dropdown.
After you add both filters to the same page, they work together.
A reader can tick “James Cann” and “Desserts” to see only James’s dessert recipes.
If you’d like to go further, our guide on how to filter by multiple taxonomies in WordPress covers more combinations.
You can also give readers a one-click way to clear every selection with a Reset element, which we cover in our guide on how to add a reset filter button in WordPress.
Frequently Asked Questions
1. Can WordPress filter blog posts by author without a plugin?
WordPress builds an author archive for each writer, usually at an address like /author/jamescan/, but it only shows one writer per page.
Letting readers pick authors from your blog page, or combine writers and categories, takes custom code with WP_Query or a filter plugin like WPFilters.
2. Can visitors filter posts by author and category at the same time?
Visitors can filter by author and category together when you create one element with the Post Author data source and a second with Categories (category), then add both to the same page.
WPFilters combines them, so a reader can see one writer’s posts in one category.
3. Can readers select more than one author at once?
Readers can pick several authors at once when you use the Checkbox or Dropdown (Multiselect) element type.
When a reader ticks two or more writers, WPFilters shows posts by any of the writers they picked.
4. Does the author filter work with guest authors or co-author plugins?
The Post Author data source reads the main author that WordPress stores on each post.
With Co-Authors Plus, for example, the first co-author is saved as that main author, so they’ll appear under Post Author. The other bylines are stored in a separate taxonomy, which shows up as Authors (author) in the Taxonomies group of the Data Source dropdown, so we recommend testing it on a staging site first.
5. Why does my author filter show usernames instead of real names?
WPFilters lists each writer by their WordPress display name.
If a writer’s display name is still their username, open their profile under Users » All Users, fill in First Name and Last Name, pick a real name from Display name publicly as, and save.
What’s Next…
You now have an author filter on your blog page, so readers can find every post from the writers they like without leaving the page.
You may also want to see our guides on how to filter blog posts by category in WordPress and add authors to WordPress search results.
Ready to help readers find their favorite writers? You can get started with WPFilters here.