Want to create advanced search forms in WordPress without writing code? Don’t buckle up because it’s going to be an easy ride.
Even if you have what your visitors are looking for on your website, you are losing business if they cannot find it, which is why you need a good search form.
It will help you reduce frustration and increase engagement with your content, providing an improved user experience and decreased bounce rate.
An ideal search form is quite challenging to create with the default WordPress search as it’s time-consuming and requires expert coding skills.
Using a simple plugin, you can create advanced search forms in WordPress easily and within minutes without writing a single line of code!
Therefore, we’ll use SearchWP, the most powerful and easy-to-use search plugin for WordPress.
How To Install And Activate SearchWP: Advanced Search Plugin for WordPress
SearchWP offers lots of features bundled in different packages. Please have a look at the different plans and find the one that suits you best!
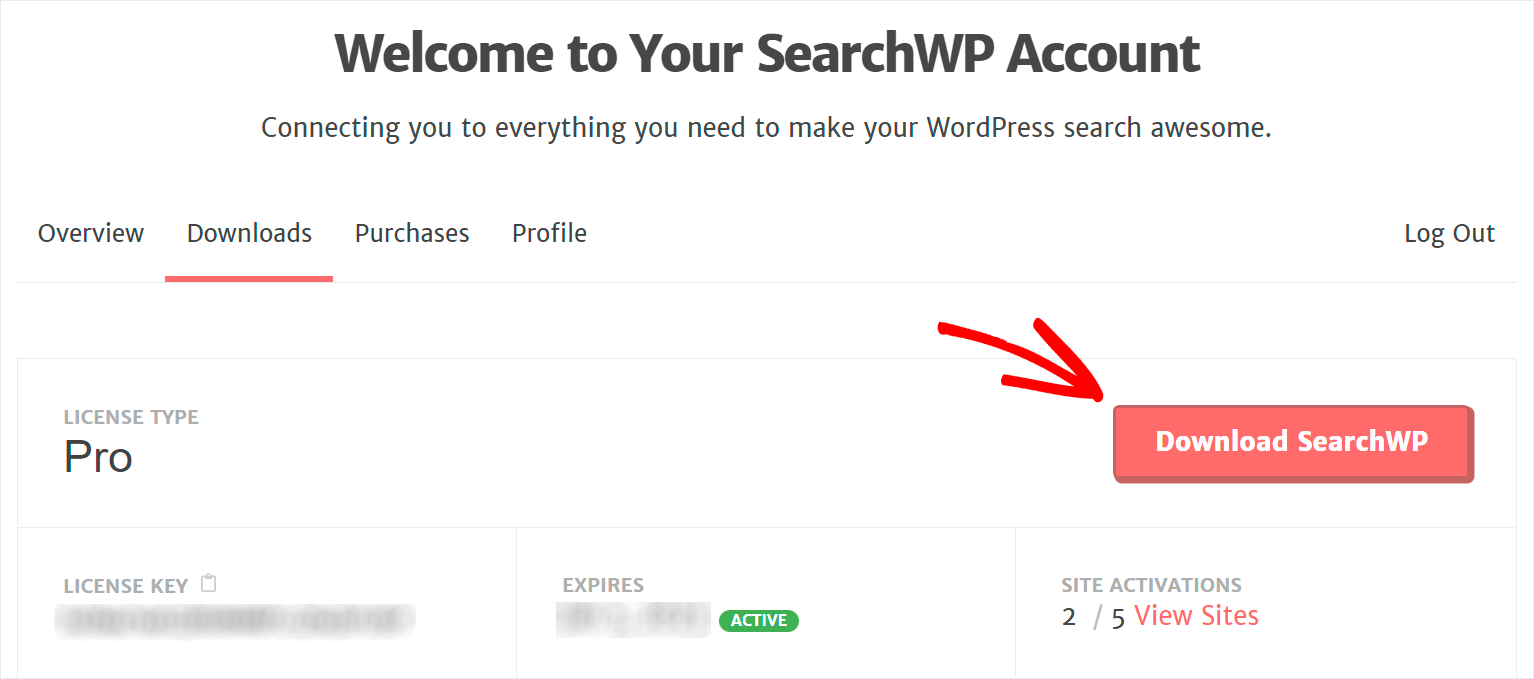
Once done, head over to the Downloads tab on your SearchWP account and get your copy of SearchWP by clicking “Download SearchWP.”
Copy your license key from the same screen; it will be required after a few steps.
Now, you can install and activate SearchWP like any other plugin.
It’s time to verify your purchase. Hover your cursor over SearchWP from the top bar and click Activate License.
Paste the license key you copied earlier from your SearchWP Account Dashboard and press Verify Key.
You’ll see your licensing information appear below if the verification is successful.
Gettings The Basics Right: Configure Search Engine for WordPress
First things first: you need a search engine for your search form to work. The built-in WordPress search engine is a basic one and cannot index custom post types, e-commerce products, document content, or taxonomies, to name a few.
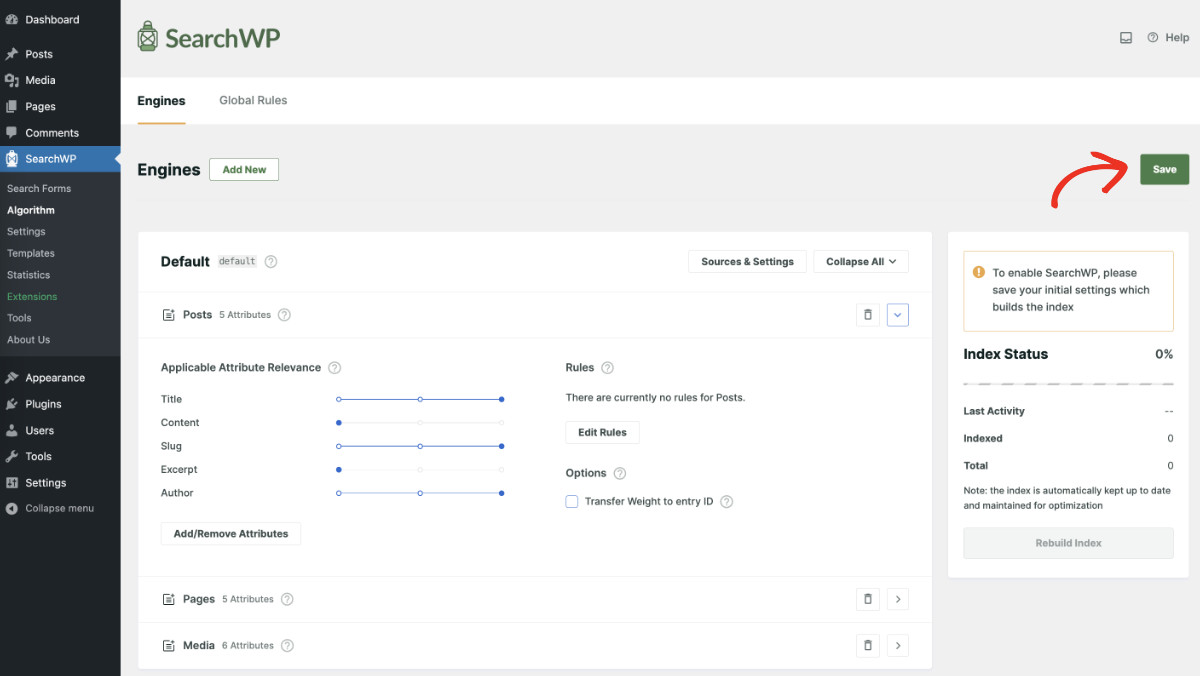
To set up the search engine, go to Dashboard > SearchWP > Algorithm. You’ll land on the Engines tab and click “Save” to go with the predefined settings, and your default WordPress search will be replaced with SearchWP Engine.
For customizing the engine according to your needs, visit the documentation.
How to Create Advanced Search Forms In WordPress Easily Without Code
Using SearchWP, you can create a search form in WordPress in 3 easy steps: 1 – add a new form, 2 – configure the form, and 3 – paste the form into your desired location. It’s that simple. Now, let’s see this in action step-by-step.
Step 1: Add New Form
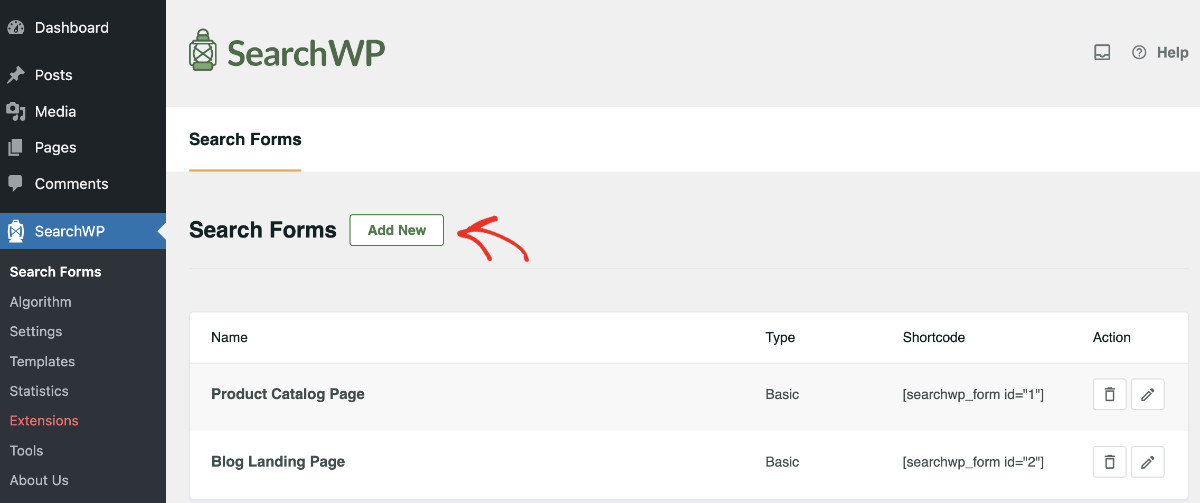
Navigate to SearchWP > Search Forms. Then click on the Add New button.
You’ll get a new form with a system-generated name. Let’s give it a meaningful name, Product Page Search, so it can be recognizable down the road. You can do that by clicking the pencil icon on the top left.
Step 2: Configure The Form
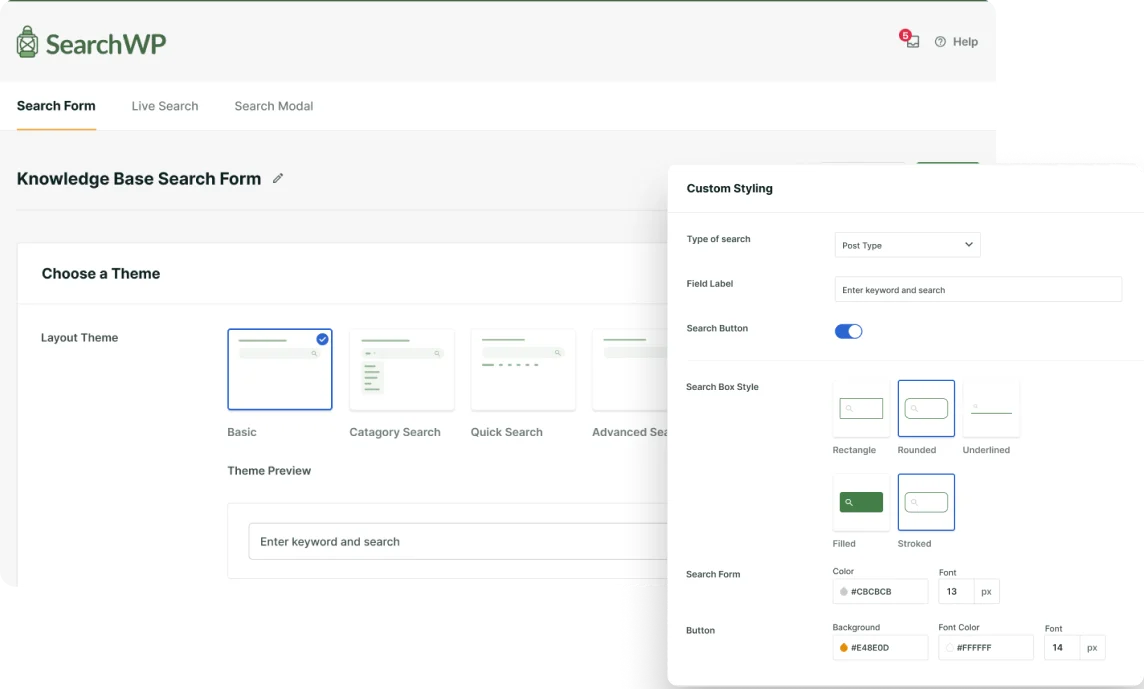
The effectiveness of a search form depends largely on its design and functionality. Hence, let’s pick a Layout Theme from the predesigned ones. You can see the Theme Preview right beneath the layouts. Pick and choose one that serves you the best.
You can also control the layout and features by tweaking the Custom Styling settings. Let’s go over the settings one by one.
Category Search: enabling this will show a category filter dropdown in the search form. It will show all the available categories; however, you can limit the categories by using the Select Category field below.
Quick Search: it promotes custom words right below the search form; with this, you can incentivize visitors to use these search terms if turned on.
Advanced Search: it gives your visitors more control over their search capabilities and lets them narrow their search results.
Any or all of these settings can be turned on independently.
Now, we can use different engines for different search forms. If you want to show different results on various forms, you can also benefit from using a supplemental engine. Let’s stick with Default, as we configured that in the previous step.
Let the form know which search results page to use by selecting one from the dropdown menu.
As we have already discussed, SearchWP uses its engine to perform search, and what is to be indexed can be defined within the search engine by selecting sources. When a search form uses an engine, it limits the results to only that particular engine.
You can put even more restrictions on the form by using the following two settings:
Type of search: the search engine used by this form uses multiple sources. Selecting them here limits the search to one or more sources. If you leave this field blank, the engine will use all the available sources.
Select Category: you can put even more restrictions and limit the search only to a particular category. For a category to show up here, it must have at least one item assigned to it. Similar to Advanced Search, your visitors can control search results by selecting their chosen category if Category Search is enabled. Please note the categories you put in here are the ones that will be displayed in the dropdown.
Now, it’s time to customize the search form. Put the text you want to be shown as a placeholder inside the search form by using Field Label, and if you want the search form to have a button, turn on the Search Button.
Quick Search Items: enable you to nudge the visitors in the direction you want. It lets you put specific keywords under the search form so the users can select what you want them to look for! You can add these keywords by selecting them from the dropdown. The suggestions you see here come from Metrics if you have it enabled; if not, they are based on Statistics.
Advanced Search Filters: you can give visitors more control and help them find exactly what they are looking for by letting them use multiple filters. SearchWP currently has support for Authors, Post Types, and Tags.
Step 3: Style The Form According to Your Taste
SearchWP provides you with 4 different styles for the search form. You can pick one you like from the list and can also customize the color and font size of the form.
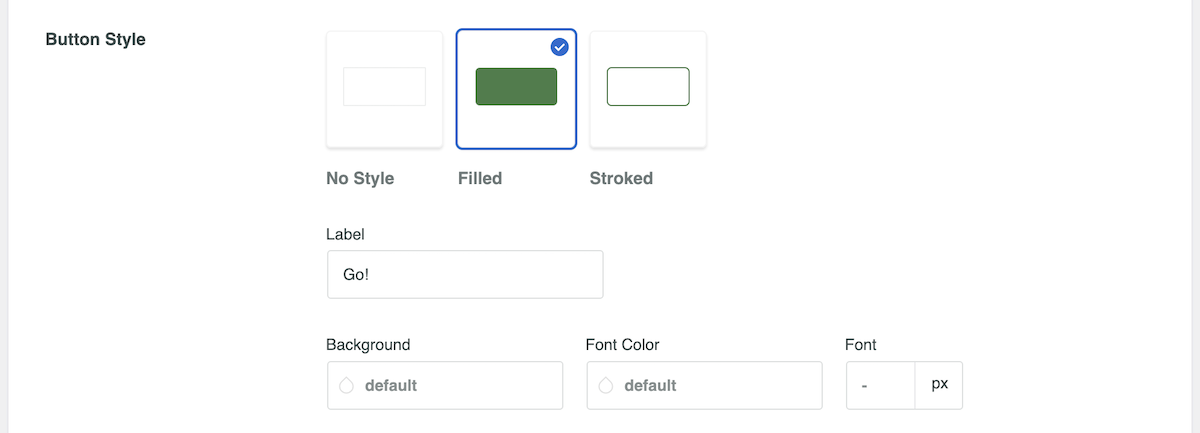
You may also like to modify the search button according to your taste. There are 3 button styles, so you have the ability to name the button and customize the background color, font color, and font size. Please note the modification will only work when the Search Button is turned on.
When you have the form you want perfectly configured, you need to store all the changes we made by clicking the Save button on the top right.
Step 4: Use the Form According to Your Need
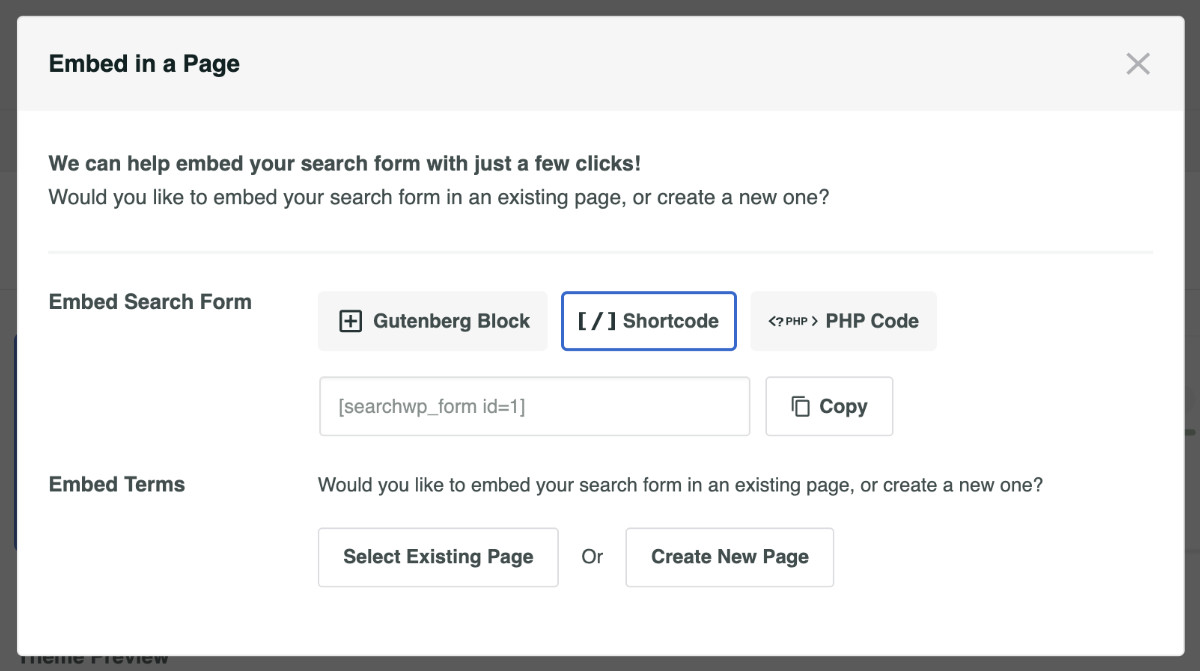
Now that your search form is configured, you can put it anywhere on your site. To do that, click on Embed right next to the Save button.
There are a few options to embed your search form with just a few clicks. Select how you want to embed the form and follow the instructions.
For instance, if you want to put the search form using a shortcode, select Shortcode from the list, and you’ll be presented with the shortcode associated with the form. Copy and paste it to your desired location.
You can paste the shortcode by opening the desired page in edit mode.
Voila! The setup is complete, and your search form is ready for action!
Wrapping Up
Using the same technique, you can configure as many custom search forms as you like with only a few clicks. If you want different search forms to show different results, you can do that by leveraging the supplemental engine.
In this tutorial, we have learned how to create a search form in WordPress effortlessly without writing code. SearchWP removes the barrier for coding and enables you to add an advanced search with custom settings. It also comes with countless other features that will improve the search experience for your visitors significantly.
Get the SearchWP plan that fits your needs to take control of WordPress search.
