Have you ever wondered how to keep visitors engaged on your site? It would be easier if you could show related content in WordPress.
By displaying related content such as posts, pages, or products, you can guide your visitors to other areas they might find interesting.
Imagine someone reading one of your blog posts and loving it but leaving your site because there’s nothing more to catch their attention.
Instead, presenting related content would keep them on your site longer and help you upsell your products or services without much effort.
Therefore, in this article, we’ll guide you on how to show related content in WordPress easily. Everyone, from beginners to experts, can do it with only a few steps.
Key takeaways:
- Discover how related content can increase engagement and boost sales.
- Learn how to show related content in WordPress without writing any code.
- Determine which content to display as related content for a specific page/post.
Why Show Related Content In WordPress
Showing related content is a great way to keep your audience interested. When visitors find something they like, they’re more likely to explore other similar topics on your site. This keeps them on your site longer and makes them more likely to come back in the future.
For example, if you have a cooking blog and someone visits to learn how to bake a cake, you could suggest related recipes like frosting techniques or other cake varieties. The reader will likely click on these suggestions, staying engaged with your content.
Or, if you run an online store, showing related products can encourage more purchases. For instance, someone looking at a phone might also be interested in accessories like cases or screen protectors. Displaying these related items increases the chances of additional sales.
So, let’s see step by step how you can leverage this strategy to boost your sales.
How To Show Related Content In WordPress
The fastest and easiest way to show related content in WordPress is by using SearchWP. It’s the most powerful search plugin for WordPress that even comes with extra functionalities to improve your website, one of which is showing related content.
Over 60,000 website owners rely on SearchWP to improve their websites and increase sales. Apart from displaying relevant content in WordPress, here’s what SearchWP enables you to do:
- Exclude Content From Search Results: Improve search quality by filtering out irrelevant content or categories, allowing users to find exactly what they’re looking for more efficiently.
- Prioritize Content in Search Results: You can adjust which content appears first in search results. This allows you to highlight specific pages or items, making it easy to draw attention to what matters most.
- Support Keyword Stemming: SearchWP automatically includes different forms of your search terms, such as ‘running’ and ‘runner’, when searching for ‘run.’ You can customize this feature to suit your site’s needs.
- Analyze Search Trends: Track and analyze what visitors are searching for on your site, gaining valuable insights into user behavior. This data can help you fine-tune your content strategy and improve overall user engagement.
Now, let’s dive into the step-by-step guide on how to display related content in WordPress.
Step 1: Install & Activate SearchWP
First, choose the SearchWP package that best serves your needs, as each package provides different features.
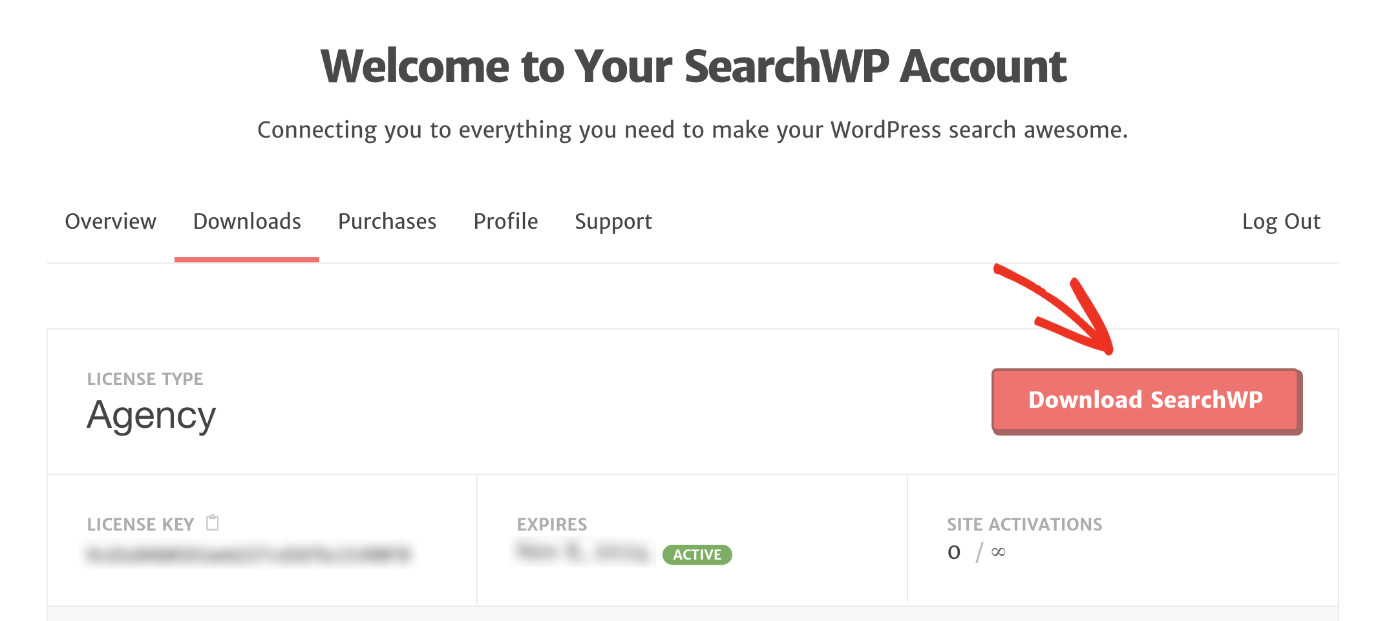
After making the purchase, download the plugin file from the Downloads tab on your Accounts page.
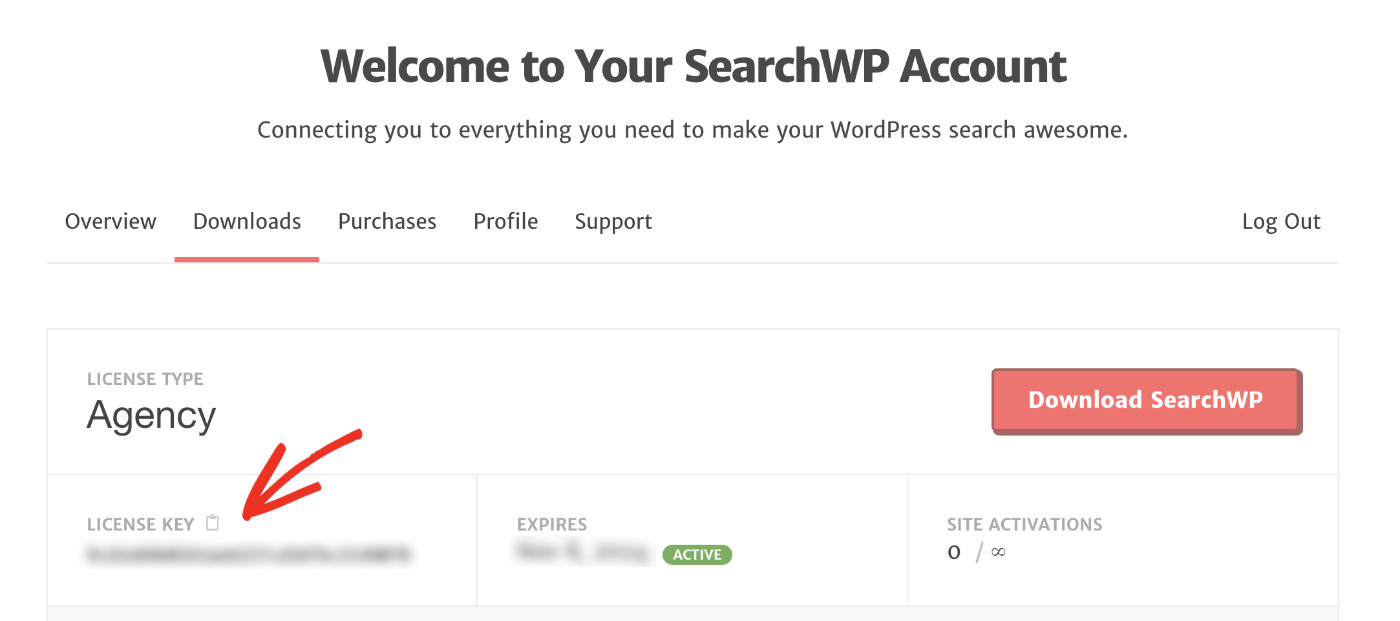
After downloading the zip file, remember to copy your license key from the same page; you’ll need it to activate your SearchWP plugin later.
Once the download is complete, install and activate SearchWP like any other WordPress plugin.
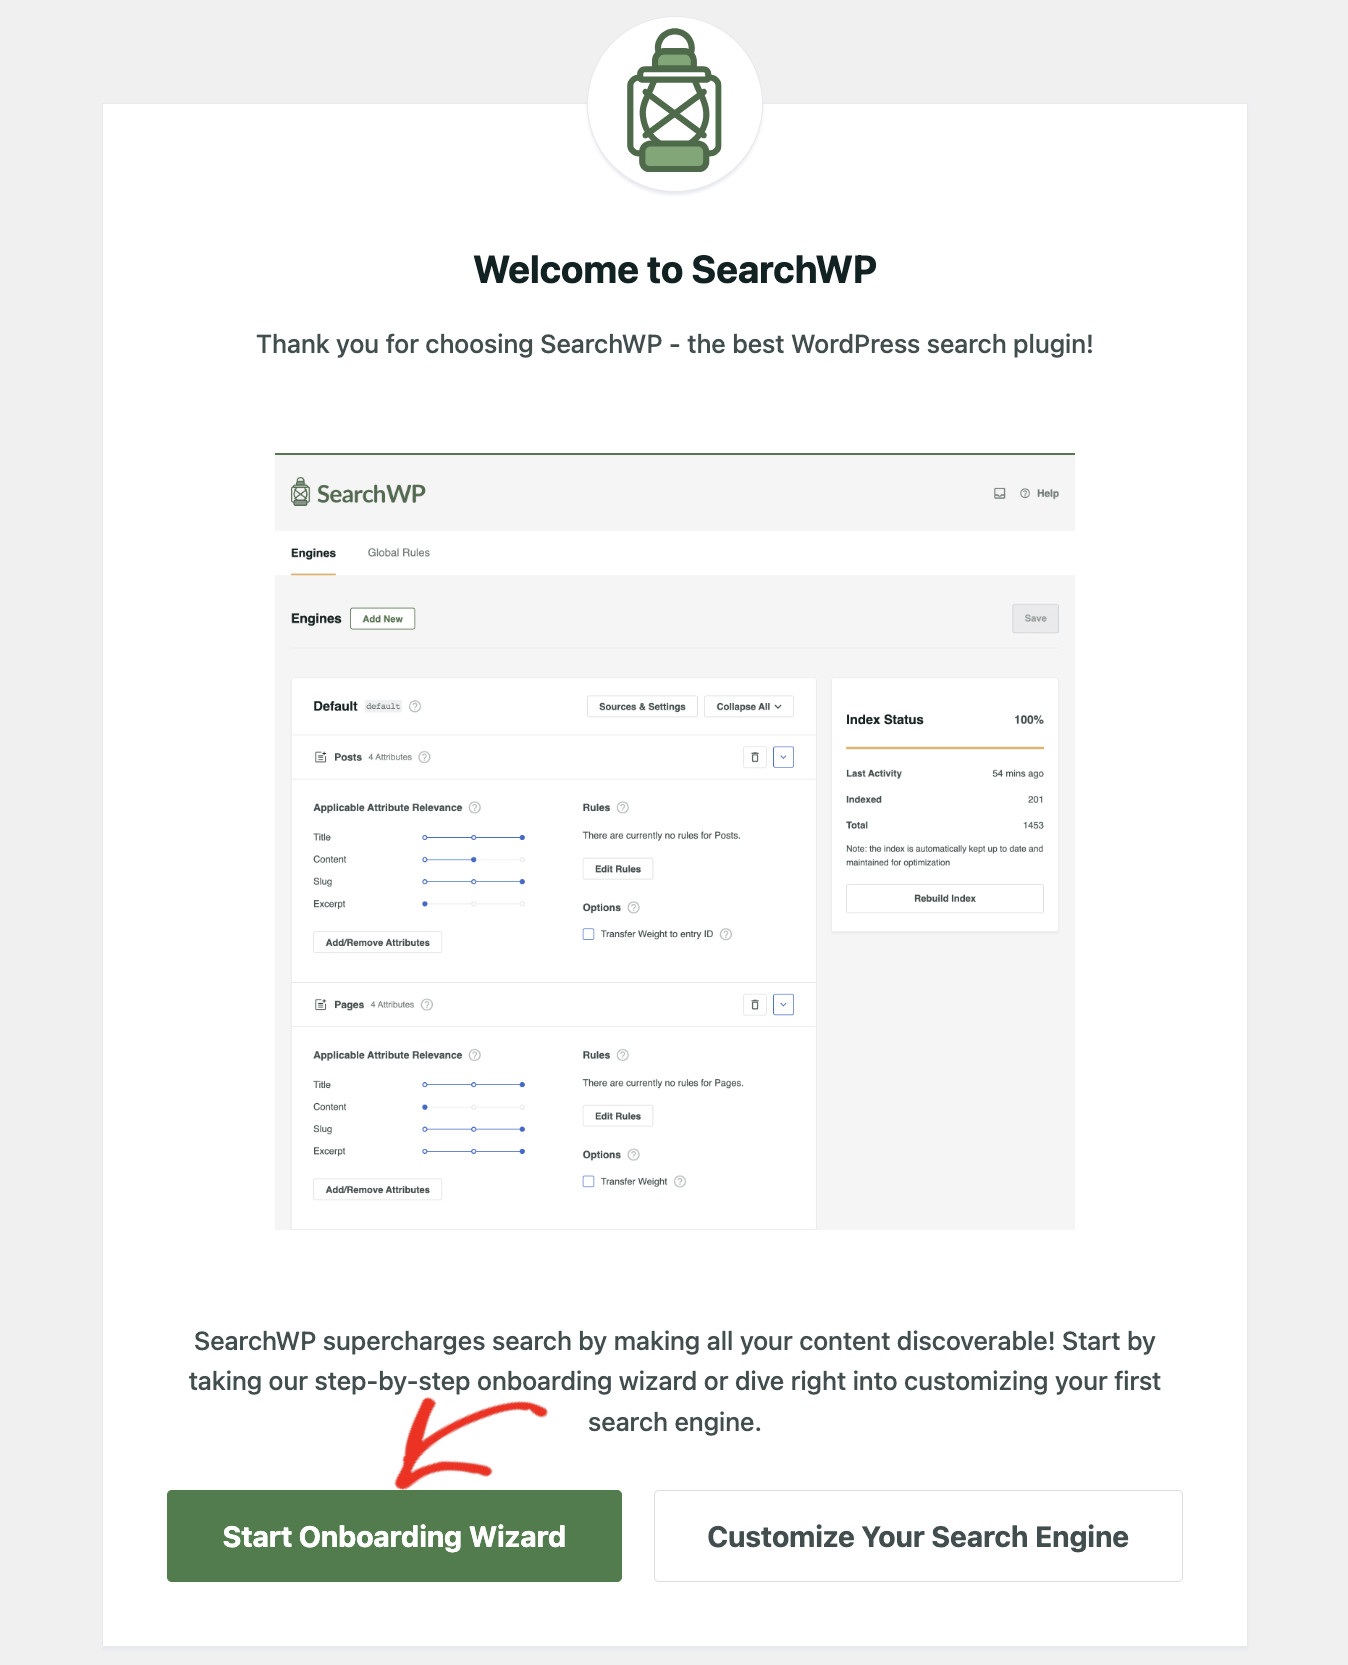
After activation, a welcome wizard will appear. Click “Start Onboarding Wizard” to follow the initial setup configuration.
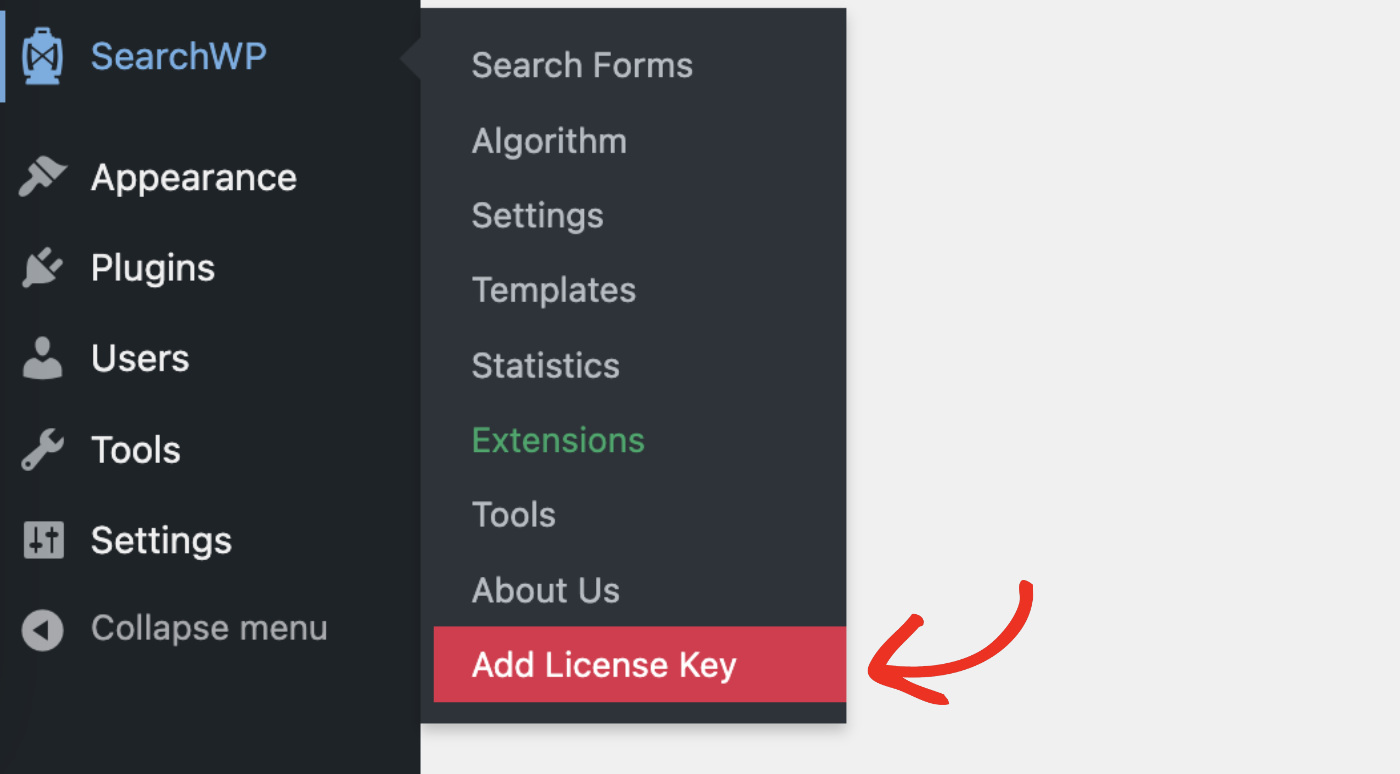
Alternatively, if you prefer to set up everything manually, go to SearchWP > Add License Key.
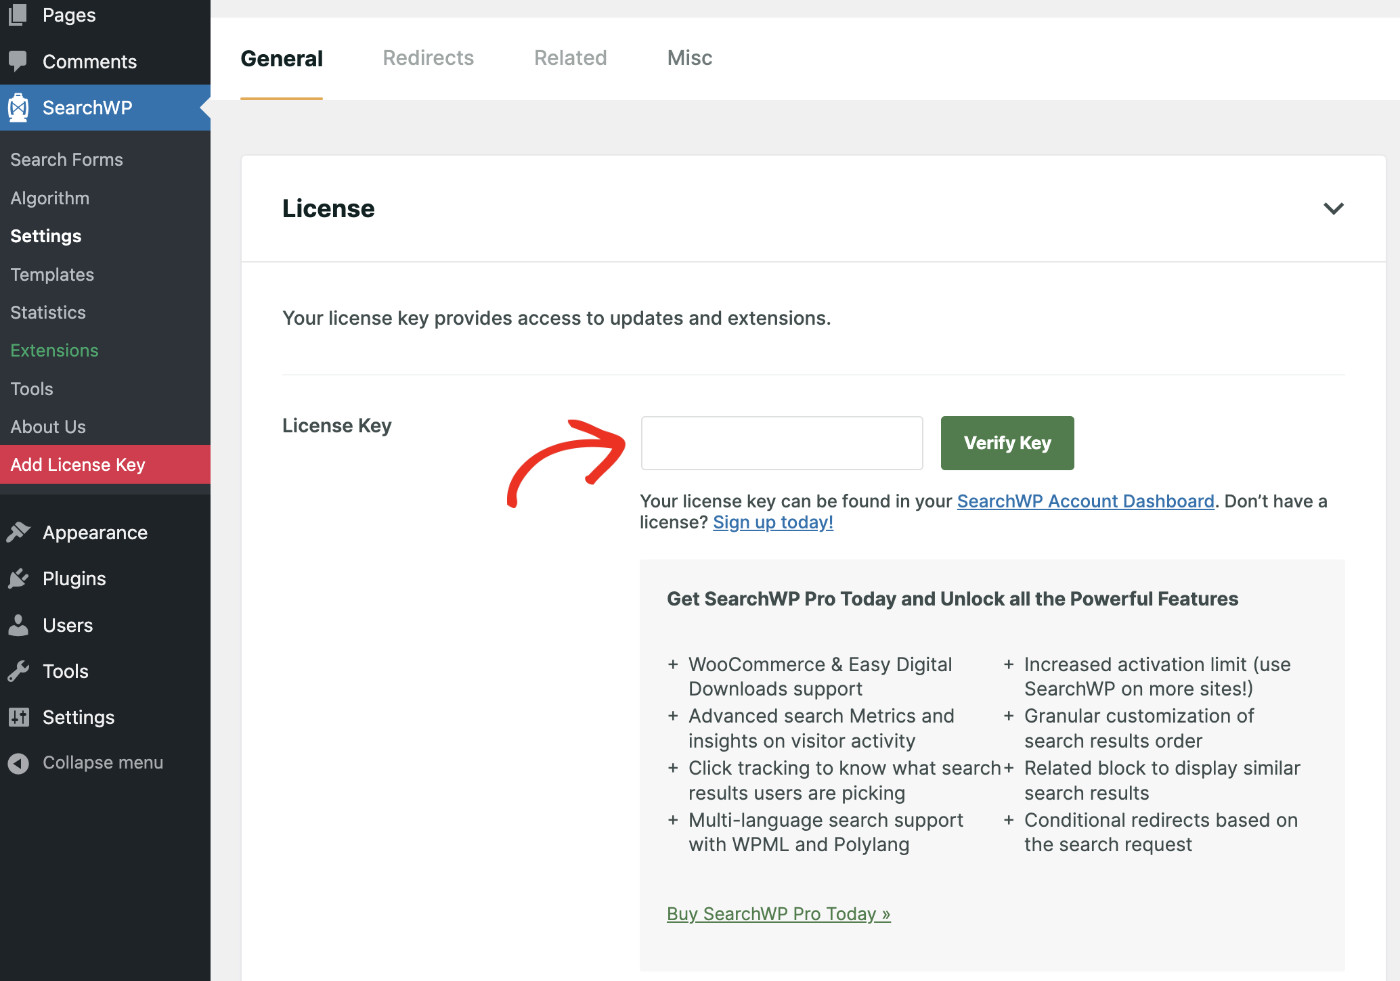
Now, paste the copied license key into the License Key field and click “Verify Key” to activate SearchWP.
Once your license key is verified, your licensing details will appear, confirming your successful activation.
Step 2: Configure Search Engine
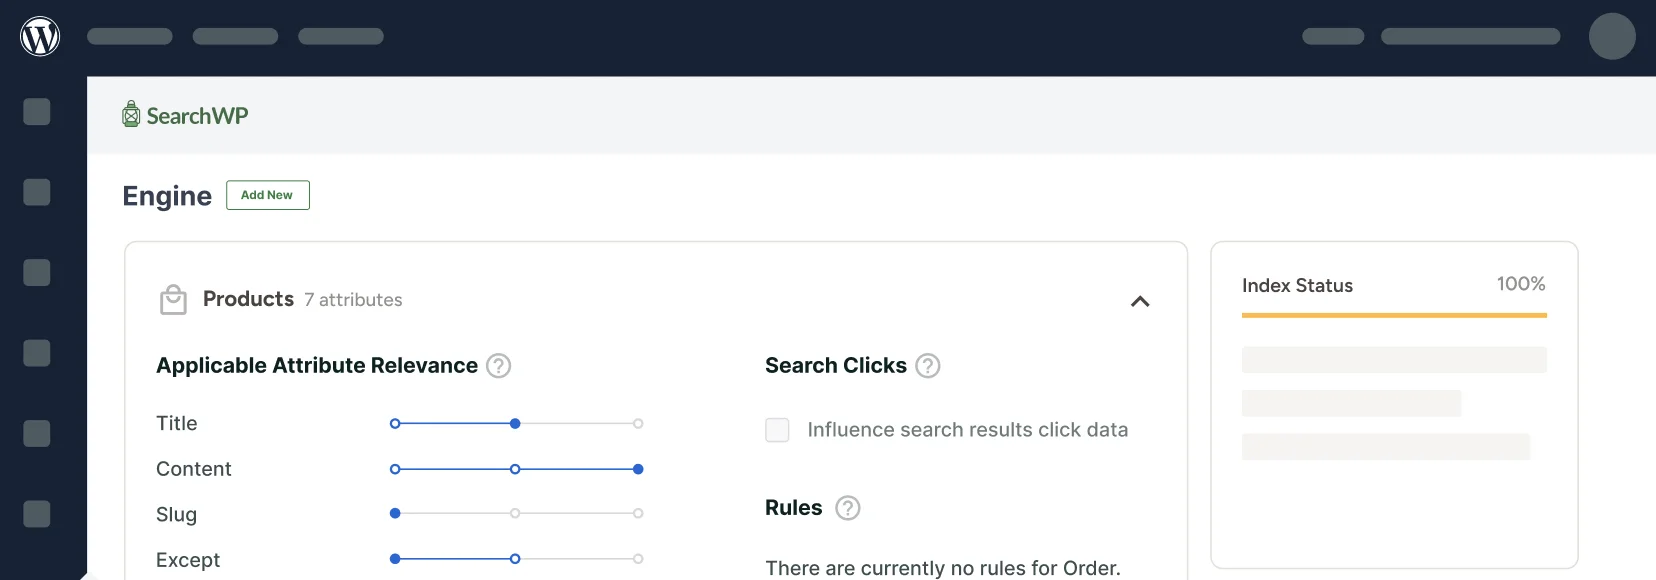
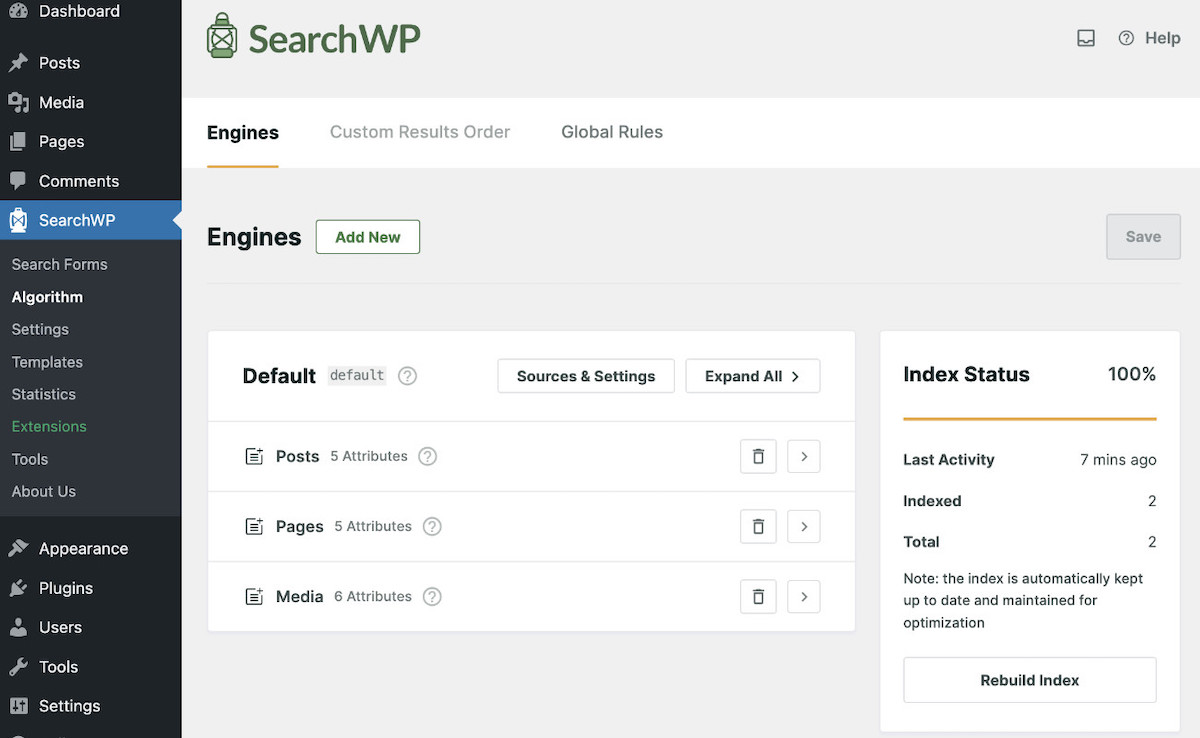
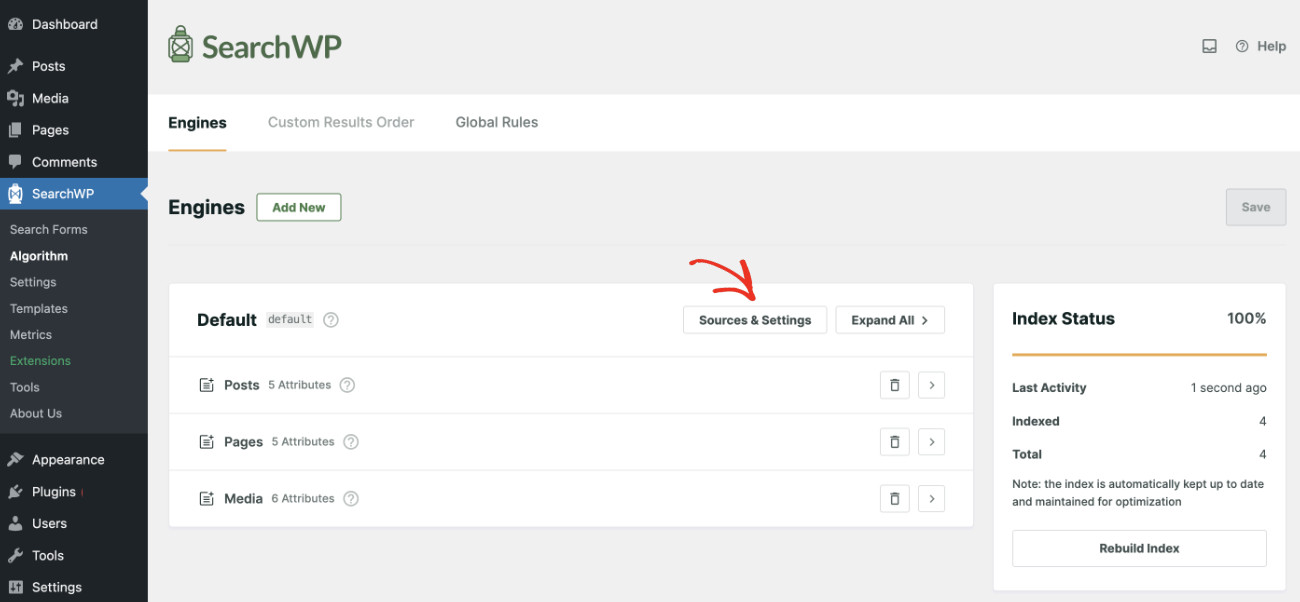
Once activated, SearchWP immediately begins indexing your website content. To check the progress, navigate to SearchWP > Algorithm.
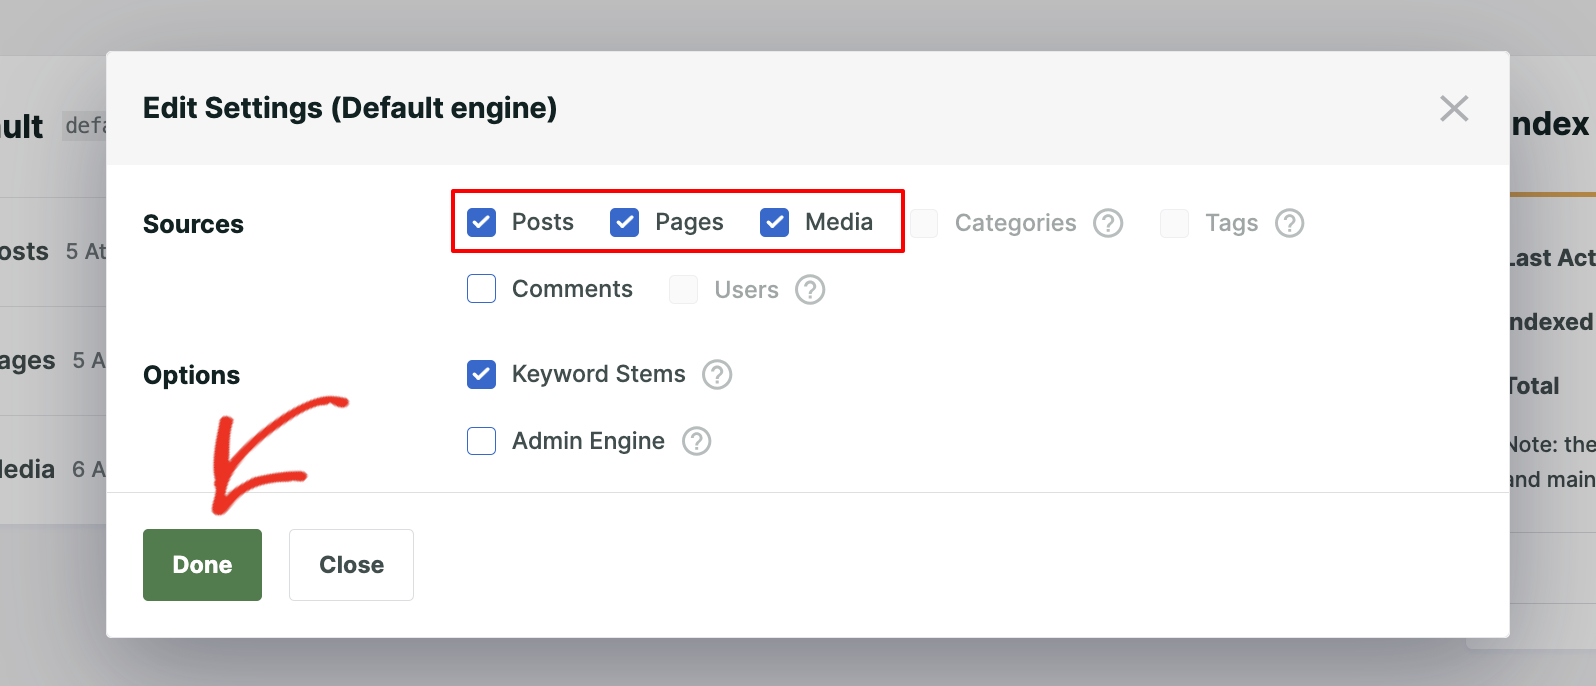
The default Engine indexes Posts, Pages, and Media files. However, you can choose which sources to index. To do that, click the “Source & Settings” button.
Check all the sources you want to index from the “Sources” list, and finally click “Done” when you’re satisfied.
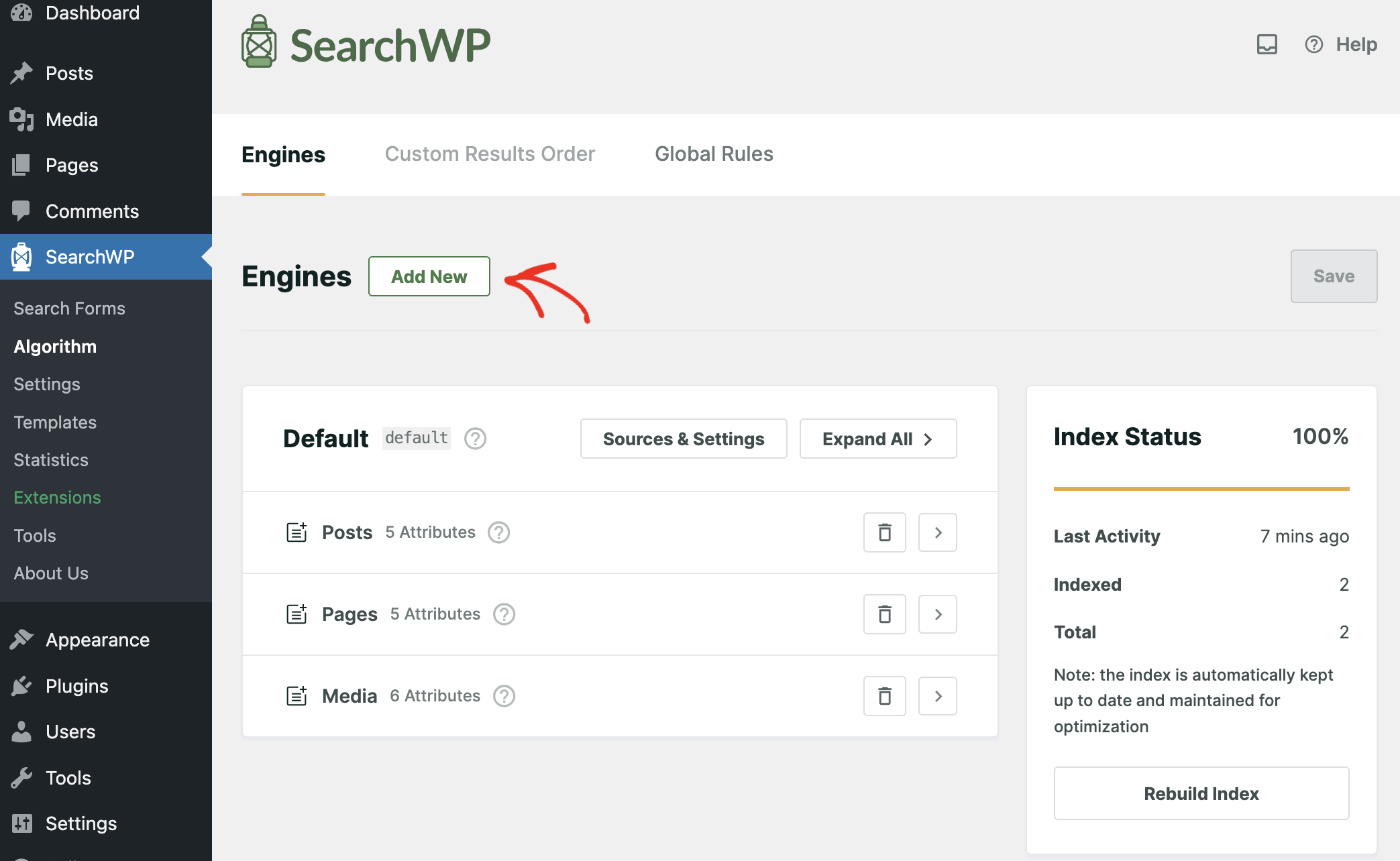
The best thing about SearchWP is that it lets us create multiple search engines to use different search settings for various needs. Therefore, let’s create a search engine dedicated to showing related content. To do that, click “Add New” next to Engines.
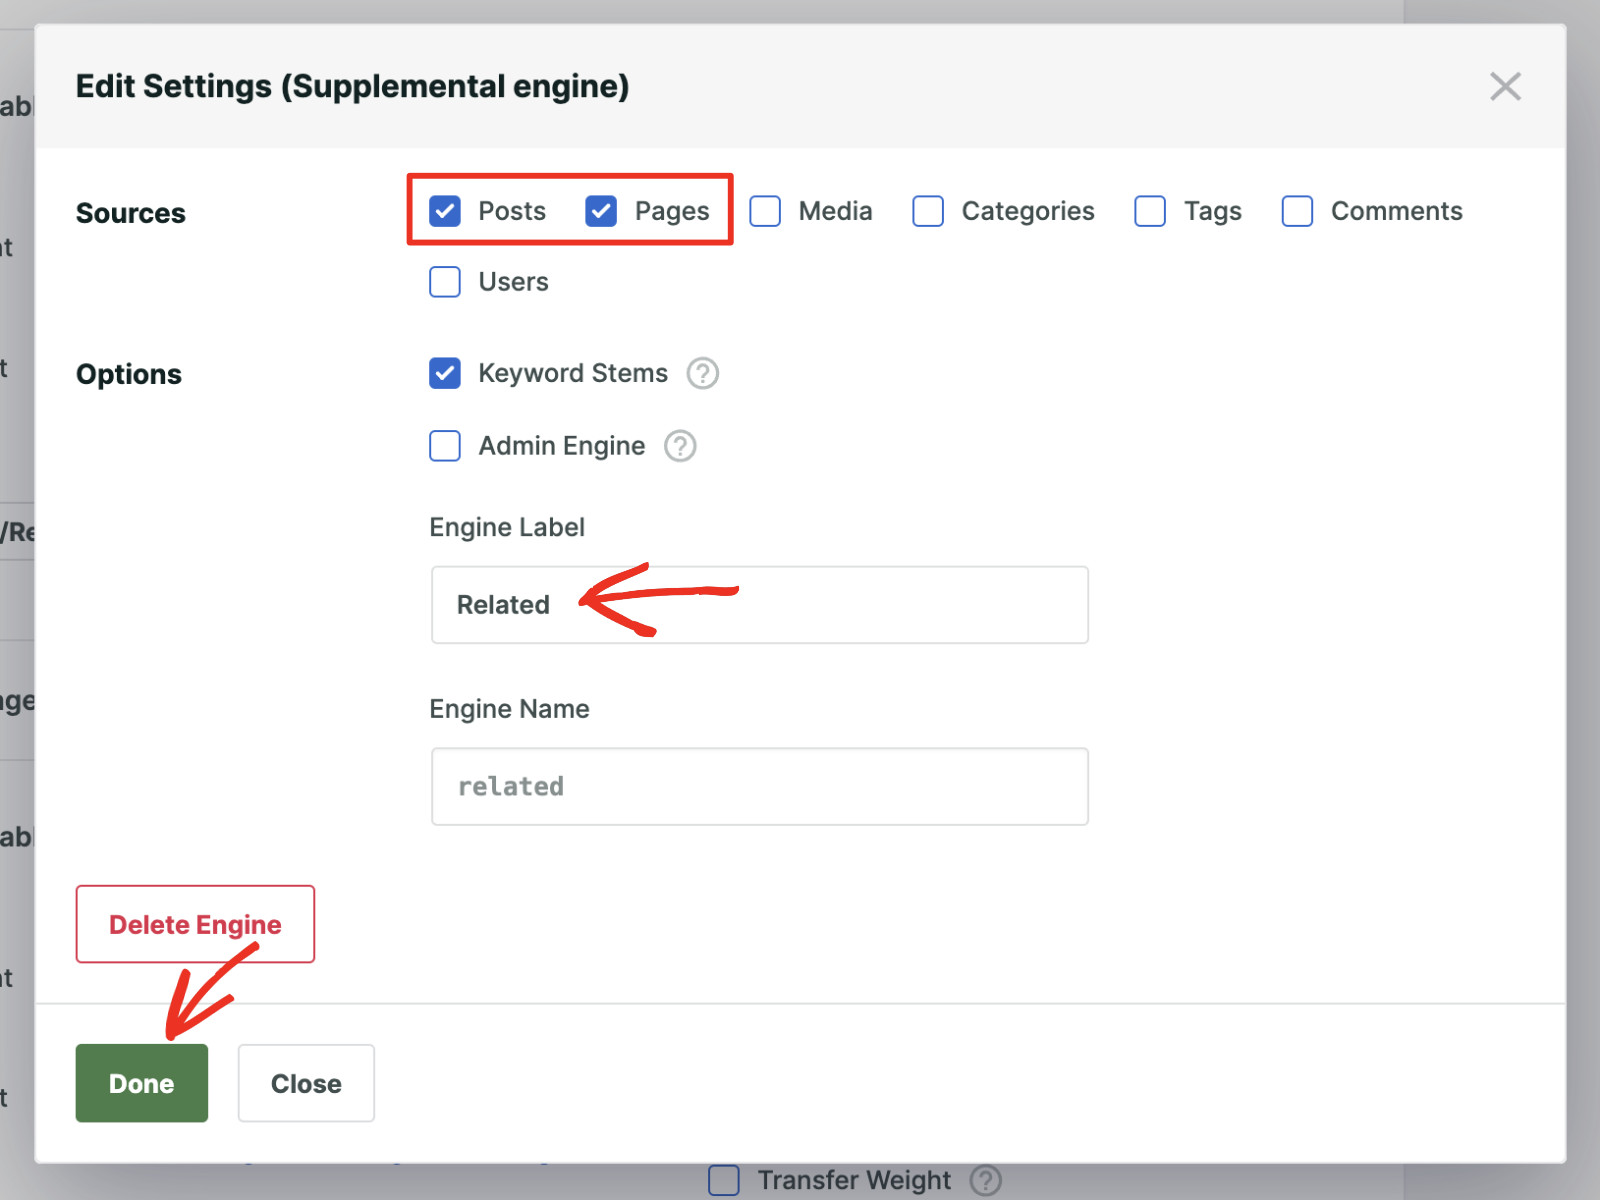
Now, choose which sources you want to use to show related content. Let’s make Posts and Pages appear as related content. If you’re running an online store with WooCommerce/EDD, you can show related products as well.
Select Posts and Pages, then name the engine “Related” so that it’s easily recognizable. Finally, click “Done” when you’re satisfied.
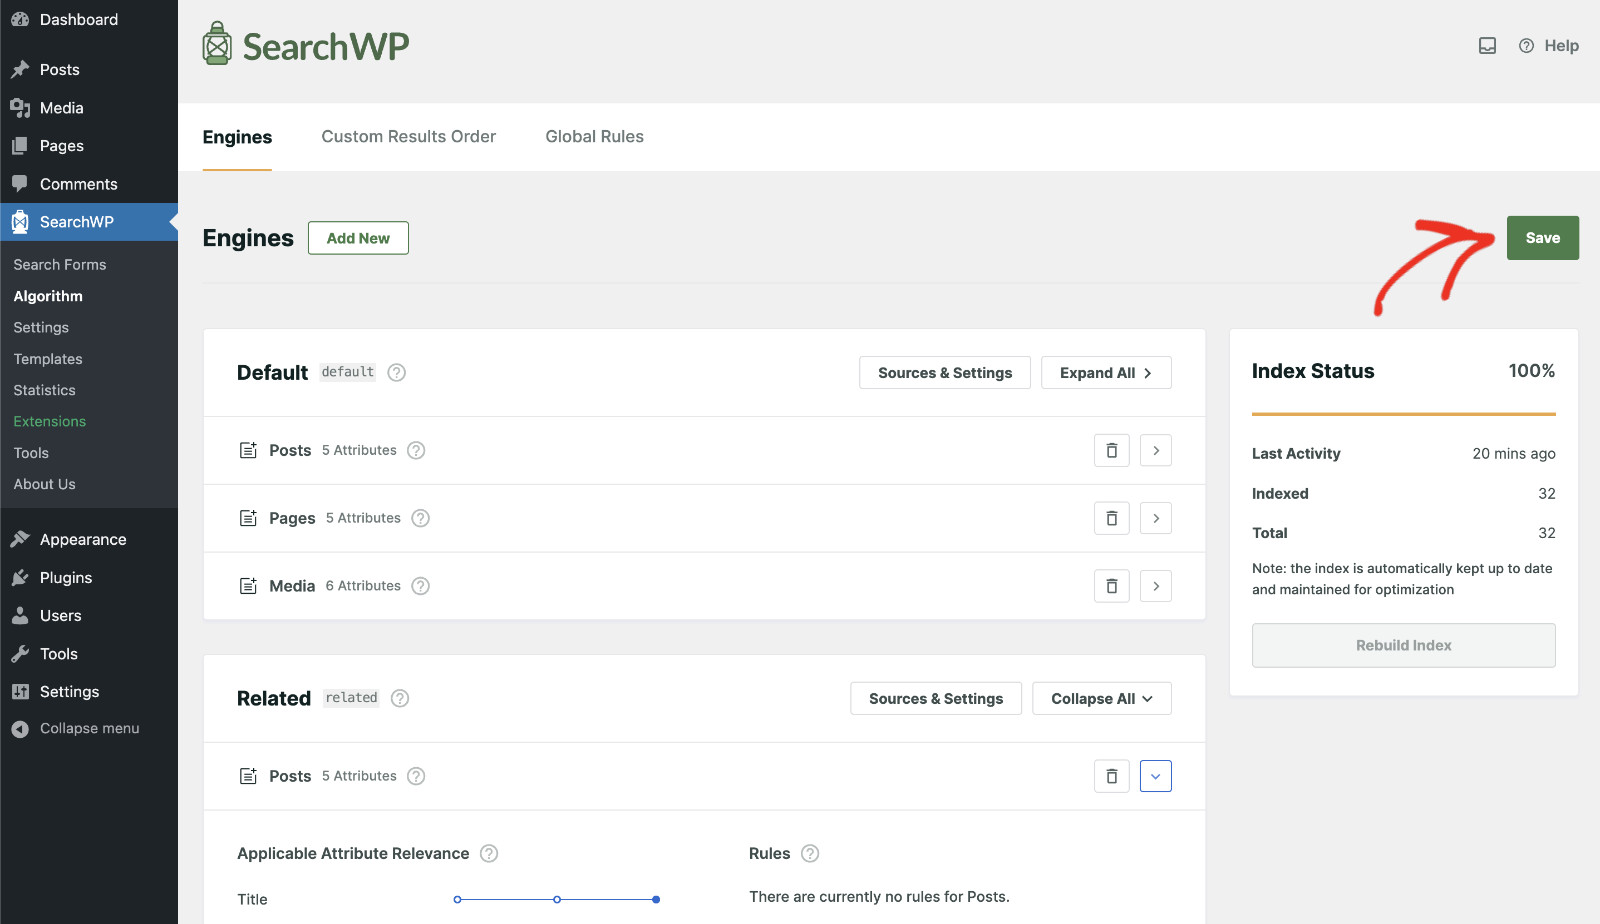
Please click “Save” to apply the changes we have made so far.
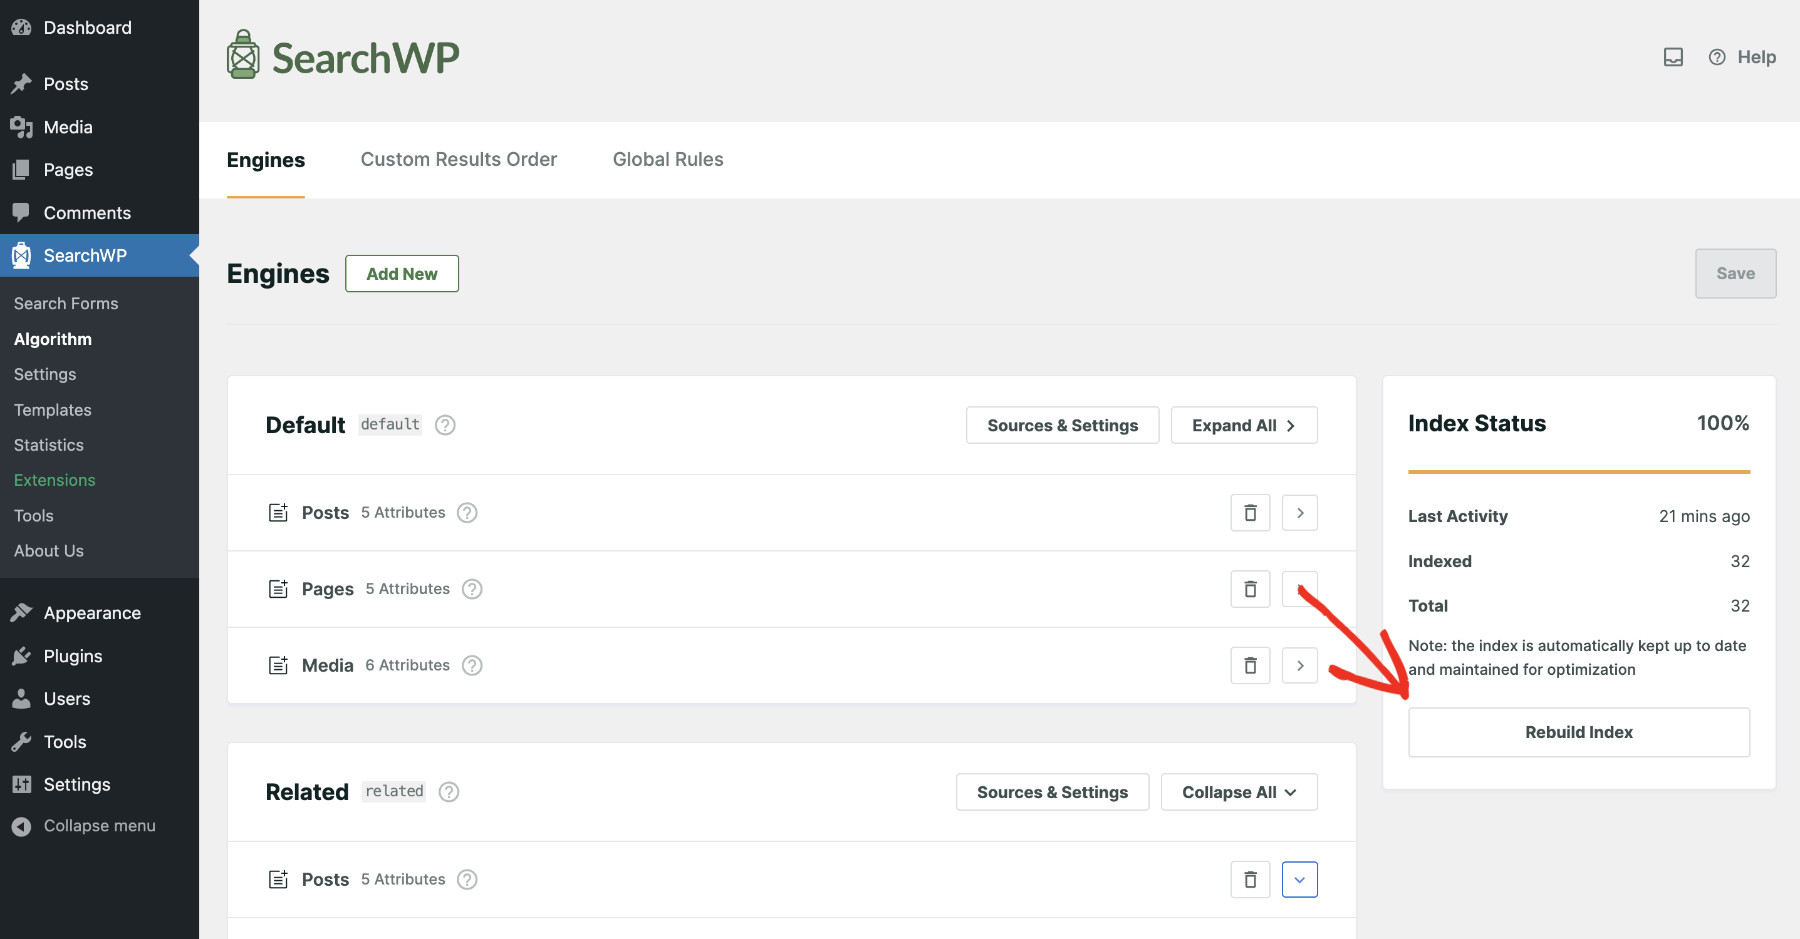
SearchWP periodically indexes your website content. However, you can initiate the process manually by clicking the “Rebuild Index” button.
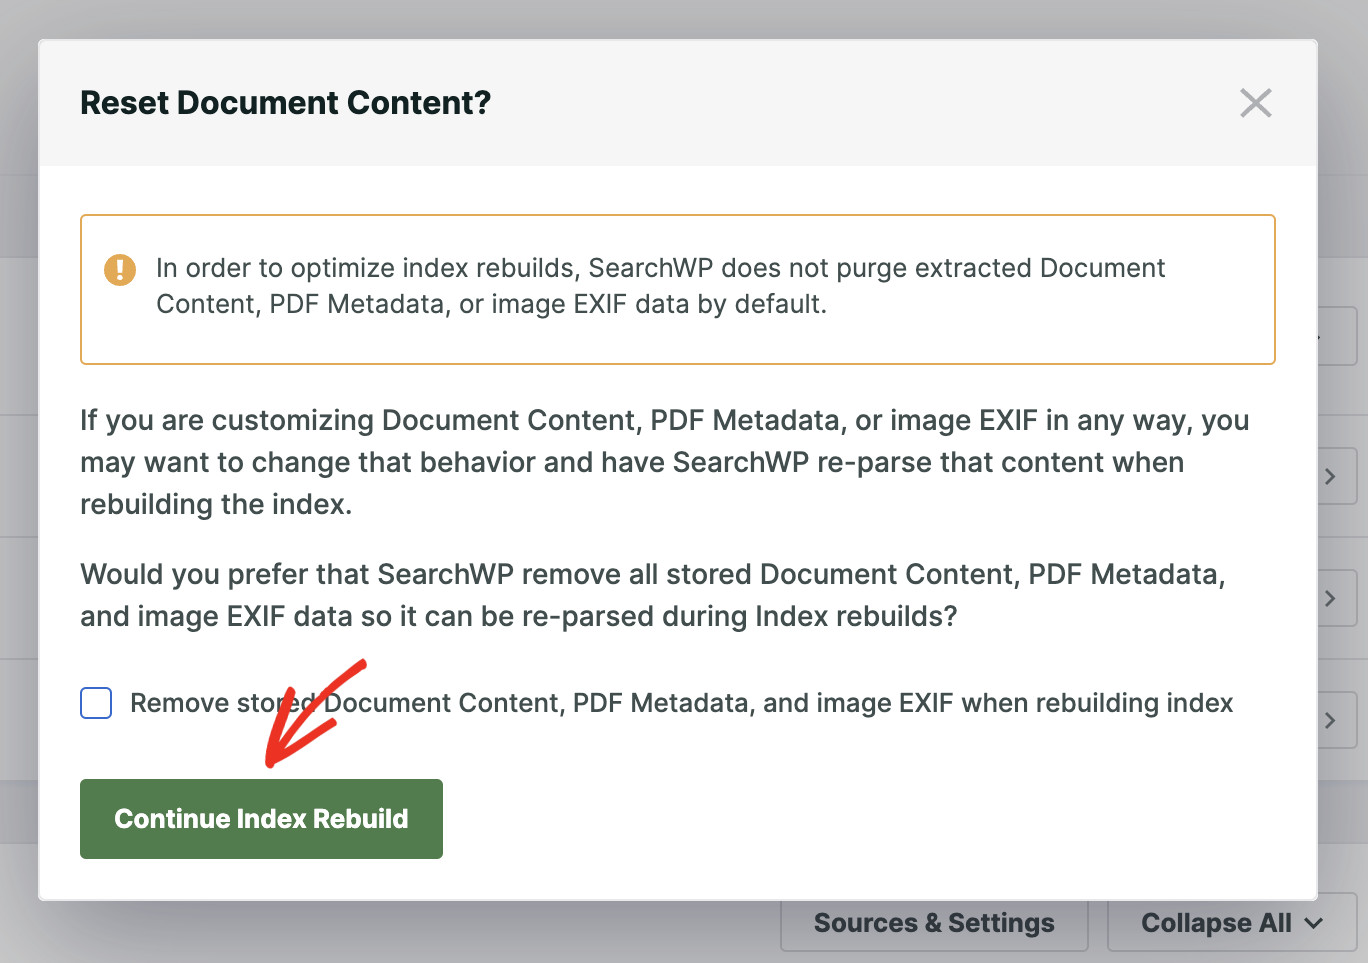
Although this is not common, you might see the following popup during this process, depending on your website’s current configuration. When SearchWP indexes an image or document file, it gathers and saves all indexable data in its database.
If you prefer replacing the existing index data with the new one, check the option “Remove stored Document Content, PDF…” Otherwise, leave it as is and click “Continue Index Rebuild.” That’s it! You’re all set.
Step 3: Install & Activate Related Content Extension
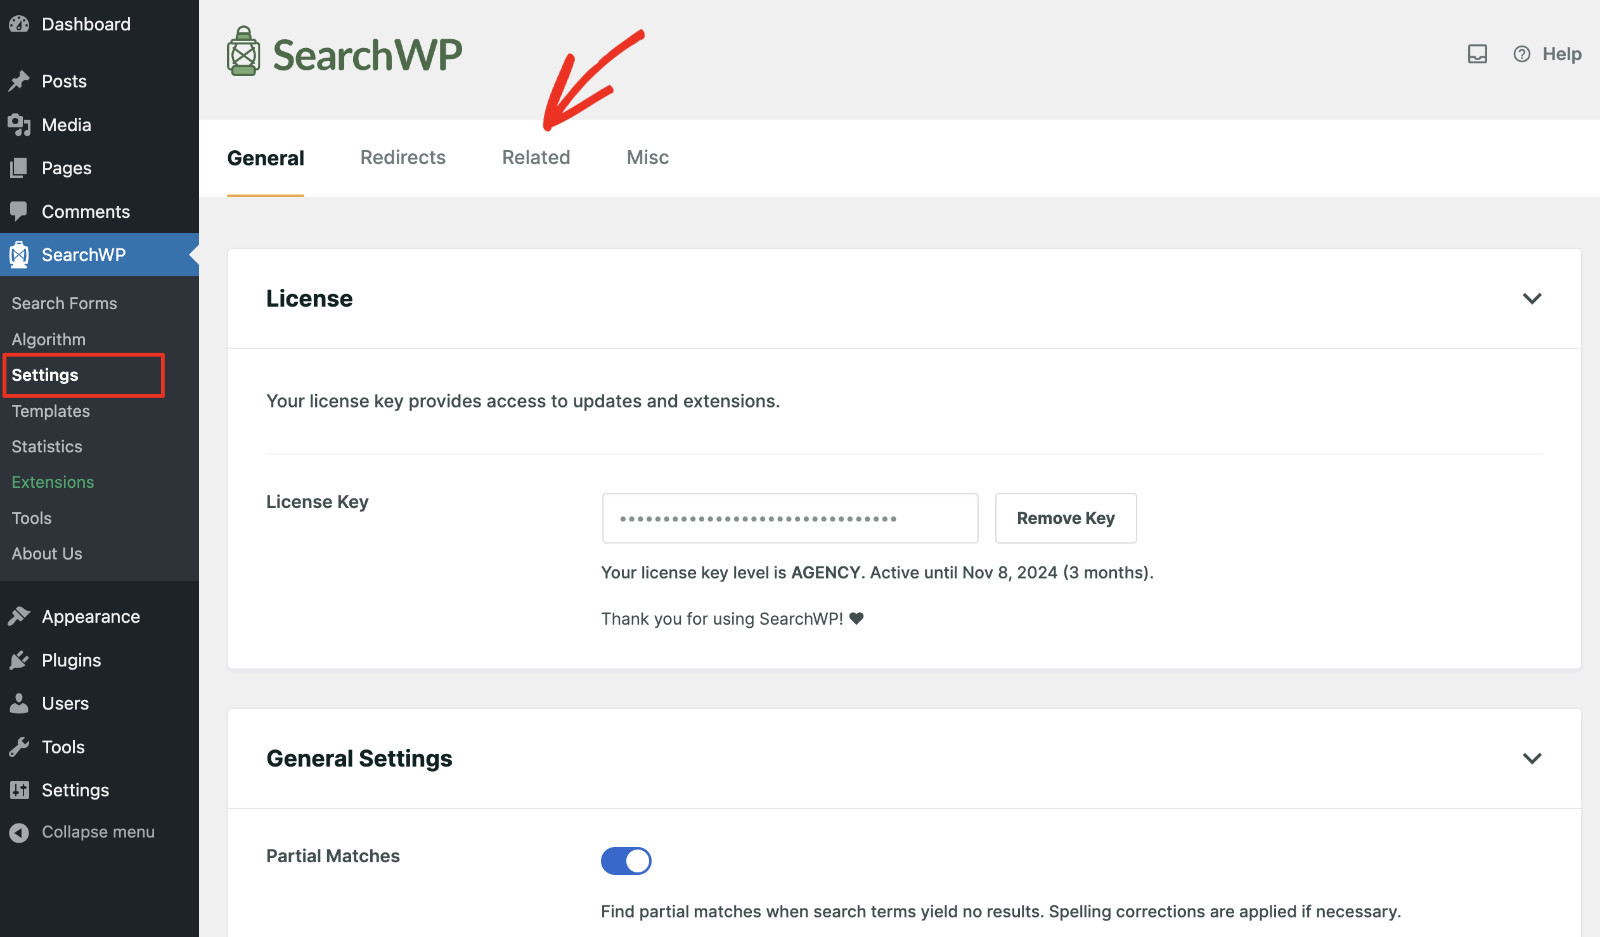
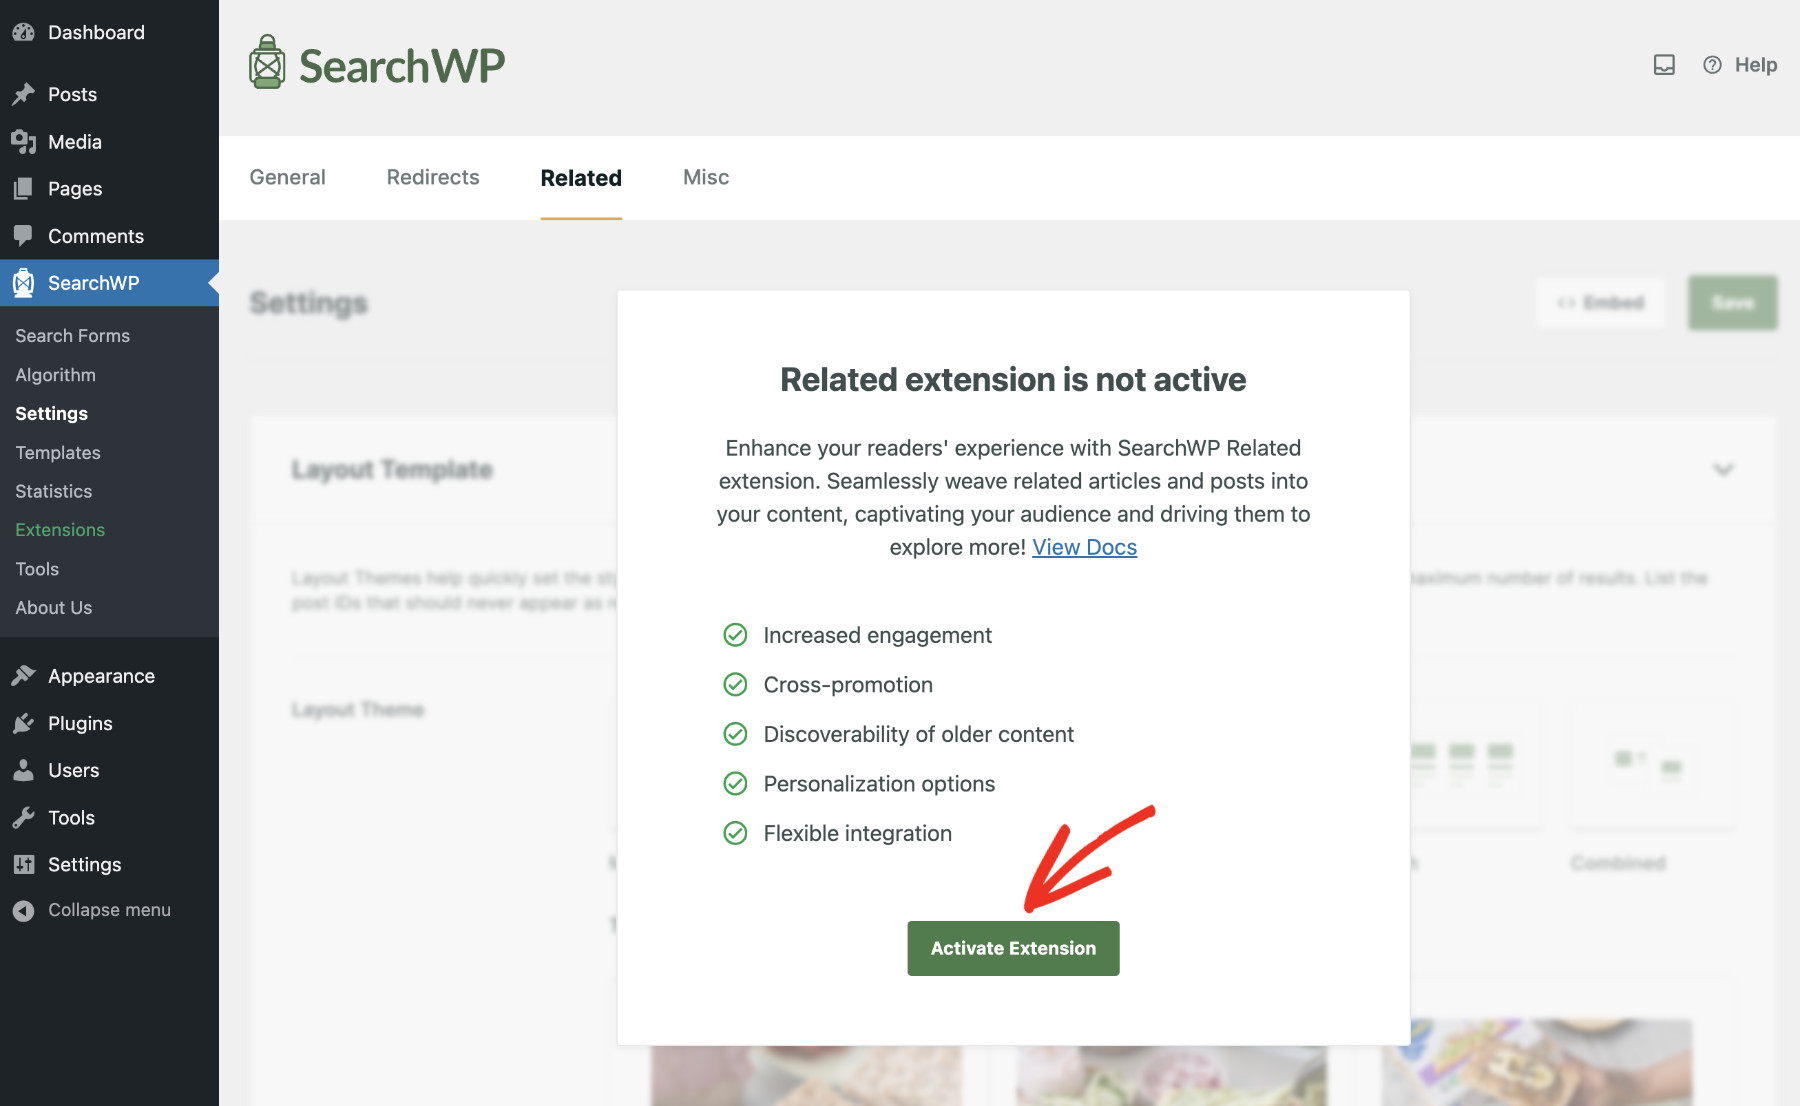
Next, we’ll need to install the Related Extension of SearchWP, which will show related content in WordPress. To do that, visit SearchWP > Settings > Related.
Click on the “Activate Extension” button to take you to the Extensions page.
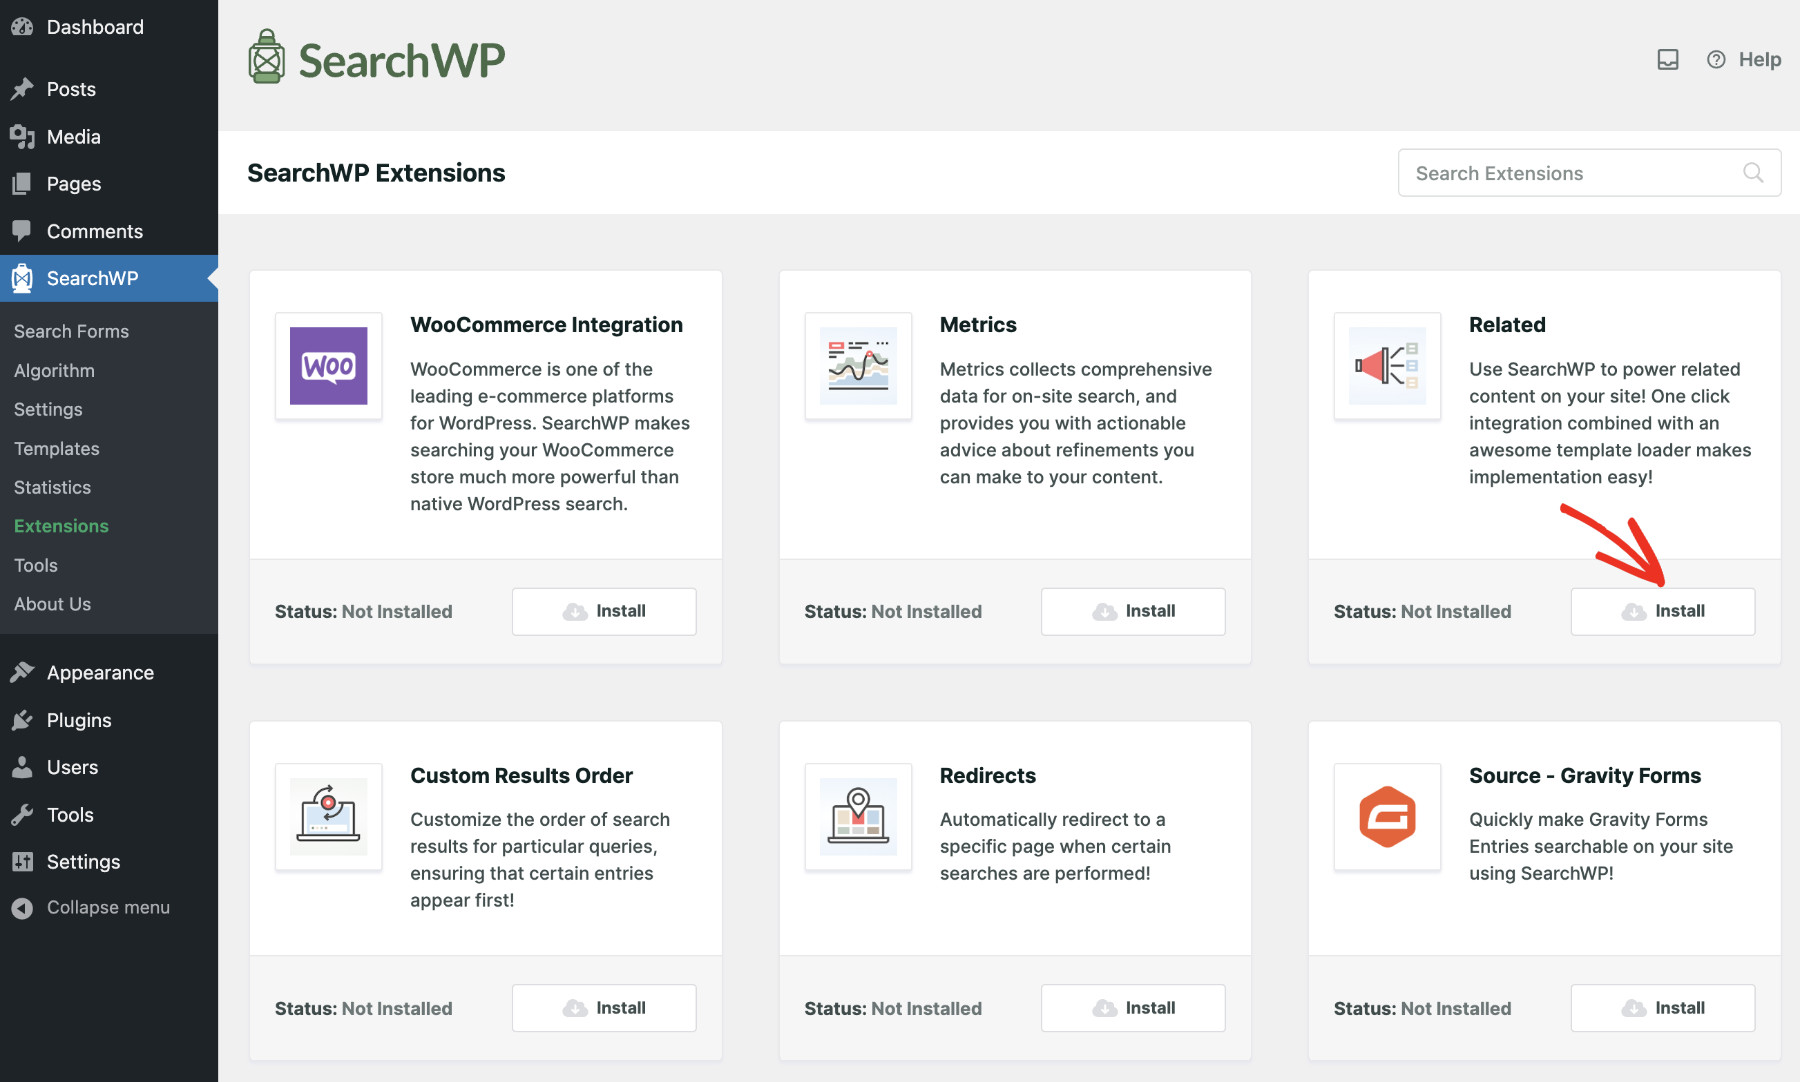
Now, find the “Related” extension from the list and click the “Install” button. After a few moments the extension will be successfully installed.
SearchWP has many more extensions for specific tasks. You can browse and use the ones that you need.
Step 4: Customize Related Content Block
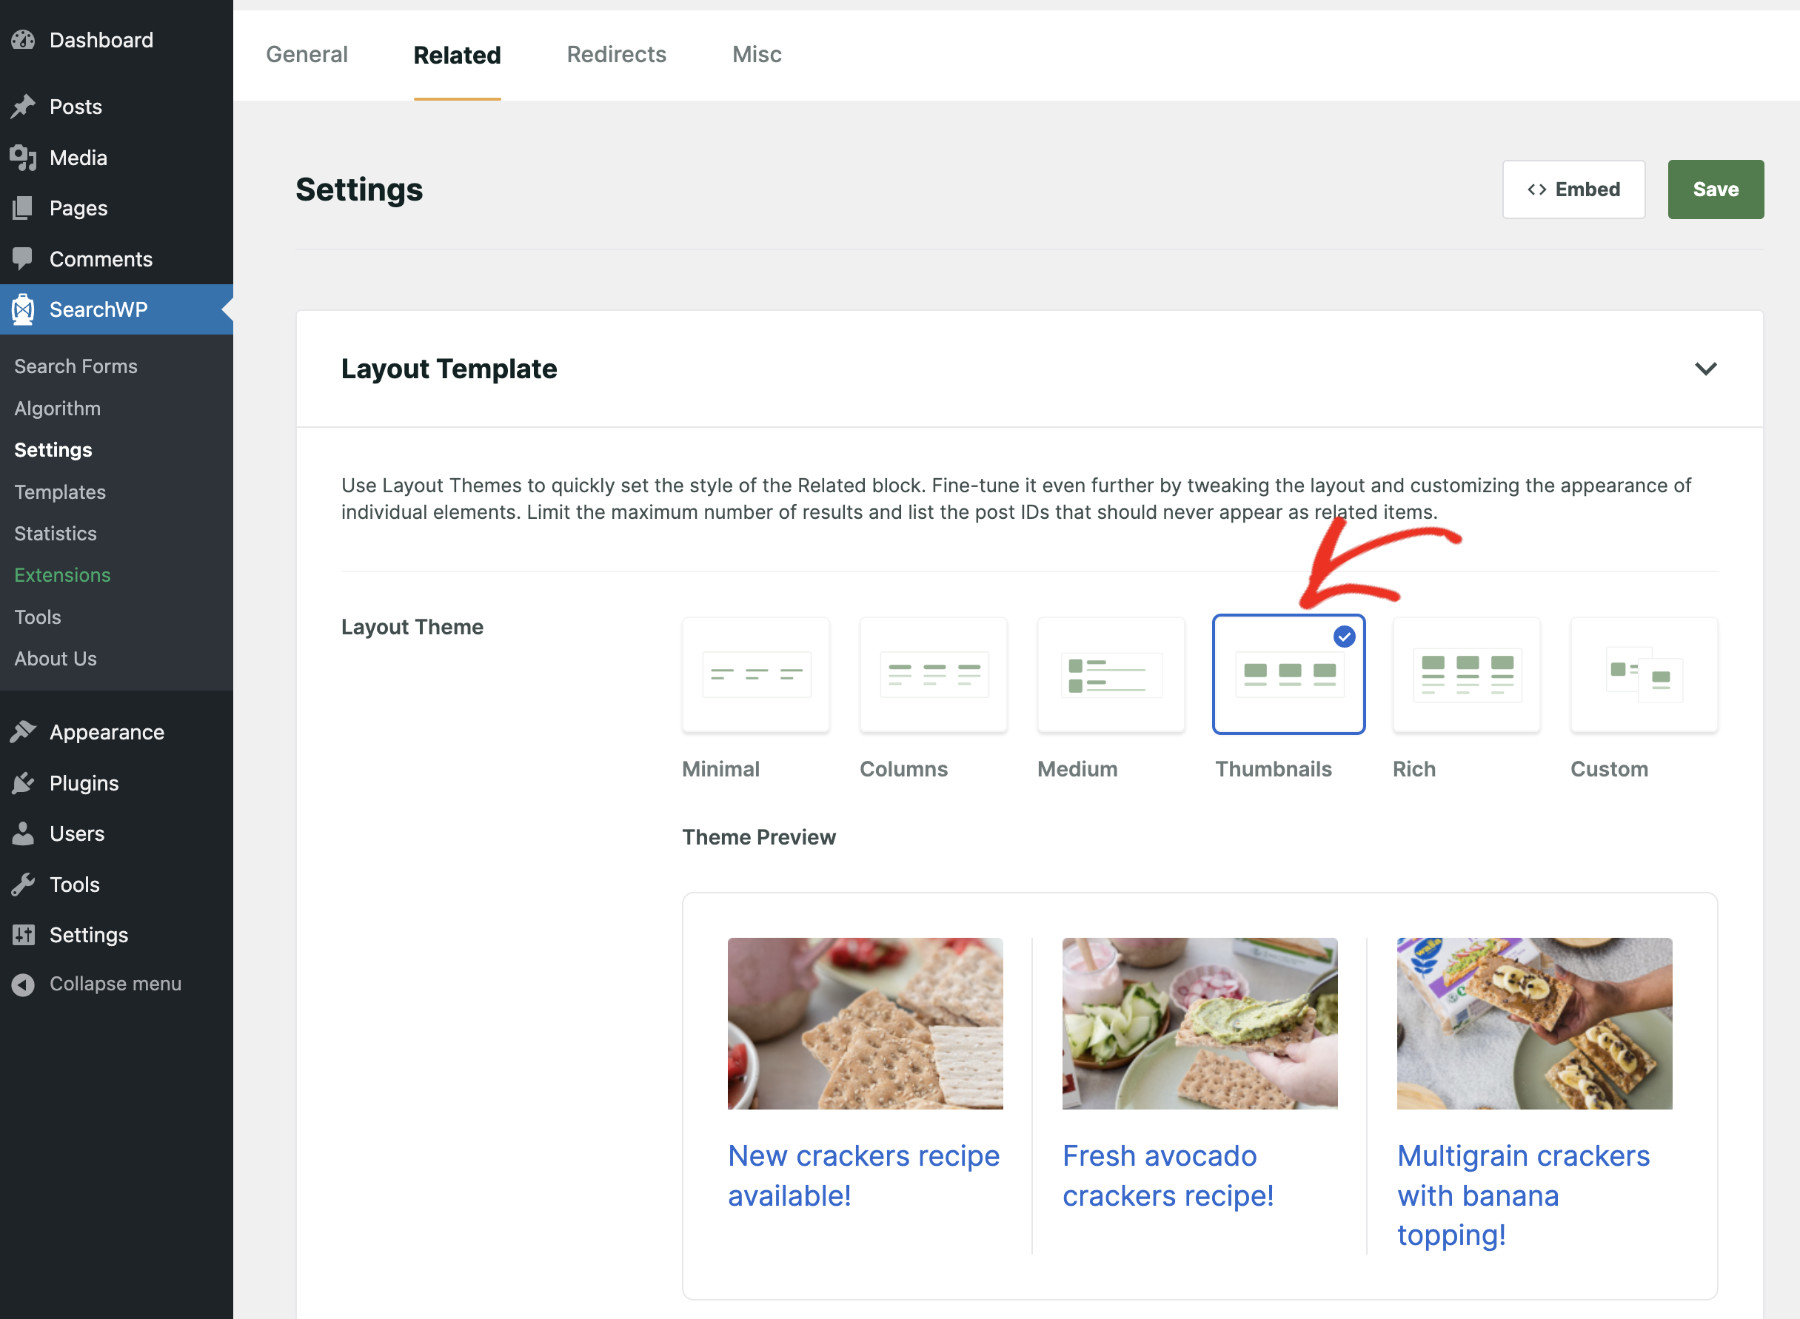
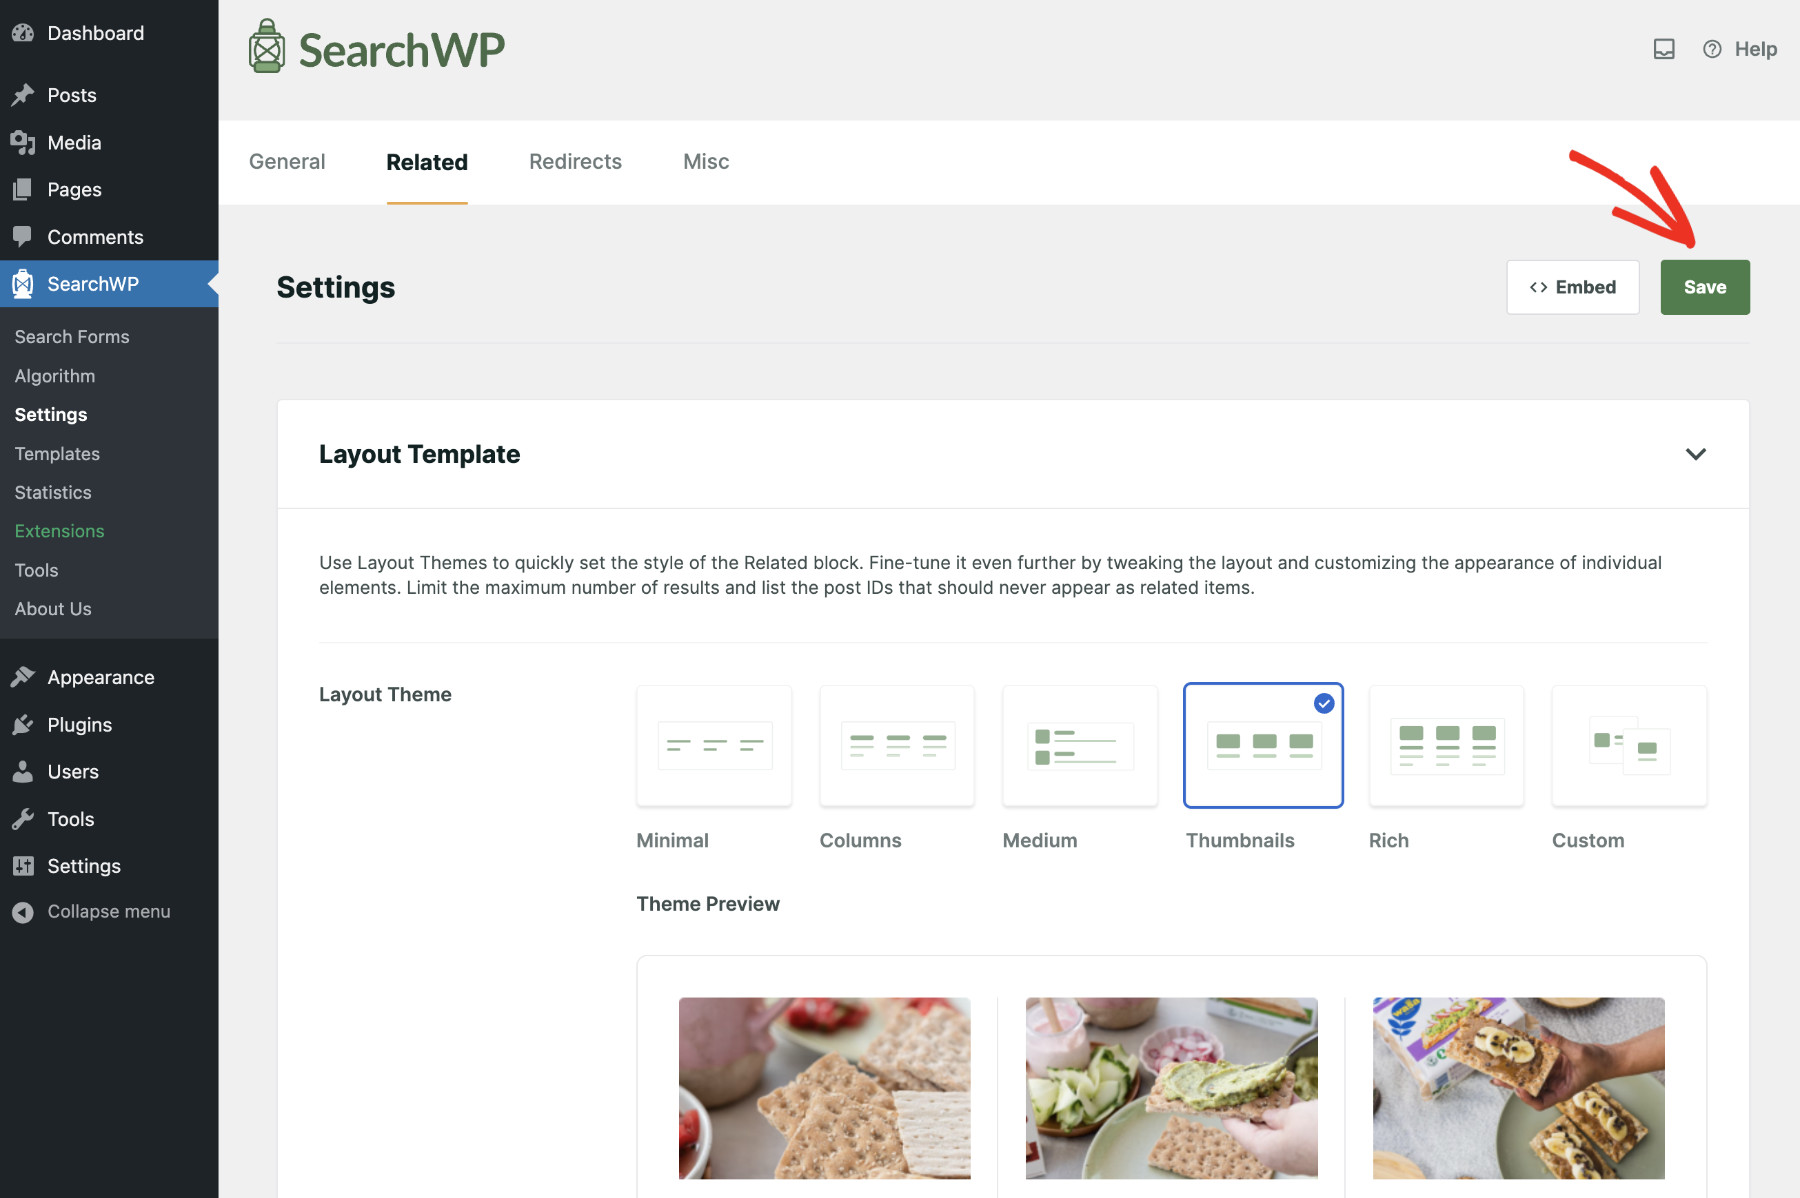
It’s time to configure how you’d like your website to show related content. To do that, visit SearchWP > Settings > Related, then choose the layout theme that blends with your website design.
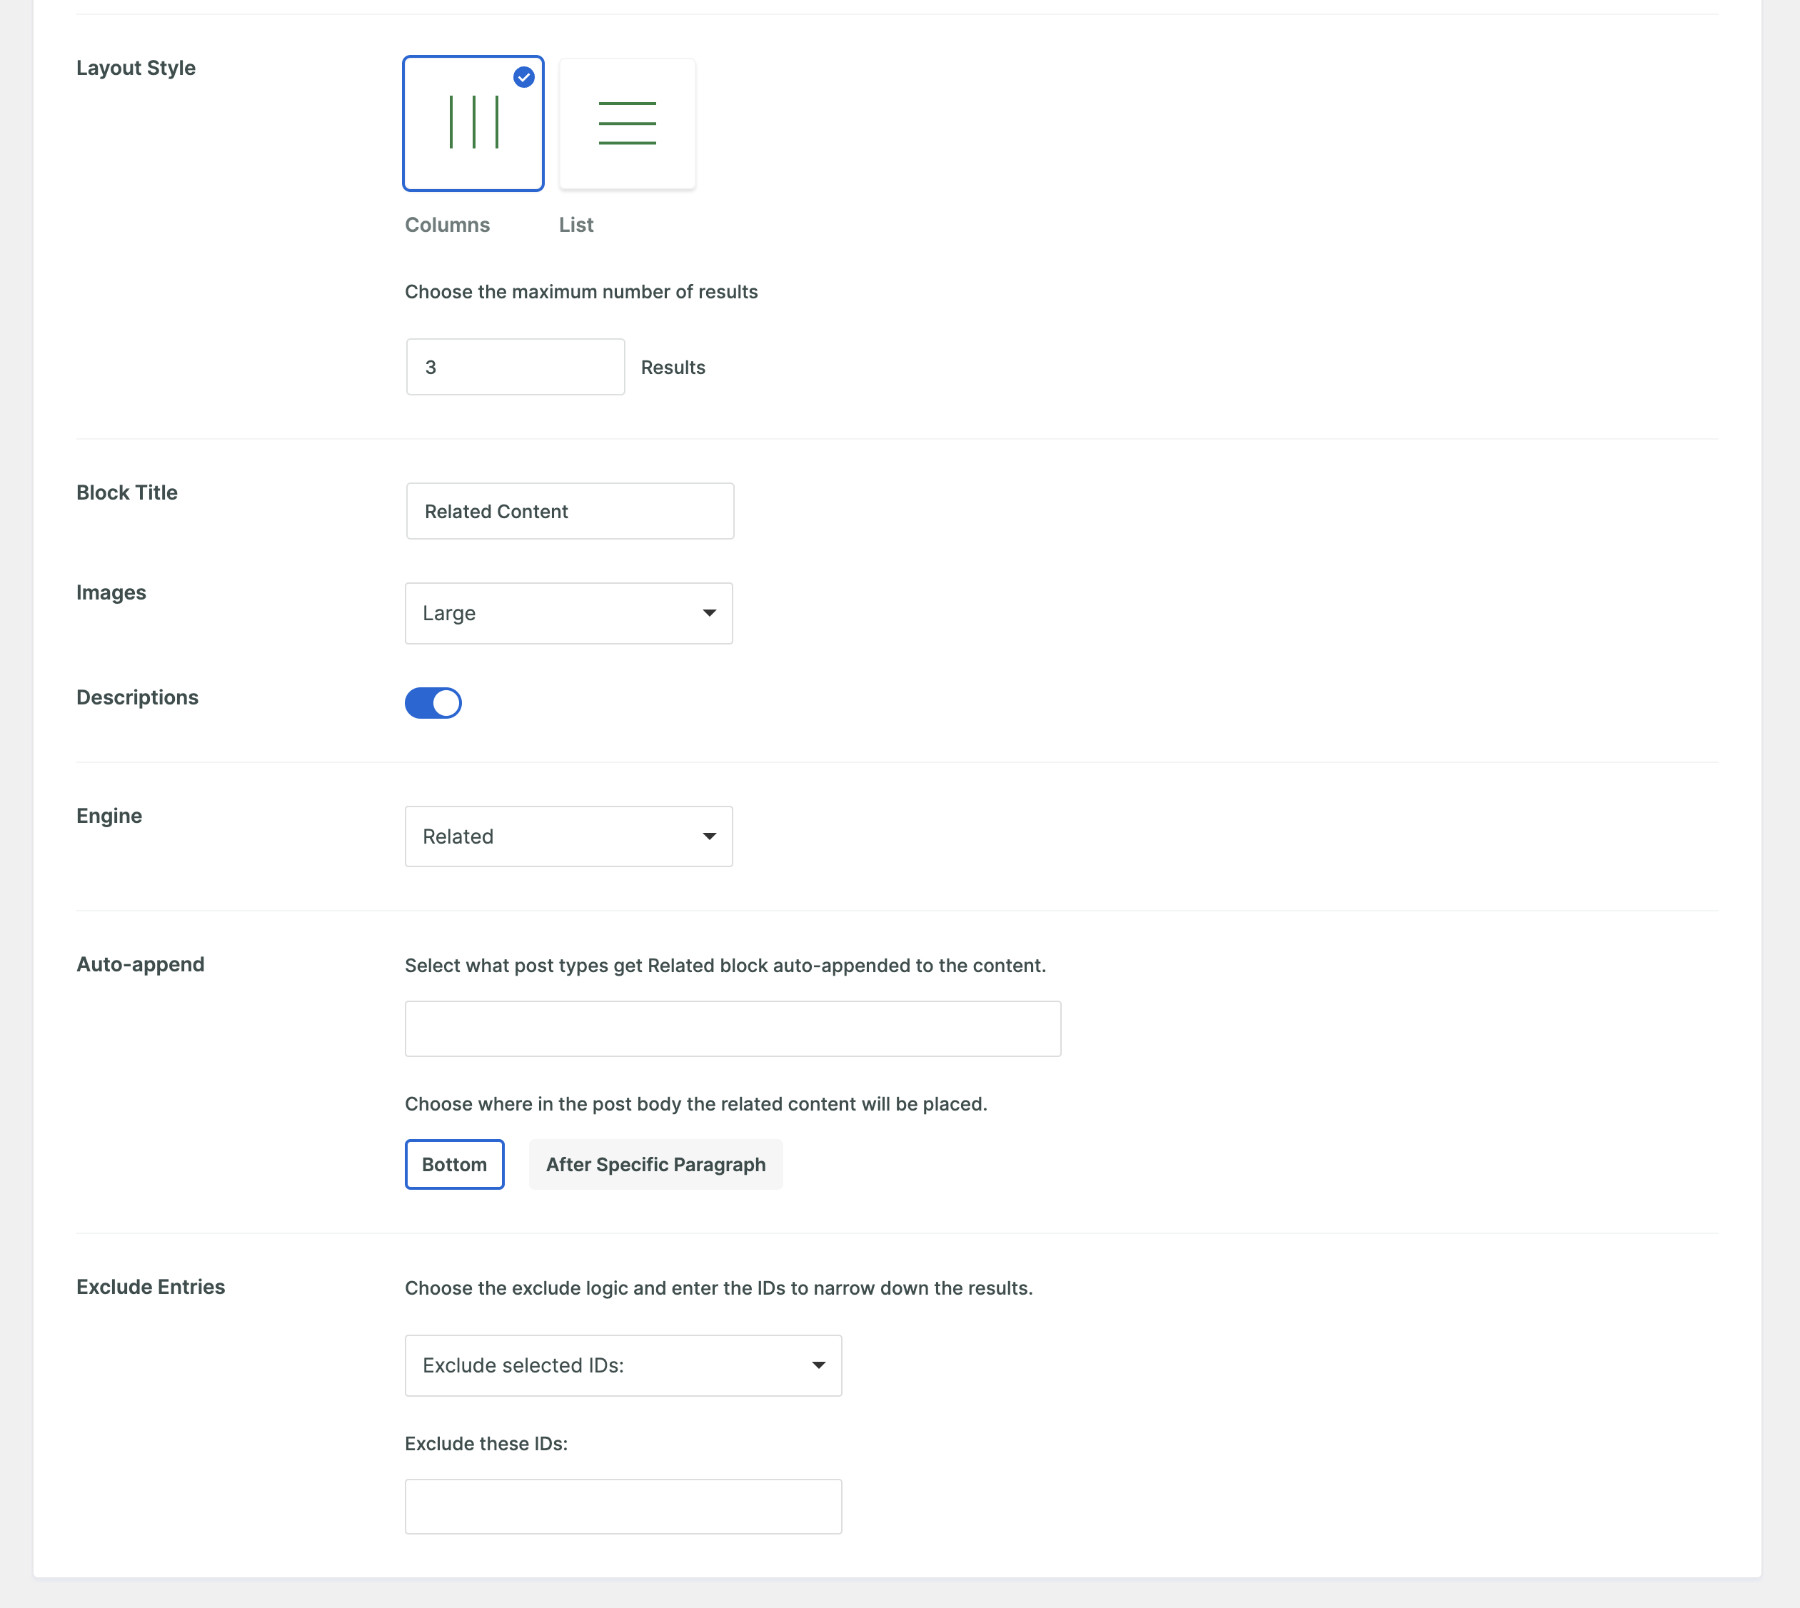
Using the following settings, you can give the Related Content block a custom name. You can also define whether to show descriptions and how many results to display.
Most importantly, you need to define which Engine you’ll use to show related content. Since we have already created a new engine called Related, let’s pick that from this dropdown.
Finally, click “Save” to apply the changes.
Step 5: Define Related Content Logic
Since every piece of content is unique, the content we would show as suggestions must be unique as well. However, setting them up one by one is a tedious process and will not address our goal.
Therefore, we need a way to set related content dynamically. SearchWP takes care of this problem brilliantly.
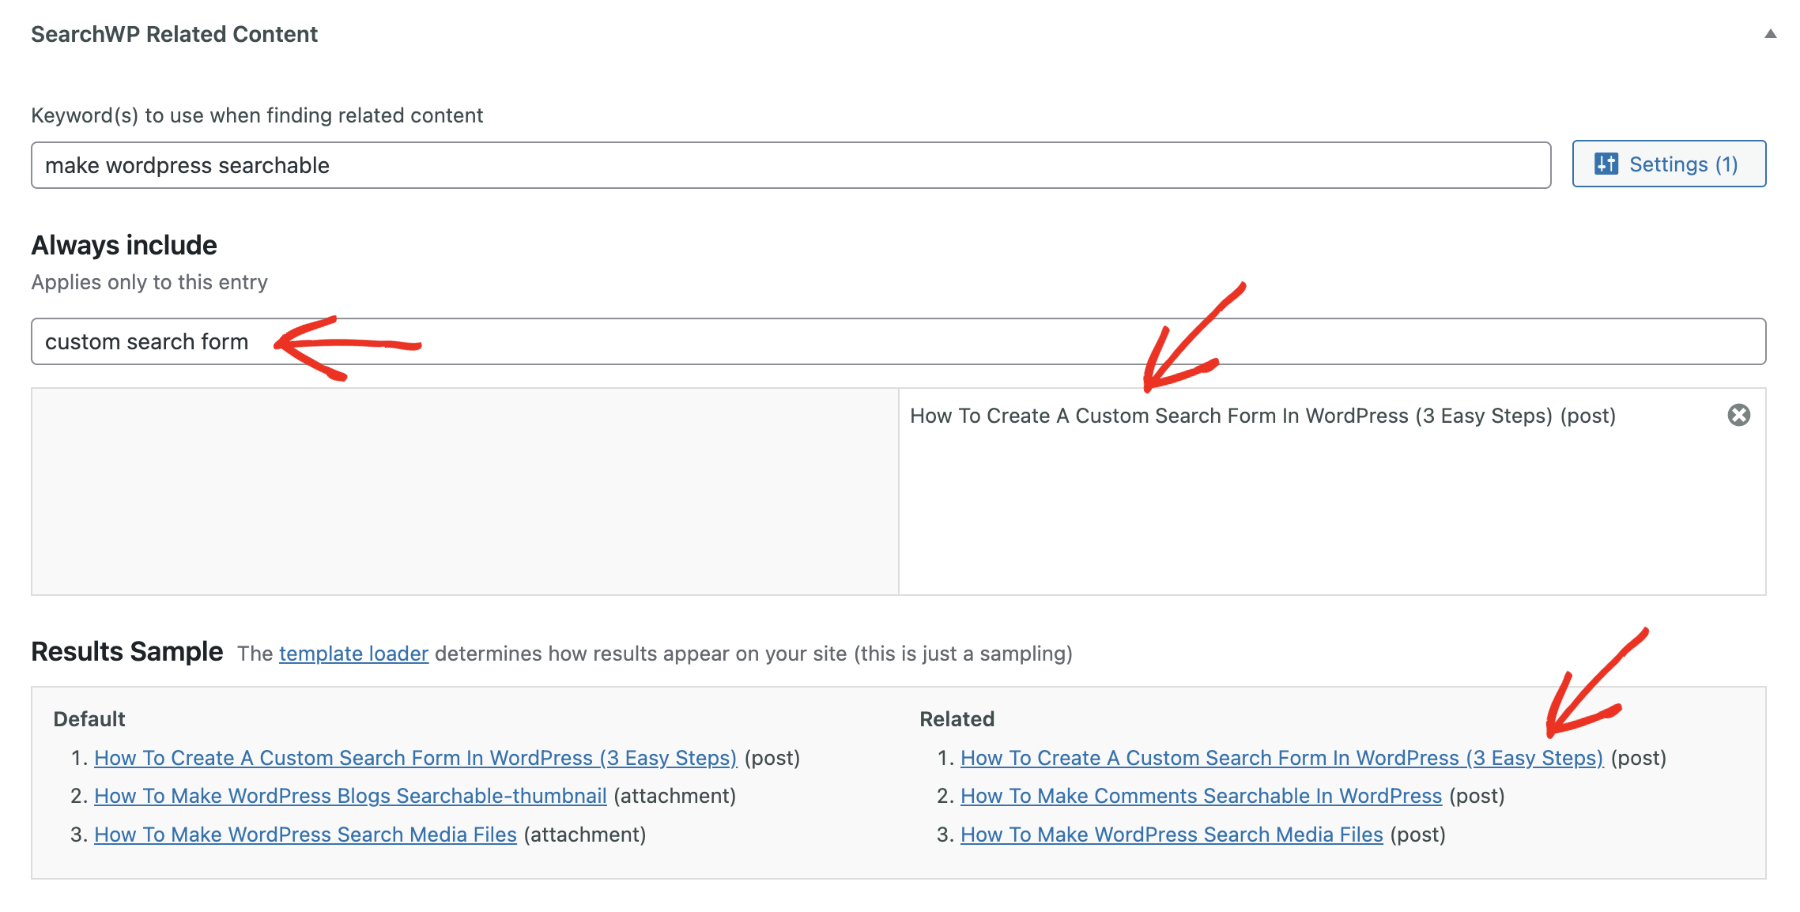
Open a post, page, or product in Edit mode and scroll to the bottom. You’ll see a new section titled “SearchWP Related Content.” From here, you can customize which content you want to display as related content for this particular post, page, or product.
Now, put the keyword using which SearchWP will find related content in the designated field. Once you do, you’ll see related content appear below based on the Engine settings.
Since we’ve selected the Related engine to show related content in Step 4, only this content will be displayed. Now, if you want to make a particular content to be shown as related content for this specific item, you can do so by clicking the “Settings” button.
Now, find the content you’re looking for using the designed search. When you find it, click on it to make it selected. Once you do, you’ll see that this item will always be displayed first when showing related content.
Step 6: Show Related Content In WordPress
You can show related content on your website’s front end automatically or manually. Let’s show you how to do both so you can go with the one that fits your needs.
Step 6.1 Show Related Content In WordPress Automatically: Use Auto Append
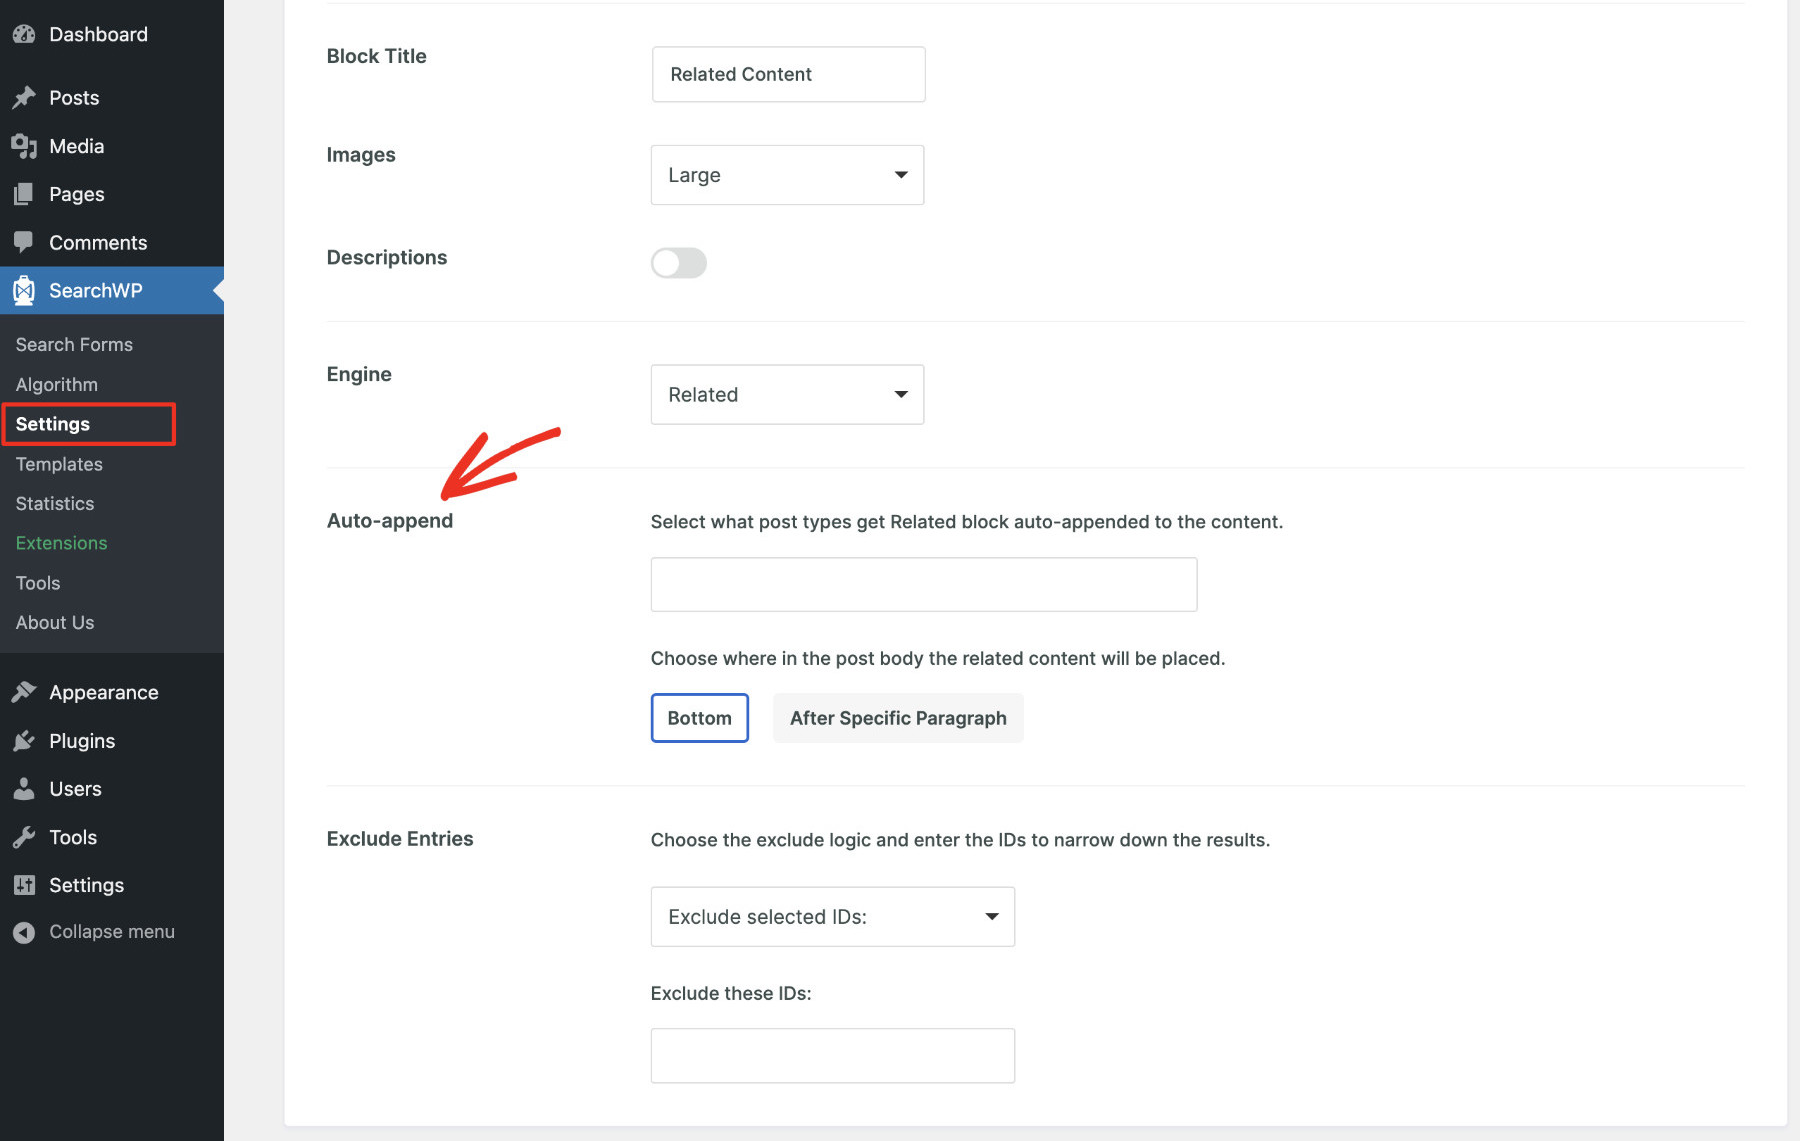
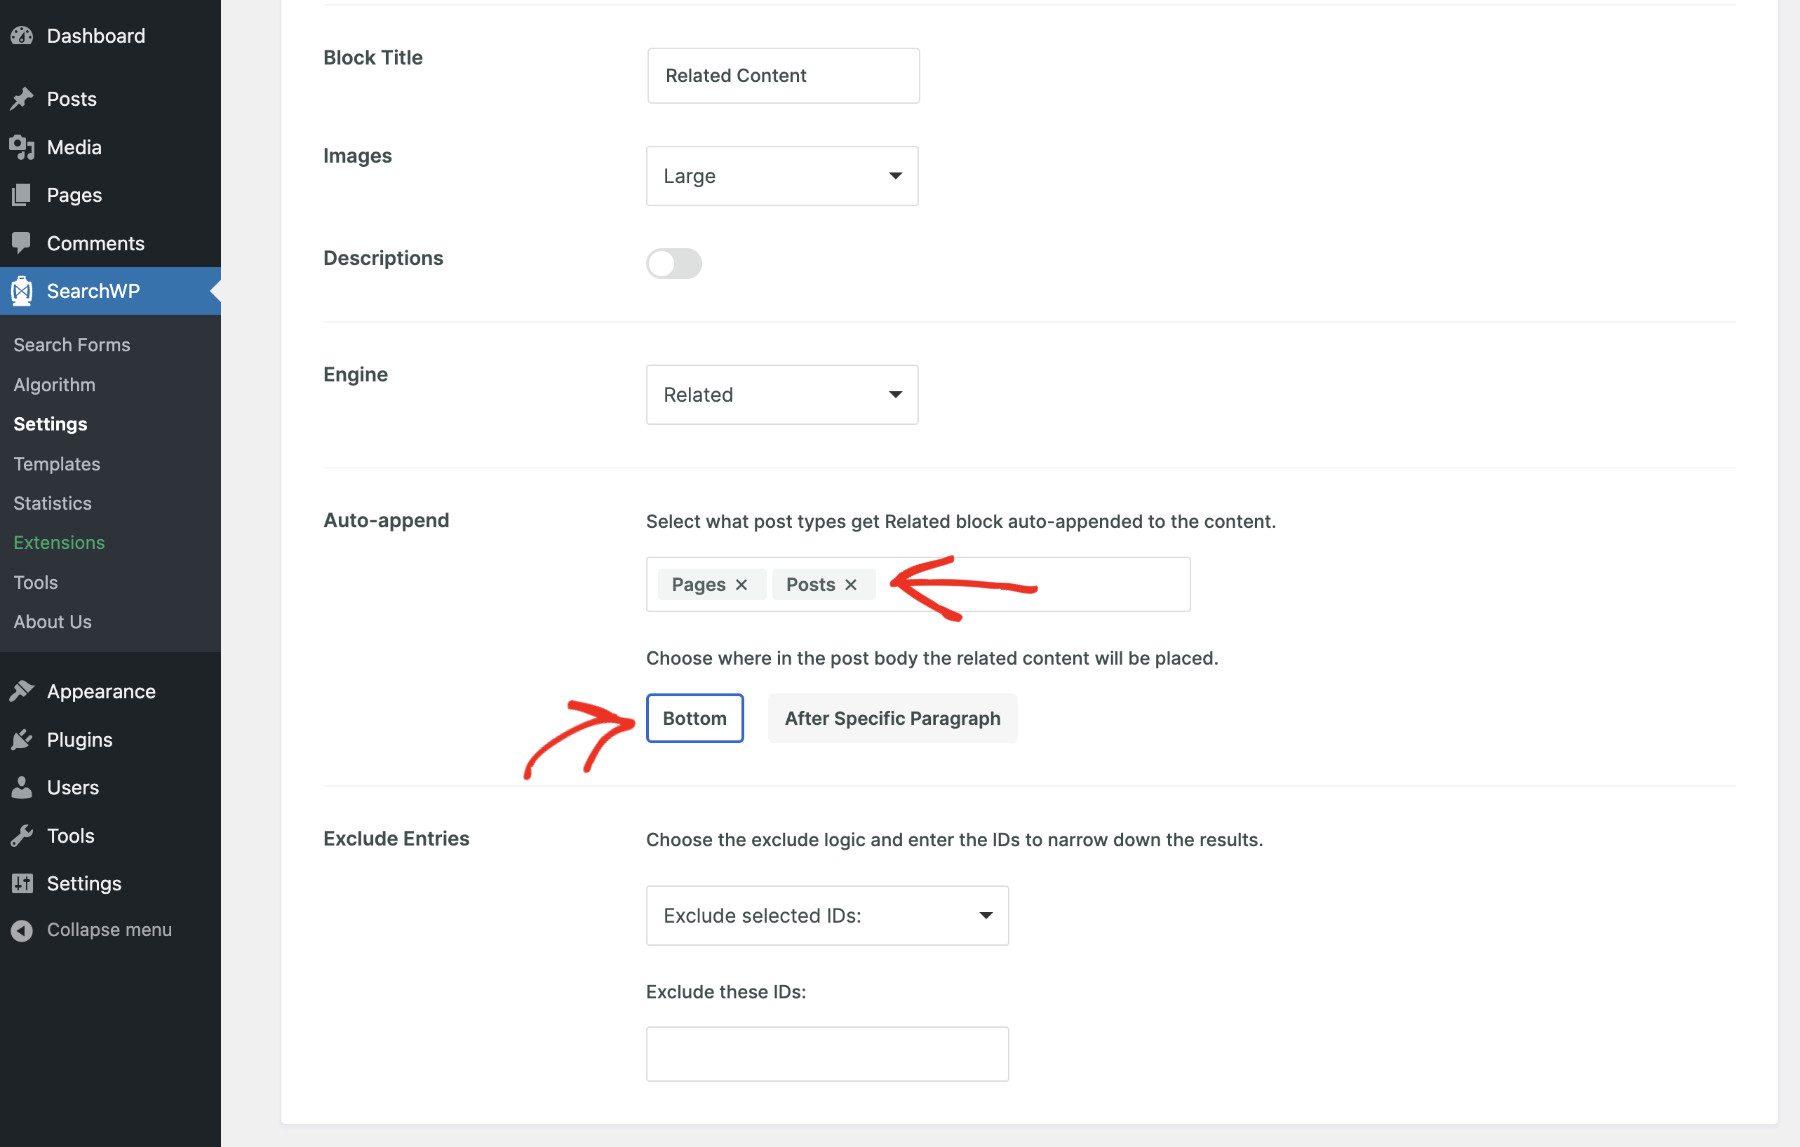
To automatically show related content in WordPress, you need to visit SearchWP > Settings > Related, then scroll down to find “Auto-append.”
Now, define the type of content for which you want the Related Content block to appear automatically. You can also determine the position of the block. You can either display it at the bottom or after a few paragraphs. Let’s select “Bottom.”
Finally, click “Save” when you’re satisfied with your settings.
Step 6.2 Show Related Content In WordPress Manually: Use Gutenberg Block
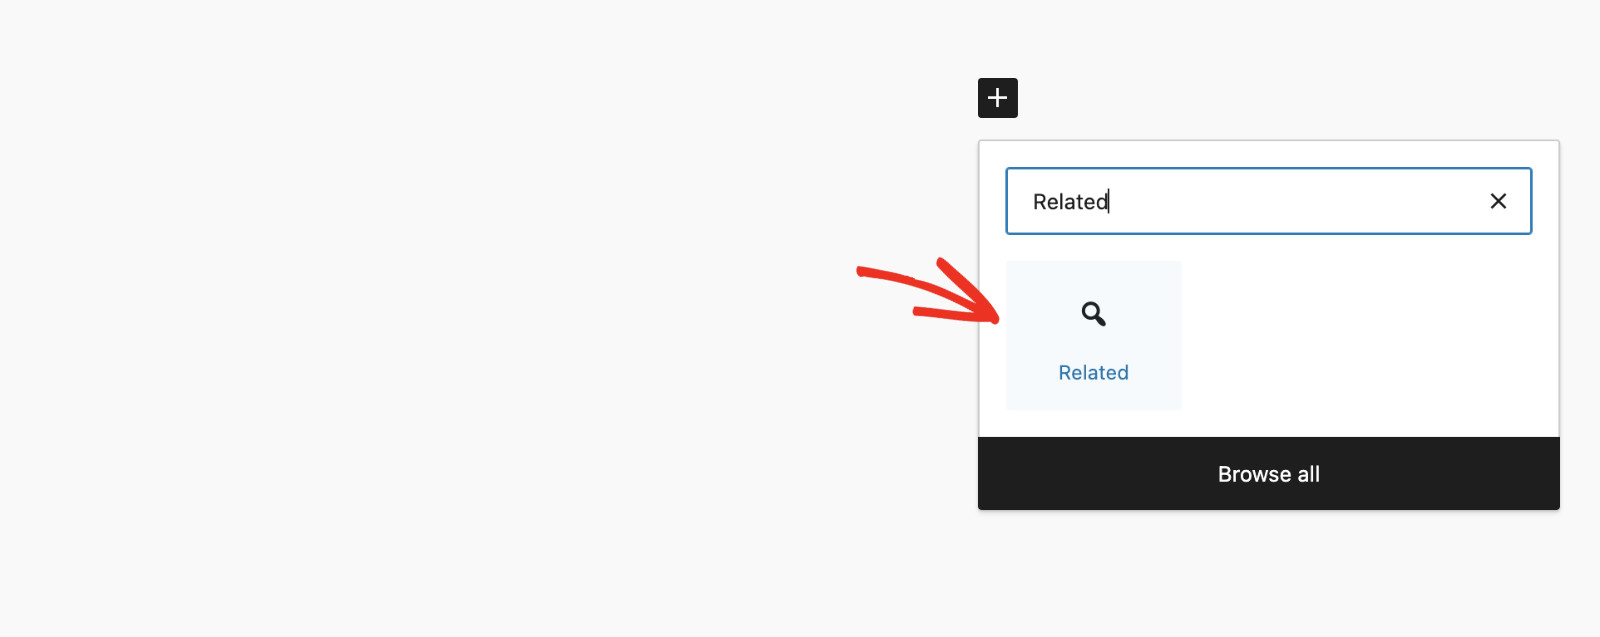
SearchWP provides a Gutenberg block to show related content. You can use it like any other Gutenberg block. Just open the designed location in Edit mode and click the Add Block button.
Next, find the “Related” block from the list and select it.
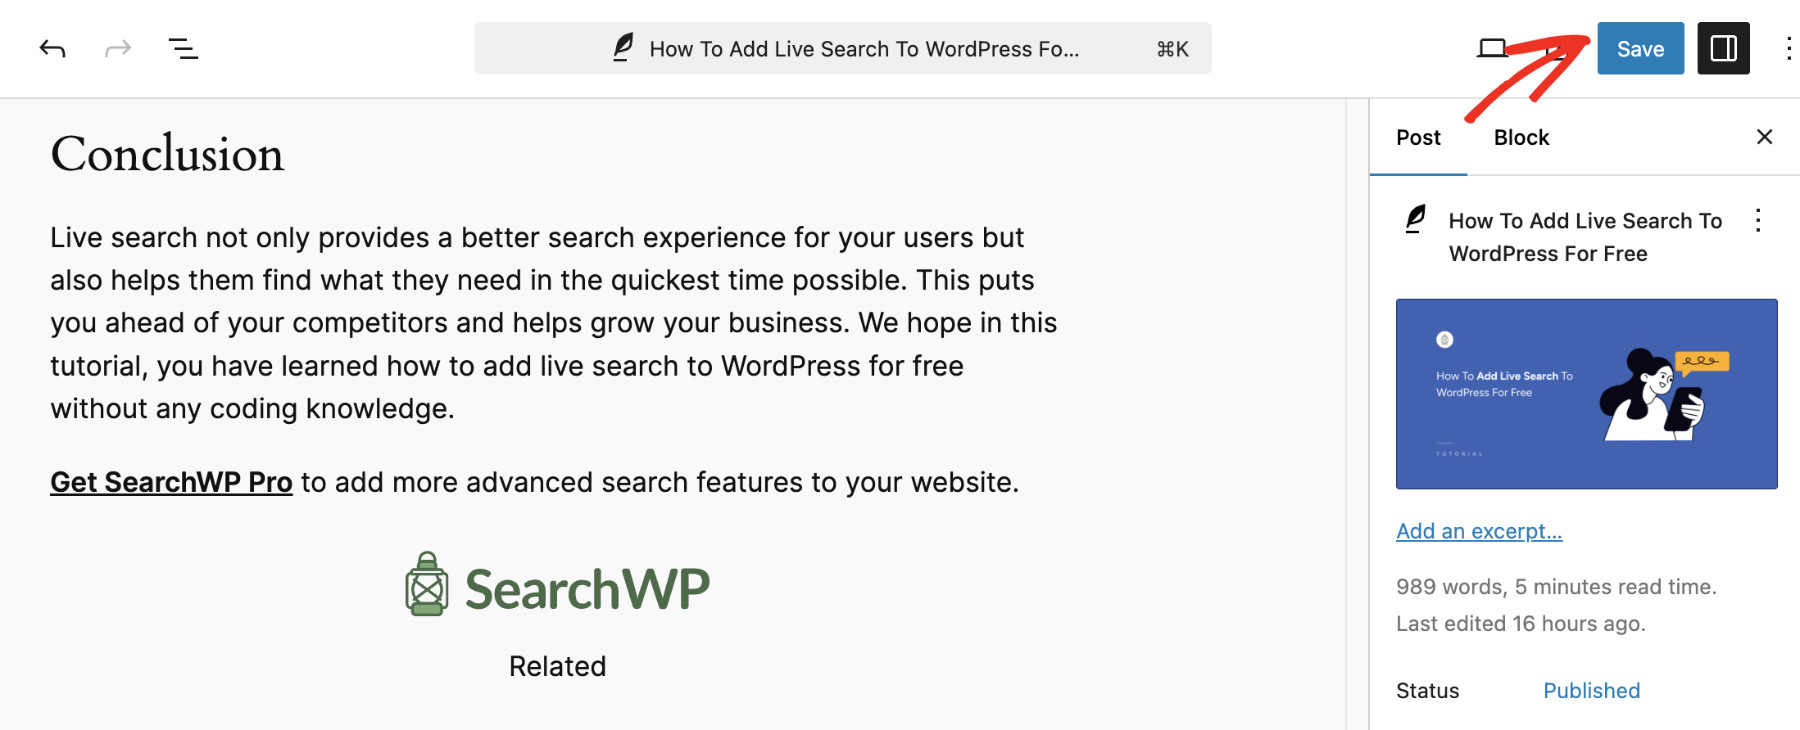
You should now see the Related block appear. As you’re on the backend, you will not see any content now. They will appear once you visit the frontend.
Just as in Step 5, you can use the “SearchWP Related Content” section at the bottom to determine which content should be shown as related content.
That’s it. When you’re satisfied with your configuration, press “Save/Publish,” depending on your scenario.
Step 6.3 See Related Content In Action
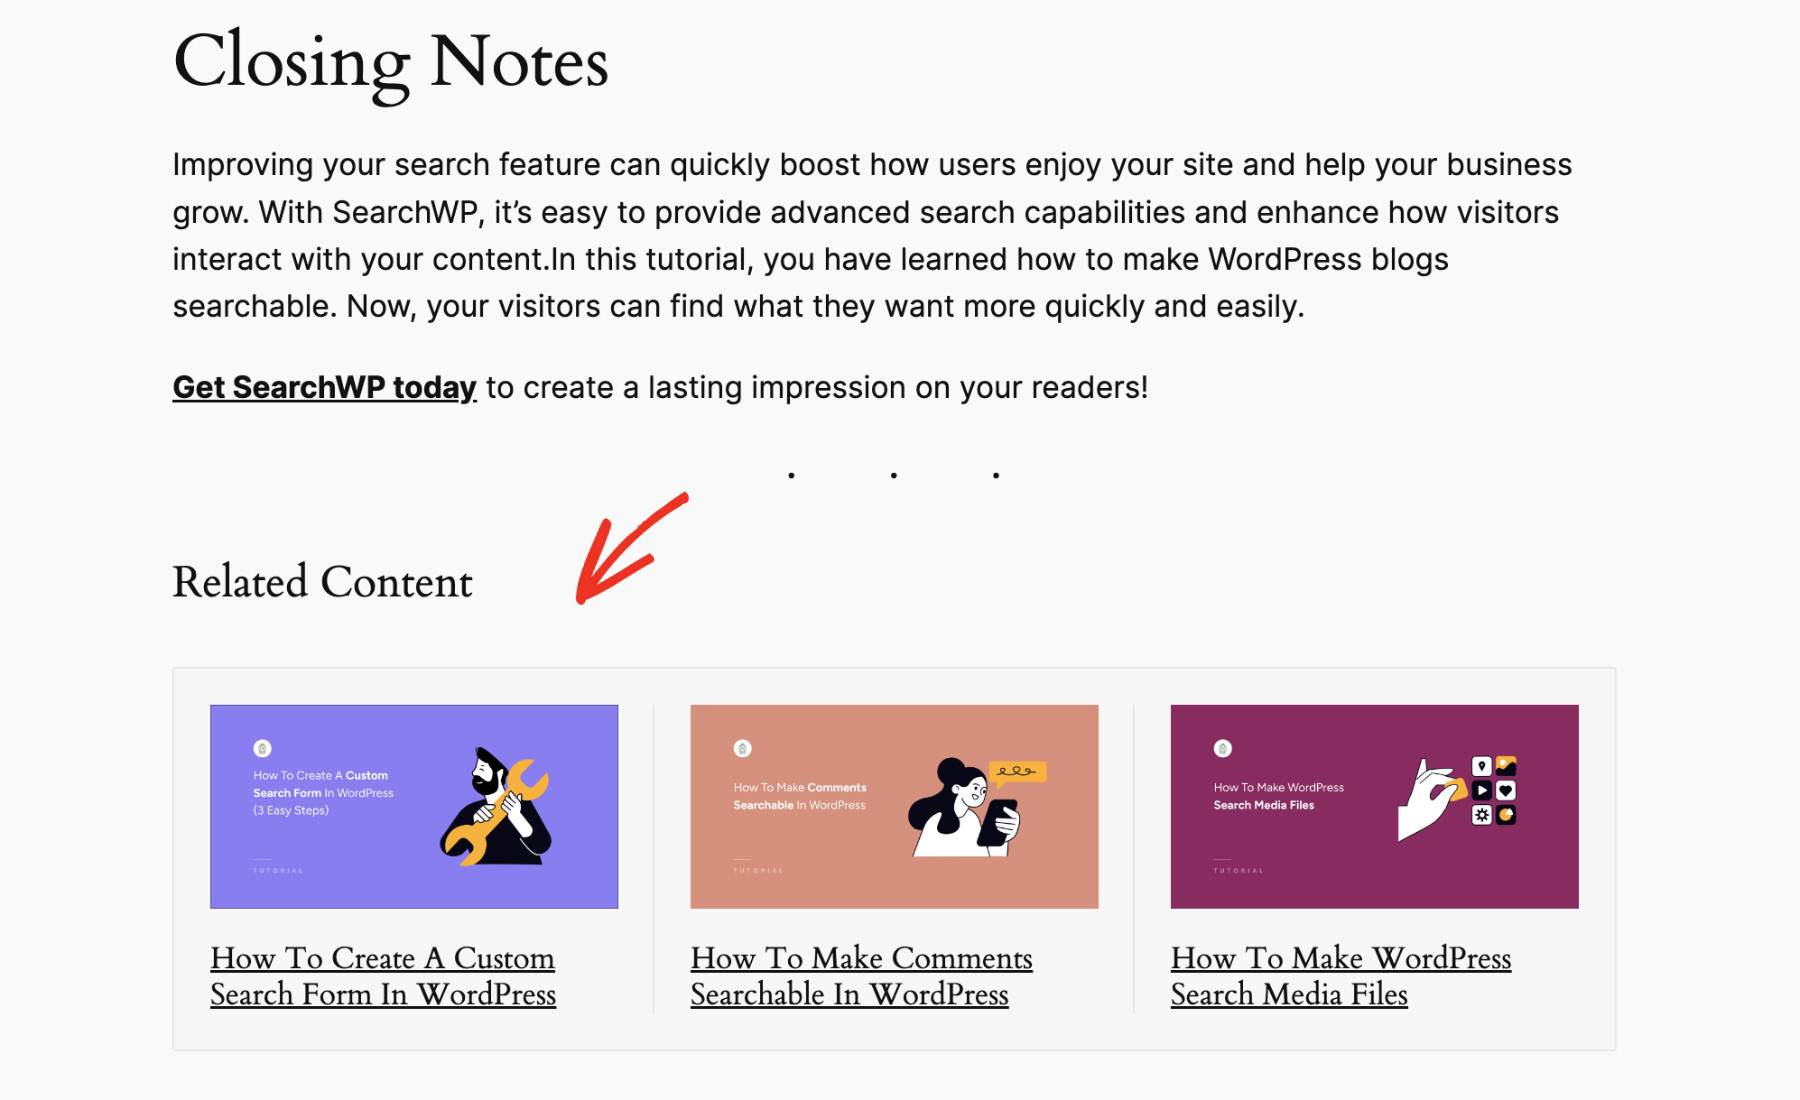
Now, when you visit your website’s front end, a “Related Content” section will appear in the designated space.
Conclusion
You can easily show related content in WordPress using SearchWP. Whether you’re running a blog, an e-commerce store, or a news website, showing related content effectively keeps visitors engaged, increases sales, and reduces bounce rates.
Get SearchWP today to add awesome new features such as this to your website.
