


Imagine a customer lands on your WooCommerce store looking for a blue merino wool sweater. They type “blue merino” into the search bar and get zero results, even though you have exactly what they need.
That’s the default WooCommerce search at work, and we’ve seen it cost store owners real sales every single day.
The problem is that the default WooCommerce search only matches keywords against product titles and basic content. It completely ignores product attributes, variations, tags, categories, and custom fields stored in your database.
Adding a custom WooCommerce search widget is how you fix that. You can place a properly configured search form in your sidebar, header, shop page, or anywhere else on your site, and connect it to a search engine that actually understands your products.
In this article, we’ll show you how to add custom WooCommerce search widgets to your store step by step, without writing a single line of code.
What Are Custom WooCommerce Search Widgets?
A custom WooCommerce search widget is a search form you place anywhere on your site and connect to a configured search engine. Unlike the default search bar, it gives you control over what the engine searches, how results are ranked, and where the form appears.
Classic WordPress themes use the Widgets screen to place search forms in areas like the sidebar, header, or footer. Block-based FSE (full-site editing) themes use the block editor instead, where you can drop a search form block onto any template or page.
Either way, the widget itself is only the front-end display. The real upgrade comes from what’s powering it.
Why Add Custom WooCommerce Search Widgets?
A well-placed search widget turns your store navigation into a direct path to purchase. Here’s what you gain by replacing the default experience:
- Better product discoverability. The default search misses products stored with custom attributes like color, size, SKU, or material. A custom widget backed by a real search engine finds products no matter which attribute the customer searches by.
- More sales from existing traffic. Visitors who use site search convert at significantly higher rates than those who browse. Every time a search returns zero results, you lose a conversion you already paid to attract.
- Control over what gets searched. With a custom widget, you decide exactly which product data the search engine reads — title, description, tags, variations, custom fields, or any combination. You can even create different search widgets for different pages, each tuned for a different purpose.
- Search analytics. Once the search is working, you can track exactly what customers are searching for and which queries return zero results. Our guide on how to find the most searched product on your website walks through this in detail.
- A clean, professional experience. A search bar that returns relevant results instantly builds trust. We’ve worked with many store owners who noticed a direct drop in bounce rate after fixing their product search.
The good news is that setting all of this up takes about ten minutes with the right plugin.
Let’s learn how to add custom WooCommerce search widgets to your website below.
How to Add Custom WooCommerce Search Widgets (Easily)
The easiest way to add a custom search widget to WooCommerce is to use a plugin, and SearchWP is the best WordPress search plugin for this task.

SearchWP is the best WooCommerce search plugin, trusted by over 50,000 website owners to replace the default WordPress search with a fast, accurate engine.
It builds a search index across your site’s content, posts, pages, products, media, custom fields, and more. And lets you control exactly what gets searched, how results are ranked, and where search forms appear.
Here are the key features that make it ideal for WooCommerce stores:
- WooCommerce Integration. SearchWP’s dedicated WooCommerce extension powers your product search with a real relevance engine. It respects product visibility rules, handles catalog sorting, and makes product attributes, variations, and tags fully searchable.
- Custom search engines. Create multiple engines and connect each one to a different search form. You can run a product-only search in the shop sidebar and a site-wide search in the header at the same time.
- Search analytics. The Metrics extension shows you exactly what your customers are searching for, which searches return zero results, and where you’re losing sales to your own search bar.
- Multiple placement options. Add search forms as widgets, Gutenberg blocks, shortcodes, or page-builder elements — no theme restrictions.
- PDF and office document indexing. If you sell books or other text-based resources, your users will be able to find them more easily. SearchWP considers the content of document files in your media library when searching.
- Visitor statistics and insights. You get to see what your visitors are searching for. You can use this information to improve your services.
With that, let’s see how to add custom WooCommerce search widgets to your site using SearchWP.
Step 1: Install and Activate SearchWP
To get started, you can visit the SearchWP website and sign up for a new account.
Once you’ve created an account and you’re in your account dashboard, go to the Downloads tab. From there, click Download SearchWP to save the plugin ZIP file to your computer. Copy the license key on the same page, as you’ll need it during setup.

Next, you can upload the plugin files and then install and activate SearchWP on your WordPress site.
If you need a hand, check out this beginner’s guide on how to install a WordPress plugin.
After activation, you’ll see the SearchWP welcome screen with a setup wizard. Go ahead and click Start Onboarding Wizard and follow the onscreen instructions, including entering your license key when prompted.

Great work, SearchWP is now installed and ready to configure. The next step is to add WooCommerce support.
Step 2: Install the WooCommerce Integration Extension
SearchWP has a dedicated WooCommerce Integration extension that powers your product search with a full relevance engine.
It handles product visibility rules, catalog sorting, and ensures SearchWP reads your product data correctly.
To install it, simply navigate to SearchWP » Extensions from your WordPress dashboard.

Next, find the WooCommerce Integration extension in the list and click Install.
It activates automatically within a few seconds.
Now SearchWP has full access to your WooCommerce products and product data. Let’s configure the search engine next.
Step 3: Set Up a SearchWP Custom Search Engine
SearchWP uses search engines, which let you set up configurations that control what gets searched and how results are ranked.
You can create multiple engines and connect each one to a different search form on your site.
To customize your SearchWP engine, navigate to SearchWP » Algorithm from the WordPress dashboard.
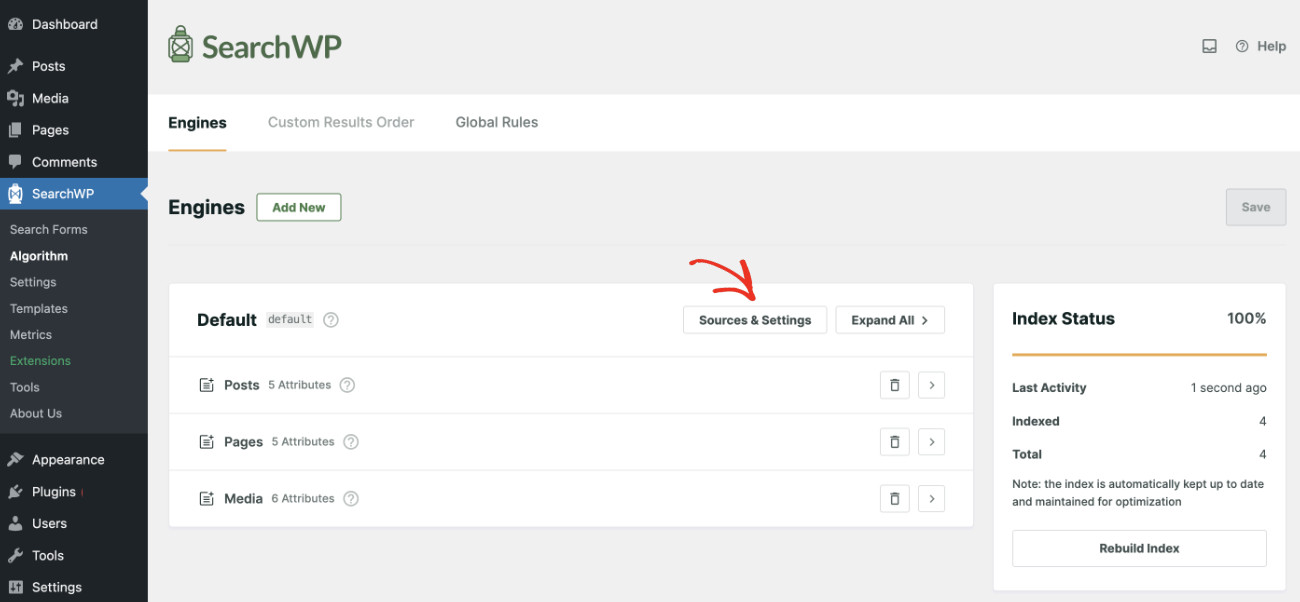
From there, click Sources & Settings. A modal will pop up with a list of sources to choose from.
Then, check the box next to Products to make your WooCommerce products searchable. You can also include other default sources like Posts, Pages, or Media if you want the widget to search across your whole site.
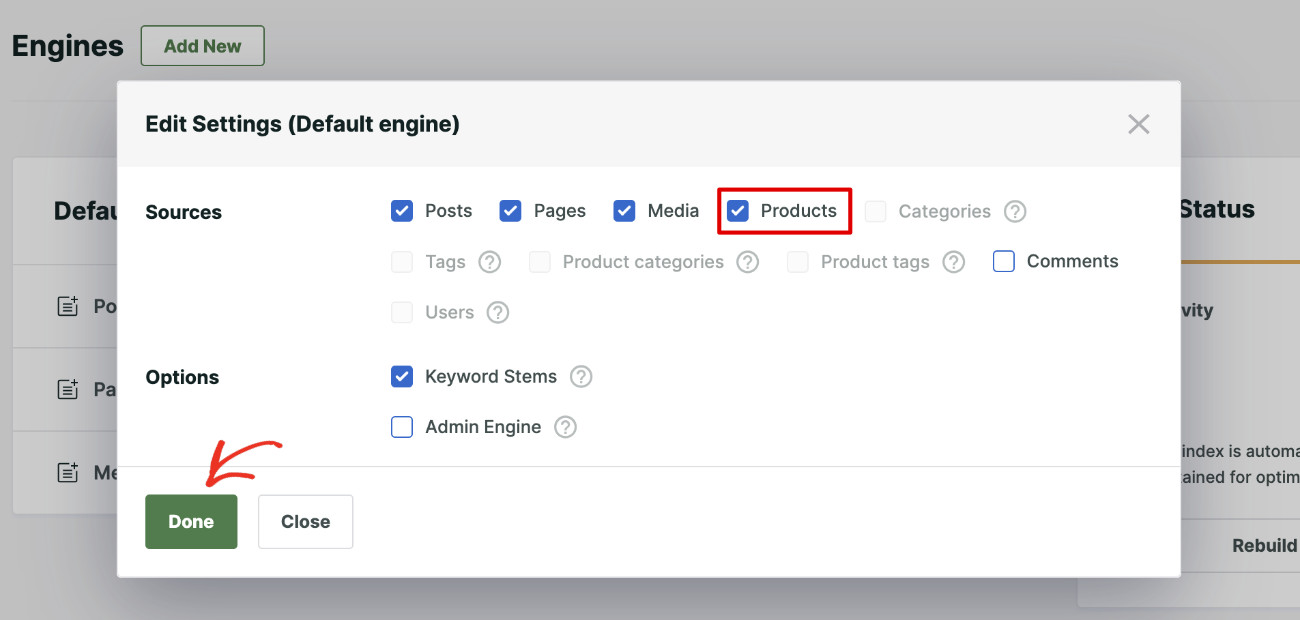
Click Done when you’re finished.
Now scroll down to the Products section to fine-tune what SearchWP reads from each product.
To start, click Add/Remove Attributes to open the attributes panel. Here you can add product custom fields (like SKU, color, or size) and taxonomies (like product tags and categories) to the search index.

When you’re done selecting attributes, click Done.
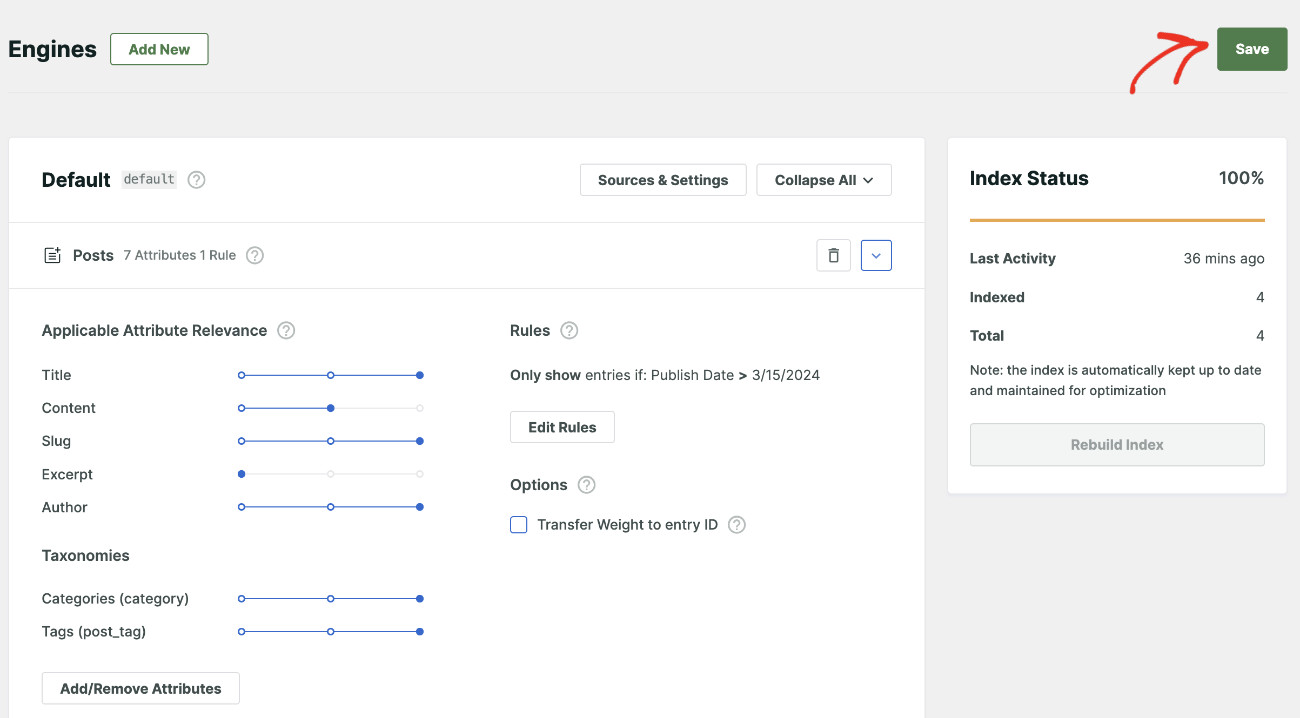
Then click Save so that SearchWP can start rebuilding your search index based on the new settings.
If you want to narrow the widget down to products only and remove other content types from results, see our guide on how to limit your WordPress search results.
Your search engine is now tuned for WooCommerce products. The final step is to add the search widget to your site.
Step 4: Add WooCommerce Search To Your Website
Now you need to create a search bar so your customers can search for their desired products.
Whether you need to use a widget or a block to create the search bar depends on the theme you are using. A WooCommerce Search Widget is your best choice if you are using a classic theme. On the other hand, if you are using a modern FSE (full-site editing) theme, then utilizing a WooCommerce search block is the standard method.
You can add a search bar anywhere on your website, regardless of the method you use. Here’s how you can add WooCommerce search to your website for both cases.
Step 4.1 Add WooCommerce Search Widget For Classic Themes
You can add a custom WooCommerce search widget anywhere on your site if your theme supports it. Let’s see how you can add the widget to the sidebar.
You can also put it anywhere on your site, such as the header and footer. It depends on your needs, but the process is similar. Simply navigate to Appearance » Widgets from the WordPress dashboard.

On the widgets settings page, select the area where you want to add the widget and click the + icon.
In this tutorial, we’ll be adding the search widget to the WooCommerce sidebar area. Type SearchWP into the field, and then select the SearchWP Form widget block.

Once the SearchWP Form block is added, you can click the dropdown menu and select a search form.
Then, click Update in the upper right corner.

Your sidebar now has a custom WooCommerce search widget.
Now visit your website front-end and see your WooCommerce search widget in action!
Step 4.2 Add WooCommerce Search Block For Modern FSE Themes
Before displaying the search bar, you’ll need to create a search form. The process is quick and easy with SearchWP and doesn’t involve writing any code.
To create a search form, go to SearchWP > Search Forms and click “Add New.”

Pick a name for your search form, select a theme layout, and configure it according to your needs.
Please note that SearchWP enables you to configure multiple Engines, leveraging which you can serve different content in different locations on your website.

Choosing SearchWP as the Results page gives full control and optimization of the WordPress search results page.
Here’s a detailed tutorial on how to optimize the WordPress search results page.

Once you are done configuring the search form, click Save.
If you are interested in learning more, here’s a detailed tutorial on how to create an advanced search form in WordPress.

Now, open the page where you want to display the search bar in Edit mode.
Click the “+ Add block” icon, then find and select the SearchWP Form from the list of blocks.

Once the SeachWP Form block is added, you can select the form you just created.
Simply click the dropdown menu to do that.

You should now see the search bar displayed on your desired location.
Lastly, you can click the Update or Publish button in the top corner.

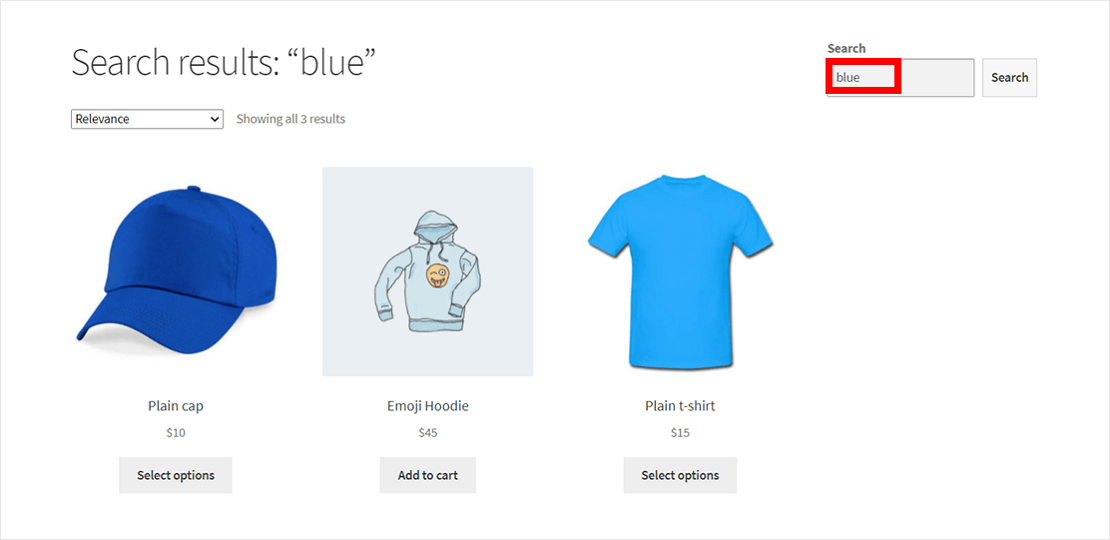
Now visit your website front-end and see your WooCommerce search in action!
You can search for different products to check if the search is working properly.

FAQs about WooCommerce Search Widgets
1. What is a custom WooCommerce search widget?
A custom WooCommerce search widget is a search form placed on your site and connected to a configured search engine. Unlike the default WordPress search bar, it searches product attributes, variations, tags, and custom fields. You can place it in any widget area or page using a plugin like SearchWP.
2. Does SearchWP require the WooCommerce Integration extension to search products?
SearchWP indexes WooCommerce products as a post type by default. The WooCommerce Integration extension adds product-specific behavior — including visibility rules, catalog sorting compatibility, and correct handling of the WooCommerce shop archive search. It is recommended for any WooCommerce store and is included with the SearchWP Pro plan.
3. Can I add a WooCommerce search widget to my header or footer?
Yes. If your theme supports header or footer widget areas, navigate to Appearance » Widgets, open the header or footer widget area, and add the Search block. For FSE themes, you can embed the SearchWP Form block directly in the header or footer template via the Site Editor.
4. Why does the default WooCommerce search miss products?
The default WordPress search runs a basic SQL LIKE query against post titles and content. WooCommerce stores product attributes, tags, SKUs, and variations in separate database tables as post meta and taxonomy terms, which the default search never reads. A plugin like SearchWP builds a custom index that includes all of this data.
5. Can I create different search widgets for different pages?
Yes. SearchWP lets you create multiple search engines and link each one to a different search form. You can have a product-only search engine powering a widget on your shop page, and a separate site-wide engine powering the search bar in your header. Each engine can be configured to search different sources and attributes.
You now have a custom WooCommerce search widget on your site, powered by an engine that understands your products. With SearchWP indexing your product attributes, tags, variations, and custom fields, your customers can find what they need, no matter how they search for it.
We hope this article helped you learn how to add custom WooCommerce search widgets. You may also want to see our guides on how to restrict WooCommerce product search to title only and how to hide a WooCommerce product from search results.
Ready to upgrade your WooCommerce search? You can get started with SearchWP here.


 - SearchWP")
