Do you want to know how to use SearchWP with Elementor to boost your site search?
In this article, we’ll show you 4 ways how you can use SearchWP to help your visitors get more relevant search results.
Since this is a huge and detailed guide, here is a table of contents to help you navigate through it:
- What is SearchWP and Why Use It
- How to Add a Custom Search Widget to Elementor
- How to Help Your Visitors Find the Right Content Faster
- How to Display Live Search Results on Your Elementor Site
- How to Customize Your Elementor Search Results Page
Let’s dive into it!
What is SearchWP and Why Use It
SearchWP is the #1 WordPress search plugin on the market, with over 30,000 active installs.
It comes with many useful features that you can use to make search on your site way smarter.
The thing is that one of WordPress’s weaknesses has always been its search functionality.
It ignores a lot of valuable data when performing searches and doesn’t give you any way to customize how the search works.
This results in your visitors often not finding what they’re looking for and leaving your site unsatisfied.
Here’s where SearchWP comes to the rescue. Using this plugin, you can make searchable almost anything on your site.
This list includes custom post types, custom fields, post tags, categories, and other data you want WordPress to consider.
SearchWP also allows you to completely customize how search works on your site.
For example, you can exclude any pages from search results, limit search to specific content, and many more.
This way, you can make it easier for your visitor to find the right content and improve their user experience.
Here are some other SearchWP features that’ll help you to boost your search:
- Multiple search engines. Would you like to create a custom search field? With SearchWP, you can create supplemental search engines with unique settings and link them to individual search fields.
- WooCommerce integration. Are you selling online using WooCommerce? SearchWP has seamless integration with this plugin to make your search better and boost your sales right away.
- Search activity tracking. SearchWP collects data on any search activity on your site so you can get new content ideas and better understand your audience.
- Fuzzy search. Want to enrich your search results? With SearchWP’s fuzzy search feature, you can make WordPress search for partial matches when there are no exact ones.
How to Install SearchWP on Your WordPress Site
Now that you know why SearchWP is the best search plugin, let’s see how you can install it on your website.
To begin, you’ll need to get your copy of the SearchWP plugin.
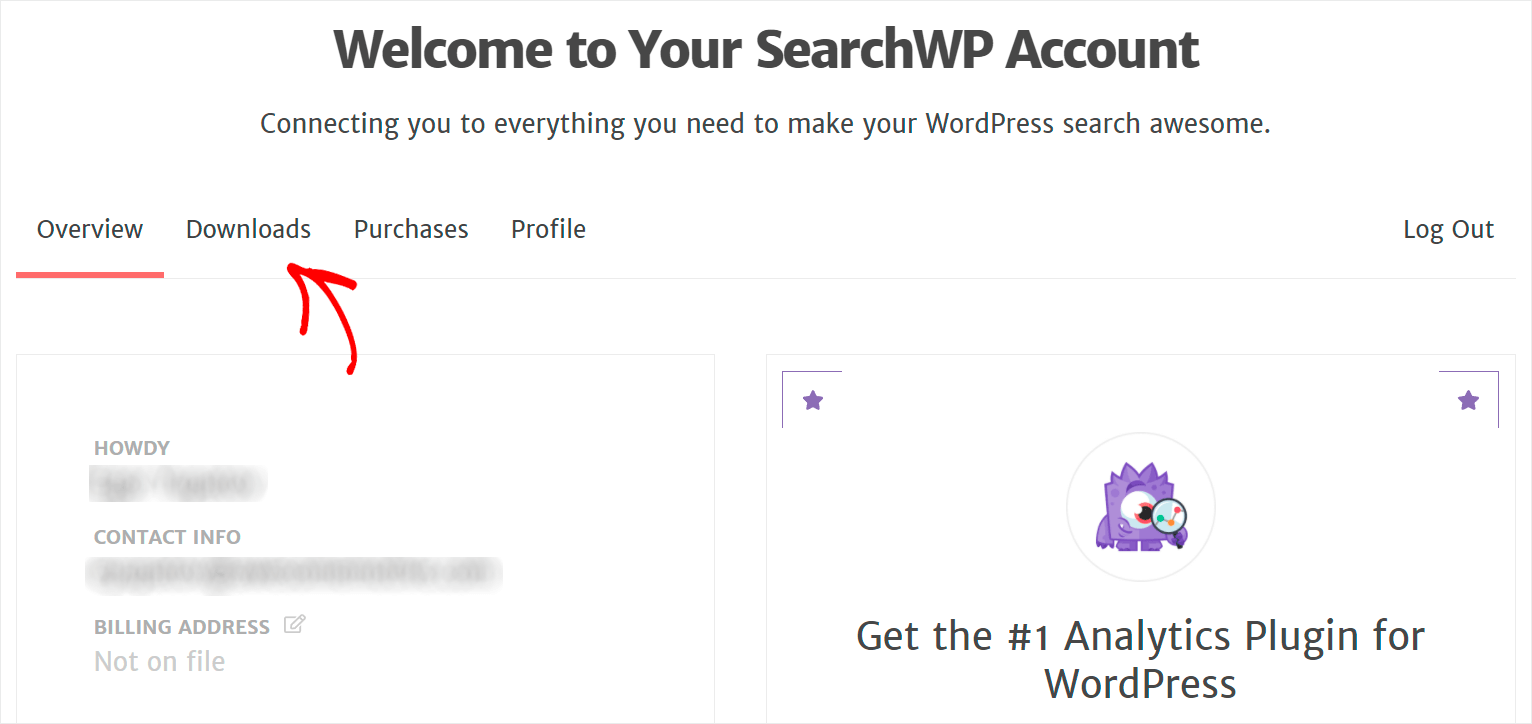
After that, log into your SearchWP account and navigate to the Downloads section.
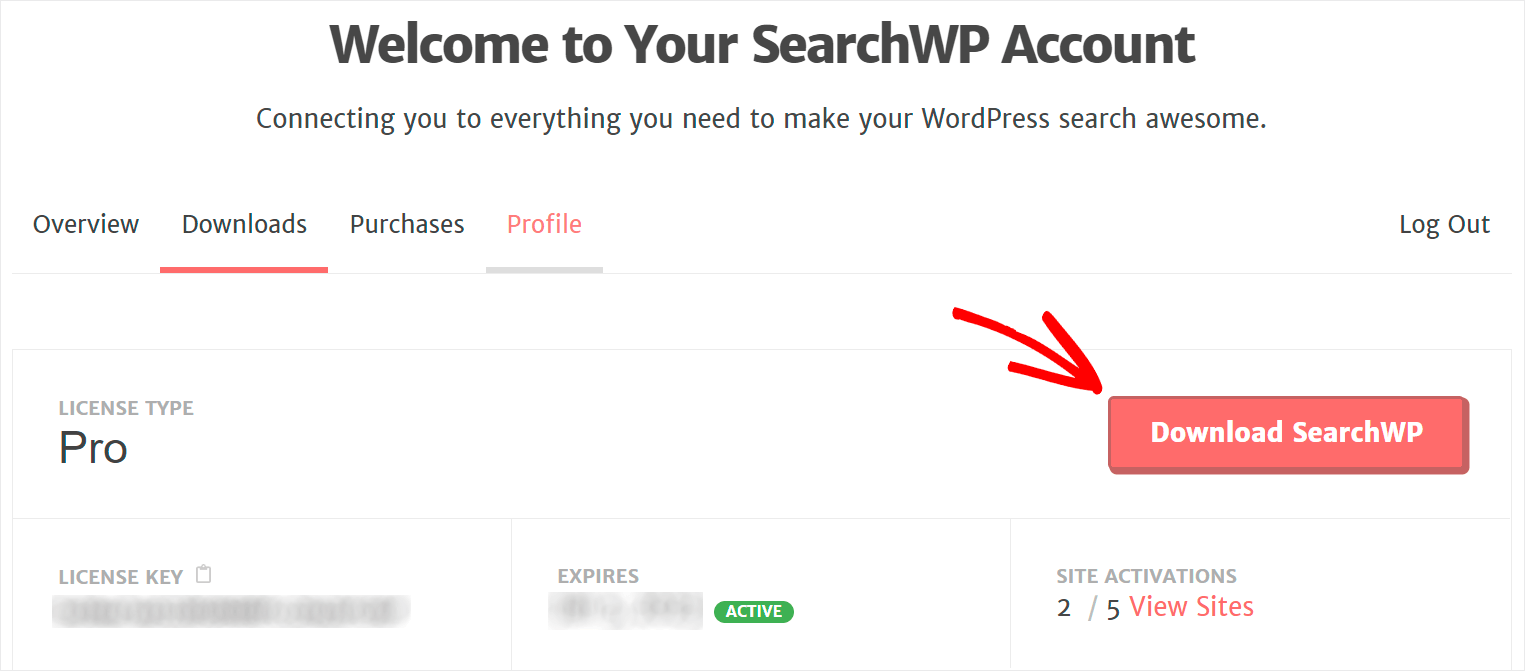
Once there, click the Download SearchWP button to download the SearchWP plugin’s ZIP file to your computer.
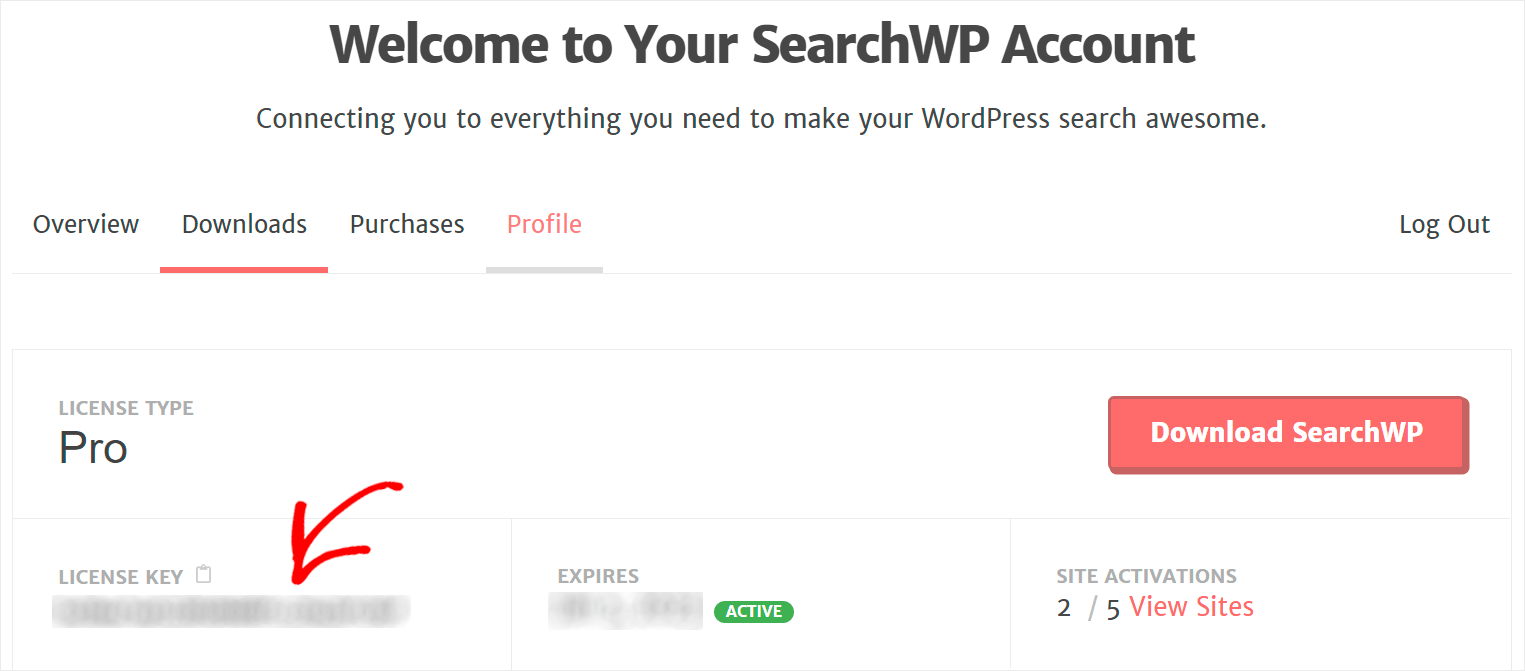
Copy the license key in the bottom left corner of the same page. You’ll need this key to activate your plugin’s copy later.
The next step is to install SearchWP. You’ll need to upload the plugin’s ZIP file to your site to do that.
Need a refresher on how to do that? You can follow the how to install a WordPress plugin step-by-step tutorial.
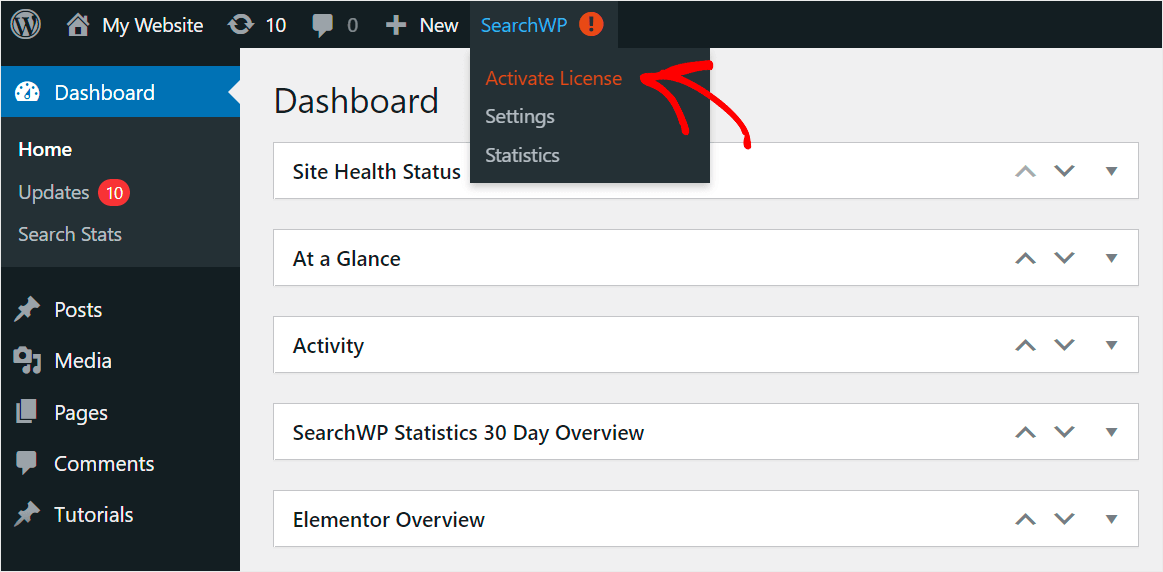
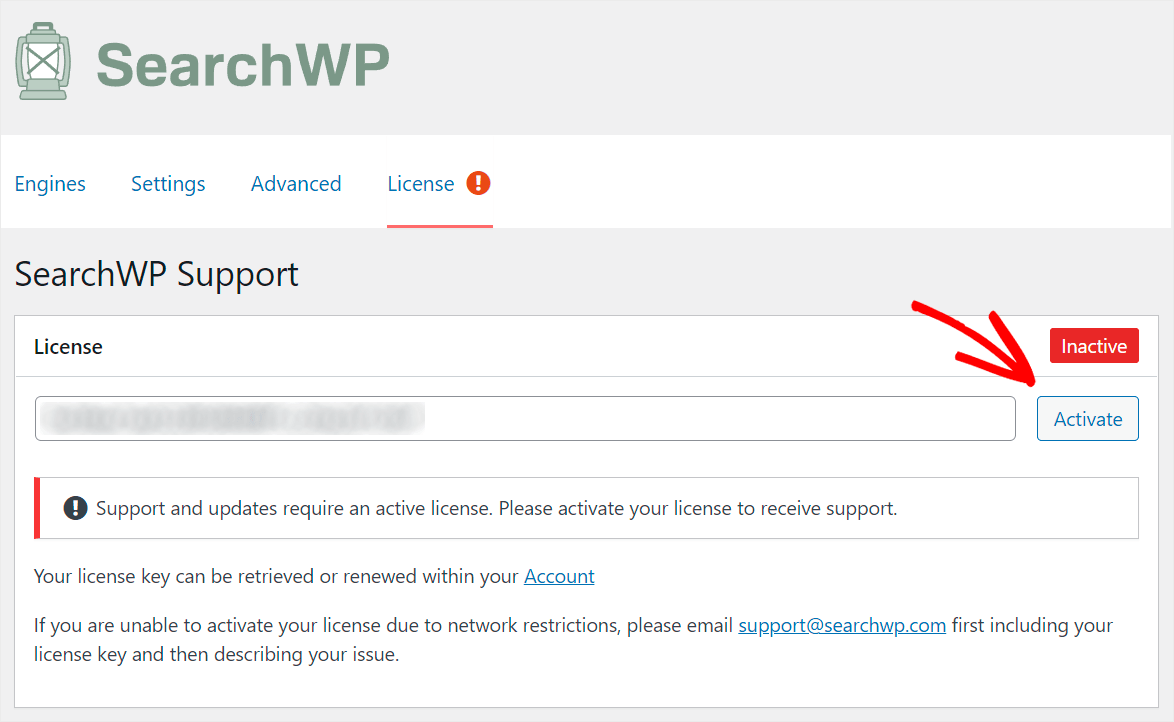
After installing the plugin, navigate to your WordPress dashboard, point your mouse cursor over the SearchWP button, and click Activate License.
Once you get to the License tab, paste your license key into the License field and press Activate.
After activating your copy of the SearchWP plugin, you’re ready to start boosting search on your site.
1. How to Add a Custom Search Widget to Elementor
Using SearchWP and Elementor, you can add a custom search widget to your pages.
It’ll encourage your visitors to discover more of your content and allow you to get more pageviews.
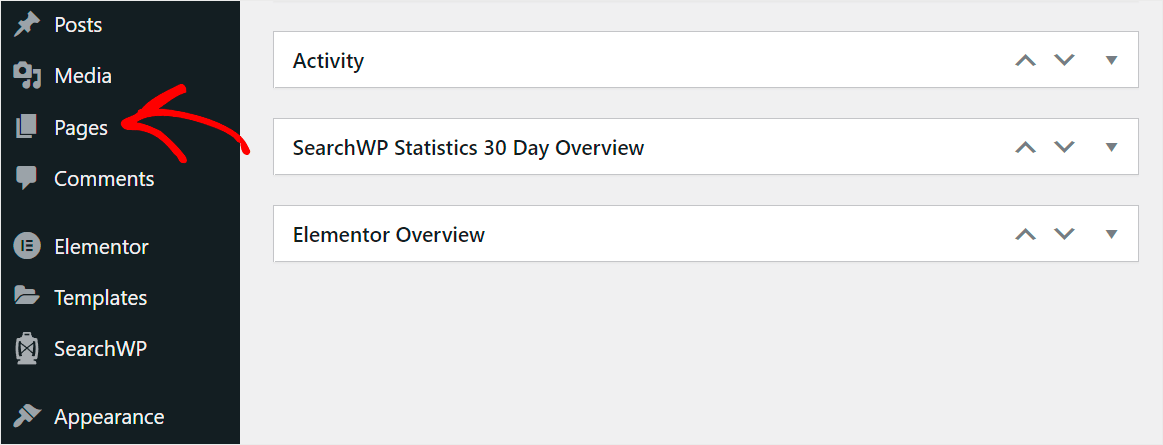
To get started, navigate to the Pages tab in your WordPress dashboard.
Then hover your cursor over the page to which you want to add the search form and click Edit with Elementor.
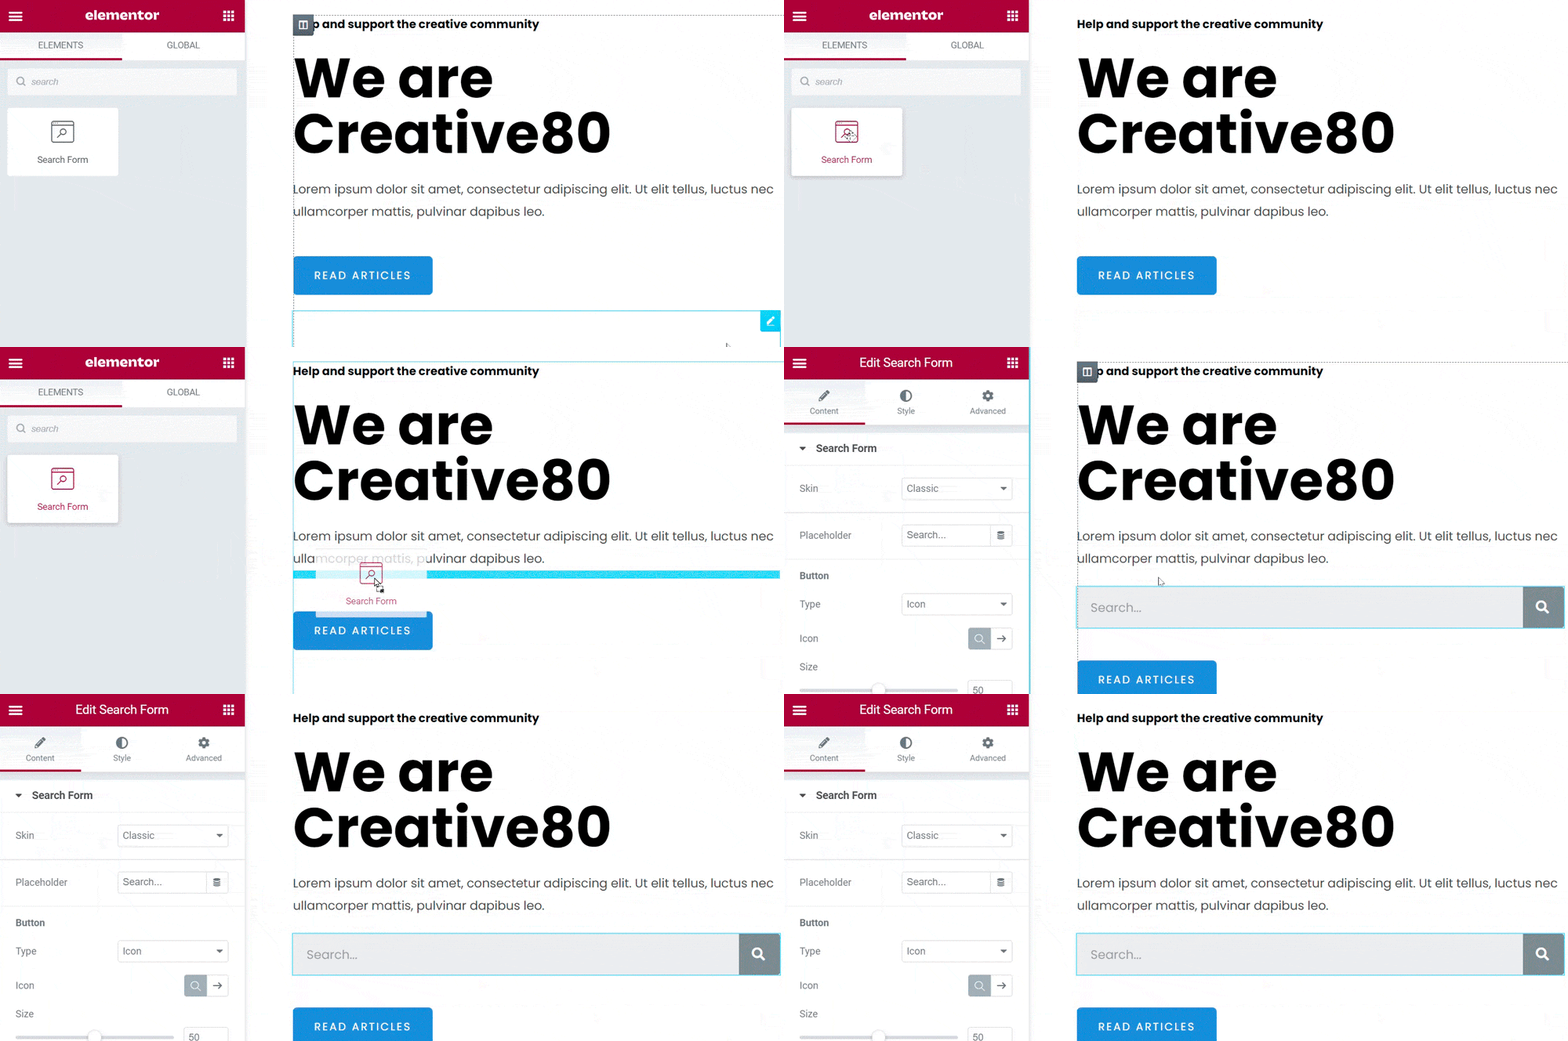
Once you get to the Elementor editor, type “search” in the left panel and find the Search Form widget.
Then drag this widget to the place on your page where you want to add the search form.
Here’s how we do it:
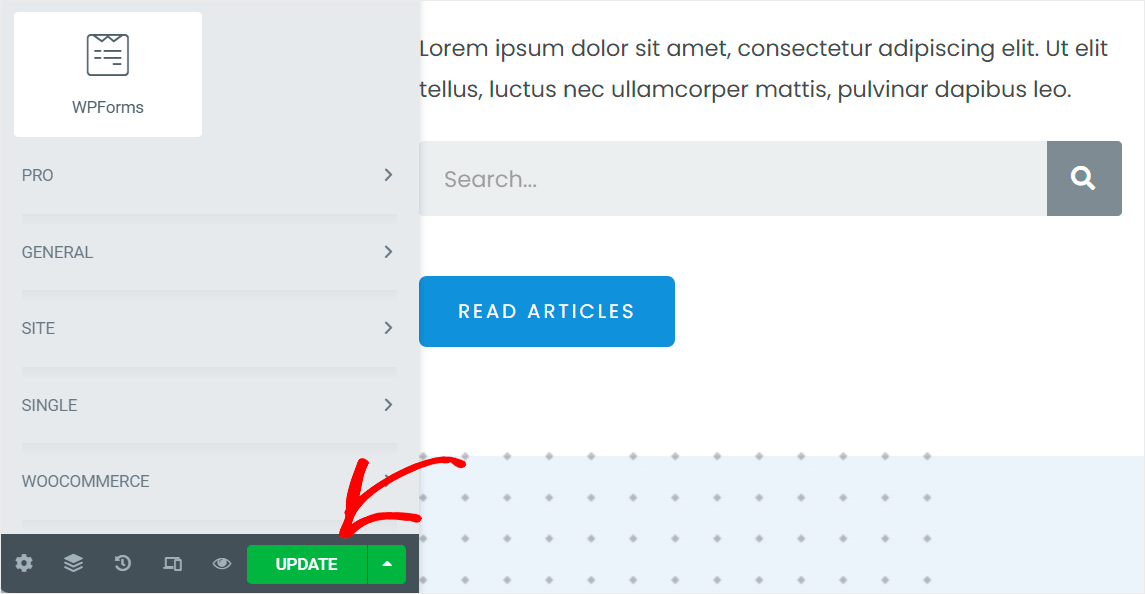
When you’ve finished, save your Elementor page by clicking the Update button at the bottom left corner of the editor.
2. How to Help Your Visitors Find the Right Content Faster
SearchWP has seamless integration with Elementor and automatically connects to every existing search field on your site.
So after you add a search widget to your page, you’re ready to customize search on your site.
Customize Your Search Engine
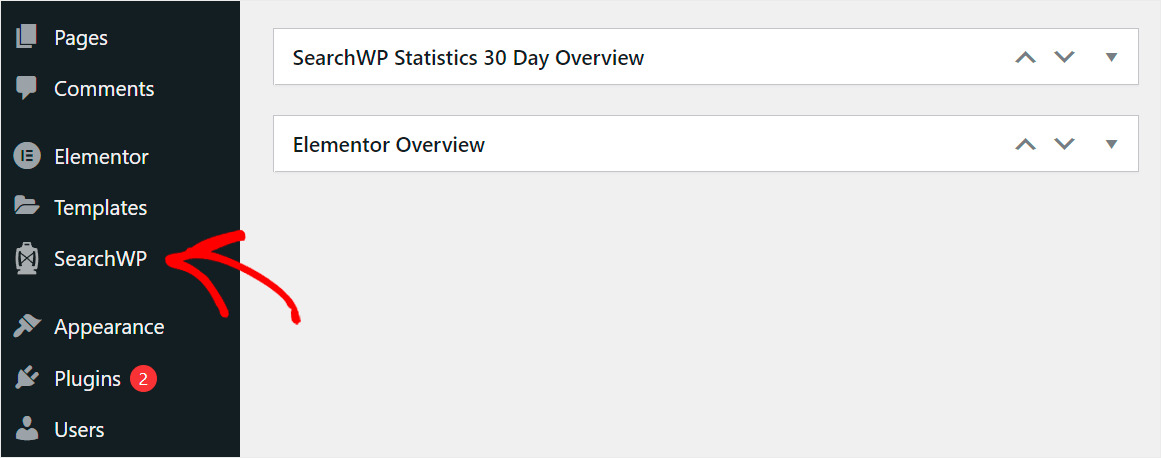
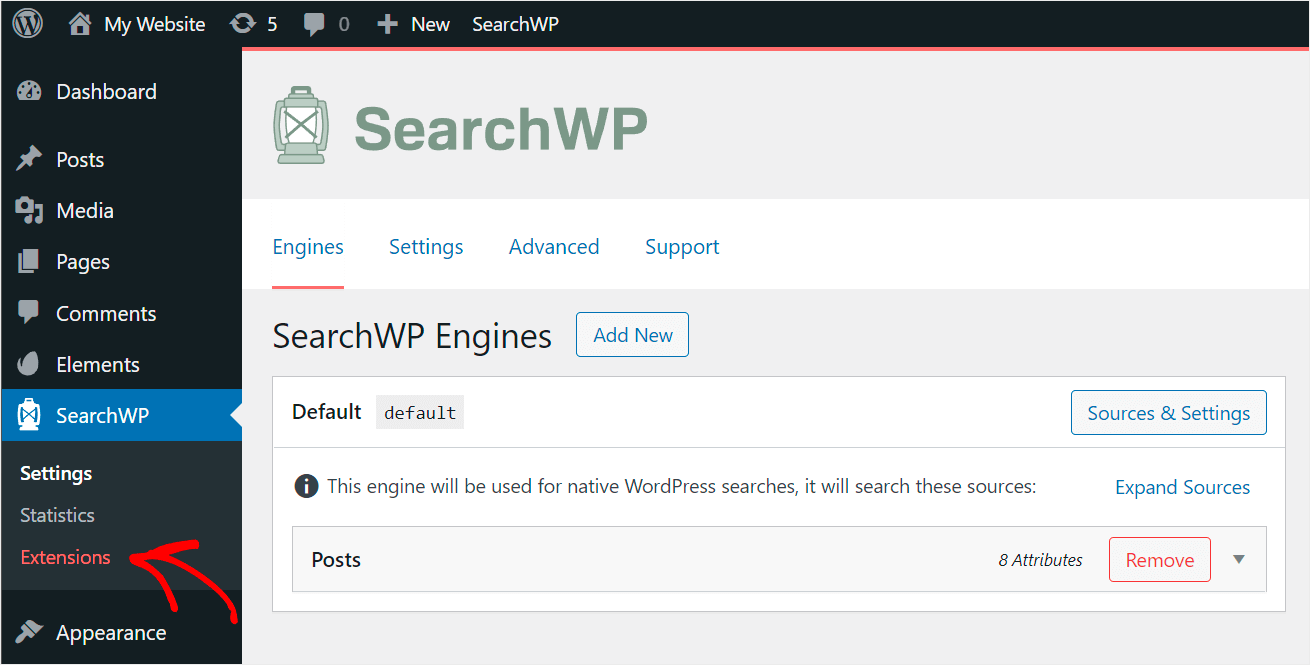
To begin, go to your WordPress dashboard and click on the SearchWP button on the left panel.
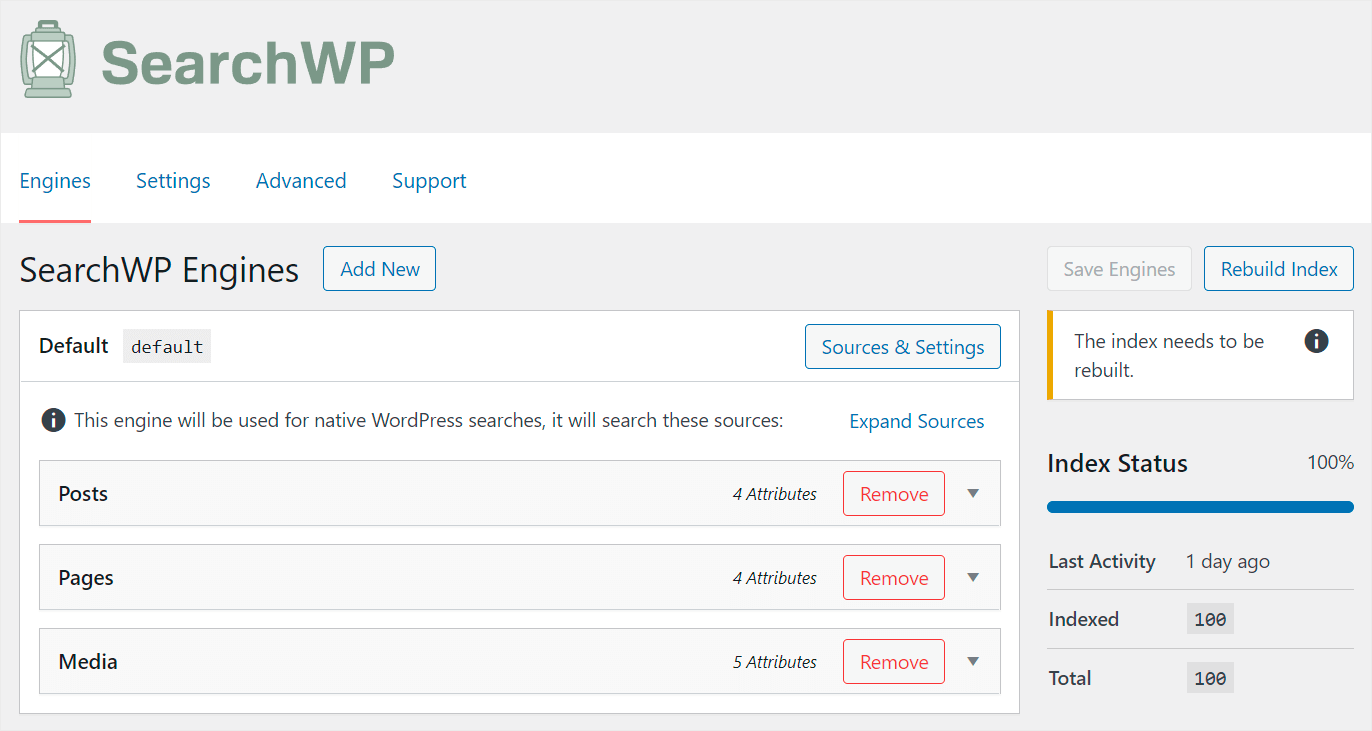
It’ll take you to the Engines tab in the SearchWP settings. Here you can find your search engines created with SearchWP.
At the moment, there is a single search engine called Default. SearchWP automatically creates it after the plugin installation.
By customizing the Default search engine settings, you can modify how searches work across your entire site.
For example, you can edit the set of search sources, manage the list of applicable attributes, and much more.
In addition, SearchWP allows you to add supplemental search engines and link them to specific search fields.
Due to that, you can create custom search fields with unique settings and place them anywhere on your site.
Let’s say we want to help our visitors find what they’re looking for faster by using any search field on our site. We’ll need to set up the Default search engine to do that.
First, you can change where WordPress will look for matches when performing a search.
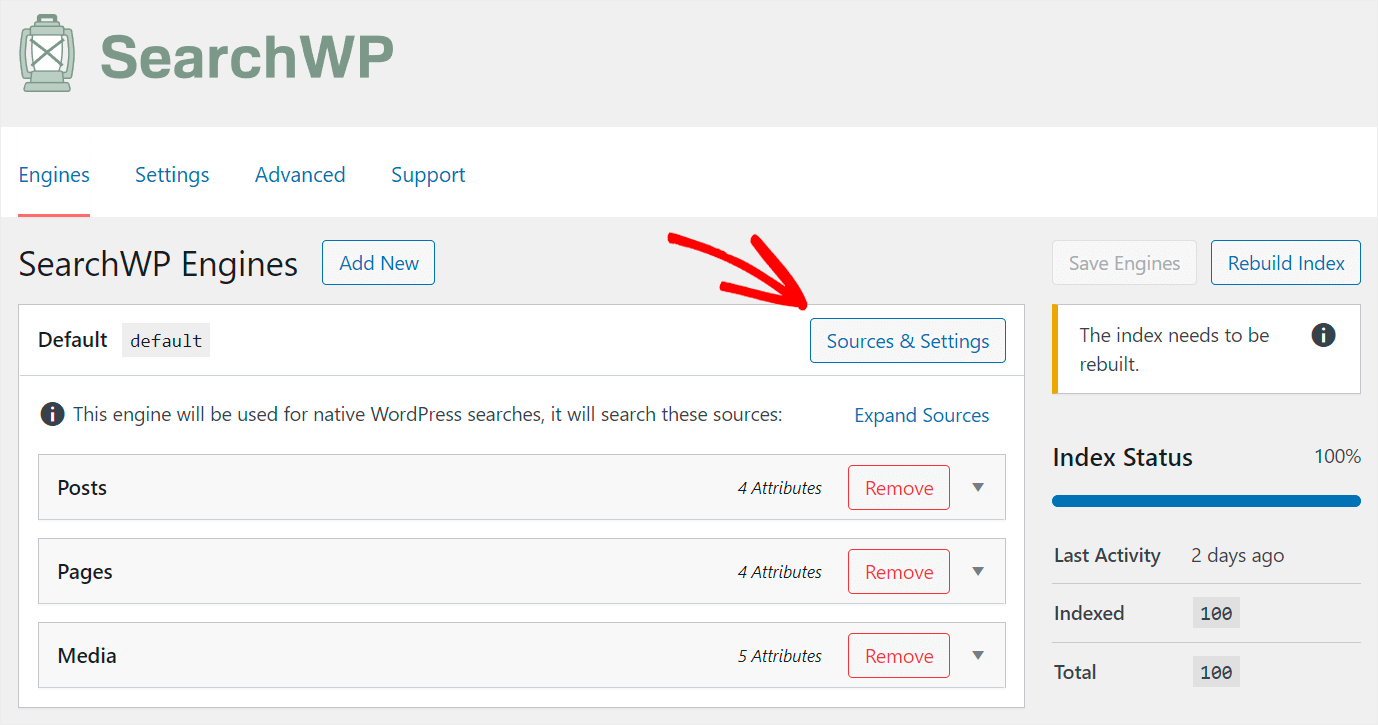
To begin, click the Sources & Settings button at the top right corner of the Default search engine section.
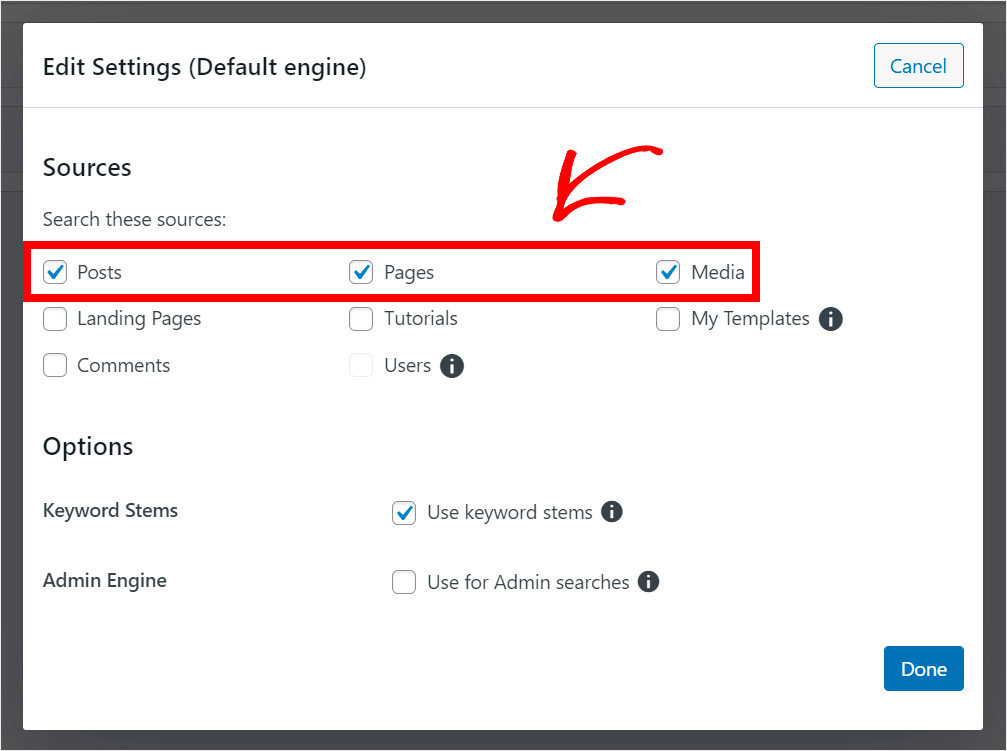
After that, you’ll see a pop-up where you can add or remove search sources.
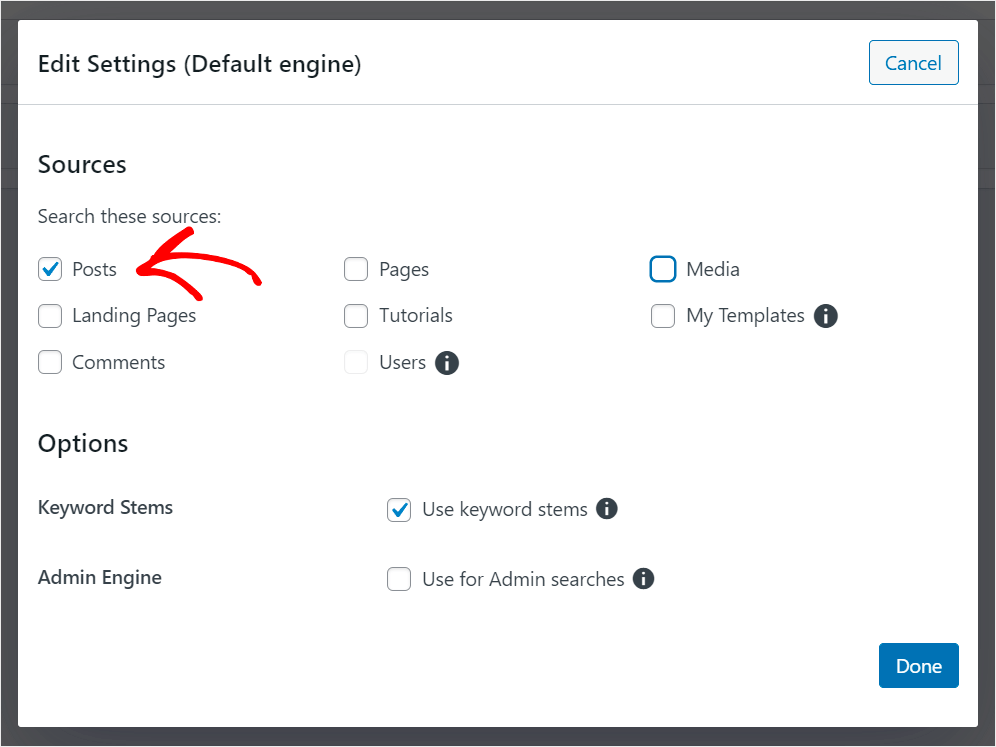
Currently, our site visitors get search results from the Posts, Pages, and Media sources.
Let’s say we want to limit search on our site to posts only. It’ll help us clean up our search results and make it easier for our visitors to find the content they’re looking for.
To do that, we’ll uncheck boxes next to the Pages and Media sources.
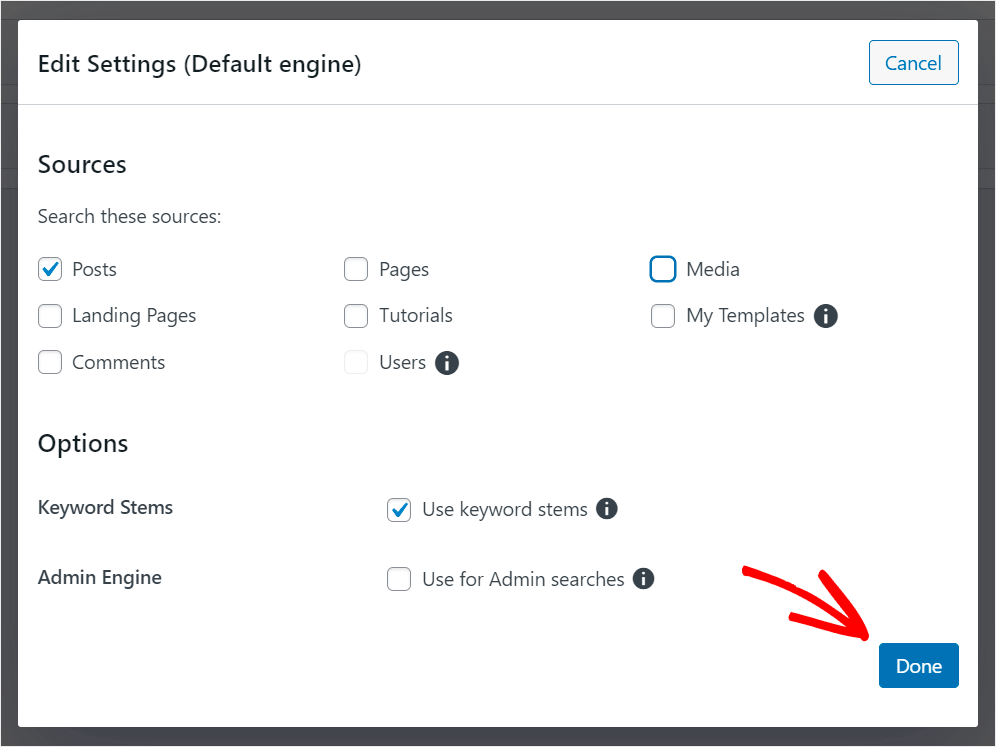
When you’re finished managing your search sources, press Done to save the changes.
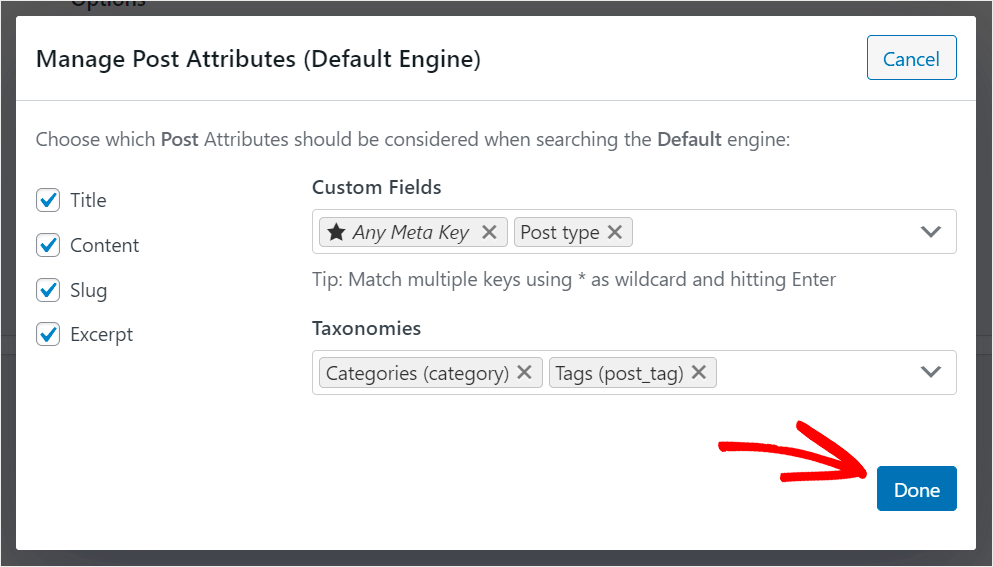
Another way to make search on your site smarter is to enable search by post custom fields, tags, and other data.
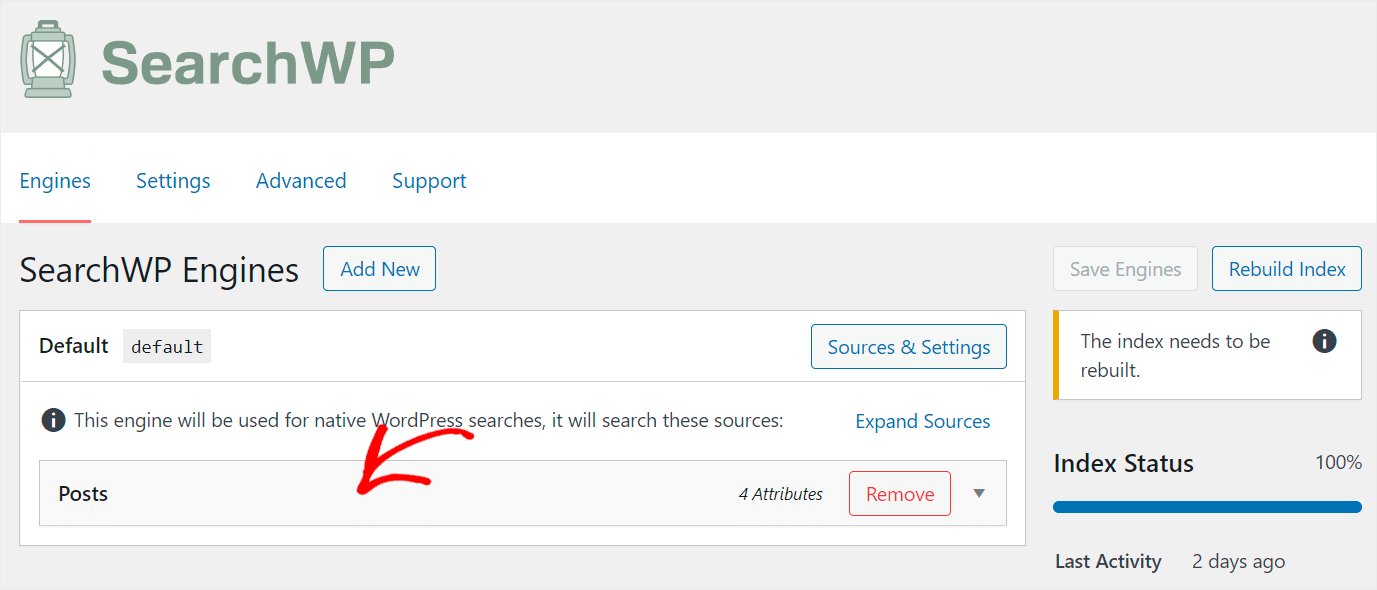
To get started, click on the Posts source to expand its settings.
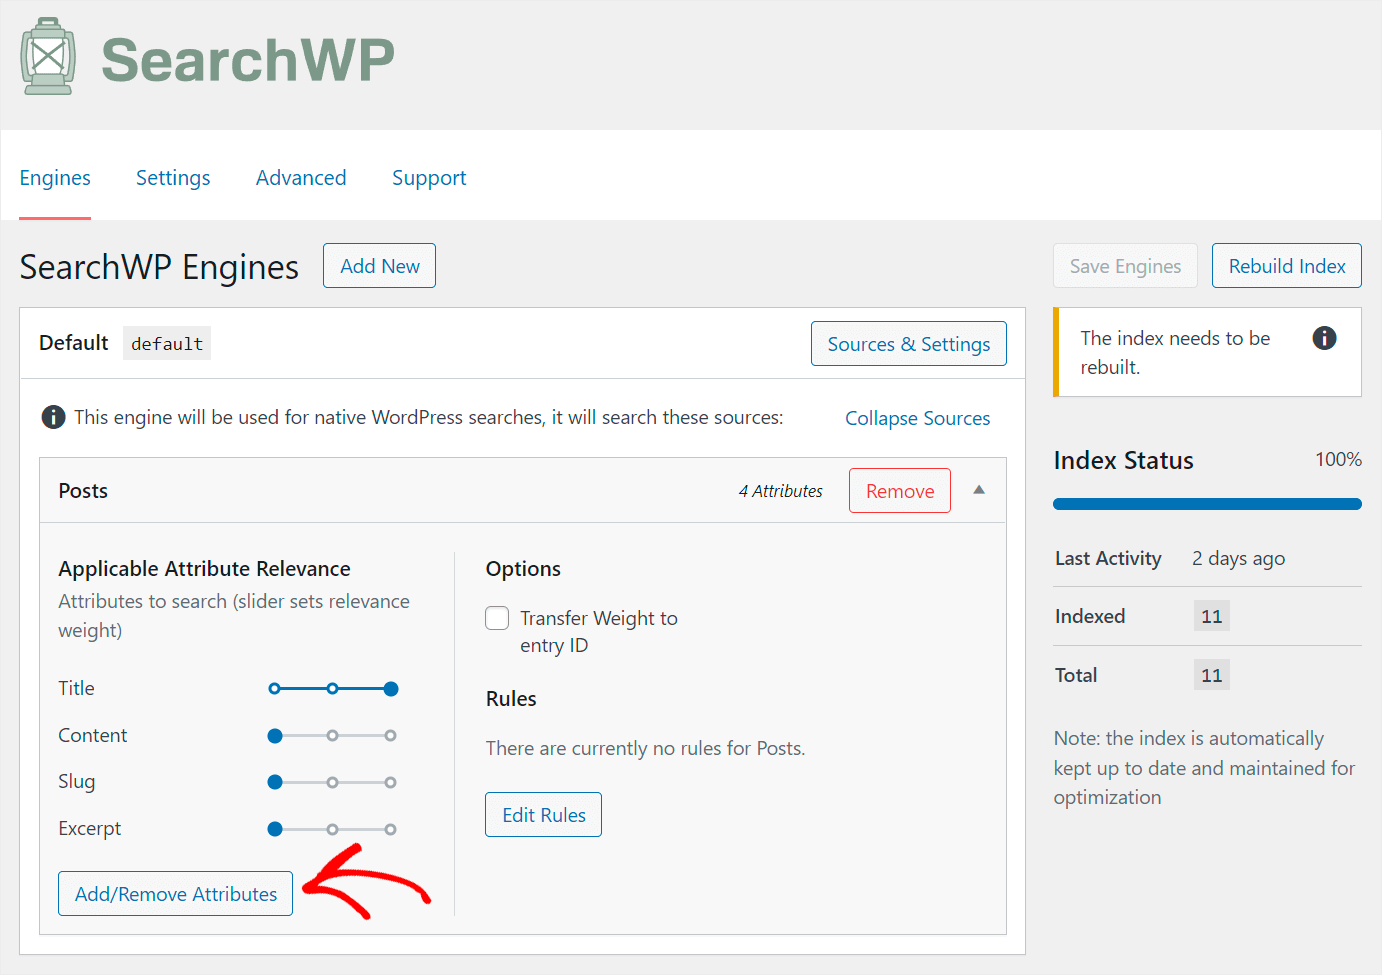
Then, press the Add/Remove Attributes button.
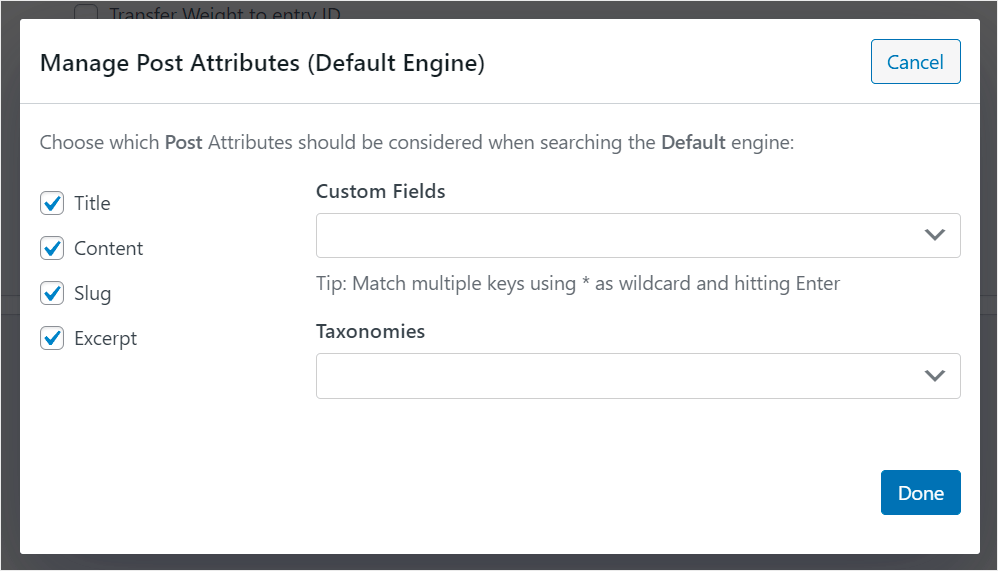
Here you can manage post attributes that WordPress considers when performing searches.
Post attributes are additional data that you can add to make it easier for your visitors to find the more relevant content.
For example, it can be tags, custom fields, and more.
Let’s start by making custom fields searchable.
That’s important since many plugins use custom fields to store valuable information about your posts. Plus, you’re free to create your own custom fields and add any data to them.
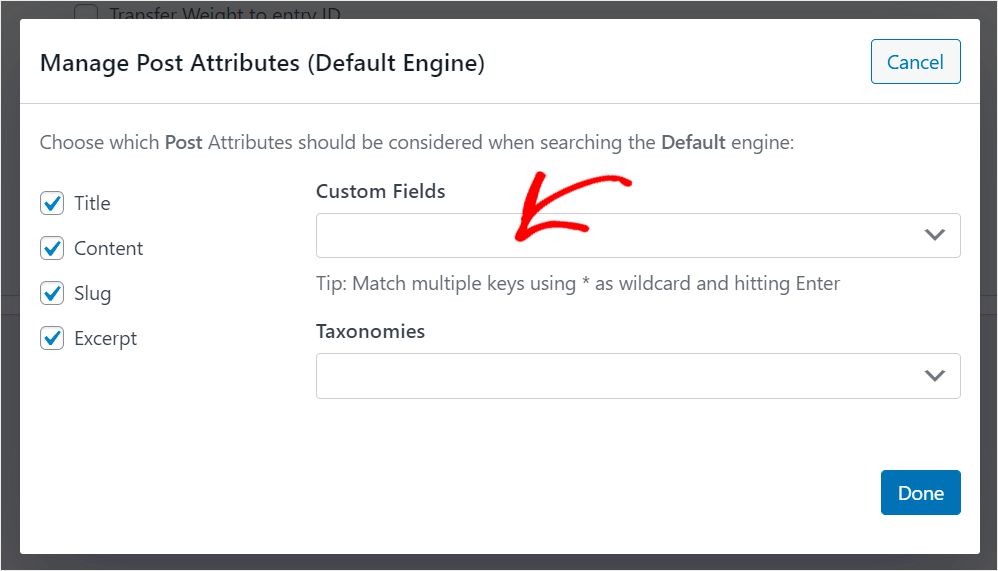
To get started, click on the Custom Fields field.
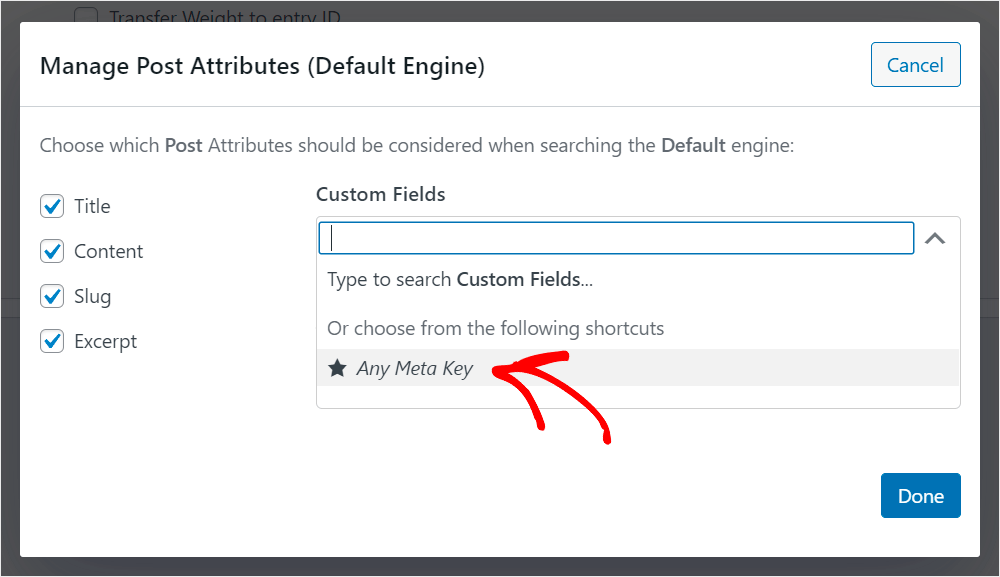
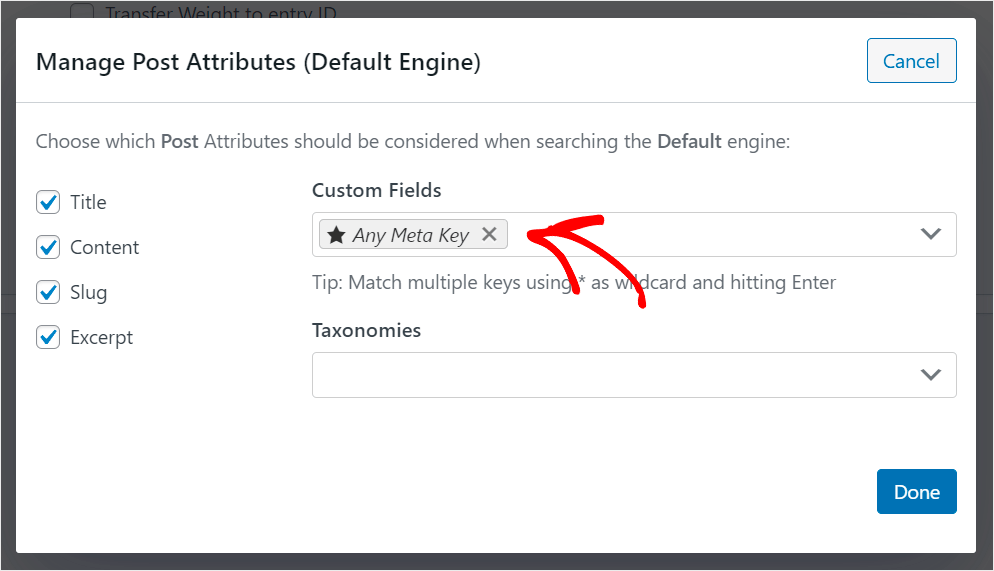
Then, click on the Any Meta Key shortcut.
This shortcut allows you to make searchable all custom fields you have on your site at once.
If you want to make a specific custom field searchable, you can also enter its name into the Custom Fields field.
For example, let’s add the Post type custom field that we have on our test site:
Once you’ve finished managing searchable post custom fields, let’s move on to taxonomies.
In WordPress, taxonomies are the method of classifying content by some common attribute. For example, it can be post categories, tags, authors, or something else.
With SearchWP, you can make all this data searchable with just a few clicks. So, you can make it faster for your visitors to find the right content they’re looking for.
Let’s make the first post taxonomy searchable on our site.
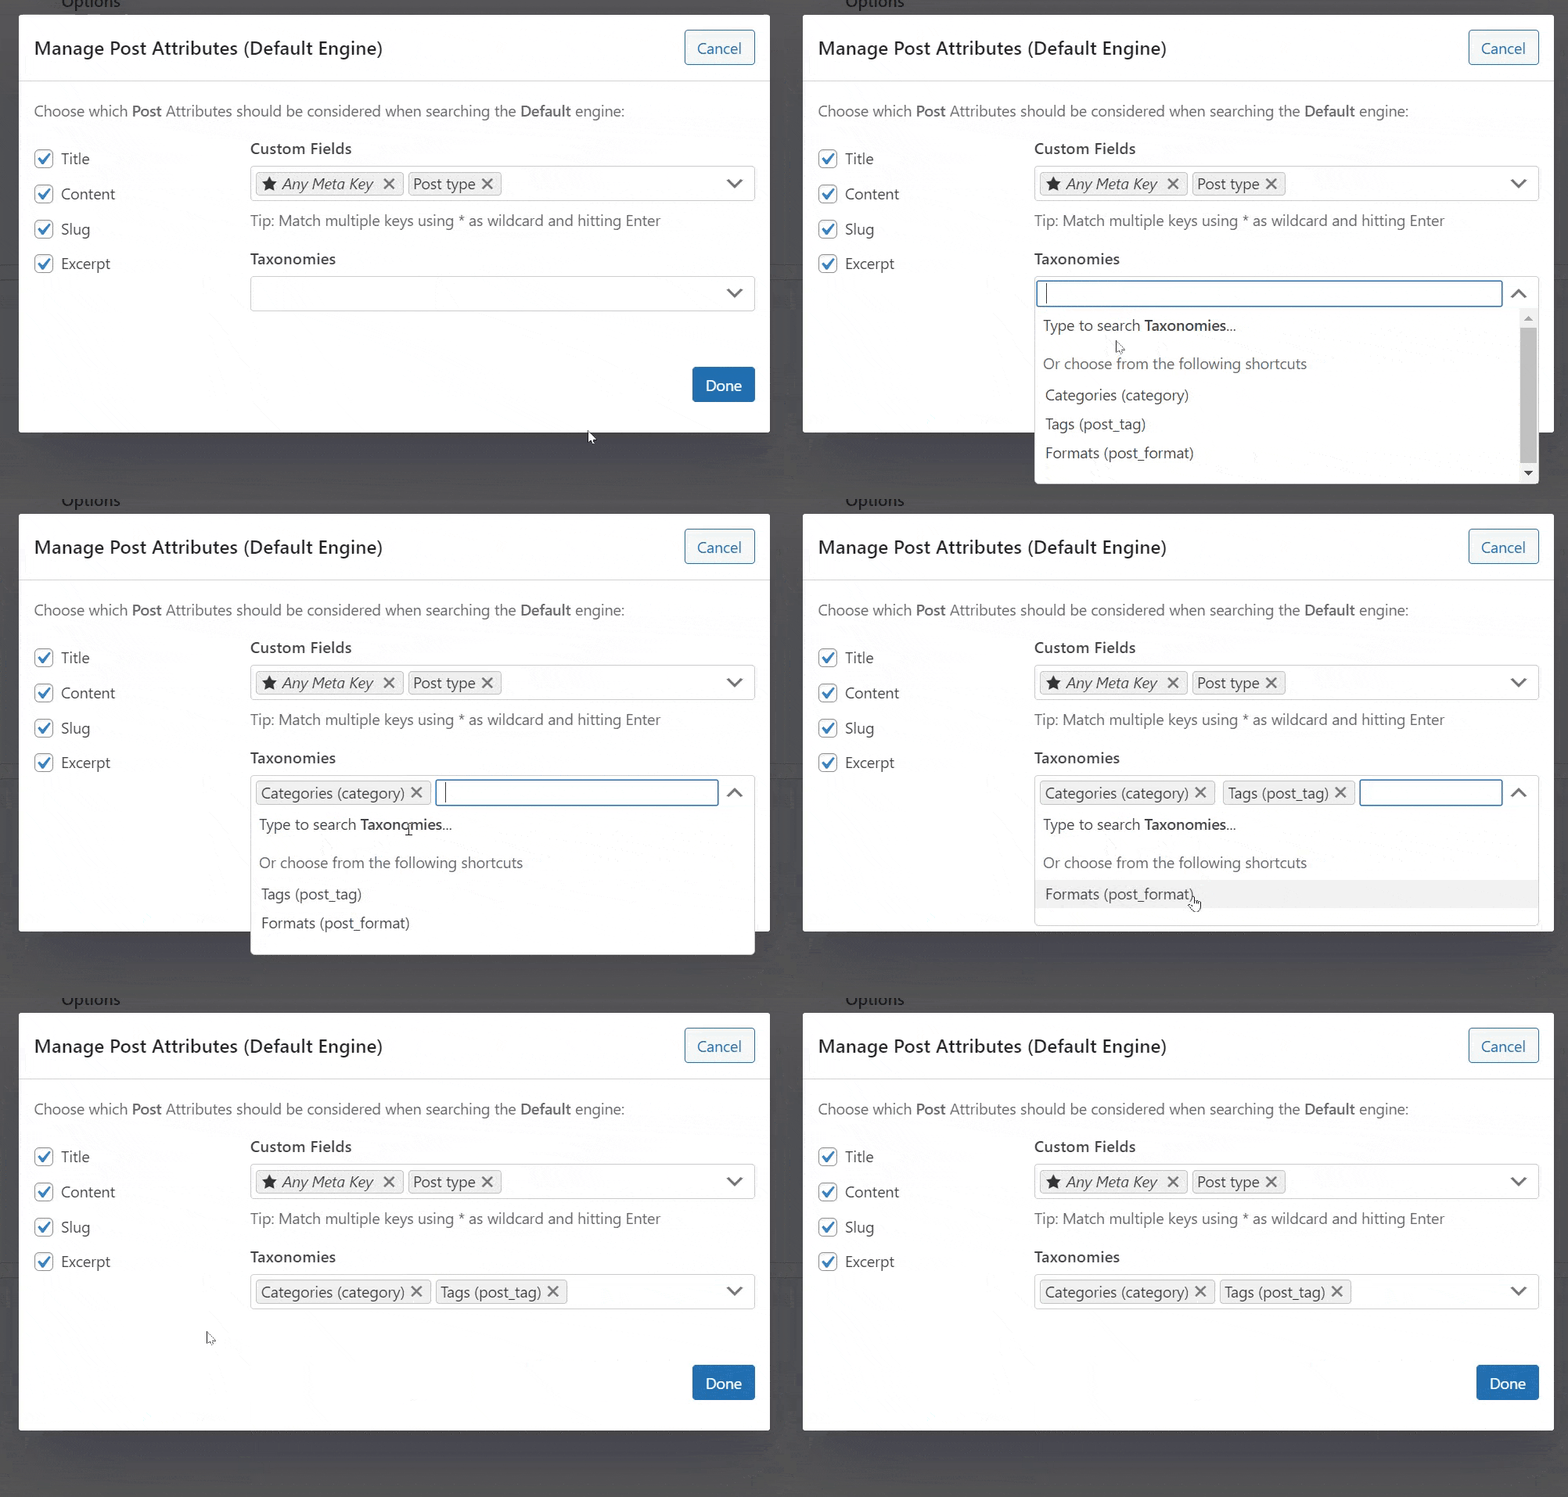
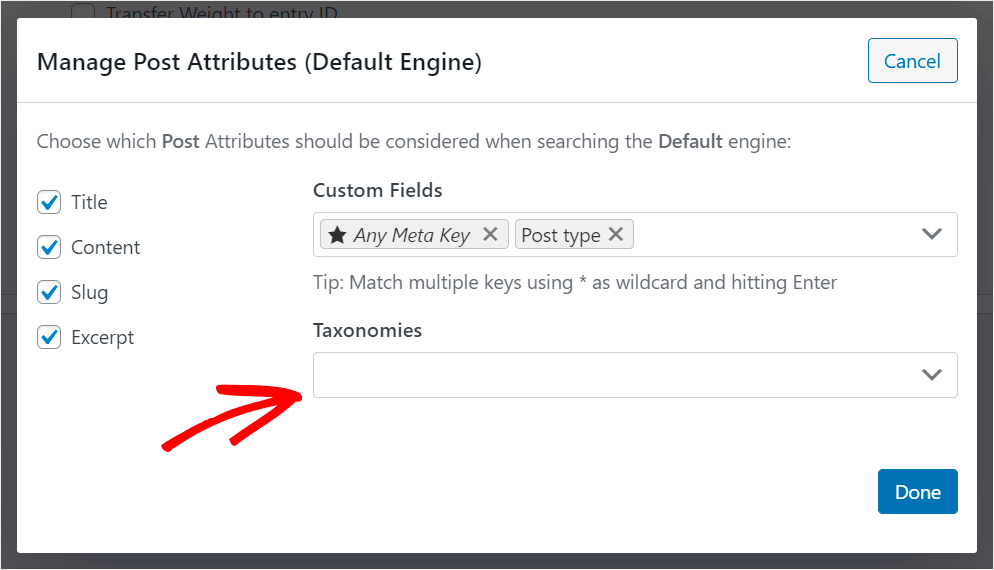
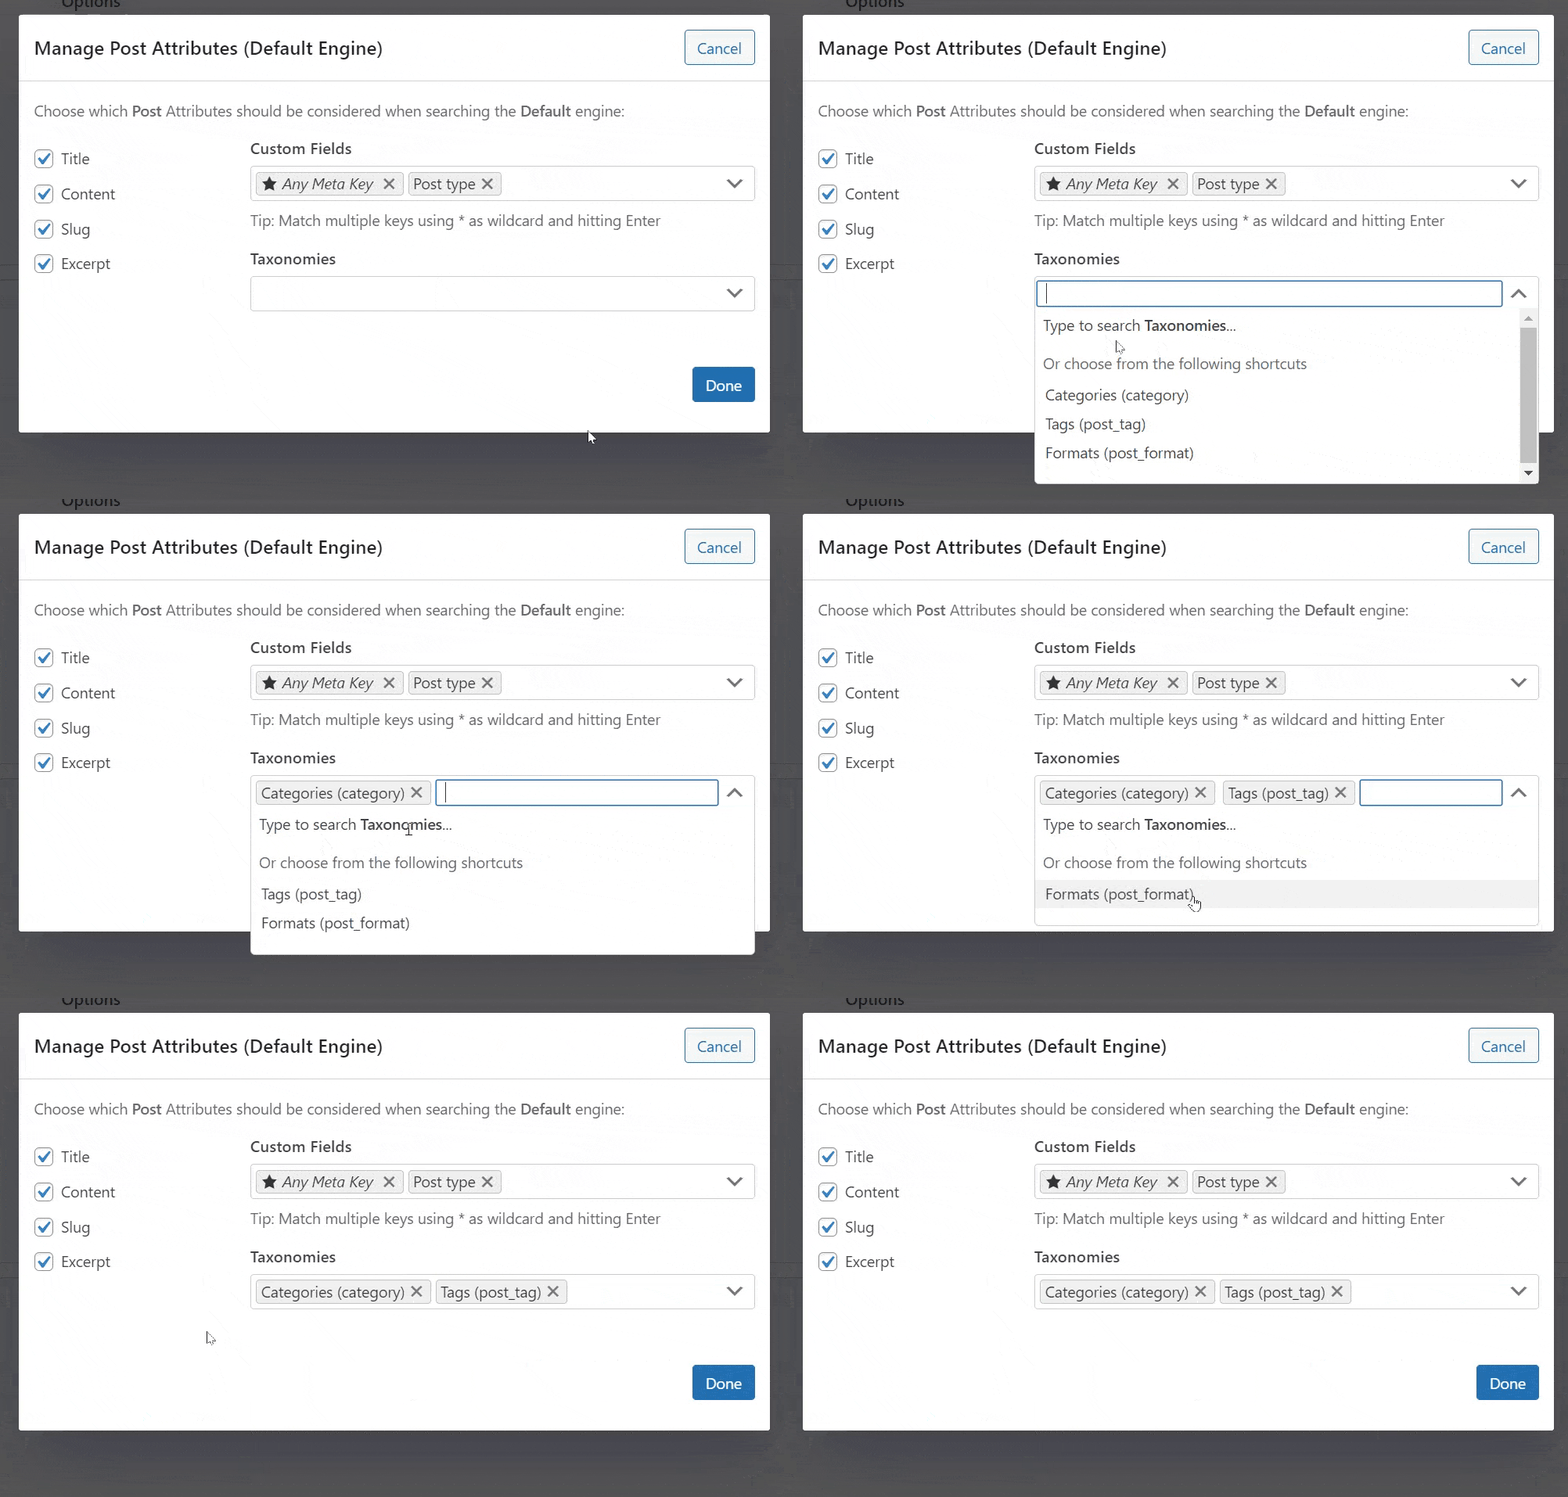
To do that, click on the Taxonomies field:
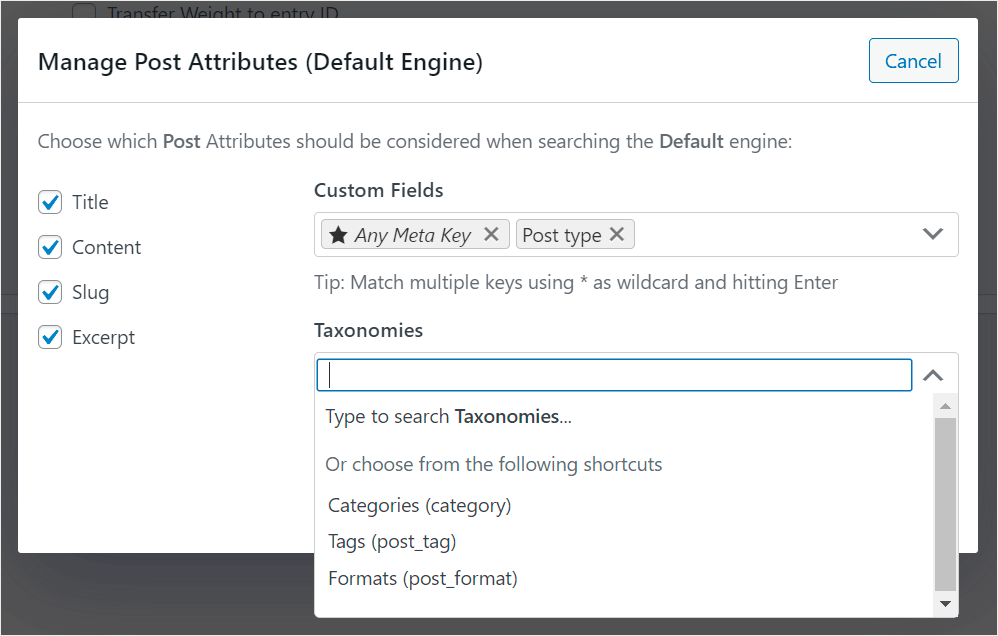
After that, you’ll see the list of suggested taxonomy shortcuts.
Let’s say we want to make WordPress consider post categories and tags when performing a search.
To do that, we’ll add the Categories and Tags taxonomies to the list of Post search source attributes.
When you’re finished managing searchable custom fields and taxonomies, press Done to save all your changes.
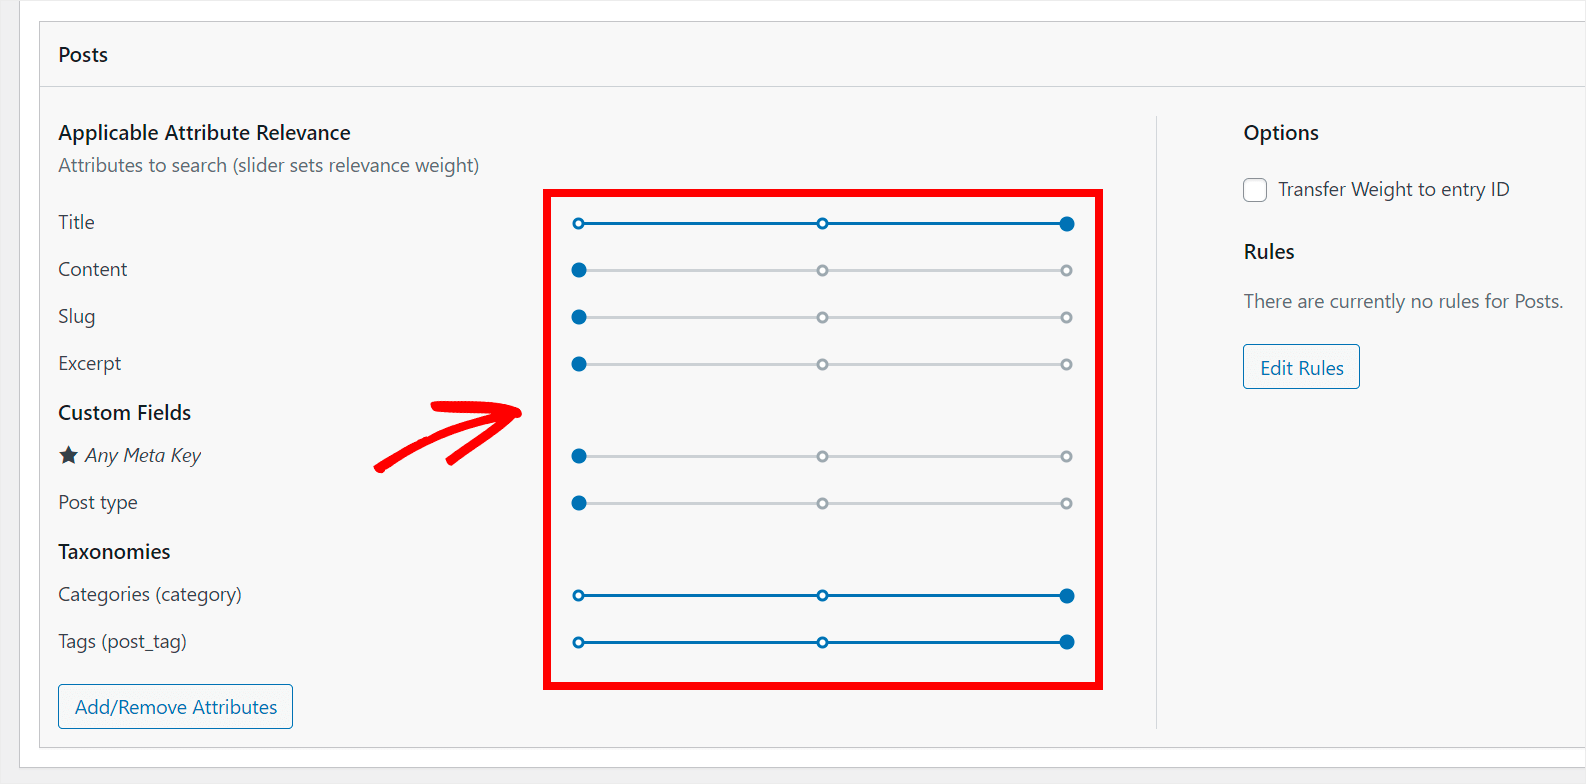
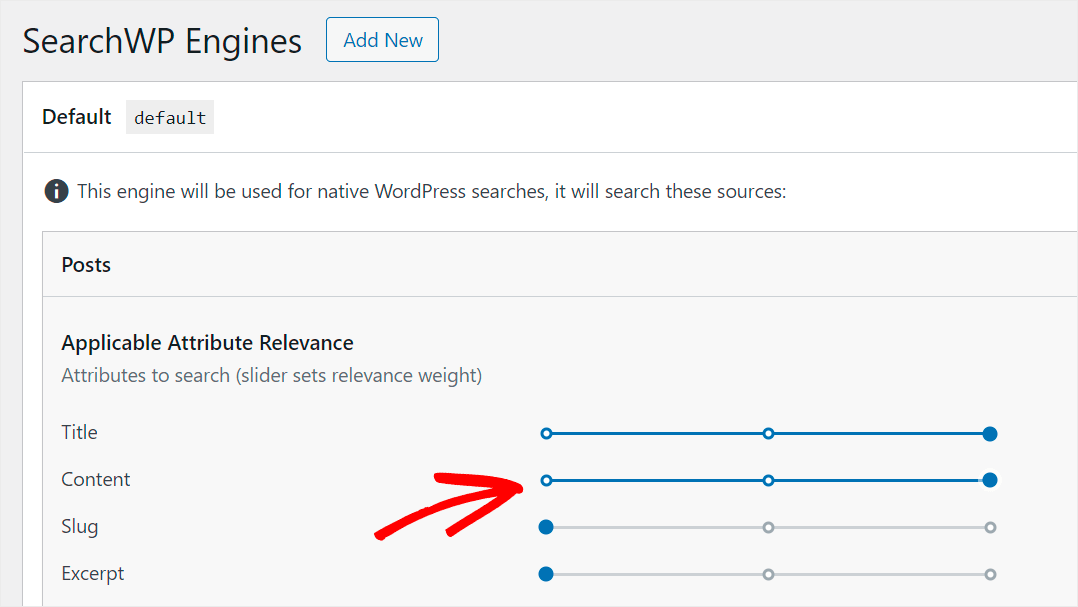
You can also control the relevance weight of applicable attributes by moving the slider next to them to the left or right.
The lower the weight, the less attention WordPress will pay to the attribute when performing a search.
For example, let’s say we want to add the relevance weight to the Content post attribute. To do that, we’ll move the slider next to it all the way right.
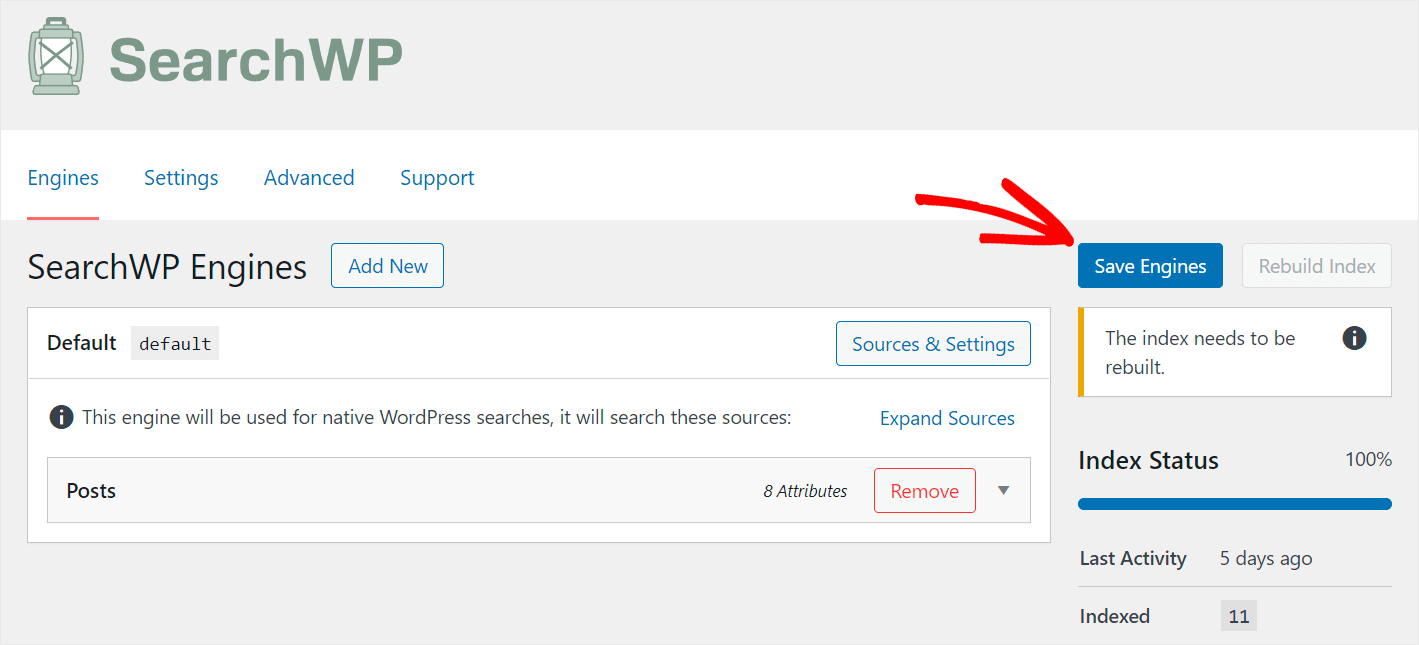
Once you’re happy with how you customized your search engine, press the Save Engines button at the top right.
Now the post search on your site is a lot smarter.
But, you can make it start delivering even more relevant search results to your visitors.
How to Exclude Specific Pages From Search Results
First, let’s clean up search results on your site to get rid of redundant pages and any other clutter.
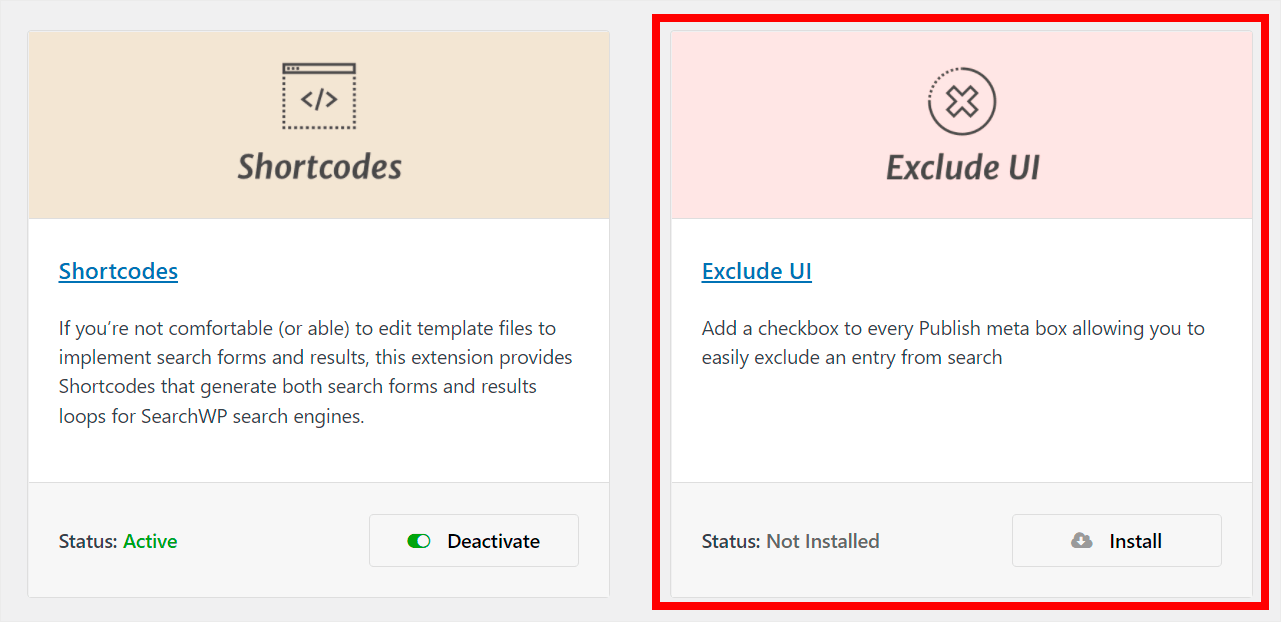
You can hide any pages from appearing in search results on your site by using the SearchWP Exclude UI extension.
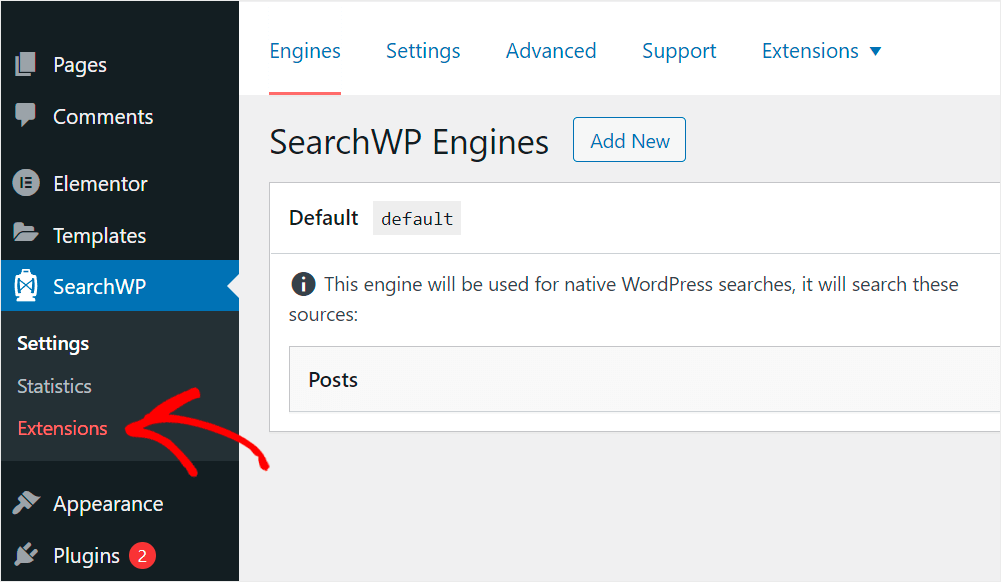
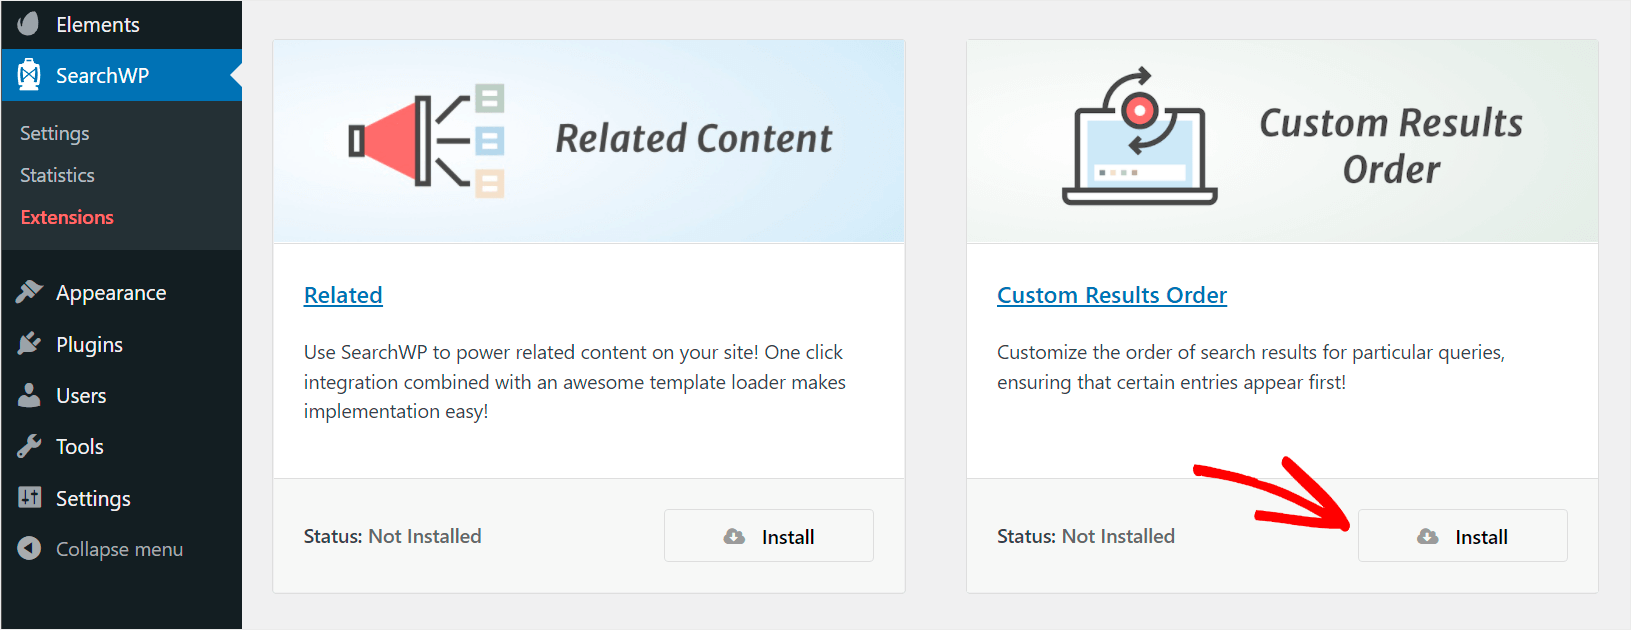
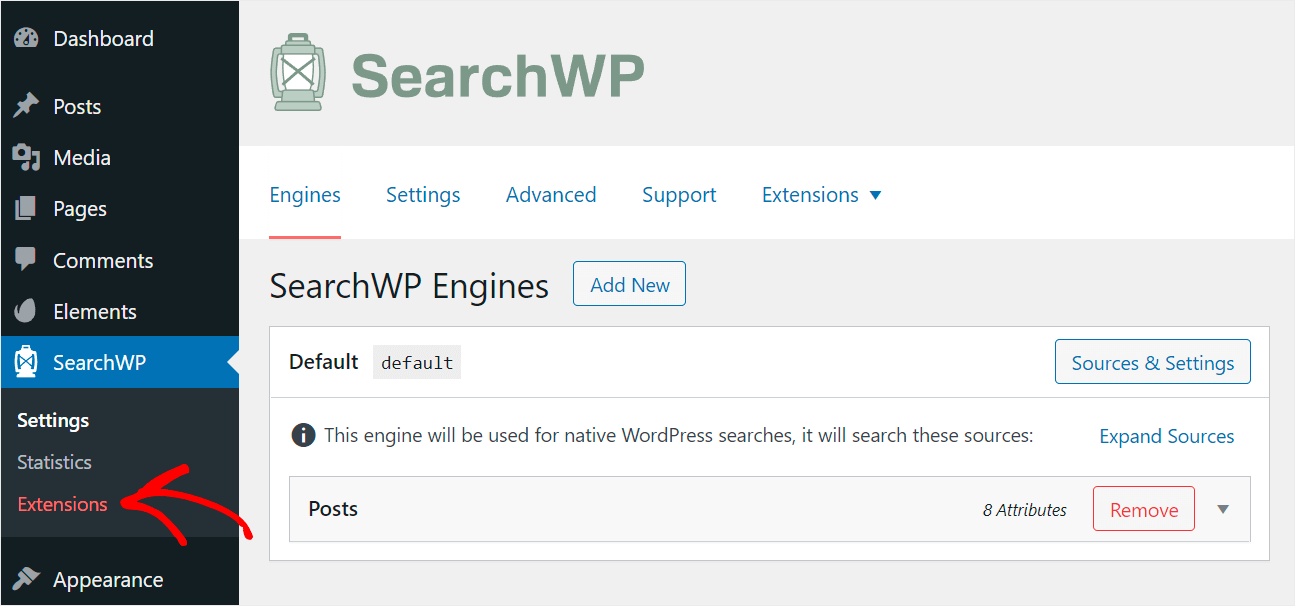
To install it, navigate to the Extensions tab under the SearchWP section on the left panel of your WordPress dashboard.
Then, scroll the extensions page down until you see the Exclude UI extension.
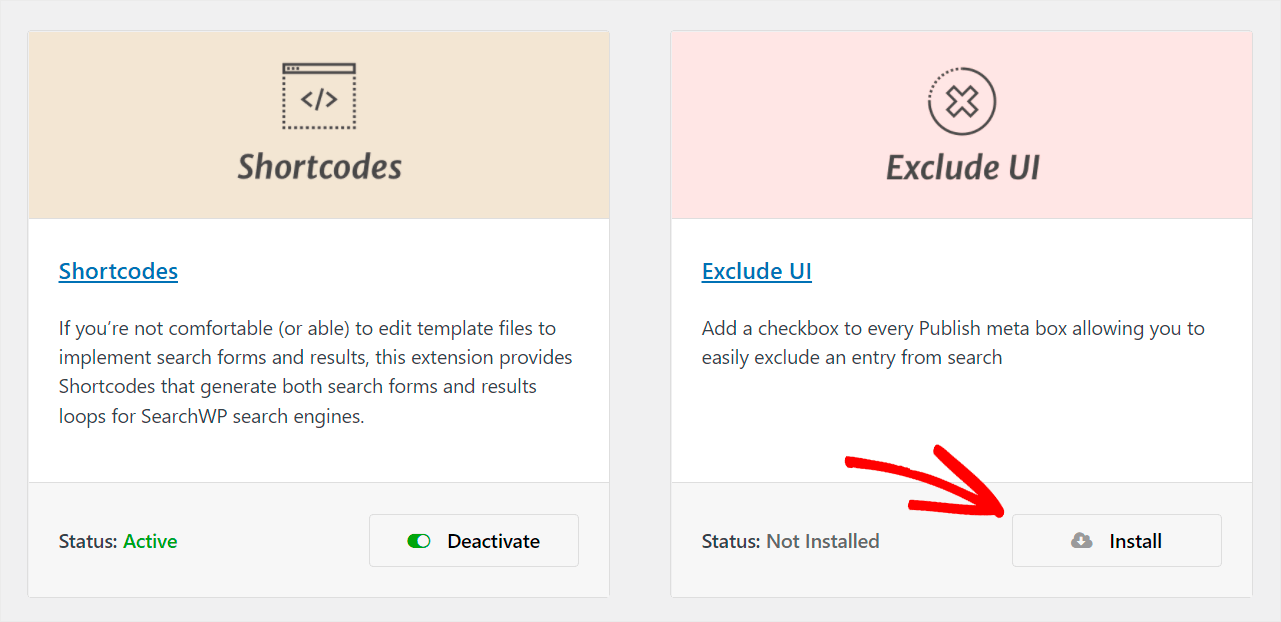
Once you find it, press the Install button.
For more information, check out our step-by-step guide on how to exclude specific pages from search results on your site.
How to Prioritize Specific Pages in Search Results
Another way to give your visitors more relevant search results with SearchWP is to use the Custom Results Order extension. This extension allows you to change the order of search results on your site.
Due to that, you can manually put the most relevant posts or pages at the top of search results for specific keywords.
The first step is to install the Custom Results Order extension.
To do that, go to the Extensions tab in the SearchWP section on the left panel of your WordPress dashboard.
Then, find the Custom Results Order extension and press Install.
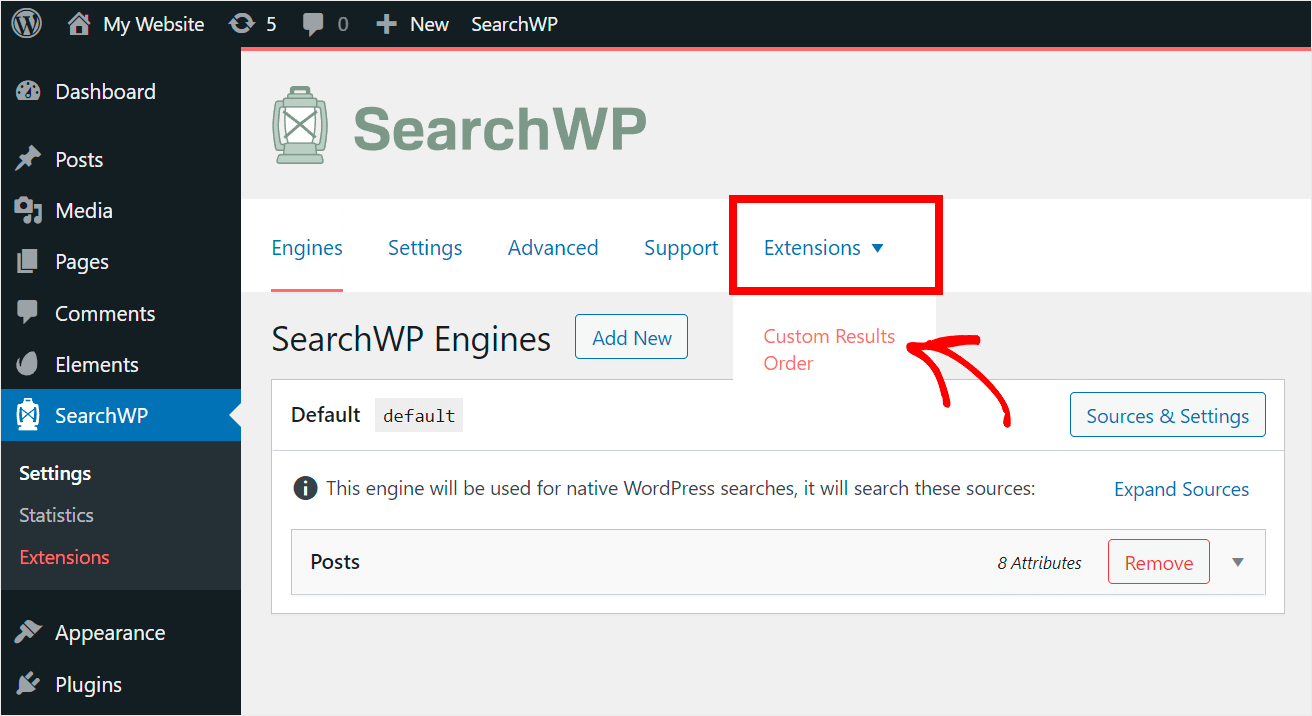
After you install the extension, navigate to your SearchWP dashboard. Then click Extensions and choose the Custom Results Order option.
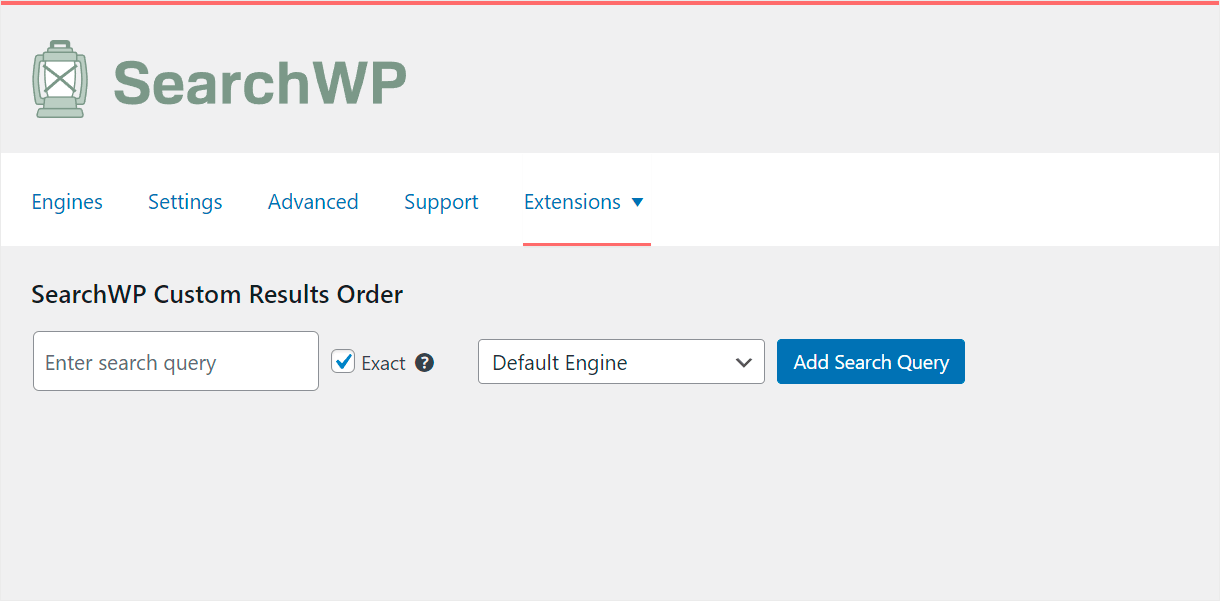
Here you can specify the search queries for which you want to customize the search results order.
For more details, follow our step-by-step guide on how to prioritize specific search results in WordPress.
3. How to Display Live Search Results on Your Elementor Site
Live search results are another SearchWP feature that you can use with Elementor to boost search on your site.
By default, WordPress shows search results by opening a new separate page. It’s inconvenient and may confuse your visitors.
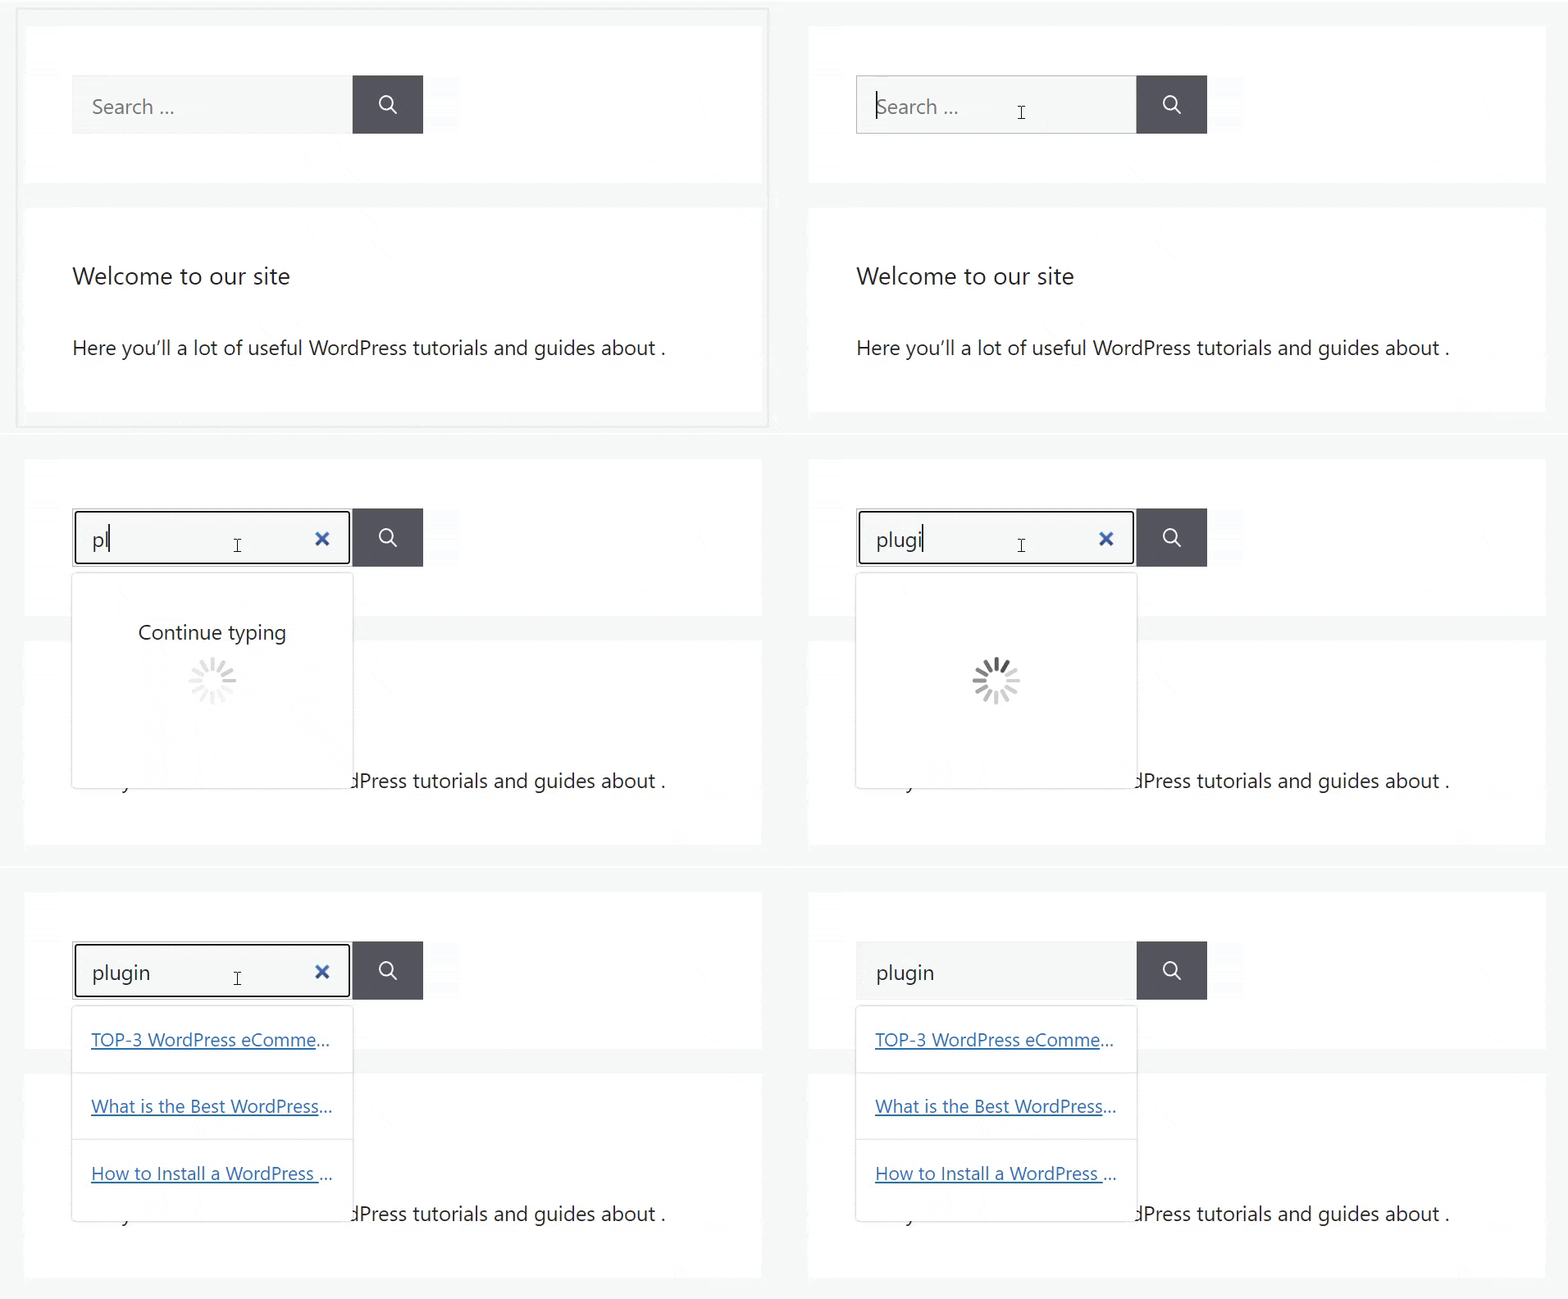
Once you enable the SearchWP live search feature, your visitors will start getting search results instantly without leaving the current page.
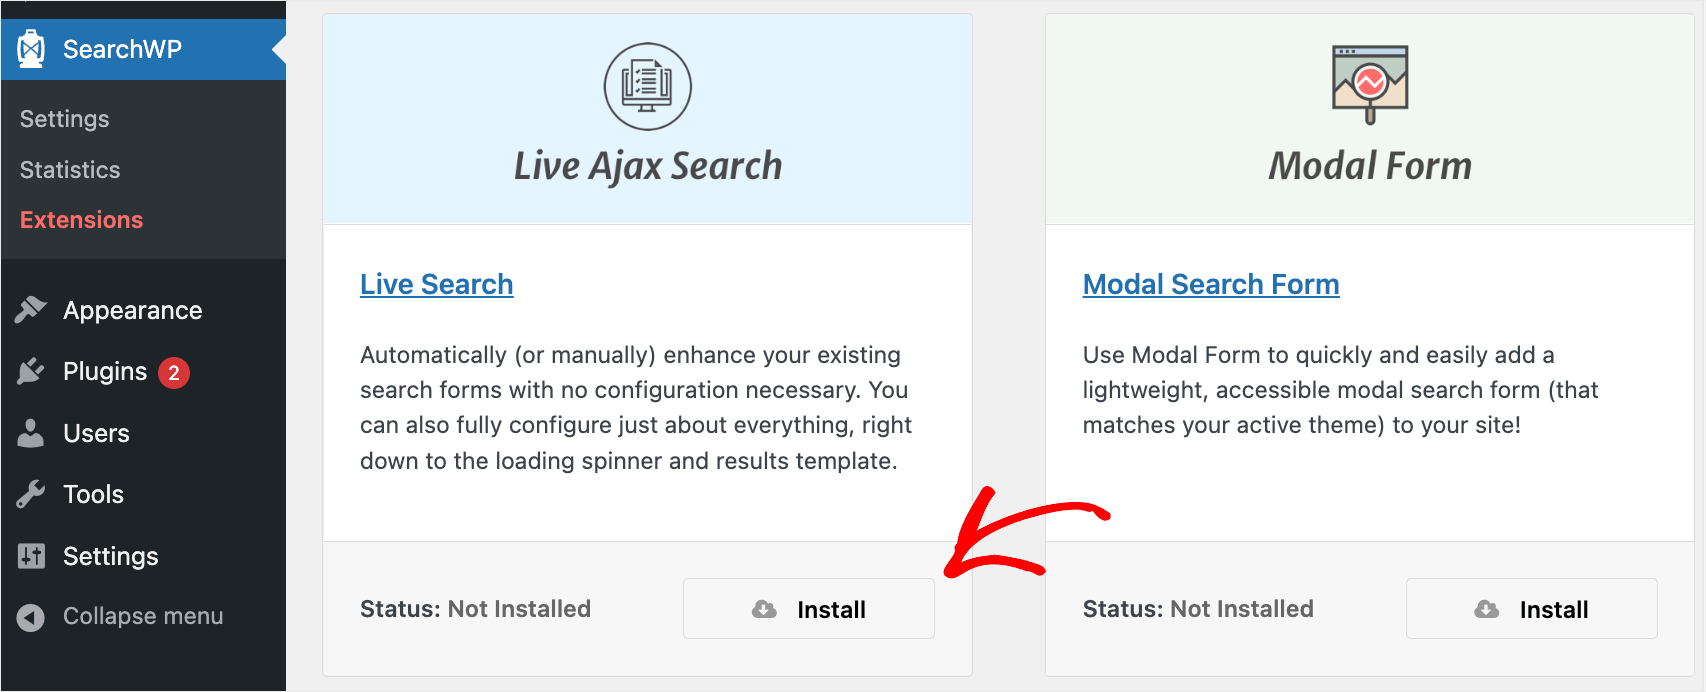
To show live search results on your site, you’ll need to install the SearchWP Live Ajax Search extension.
First, click Extensions under the SearchWP section on the left panel of your WordPress dashboard.
Then, find the Live Ajax Search extension and click Install.
That’s it. You don’t need to take any additional steps.
Now all search fields on your site will automatically start displaying search results in live mode.
4. How to Customize Your Elementor Search Results Page
Using Elementor with SearchWP, you can create a custom search results page that’ll help you to get more pageviews.
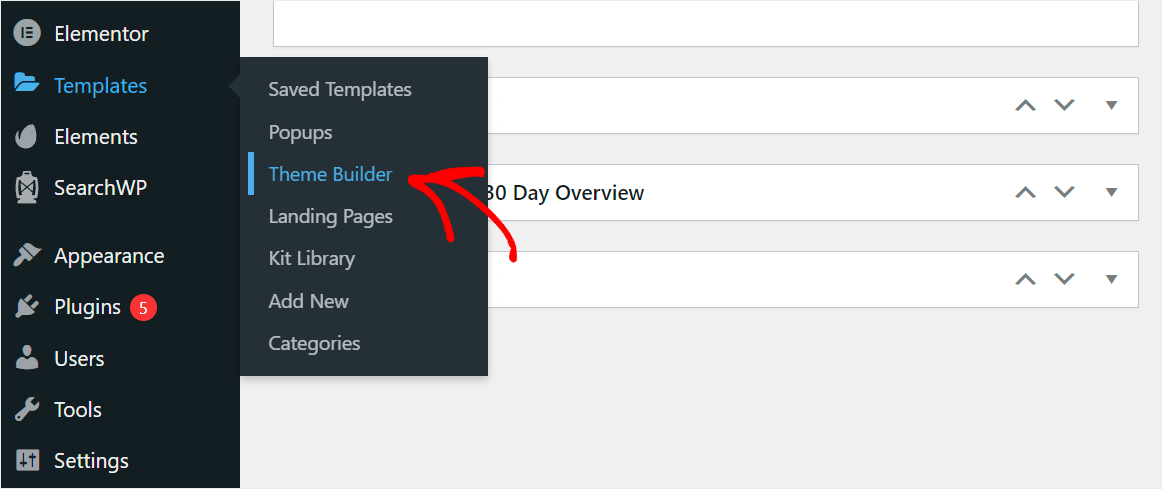
To get started, navigate to Templates » Theme Builder in your WordPress dashboard.
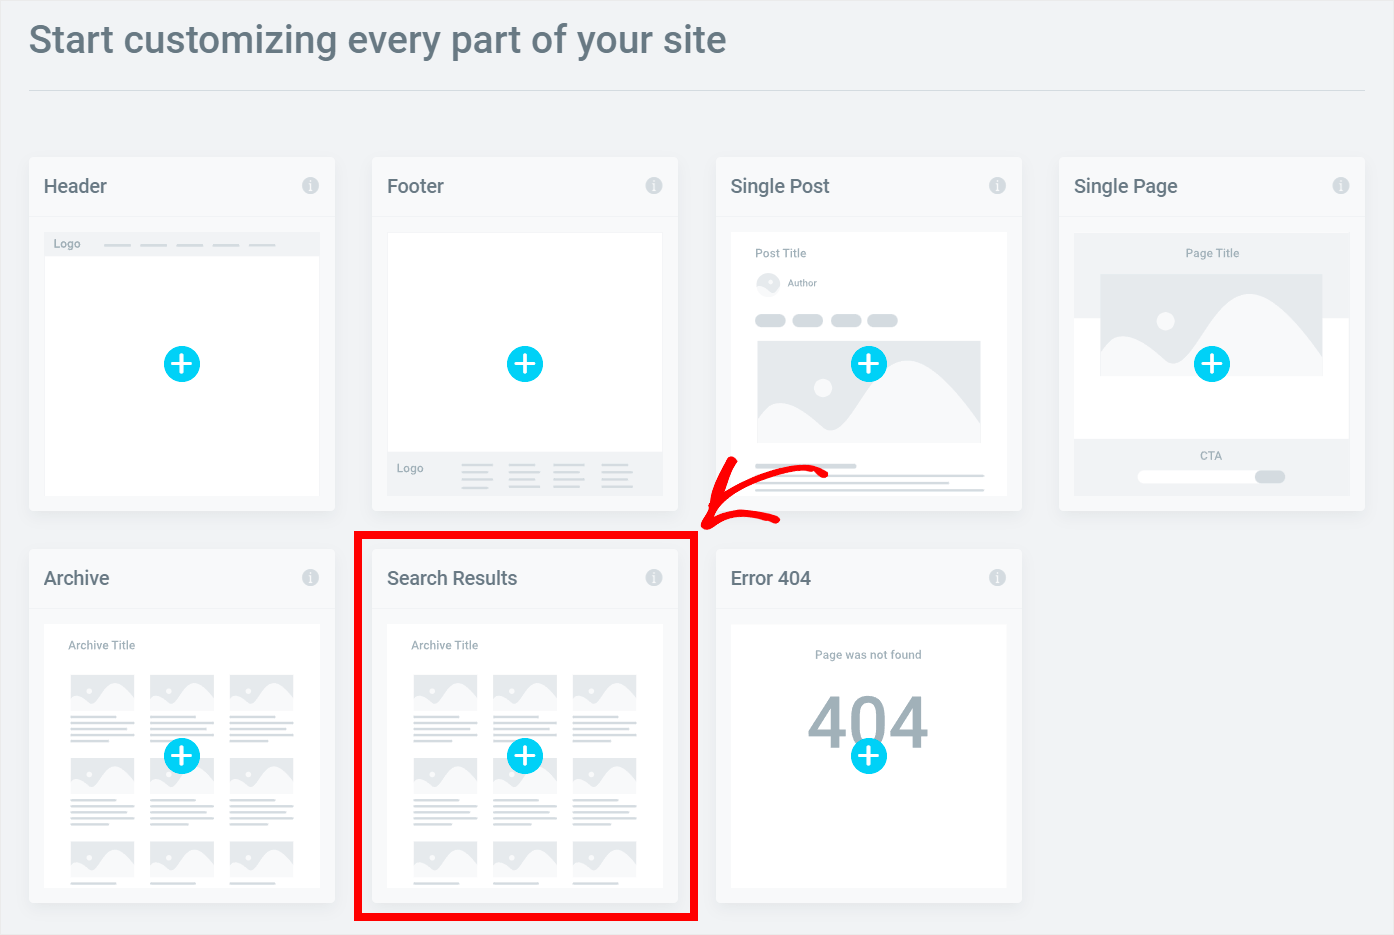
Then, click on the Search Results template.
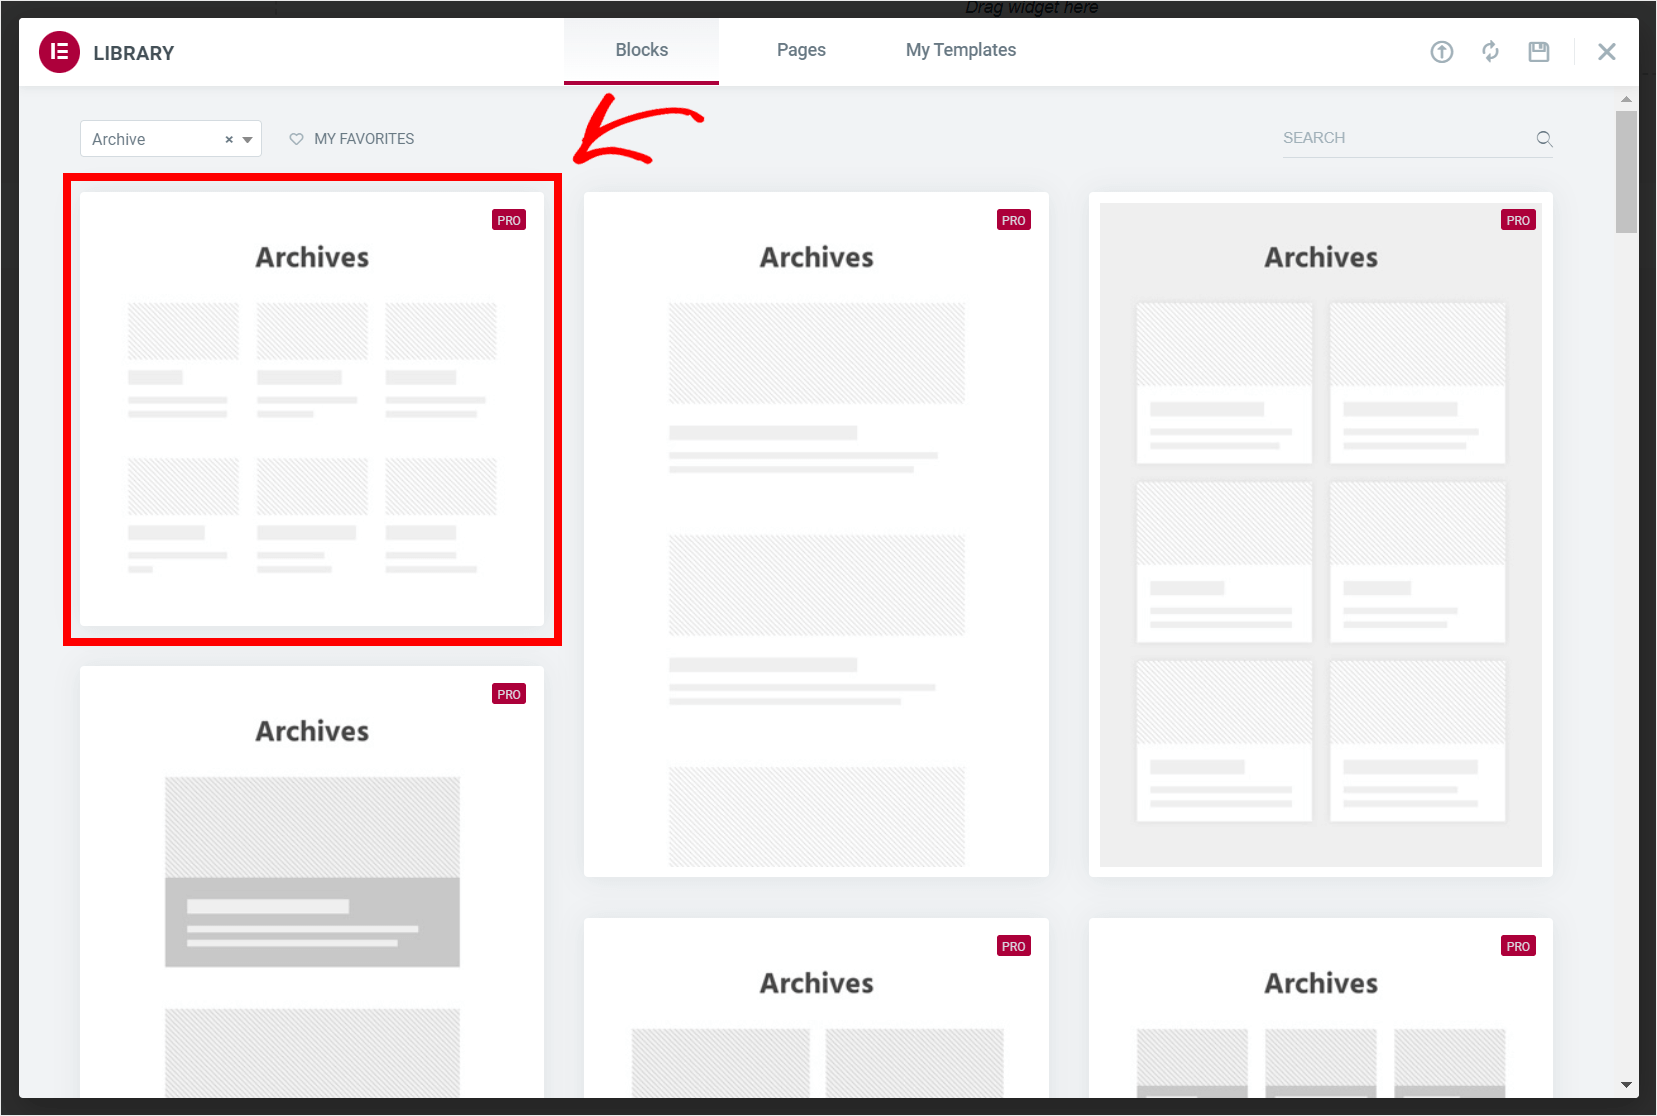
The next step is to choose a template that better suits your needs. Once you’ve made up your mind, click on the template you like to start editing it.
In this tutorial, we’ll use the first template.
Now you can customize your search results page the same way as any other page created with Elementor.
For example, you can change the appearance of search results.
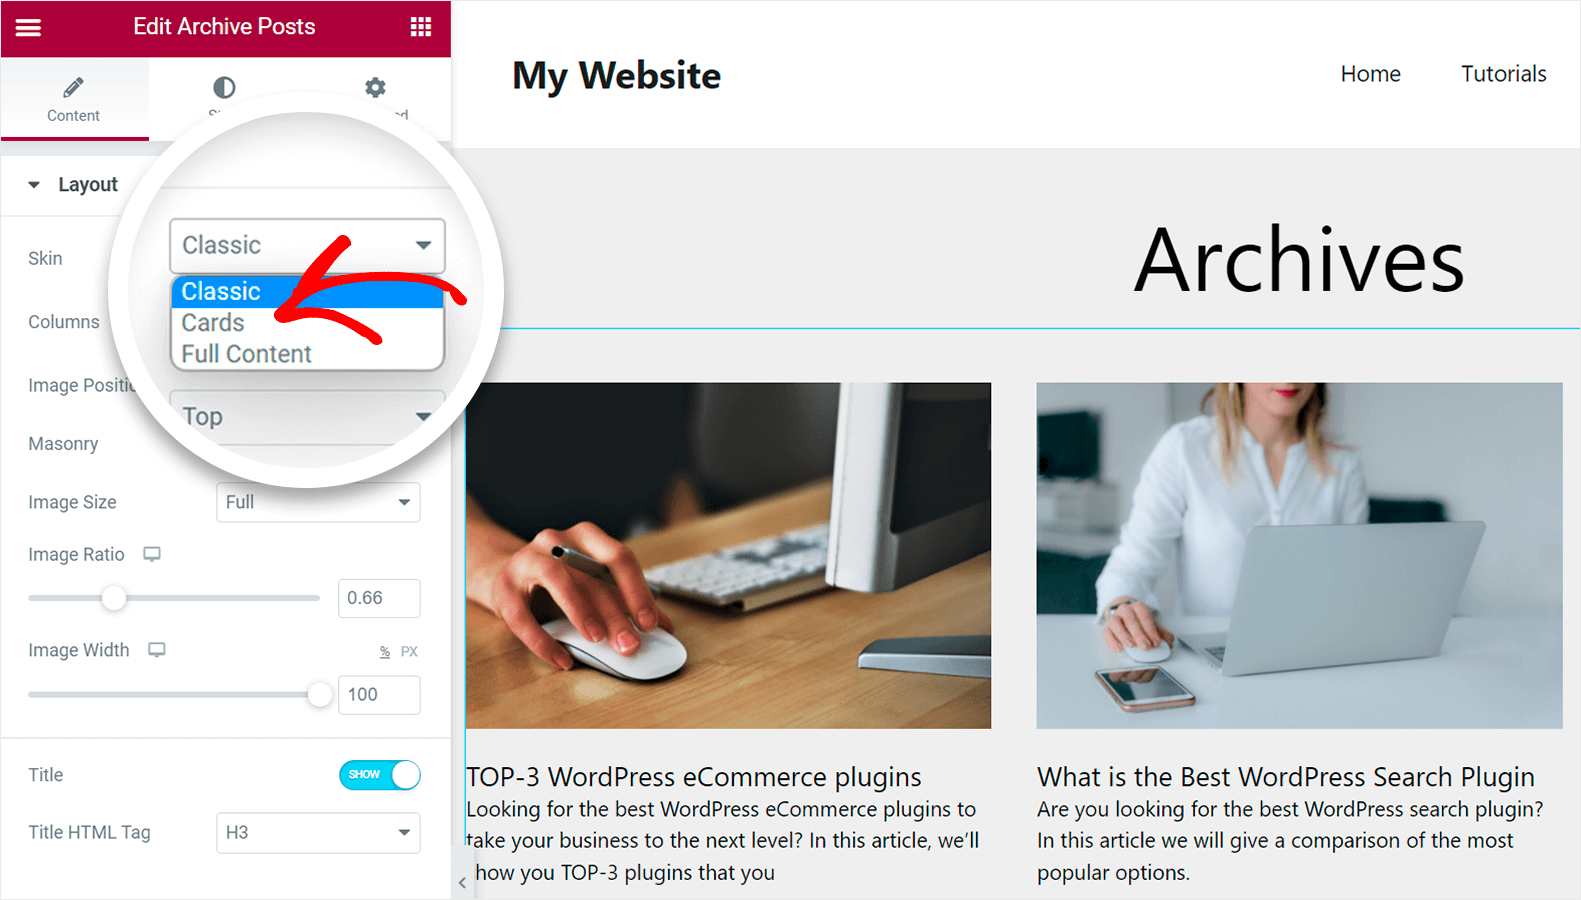
To do that, click on the Archive Posts element, and on the left panel, you’ll see its settings.
Let’s change the layout skin to something more modern. Click on the drop-down menu next to the Skin item, and you’ll see a couple of options.
For instance, let’s select the Cards option.
Our search results now look much fancier.
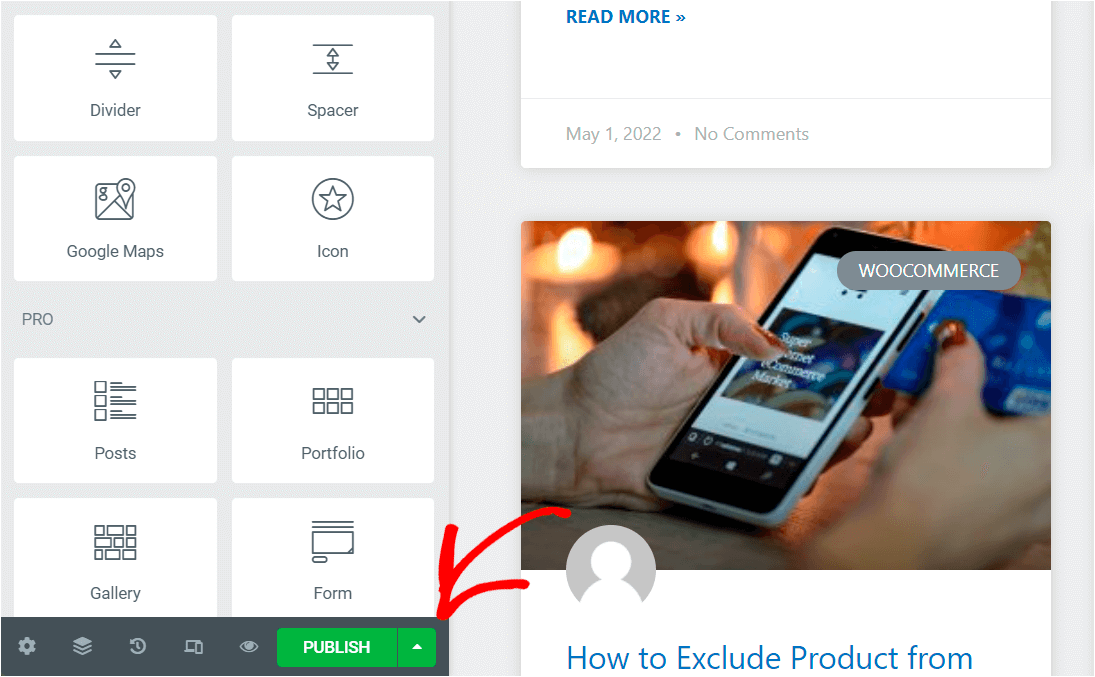
When you’re happy with how your search results page looks, click Publish in the lower-left corner to save your changes.
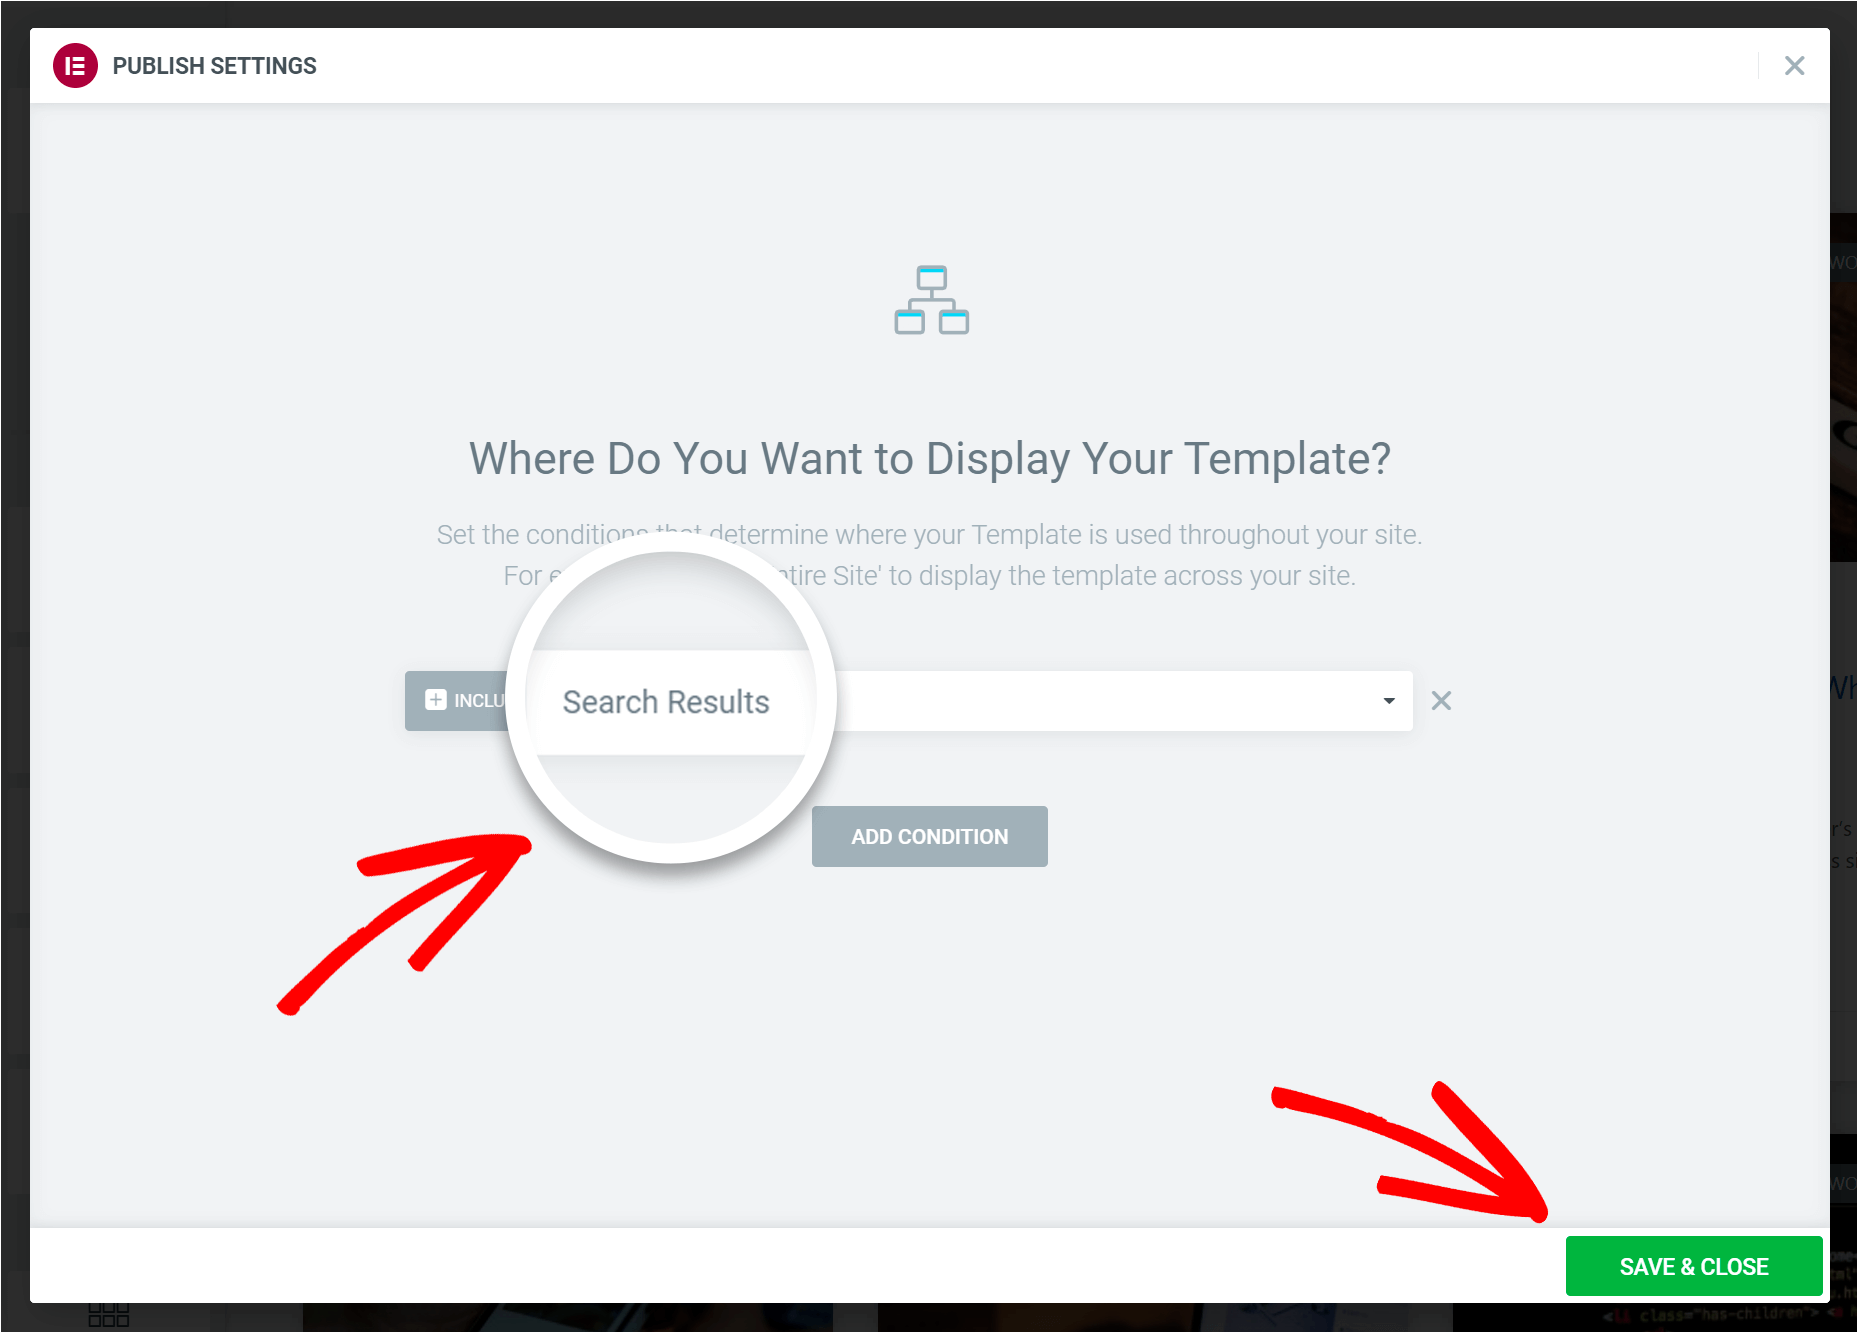
Make sure your template is set to include Search Results and press Save & Close.
That’s it. You successfully customized your search results page.
In this article, you learned how to use SearchWP with Elementor to boost your site search. It’ll ensure a better user experience for your visitors and allow you to get more pageviews.
Ready to boost Elementor search on your site? Get started with the most powerful WordPress search plugin today.
Looking for a way to limit search to post content? Check out this detailed guide on how to make WordPress search in post content.
You may also want to read this next post on how to include shortcode results in WordPress search.

