Managing search results in your WooCommerce store can be tricky, especially when product categories keep showing up where they shouldn’t.
Product categories are great for organizing your store, but they can clutter up search results and confuse your customers.
By hiding certain categories, you can avoid cluttering search results, making it easier to navigate your online store.
In this article, we’ll show you the easiest way to exclude specific WooCommerce categories from search results on your site.
Why Hide Categories from Search in WooCommerce
There are lots of reasons why you might want to hide some WooCommerce product categories from the search results on your site.
By hiding categories from search in WooCommerce, you can:
- Make it easier to browse your store – The easier it is for your customers to find a product they’re looking for, the more profit you’ll make.
- Manage products more effectively – It’s convenient to have a specific category where you can store products that you don’t want to appear in search results.
- Restrict access to limited offers – If you have a category with limited offers for certain customers, it’s better to exclude it from public search results.
Once we’ve figured that out, let’s take a look at how you can hide specific WooCommerce categories from being displayed.
Hide a WooCommerce Category from Search on Your Site
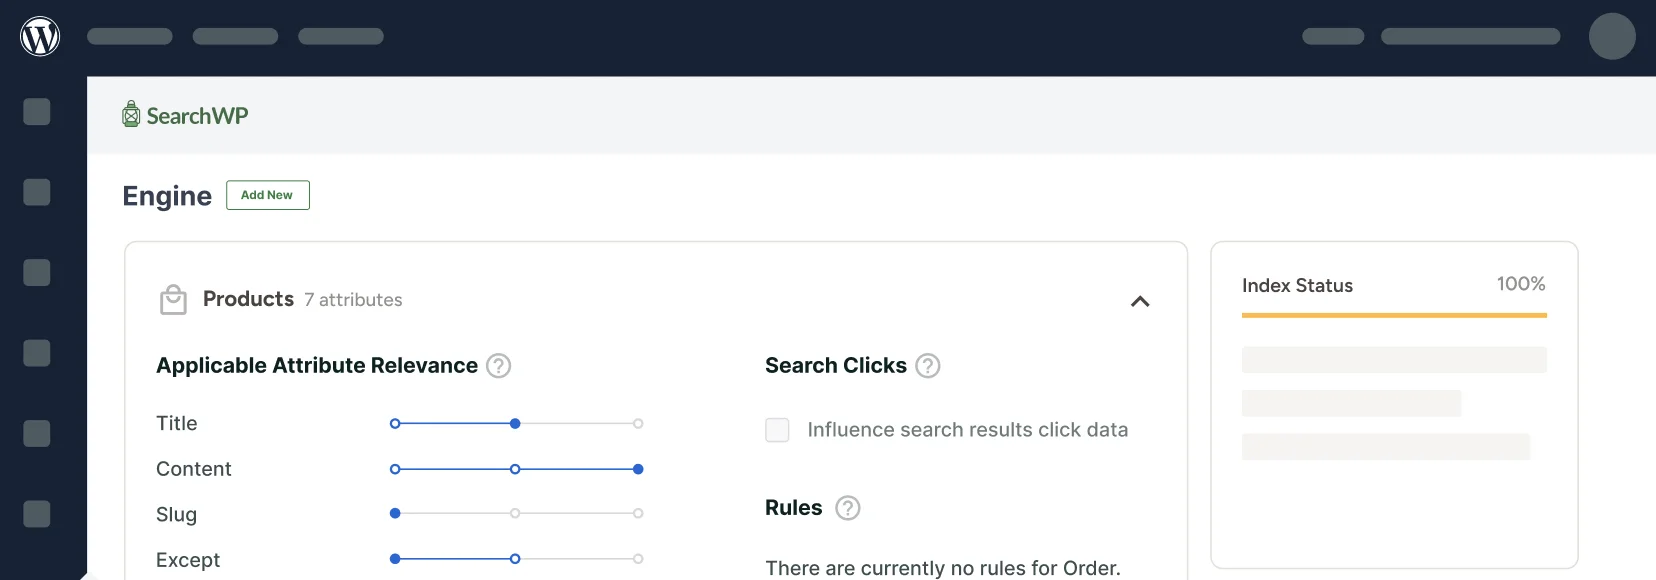
The easiest and fastest way to hide a WooCommerce category from search results on your site is to use a plugin like SearchWP.

It is the best search plugin for WordPress, and it gives you complete control over how search works on your WordPress site.
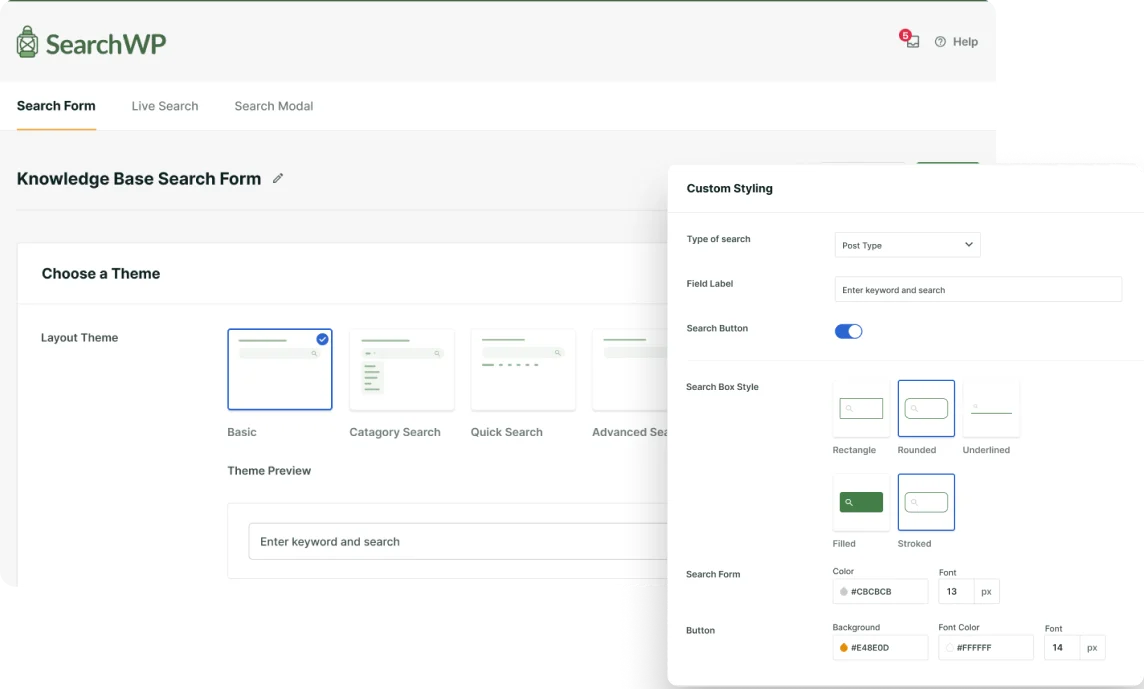
With it, you can select which categories you want to appear in search, prioritize specific search results, create custom search forms, and much more.
Over 50,000 eCommerce WordPress site owners already use it to give their customers more relevant search results and boost their sales.
SearchWP also improves your site search by helping you:
- Enable search by product attributes: Want your customers to search for products by their features, such as color, size, price, and others? With SearchWP, you can make WordPress consider product attributes when searching with just a few clicks.
- Add a search form to your shop page: Want to effortlessly increase your profit and make it easier for customers to browse your store? One of the best ways to do that is to add a search form to your shop page with SearchWP.
- Track on-site search activity: Wondering what your customers search for on your site? SearchWP gathers all the search data and gives you useful insights into your customers’ needs.
- Show search results in live mode: Want to show search results in your store in Amazon style? With SearchWP, you can add live autocomplete search to your store, making it faster for your customers to find what they’re looking for.
Now let’s take a look at how to exclude particular categories from your site’s search results using SearchWP.
Step 1: Install and Activate SearchWP
To get started, you’ll need to visit the website and signup for a SearchWP account.
After that, you can go to your SearchWP account and navigate to the Downloads tab.
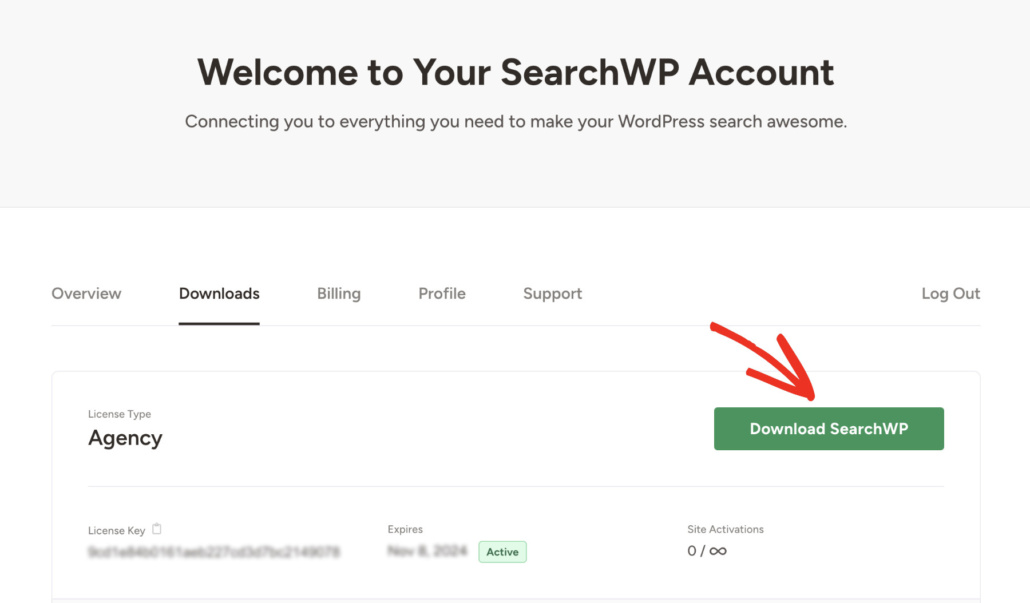
Then, go ahead and press the Download SearchWP button to start downloading the plugin’s ZIP file to your computer.
Once the download begins, copy the SearchWP license key on the same tab. You’ll need it later to activate the plugin.
After you’ve finished downloading, the next step is to upload the plugin’s ZIP file to your site. If you need a refresher on how to do that, please check this guide on how to install a WordPress plugin.
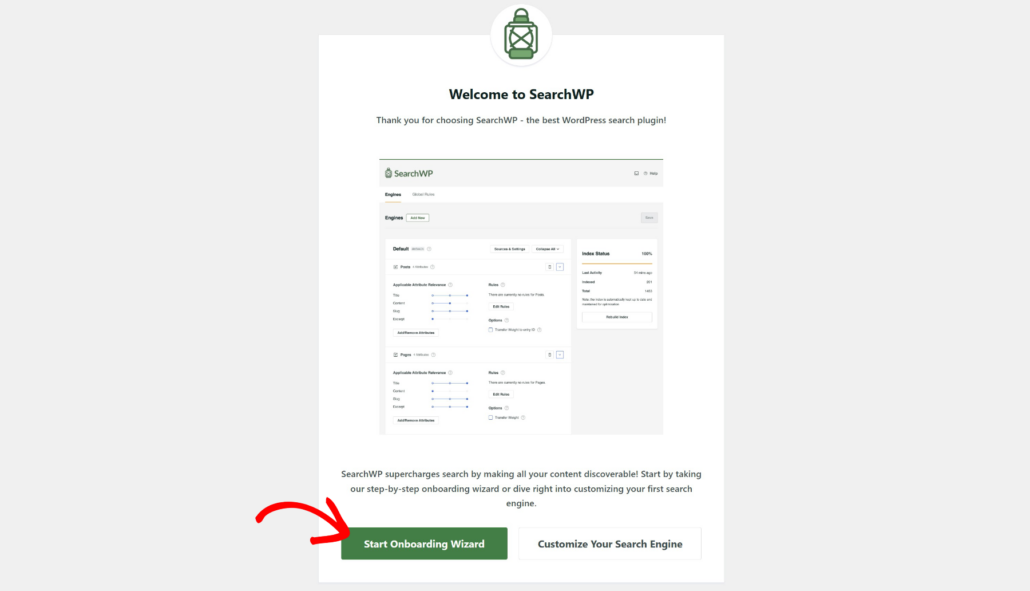
Next, you will see the SearchWP setup wizard. Simply click the Start Onboarding Wizard button and follow the on-screen instructions.
The next step is to install the WooCommerce extension on your site.
Step 2: Install and Activate the WooCommerce Extension
This extension ensures seamless integration of WooCommerce and SearchWP, allowing you to get full control over search in your store.
To start, you can navigate to SearchWP » Extensions from the WordPress dashboard. From here, simply go to WooCommerce Integration and click the ‘Install’ button.
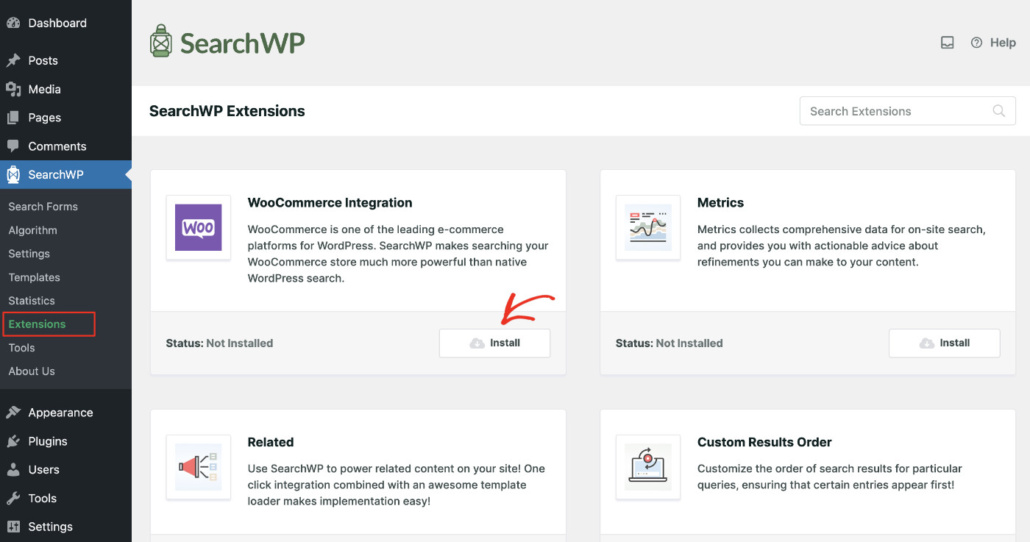
Once you’ve installed and activated the WooCommerce Integration extension, the next step is to customize your search engine.
Step 3: Customize Your Search Engine
By setting up a search engine, you can specify the way WordPress should carry out searches on your site.
For instance, you can add or remove search sources, limit search to certain types of content, adjust the weight of relevance attributes and much more.
To get started, navigate to SearchWP » Algorithm from your WordPress dashboard.
You will see that there will be only one search engine called Default. By editing its settings, you can customize how the search works across your site.
To hide a specific WooCommerce category from search, you first need to add WooCommerce products as a search source. To do so, press the Sources & Settings button.
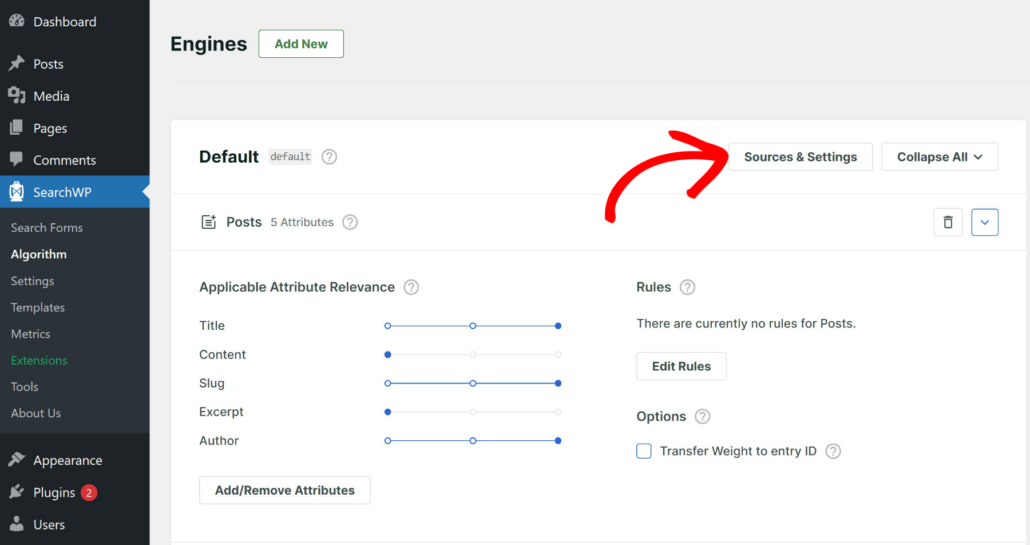
Next, you will see the sources used by the default WordPress search.
You’ll need to ensure that the checkbox next to the Products source is selected.
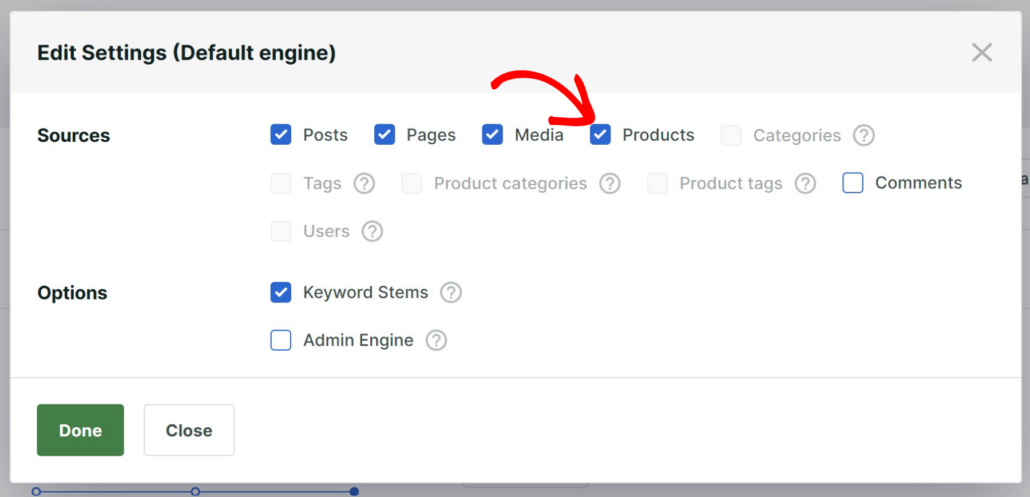
When you’re finished, simply click the ‘Done’ button.
After that, there will appear a new Products search source. It means that WordPress now considers WooCommerce products when searching.
The next step is to add a rule that will exclude certain WooCommerce categories from search results. To do so, press the Edit rules button within the Products source section.
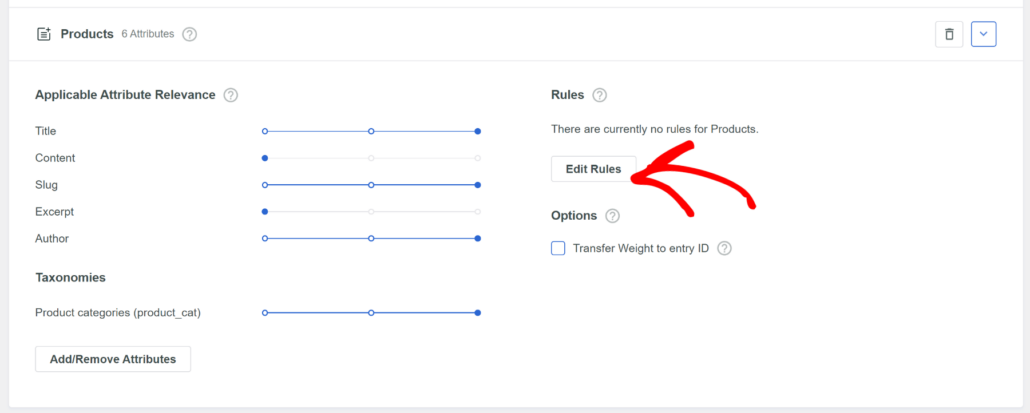
Here you can find the rules that apply to the Products search source.
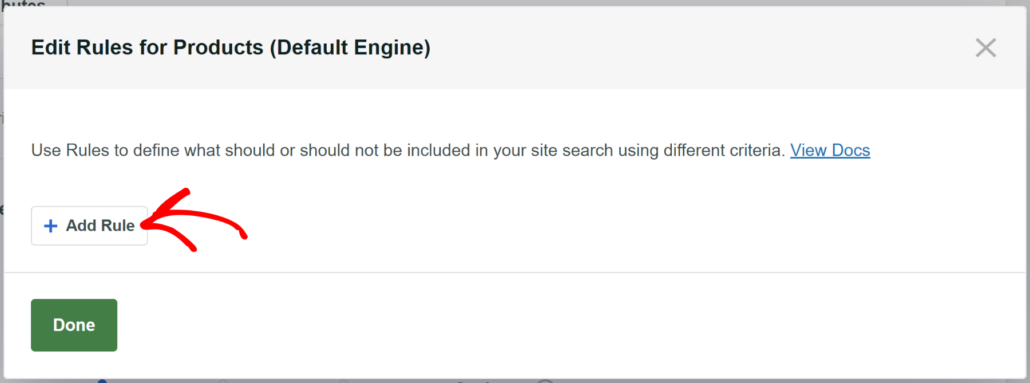
First, you’ll see that there will be no rules by default, so let’s add the first one.
To do that, you can click the Add Rule button.

Since you want to exclude WooCommerce categories from search, first, choose the Exclude entries if option from the dropdown menu.
Once done, you’ll need to choose Taxonomy and then select the Product categories you want to exclude from the drop-down menu.
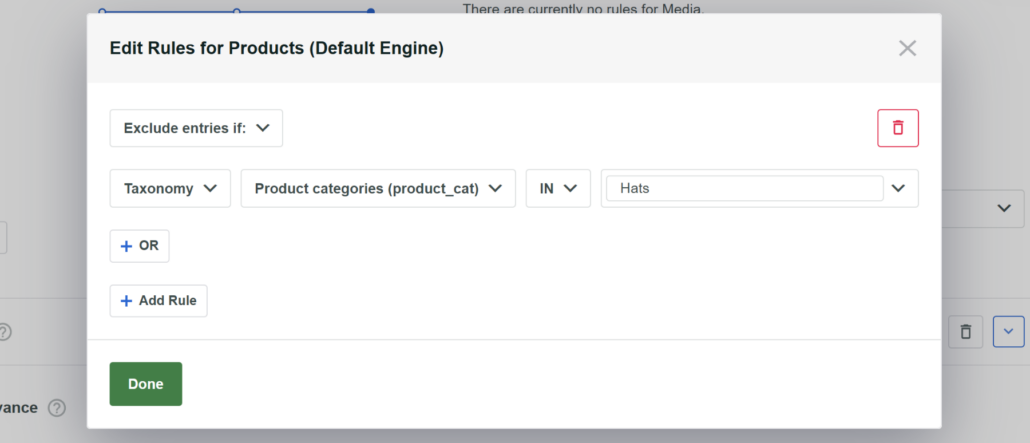
After that, enter the name of a WooCommerce category you’d like to exclude from the search to the very right field.
Click Done to save your changes when you’re finished adding categories you want to exclude.
Next, you can go to the top of the page and press the Save button to apply all the edits you made.
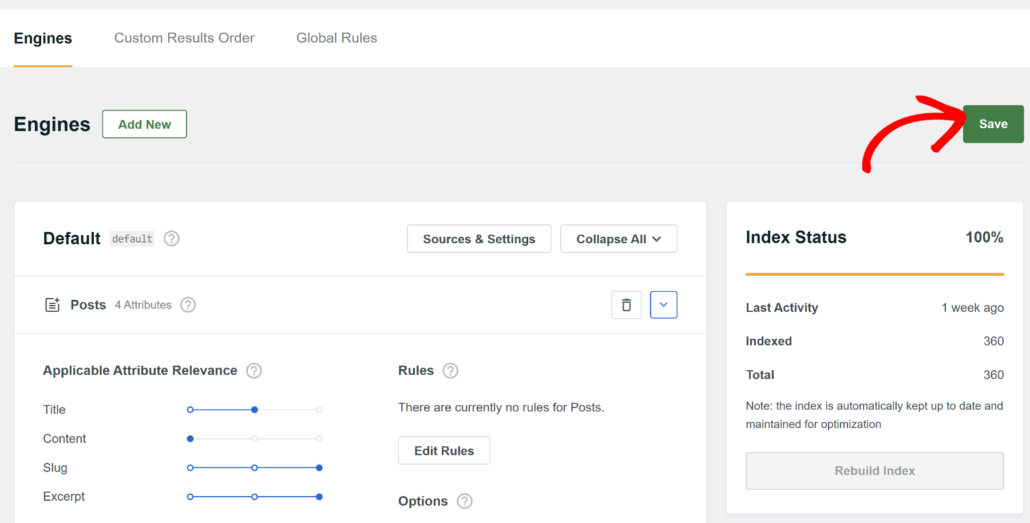
That’s it! You’ve successfully excluded a WooCommerce category from search results on your eCommerce website.
The final step is to test your new search.
Step 4: Test Your New Search
To do that, simply visit your WooCommerce store.
For the purposes of this tutorial, we excluded the WooCommerce Hats category from the search results on our test site.
To check if the exclusion rules have been applied correctly, we’ll search for the Green hat product, which is placed in the Hats category.

As you can see, no results were found.
It means that we’ve successfully excluded the Hats category from the search results.

We hope this article helped you learn how to hide a category from search in WooCommerce. You may also want to see our guide on how to make a smart WooCommerce product search and how to customize your WooCommerce product search.
If you’re ready to get full control over the search on your site and easily exclude any categories with a few clicks, you can grab your copy of SearchWP here.
