Are you wondering how to customize your WooCommerce product search?
By default, WordPress has limited search capabilities. That’s why customizing product search is important if you want to increase your sales and grow your business.
In this article, we’ll show you the easiest and fastest way to customize your WooCommerce product search.
Here is the table of contents to help you faster navigate through the article:
- Why Customize WooCommerce Product Search on Your Site
- Easiest Way to Customize Your WooCommerce Product Search
- How to Install and Activate SearchWP
- How to Install and Activate the WooCommerce Integration Extension
- How to Make Your Search Engine Consider WooCommerce Product Attributes
- How to Exclude Certain Products from Search Results
Let’s dive into it!
Why Customize WooCommerce Product Search on Your Site
You might want to customize WooCommerce product search on your site due to a couple of reasons.
First of all, it helps you give your customers more accurate and comprehensive search results.
The thing is, the native WordPress search engine completely ignores WooCommerce product attributes, tags, reviews, and other details.
It happens because WooCommerce stores all additional product data as custom fields.
By default, WordPress only indexes the title, content, and excerpt of posts and pages. This means it doesn’t consider any content within custom fields while performing a search.
As a result, customers can only find products by titles and descriptions, making it harder to find what they’re looking for.
If customers can’t find the product they came for in your store, they’ll simply leave and are unlikely to come back again.
That’s why it’s important to customize your product search and make custom fields searchable.
Also, by customizing WooCommerce product search, you can create search fields limited to specific categories or tags.
It can help you further narrow the search and provide your audience with more relevant search results.
Now, let’s look at how you can customize WooCommerce product search on your WordPress site.
Easiest Way to Customize Your WooCommerce Product Search
The easiest and fastest way to customize your WooCommerce product search is to use a plugin like SearchWP.
This is the most powerful WordPress search plugin, which allows you to fully customize how search works on your site.
For example, using it, you can make searchable WooCommerce product attributes, exclude or prioritize specific products in search results and many more.
Also, using SearchWP, you can add and use multiple search engines with different rules. This feature allows you to create search boxes limited to specific categories and product types.
More than 30,000 online store owners already use it to boost their sales by providing customers with more relevant search results.
Here are other things you can do with SearchWP:
- Keyword tracking. Do you want to know what customers were searching for in your store? SearchWP gathers all on-site search activity, providing precious insights into customers’ needs.
- Fuzzy search. Would you like WordPress to understand that the words “ball” and “basketball” boil down to the same product? It’s possible with the SearchWP fuzzy search feature, also known as partial matching.
- Live search results. Want to display search results on your online site in live mode? Using SearchWP, you can turn this feature on, helping your customers to find products faster.
- Searchable PDFs. Do you upload any PDF files with price lists, tutorials, or anything else to your store? With SearchWP, you can make the content within them searchable.
Now let’s see how you can customize your WooCommerce product search using SearchWP.
Step 1: Install and Activate SearchWP
The first step is to grab your copy of the SearchWP plugin here.
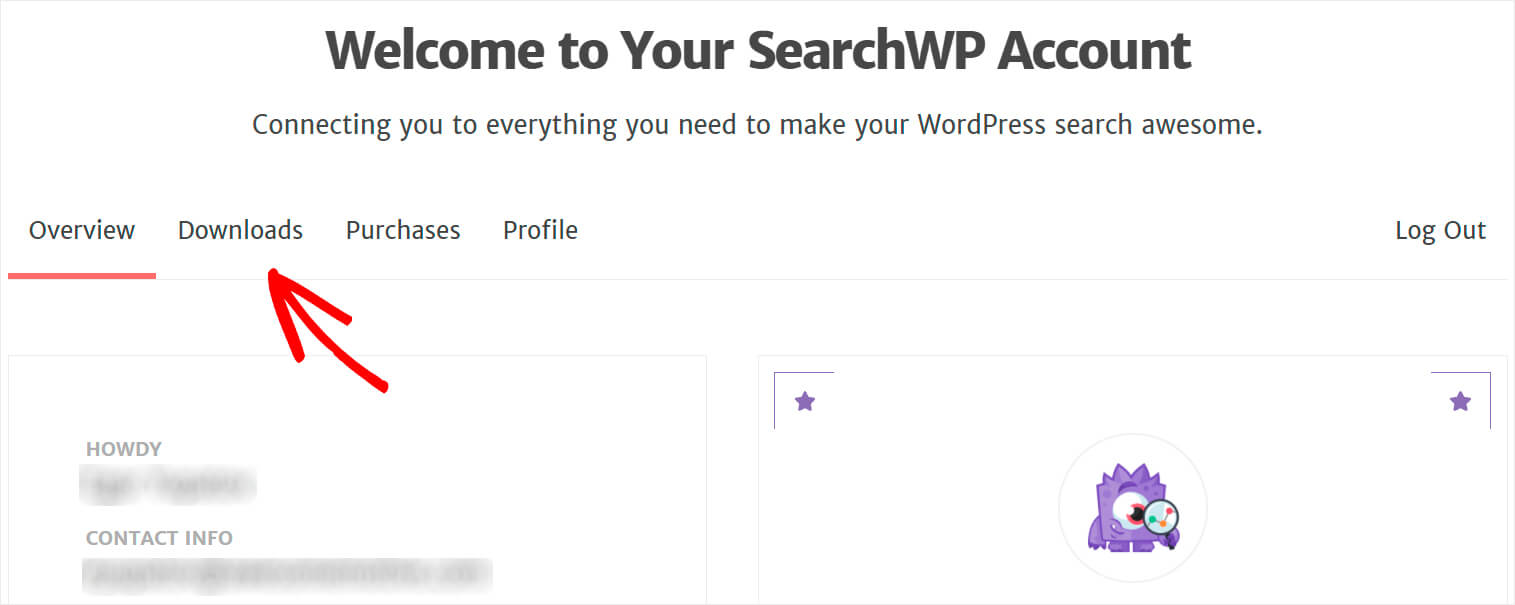
Then, go to your SearchWP account and navigate to the Downloads tab.
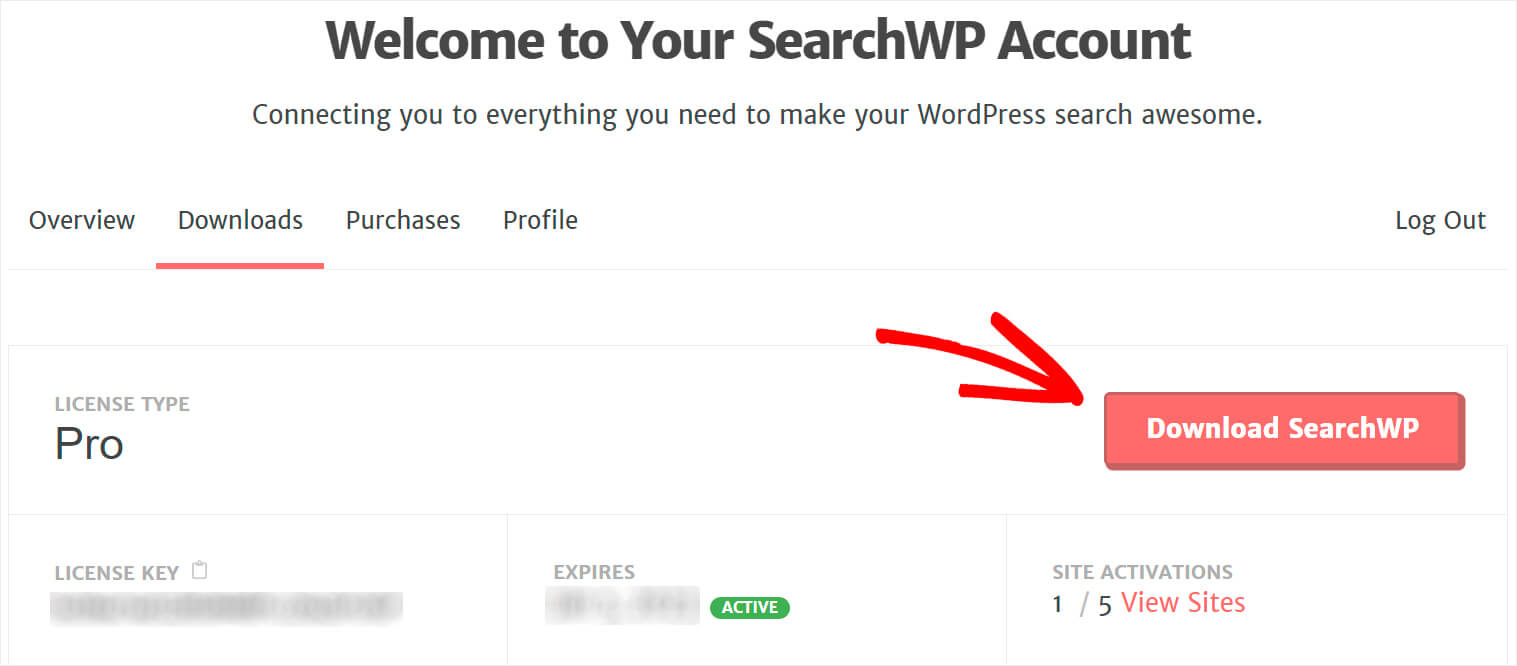
Once there, press the Download SearchWP button to start downloading the plugin ZIP file to your computer.
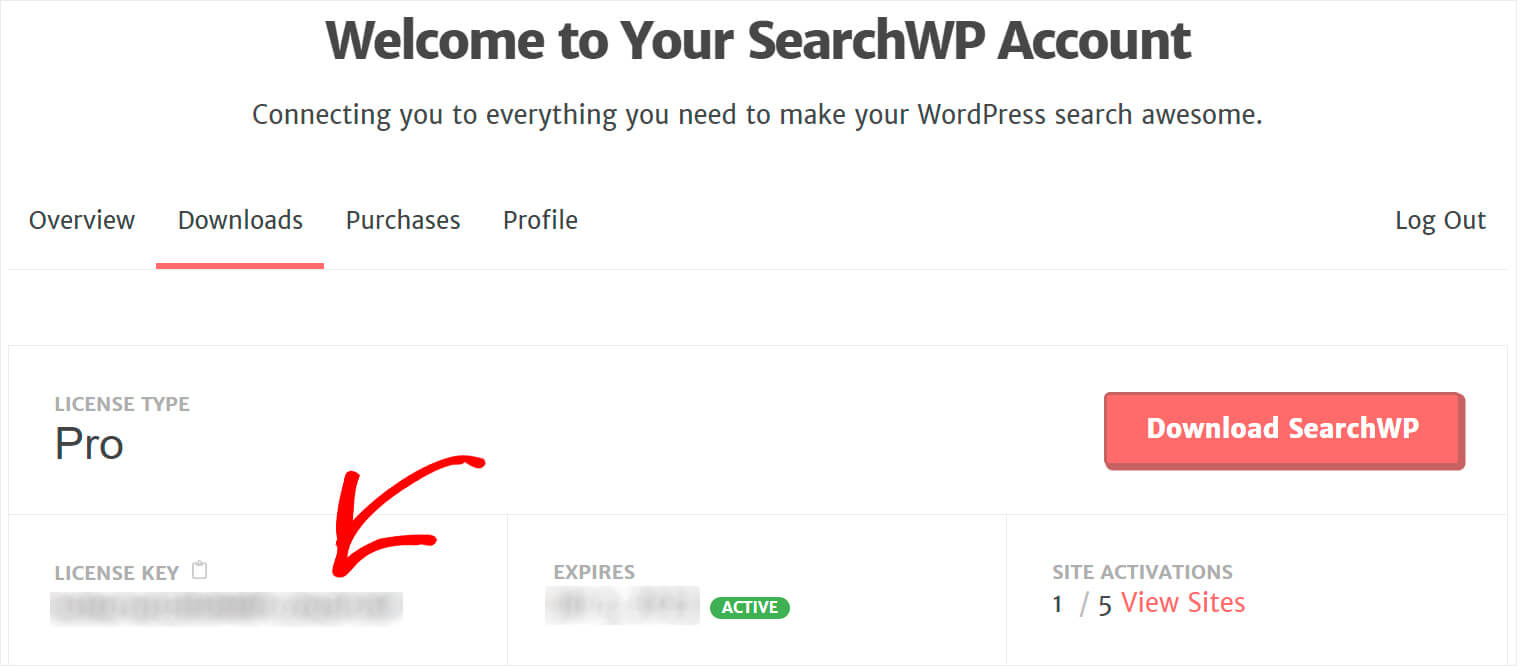
Then copy the license key on the same tab. You’ll need it to activate the plugin on your site after the installation.
Once the download is finished, the next step is to upload the SearchWP plugin ZIP file to your site.
Need any help with that? Check out the how to install a WordPress plugin step-by-step tutorial.
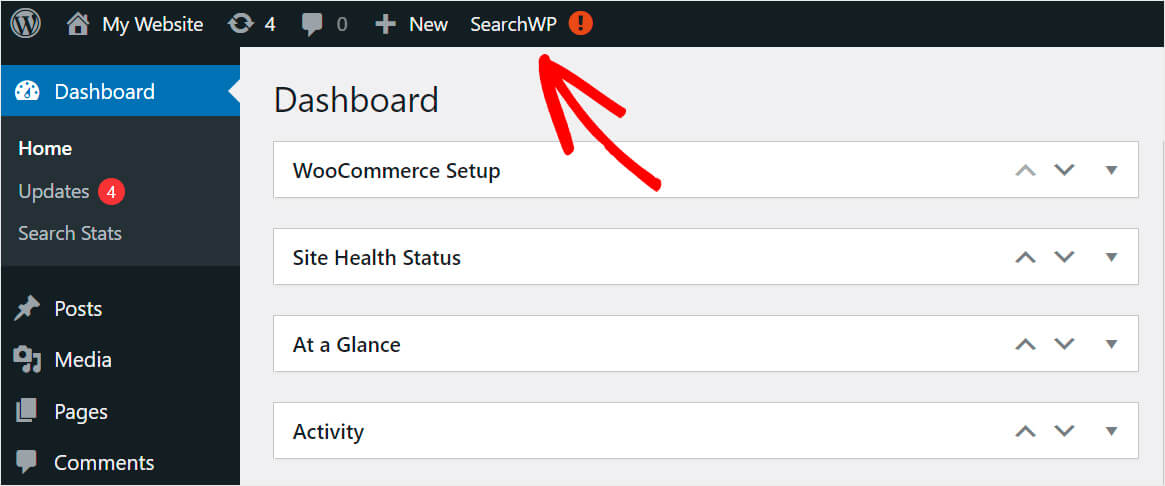
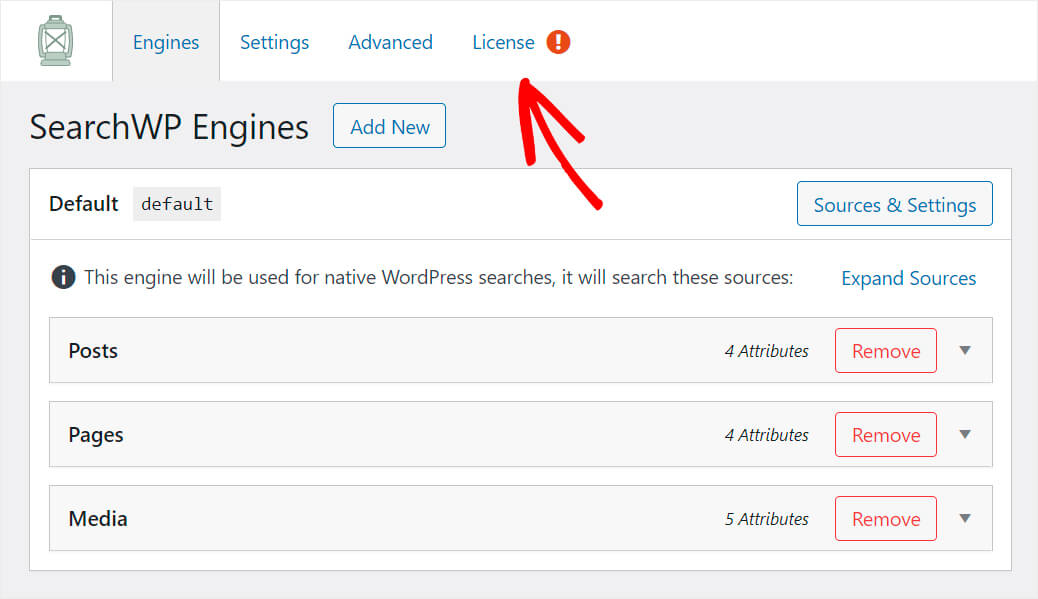
After installing the plugin, click SearchWP at the top panel of your WordPress site dashboard.
Once you get to the SearchWP settings, go over to the License tab.
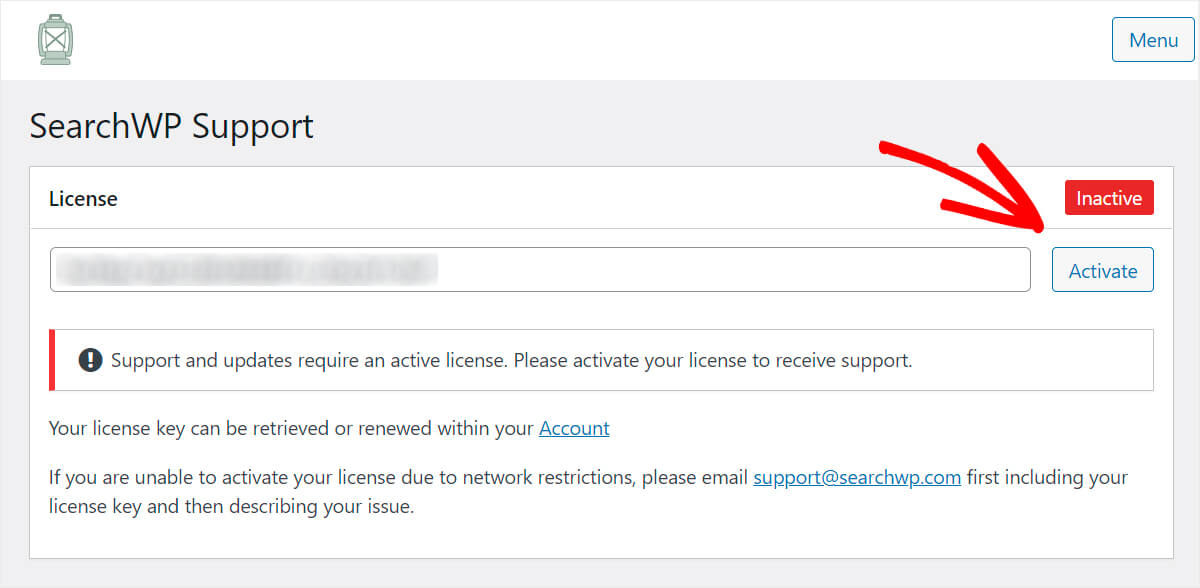
Then, paste the license key you copied earlier into the License field and press Activate.
That’s it. You successfully activated your copy of SearchWP. The next step is to install the WooCommerce Integration Extension.
Step 2: Install and Activate the WooCommerce Integration Extension
This extension ensures the seamless integration of SearchWP with WooCommerce.
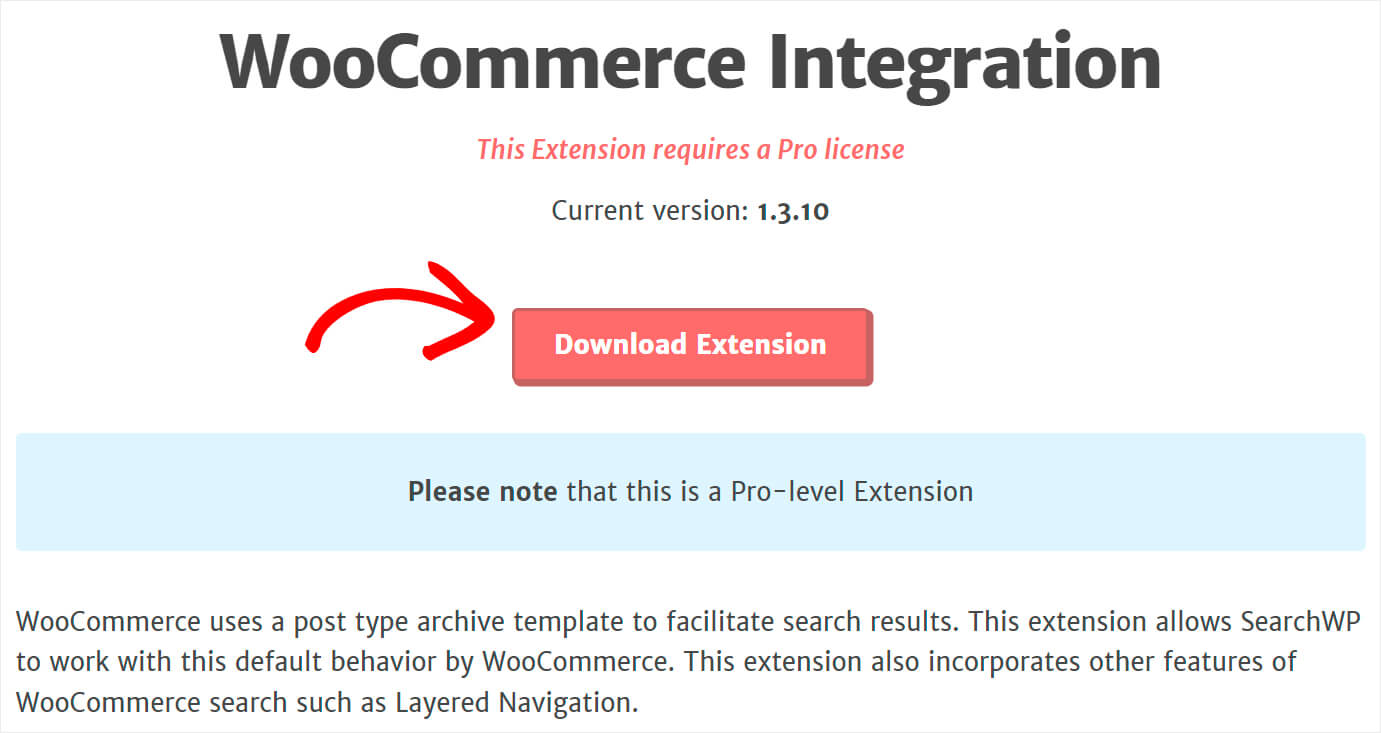
You can grab it at the WooCommerce Integration extension download page.
Once you navigate to the page, press the Download Extension button.
After downloading the extension, simply install it the same way you installed SearchWP.
Step 3: Customize a Search Engine
Once you’ve installed SearchWP and the WooCommerce Integration extension, the next step is to customize the WordPress search engine.
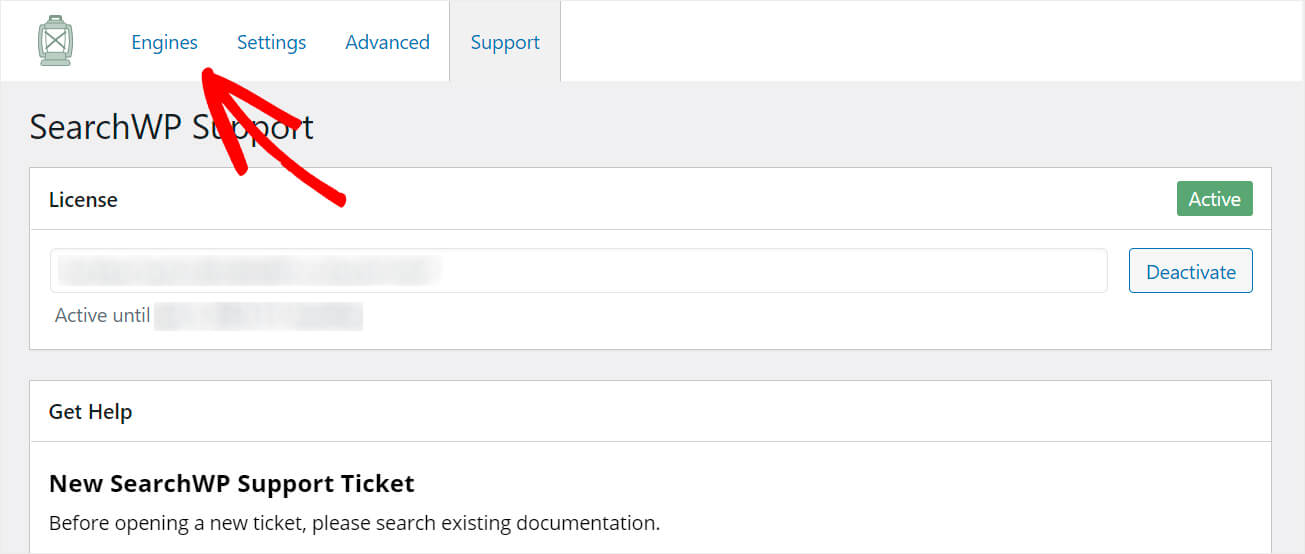
To do that, go over the Engines tab at the SearchWP settings.
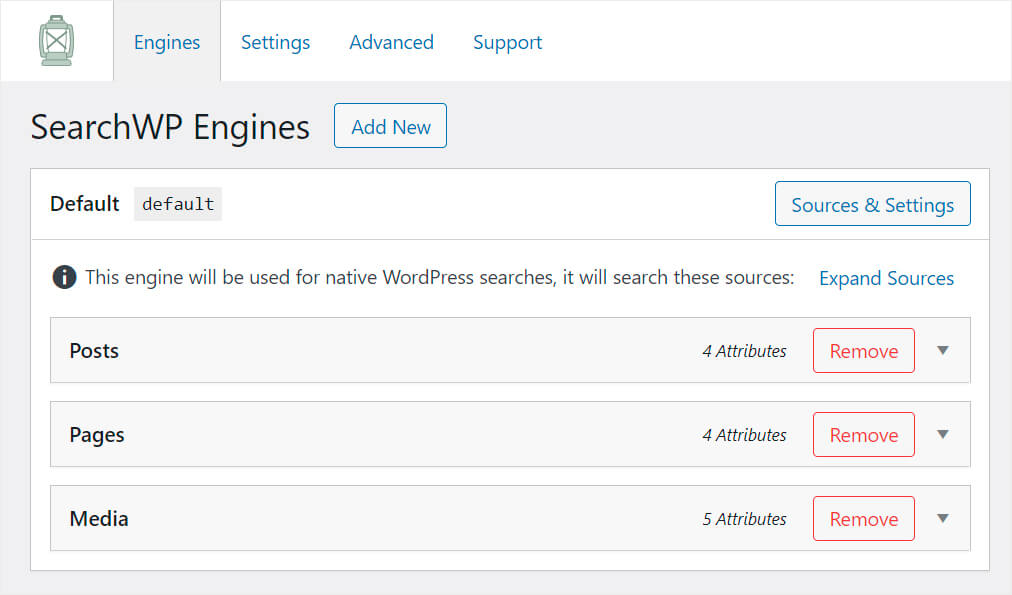
Here you’ll find the list of search engines you currently have.
You can think of a search engine as a list of rules that WordPress follows when performing a search. By changing the settings of a search engine, you can customize the way it works.
For example, you can specify which search sources it should look for, what post or page attributes to consider, and many more.
SearchWP allows you to add and use multiple search engines with a different set of rules and settings.
This way, you can create customized separate search forms in WordPress and place them wherever you want.
Currently, there is only the Default search engine, which is used for native WordPress searches.
It means that by customizing it, you can change how the search works across the entire site.
How to Make Your Search Engine Consider WooCommerce Product Attributes
Let’s start customizing our search engine by making it consider WooCommerce product attributes.
Product attributes are additional product information such as price, weight, SKU, and any other details you might want to specify.
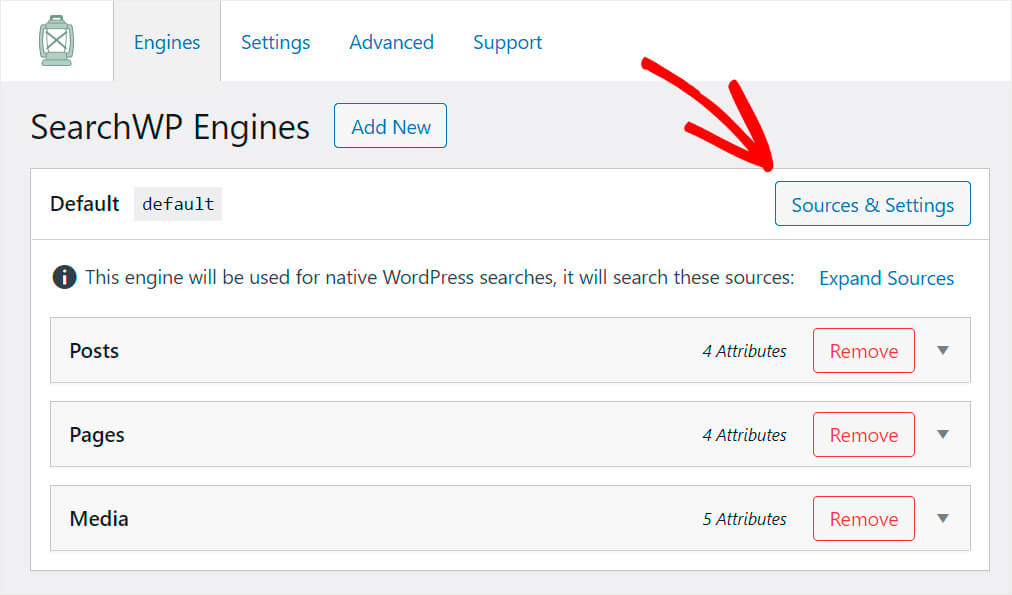
To get started, press the Sources & Settings button at the top right of the Default search engine section.
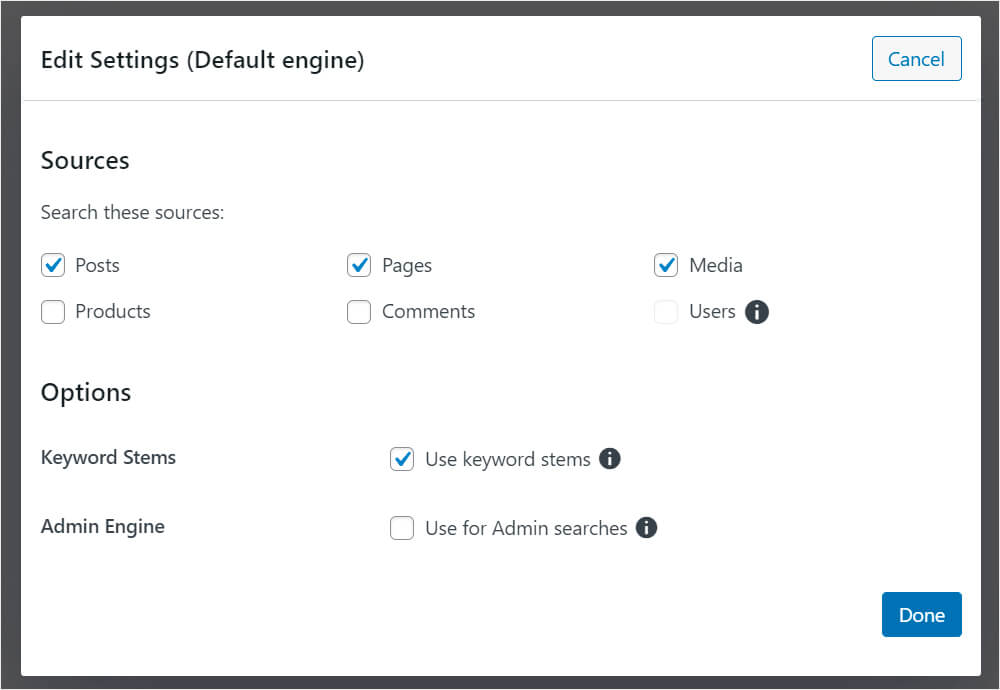
Here you can change which sources WordPress will search for.
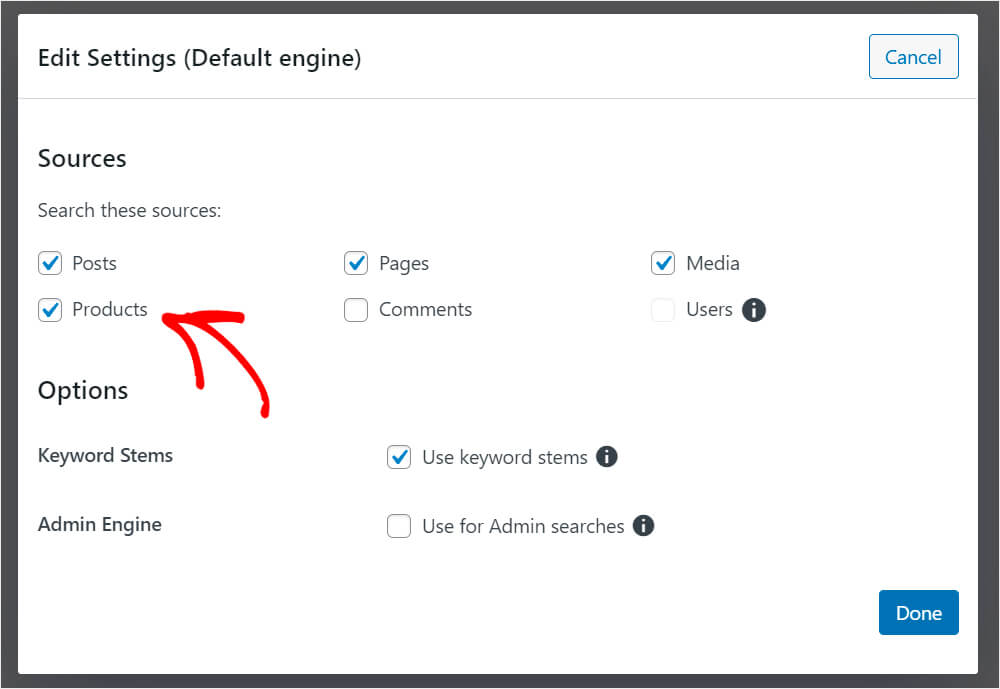
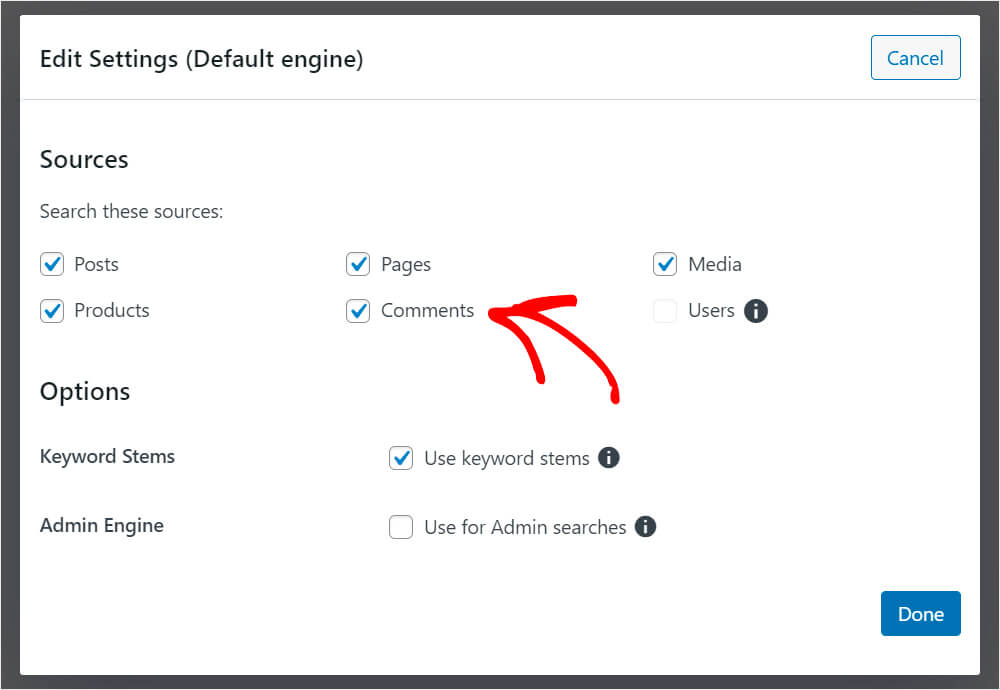
To make it consider WooCommerce product attributes, we first need to add products as a source. To do so, check the box next to the Products source.
WooCommerce stores product reviews as regular WordPress comments. So if you want to make them searchable as well, also check the Comments source.
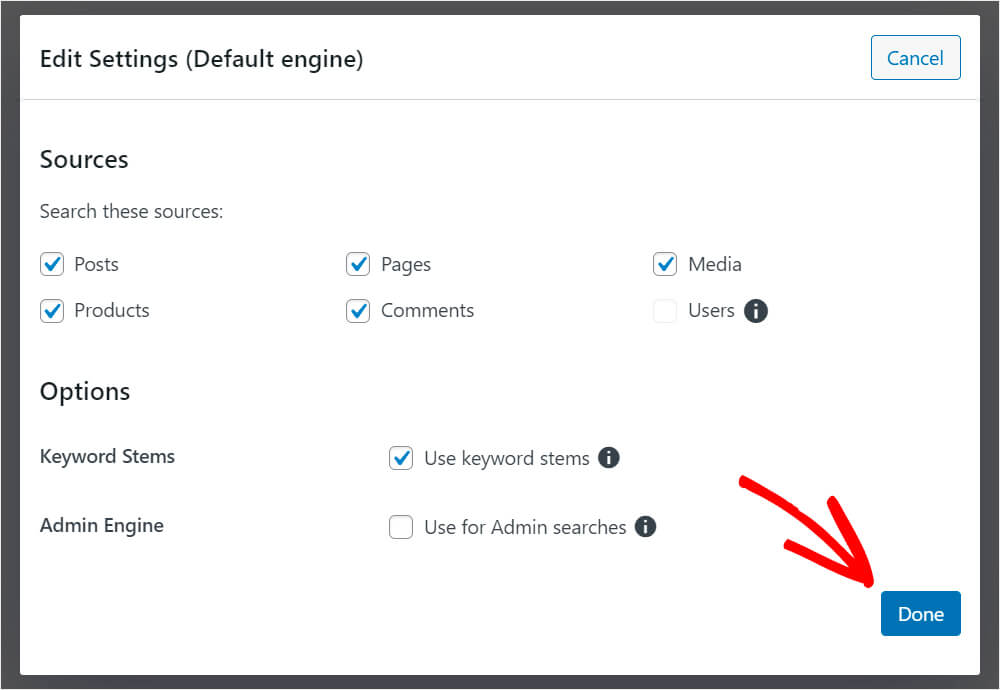
After you finish selecting the necessary sources, click Done to save the changes.
Now our default search engine has 5 sources: posts, pages, media, products, and comments.
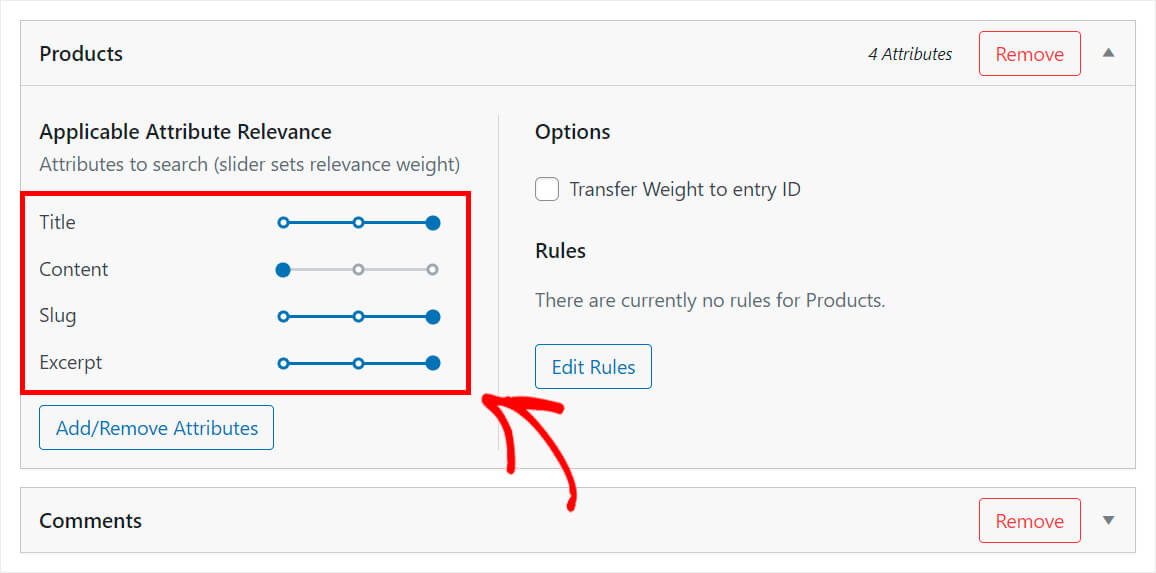
As you can see, each source has its own set of attributes it considers. There are only title, content, slug, and excerpt attributes by default.
To make WordPress consider product attributes, taxonomies, and other details, we need to add them as attributes to the Products source.
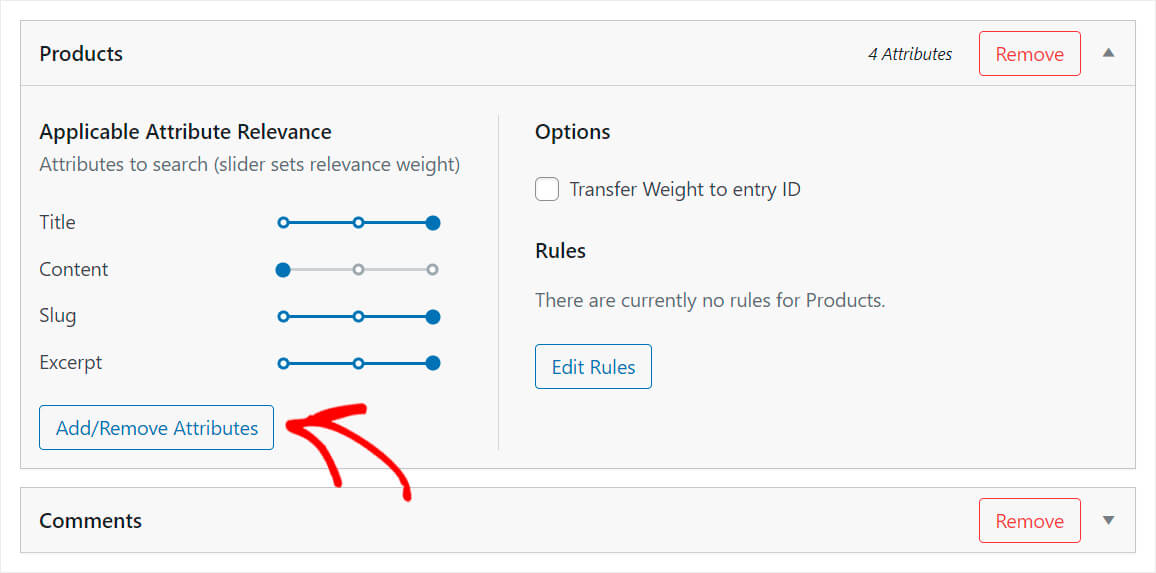
To do that, under the Products source, press the Add/Remove Attributes button.
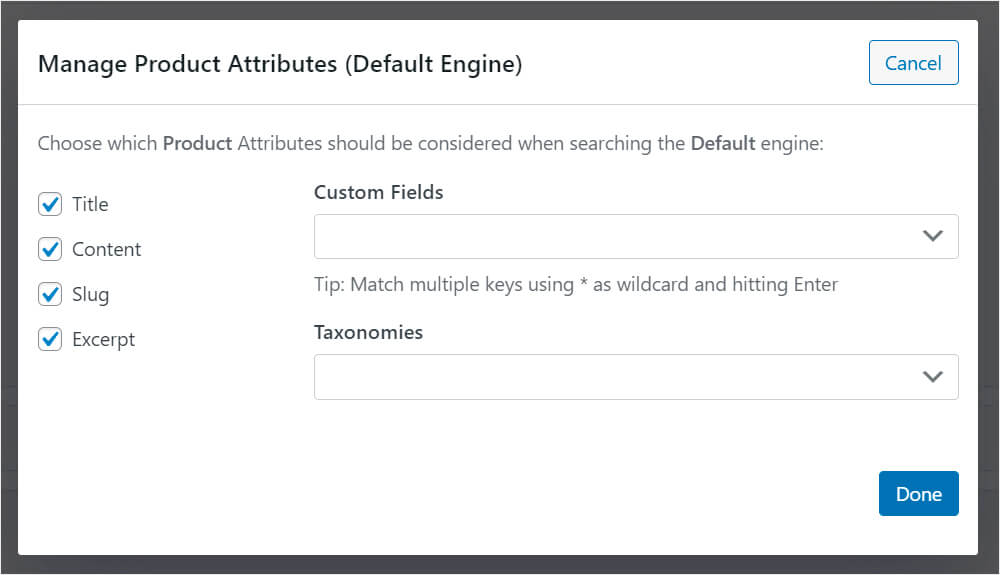
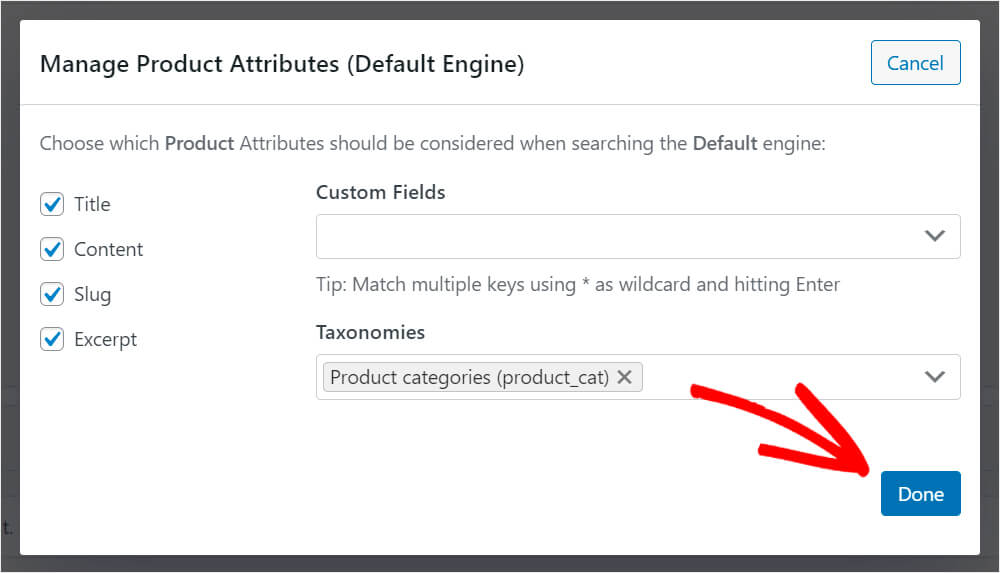
Here you can specify which custom fields and taxonomies you want the search engine to consider while performing a search.
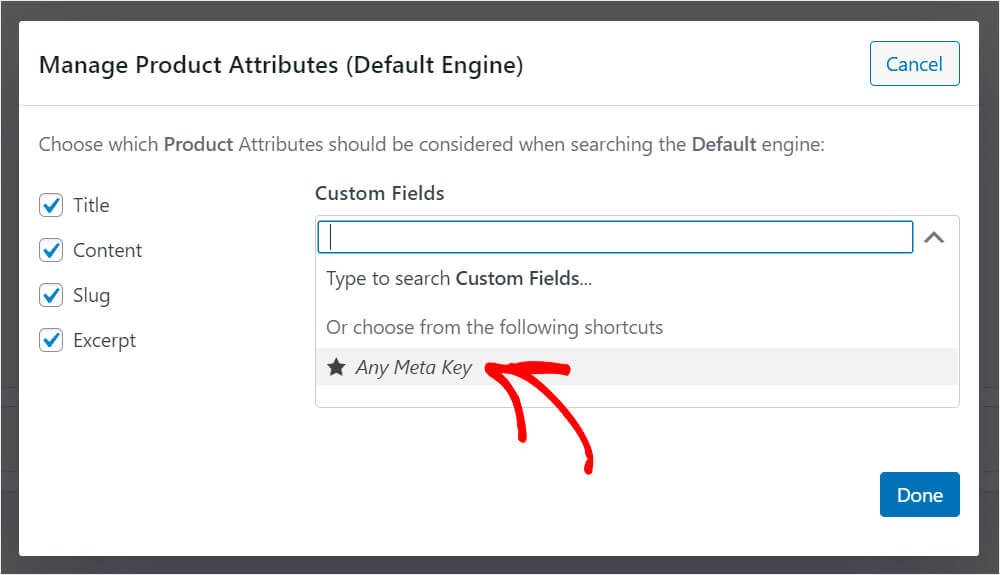
To begin with, let’s make our search engine index custom fields. To do so, click on the Custom Fields field.
After that, there will appear the Any Meta Key shortcut. By selecting it, you can make searchable data in absolutely all custom fields that WooCommerce products have.
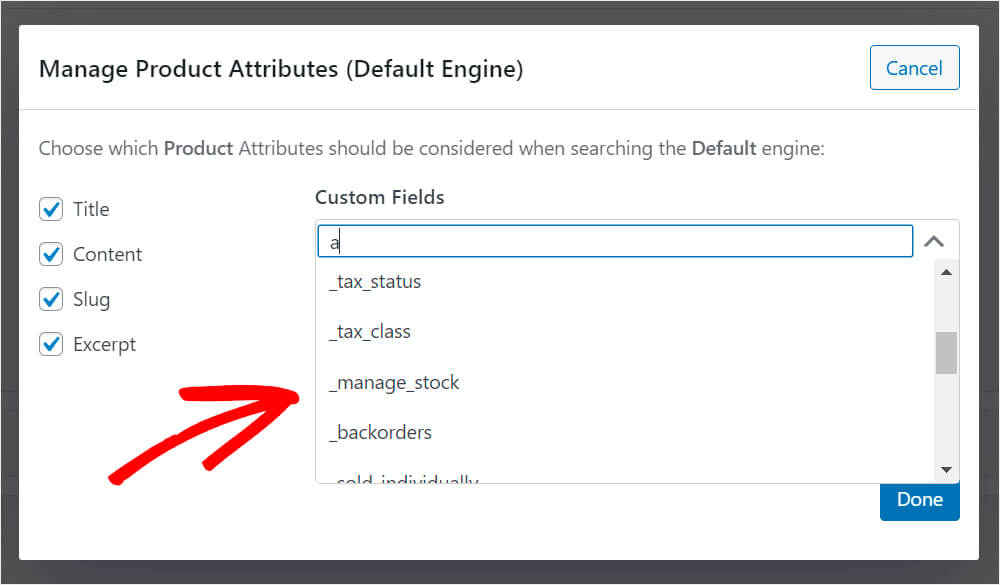
If you want to make searchable just a specific product attribute, start typing its name in the Custom Fields field.
After that, there will appear a drop-down menu with available options.
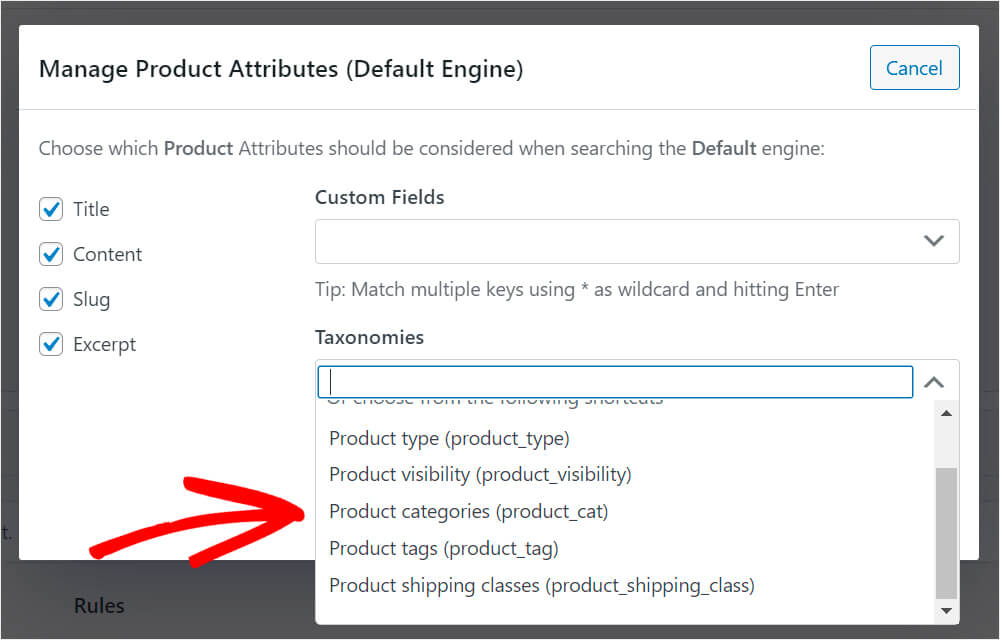
The same goes for Taxonomies. Click the field under Taxonomies to see the available shortcuts.
For the purposes of this tutorial, we’ll select the Product categories taxonomy.
When you’re finished managing attributes and taxonomies, click Done to save the changes.
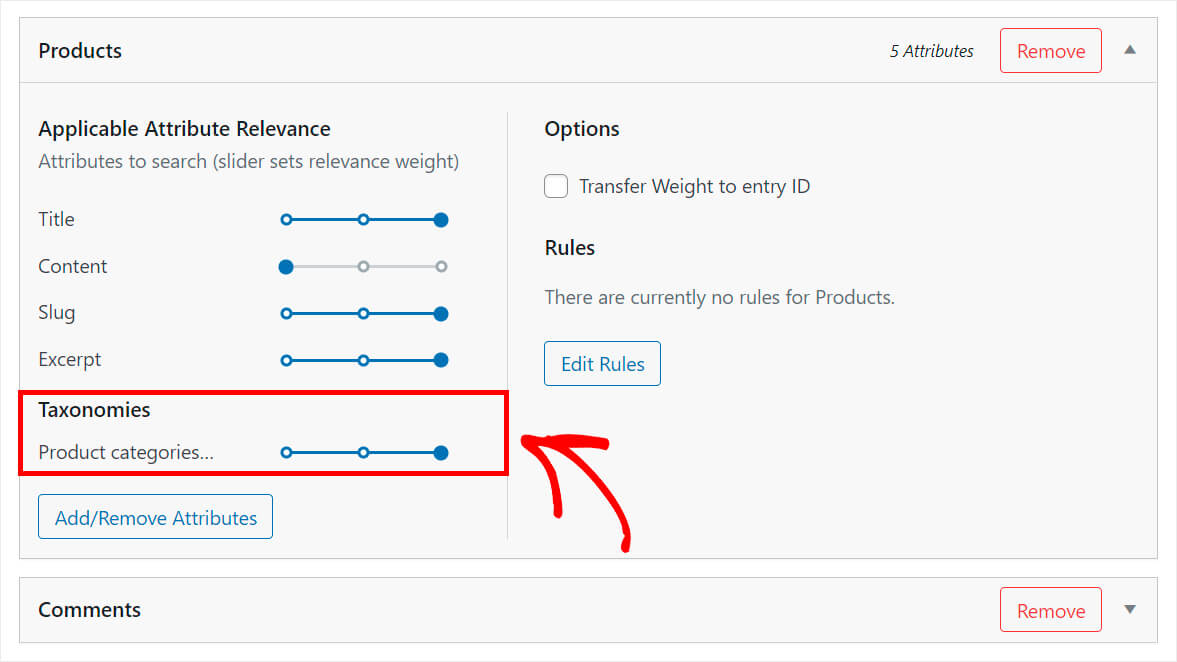
As you can see, the Product categories taxonomy now appears among the list of attributes of the Products source. As a result, WordPress will now take the product category into account when searching.
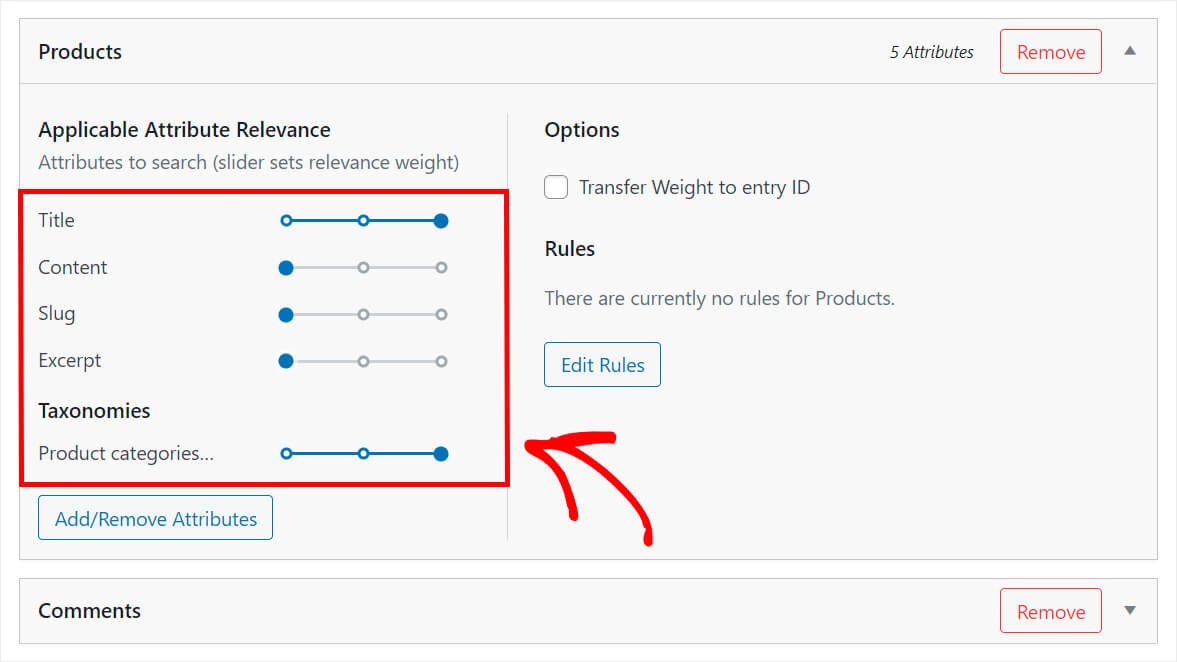
You can also adjust the relevance weight of the attributes by moving the slider next to each one to the left or right.
The greater the weight, the more attention WordPress will pay to the attribute when searching.
For example, let’s say we want to give the highest priority to the product title and category.
For that purpose, we’ll move the slider next to other attributes such as Content and Slug all the way left.
Here is how it looks on our test site:
Now, let’s take a look at how you can hide products from appearing in search results.
How to Exclude Certain Products from Search Results
SearchWP lets you automatically exclude products from search results if they fall under certain conditions.
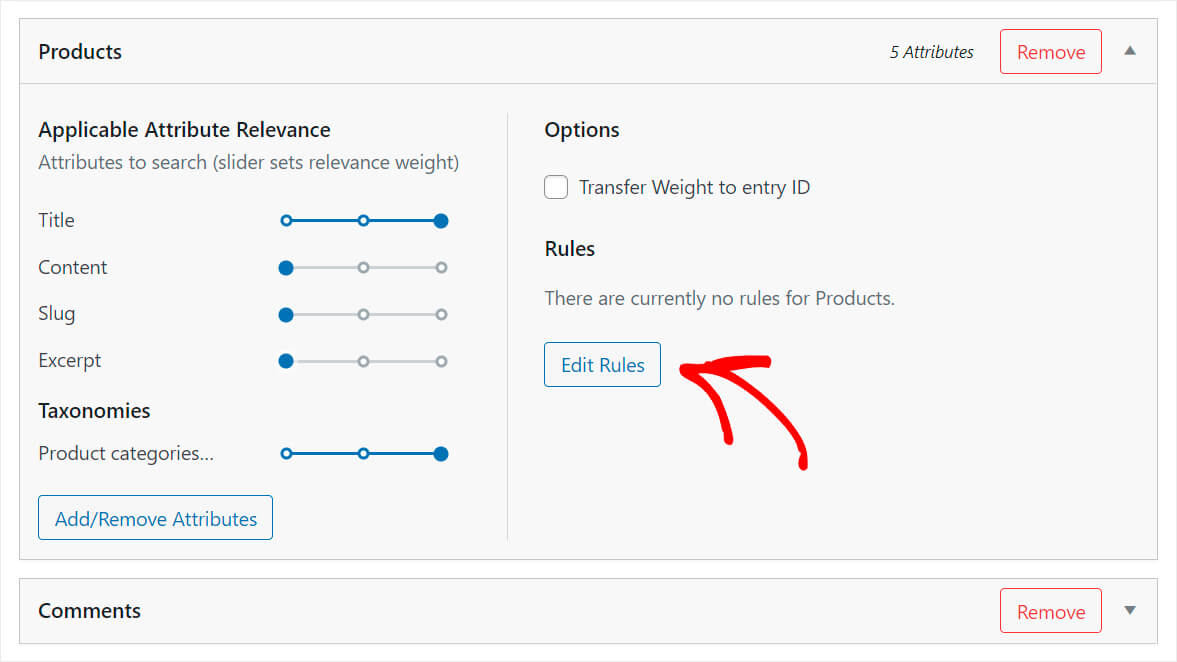
To get started, press the Edit Rules button.
At the moment, there are no rules here. To add a new one, click Add Rule.
Here you can specify under what conditions products should be shown or excluded from search results.
For example, you can add a rule to limit search to certain categories or exclude out-of-stock products from search results.
Let’s say we want to show only those products that have the Free shipping tag.
To do so, we’ll select the Product tags taxonomy from the drop-down menu and type Free shipping to the field next to it.
Here is how it looks on our test site:
When you’re finished adding rules, click Done.
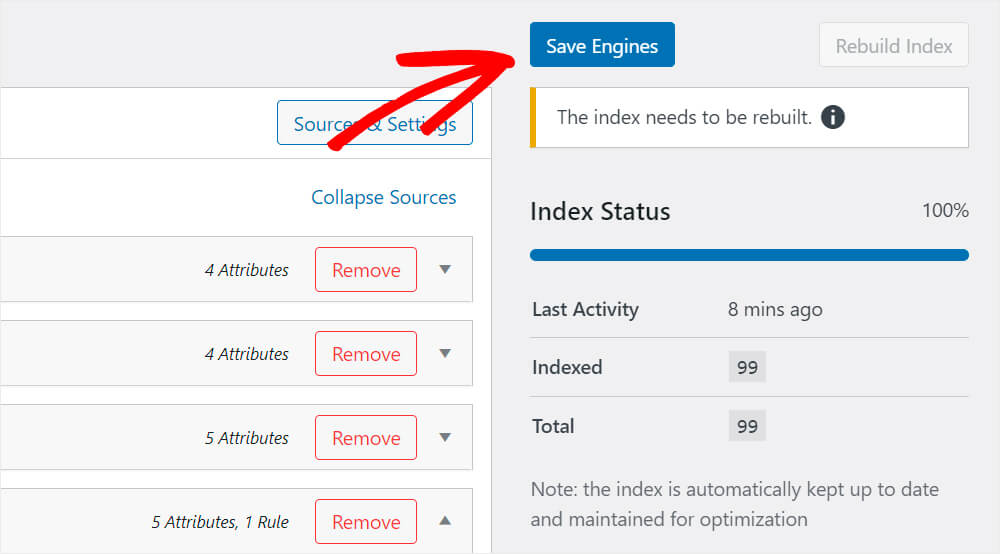
Then, press the Save Engines button at the top right to save all the changes you’ve made.
That’s it. Now you have a fully customized search engine.
The next step is to try how the customized search works on your site.
Step 4: Test Your New Search
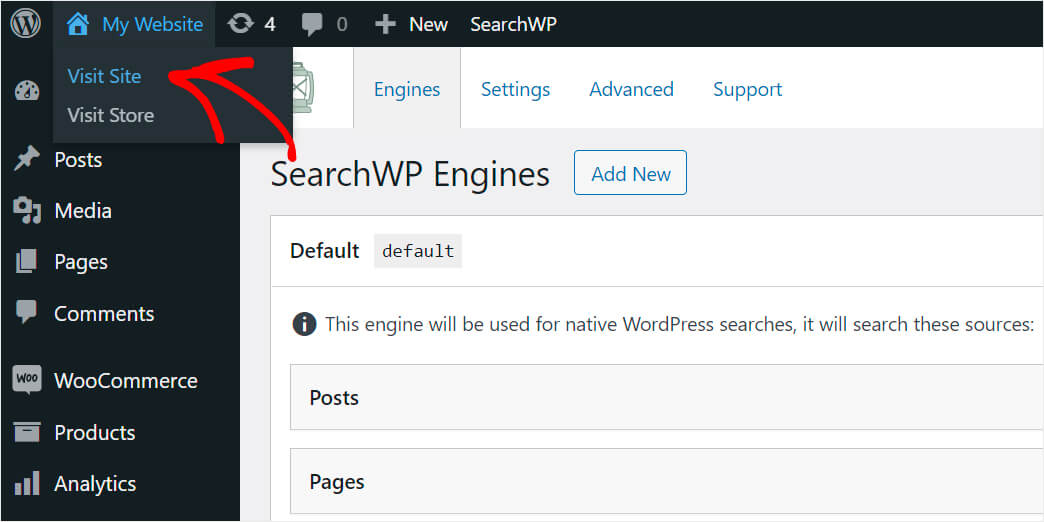
To do so, click the Visit Site button under your site’s name at the top left of your WordPress dashboard.
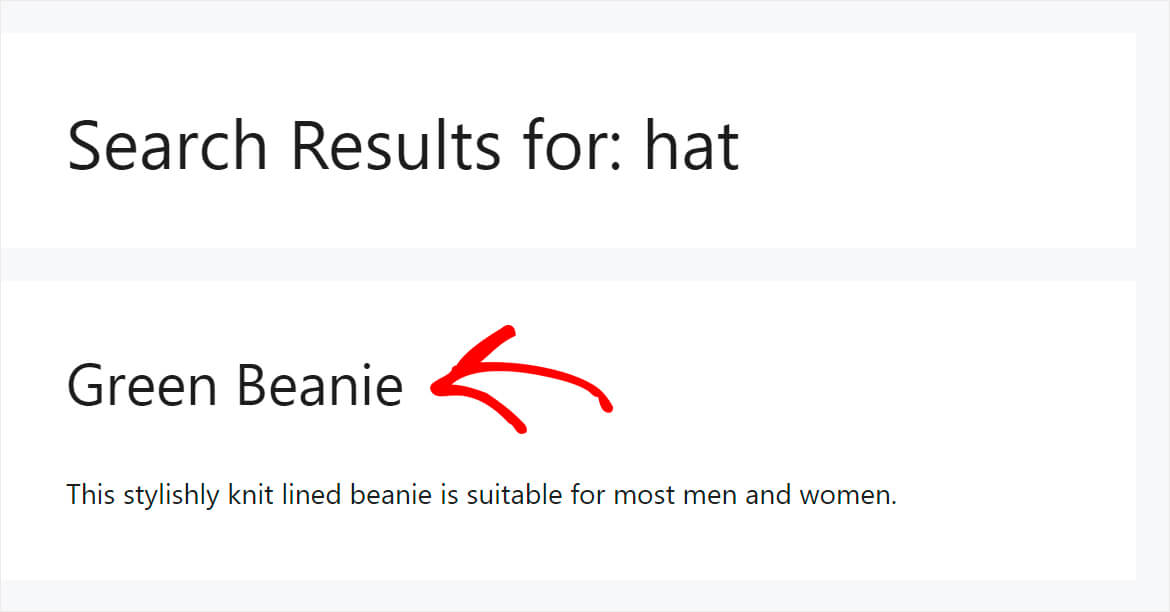
To test our customized WooCommerce product search, we’ve added a product entitled Green beanie and placed it into the Hats category.
If we can find this product by searching for “hat”, it means that search on our test WordPress site now considers product categories.
As you can see, we successfully found the Green beanie product, even though it doesn’t contain the word “hat” in the title or description.
Let’s also check if the excluded products have disappeared from the search results.
To do this, we added 2 products to our test site: Green beanie and Blue beanie.
The first one has the Free shipping tag, and the other one doesn’t.
Since we customized our search engine to show only products with the Free shipping tag, it will help us find out if the new rules are being applied correctly.
To begin with, let’s search for the green beanie.
As you can see, this product appears in the search results.
Now let’s try to search for the blue beanie, which doesn’t have the free shipping tag.
Nothing was found, which means that we’ve successfully excluded products that don’t have the Free shipping tag from search results.
In this article, you learned how to customize your WooCommerce product search. It’ll help you to increase sales by giving your customers more relevant search results.
If you’re ready to start customizing search on your site, you can grab your copy of SearchWP here.
Would you like to add a search form to your WooCommerce shop page? Feel free to check out this how to add a WooCommerce search form to your shop page tutorial.
Do you want to show search results on your site in live mode? Follow the how to add live autocomplete search to your WordPress site guide.

