Did you know that you can help users find content on your site without leaving the blog post they’re reading?
By adding an add search box to a WordPress post with a shortcode, you provide a great search experience.
That’s handy, as it allows your visitors to search for new content without distracting themselves from exploring your site.
In this article, we’ll show you step-by-step how you can add a search box to any post on your site with no coding needed.
Why Add a Search Box to a WordPress Post With a Shortcode
Adding a search form to your posts brings a lot of advantages.
Mainly, it allows your visitors to find the content they’re looking for faster and improve their user experience.
For example, you can create a custom search form limited to a specific category and put it within the relevant post, like this:
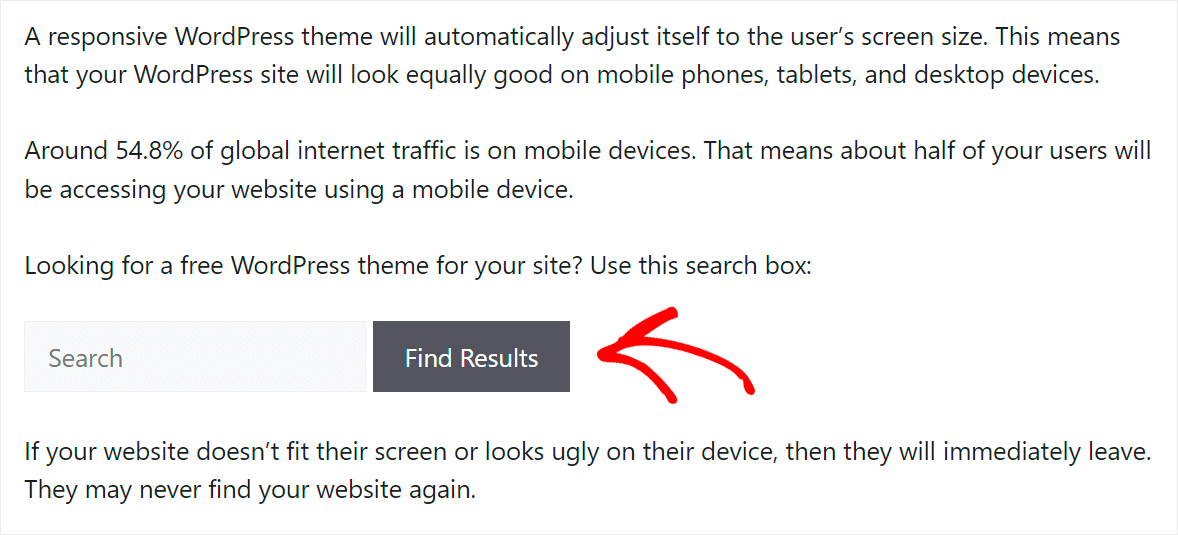
This way, you won’t only make it easier for your visitors to find the right content but also encourage them to explore your site further.
In addition, placing a search bar inside your WordPress site posts will help you to:
- Increase the average session duration – By offering a search form in the post, you’ll help your visitors find more content that interests them.
- Get more traffic from search engines – The average session duration is an important ranking factor in Google, so by keeping it high, you can get better rankings.
- Build a loyal audience – Satisfied visitors who’ve had a positive user experience when browsing your site are more likely to return again.
Now that you know what are the benefits of adding a search bar to your posts with a shortcode, let’s see how you can do that.
Add a Search Box to a WordPress Post With a Shortcode
Using a plugin is the easiest way to add a search box to posts on your site with a shortcode. In this regard, no plugin beats SearchWP.

Why? Because SearchWP is the best search plugin for WordPress, and it offers the most comprehensive solution on the market that can cover all your needs.
Beyond adding a search box with a shortcode, you can use it to display search results in live mode, track on-site search activity, and more.
SearchWP boosts your on-site search by helping you:
- Add multiple search engines: Want to add custom search fields to your site? You can create multiple search engines with different settings and link them to specific search fields.
- Impact search results order: Not happy with the current order of search results on your site? SearchWP allows you to customize it the way you want.
- Exclude pages from search: Looking for a way to exclude unwanted pages from search results? With SearchWP, you can do that with a few clicks, no coding needed.
- Make custom fields searchable: Store valuable post data in custom fields? Using SearchWP, you can make WordPress consider them when performing a search.
Over 50,000 websites are already using this plugin to give their visitors the most relevant search results.
With that, let’s see how you can use SearchWP to add a search box to your posts with a shortcode.
Step 1: Install and Activate the SearchWP Plugin
The first step is to get your own copy of SearchWP by visiting the website and creating a new account.
Once done, you can sign in to your SearchWP account and navigate to the Downloads tab.

Then, you can press the Download SearchWP button to begin downloading the plugin ZIP file to your computer.
After you’ve downloaded the file, also copy your SearchWP license key on the same tab. You’ll need it further to activate the plugin.
The next step is to upload the SearchWP plugin’s ZIP file to your site. Need a refresher on how to do that? Follow the how to install a WordPress plugin step-by-step tutorial.
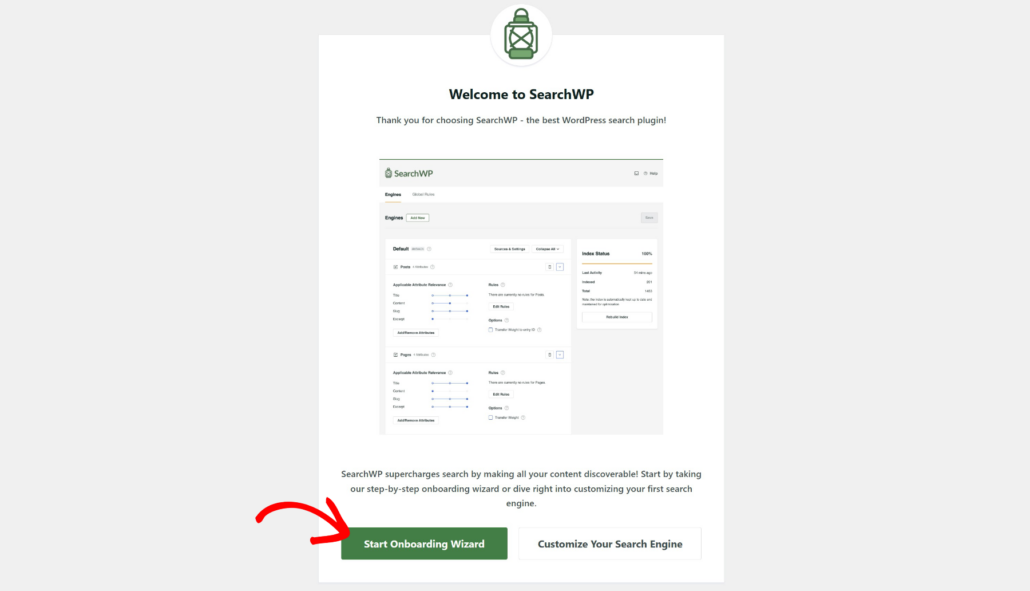
Upon activation, you’ll see the welcome screen and the setup wizard. Simply click the Start Onboarding Wizard button and follow the onscreen instructions.
After SearchWP is up and running, you can use it to customize the default search engine or create new ones.
First, you will need to go to SearchWP » Algorithm from the WordPress dashboard and click the ‘Sources & Settings’ button.
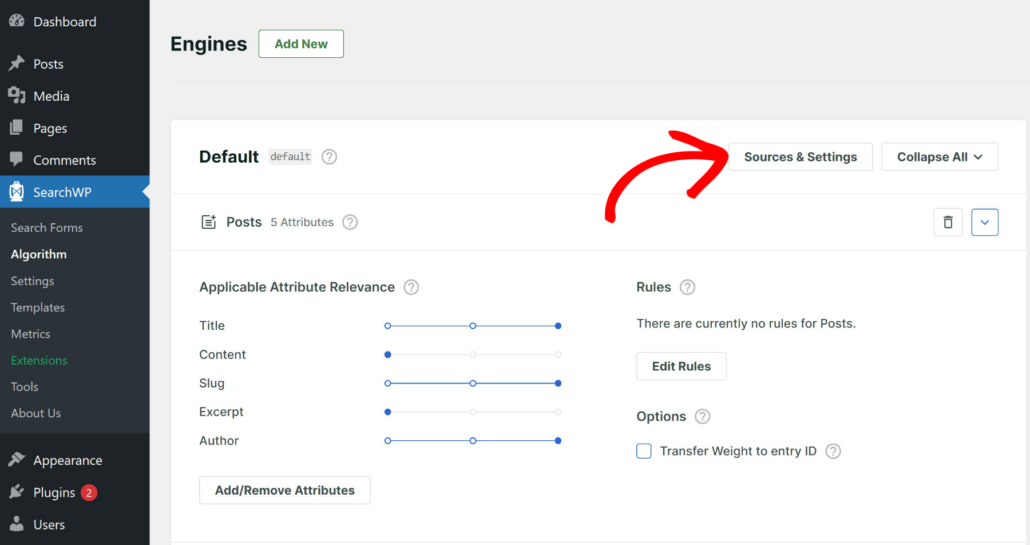
After that, you can select which sources to include in the search process.
SearchWP will use posts, pages, and media by default. However, if you have an eCommerce store, then you can include products or downloads as well.
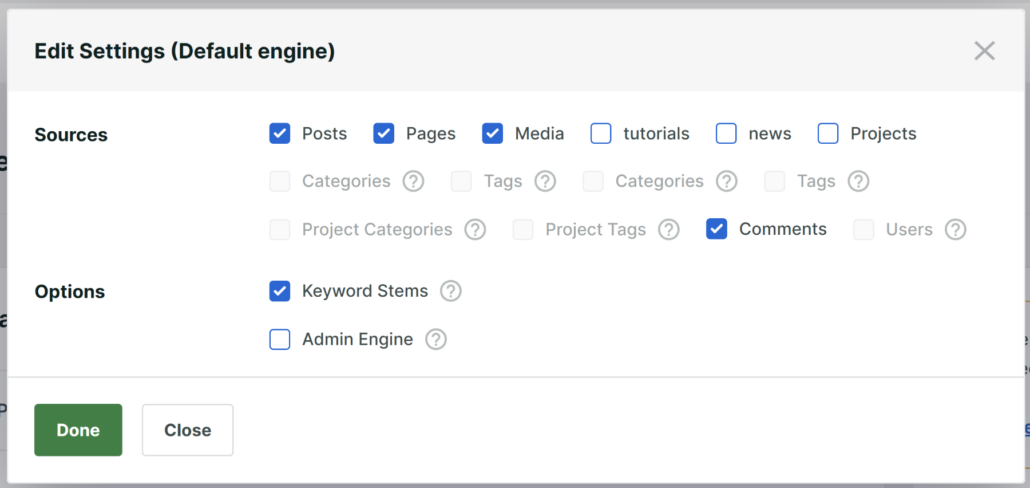
When you’re finished, click the Done button.
Next, you can also edit the attributes for each source that SearchWP should consider while searching.
For instance, let’s say you want to include custom fields and taxonomies for posts. Simply click the ‘Add/Remove Attributes’ button under Posts source.
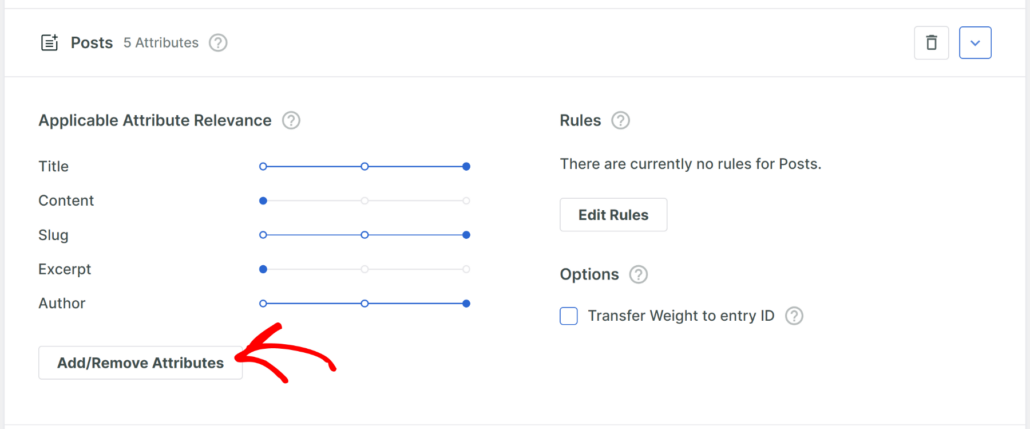
A new window will now open where you can manage the post attributes. SearchWP will automatically include title, content, slug, excerpt, and author as attributes.
However, you can also include any additional information that’s stored in custom fields or consider categories and tags in the search process.
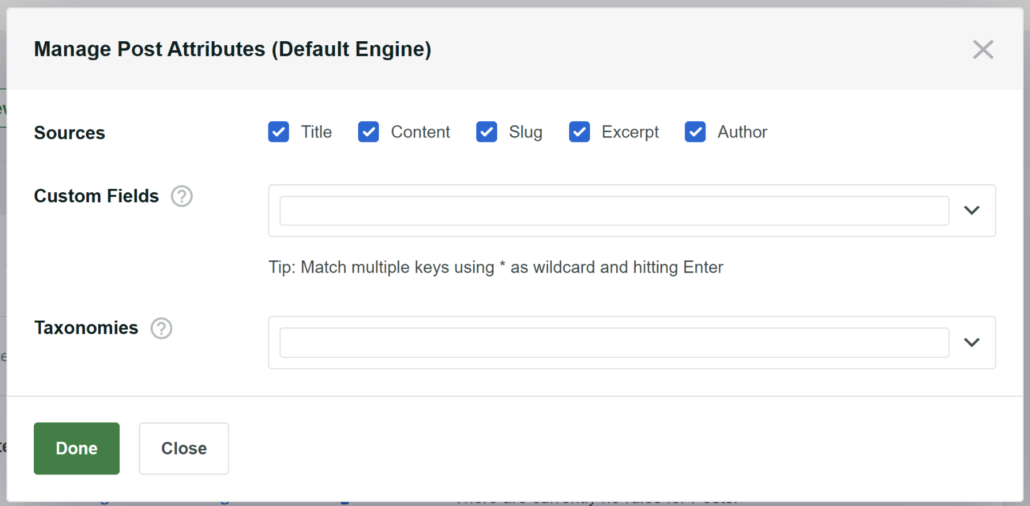
When you’re finished, simply click the ‘Done’ button.
Lastly, scroll to the top and click the Save button to store your changes.
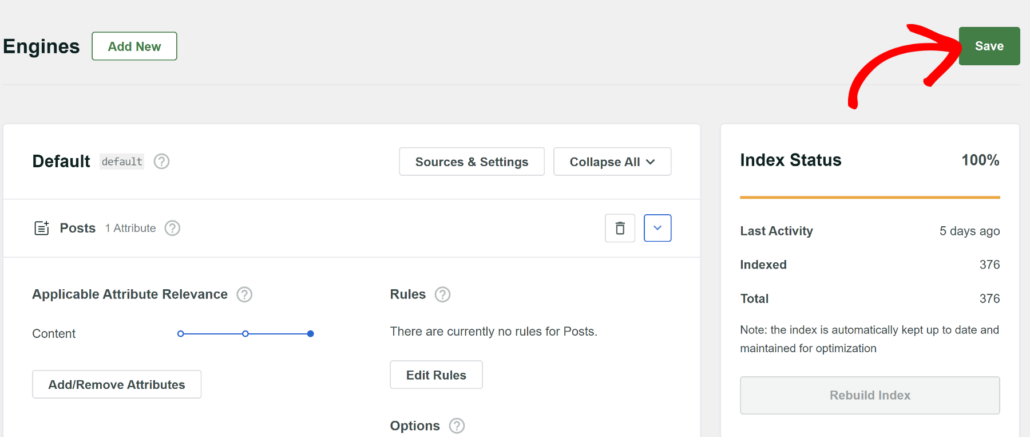
Now, the next step is to create a custom search form that you can place inside an article.
Step 2: Create a Custom Search Form
SearchWP lets you create unlimited custom search forms for your site and link them to different search engines.
For example, you can add a search box within content that only searches posts or place it between products and limit search to only goods on your eCommerce store.
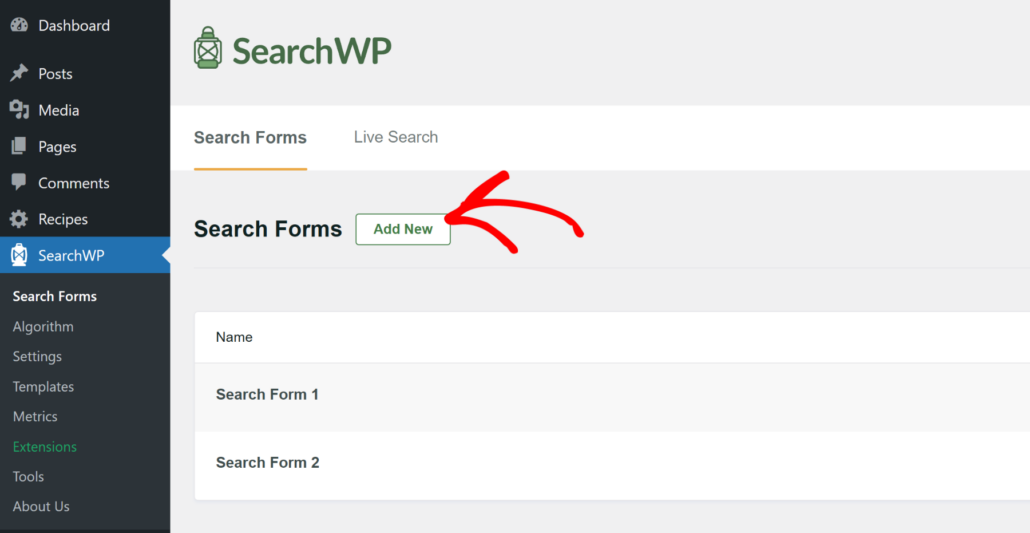
To start, simply go to SearchWP » Search Forms from the WordPress dashboard and click the ‘Add New’ button.
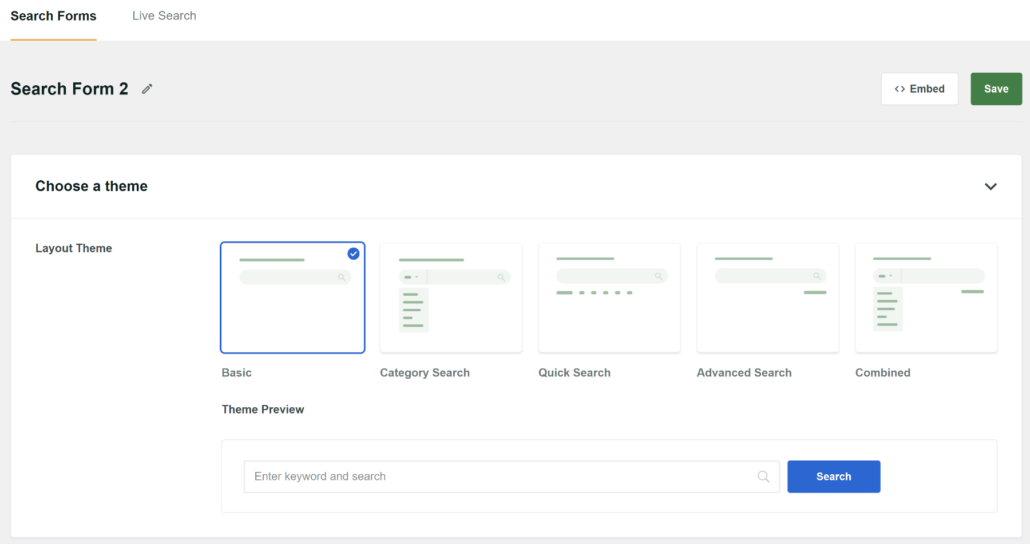
After that, you can enter a name for your form at the top and select a layout.
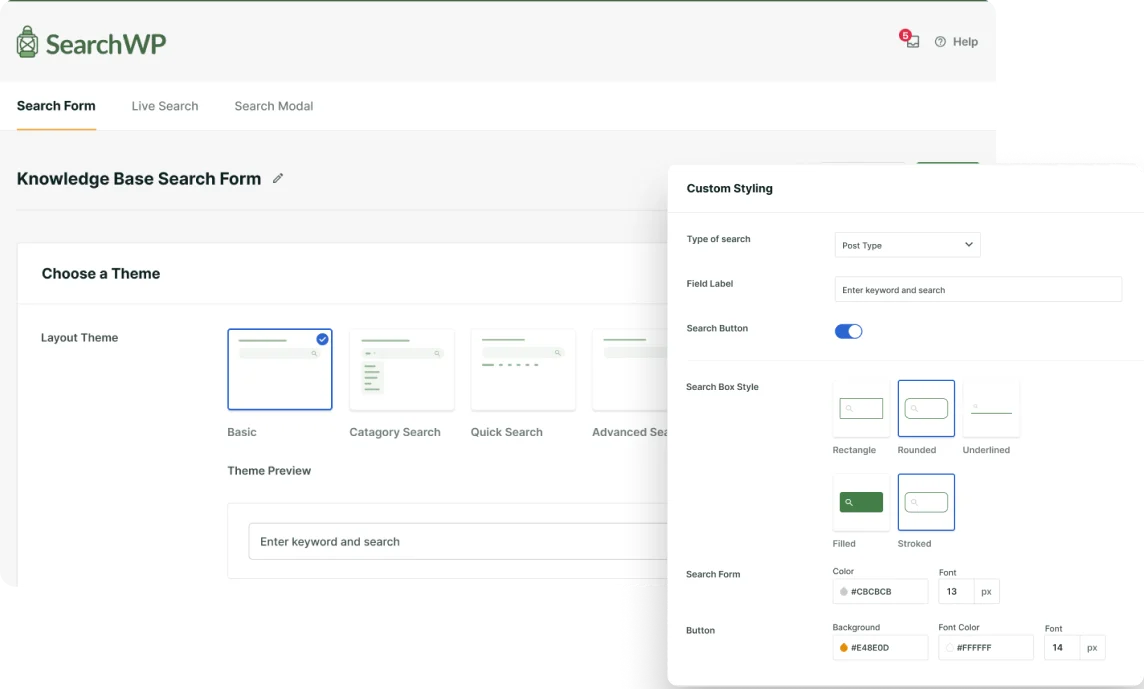
SearchWP offers 5 pre-built theme layouts to choose from. The best part is that you get to see a theme preview of the search form. This helps in selecting the style you want to use on your site.
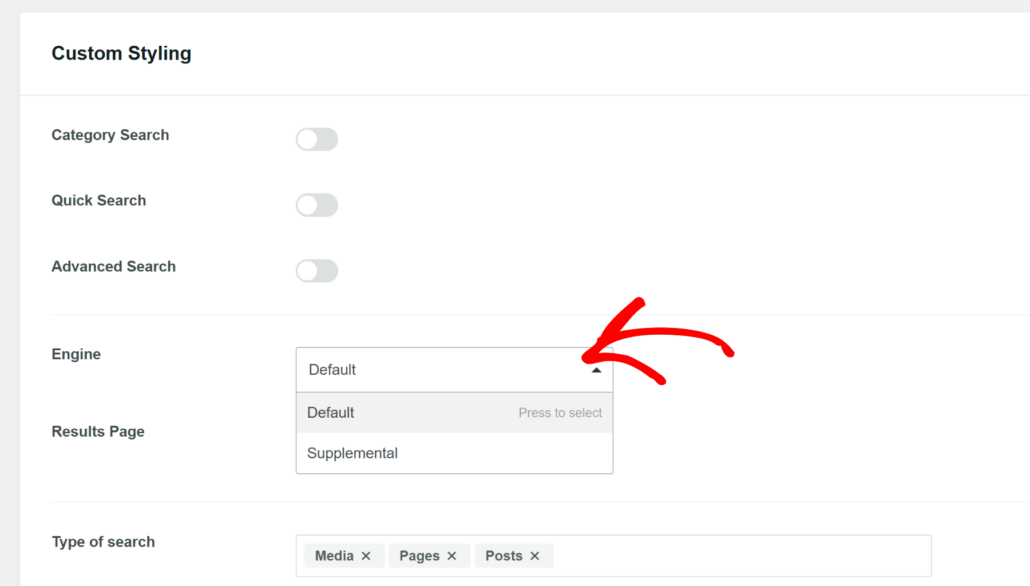
If you scroll down, then you’ll see more options to edit the form.
For instance, under the Custom Styling section, you can select the Engine to use for your form, choose a results page, and more.
You’ll also find more options to change the form and button styling.
For more details, please follow our guide on how to create a custom search form in WordPress.
Next, you can scroll to the top and click the ‘Save’ button.
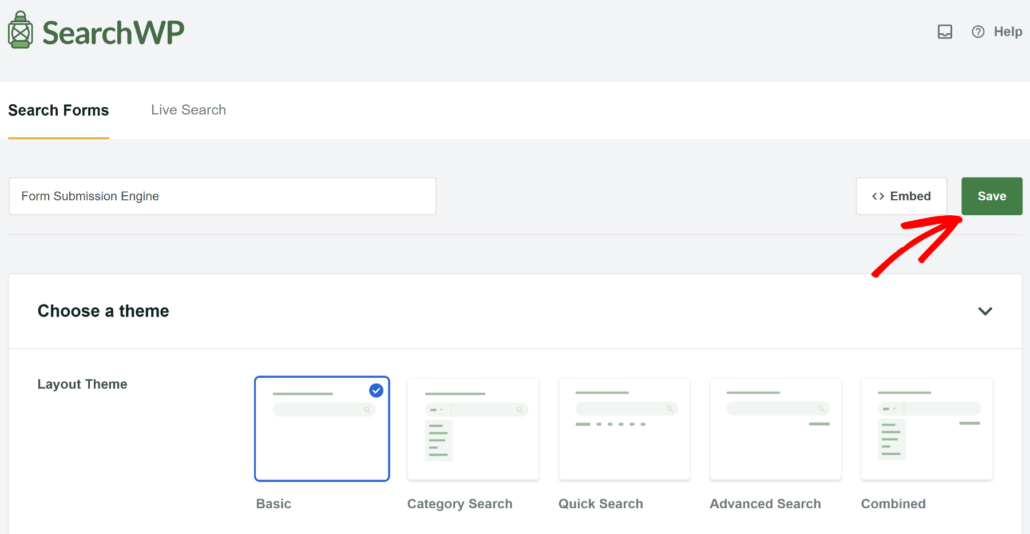
Once the form is save, go ahead and click the Embed button next to it.
This will open a small window where you can choose different methods to display your search form.
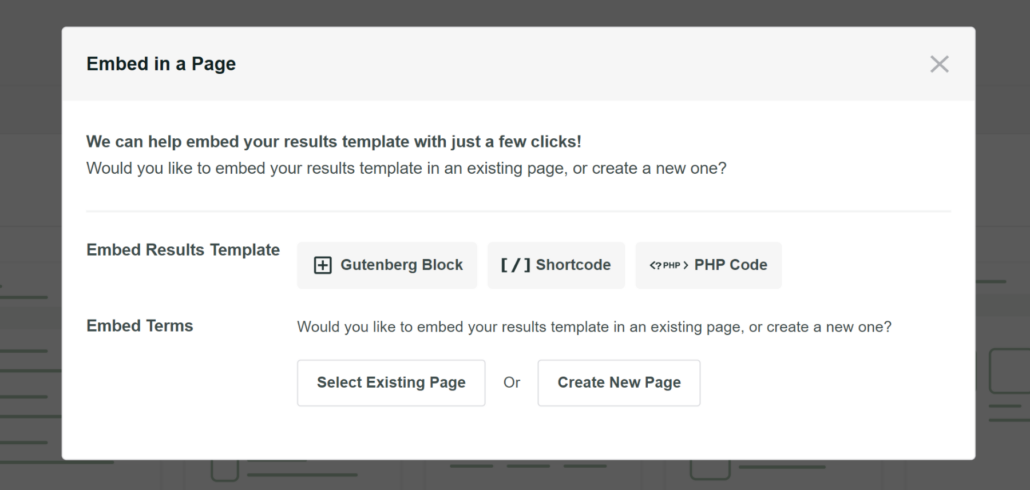
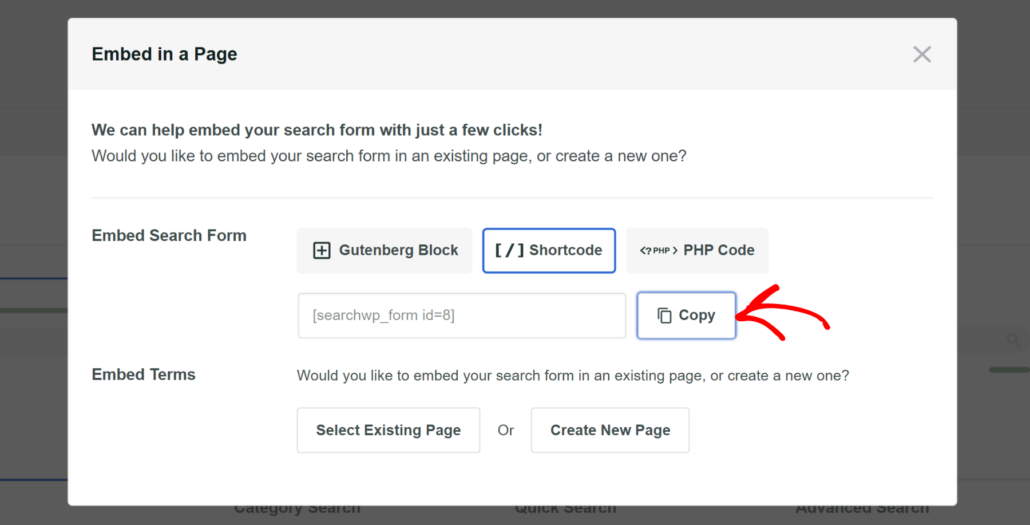
Simply select the ‘Shortcode’ as the Embed Results Template option.
From here, you can click the Copy button next to the shortcode.
Now, the next step is to add a search box to one of your posts using the shortcode.
Step 3: Add a Search Box to Your Post With a Shortcode
To get started, navigate to the Posts tab in your WordPress dashboard.
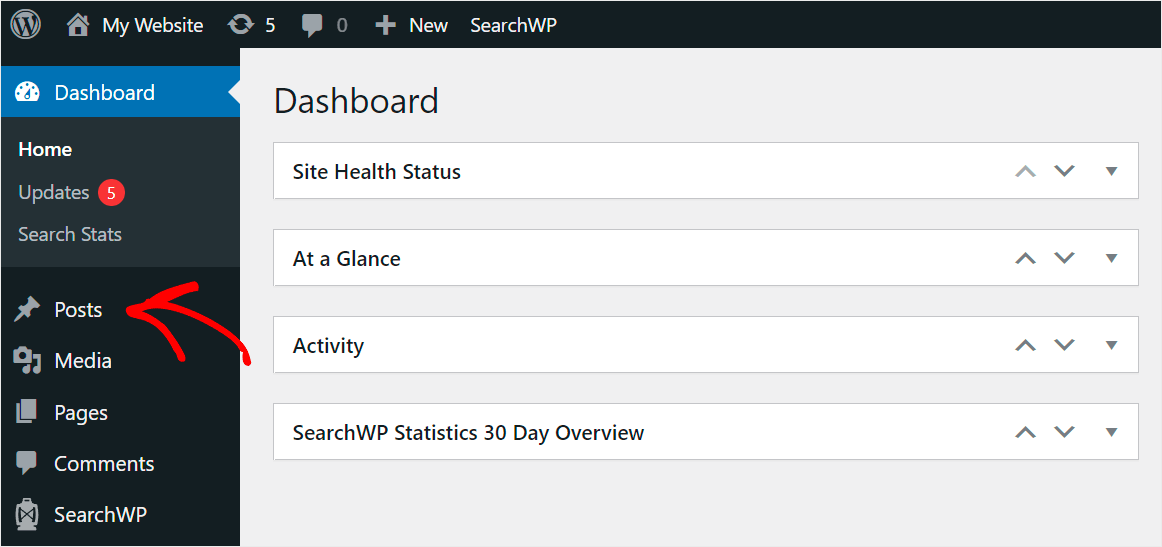
On the next screen, you’ll see all the posts that you have on your website.
Simply click on the post where you want to add a search box.

Once in the post editor, select the exact spot in the post where you want to add a search box.
After that, you’ll need to click the Plus (+) button next to it and then add a ‘Shortcode’ block.
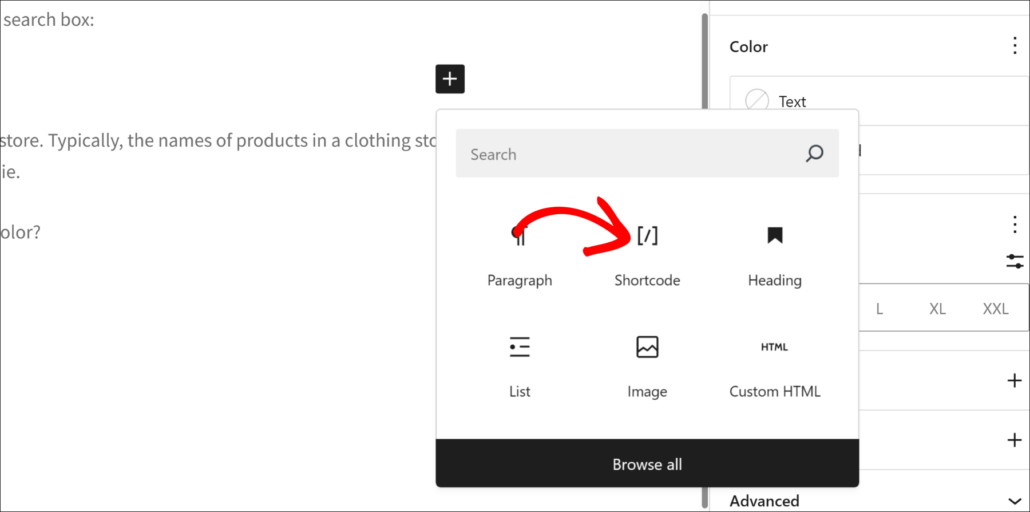
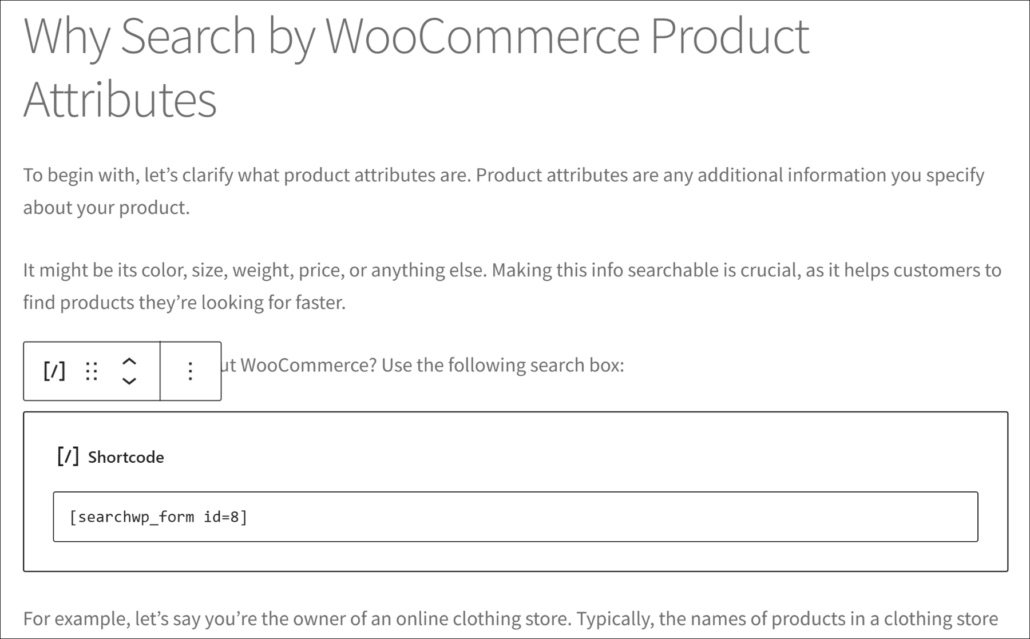
Next, you will see the shortcode block appear within your content.
Go ahead and enter the shortcode for the search form you copied earlier.
Alternatively, a better way to place a search box in WordPress blog post is by using the SearchWP Form block.
You can simply click the Plus (+) sign and add the ‘SearchWP Form’ block.
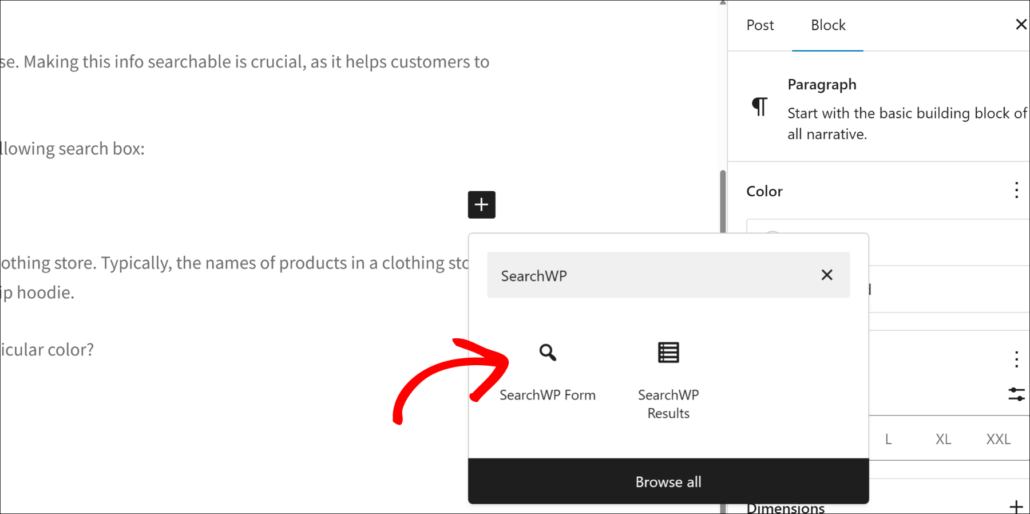
Next, you will see the SearchWP Form block added to your post.
From here, simply click the dropdown menu and select your search form.
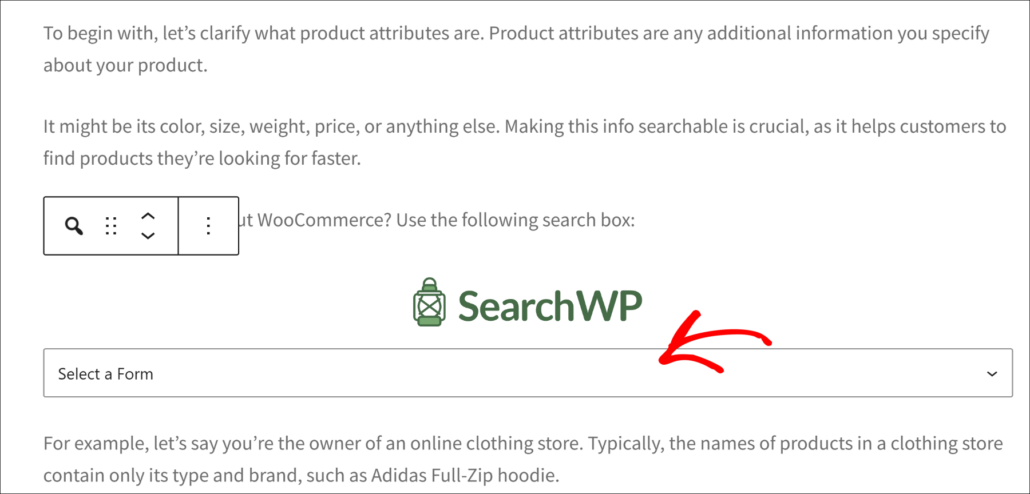
After you choose the right search form, you can publish or update your blog post.
That’s it. You’ve added a search bar to your post, so your visitors can discover more of your content.
Step 4: Check Out Your Post With a Search Box
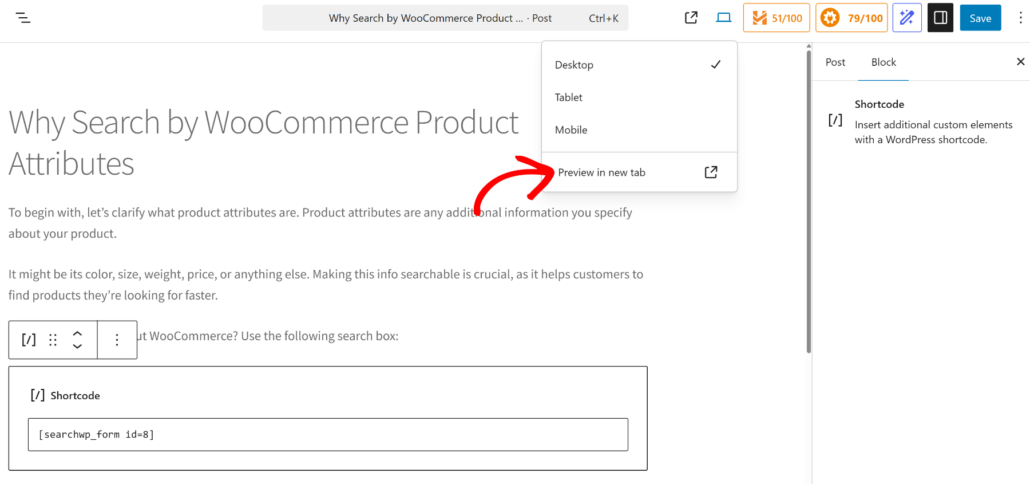
To go to your post, click Preview, and then select Preview in new tab option from the drop-down menu.
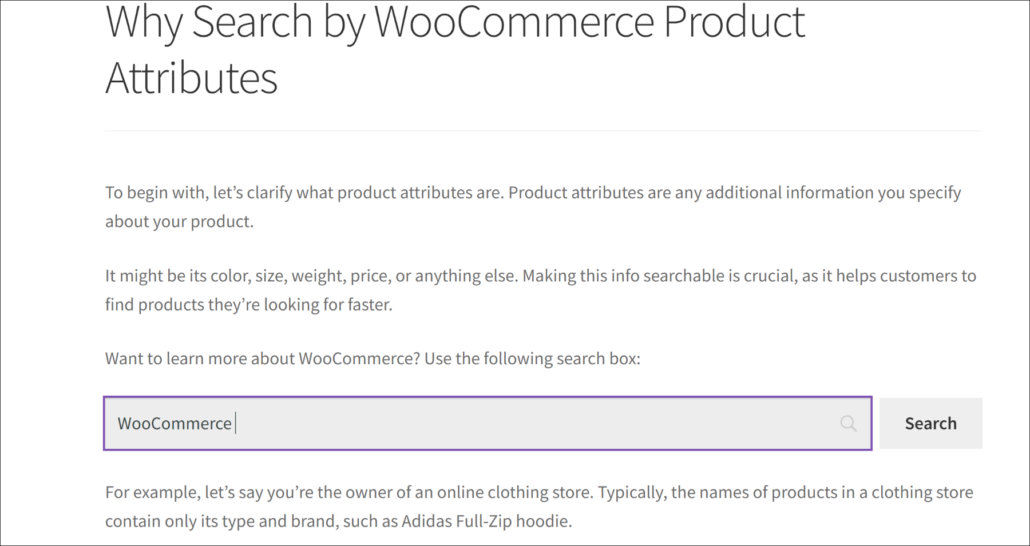
Here’s how the search bar looks within a post on our test site.
To test it, let’s try to search for “WooCommerce”.
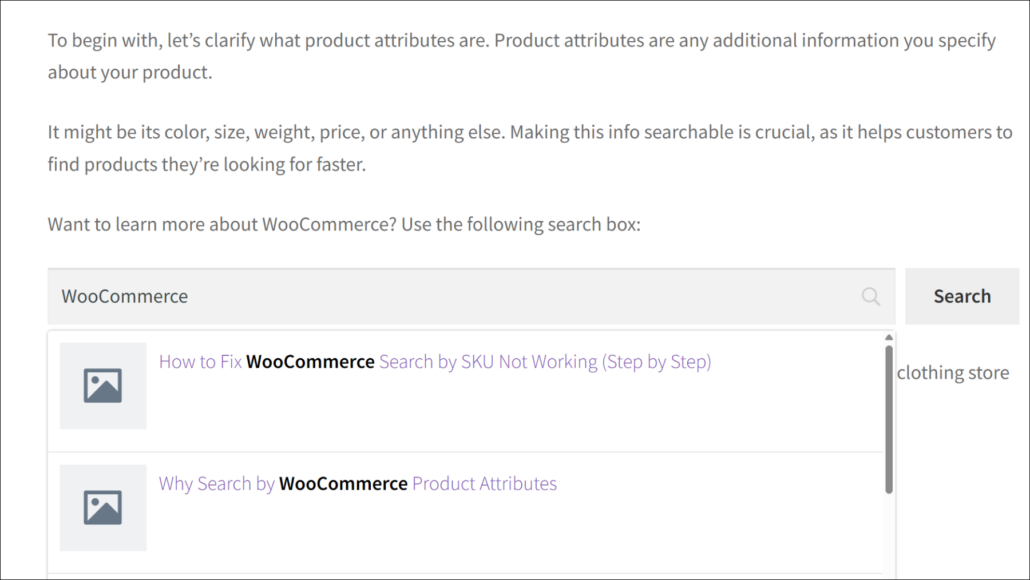
As you can see, search results for the “WooCommerce” search term appear right inside our post.
It’s helpful because it allows your visitors to search your website without getting distracted from reading your posts.
Pro Tip: You can use SearchWP Live Search extension to show search results in the dropdown as users type in the search term. To learn more, you can see our guide on how to add live autocomplete search to WordPress.
FAQs About Adding a Search Box in WordPress Posts
Here are some common questions about showing a search in WordPress posts using shortcodes.
1. Can I use SearchWP shortcodes without coding knowledge?
Yes, SearchWP shortcodes work without any coding experience. You simply copy and paste the code snippet in a Custom HTML block into your post content where you want the search box to appear. The plugin handles all the technical aspects automatically.
2. Will adding search boxes to my posts slow down my website?
SearchWP is designed to be lightweight and won’t significantly impact your site’s speed. The plugin uses efficient indexing methods and only loads search functionality when needed.
3. Does SearchWP work with all WordPress themes?
Yes, SearchWP is compatible with virtually all WordPress themes. The shortcode generates standard HTML that works across different theme designs. If you encounter any styling issues, they can usually be resolved with minor CSS adjustments.
We hope this article helped you learn how to add a search box to a WordPress post with a shortcode. You may also want to see our guide on how to exclude category from WordPress search and how to limit search to only posts in WordPress.
If you’re ready to add a search box to posts with a shortcode on your WordPress site, you can grab your copy of SearchWP here.
