Installation
Installing WPFilters follows the same straightforward process as any other WordPress plugin. When you purchase a license for WPFilters, you will receive a download link to access the latest version of the plugin. You can install WPFilters by either uploading the ZIP file through the WordPress admin interface or by uploading the files via FTP and then activating the plugin through your WordPress dashboard.
To upload the ZIP file through your WordPress admin, navigate to Plugins > Add New in the WordPress Administration Area and click the “Upload Plugin” button at the top of the page. Select the WPFilters ZIP file from your computer and click “Install Now” to begin the installation process.
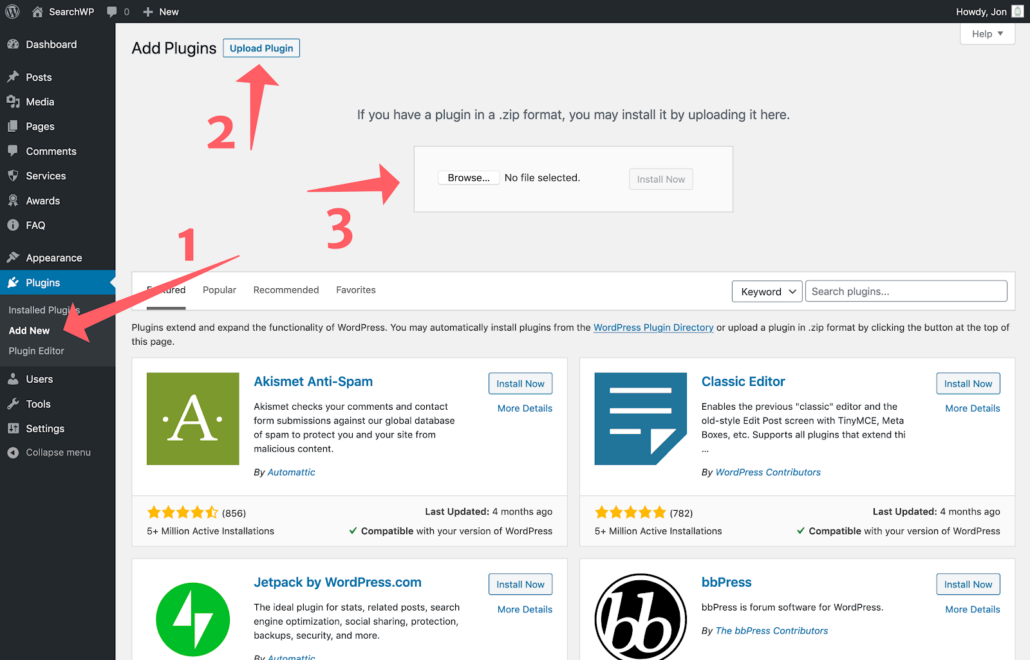
Once the installation is complete, you can activate WPFilters by locating it in your plugins list and clicking the “Activate” link. The plugin will then be active and ready for configuration on your WordPress site.
Getting Started

Upon plugin activation, you’ll be automatically redirected to WPFilters’s Get Started screen, which guides you through the initial setup process. This streamlined onboarding experience helps you configure the plugin quickly and ensures you have the essential filter elements in place from the start.

On the first screen, you’ll have the option to select pre-configured filter elements that best represent the content types on your site. These pre-built filters are designed to work with common WordPress post types and taxonomies, allowing you to get started quickly without manual configuration.
In the next step, you’ll be prompted to enter your License Key to activate the plugin on your site. This activation connects your installation to your WPFilters account and enables access to updates, support, and premium features included with your license.
In the final step, click “Save and Continue” to save your initial settings. You’ll then be redirected to the Filter Elements page, where you can review the filters that were created during setup. From this central management area, you can create additional custom filters or modify the existing ones to better align with your specific site content and filtering requirements.
Adding WPFilters Elements to Your Pages
For WordPress sites using the Block Editor, adding WPFilters to your pages is a simple block-based process that integrates seamlessly with WordPress’s native content display features.
First, create a new page or edit an existing page where you want to display filtered content. Add a Query Loop block to the page, which will display a list of posts or custom post types. The Query Loop block is WordPress’s built-in solution for displaying dynamic content and works perfectly with WPFilters to create filterable content displays.
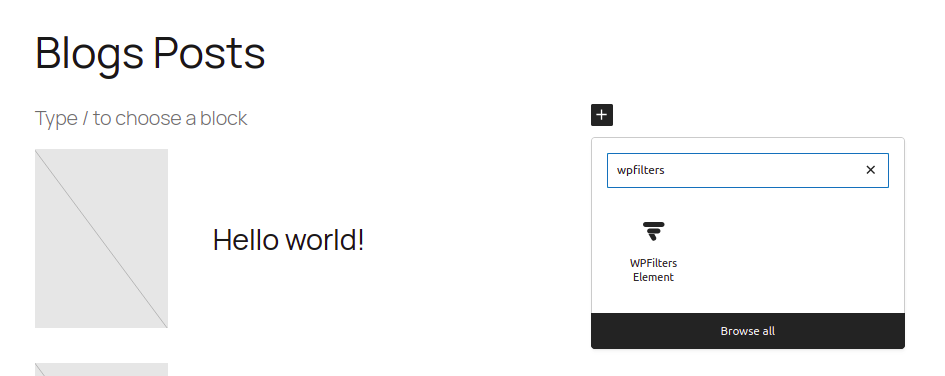
Next, add the WPFilters block to your page by searching for “WP Filters” in the block inserter. You can access the block inserter by clicking the plus (+) icon in the editor toolbar.
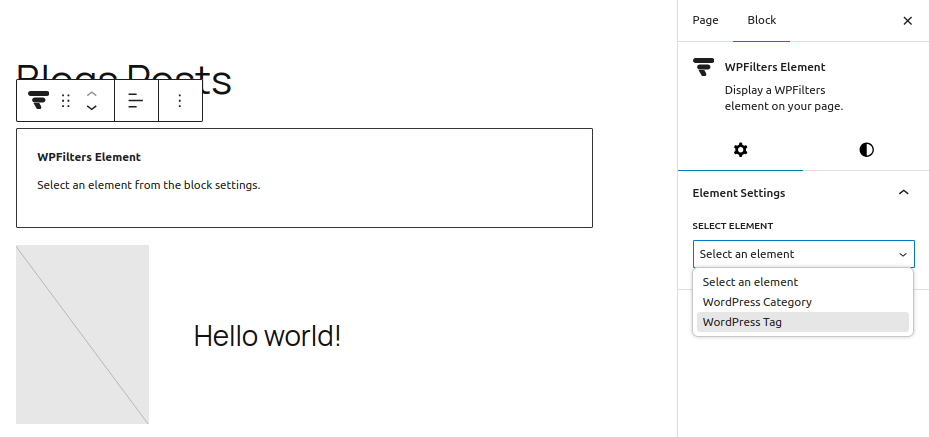
Once the WPFilters block has been added to your page, you can configure it using the block settings panel in the page sidebar. Select the appropriate filter element from the available options to determine which filtering controls will be displayed to your visitors. The selected filters will automatically work with the Query Loop block to filter the displayed posts based on user selections.
Note: Filters can also be added to a sidebar as widgets or blocks. When used this way, they will automatically interact with other primary page queries such as WooCommerce Shop listings, Blog post archives, or any other content rendered using a WP_Query loop.
That’s it! Your site is now ready to provide dynamic filtering functionality to your visitors. Users will be able to interact with the filter controls to narrow down the displayed content based on their preferences, creating a more engaging and user-friendly browsing experience.
