Are you wondering how to create a custom WordPress theme?
This can be tricky for beginners, as it usually requires coding experience and deep knowledge of WordPress.
In this article, we’ll show how to create a custom theme in a few simple steps with no coding needed.
Let’s get started!
What is a WordPress Theme?
To begin with, let’s clarify what exactly WordPress theme is and what it consists of.
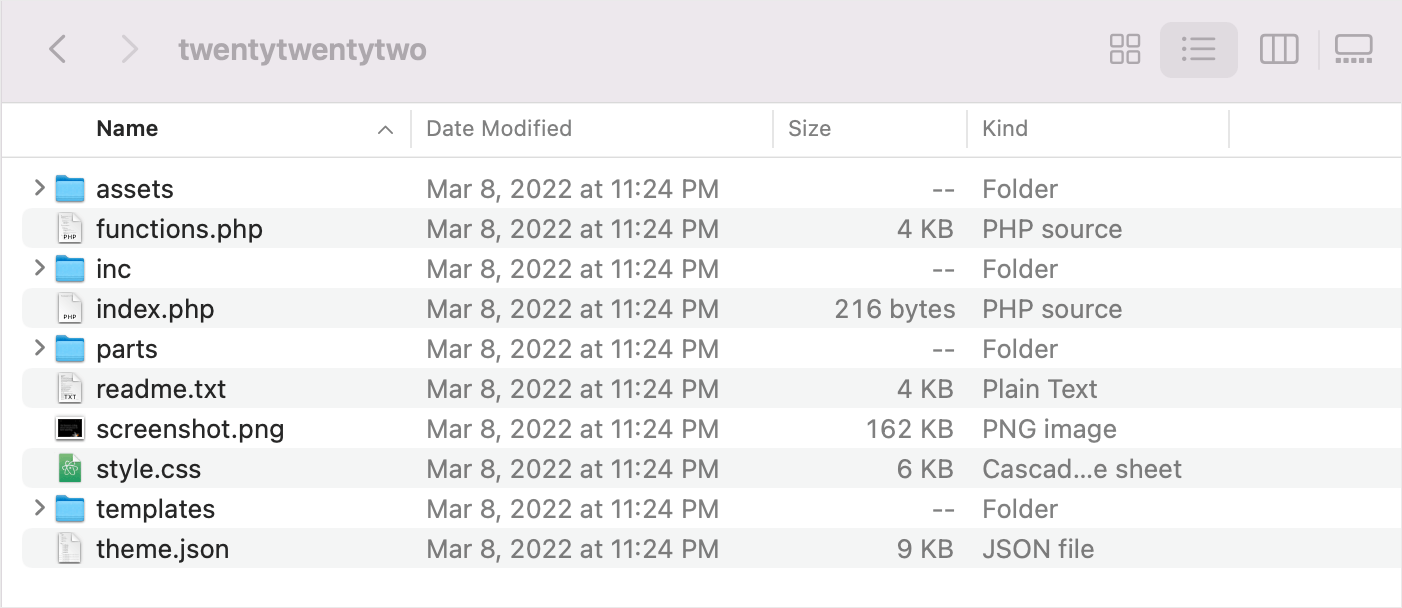
A WordPress theme is a set of files placed in a common folder in the WordPress Themes directory on your hosting.
This set includes page templates written in HTML, PHP, and JavaScript languages, CSS style sheets, and graphics.
Here is an example of what it looks like on a server:
Together, these files define the layout and appearance of your WordPress site.
There are 2 typical ways to create a custom theme from scratch:
- Do it yourself. It requires extensive experience in web development and a lot of free time.
- Hire a developer or web agency. The average price ranges from a couple of hundred to a couple of thousand dollars.
For obvious reasons, both of these methods are hardly acceptable to beginners.
Thankfully, there is a third way to create a custom theme without breaking the bank or being a coding guru.
This is possible through the use of the SeedProd plugin. Let’s take a look at it in detail and find out why it’s so popular among WordPress users.
Why Use SeedProd to Create a Custom WordPress Theme?
SeedProd is the #1 website builder plugin for WordPress, with over a million active installs.
This is a real game-changer, as it allows you to create top-notch custom WordPress themes in minutes, no coding required.
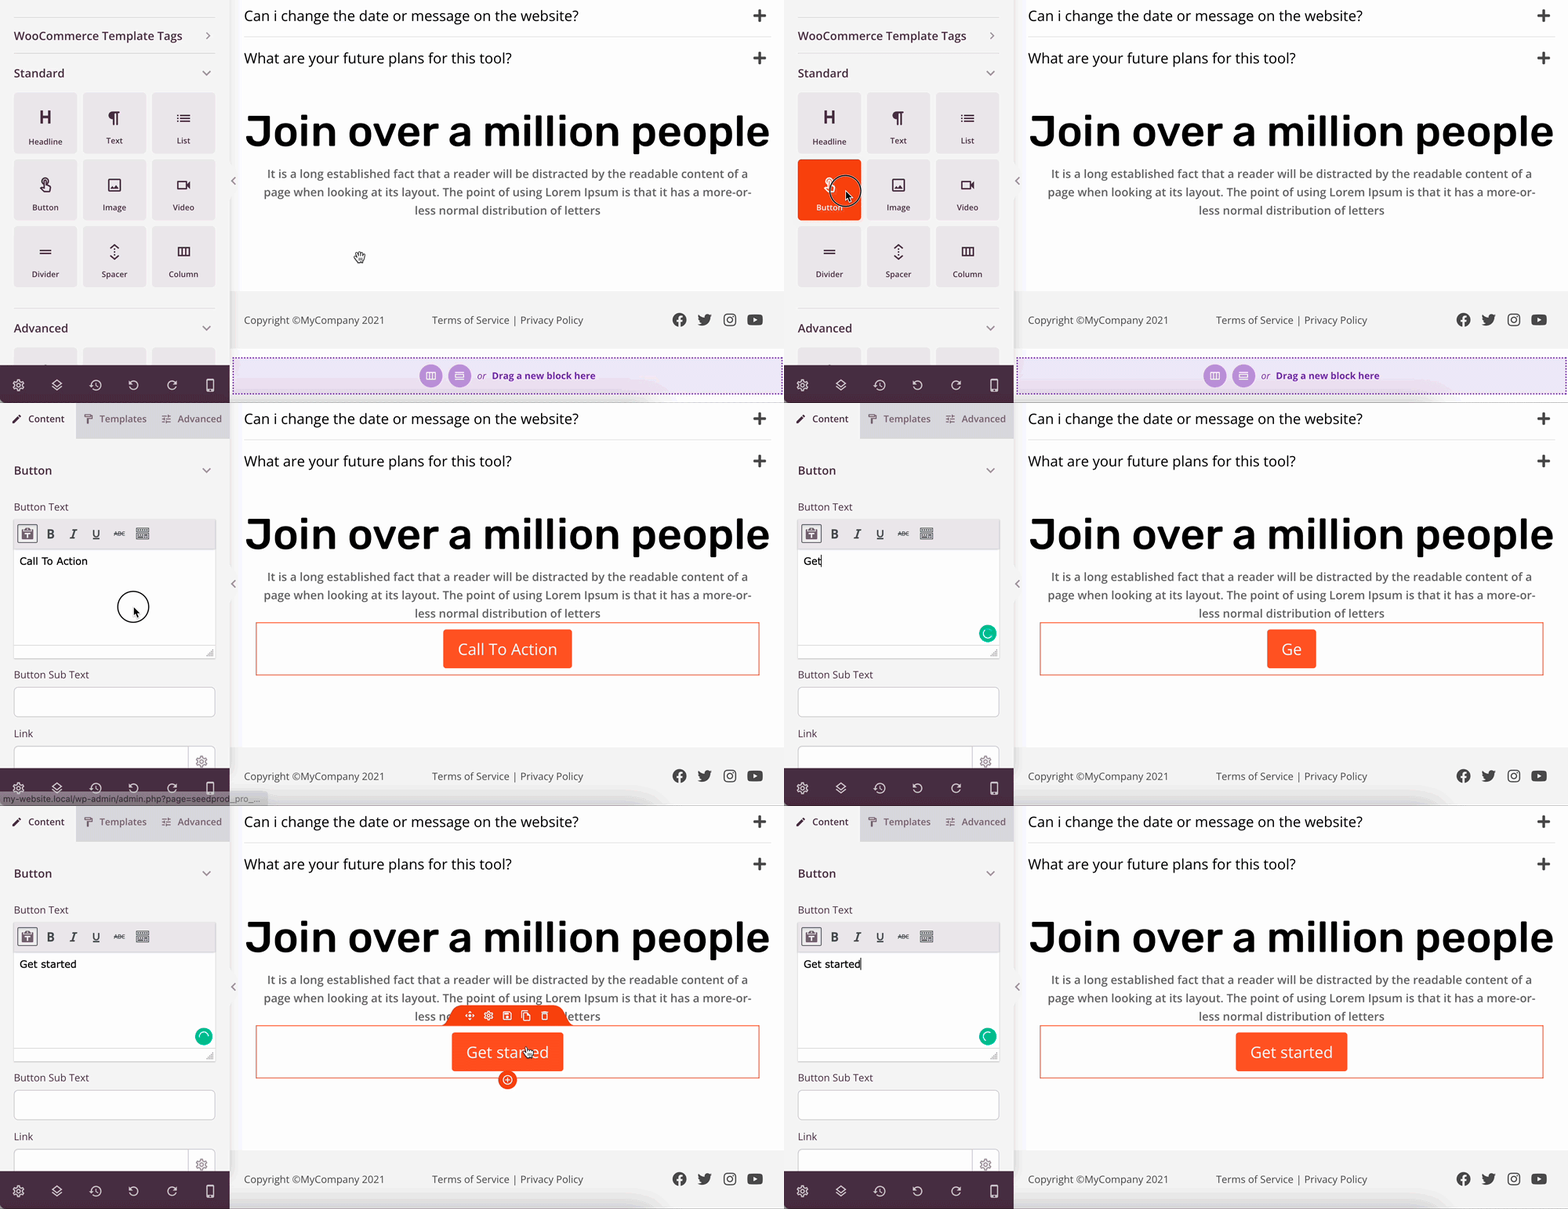
The secret ingredient is the handy and powerful SeedProd visual editor. Using it, you can easily drag and drop the necessary site elements, blocks, or even whole sections to your page.
Here is a short preview of how it works:
SeedProd automatically optimizes pages and themes for fast loading. It allows you to ensure the best user experience for your visitors.
They are also responsive and mobile-ready by default, so you don’t have to worry about how your site looks on different devices.
Along with that, SeedProd comes with powerful features like:
- Hundreds of ready-made page templates. Don’t feel inspired to create a theme from scratch? You can use one of 150+ pre-built templates and easily customize them to meet your needs.
- WooCommerce integration. Selling products online? SeedProd is fully compatible with WooCommerce, so you can create modern coming soon and checkout pages, product grids, and more.
- E-mail subscribers management dashboard. Do you have an email newsletter? SeedProd allows you to collect emails and track the status of your subscribers on a handy dashboard.
- SEO-optimized code. Worried about code clarity? The code of themes and pages you create with SeedProd is SEO-friendly and meets all search engine requirements.
Plus, SeedProd has an awesome and responsive support team.
Even though this plugin is super easy to use, if you come up with any questions, they’re always ready to come to the rescue.
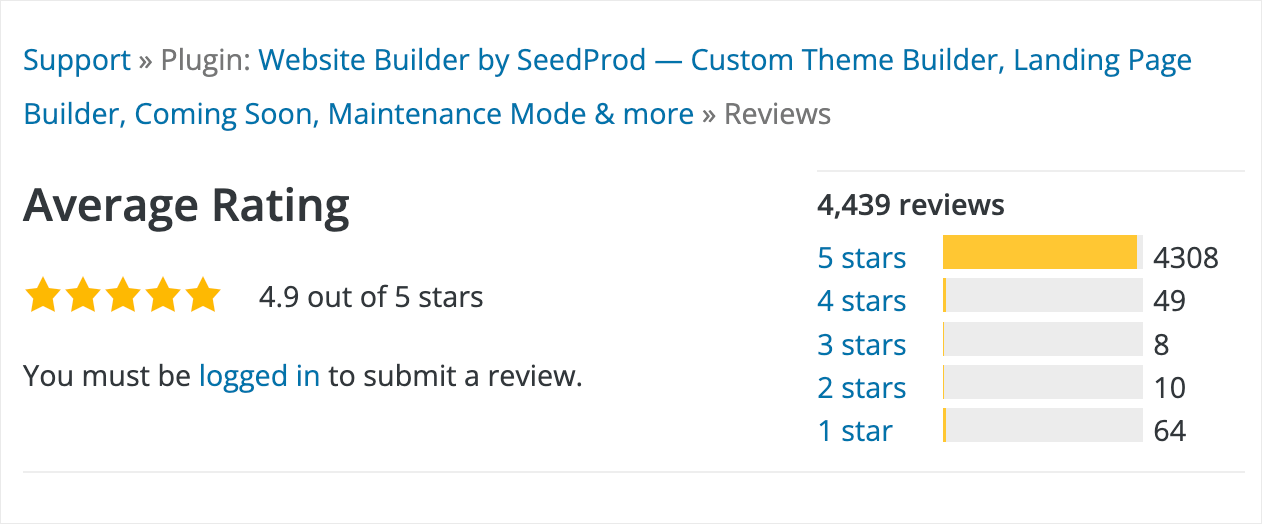
But numbers speak louder than words. SeedProd has over 4,000 reviews with an average rating of 4.9 out of 5 stars.
The feedback from excited users leaves no chance to doubt that this rating is well deserved.
Here is what people are saying about their experience with SeedProd:
Now that you know why using SeedProd is the best way to create a custom theme for beginners, let’s see how you can do that.
How to Create a Custom WordPress Theme
This detailed tutorial has 6 easy steps. Follow them to create a beautiful custom WordPress theme without touching a single line of code.
Here is a table of contents to help you navigate:
- Step 1: Install and Activate the SeedProd Plugin
- Step 2: Select a Pre-built WordPress Theme
- Step 3: Customize Your WordPress Theme Parts
- Step 4: Customize Your Theme’s Global CSS (No Code)
- Step 5: Connect to Your Email Marketing Service
- Step 6: Publish Your Custom WordPress Theme
Step 1: Install and Activate the SeedProd Plugin
To get started, grab your copy of SeedProd here.
Once done, you’ll receive an email that contains your login details and a link to access your SeedProd account.
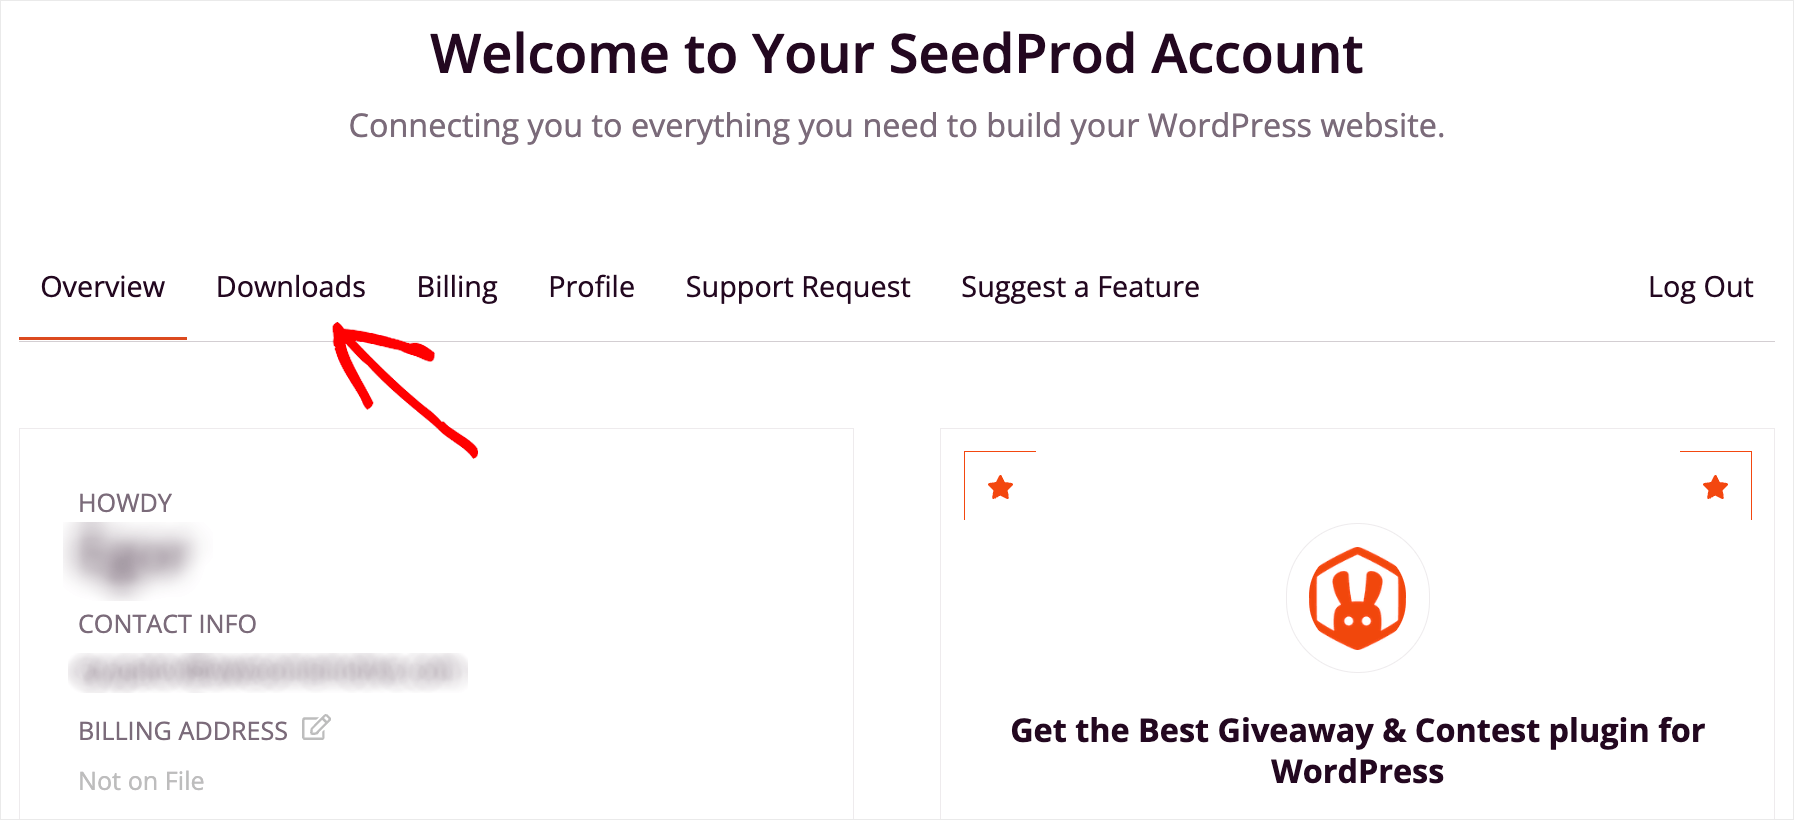
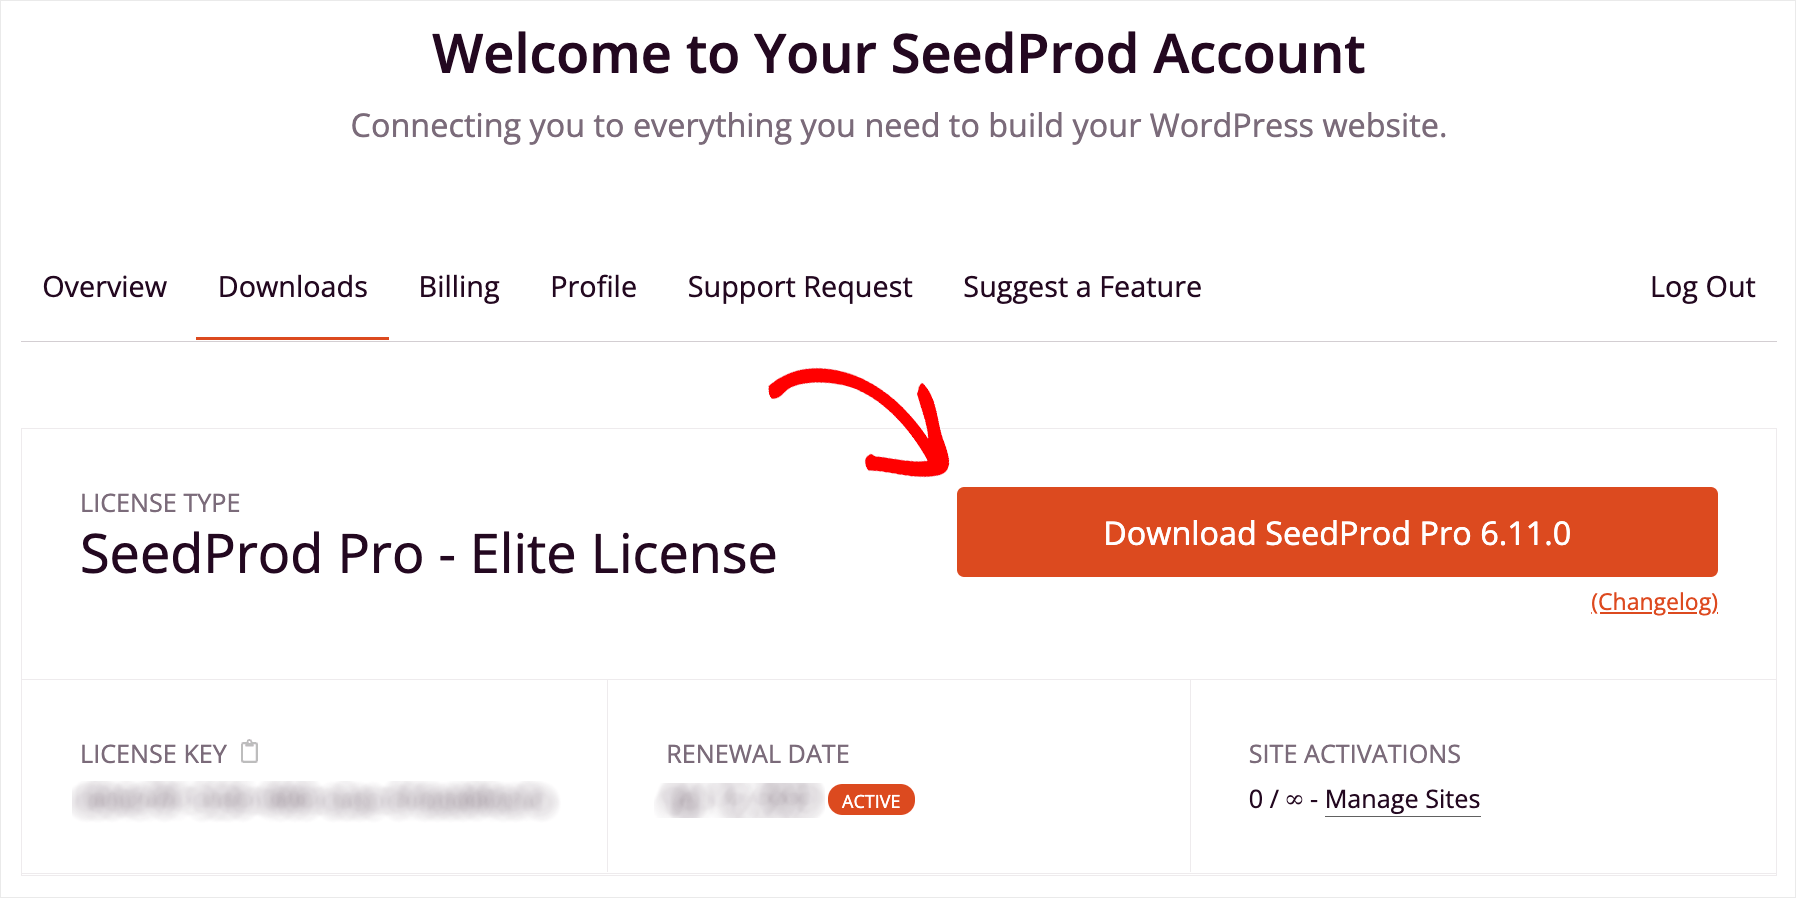
Follow this link, log into your SeedProd account and go over to the Downloads tab.
Then, click the Download SeedProd button to start downloading the plugin’s ZIP file to your computer.
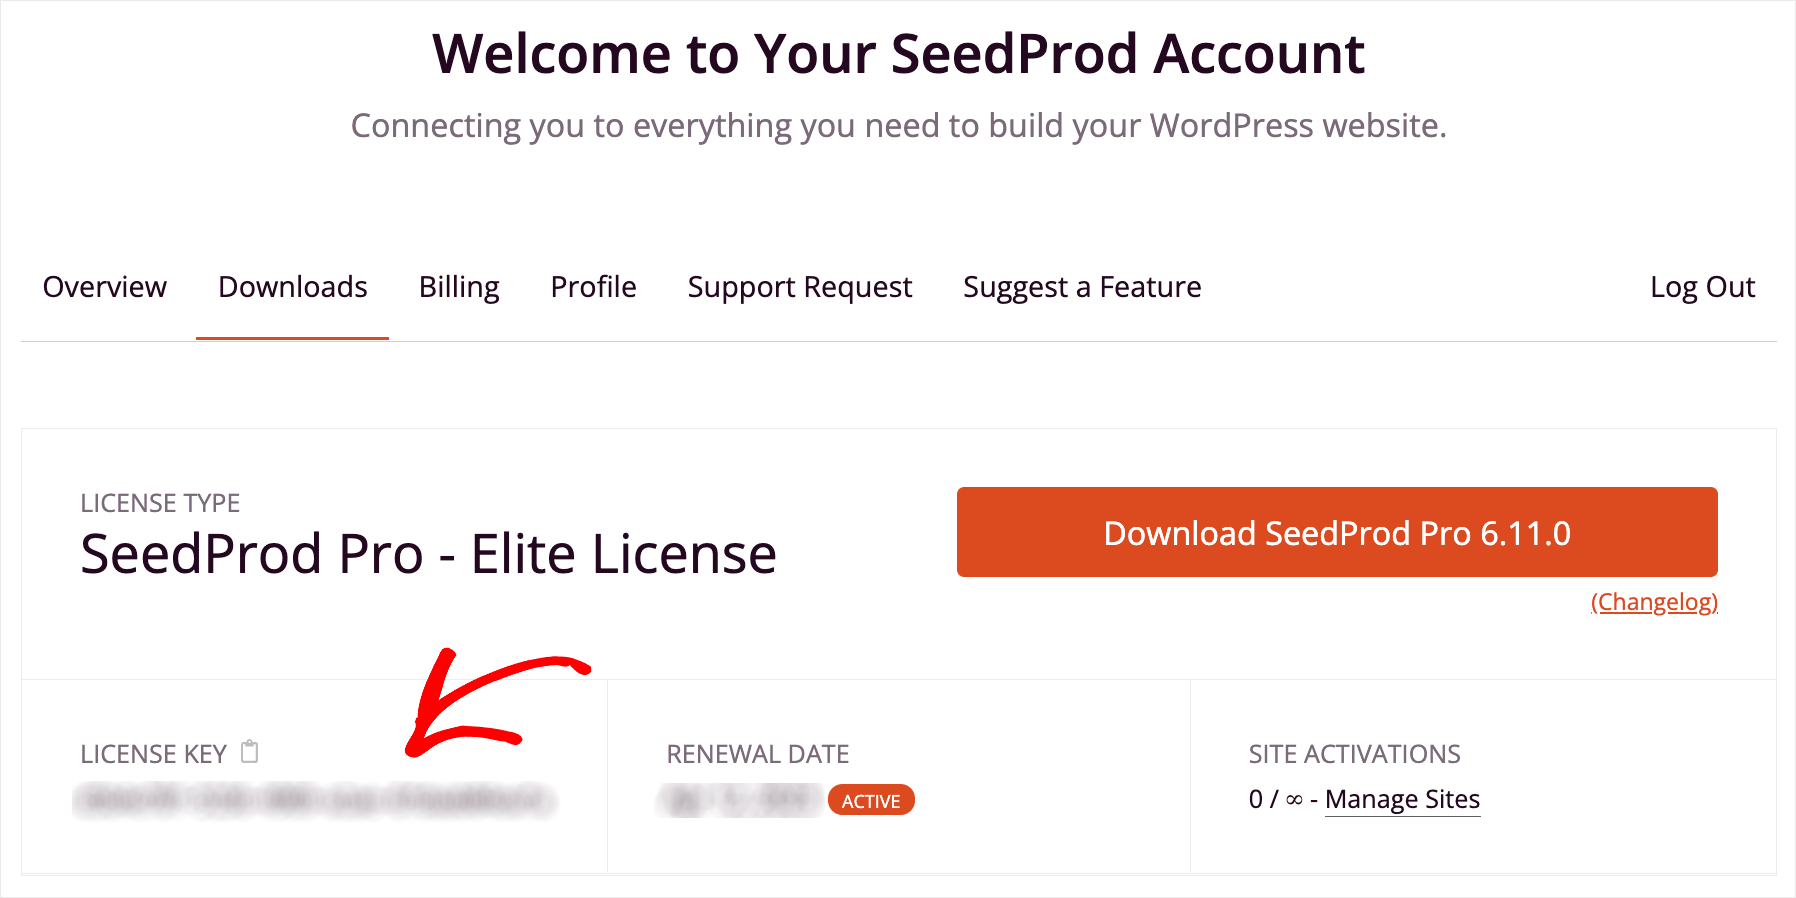
When you’ve finished downloading, copy your license key on the same tab. You’ll need it further to activate your copy of SeedProd.
The next step is to upload the downloaded ZIP file to your site and install the plugin.
If you need help, you can follow along with this tutorial on how to install a WordPress plugin.
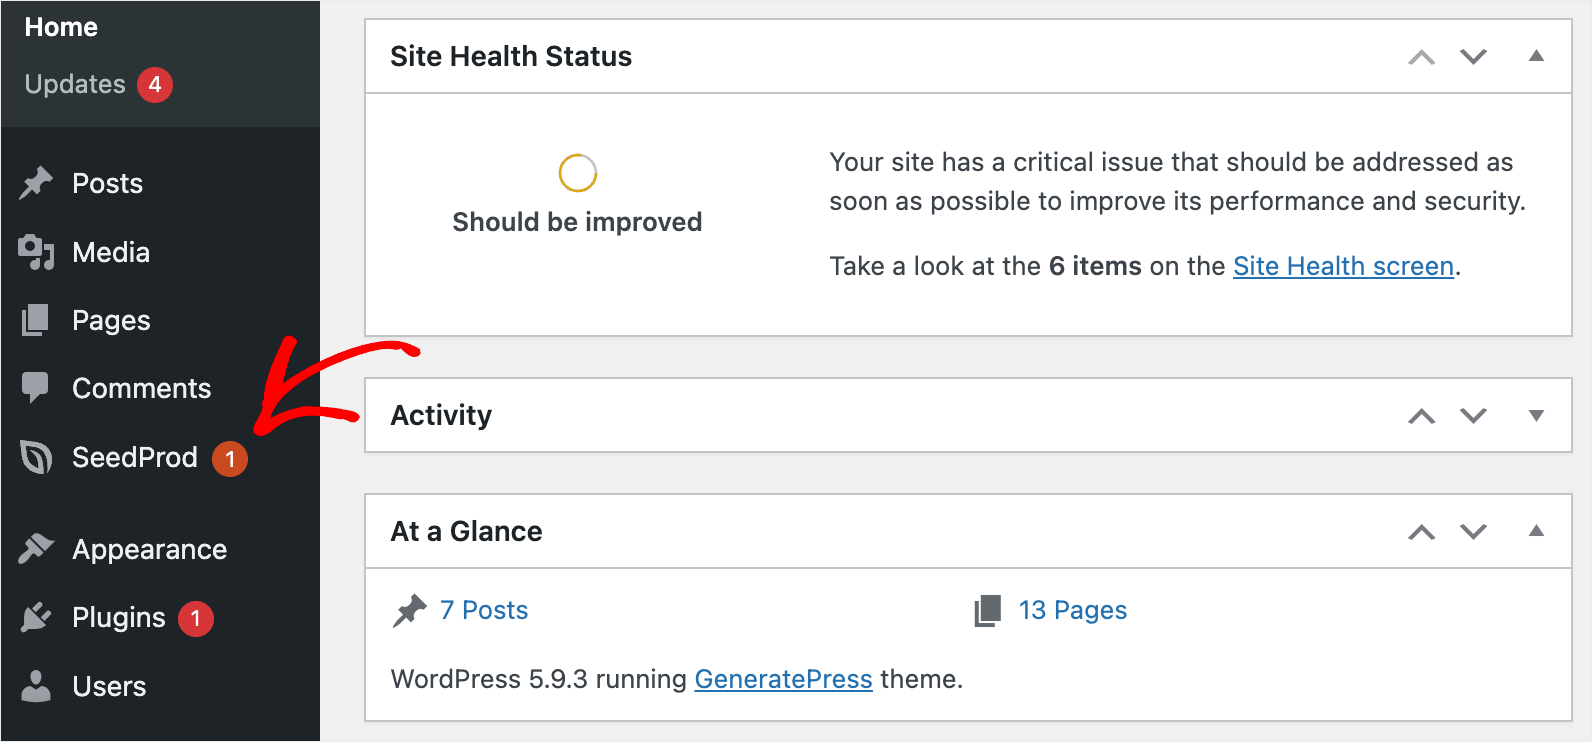
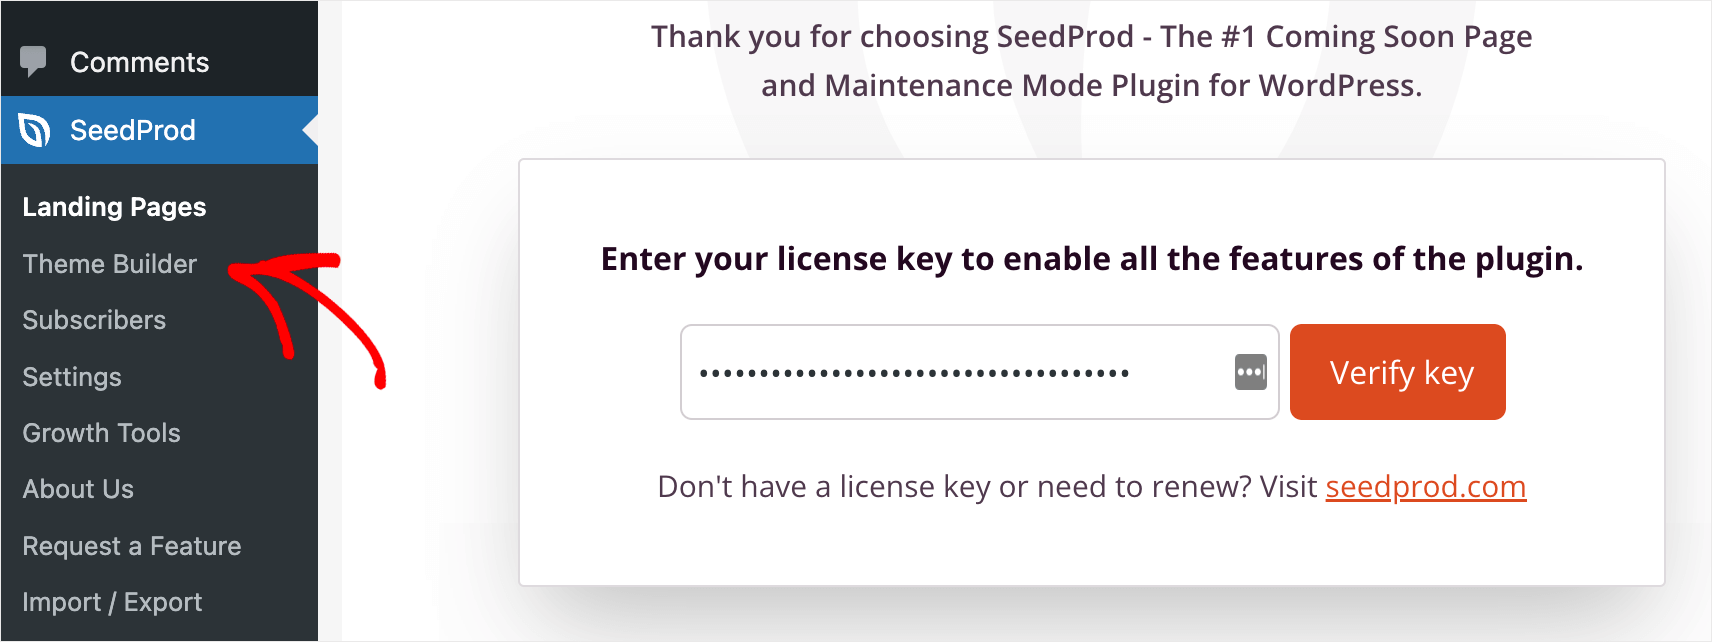
After you’ve installed the plugin, go to your WordPress dashboard and click on the SeedProd button on the left panel.
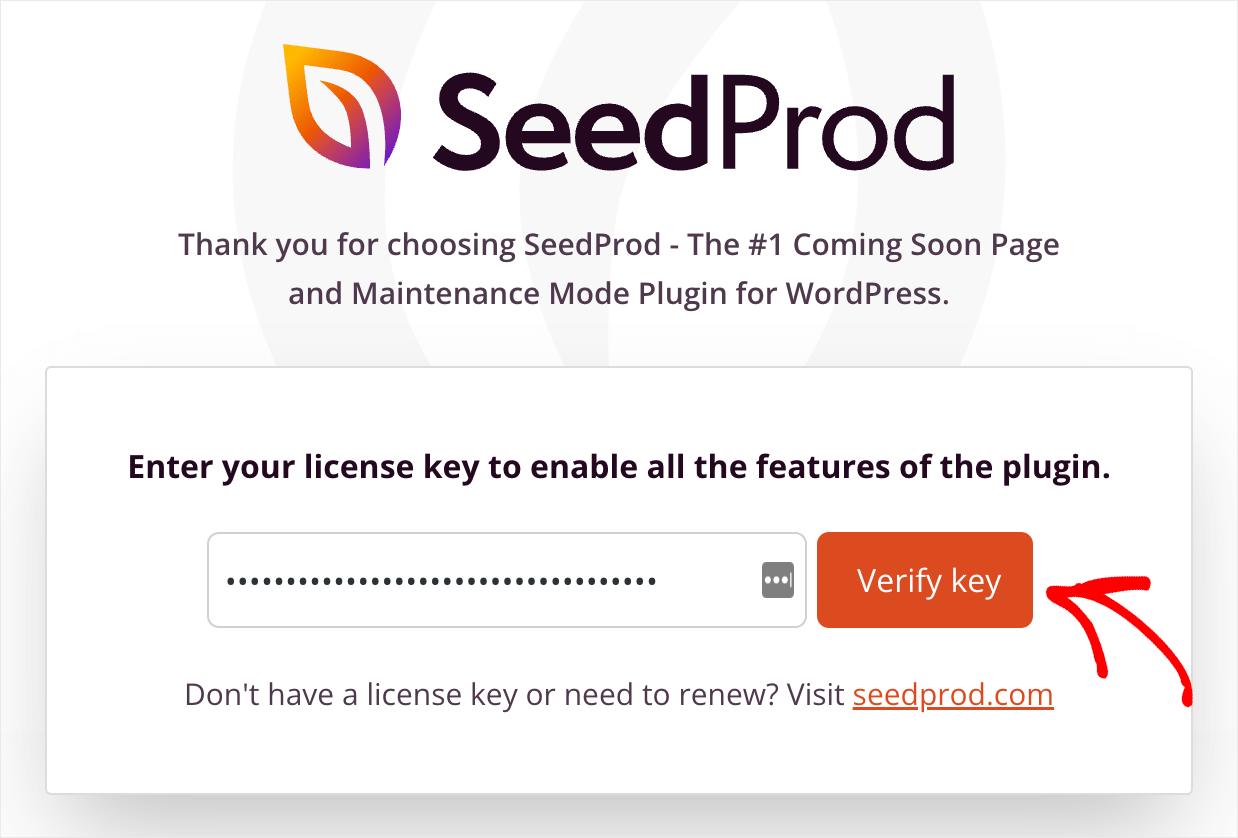
Then, paste your license key into the license field and press the Verify key button.
Once you activate your copy of SeedProd, you’re ready to start creating your custom WordPress theme.
Step 2: Select a Pre-built WordPress Theme
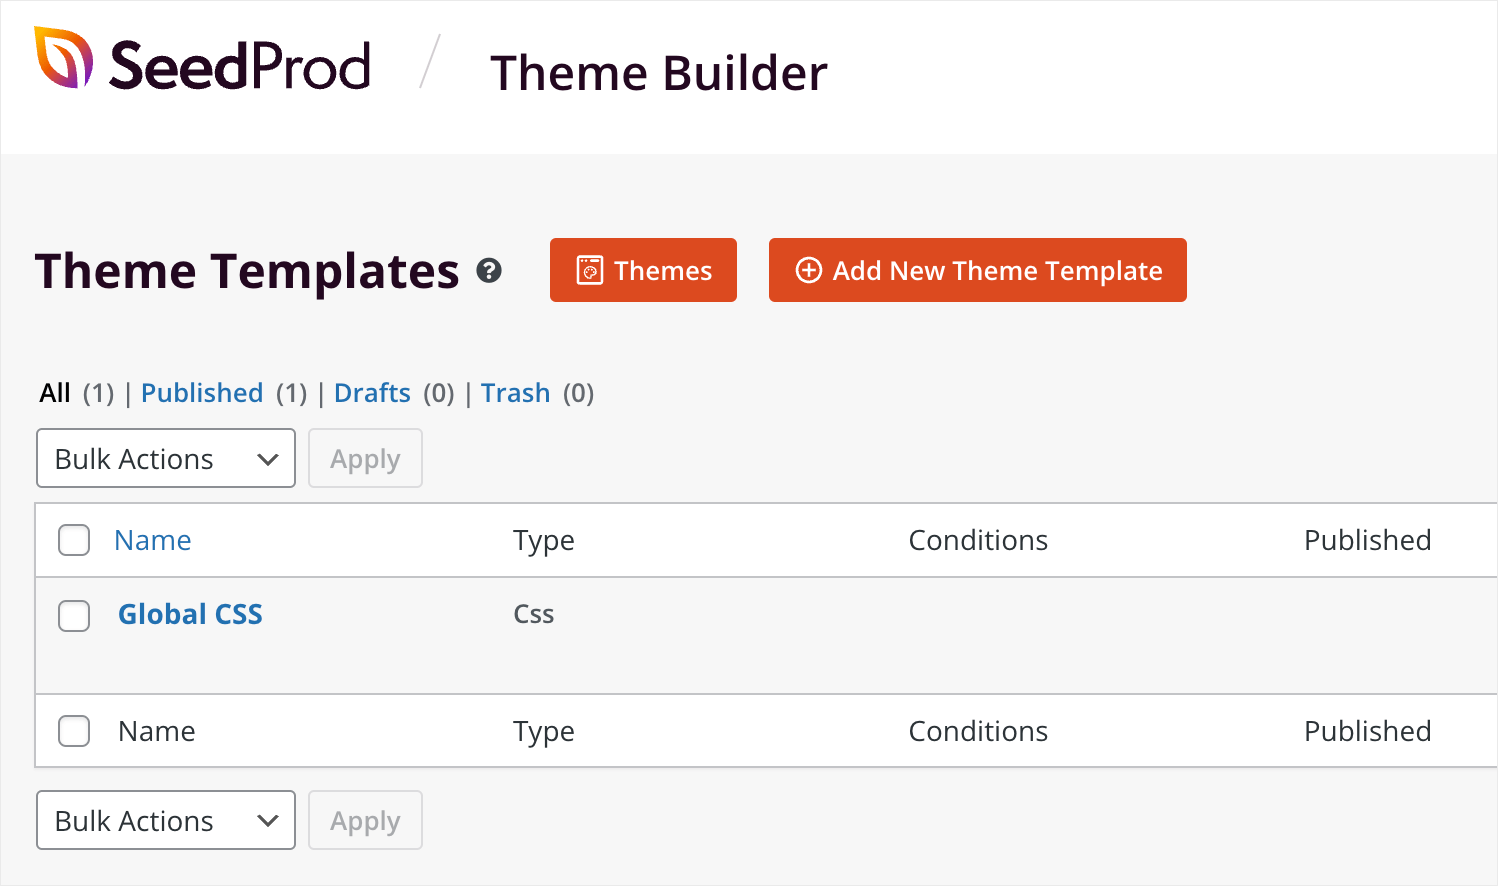
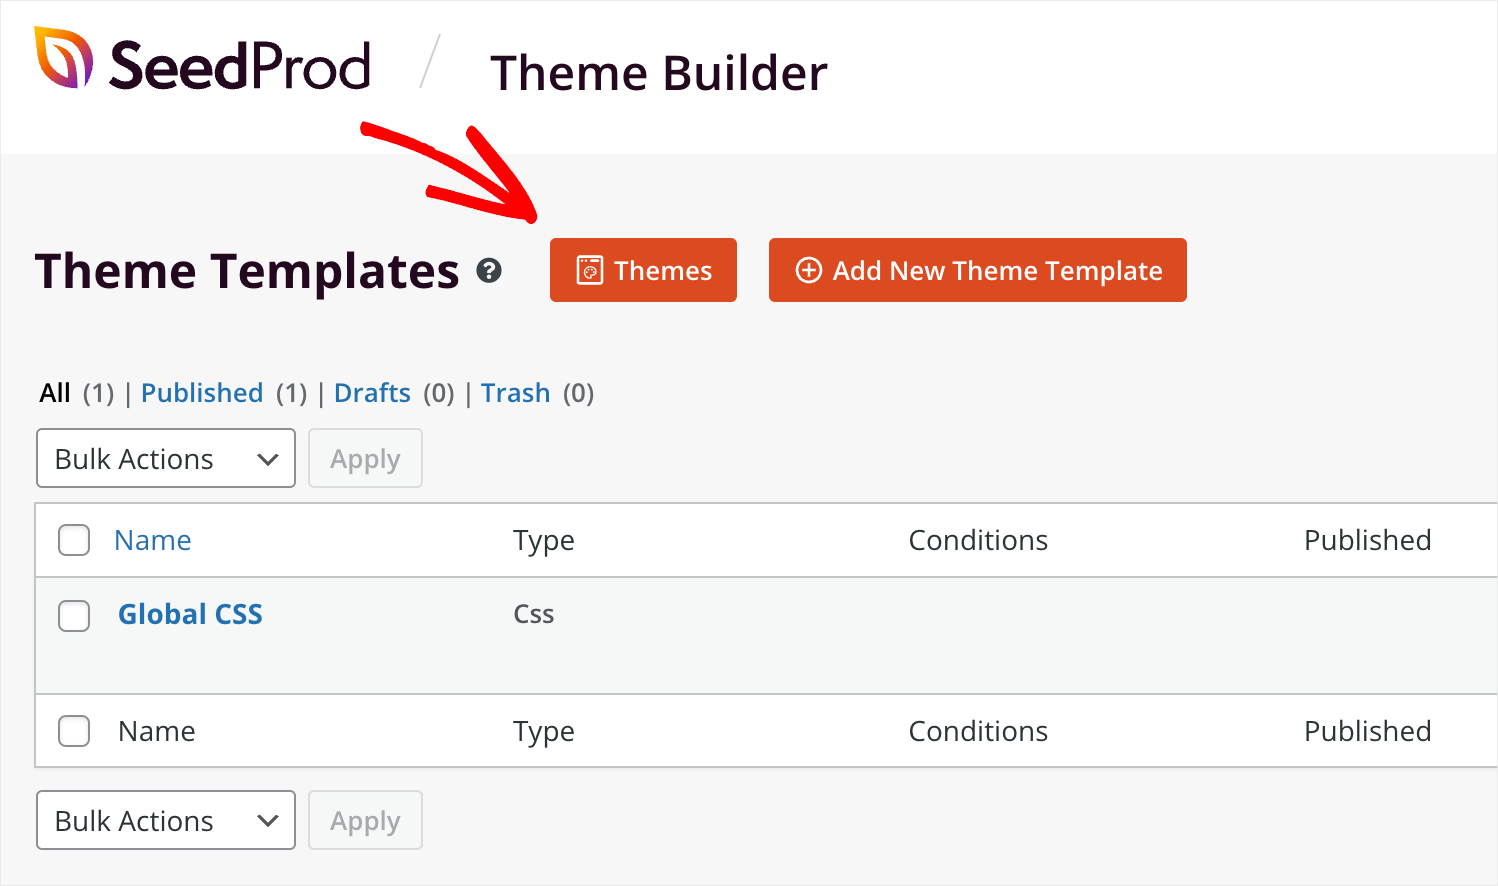
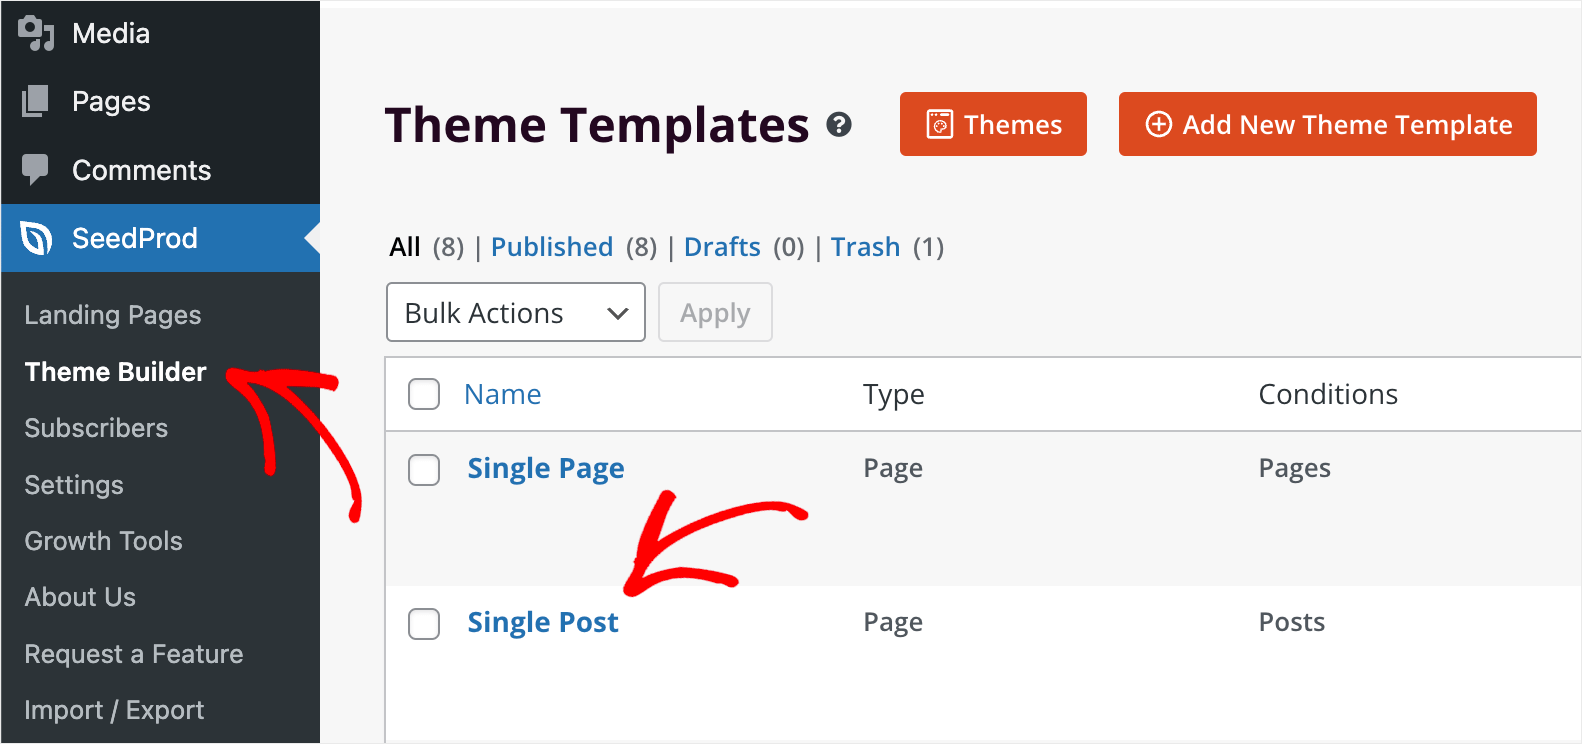
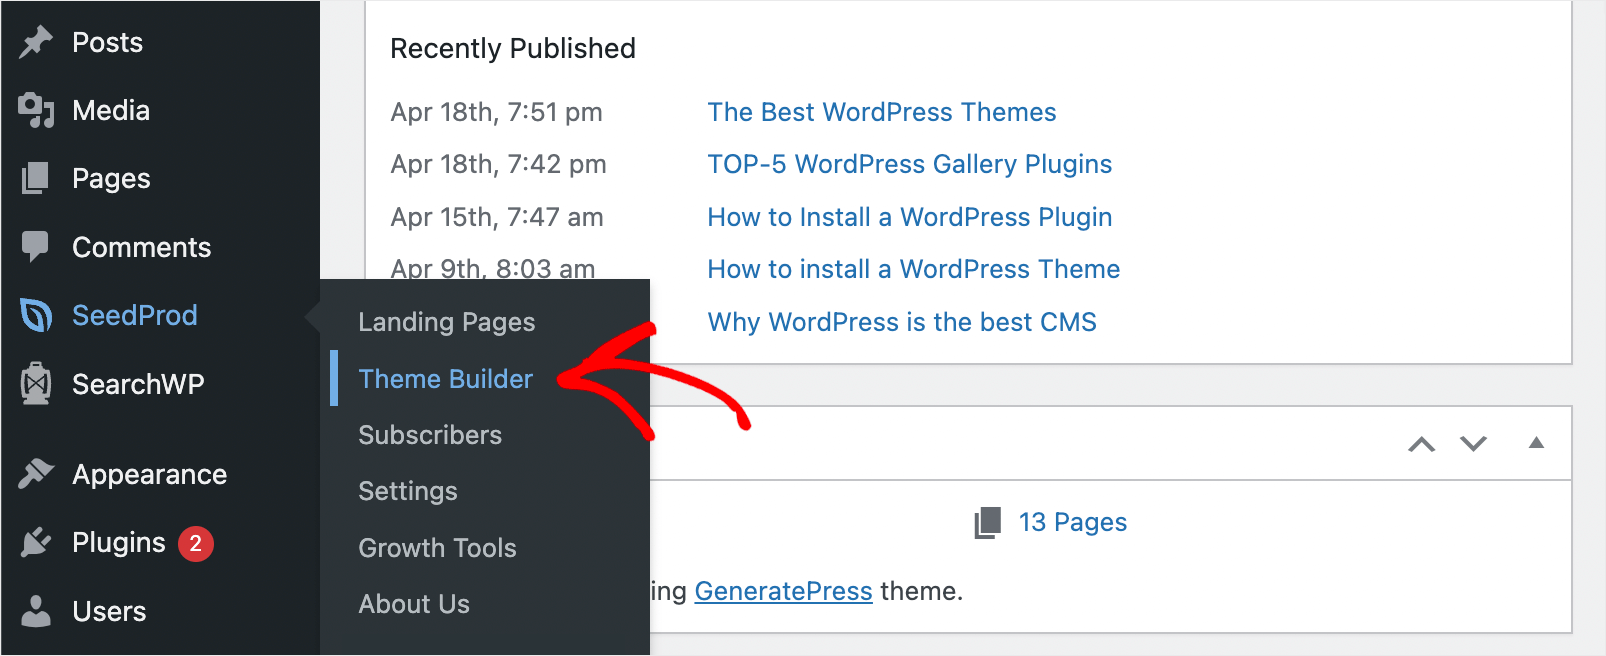
To get started, navigate to SeedProd » Theme Builder in your dashboard.
On this page, you can manage your custom themes and create new ones.
From here, you have 2 ways.
The first one is to create each part of your custom theme from scratch.
Every WordPress theme consists of the following parts:
- Header
- Footer
- Single Post
- Single Page
- Archive (Blog Page)
- Home Page
- Sidebar
These parts make up your theme, and SeedProd allows you to create and customize them individually.
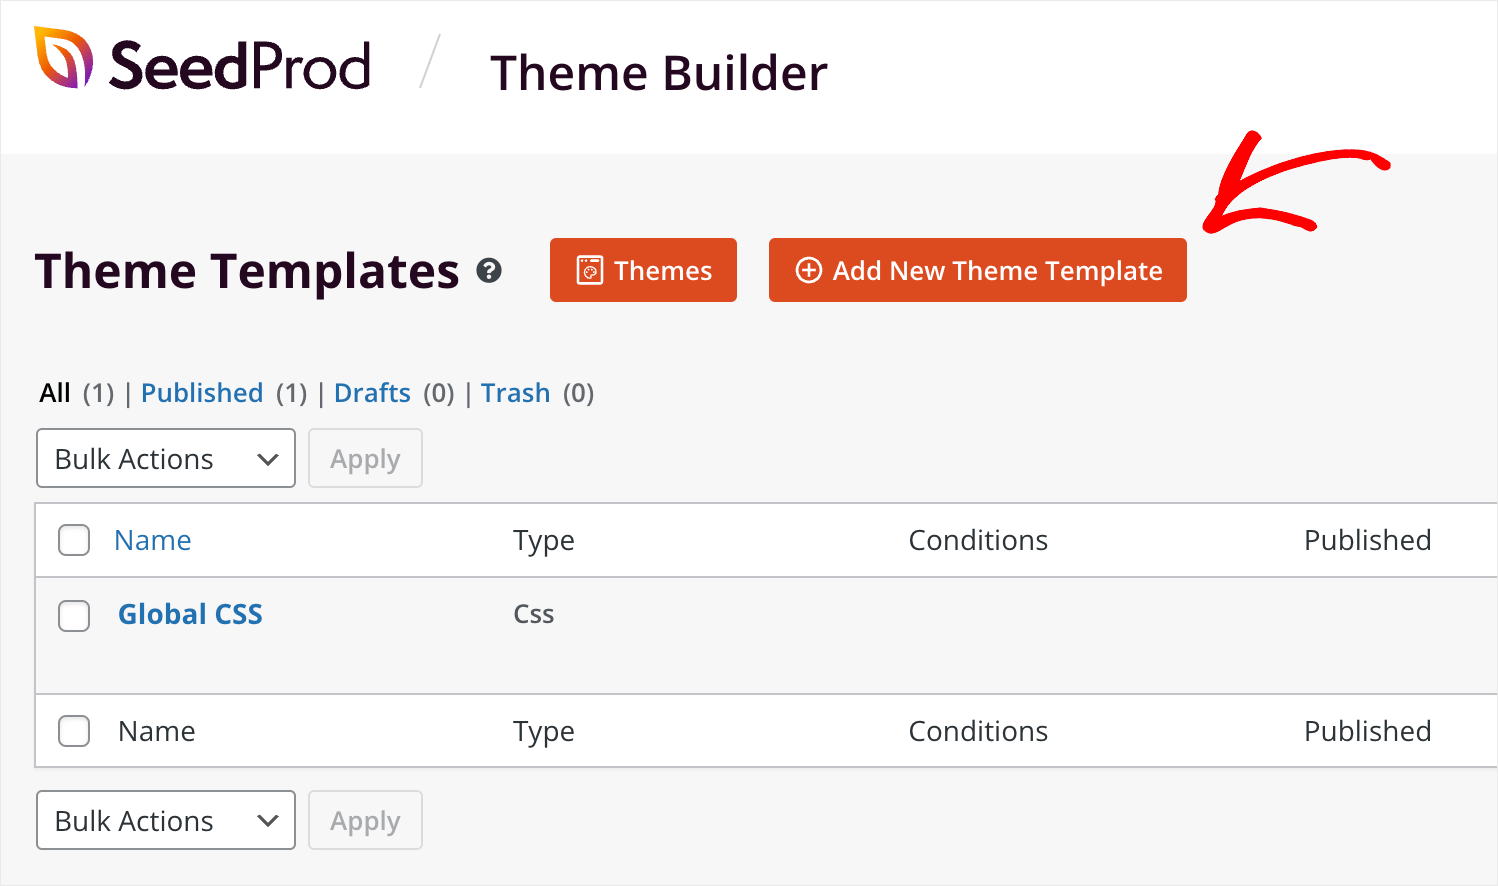
To start creating a new part of your theme, press the Add New Theme Template button.
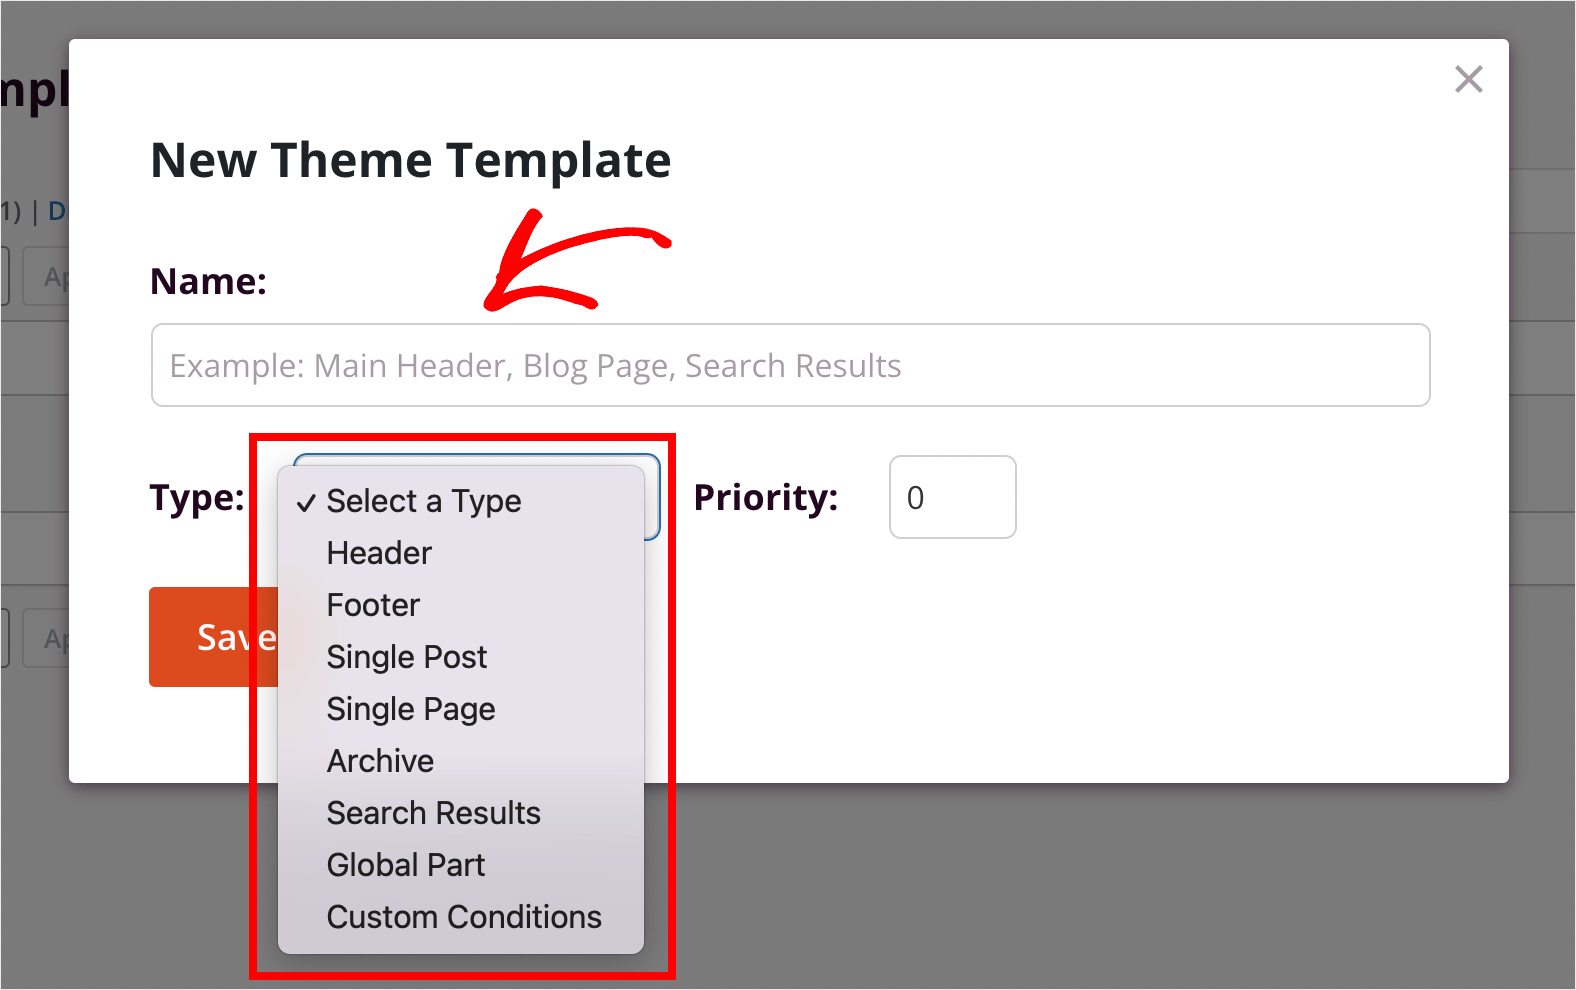
Here you can choose the type of your theme part, give it a name, and then start building it from scratch.
But, if you feel like it’s too overwhelming for your first try, there is a second way to create your custom WordPress theme.
SeedProd comes with a bunch of professional-looking premade theme templates. You can select them and customize them for your needs.
In this tutorial, we’ll focus exactly on this way as it’s easier for beginners and allows us to show you more SeedProd features.
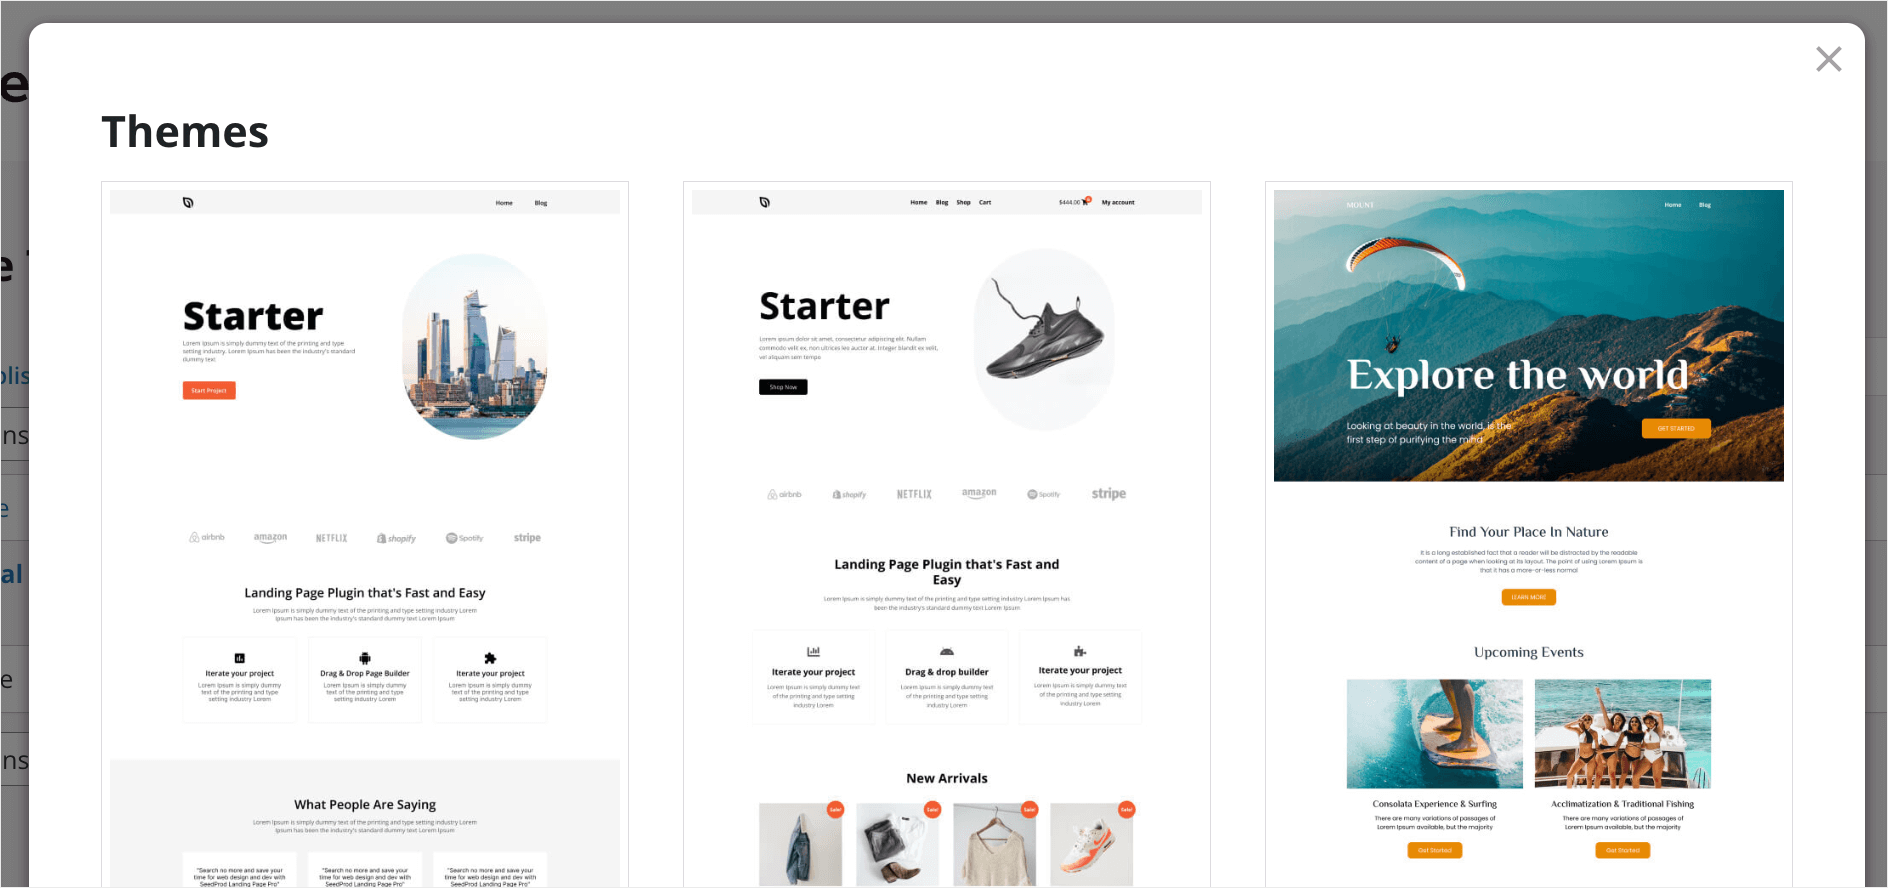
To start customizing one of the ready-made theme templates, press the Themes button.
Here you will find a variety of themes for different purposes. For example, there are themes for personal blogs, portfolios, business or eCommerce sites, and more.
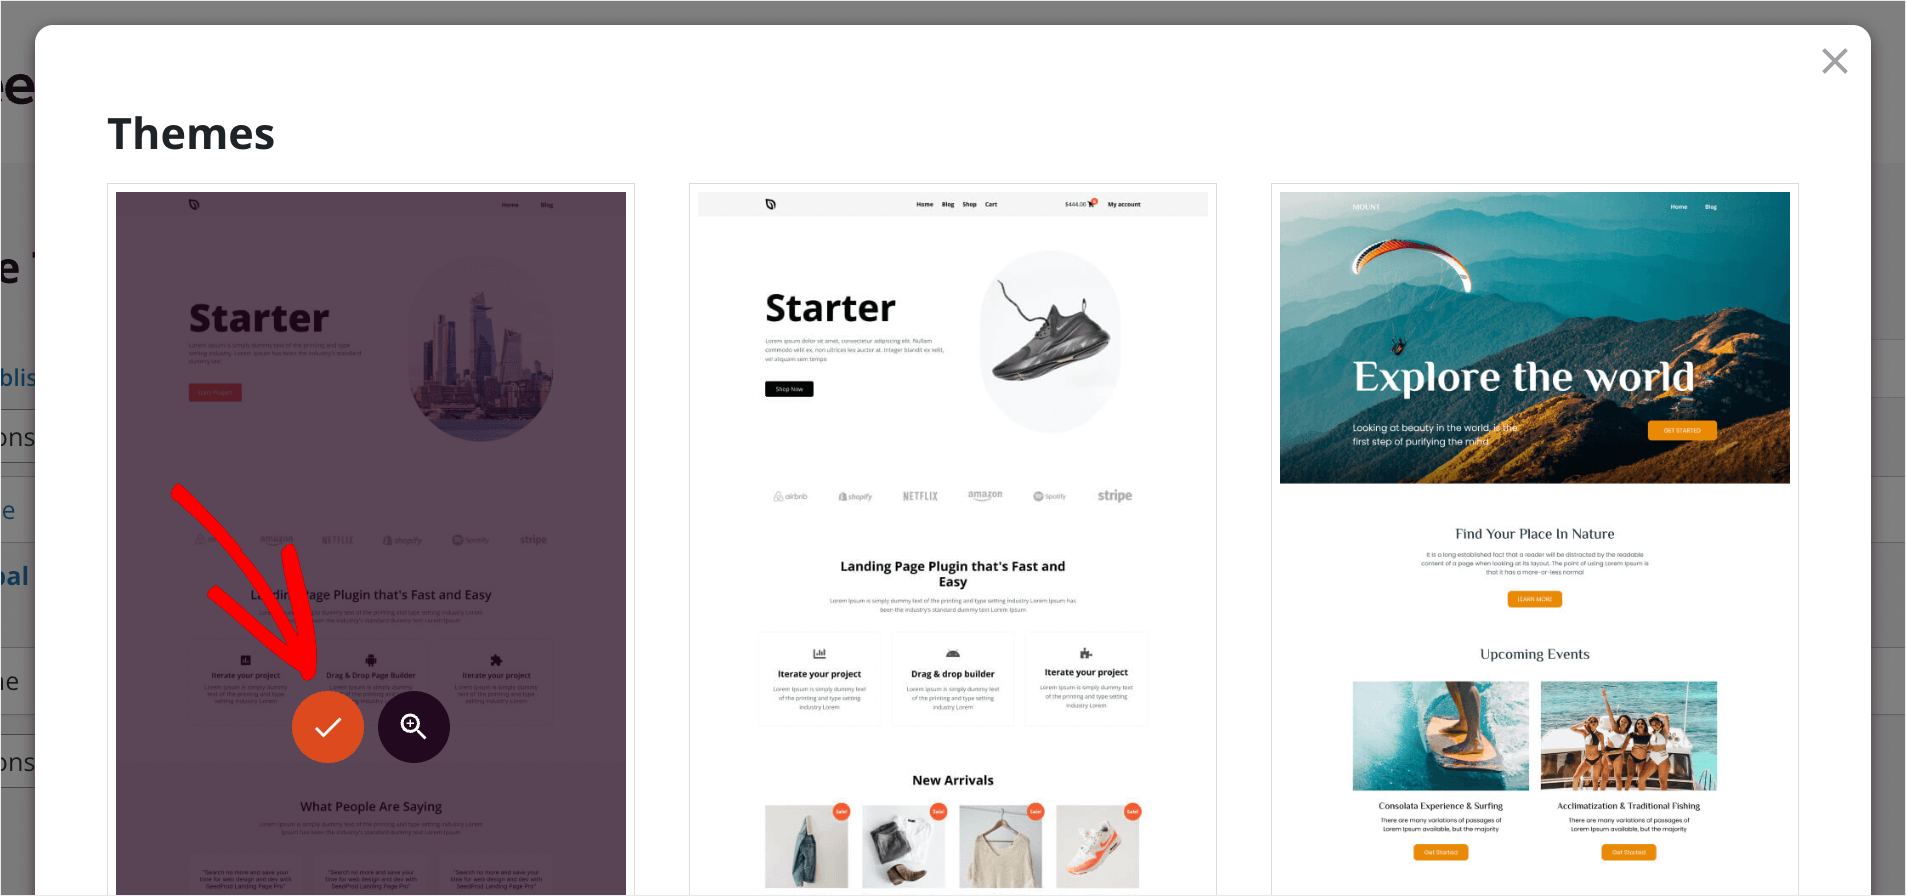
To choose a theme you like, hover your cursor over it and click the checkmark icon. For example, we’ll choose one of the starter templates.
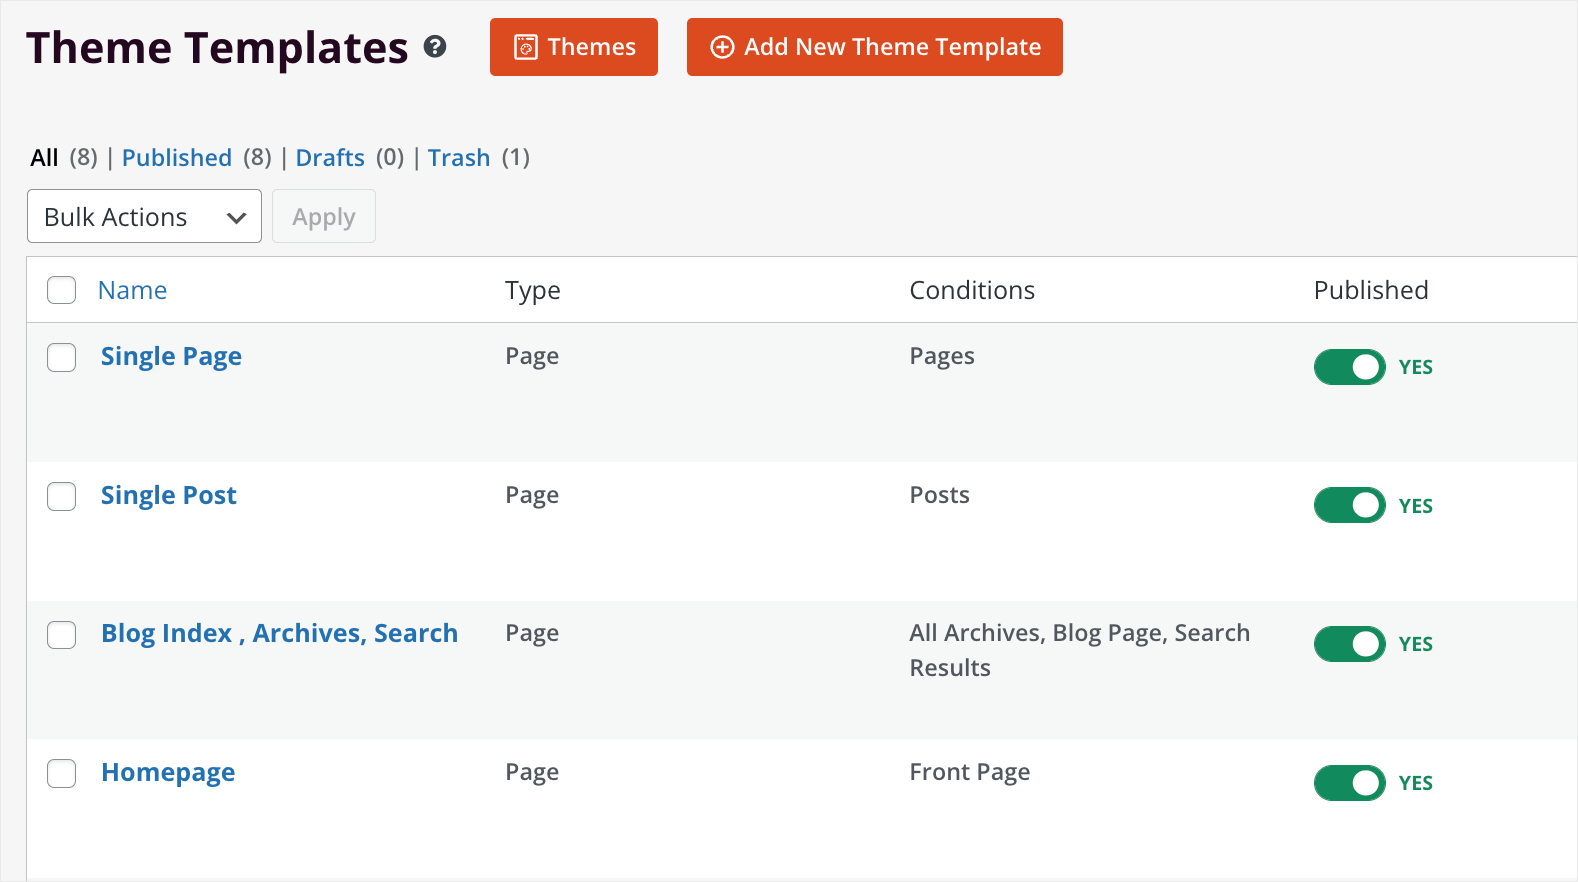
Once you’ve selected a template, SeedProd automatically creates the parts that make it up.
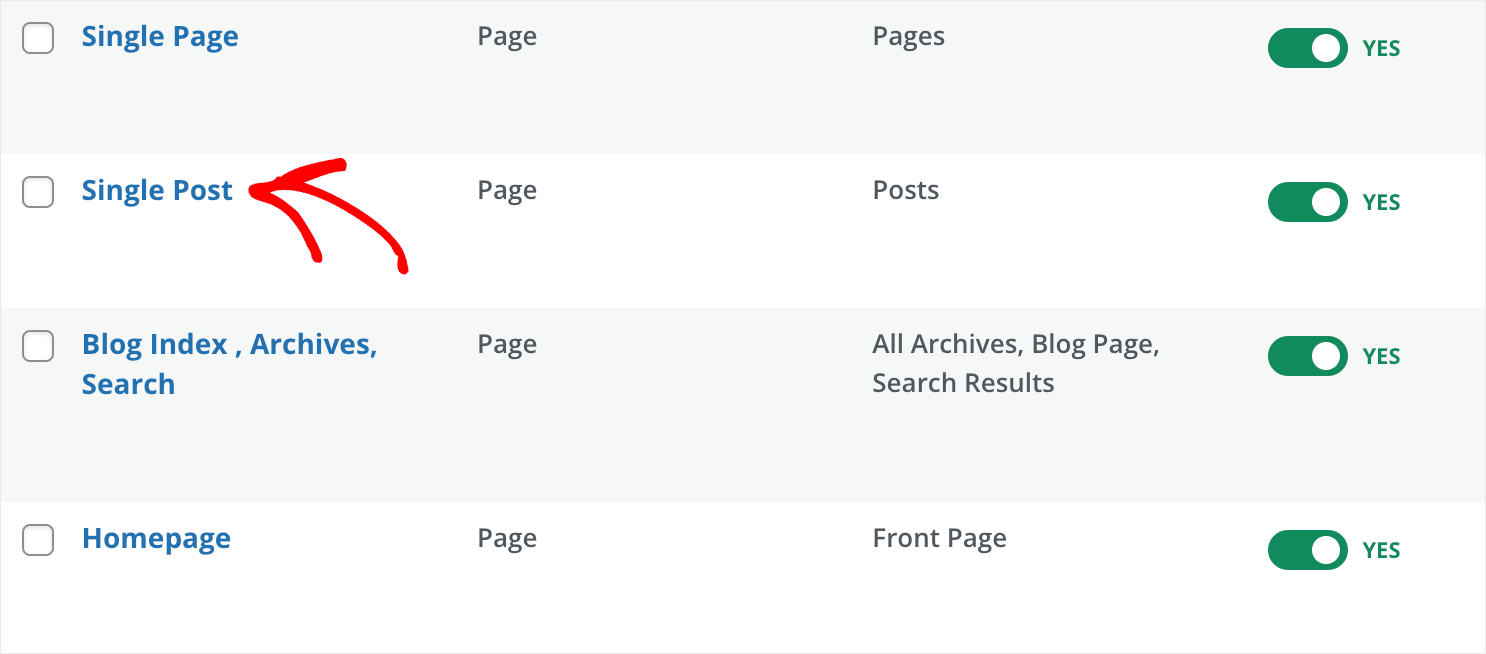
As you can see, our theme not only includes page part templates, such as the header, footer, and sidebar.
There are also templates for entire pages, like a single page, post, archives, and homepage.
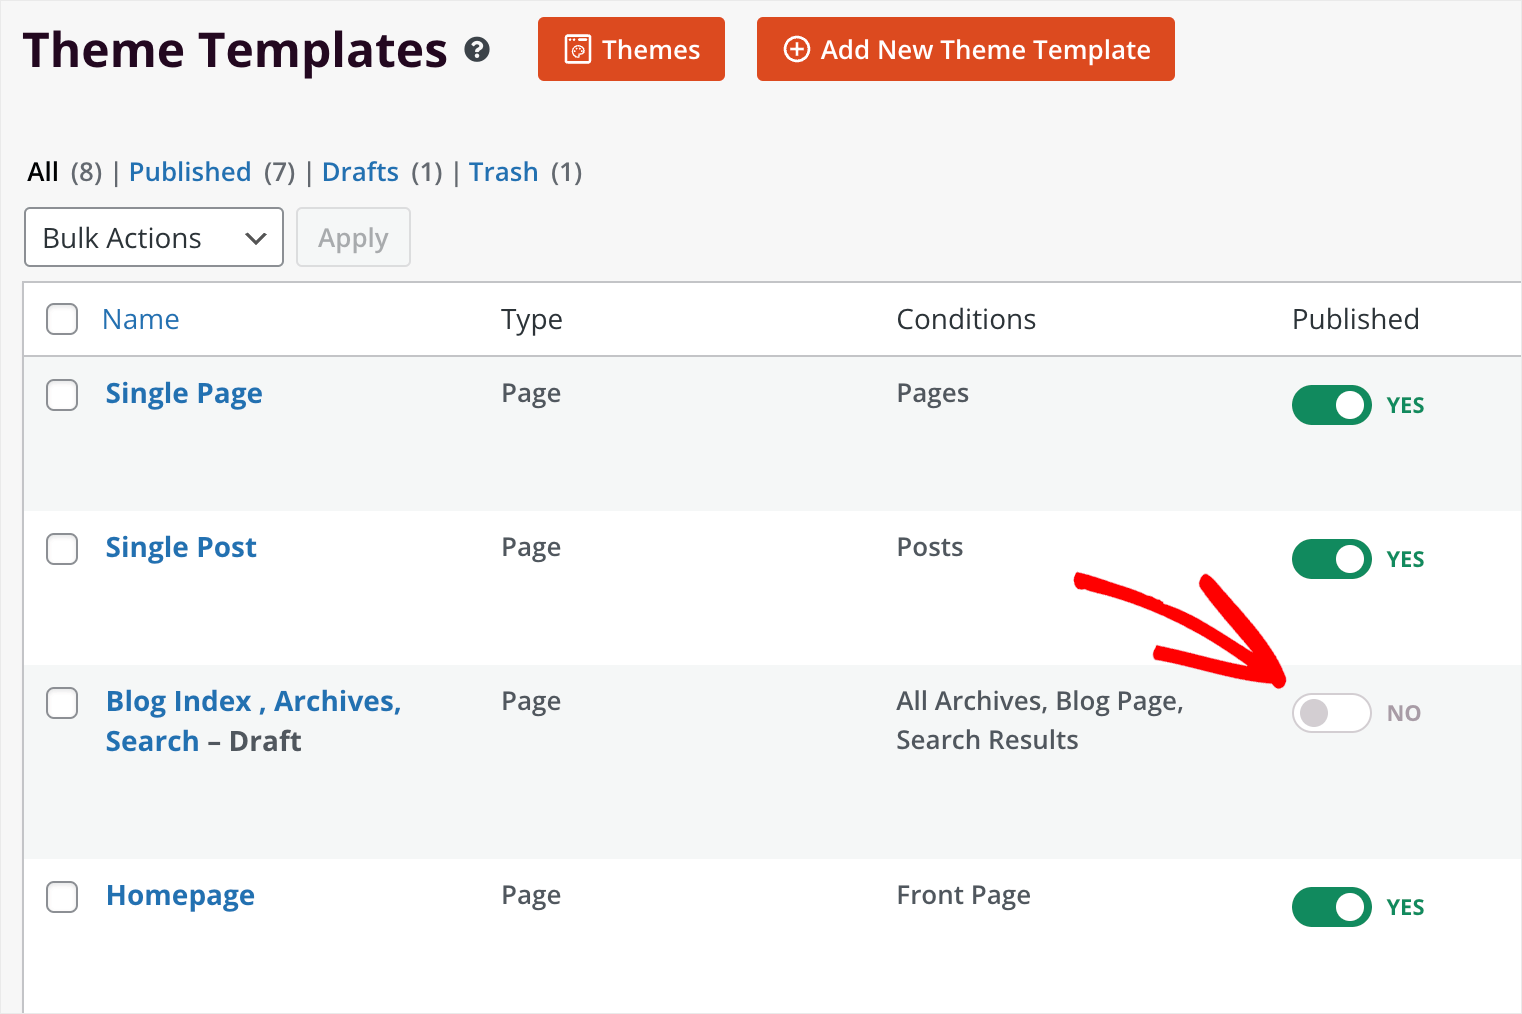
If you don’t need a specific template on your site, you can unpublish it by switching the toggle next to it.
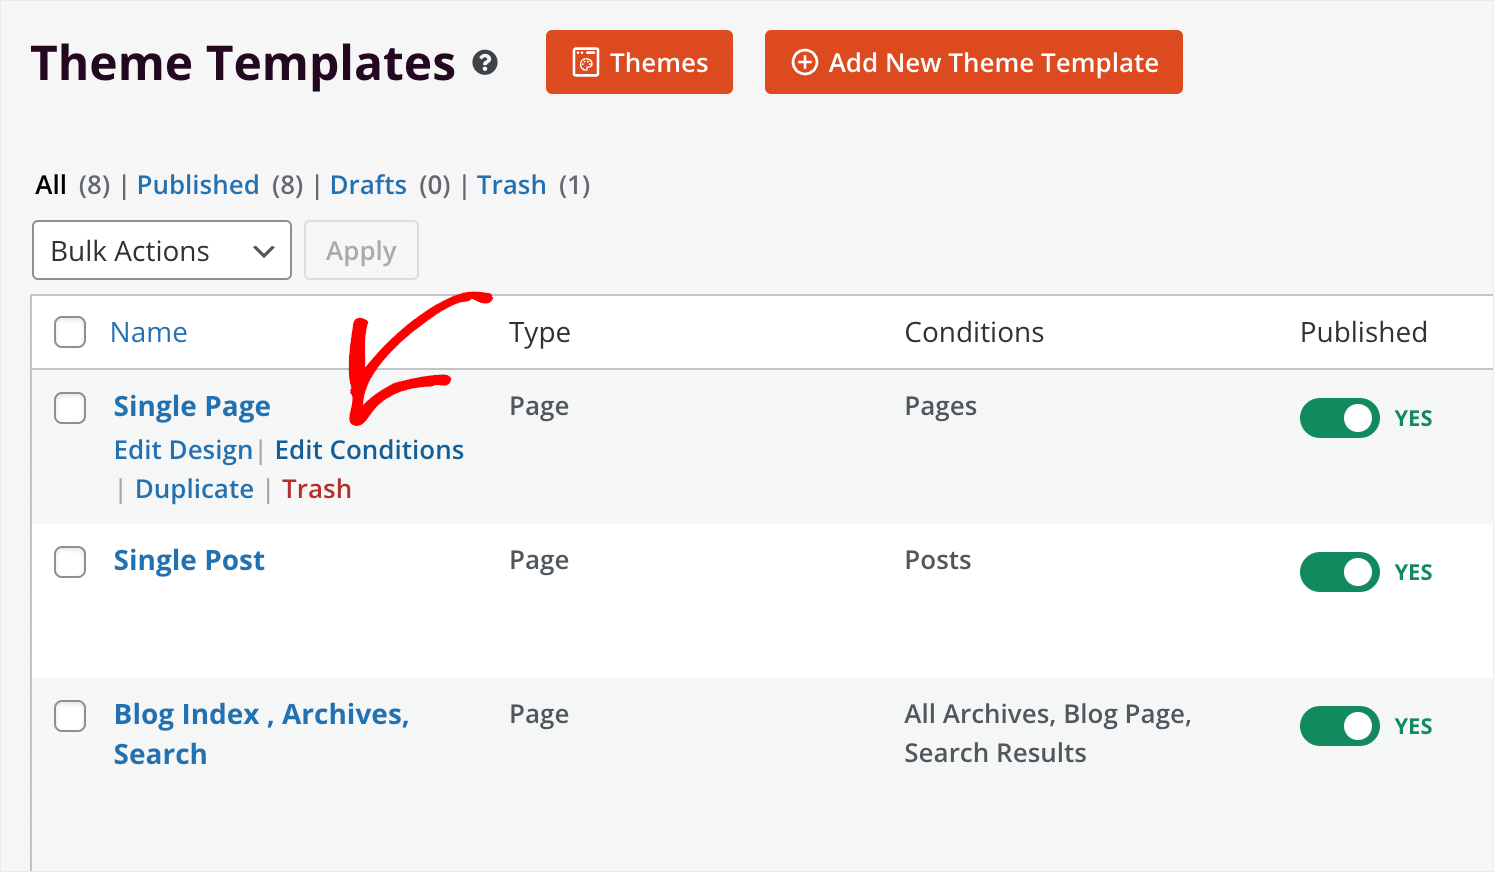
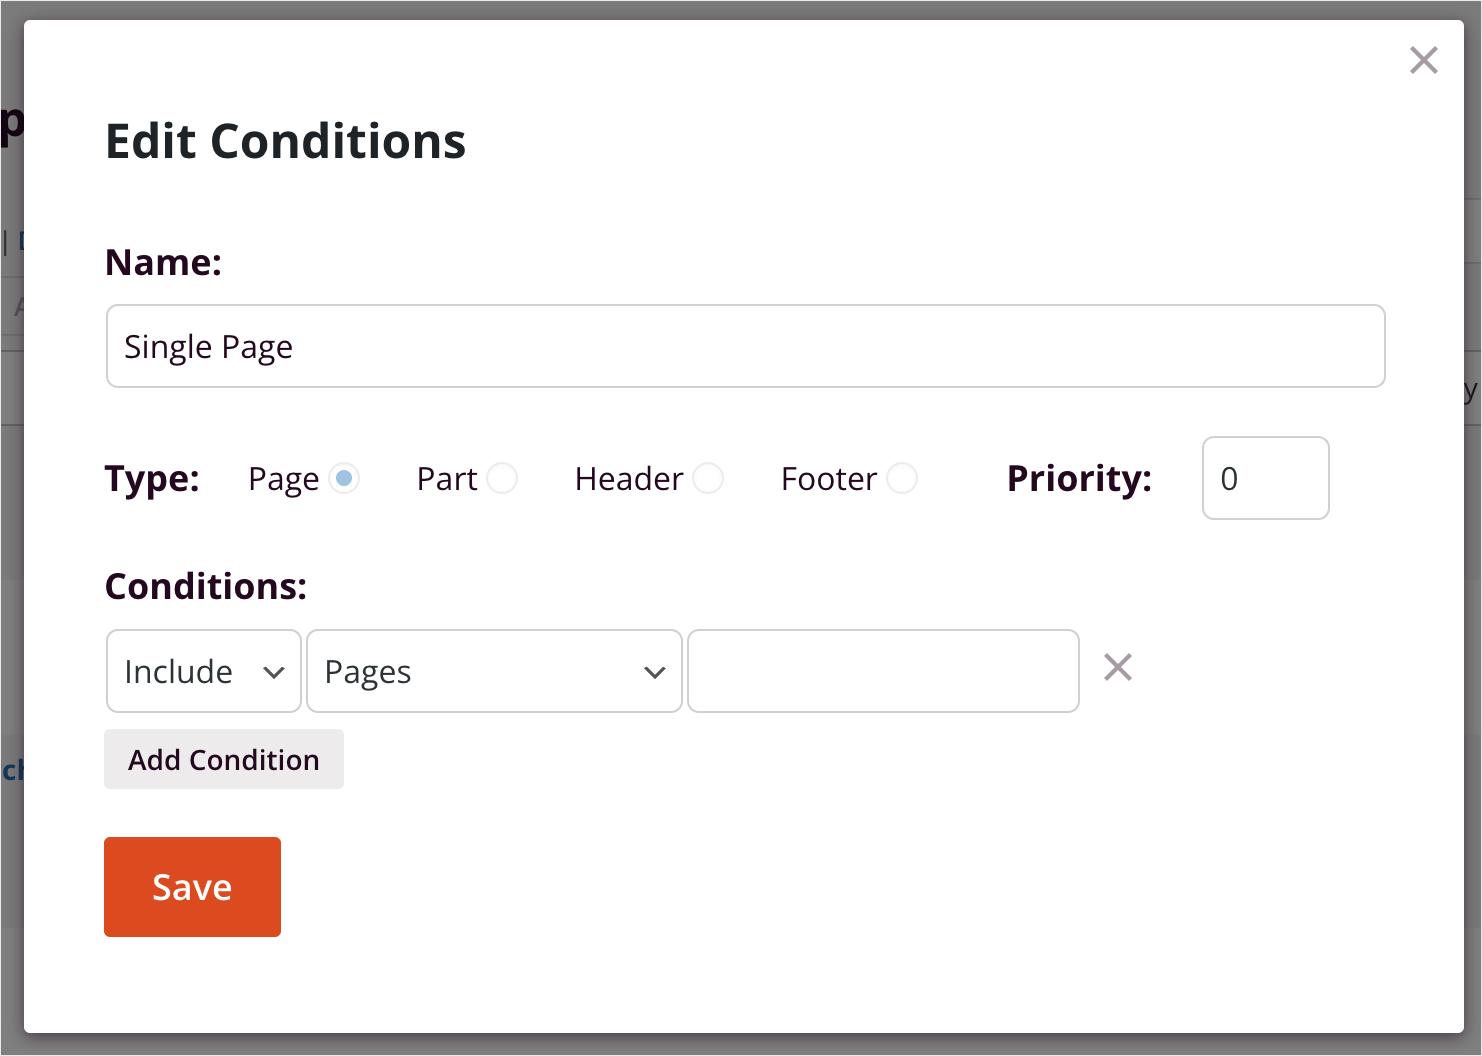
To change the name of a template or edit conditions when it should appear on your site, click the Edit Conditions link.
It’ll bring up a modal window where you can name a template the way you want and change its type, priority, and conditions.
Now that you know how to manage parts of your theme, you’re ready to start customizing it.
Step 3: Customize Your WordPress Theme Parts
First, let’s customize the header as it’s the first thing that visitors see after coming to your site.
Header
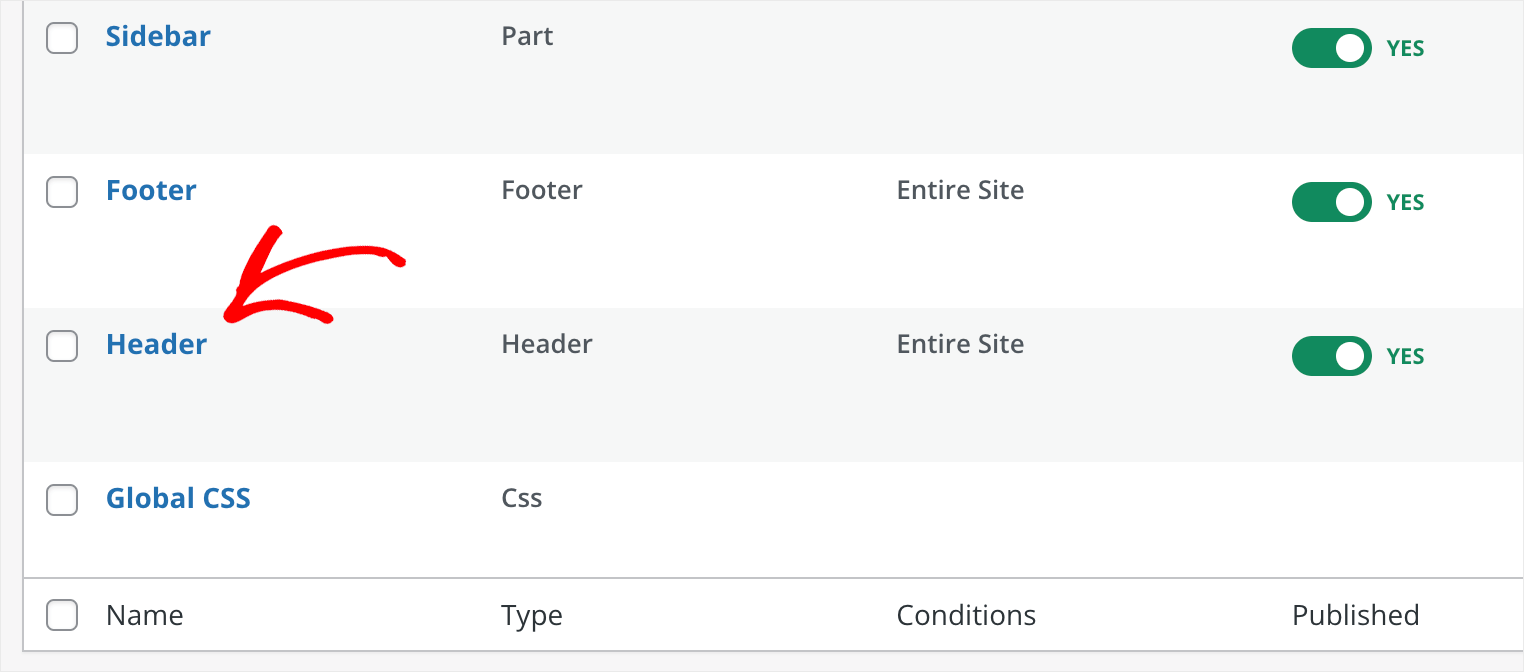
To get started, scroll the Theme Builder page down, find the Header template and click on it.
Note: The header and footer are common to the entire site. It means that every change you make to them will be visible on every page of your site.
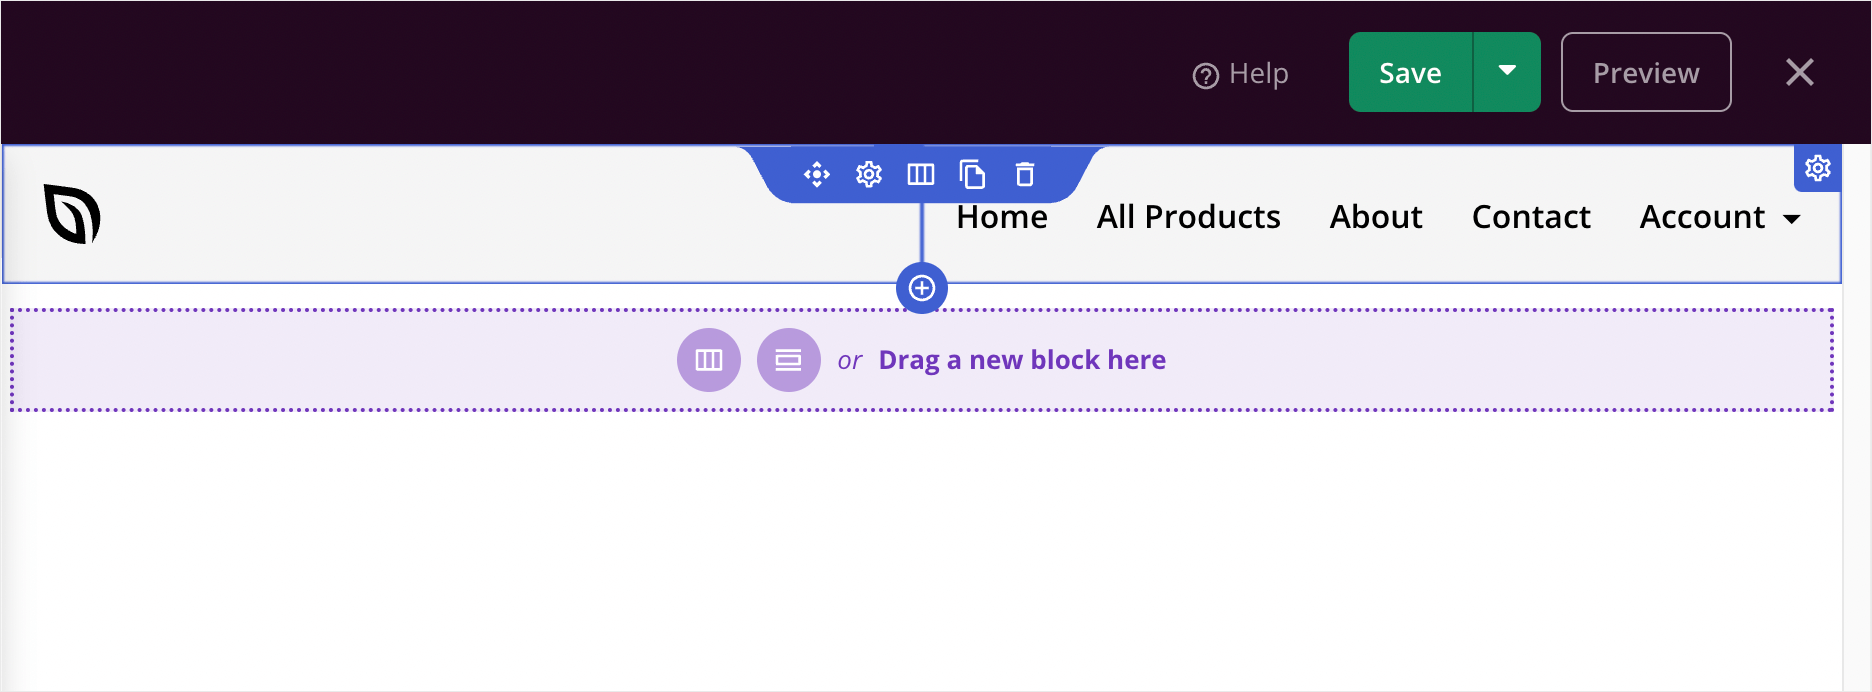
As you can see, our header consists of two parts. There is the left part with the site logo and the right part with the navigational menu.
SeedProd has a visual drag-and-drop editor. You can interact with any element on the page and add new ones by simply dragging them on the page.
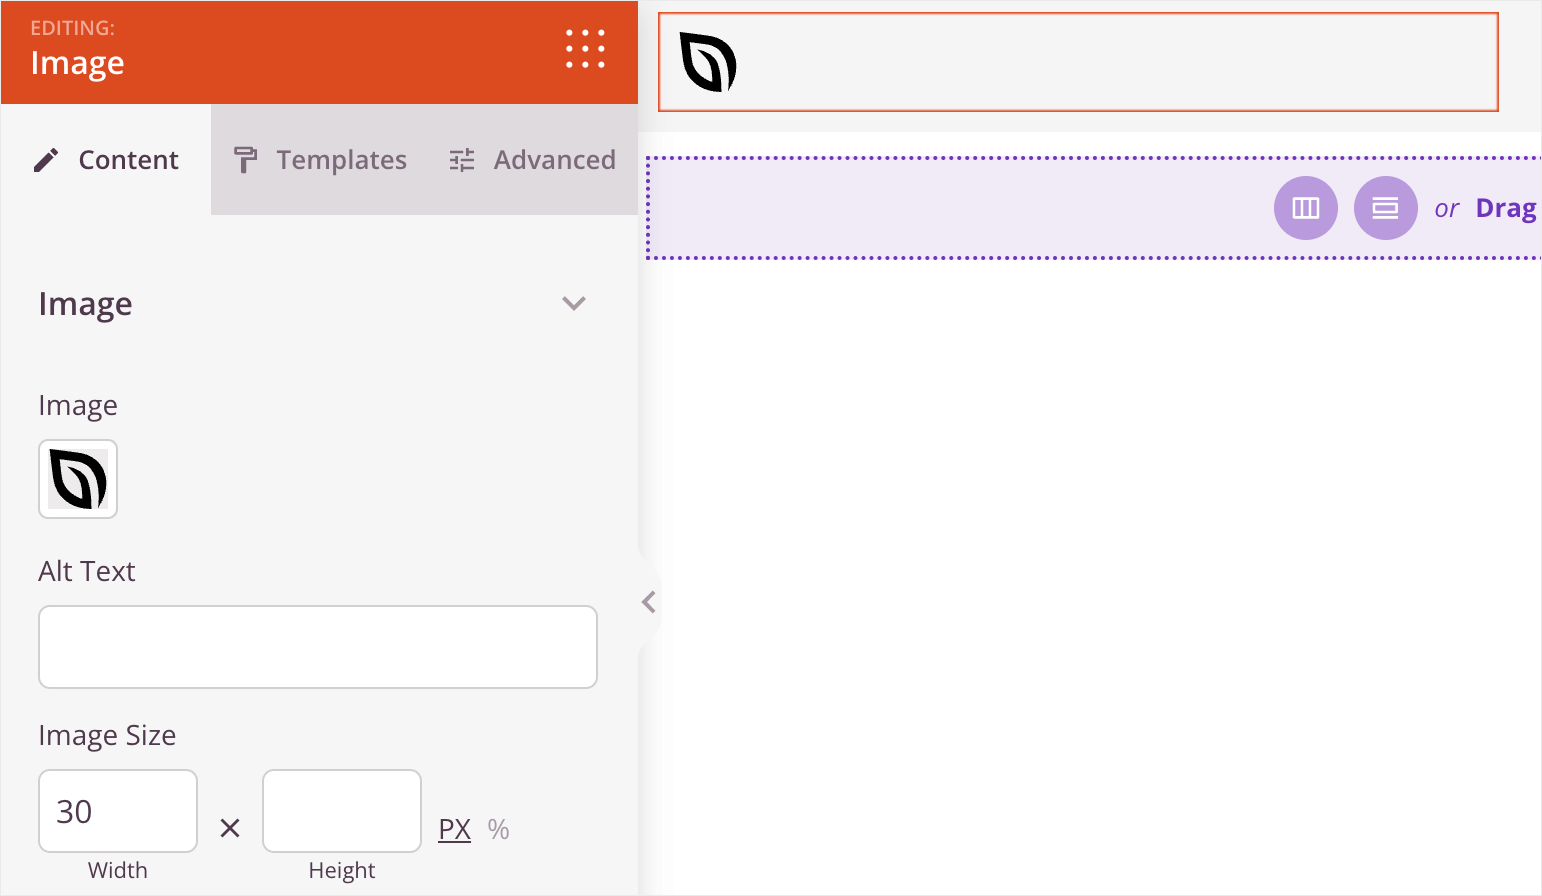
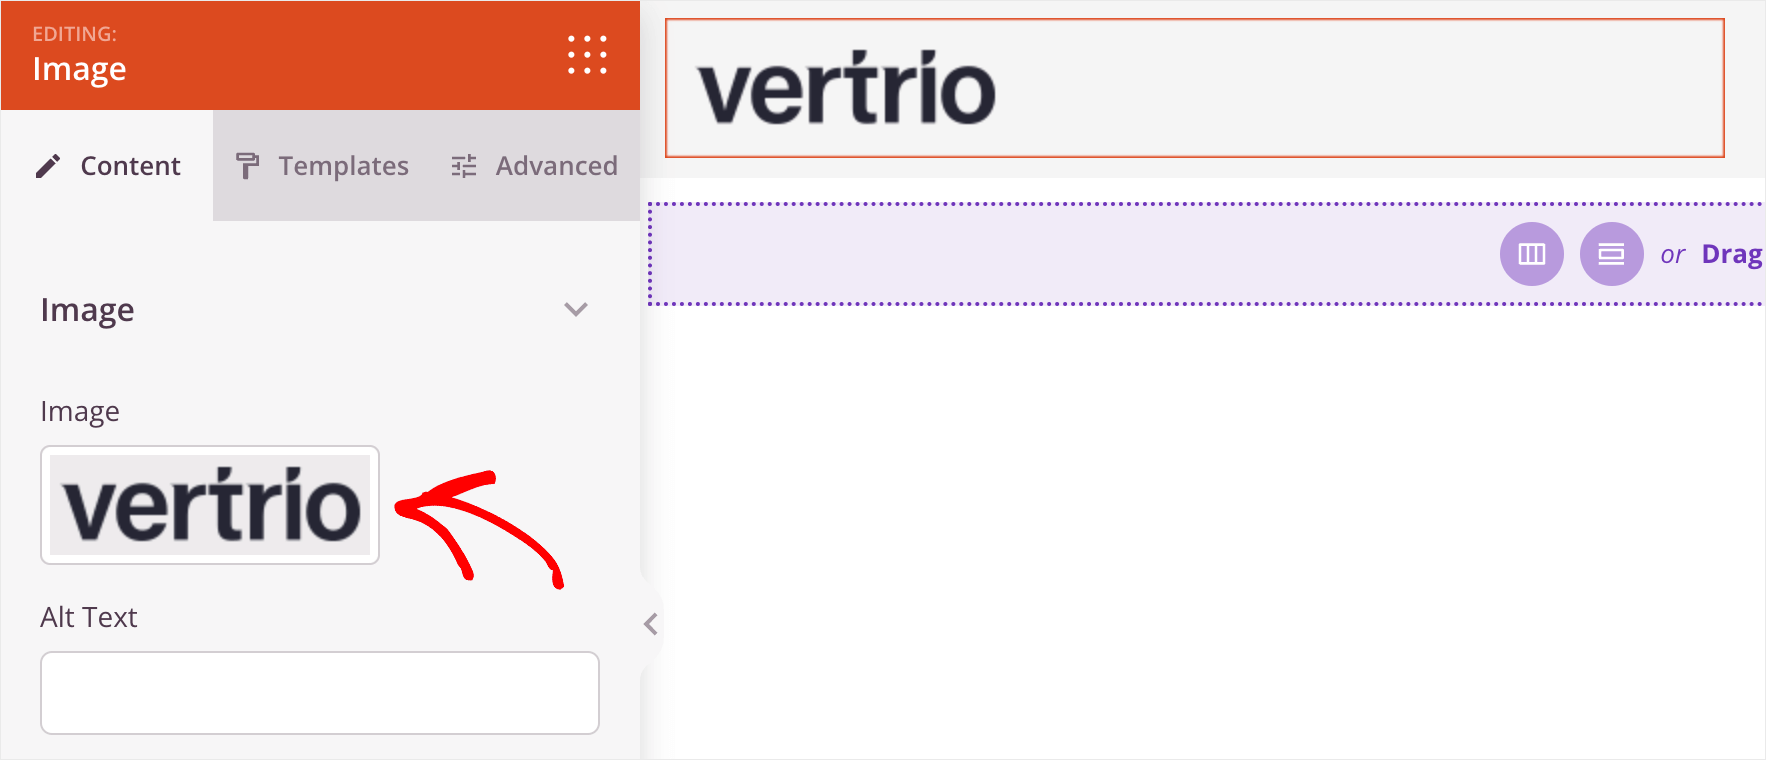
Let’s try to change the logo. To do so, click on it, and there will appear a sidebar where you can edit the element settings.
Each type of element in the SeedProd editor has its own set of settings and customization options.
For example, our logo has the Image type. So it has all the settings you would normally expect from an image, such as its source file, alt text, size, and more.
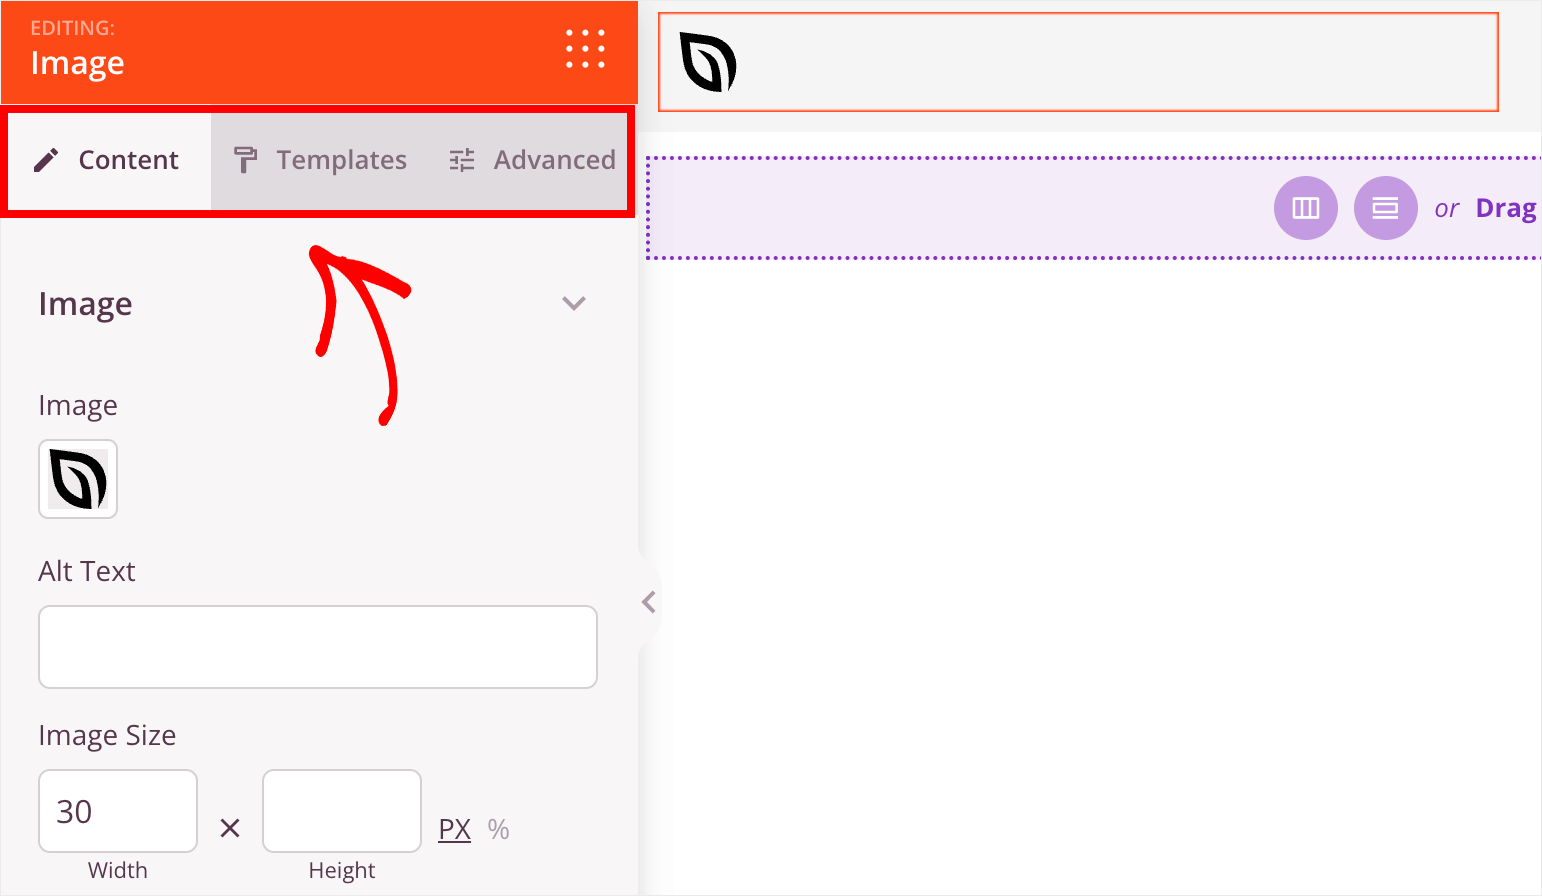
You can also switch between the Content, Templates, and Advanced tab on the left sidebar to discover even more customization options.
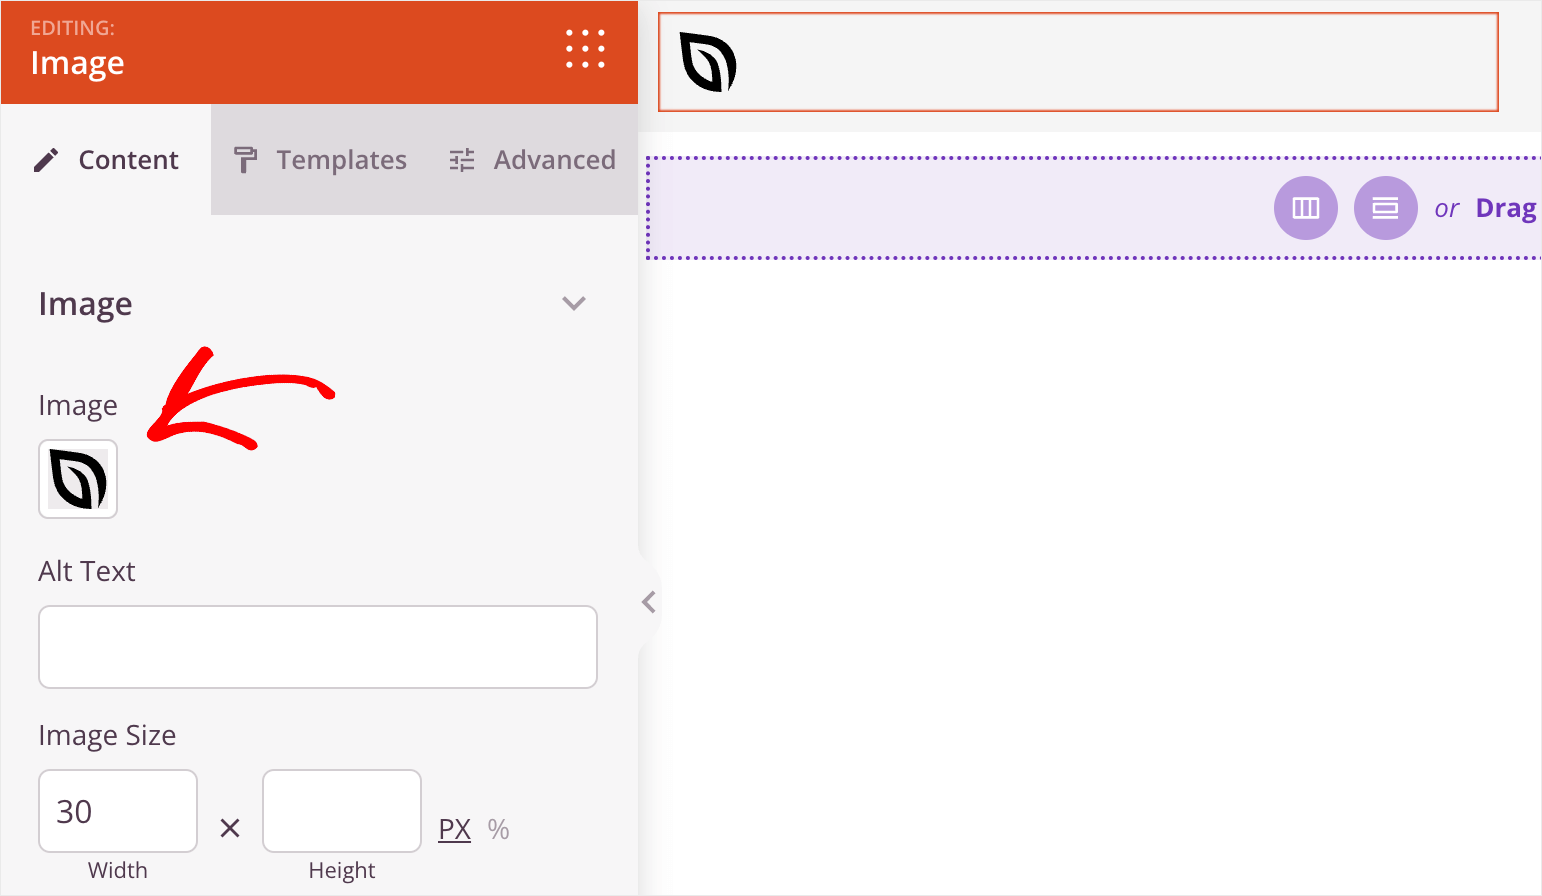
Now, let’s say we want to replace the default logo with our own.
To do that, click on the current logo image, and then you can select the image you want to use instead.
Here is how our new logo looks on our test site:
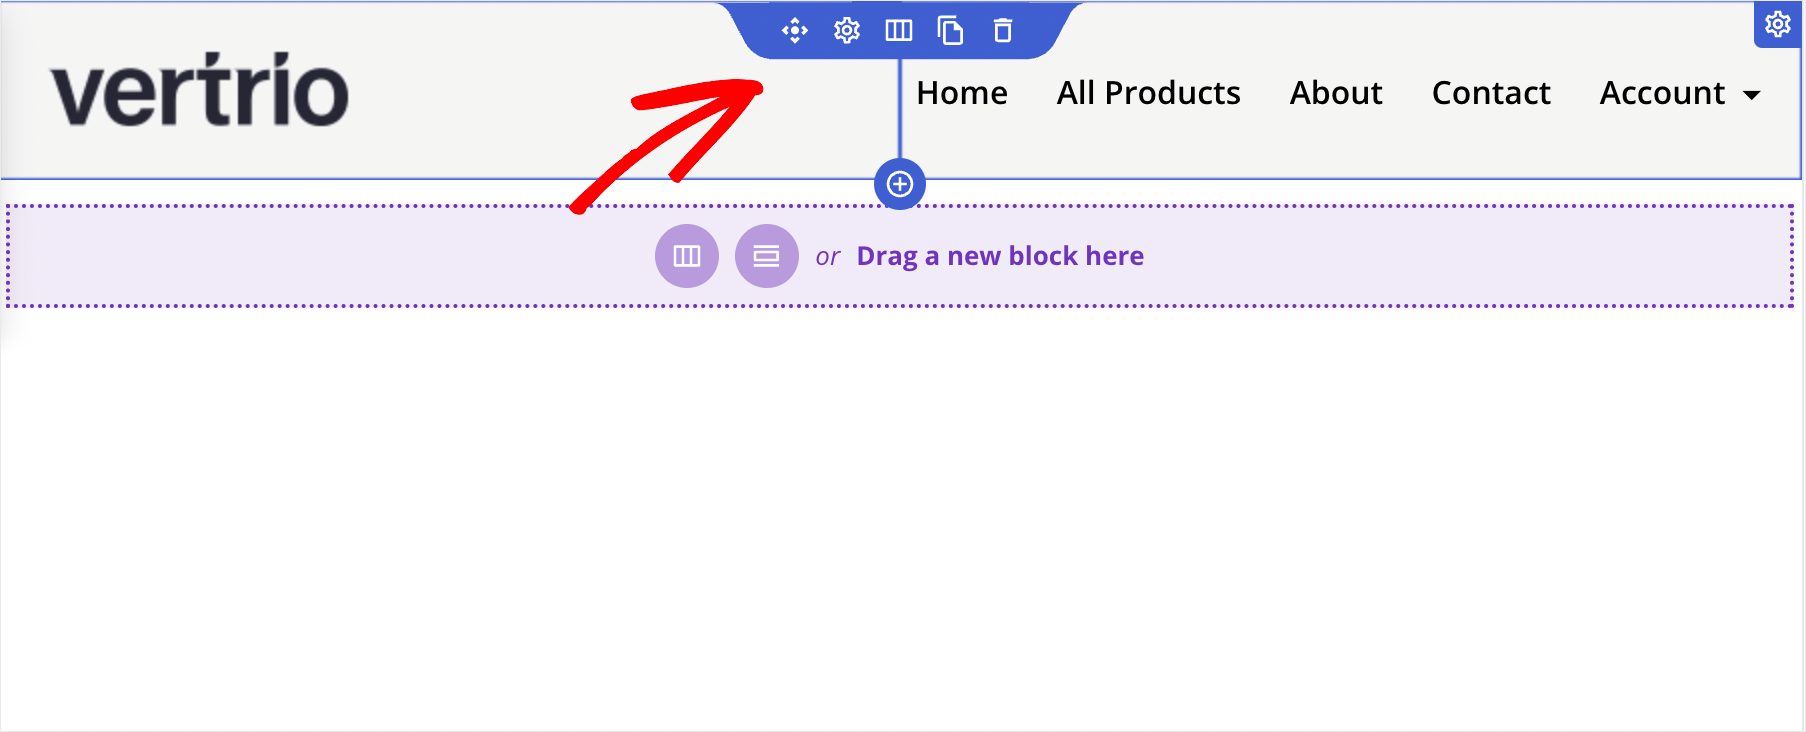
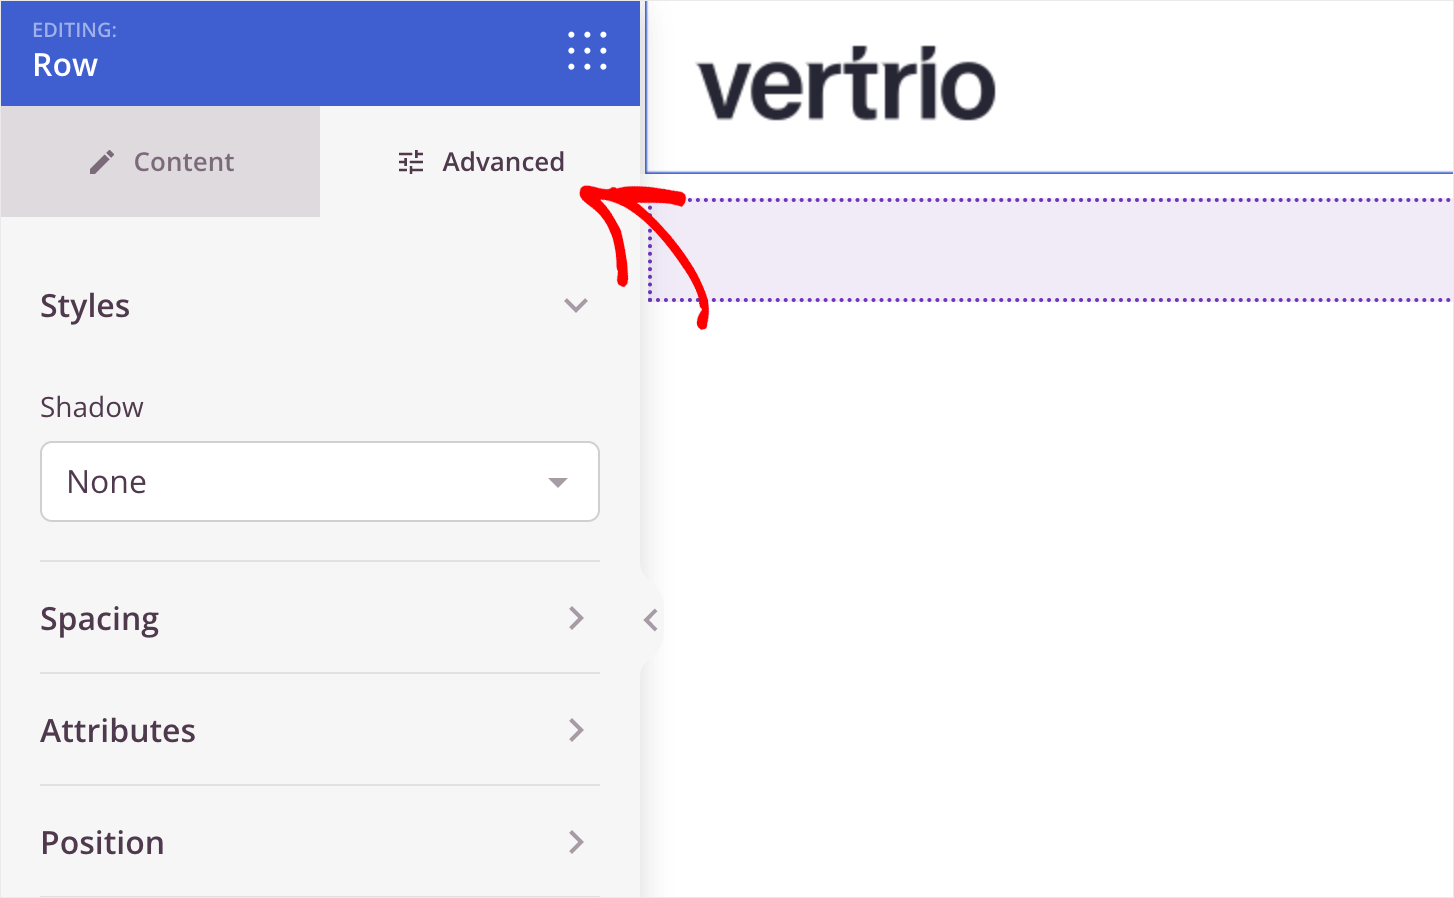
Now let’s change the header background color. To do so, point a cursor over your header until it has a blue outline, and click on it.
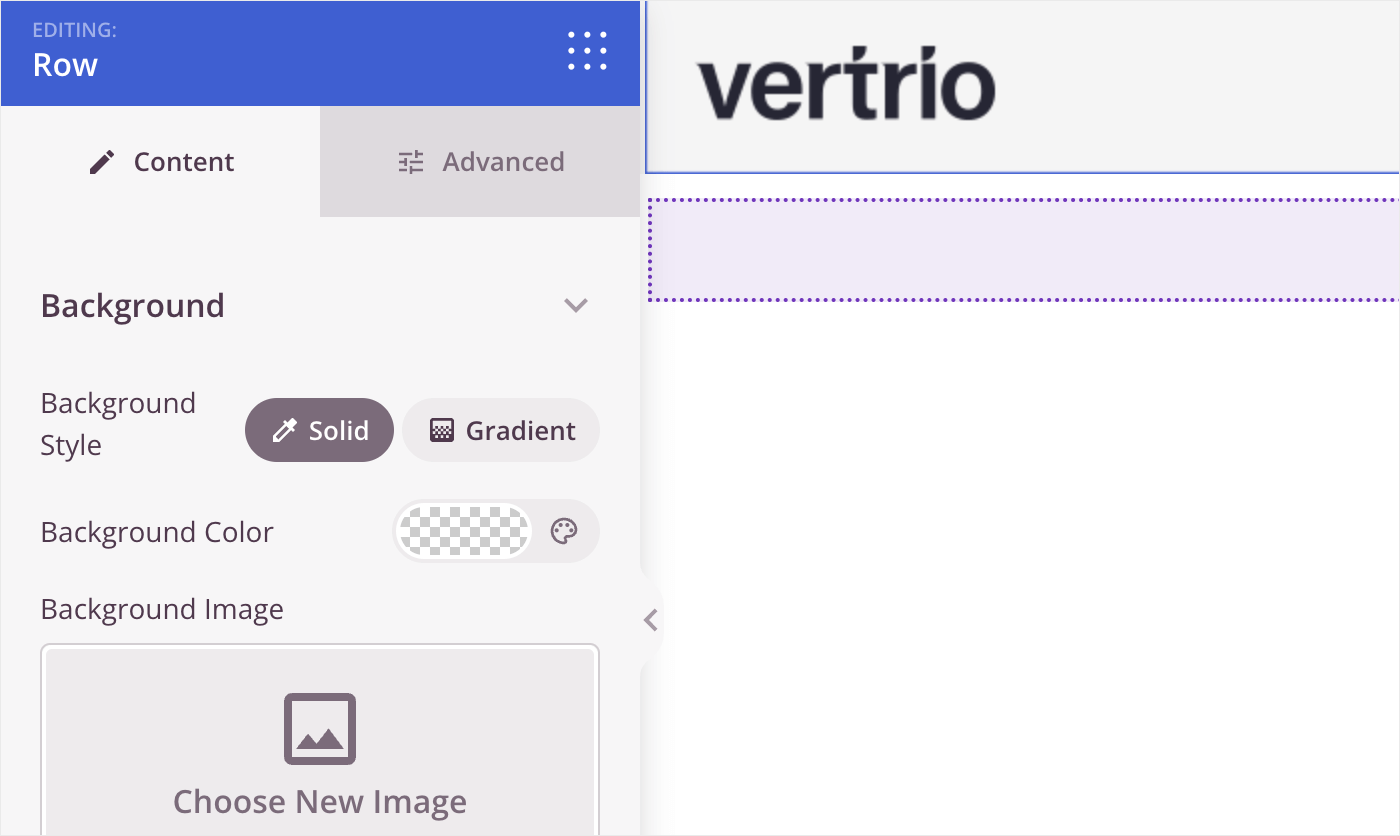
After that, you’ll see the header customization options on the left sidebar. It has the Row element type.
On the Content tab, you can change your header background color, replace it with an image and choose the header width.
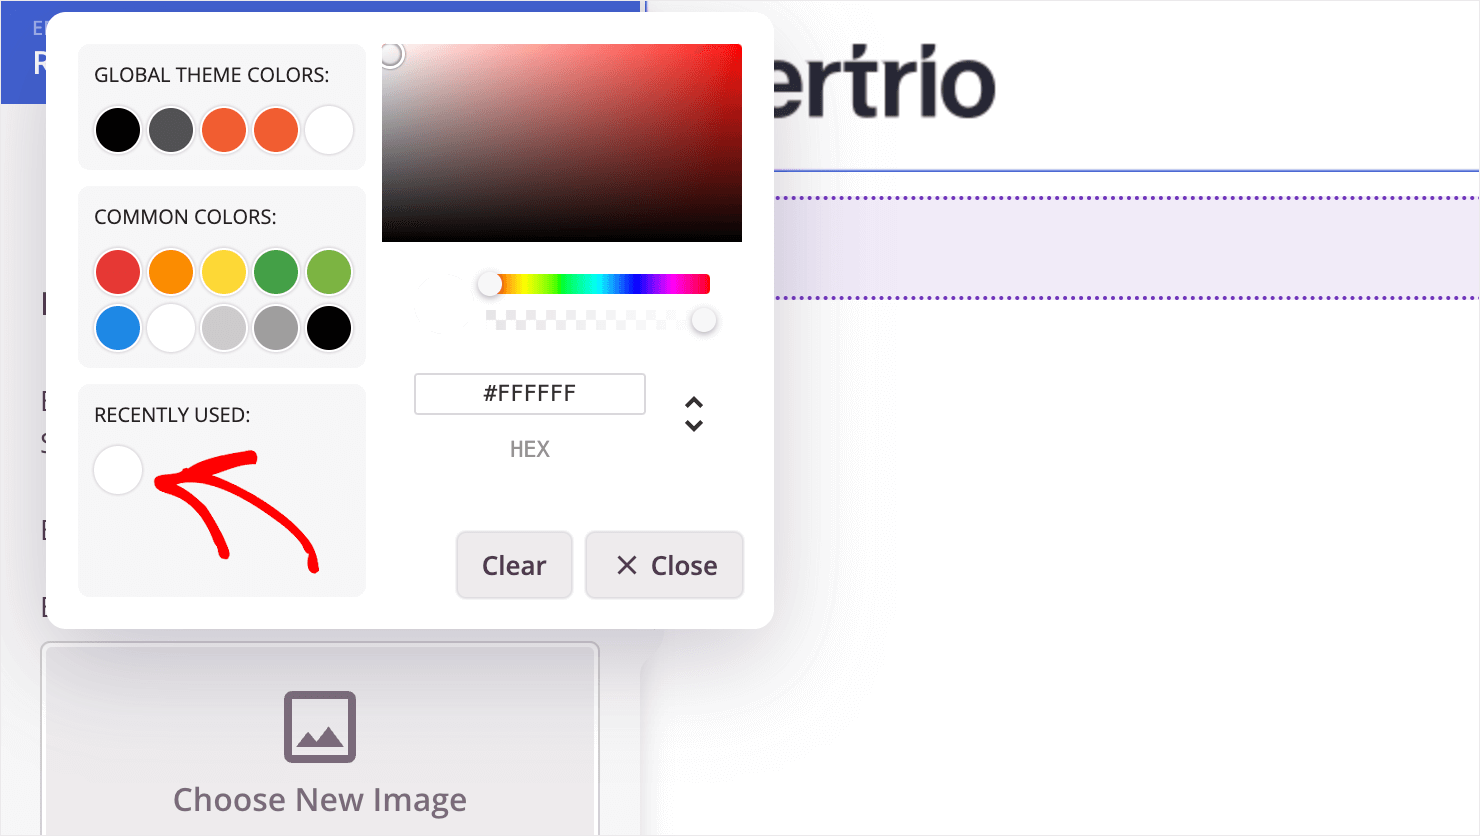
To change the background color, click the color palette icon and select the color you want.
Then, on the Advanced tab, you can add a shadow or border to your header, change its spacing settings, and more.
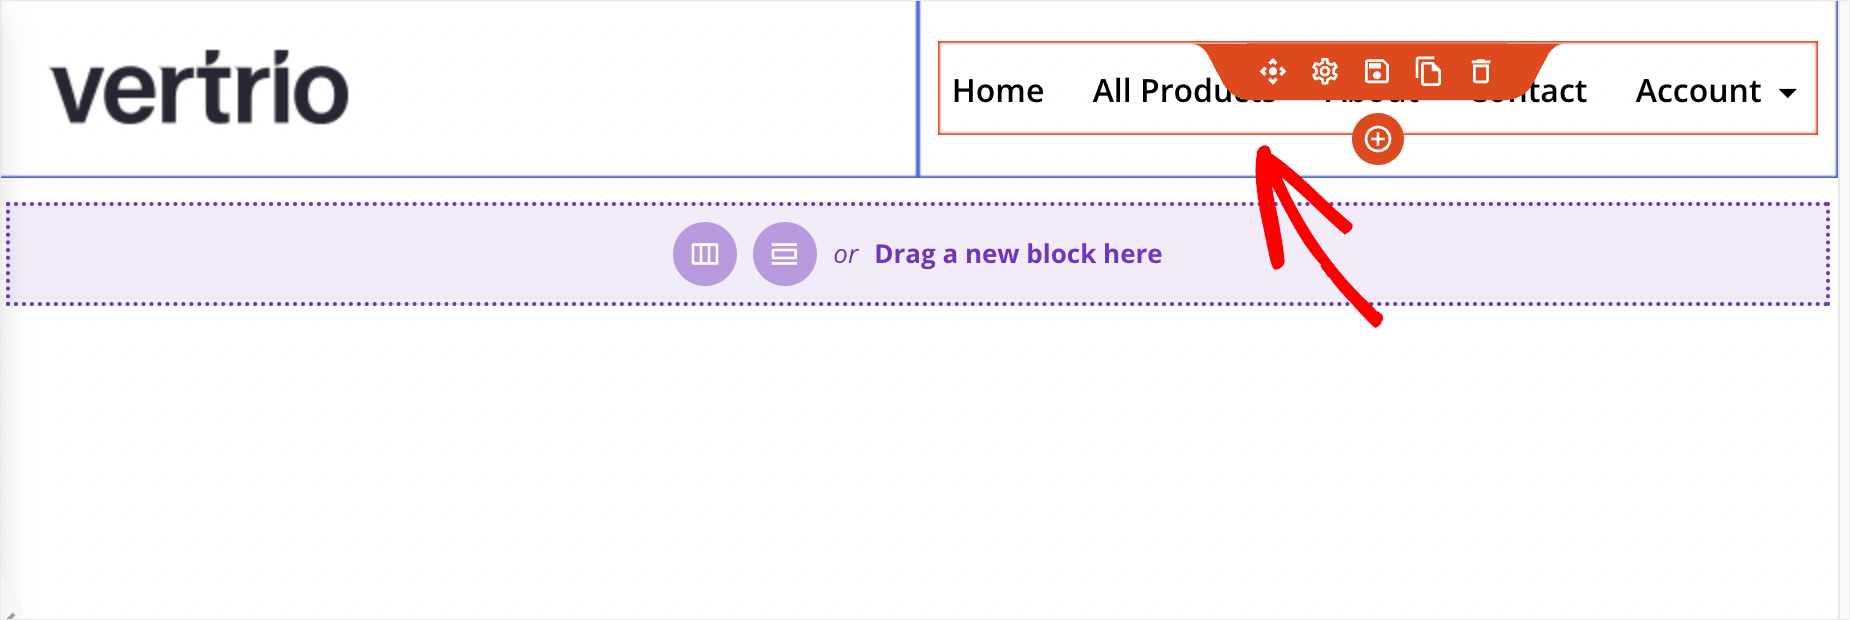
As the finishing touch, let’s make the navigation menu font a bit bigger. To do so, point a cursor over the menu and click on it.
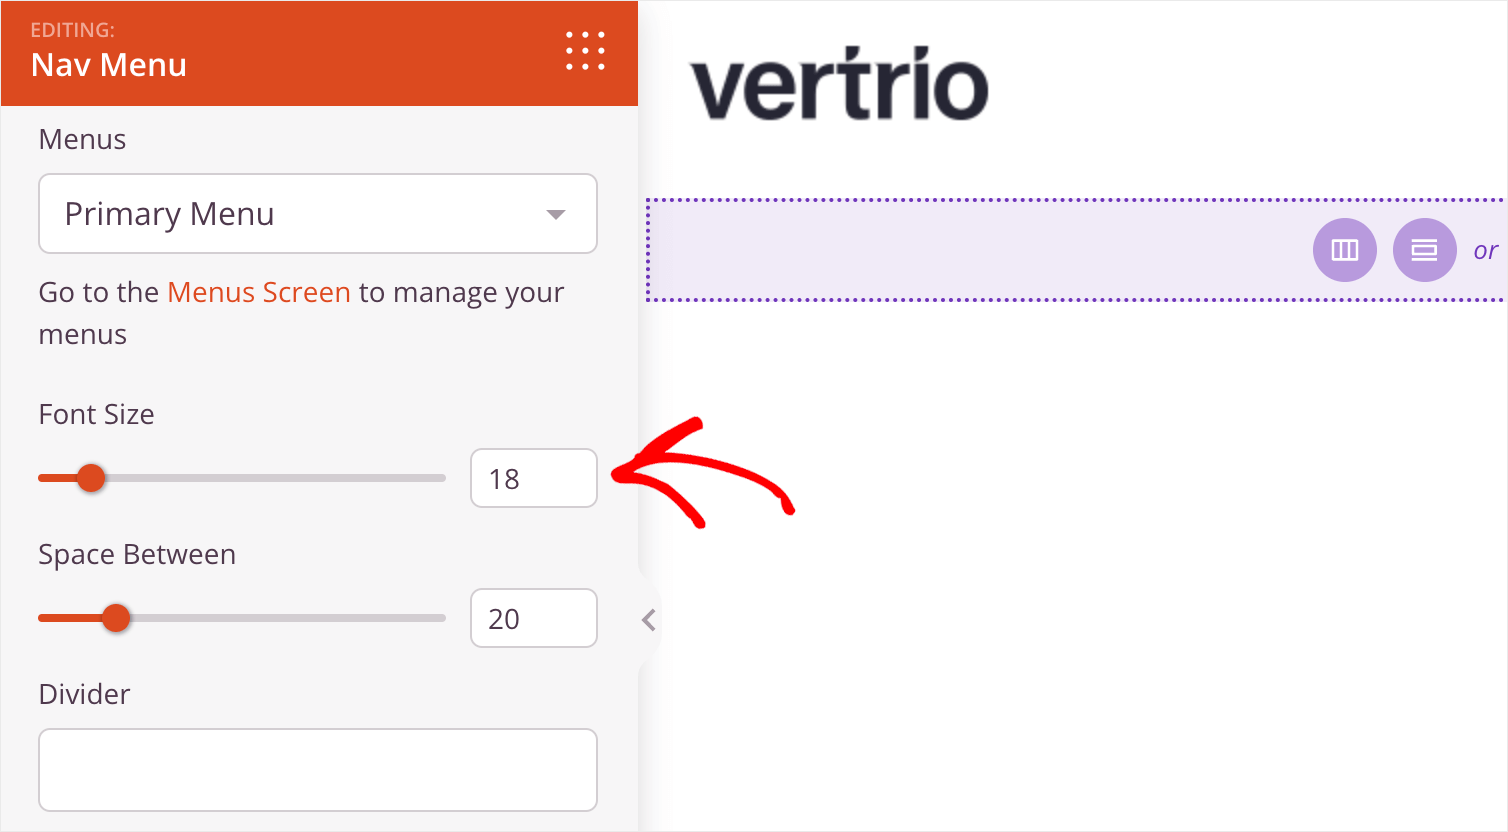
Now, in the Font Size field on the left sidebar, enter the desired font size.
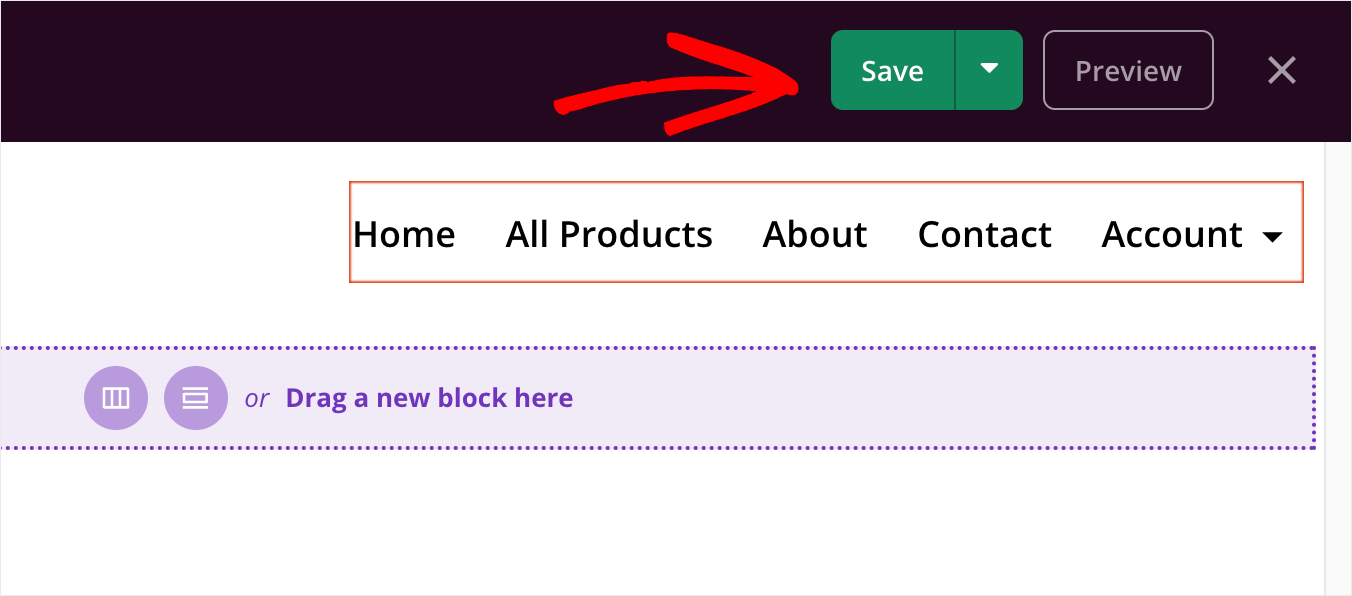
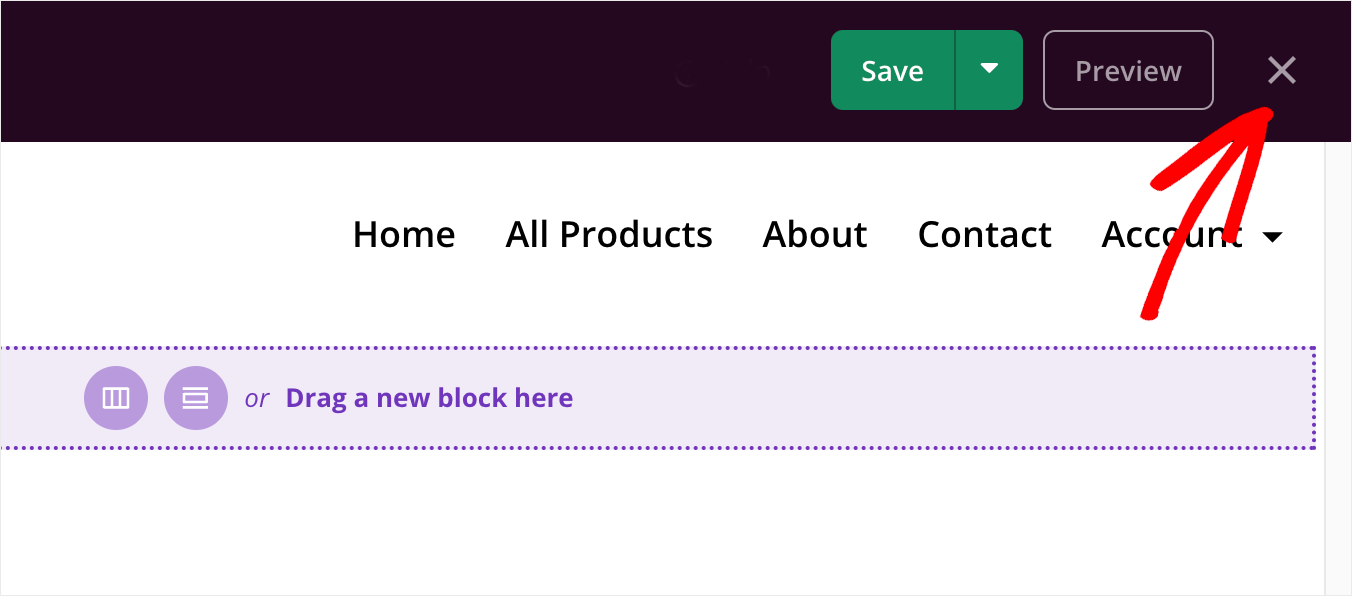
When you’ve finished customizing the header, press the Save button in the top-right corner.
Then, press the exit icon to leave the visual editor and go back to the theme templates page.
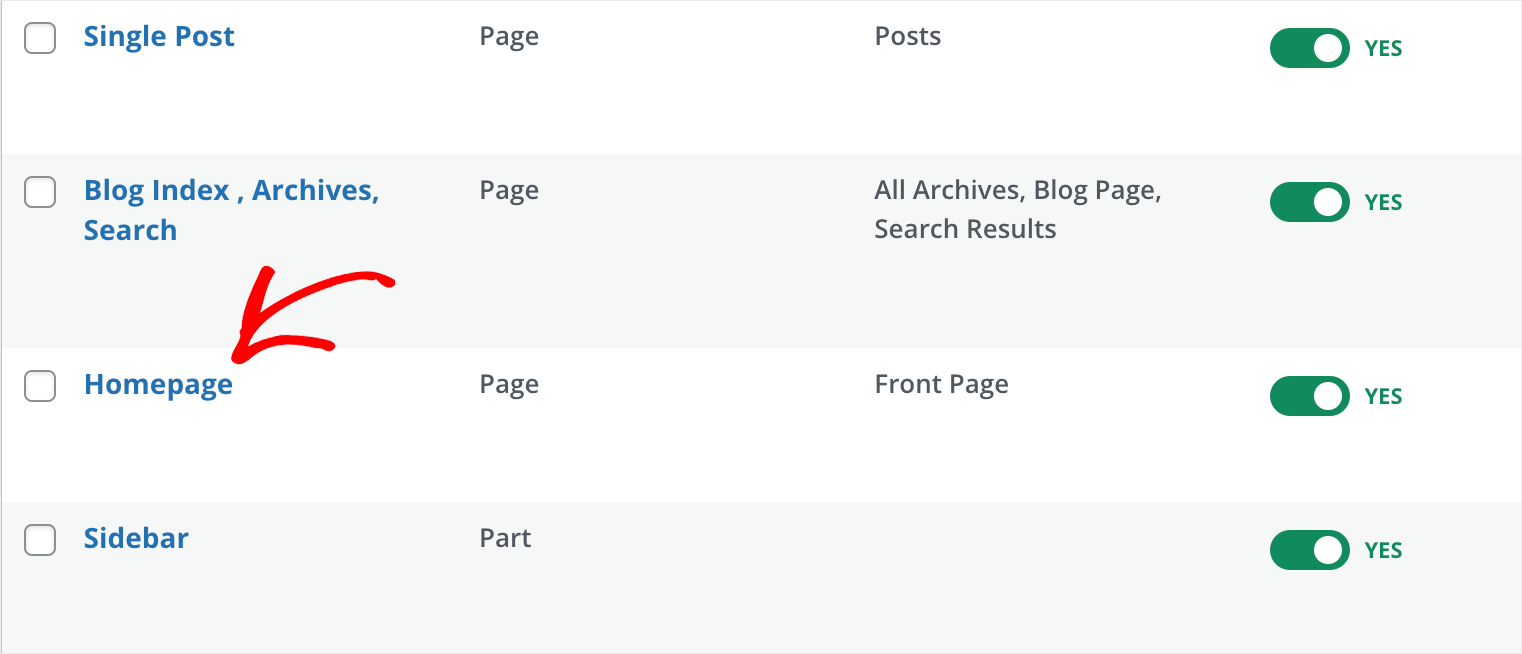
Next, let’s customize the Homepage.
Homepage
To do so, find the Homepage template among the other theme templates and click on it.
Our starter template has a homepage with features you can find on a typical business site, such as:
- Business description section
- List of clients with their logos
- Business features
- Testimonials
- FAQ section
- and more…
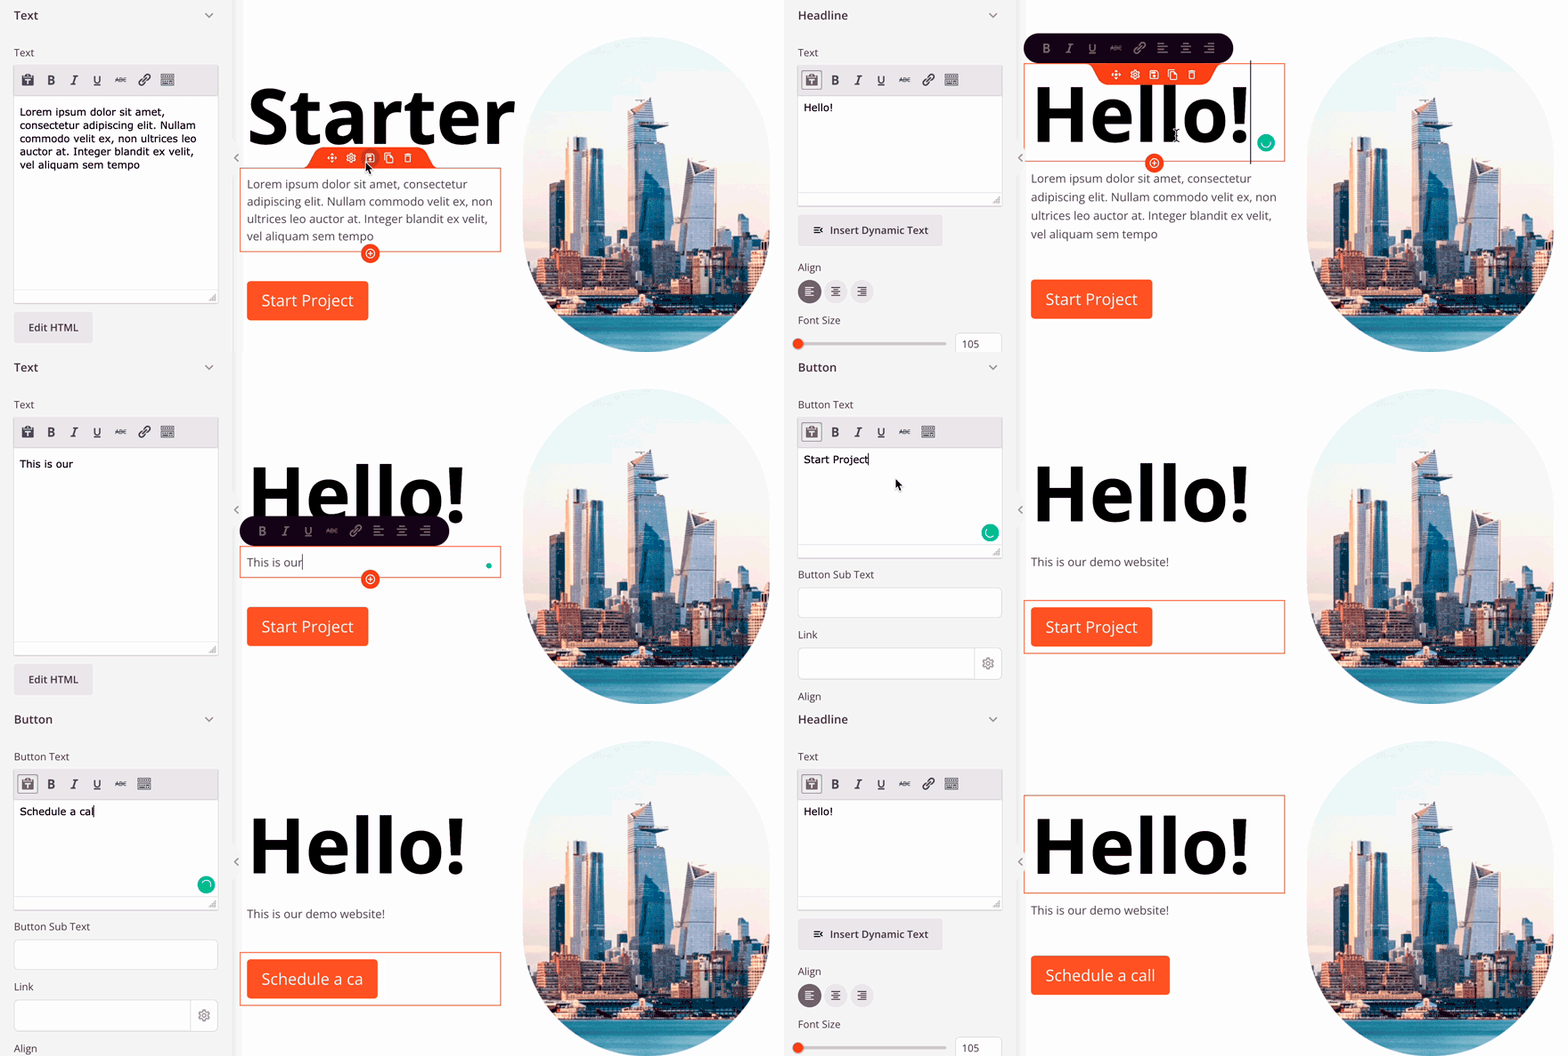
As with the header, you can interact with every element on the page and change its appearance.
For example, on the gif below you can see how we easily change the title, description and text of the button in the hero section with just a few clicks:
Now let’s try to add something new to our page.
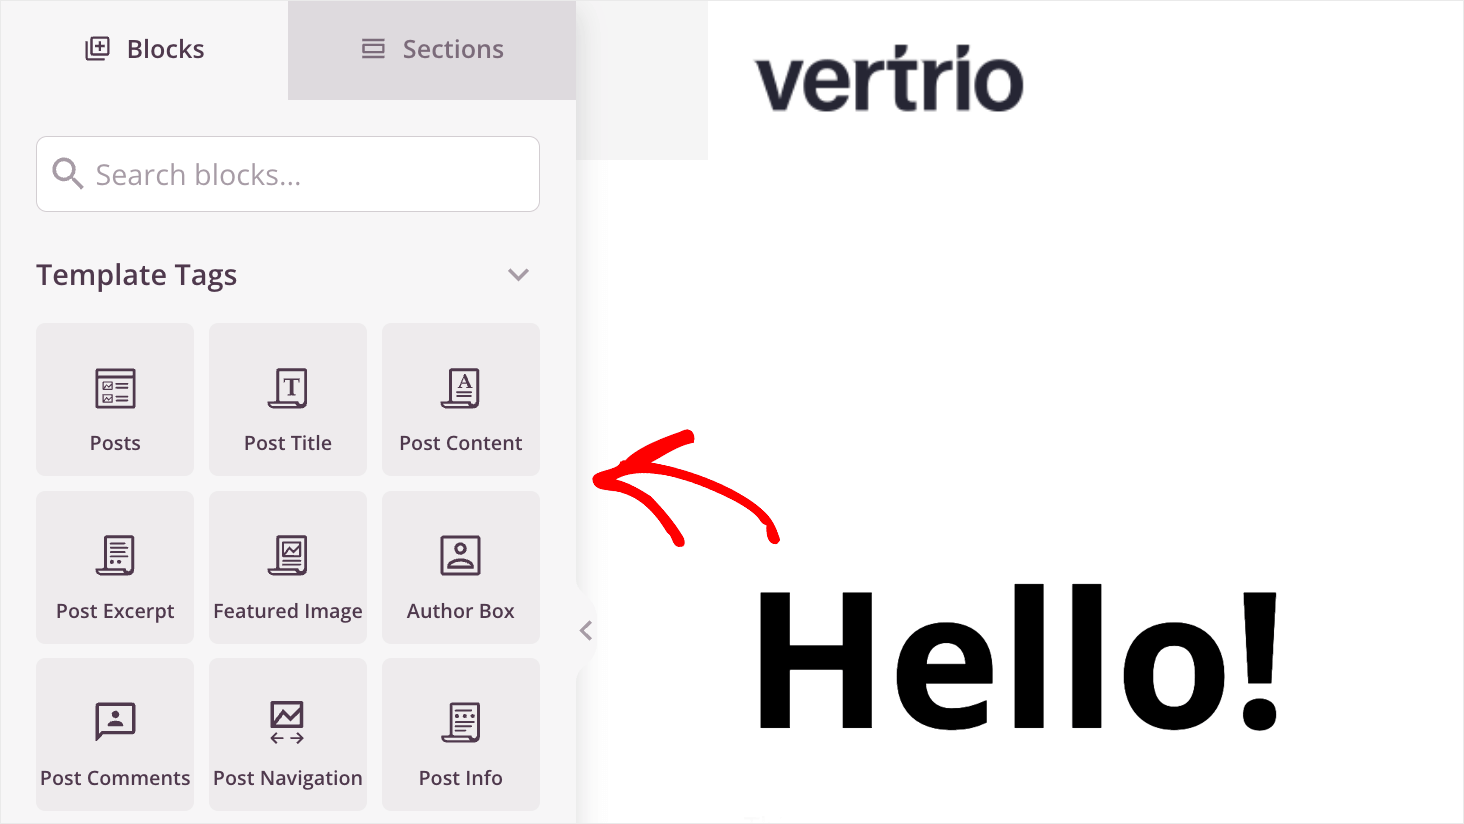
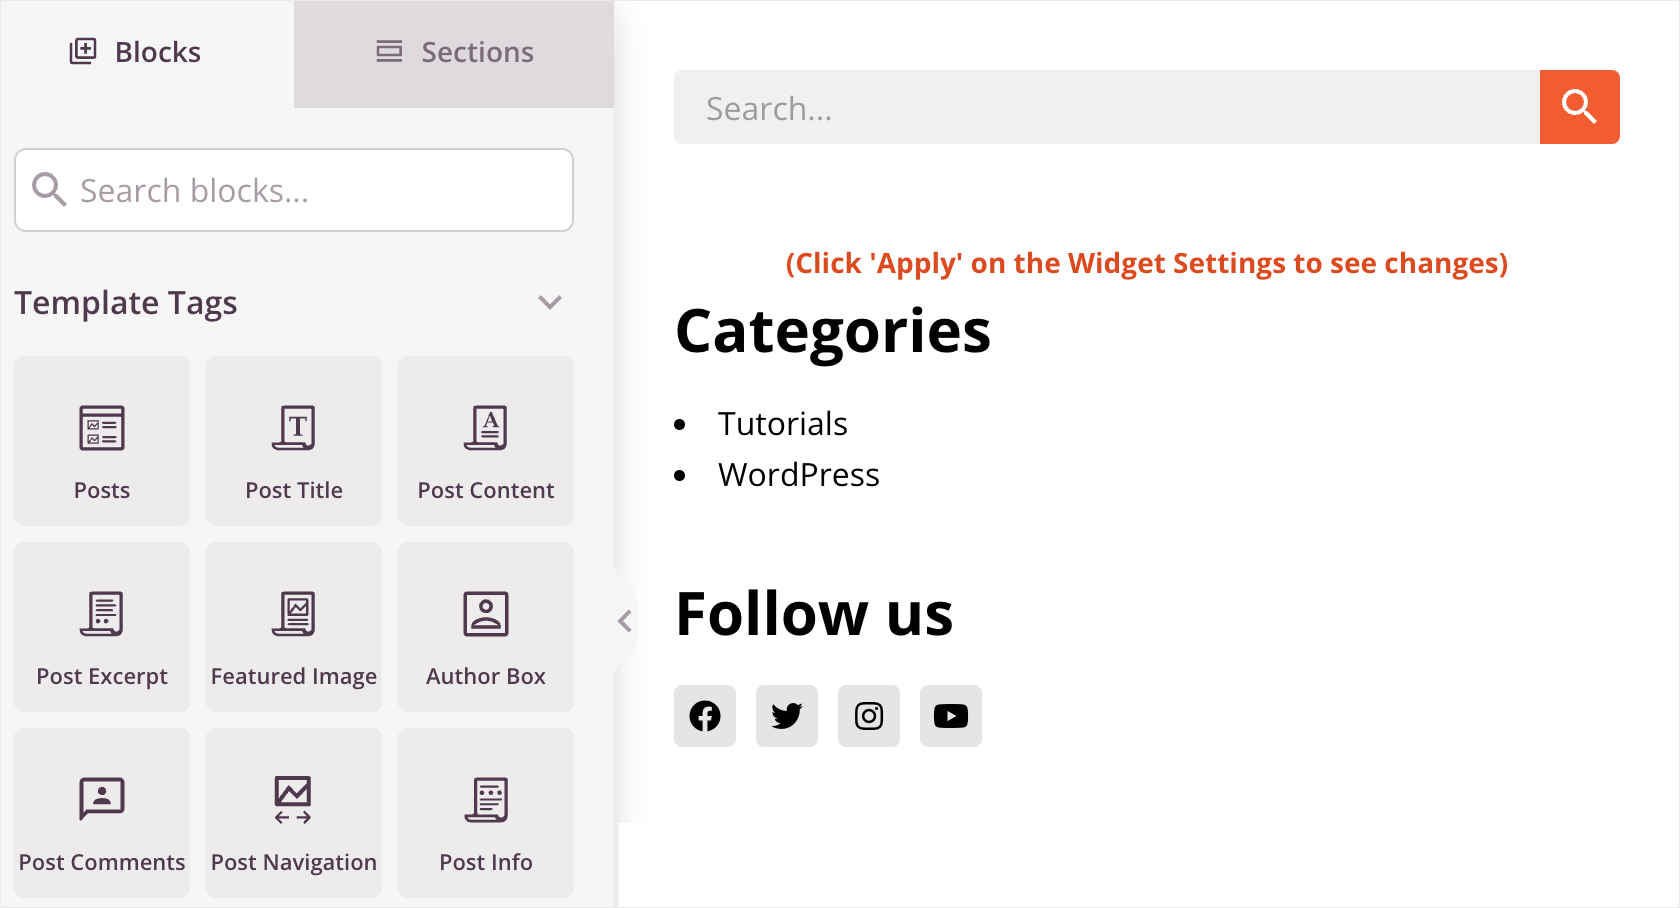
If no element on the page is currently selected, on the left sidebar, you can see the Blocks tab.
There are plenty of ready-made blocks that you can add to your page with a few clicks, no coding needed.
For example, you can find such blocks as the post author, price table, search form, and many others.
To add a specific block to your page, drag and drop it at the place you want.
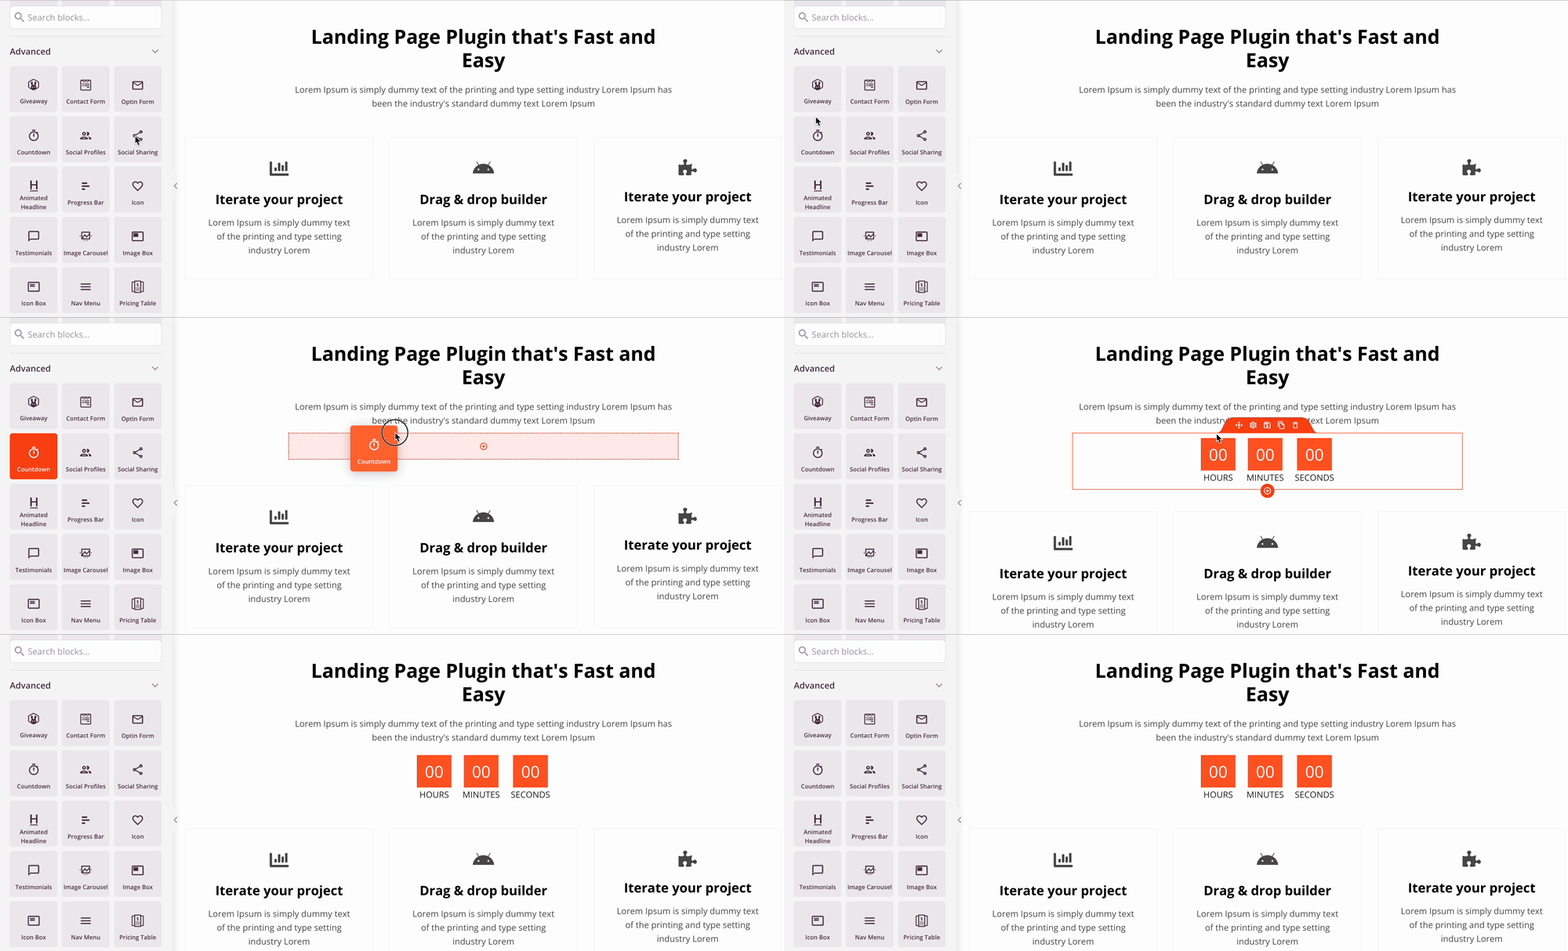
For example, let’s add a Countdown block to the Features section:
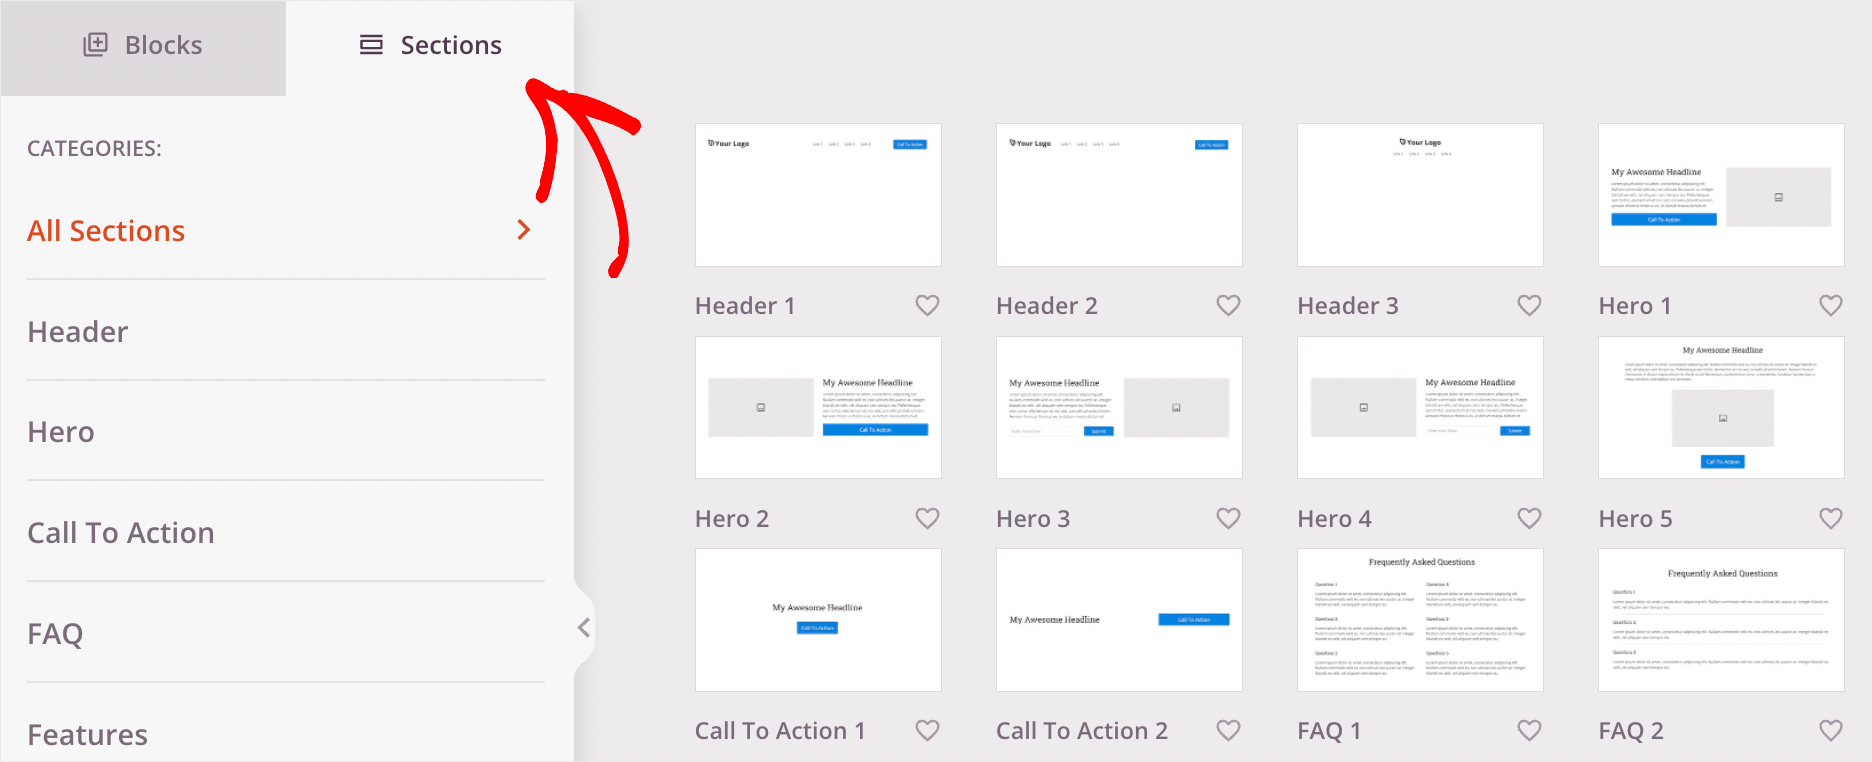
Plus, if you go over to the Sections tab, you’ll find tons of premade sections that you can also add to your page, such as:
- Headers
- Footers
- Call to action
- Features
- Testimonials
- and many more…
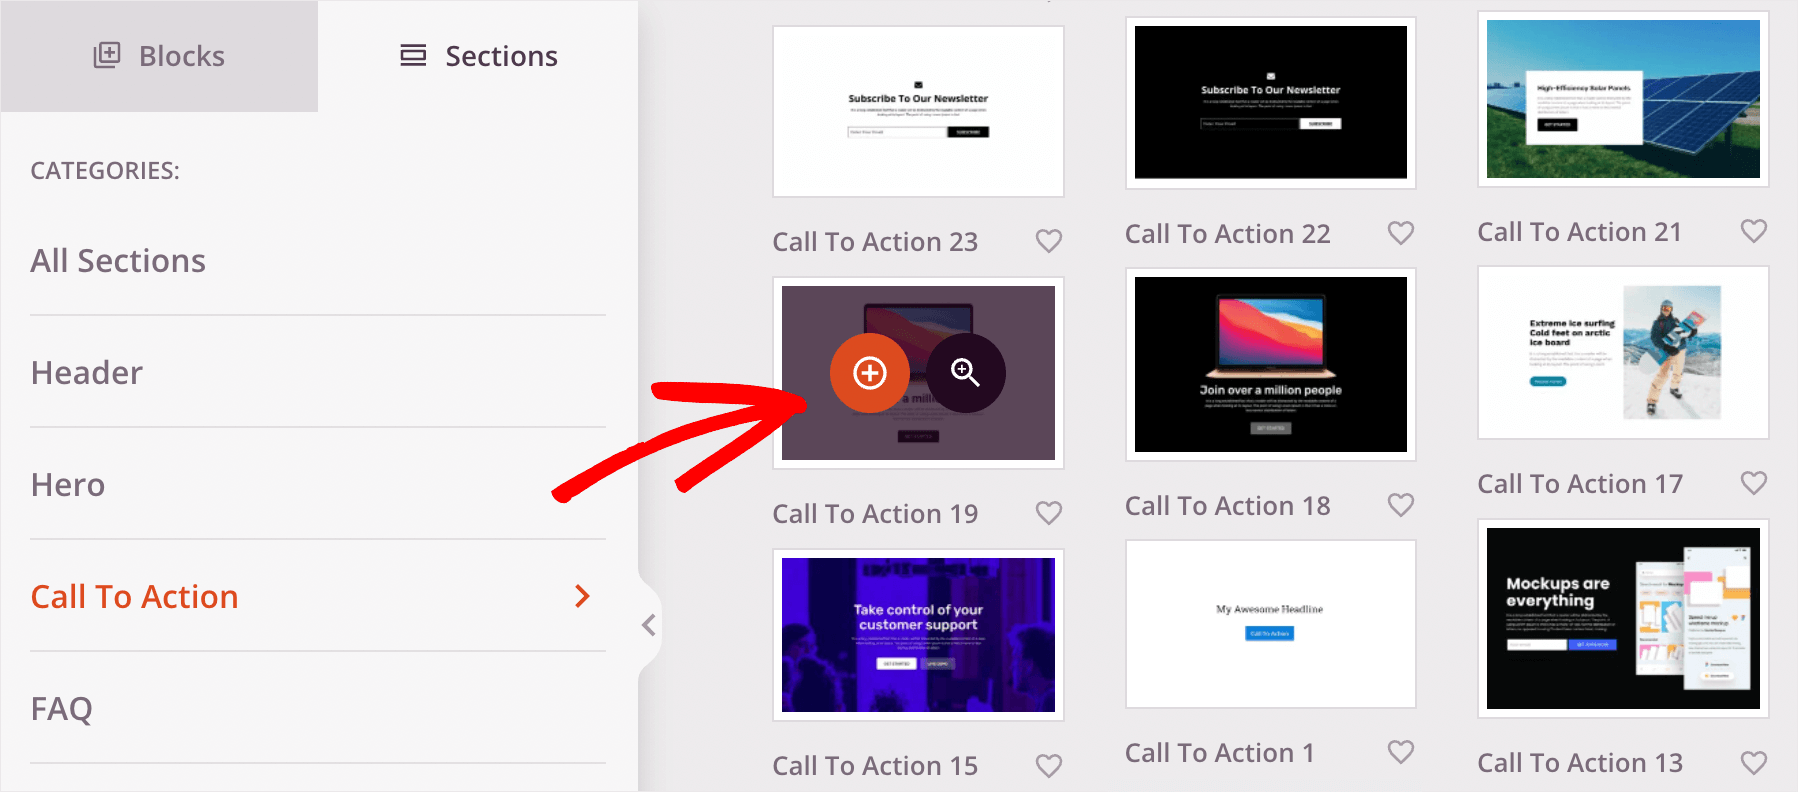
To add a new section to the page, hover your mouse over the desired section and click the plus icon.
For example, let’s add a new Call to Action section to our page.
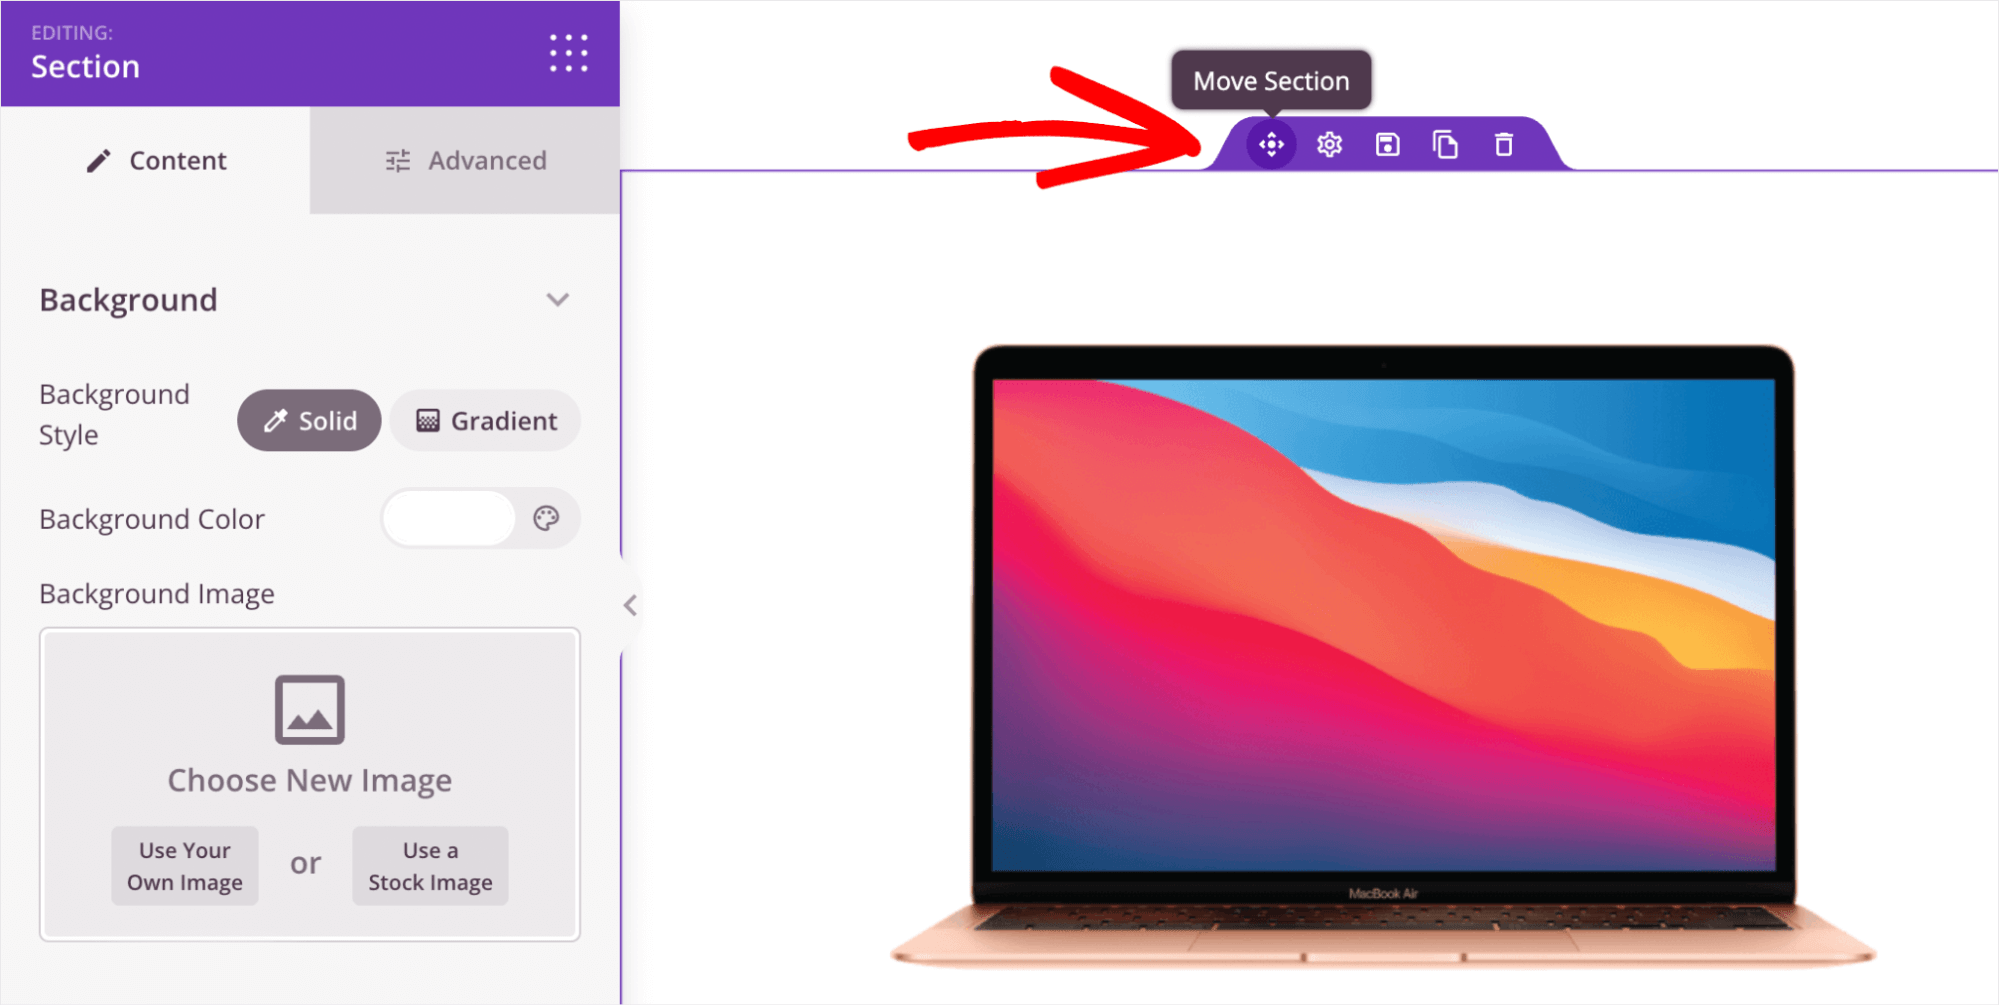
By default, the new section will appear at the very end of the page.
To change the section position, point a cursor over its top border, choose the Move Section option and drag it the same way as a block.
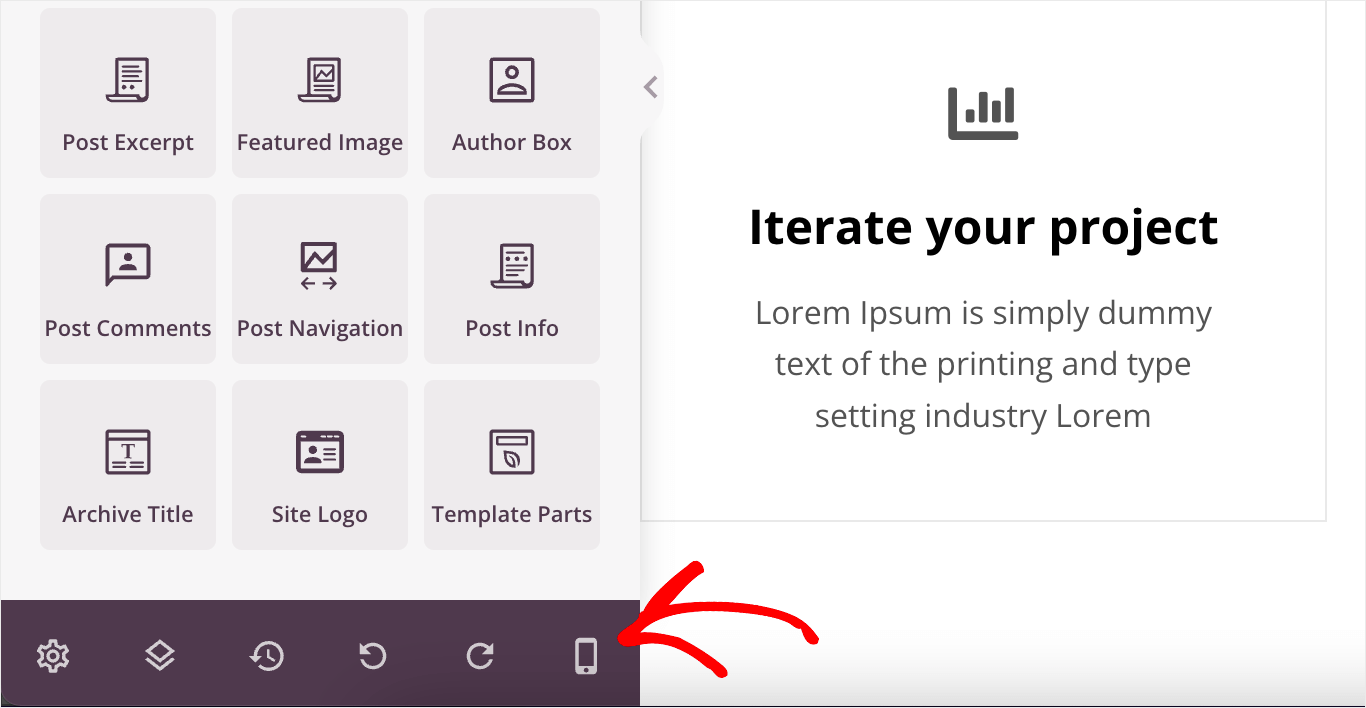
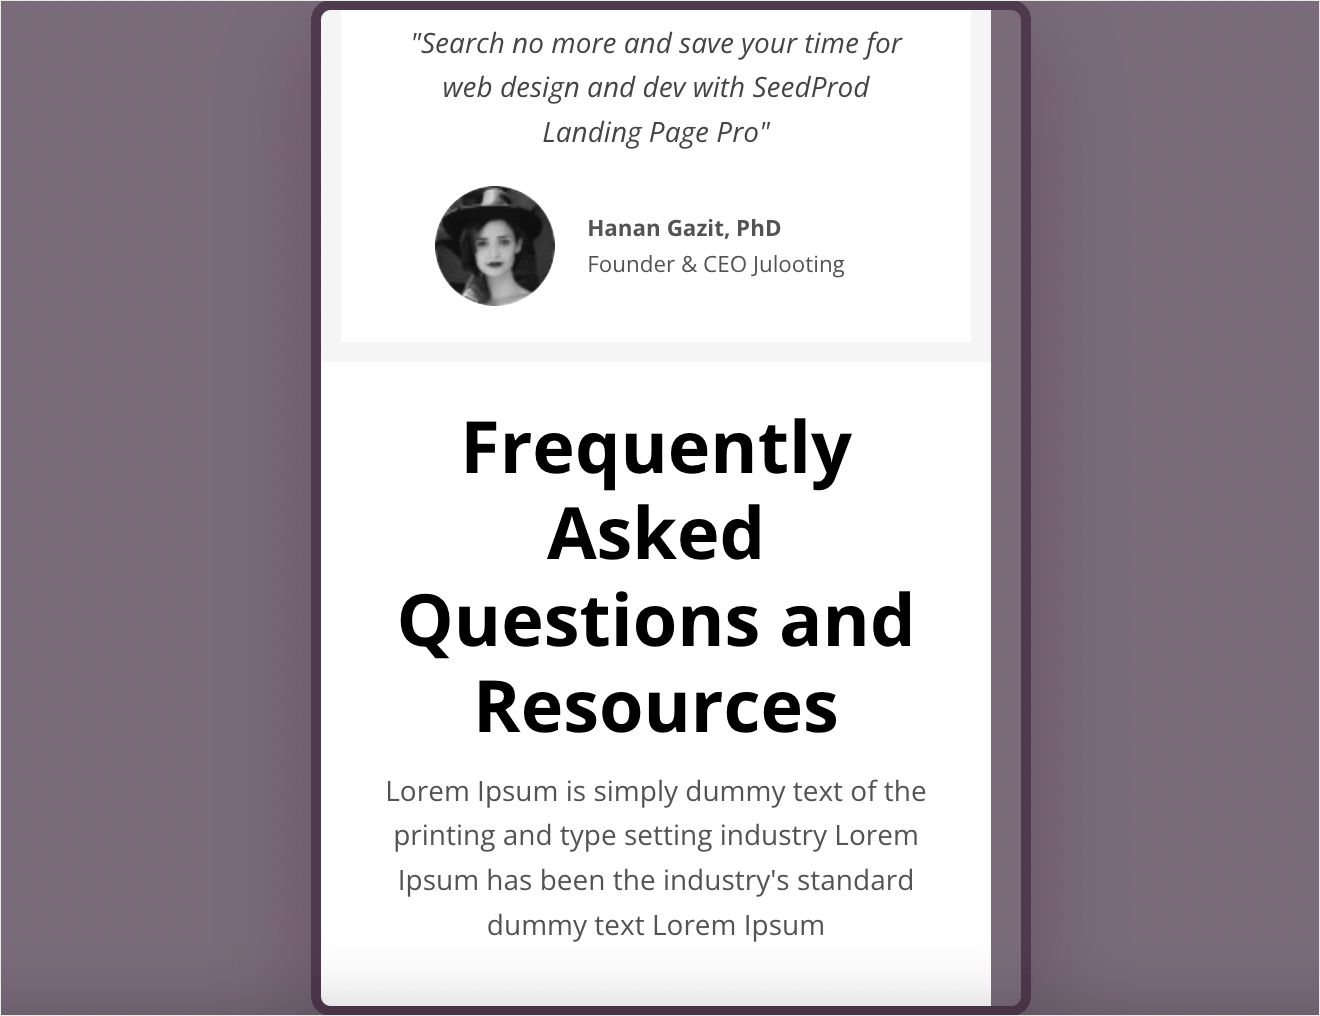
When you’re finished customizing your homepage, you can see how it looks on mobile devices.
To do that, click the mobile preview icon at the bottom left corner.
If there are some blocks or sections that don’t look right, you can move them around until you’re sure that your mobile version offers the best user experience.
When you’re satisfied with your homepage, don’t forget to press the Save button to save all the changes you’ve made.
Blog Index, Archives, and Search pages
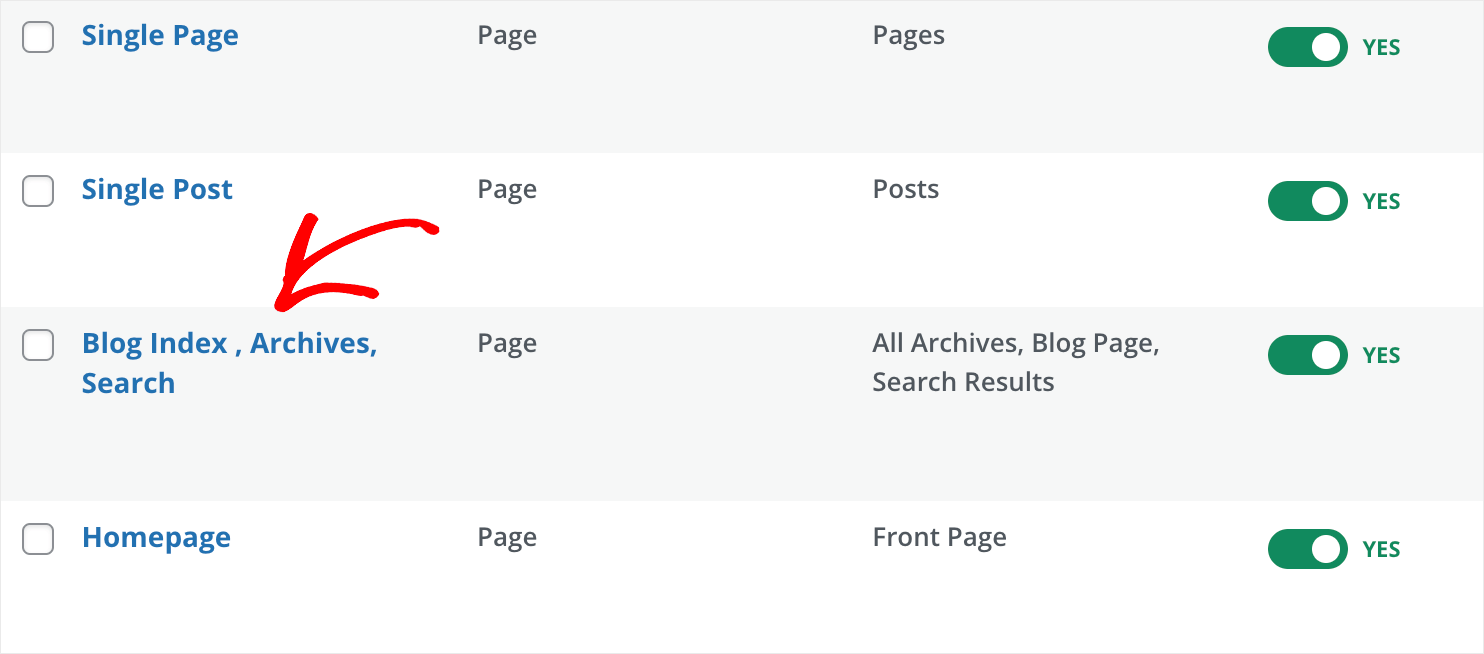
Let’s now look at a template that’s called Blog Index, Archives, Search.
As you can assume from its name, this template is responsible for displaying the blog posts page, archives, and search results.
This is handy since you can change the appearance of 3 pages at once.
As you’ve already learned how to customize pages, and add new blocks and sections to them, let’s focus on setting up specific elements.
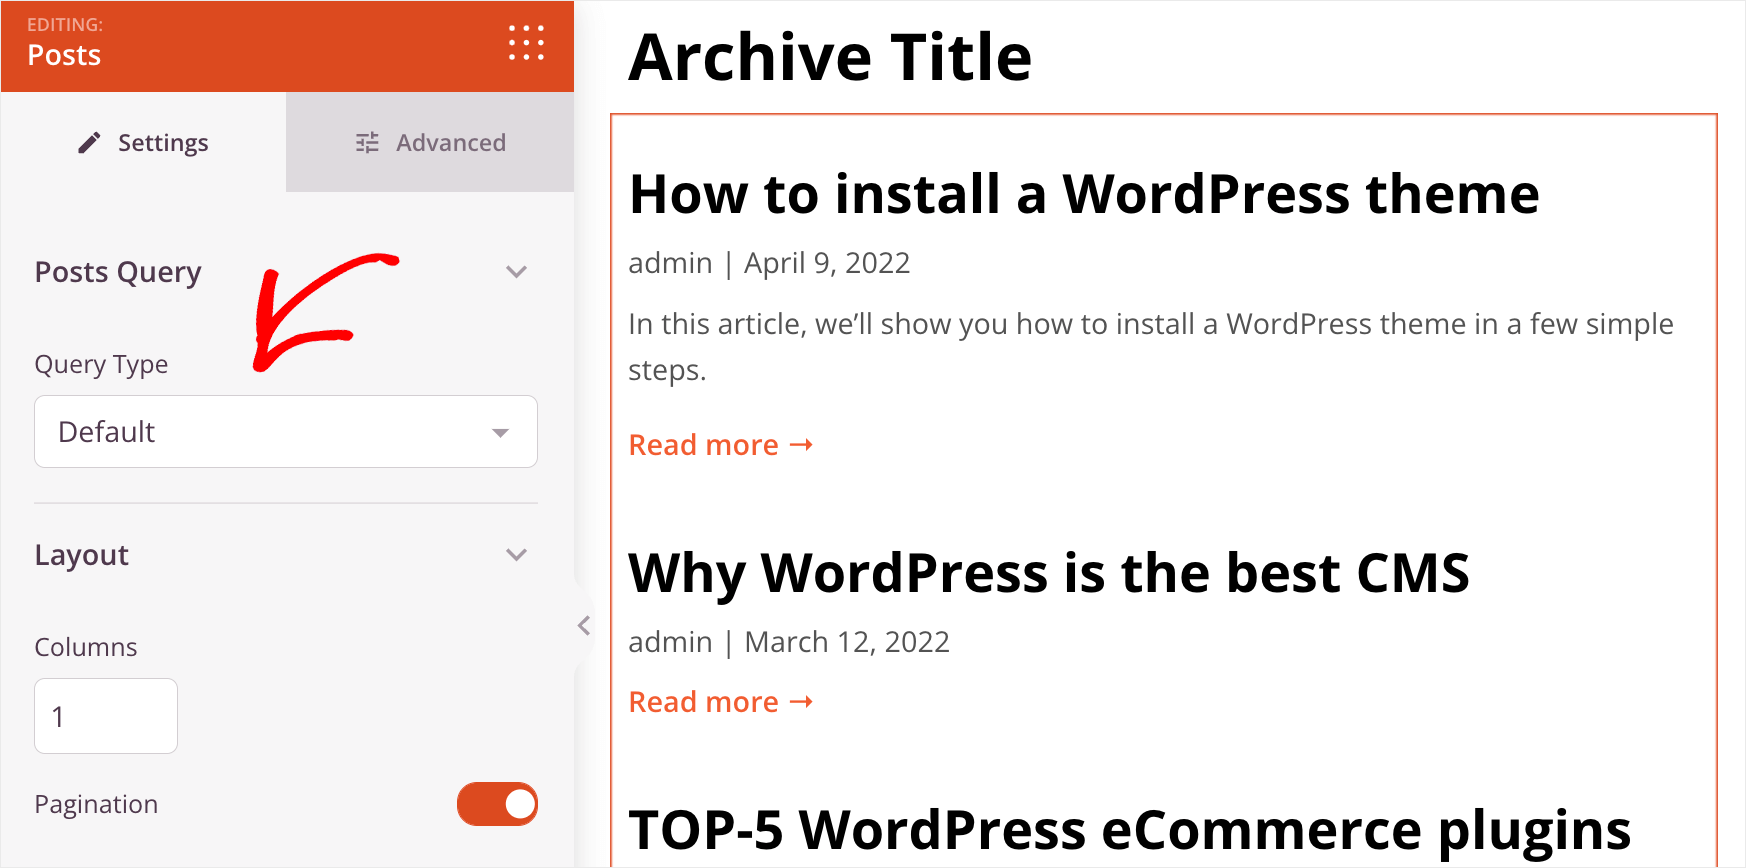
For example, if you click on the Posts element, you can change the posts’ order, exclude posts from specific categories, tags or authors, and more.
Plus, you’re free to fully customize the layout of the post list.
Namely, you can change the number of columns and posts per page, change the visibility of the author’s name, publish date, time, and comment count.
It’s rare that a website builder allows you to control such things, no coding needed, which is another reason for SeedProd’s popularity.
Single Post
When you’re finished customizing your blog page, let’s also edit the Single Post template.
A typical blog post has the following parts:
- Featured image
- Post title
- Post info
- Post content
- Author box
- Comments section
The best thing is, with SeedProd, you can fully customize each of these parts.
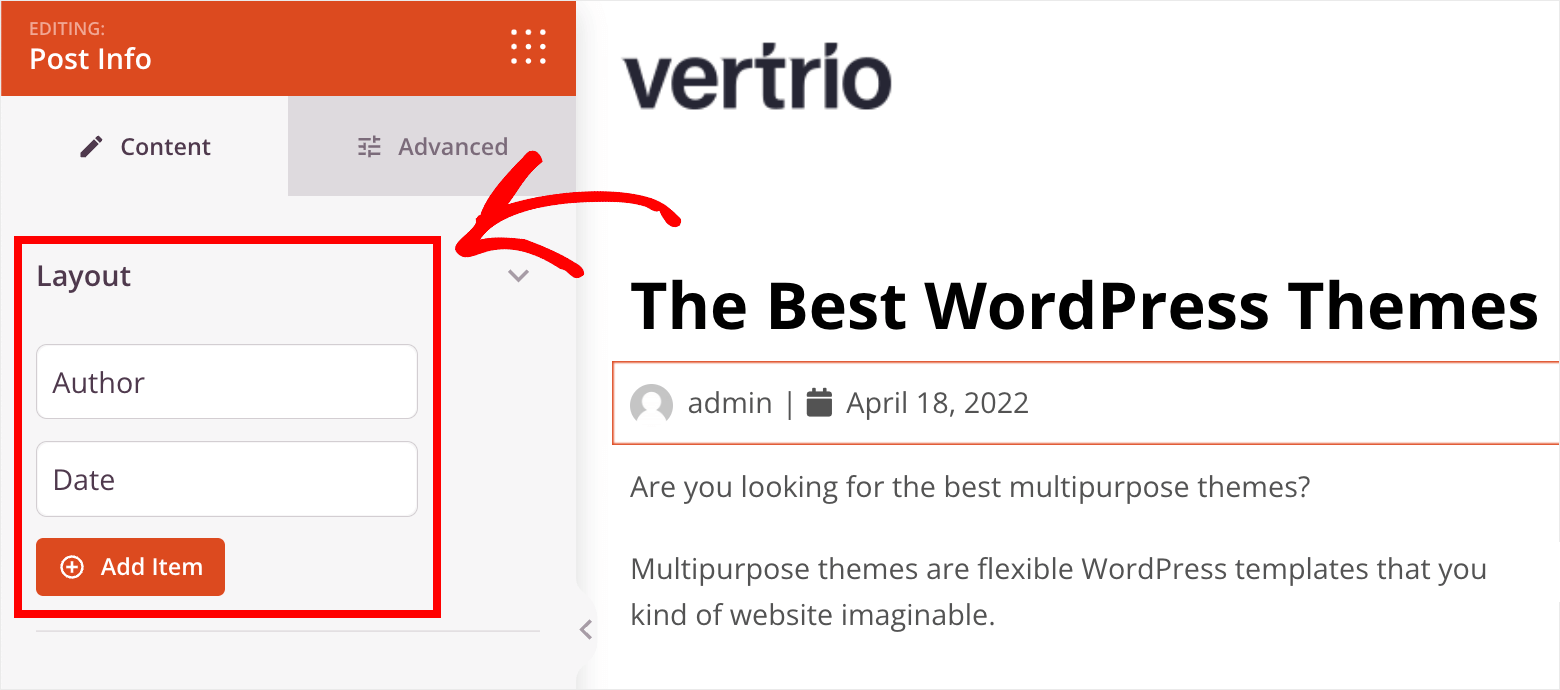
For example, if you click on the Post info element, you can add new useful data to it.
It can be a time of publication or modification, additional info about the post author, or something else you want to specify.
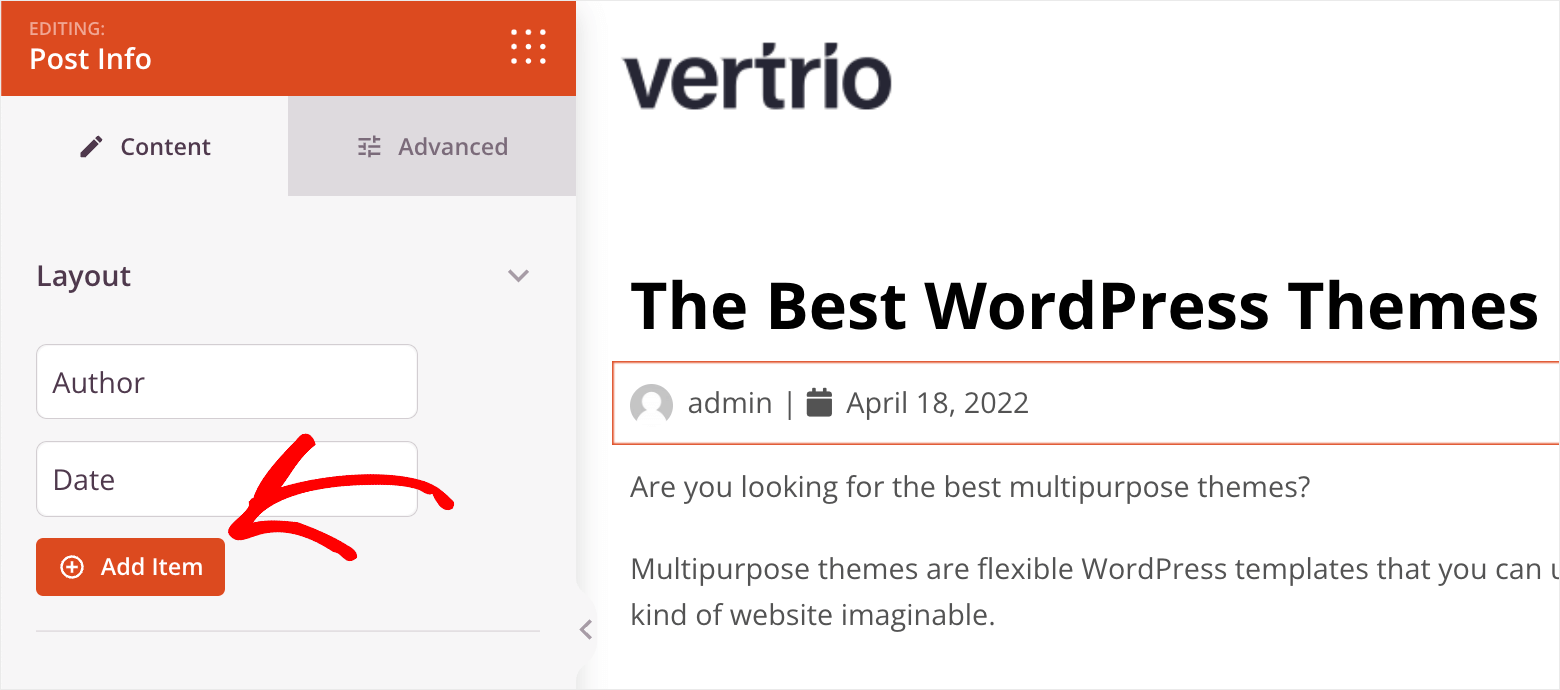
For example, let’s say we want to display the number of comments in our post info section. To get started, press the Add Item button.
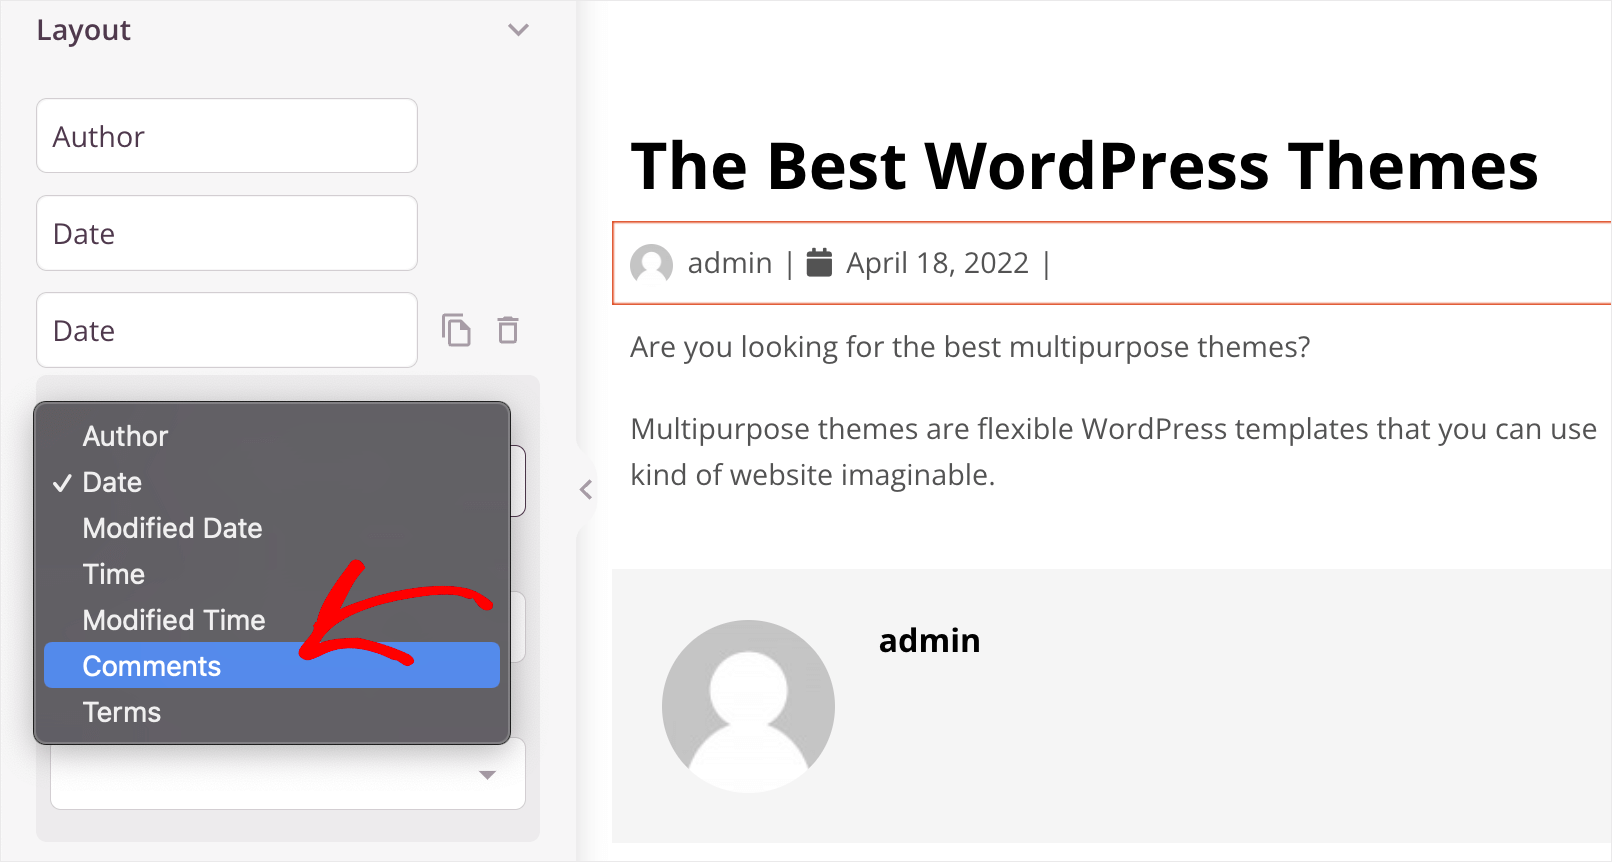
Then, click on the Type drop-down menu and select the Comments option.
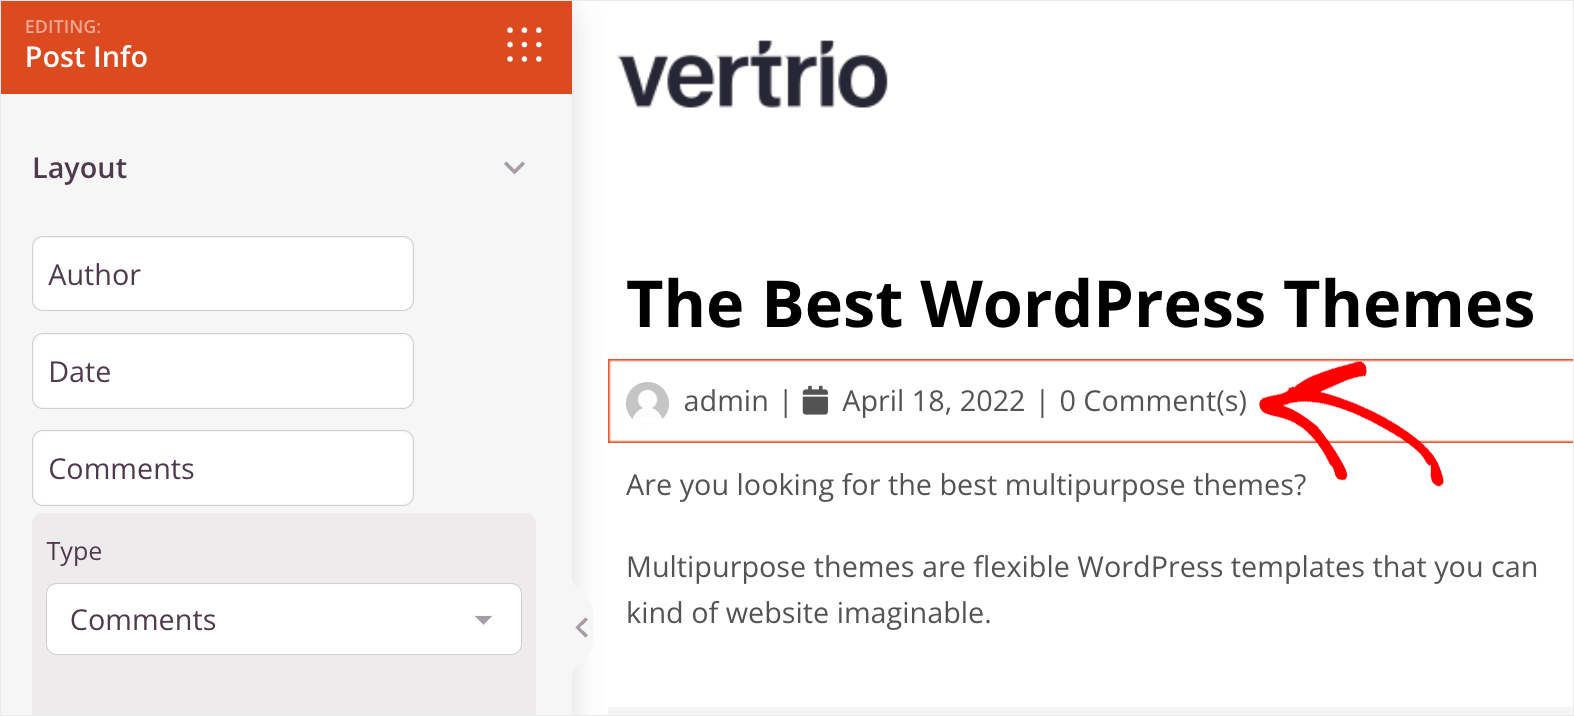
After that, you’ll see that the number of comments now displays inside the post info element.
This way, you can easily customize any element on the page.
Sidebar
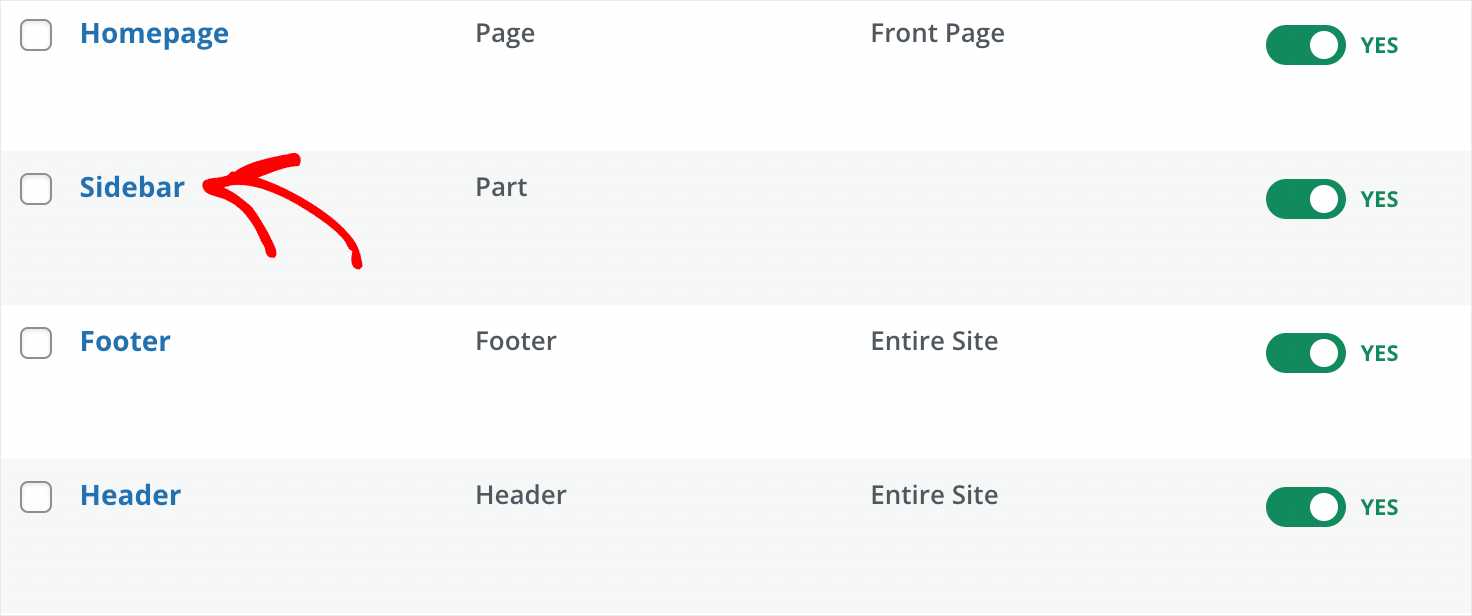
Let’s also change the appearance of our theme’s sidebar. Head over to the theme builder dashboard and click on the Sidebar template.
Sidebar is very popular among WordPress site owners. It’s a great place to put relevant website elements such as a list of recent posts, subscription form, and many others.
And there is good news. SeedProd allows you to customize your sidebar totally in the same way as other templates.
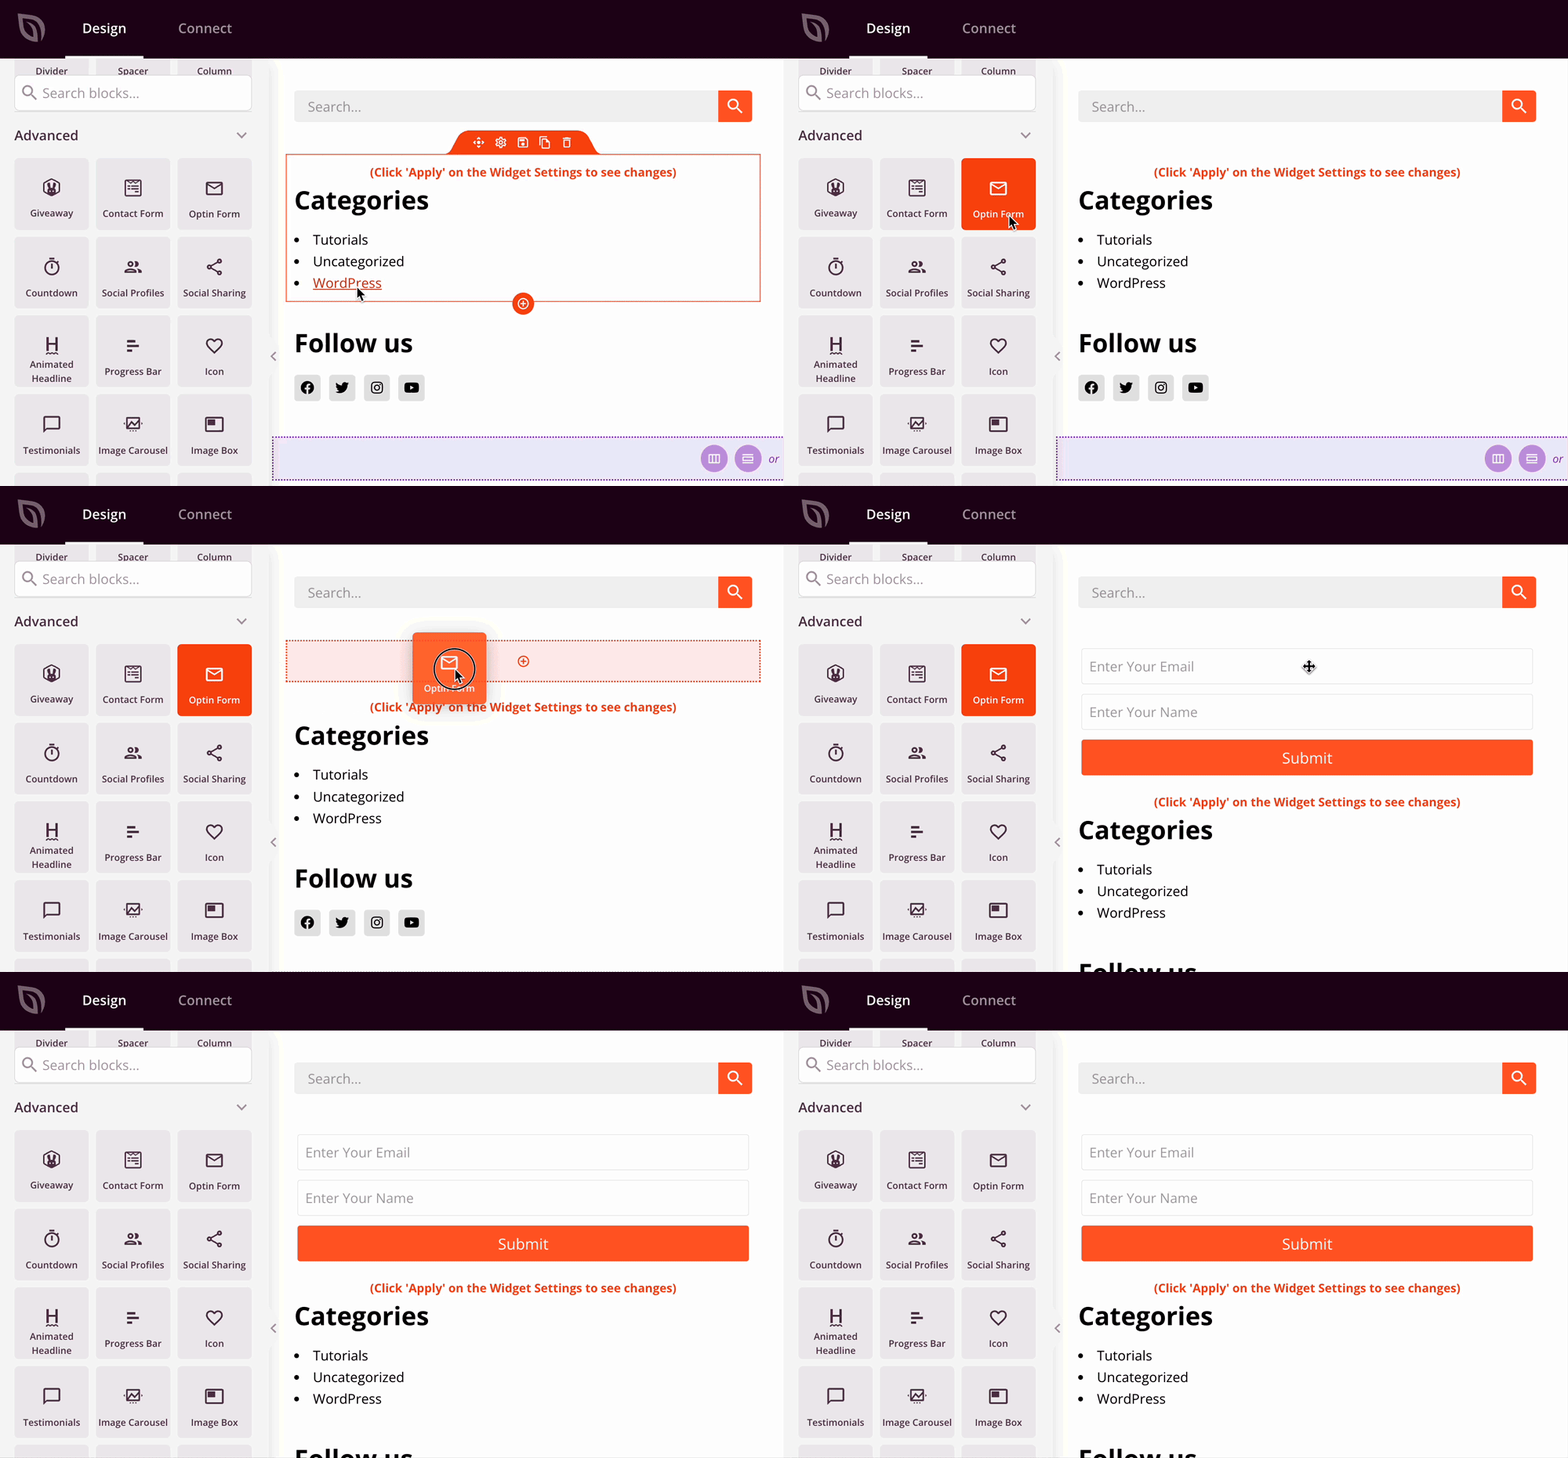
For example, you can add an email newsletter signup form to your sidebar with a few clicks.
To do that, simply drag and drop the Optin Form element from the Blocks tab to your sidebar:
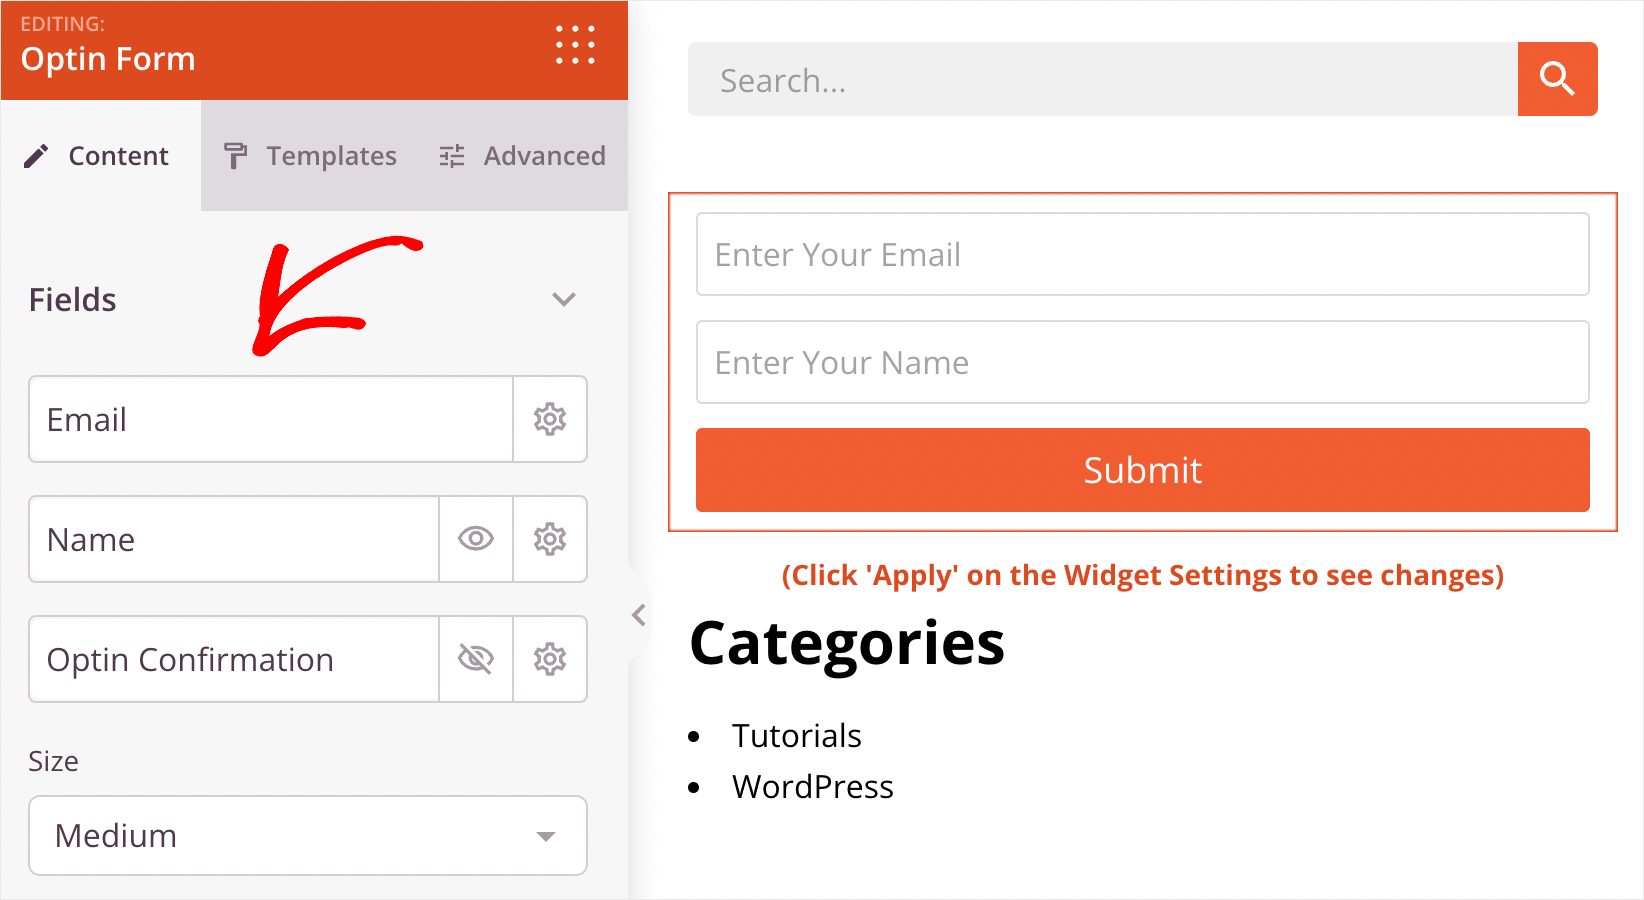
Then, if you click on it, you can change the number of fields, their type and more.
Now that you know how to work within the SeedProd visual editor, you’re ready to customize your theme’s global CSS.
Step 4: Customize Your Theme’s Global CSS (No Code)
First, let’s clarify what CSS is and how you can change your site’s global appearance by editing this file.
CSS stands for cascading style sheets. It’s a file that contains code that determines your site’s global styling, typography, and colors.
When you change the appearance of an element in the CSS file, those changes apply to that element across your entire site.
Every WordPress theme has its own CSS file. Typically, to make changes to it, you need to have some background in web development.
But, SeedProd allows you to customize your site’s global CSS in a simple and beginner-friendly editor.
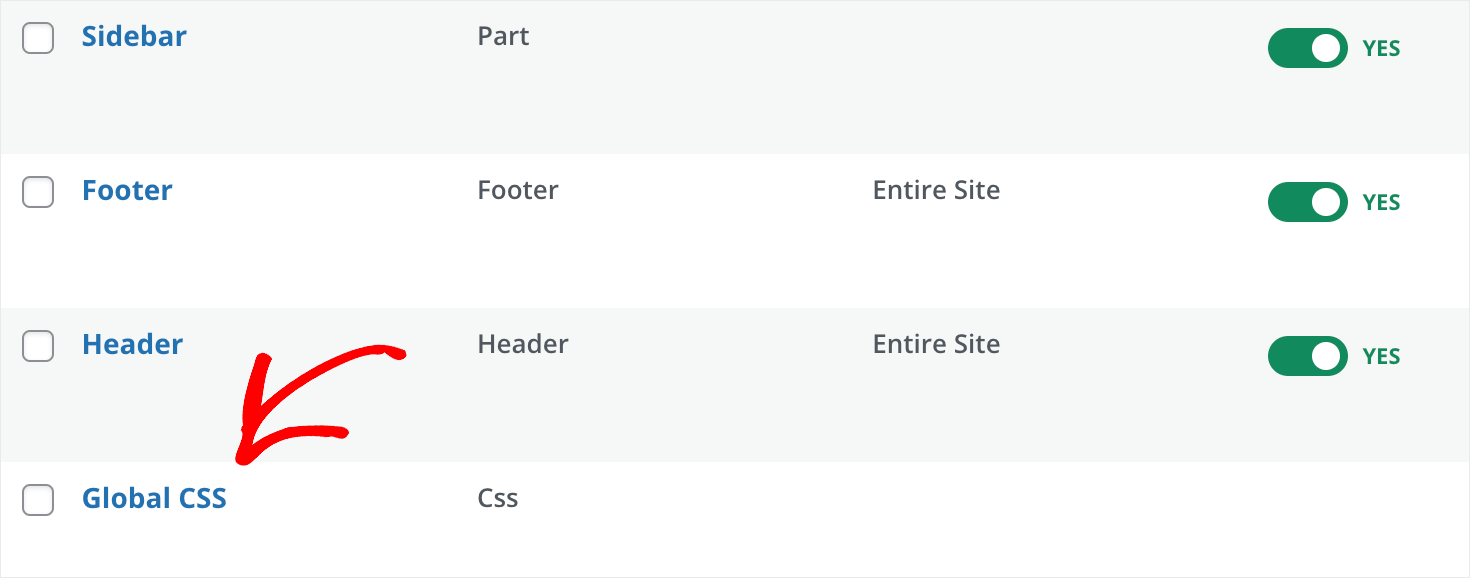
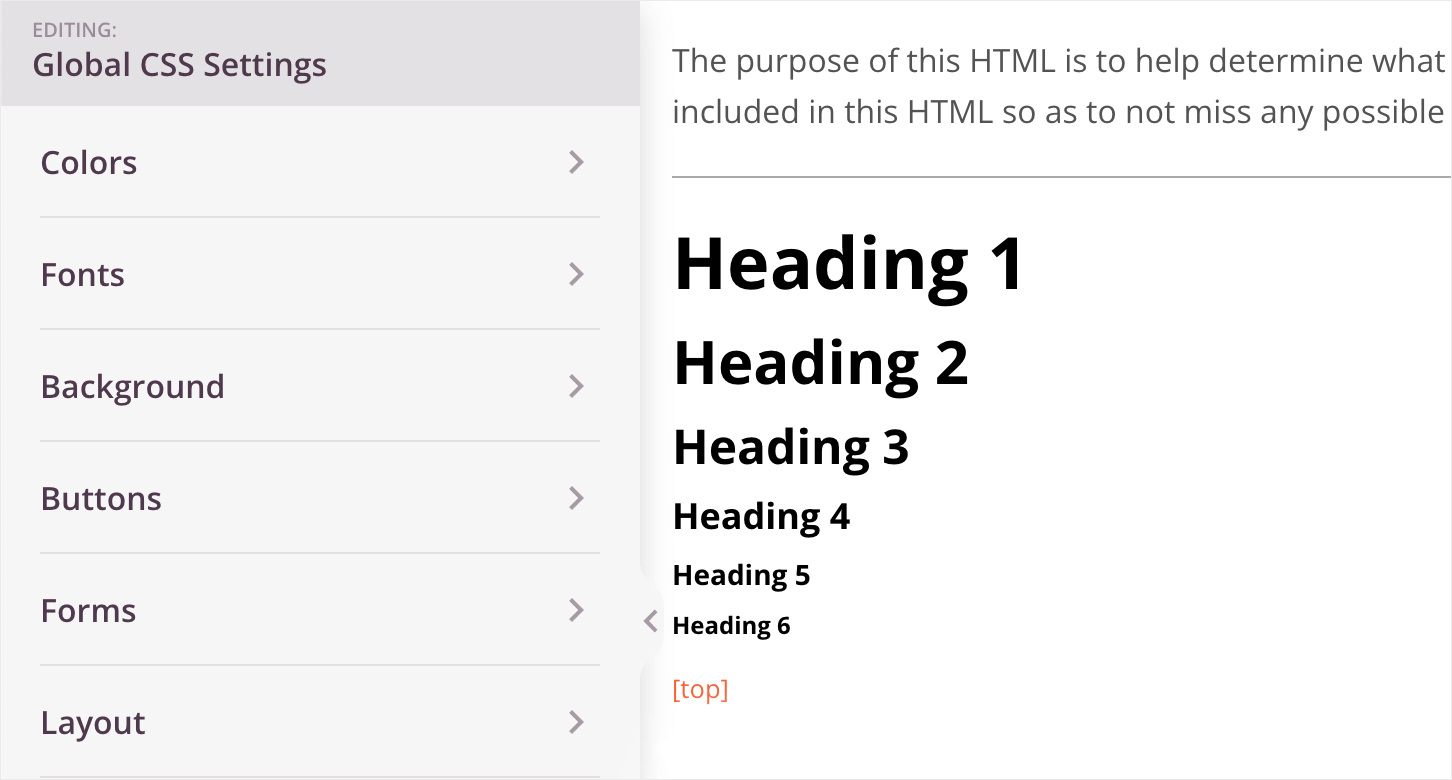
To get started, click on the Global CSS template in your theme templates dashboard.
This will take you to the global CSS settings visual editor.
On the left side, you’ll find tabs where you can change your site’s color, fonts, background, and more.
And on the right side, you can see the results of the changes you’ve made in real-time.
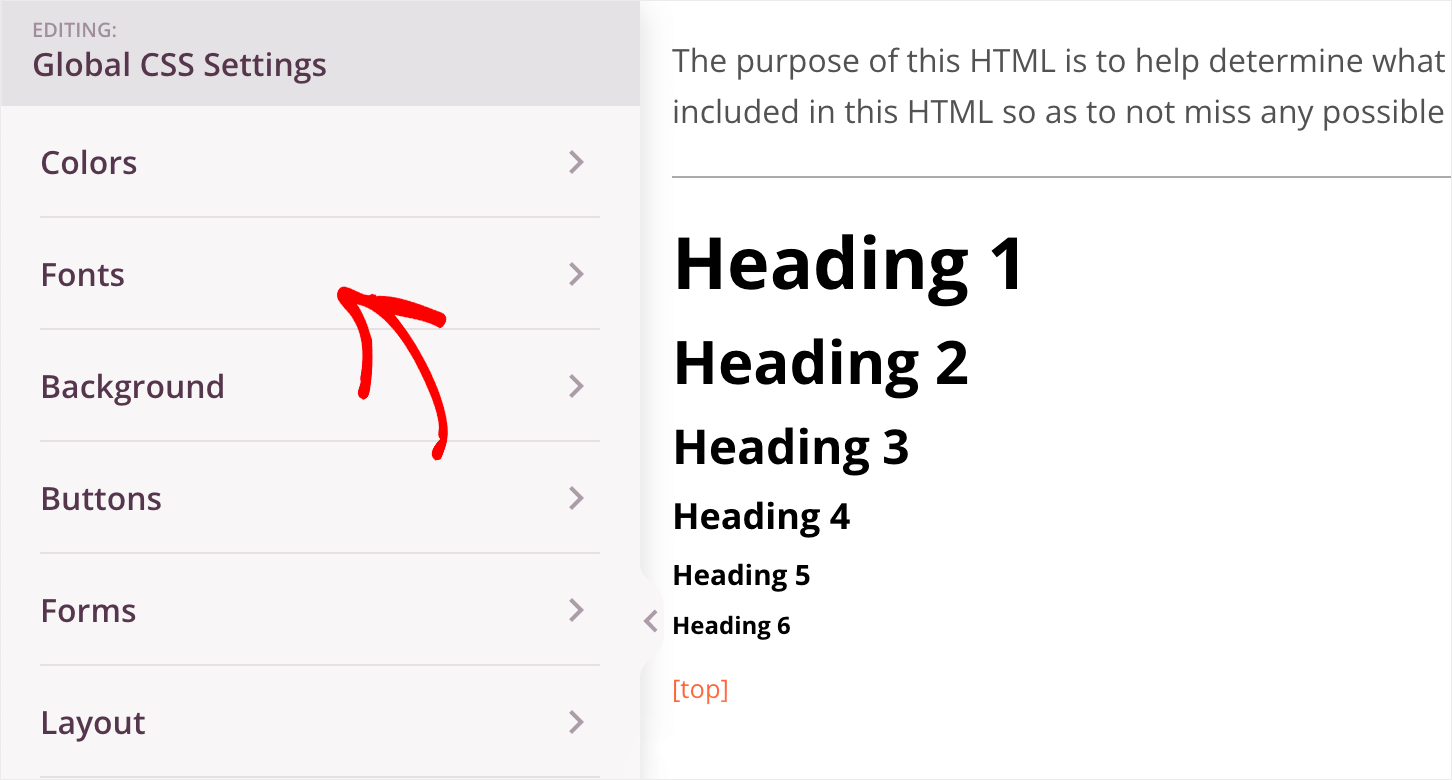
For example, let’s change the font of the headings. To do that, click on the Fonts tab.
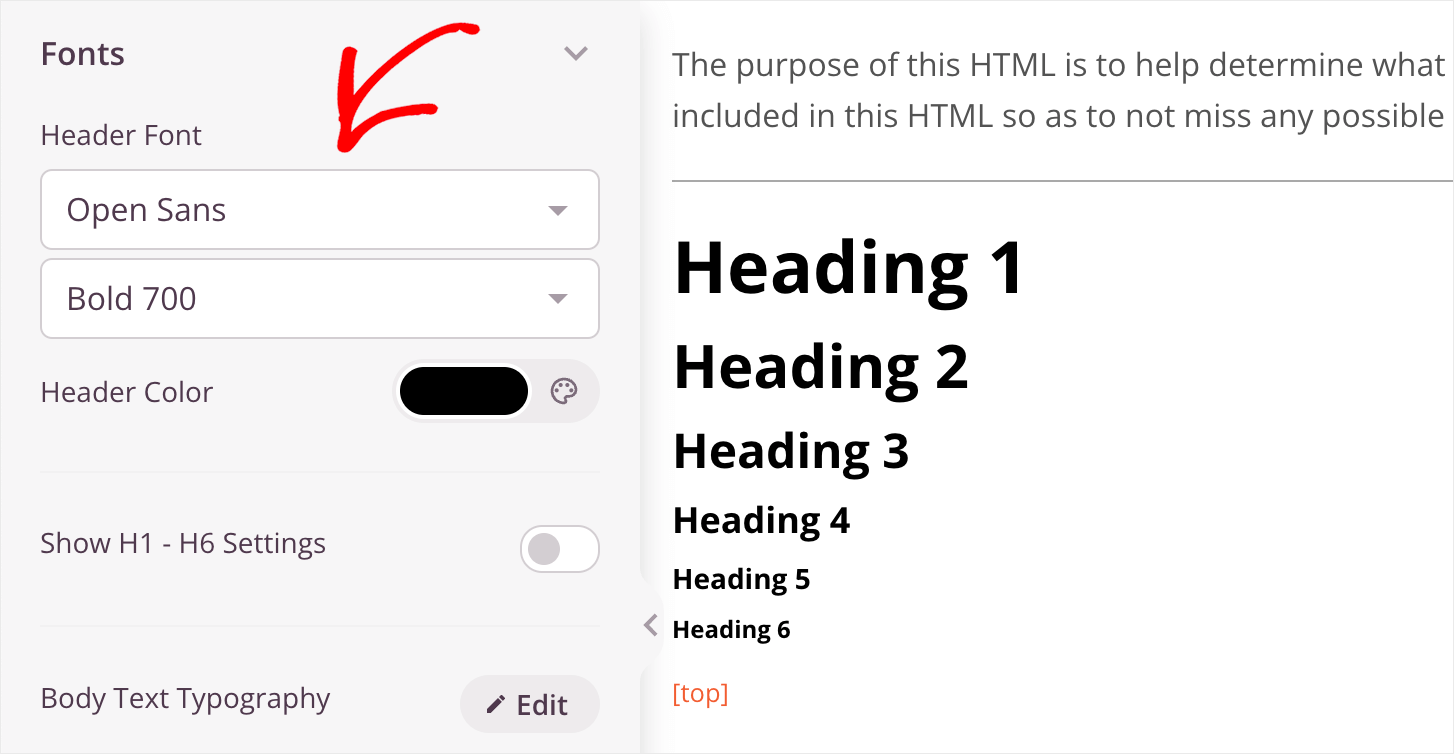
To change the font of all headings from H1 to H6, select a new font from the drop-down menu under the Header Font title.
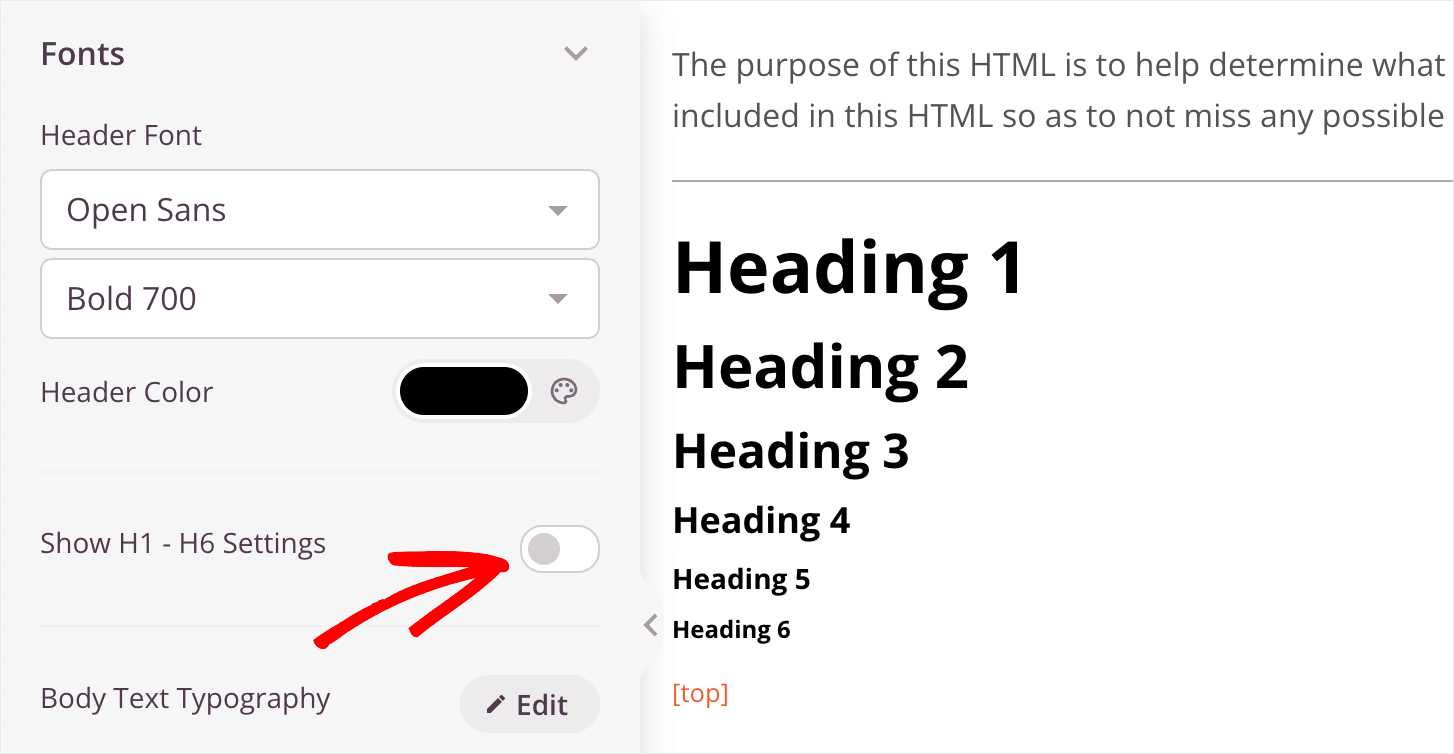
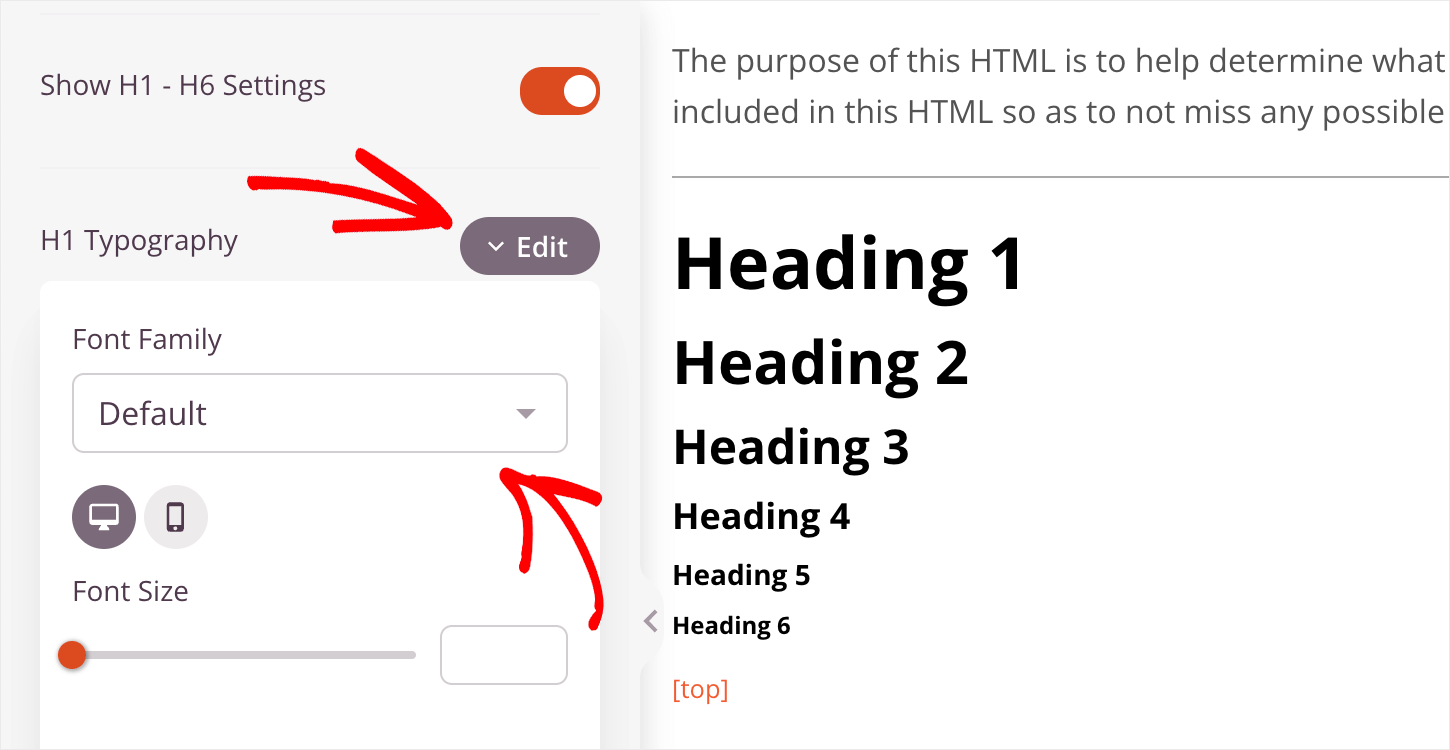
If you want to change the font of a particular heading, you can switch the Show H1 – H6 Settings toggle.
Then, click the Edit button next to the Typography option of a chosen heading and select the font you want to have.
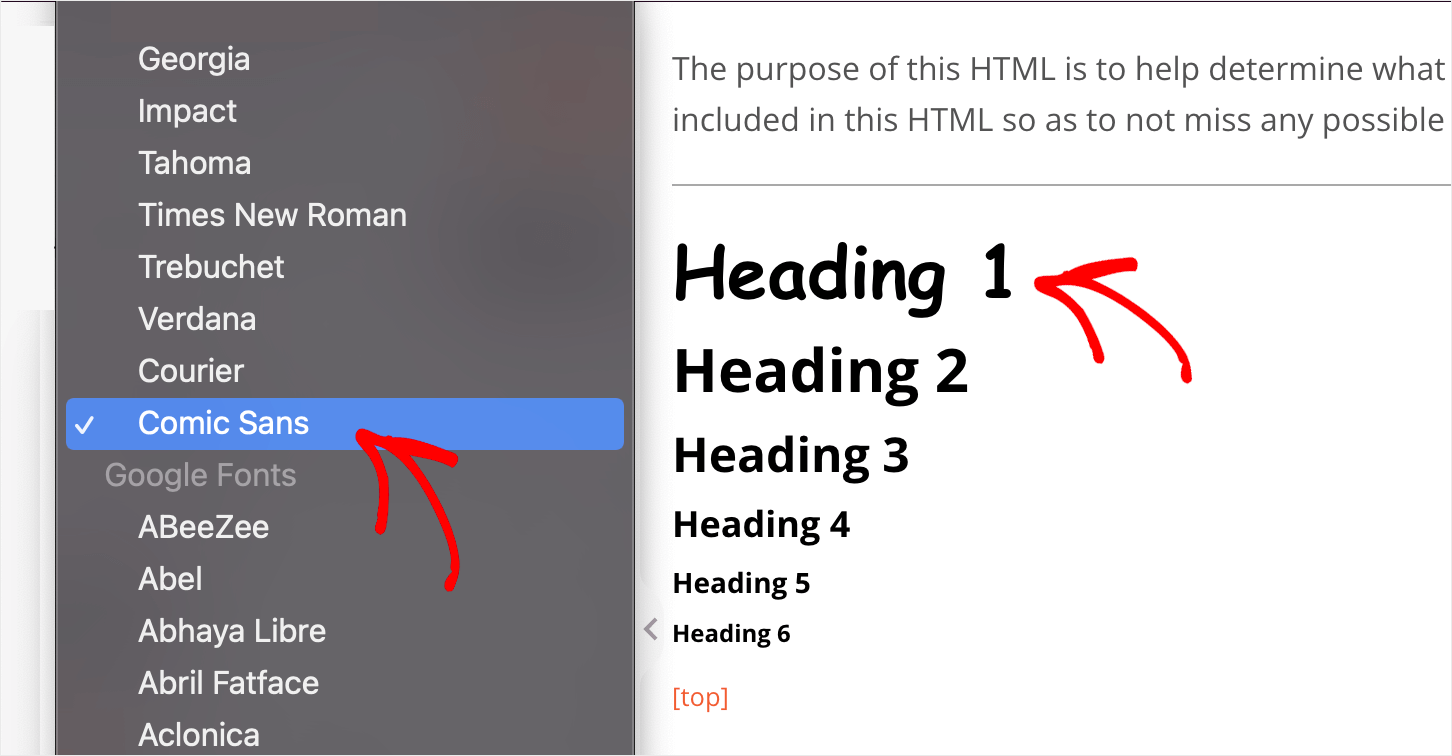
For example, we’ll change the H1 heading font to Comic Sans. As you can see, the font changed instantly.
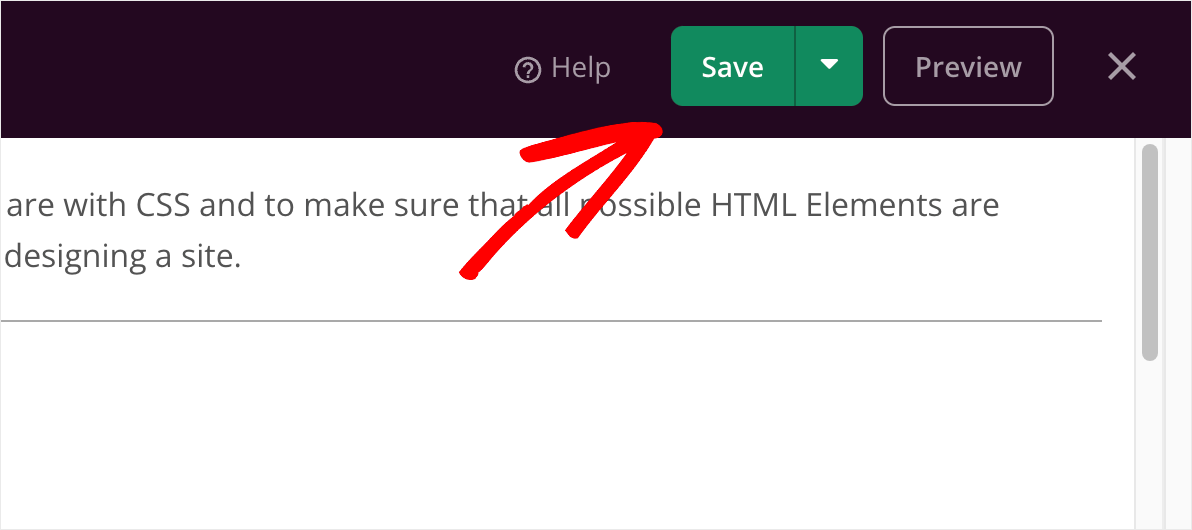
When you’re done adjusting the CSS settings, click the Save button to save the changes you’ve made.
By following this way, you can customize a lot of things related to the appearance of your custom WordPress theme.
Now that you know how to edit the global CSS settings, you’re ready to move on and connect your email marketing service account.
Step 5: Connect to Your Email Marketing Service
SeedProd has seamless integration with the most popular email marketing services. This list includes but isn’t limited to Mailchimp, Constant Contact, and Drip.
This is great news if you already have an active base of email subscribers or want to start growing your first email list.
To connect your email marketing account, first navigate to the Theme Builder tab and click on any template.
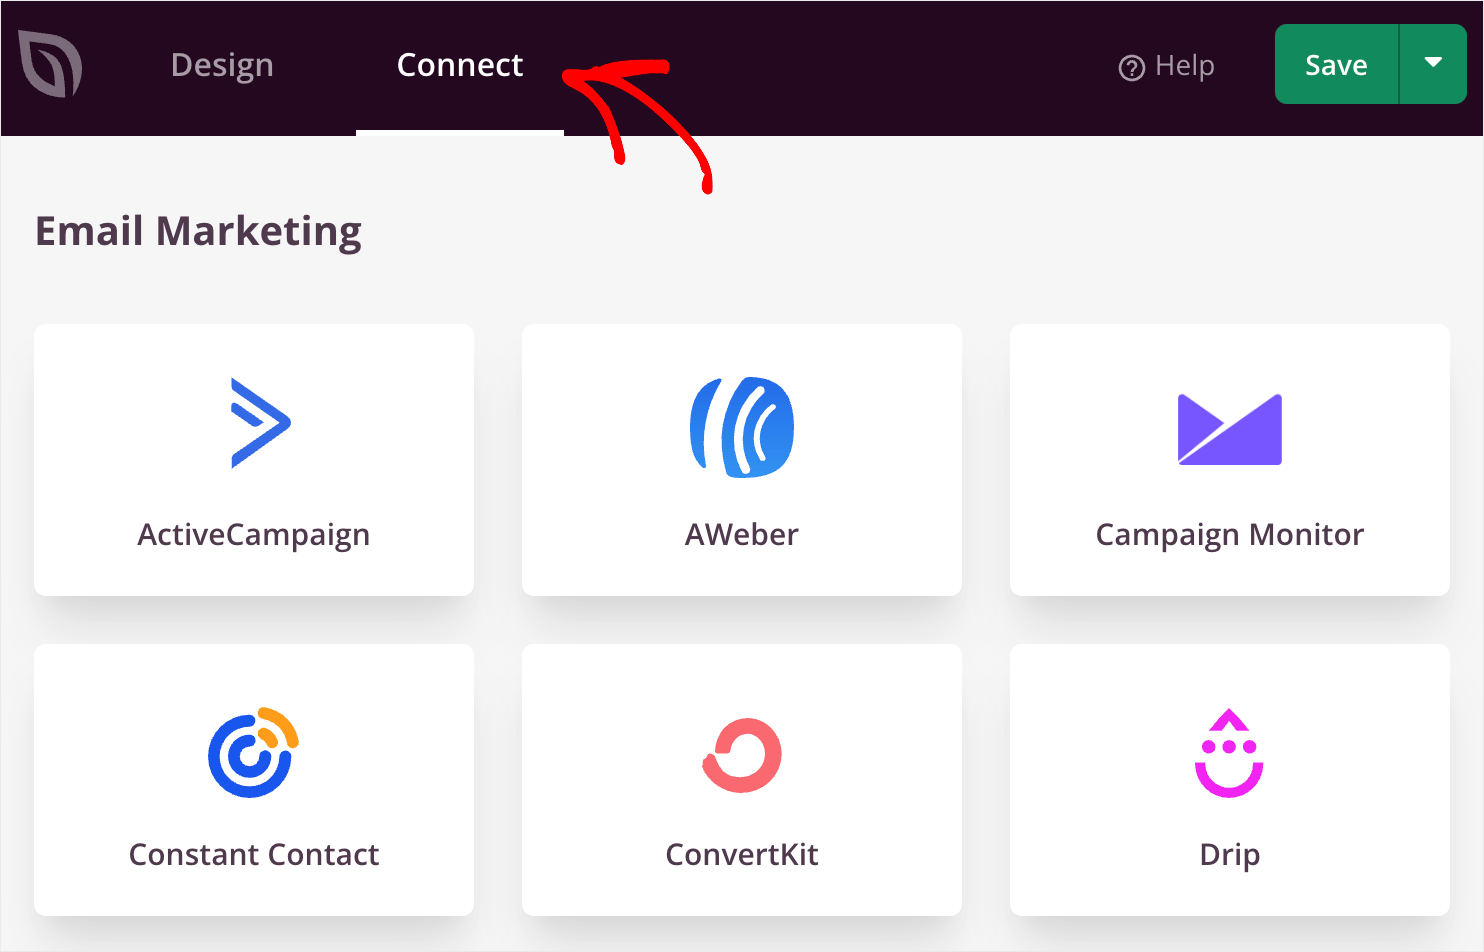
Then, go over to the Connect tab at the top panel.
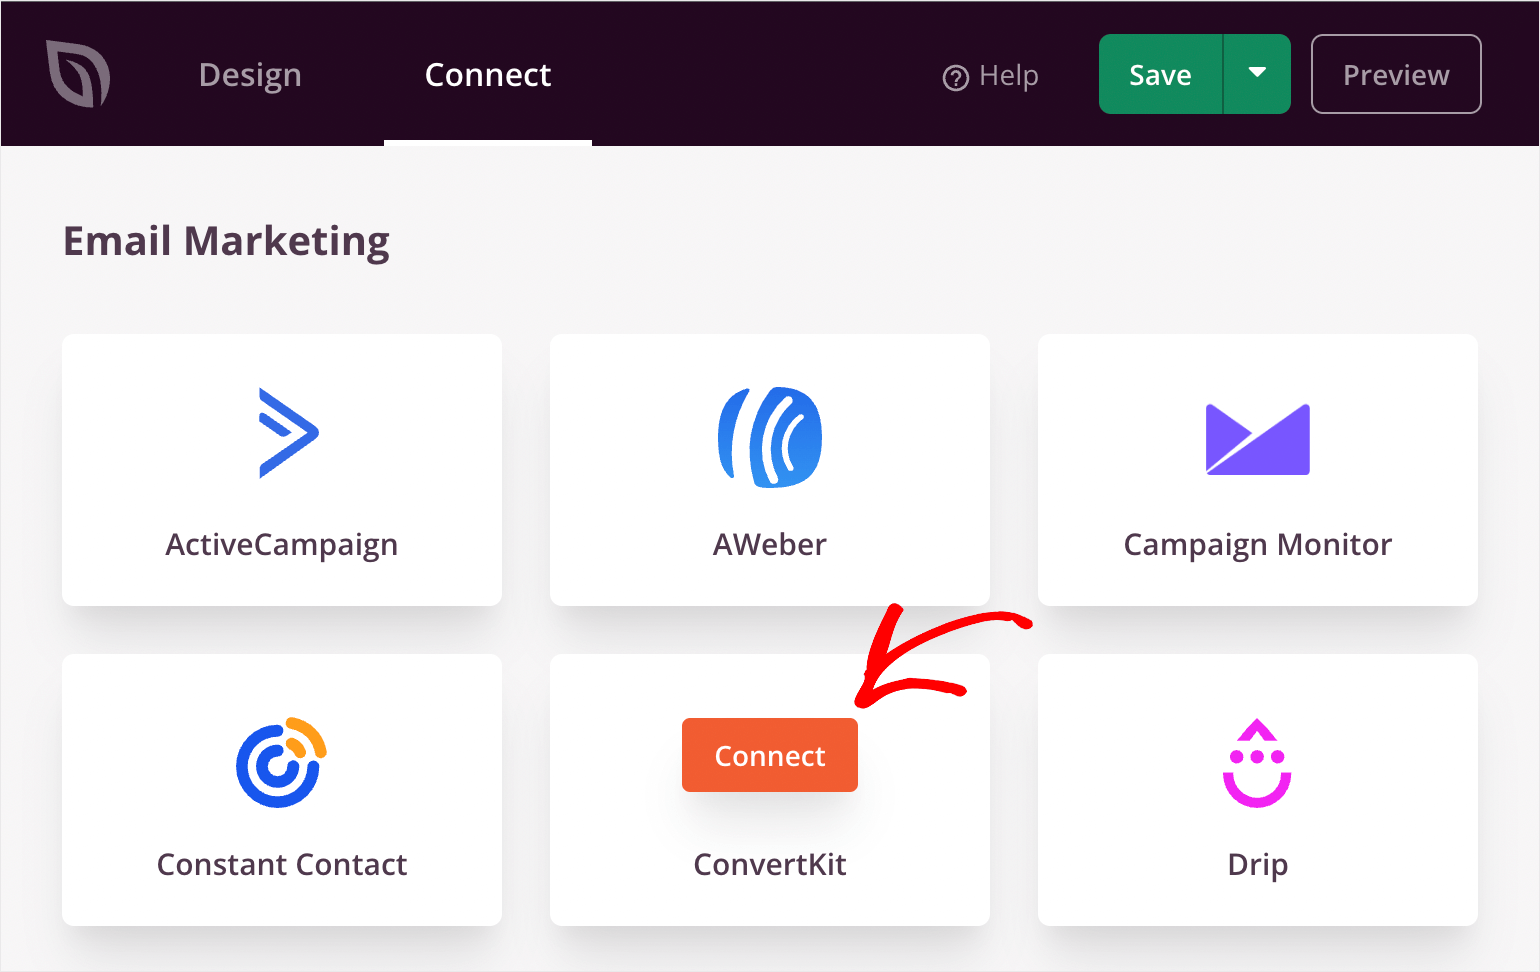
Once there, point a cursor over a service you’re using, press the Connect button and follow the on-screen instructions.
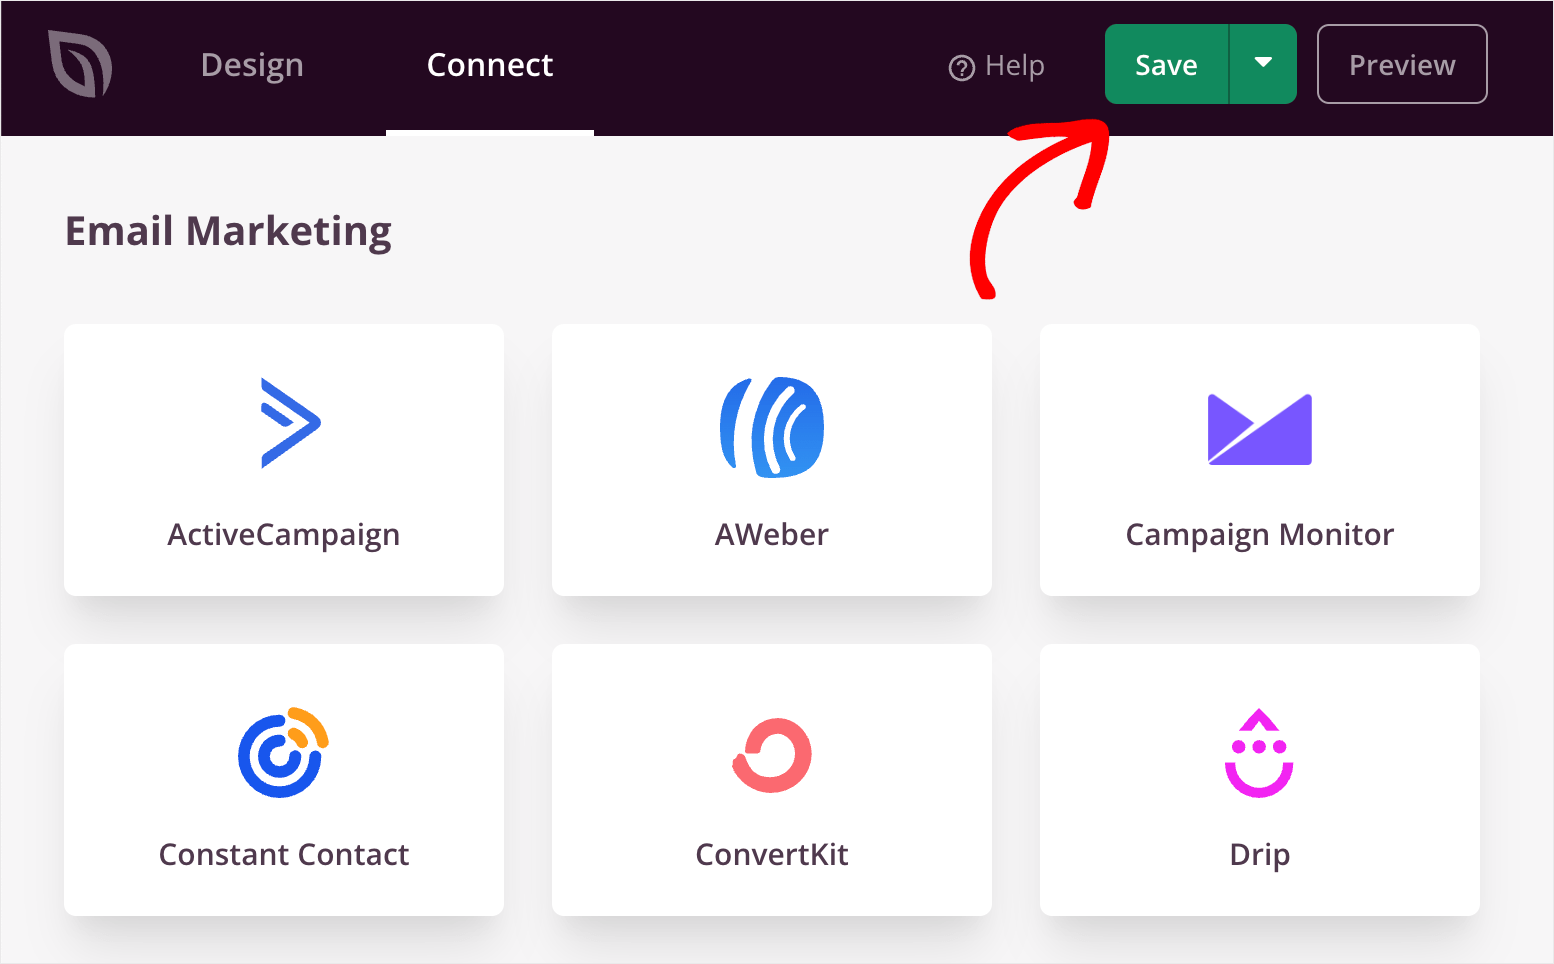
When you’re done connecting your email service, press the Save button at the top right to save the changes.
Now SeedProd will collect emails of visitors who filled out your optin form and add them to your email base.
Step 6: Publish Your Custom WordPress Theme
The final step is to publish your custom theme and make it live on your website.
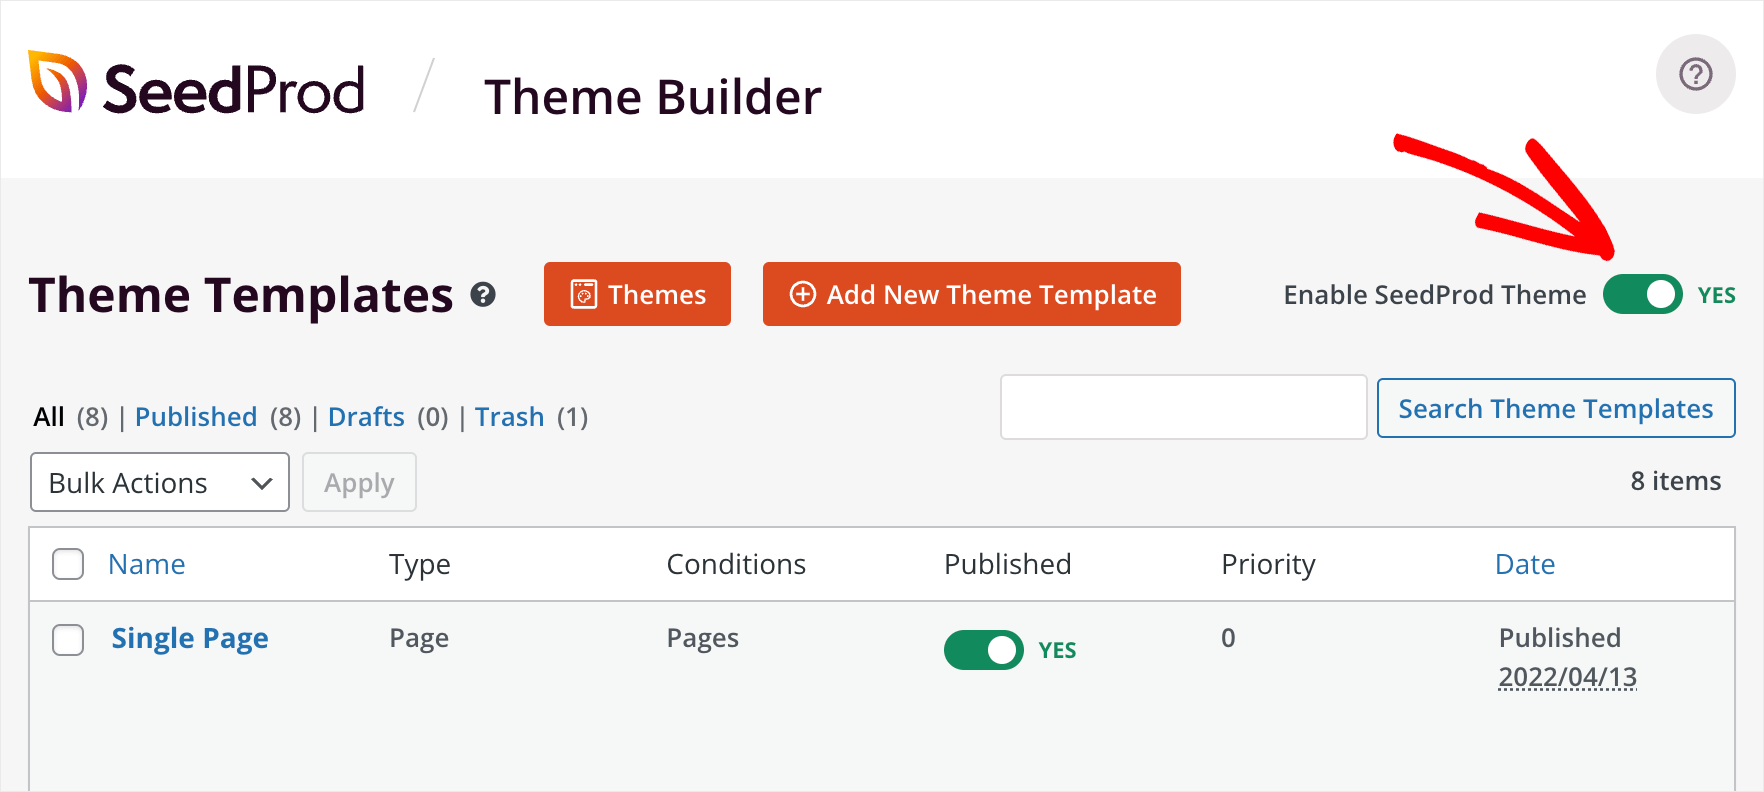
To do that, first, go to SeedProd » Theme Builder from your WordPress dashboard.
Then, switch the Enable SeedProd Theme toggle at the top right.
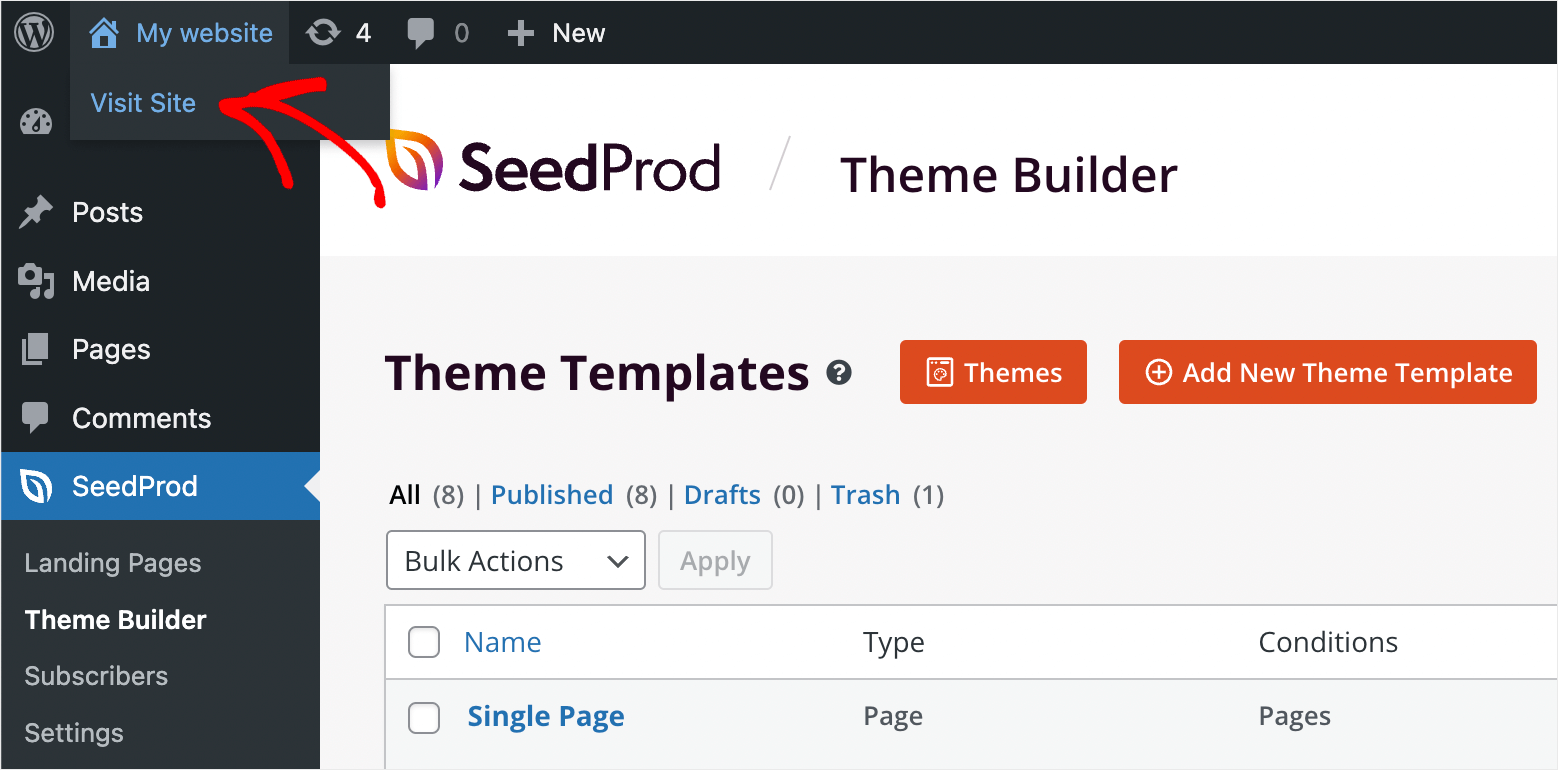
That’s it. Your custom WordPress theme is live, and you can see it on your site.
To do so, press the Visit Site button under your site’s name at the top left of your WordPress dashboard.
Here is our customized homepage:
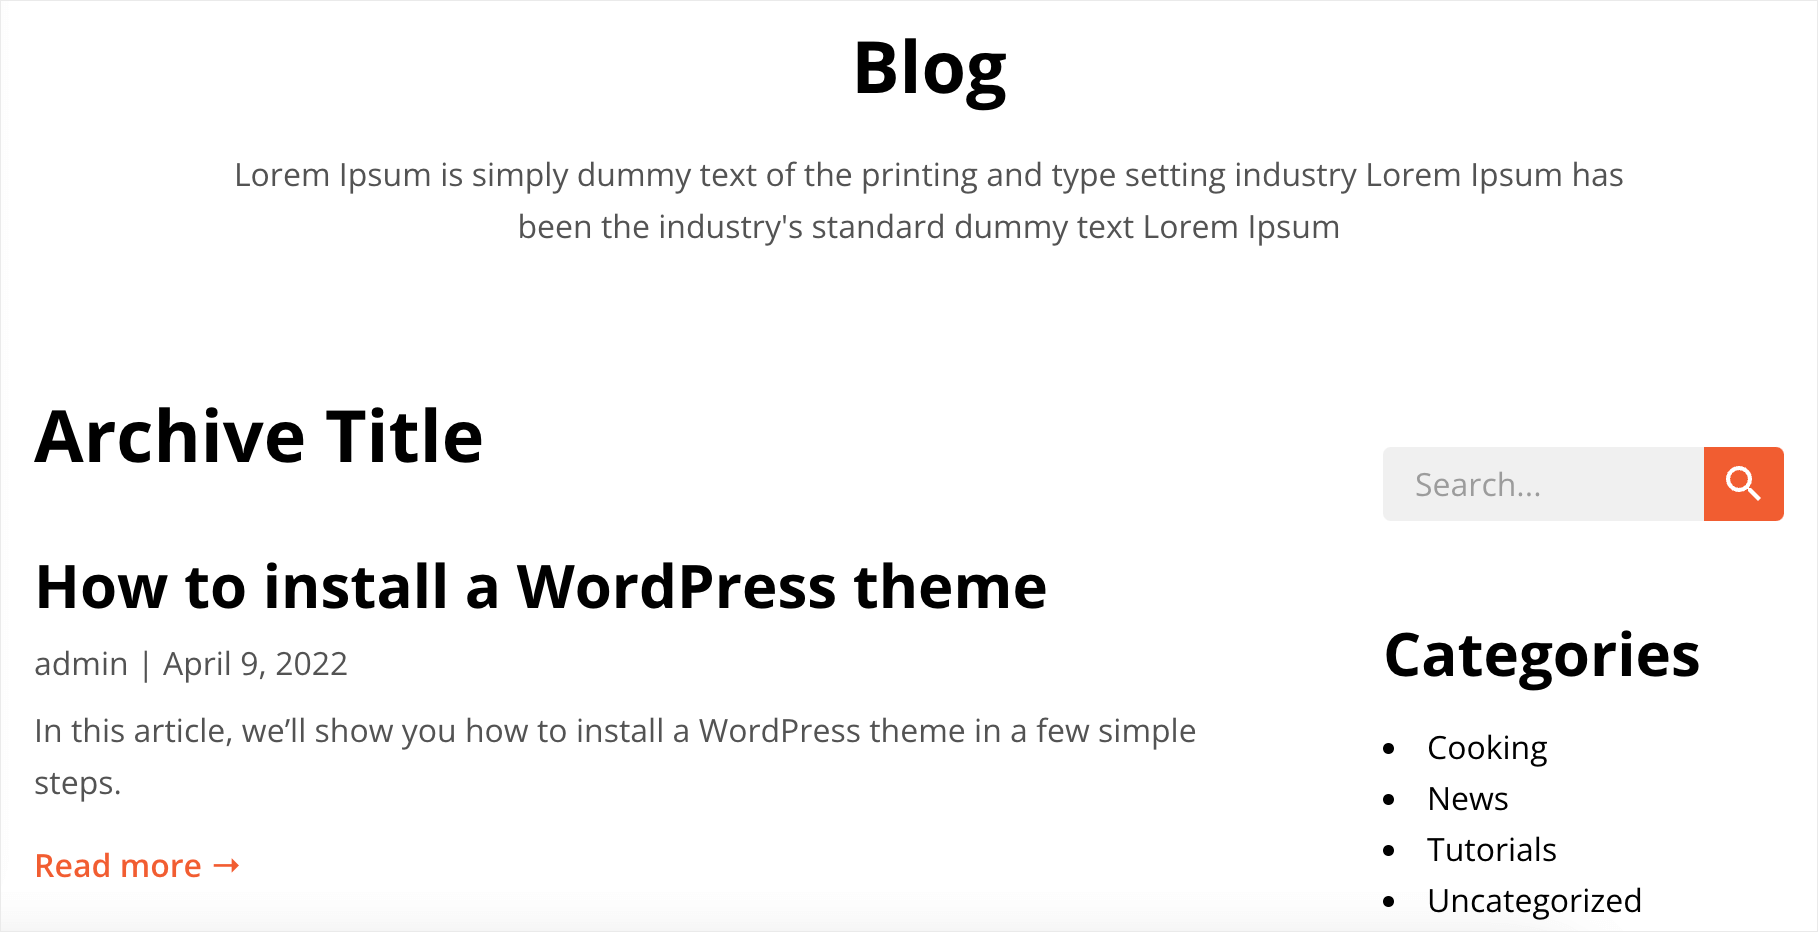
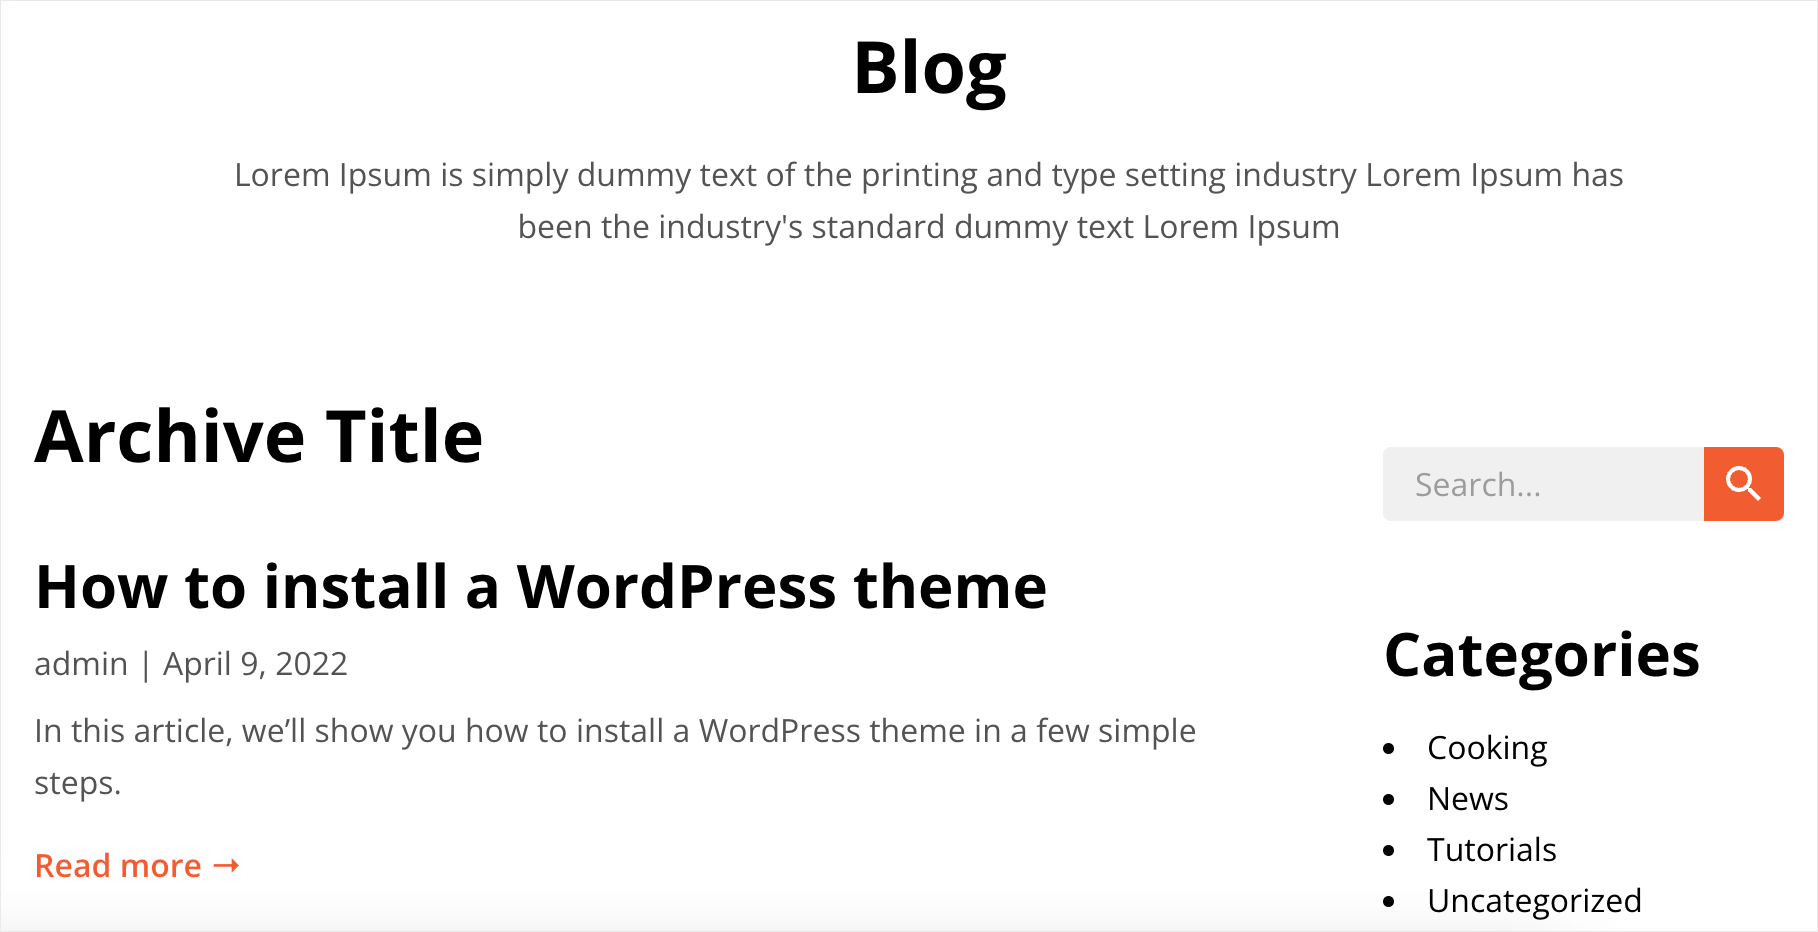
Here is the archive page:
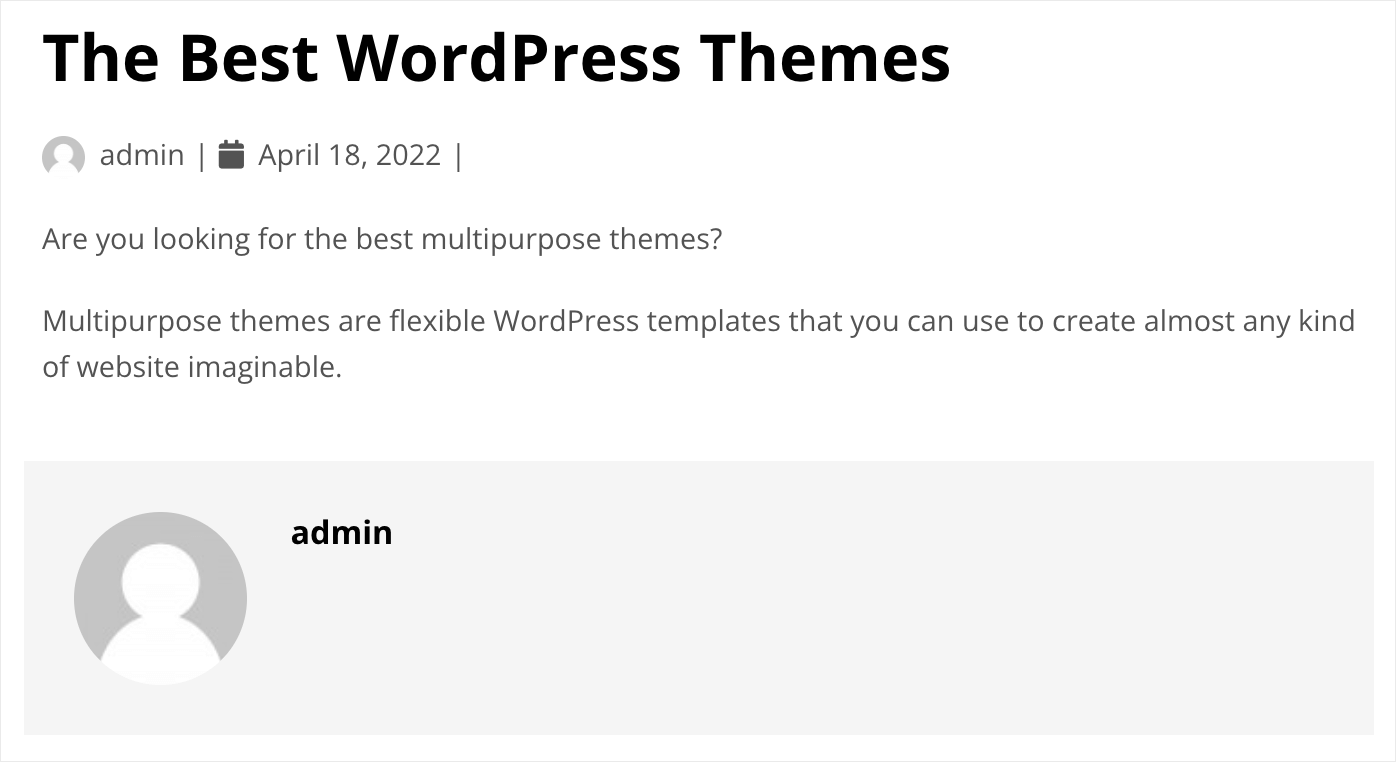
And here is the single blog post template we also customized with just a few clicks using SeedProd:
In this article, you learned how to create a custom WordPress theme in 6 easy steps, no coding needed.
If you’re ready to start creating your own custom WordPress theme, you can grab your copy of SeedProd here.
Looking for the powerful WordPress plugin to enhance search on your site? Check out the best WordPress search plugins to boost your site search showcase.
Going to launch an online store? Take a look at the best WordPress eCommerce plugins for digital downloads showcase.
