If you’re running a WooCommerce store but also have other content on the site, then it can be hard for your visitors to find the right products.
But what if you could limit search results to WooCommerce products only?
It’ll help you to clean up your search results from redundant pages, allow your visitors to find the products they’re looking for faster, and increase your sales.
In this article, we’ll show you how to limit search on your site to WooCommerce products in a few minutes, with no coding needed.
Why Limit Search Results to Products on Your Site?
Before we get to the tutorial, let’s talk about how limiting WooCommerce search to products can benefit your business.
1. Get More Sales
First, it helps your customers to find the right products faster, which directly affects the number of your sales.
By default, WordPress performs searches among titles, content, and excerpts of all posts and pages published on your site.
Not surprisingly, your site visitors see a lot of redundant search results when searching for a product.
That’s especially true if your online store has a blog where you publish company news, featured deals, product manuals, and other relevant content.
2. Build Customer Loyalty
Secondly, having an accurate search on your site is crucial to building a loyal customer base.
Visitors who’ve had a positive search experience on your site are more likely to return when they need to purchase something else.
That’s why it’s essential to make it as easy as possible to find the right product in your store if you want to succeed online in the long run.
After you’ve learned why it makes sense to limit your WooCommerce store search to products, let’s talk about how you can do that on your site.
3. Improve Product Visibility
Finally, limiting search on your site to only products allows you to boost product visibility across your site and also better optimize it for ranking in search engines.
If your visitors can easily find on your site what they’re looking for and have a positive user experience, it’s a positive signal for Google to rank your site higher.
With that, let’s see how you can limit search on your site to WooCommerce products with no coding needed.
How to Limit Search Results to WooCommerce Products Only
The easiest way to limit your site’s search to WooCommerce products is to use a plugin like SearchWP.

SearchWP is the best search plugin for WordPress that has seamless integration with WooCommerce.
Using it, you can enhance search in your store to make it easier for your customers to find the product they’re looking for.
For example, SearchWP allows you to make product SKUs searchable, display search results in live mode, enable fuzzy search, and many more.
Over 50,000 WordPress site owners already use SearchWP to give their visitors more relevant search results and grow their business.
Here are some other amazing SearchWP features:
- Manage the order of search results: Customize the order of search results in your WooCommerce store to promote the best-selling products.
- Exclude specific products from search results. Clean up search results on your site by excluding from search redundant or outdated products.
- Track searches of your customers: Look at what visitors are searching for on your site to find out which products are most popular and come up with new product ideas.
- Add a search form to your shop page: Enhance your shop page by placing a search form on it to get additional pageviews and sales.
With that, let’s see how you can use SearchWP to limit search results on your site to WooCommerce products only.
Step 1: Install and Activate SearchWP on Your Site
First, you’ll need to visit the SearchWP website and sign up for a new account.
When you’re done, simply go to your SearchWP dashboard and click the Downloads tab.
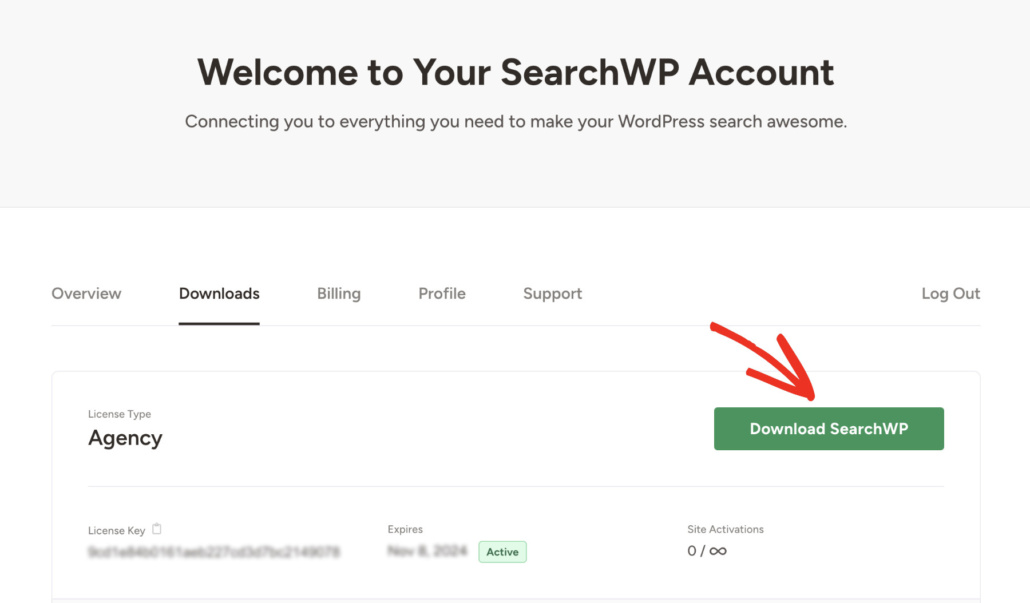
Once you get to the Downloads tab, press the Download SearchWP button and save the plugin’s ZIP file to your computer.
We’ll also recommend that you copy your license key in the bottom left corner when you’ve finished downloading, as you’ll need it later in the setup process.
Next, you’ll need to install and activate SearchWP on your WordPress website. Not sure how to do that? Check out this beginner’s guide on how to install a WordPress plugin.
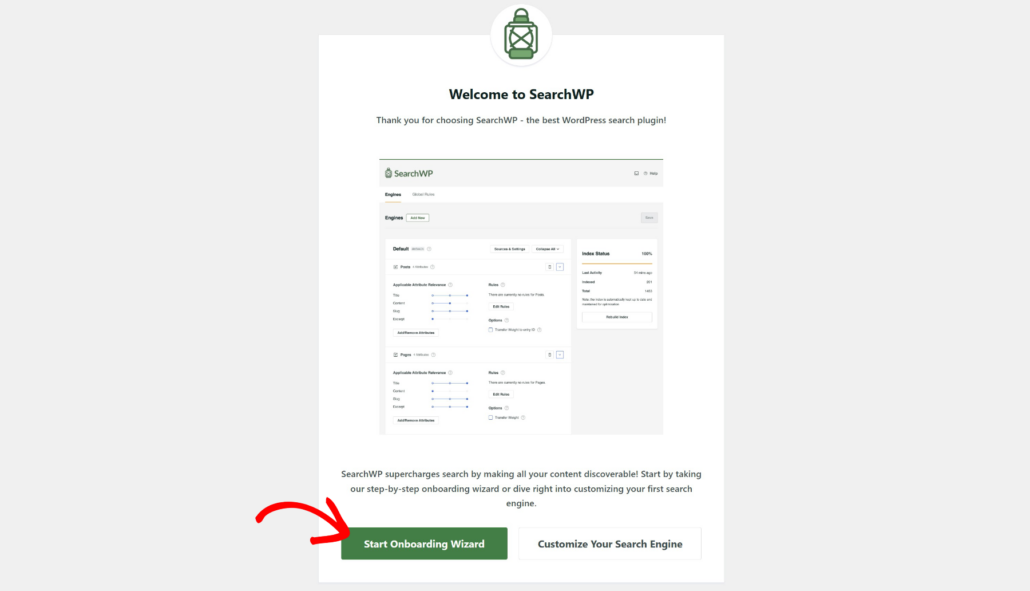
Upon activation, the welcome screen will appear along with the setup wizard. Simply click the ‘Start Onboarding Wizard’ button and follow the onscreen instructions.
After setting up SearchWP, you’re ready to move to the next step and install the WooCommerce Integration extension.
Step 2: Install the WooCommerce Integration Extension
This extension ensures seamless SearchWP integration with WooCommerce, allowing you to fully customize the way search works in your store.
To install it, simply navigate to SearchWP » Extensions from your WordPress dashboard.
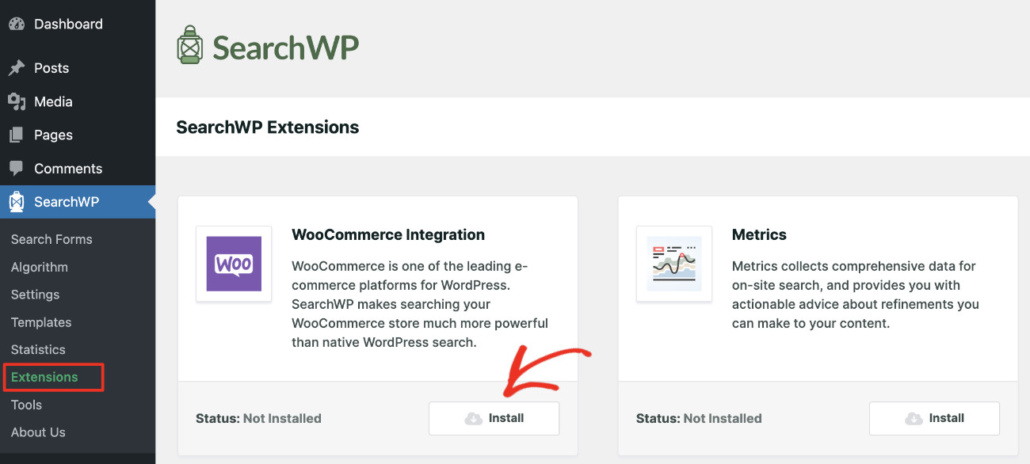
Next, you will need to find the WooCommerce Integration extension and click Install under its section.
After that, you’re ready to start customizing your search engine to make it search only among WooCommerce products.
Step 3: Limit Your Search to WooCommerce Product Only
To get started, you can head to SearchWP » Extensions from the WordPress dashboard.
click the SearchWP button on the left side of your WordPress dashboard.
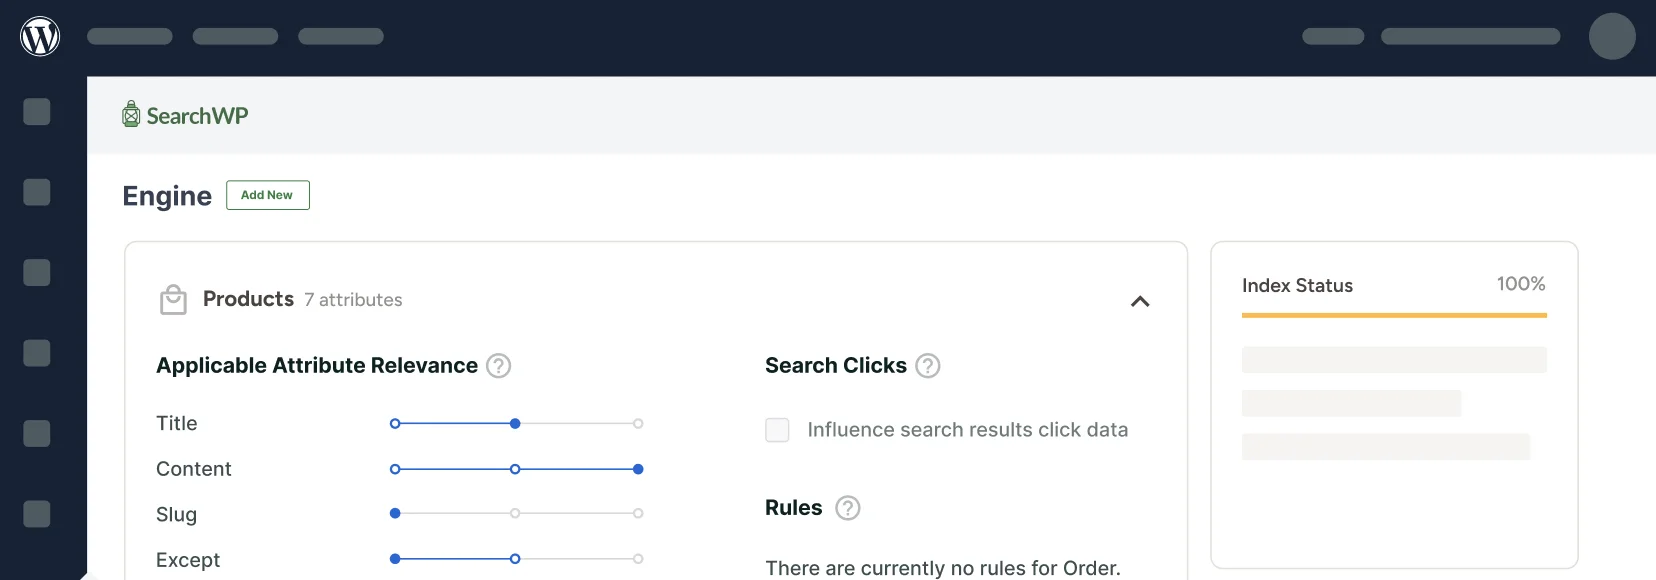
Here, you can customize the search engine by selecting which sources to include, or which additional information like custom fields and tags to make searchable.
For example, you can enable search by WooCommerce product tags, hide specific WooCommerce categories from search, and many more.
To limit search on your site to WooCommerce products, you’ll need to add them as a search source and then remove all other search sources.
To get started, simply click the Sources & Settings button.
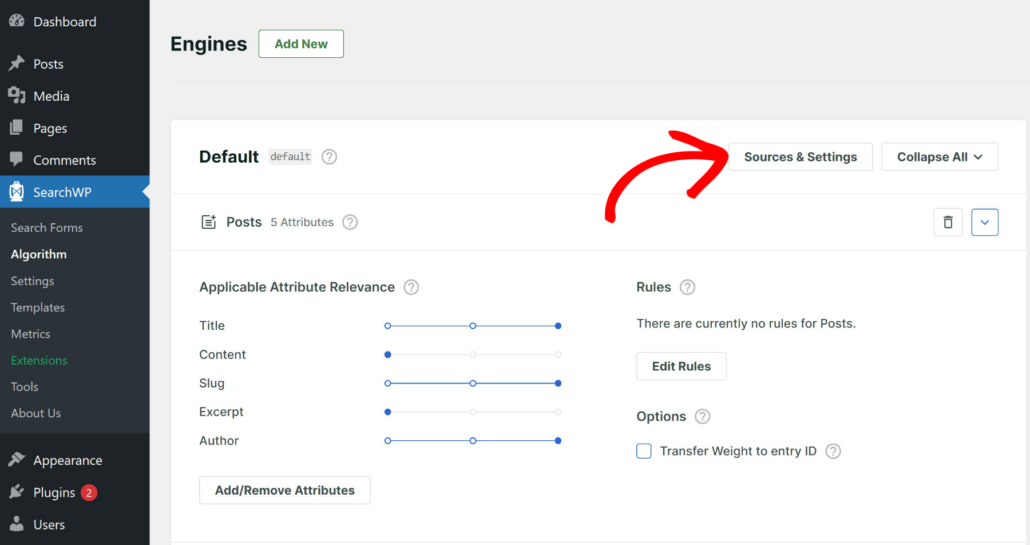
Next, you will see a popup window that will have all the default sources, such as Posts, Pages, and Media.
Go ahead and check the box next to the Products search source to make it active, and uncheck all other sources.
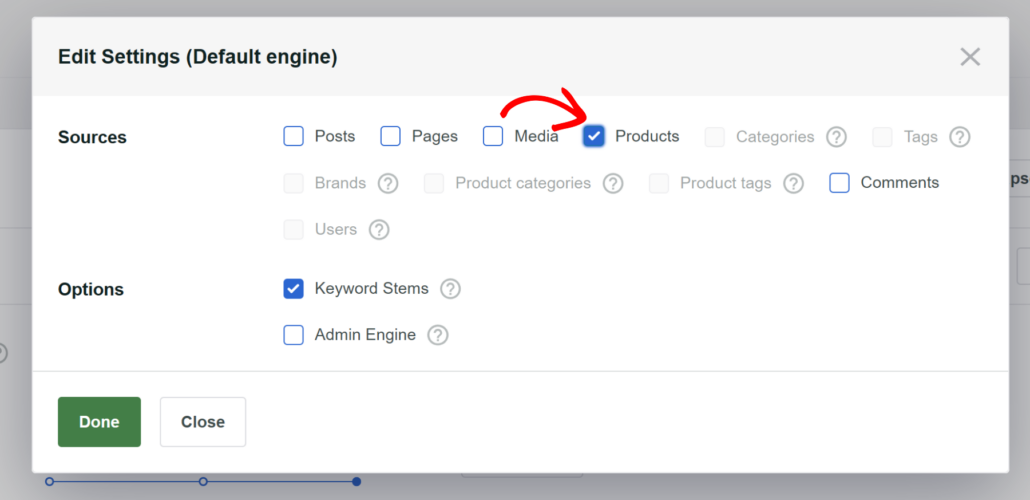
When finished, click Done to save your changes.
You can go a step further and also select product attributes in the search process. For example, you can make product details like SKUs, color, size, categories, tags, and more searchable using SearchWP.
To start, simply scroll down to the Products section and click the Add/Remove Attributes button.
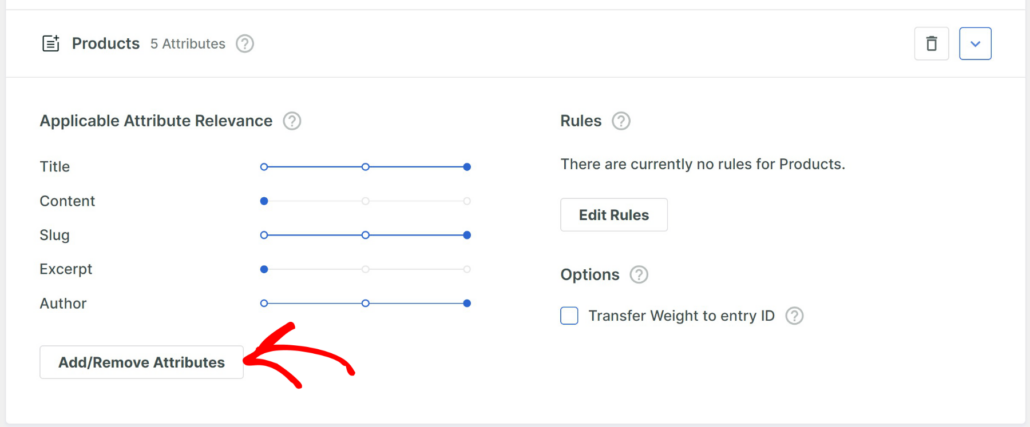
A new popup window will now open where you can select product attributes. By default, the title, content, slug, excerpt, and author attributes will be selected.
You can simply click the ‘Custom Fields’ dropdown menu to add additional product details and the ‘Taxonomies’ dropdown menu to add tags and categories to the search process.
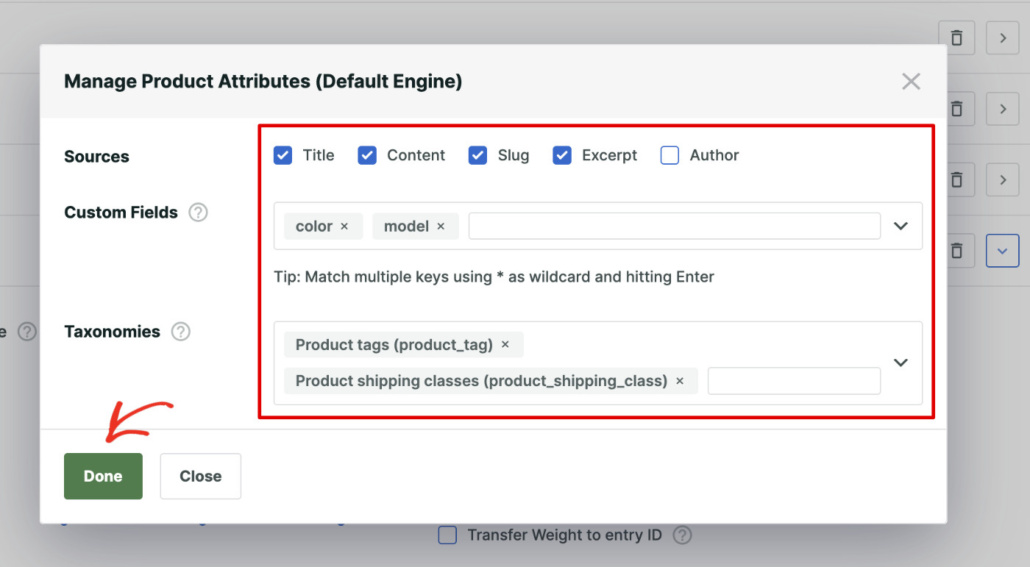
When you’re finished, go ahead and click the Done button.
The last step is to save your search engine. You can do that by pressing the Save button in the upper right corner.
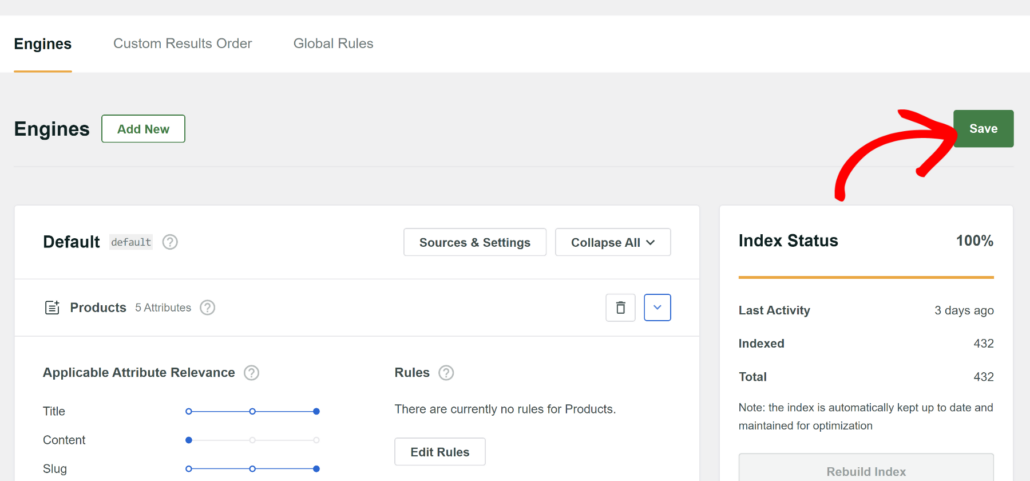
That’s it. Now search on your site is limited to WooCommerce products.
Let’s test it to make sure that everything works as it should.
Step 4: Test Your New Product Search
To do that, go to your site and type some search query into the search field.
For example, let’s say we sell tea on our test site and have several blog posts related to various tea topics.
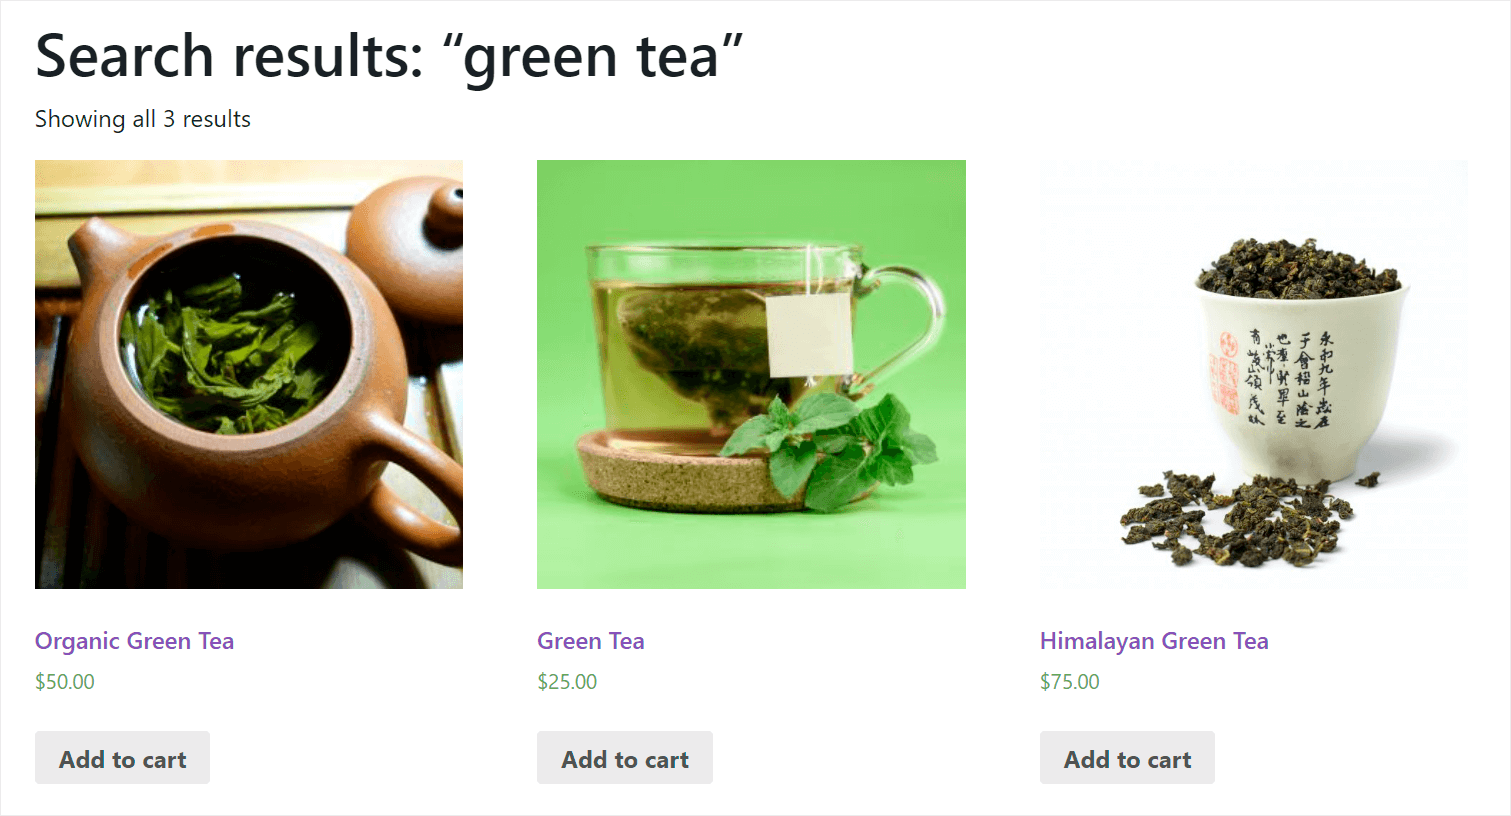
Let’s type “green tea” into the search and see what results we get.

As you can see, we only have products among our search results.
It means that we have successfully limited search on our site to WooCommerce products, and now nothing will distract our customers from shopping.
Bonus: Create a Custom Search Widget for WooCommerce
Now that you’ve customized the WooCommerce search to only look for products, you can also set up custom widgets for your store.
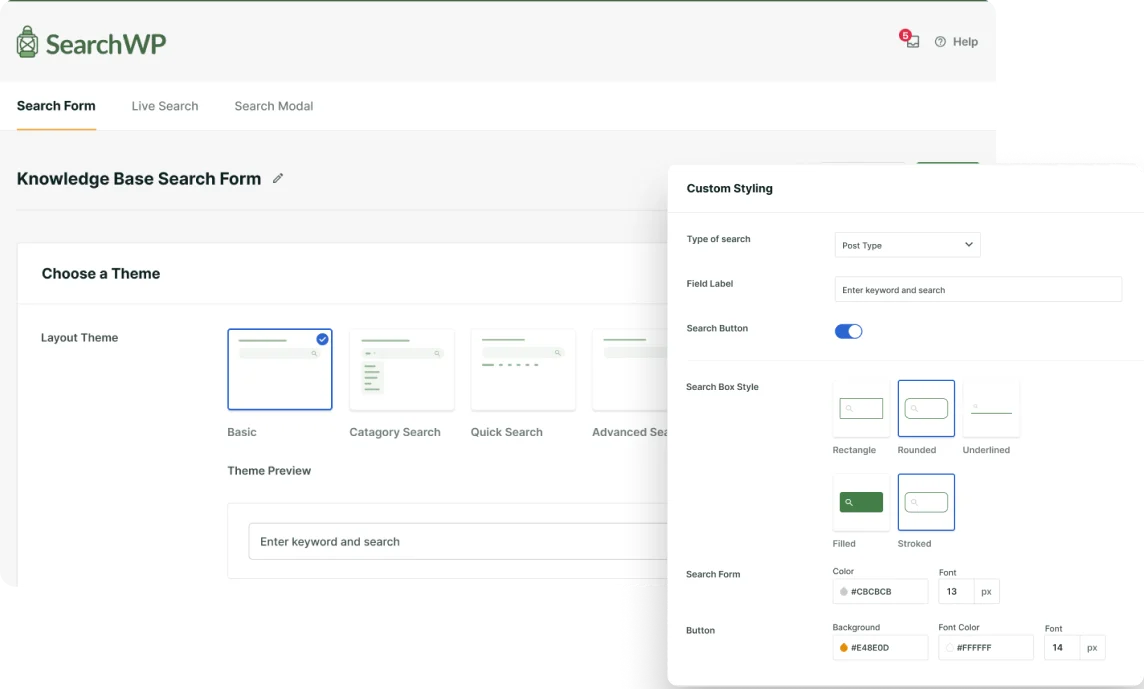
SearchWP offers prebuilt search form templates that you can link to your custom search engine.
This way, you get full control over the appearance of the form and also power it with the search engine you just customized in SearchWP.
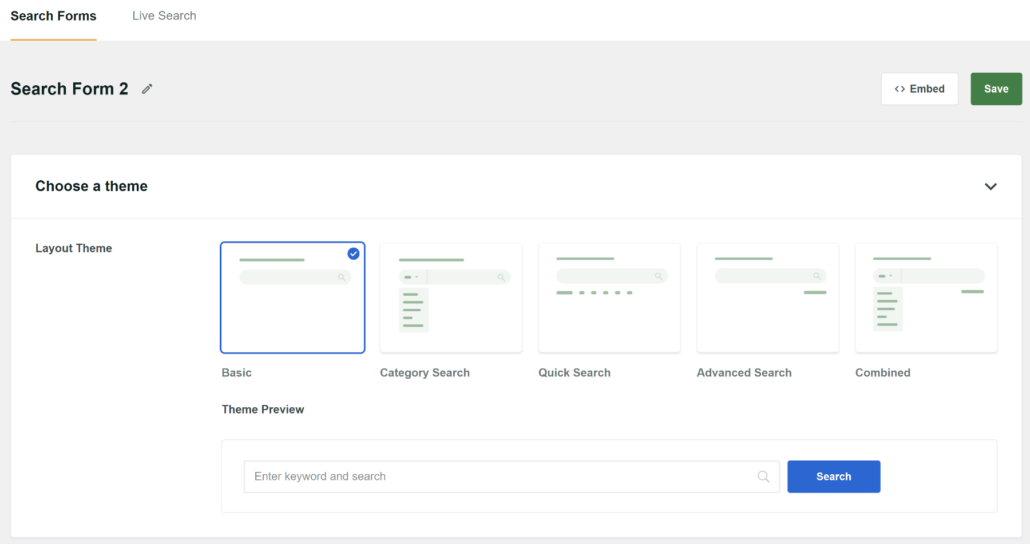
For more details, please see our guide on how to add custom WooCommerce search widgets.
We hope this article helped you learn how to limit search results on your site to WooCommerce products only. You may also want to see our guides on how to make a smart WooCommerce product search and how to search by WooCommerce product attributes.
Ready to improve your WooCommerce search? You can get started with SearchWP here.
