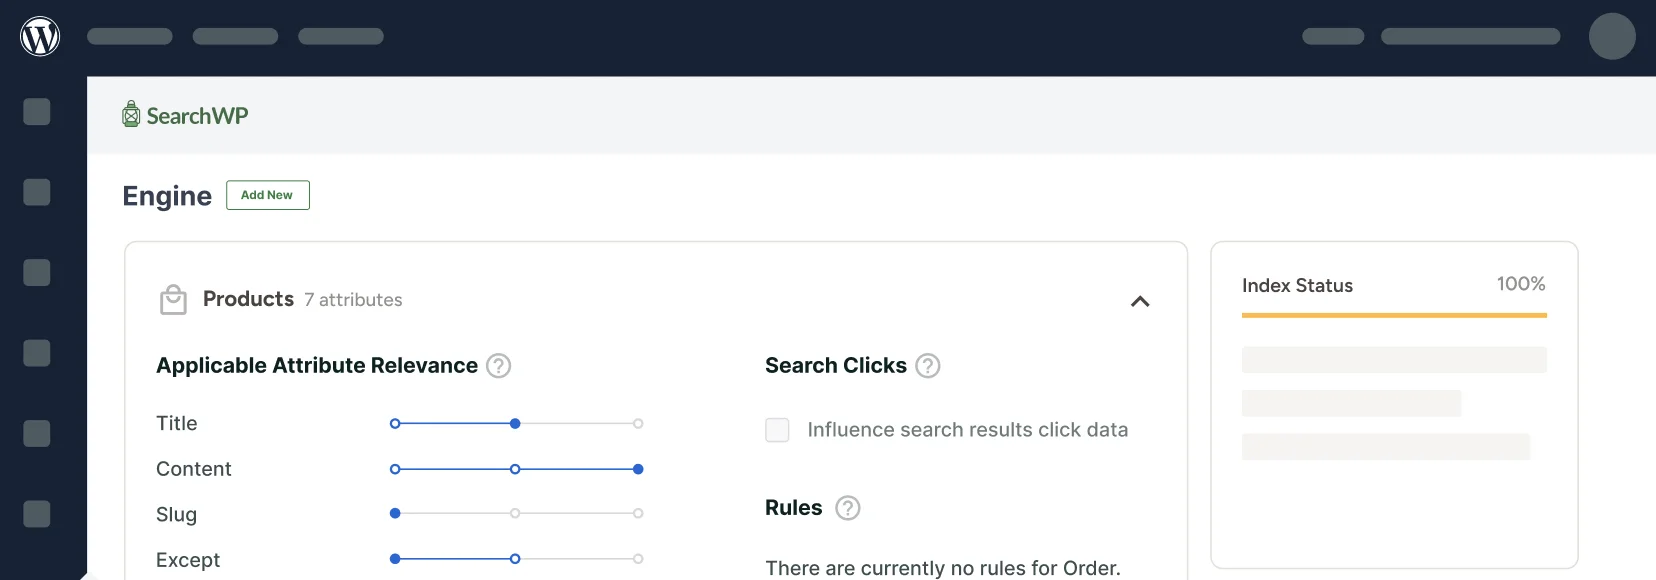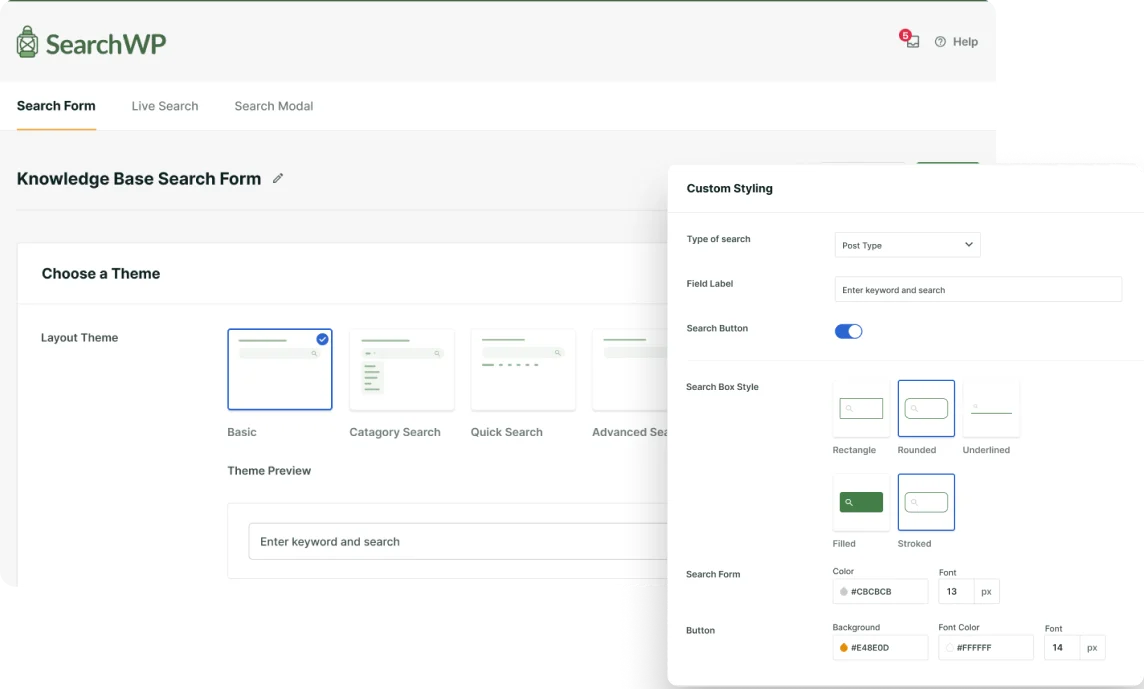
Looking for a way to create a search page in WordPress?
By adding a custom search page to your site, you can help your visitors find what they’re looking for faster.
It’s also a great way to encourage them to use search again in the future and discover more of your content.
In this guide, we’ll show you 2 ways to create a professional-looking search page on your site.
You can simply click the links below to jump ahead to any section:
Let’s begin!
Why Create a Search Page in WordPress?
Creating a search page on your WordPress site has many advantages:
- Get more pageviews: You can promote specific posts, pages, or categories on your search page to engage your visitors and get more pageviews.
- Promote ads to boost revenue: A custom search page also allows you to showcase affiliate links, blog posts, products, and more to increase conversions.
- Customize your search form: You can add a customized search form to your search page to narrow your search and deliver more relevant results to your visitors.
- Improve the user experience of your visitors: By customizing your search page and search form, you help your visitors find the right content faster.
- Make visitors spend more time on your site: Satisfied users who found what they were looking for on your site are more likely to continue exploring your content.
- Improve your site’s ranking in search engines. High average session duration and low bounce rate are strong signals to Google that your site’s pages deserve better positions.
Are you ready to add a search page to your site? Let’s see how you can do that below.
Method 1: Create a Search Page With SearchWP
The best way to create a search page is to use a plugin like SearchWP. It offers pre-built templates and lots of customization options.

SearchWP is the most powerful WordPress search plugin trusted by over 50,000 website owners.
Using SearchWP, you can completely customize how search works on your site and create a smart search page – no coding needed.
For example, you can exclude specific pages from search results, make custom fields searchable, and more.
As a result, you can give your visitors more relevant search results and improve their user experience.
That’s not all. Here’s a quick overview of other SearchWP features:
- Search tracking: Want to know your audience’s interest? SearchWP collects data on what visitors are searching for on your site, allowing you to understand their needs better.
- Live search results: With SearchWP, you can enable displaying real-time search results in a few clicks.
- Control over search results: This plugin lets you manually change the order of search results the way you want.
- Multiple search engines: Want to add custom search forms to your site? SearchWP allows you to create multiple search engines, customize them, and link to any search forms across your site.
Now that you know how SearchWP helps you create a smart search page, let’s look at how to use it.
Step 1: Install and Activate SearchWP
To get started, you can visit the SearchWP website and grab your copy of SearchWP.
Once done, simply log into your SearchWP account and go to the Downloads page.
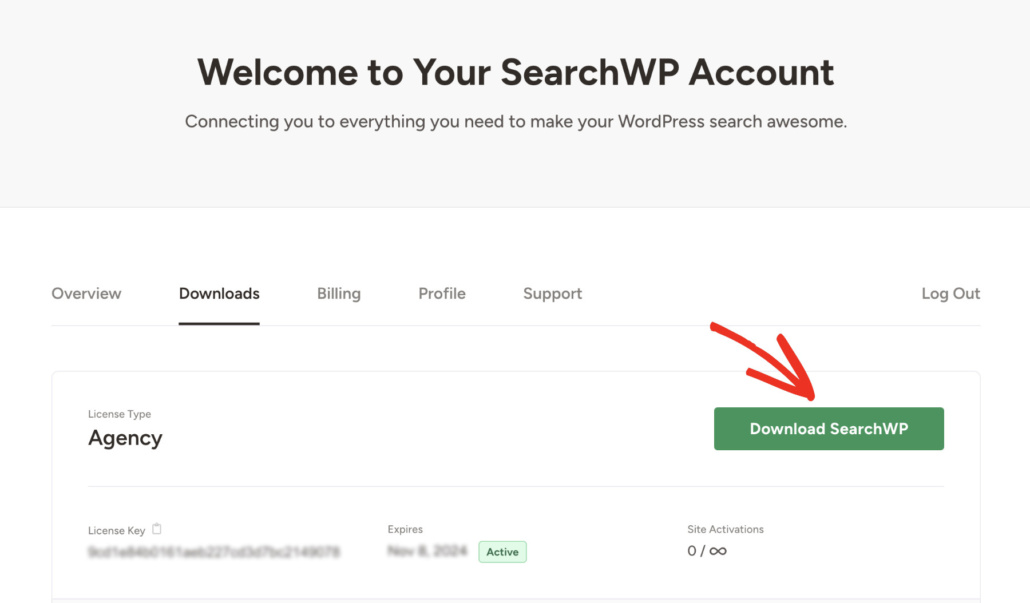
From here, you can click Download SearchWP and save the plugin’s ZIP file to your computer.
After downloading, also copy your SearchWP license key on the same page.
The next step is to install SearchWP on your site. To do that, you’ll need to upload the plugin’s ZIP file to your site.
Need a refresher on how to do that? You can follow this how to install a WordPress plugin step-by-step guide.
Upon activation, you’ll see the SearchWP welcome screen and setup wizard. Go ahead and click the ‘Start Onboarding Wizard’ button and follow the onscreen instructions.
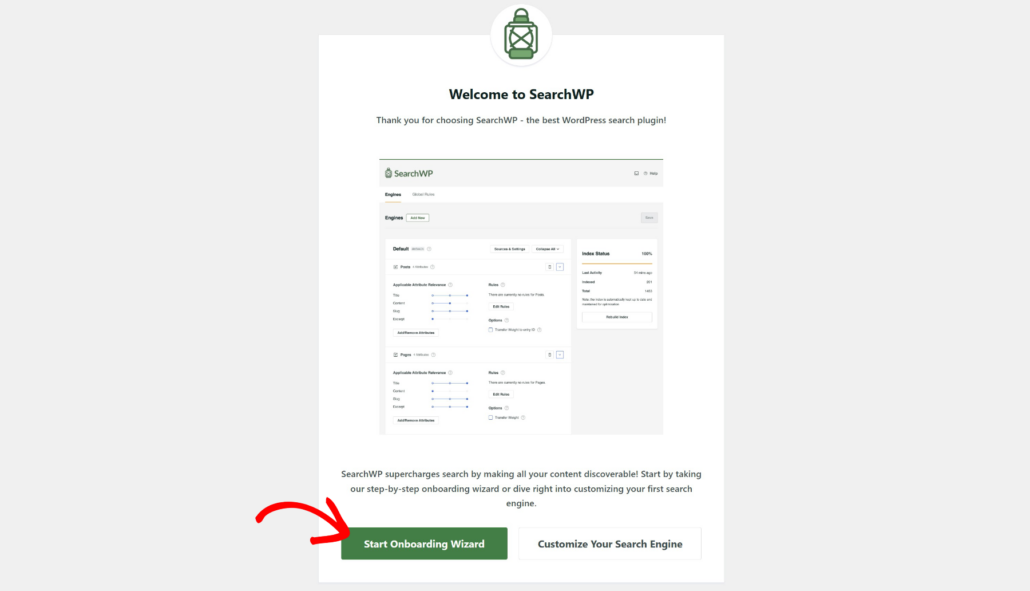
Now that SearchWP is up and running, you can use it to create custom search engines and search forms.
To learn more, you may want to see our guide on how to change the default WordPress search settings.
Now, let’s add a new search
Step 2: Create a Search Results Page
SearchWP offers pre-built templates for creating a search results page. Plus, you can set up unlimited search results templates and connect them to specific search forms.
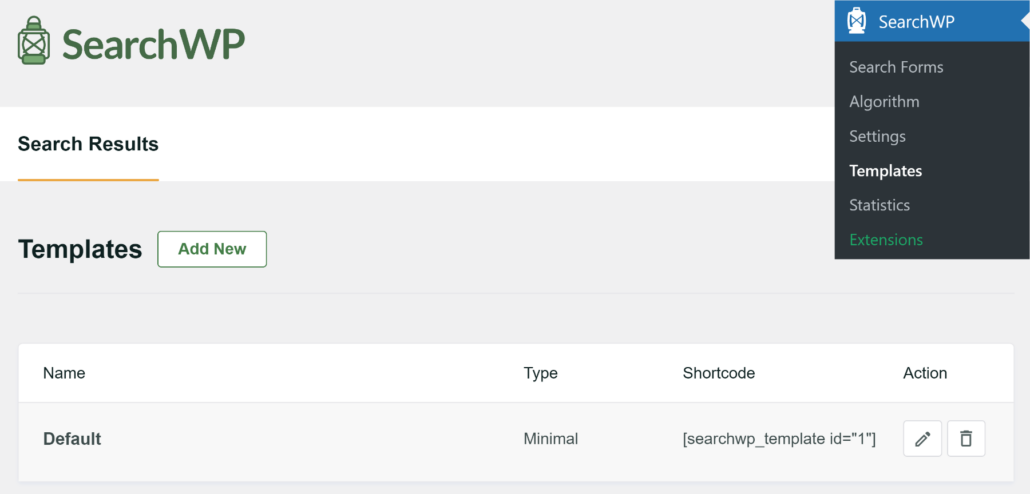
To get started, navigate to SearchWP » Templates in your WordPress dashboard. Here, you will see the default template that will appear on your site when a user performs a search.
Now, you can edit the default template or simply click the ‘Add New’ button. For this tutorial, we’ll add a new search results page.
On the next screen, you can edit the name of the search results template at the top.
After that, you can select a layout theme for your search results page. SearchWP offers 6 different layouts to choose from.
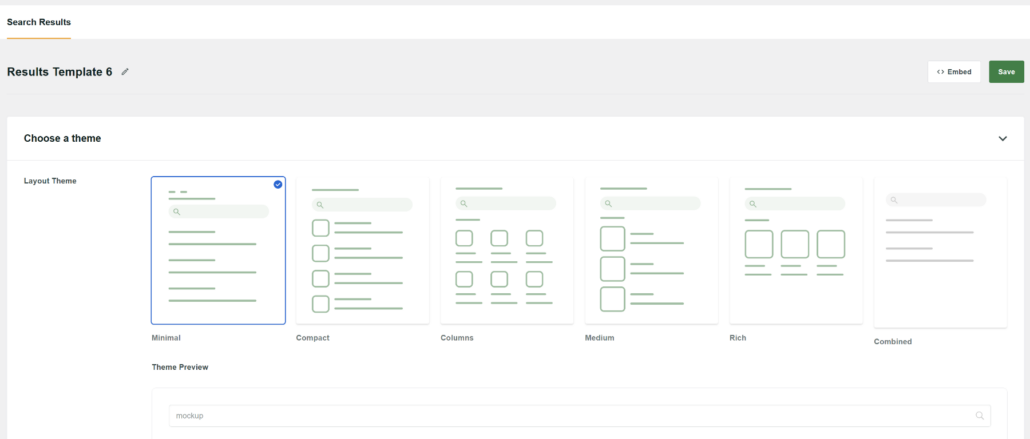
Under the layout, you’ll also see a theme preview.
This helps you select the right theme for your site, as it shows how the results will look like. Do note that the final preview might differ depending on your WordPress theme.

After that, you can scroll down to the ‘Custom Styling’ section. Here, you will find more options to customize your results page.
For example, SearchWP offers options to change the layout style, enable description, change image size (if you’ve select a theme that shows featured images), and more.
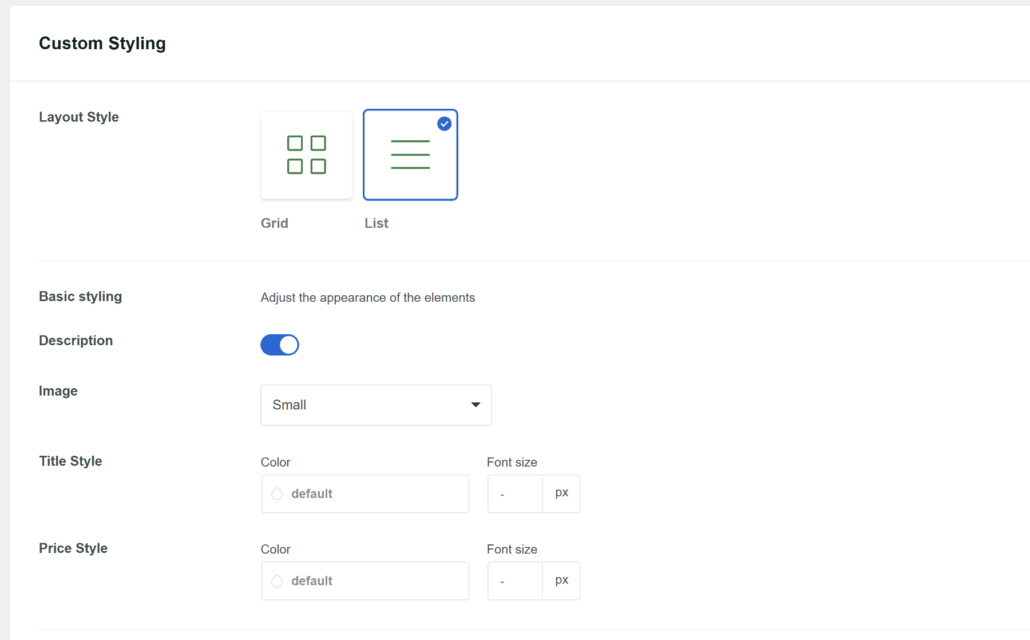
If you scroll down further, you will find more styling options for your search results page.
For instance, you can control the results per page. By default, SearchWP will show 10 results but you can change that.
Other than that, you also get to edit the pagination settings.
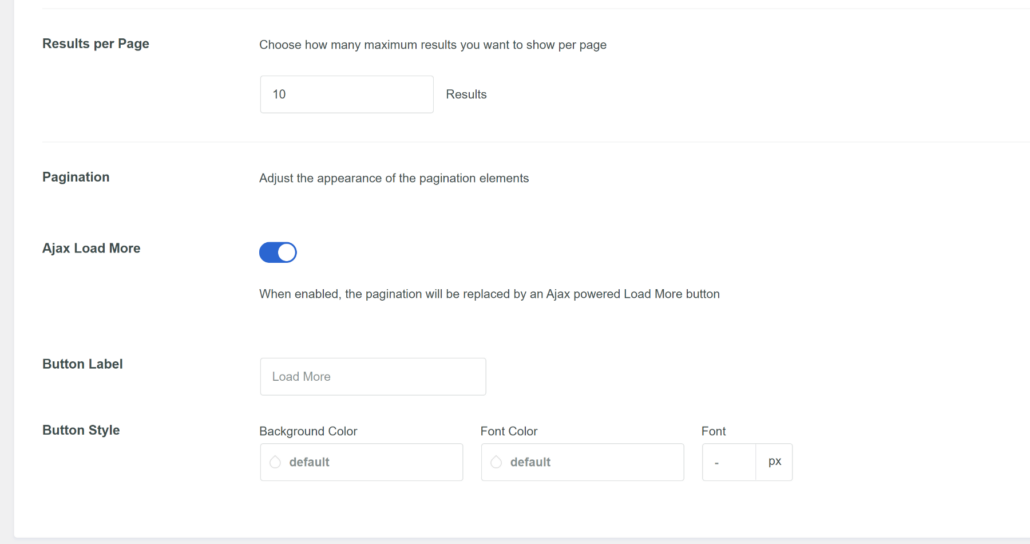
When you’re done customizing the results page, simply scroll to the top and click the Save button.
This will help save all your settings.
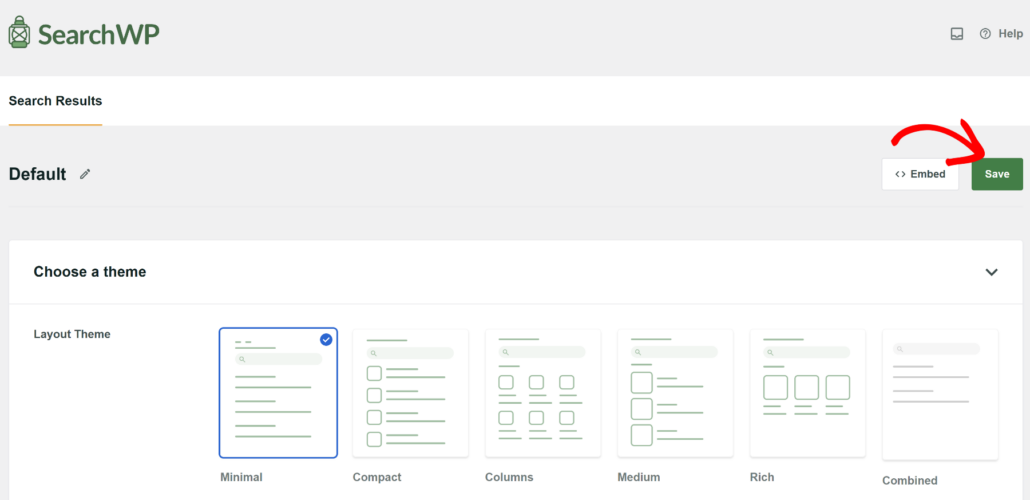
SearchWP also makes it very easy to embed the results template anywhere on your site.
To start, simply click the Embed button at the top next to Save. This will open a new popup window with multiple embed options.
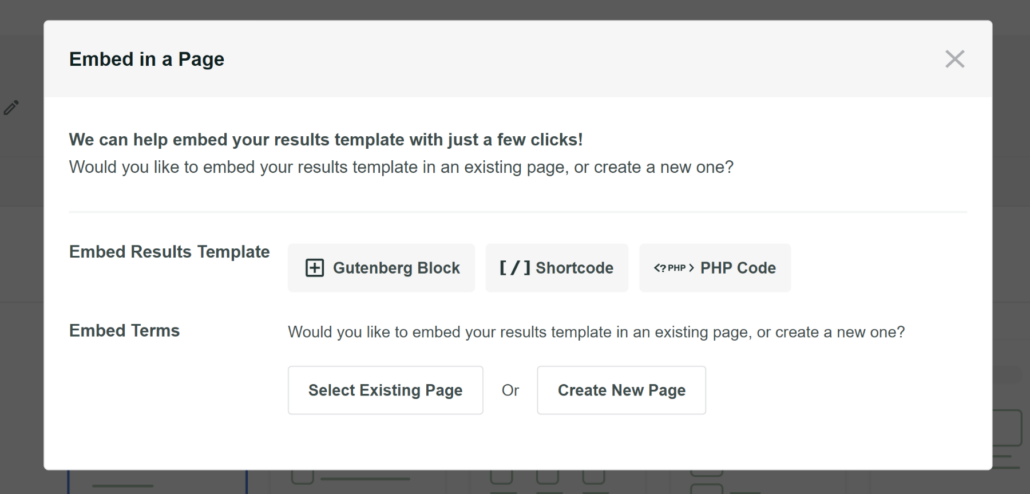
You can use a Gutenberg block, shortcode, and PHP code to embed the template. Plus, you’ll also need to select whether you’d like to embed the template on an existing page or create a new page.
For this tutorial, we’ll select the ‘Gutenberg Block’ option and ‘Create New Page’ for our search results template.
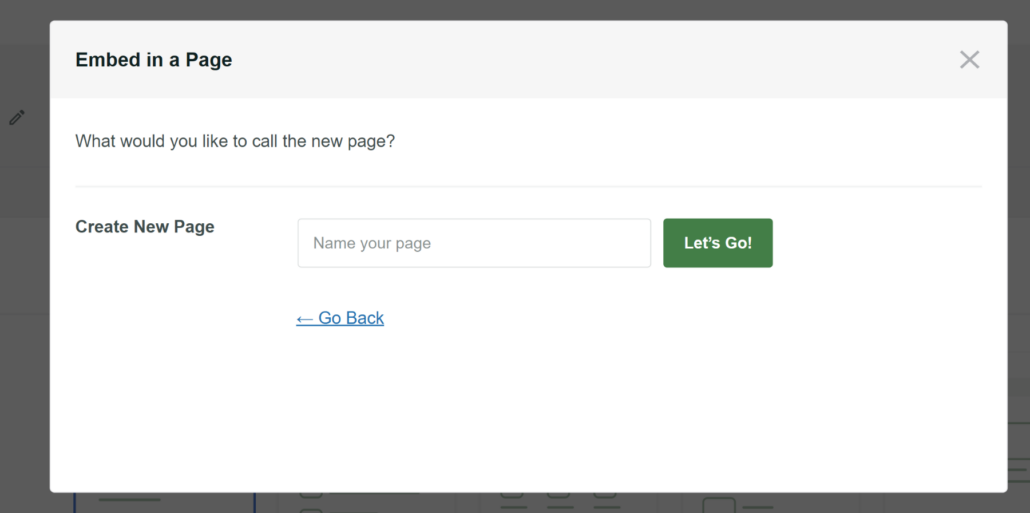
Next, you’ll need to enter a name for your new page and click Let’s Go.
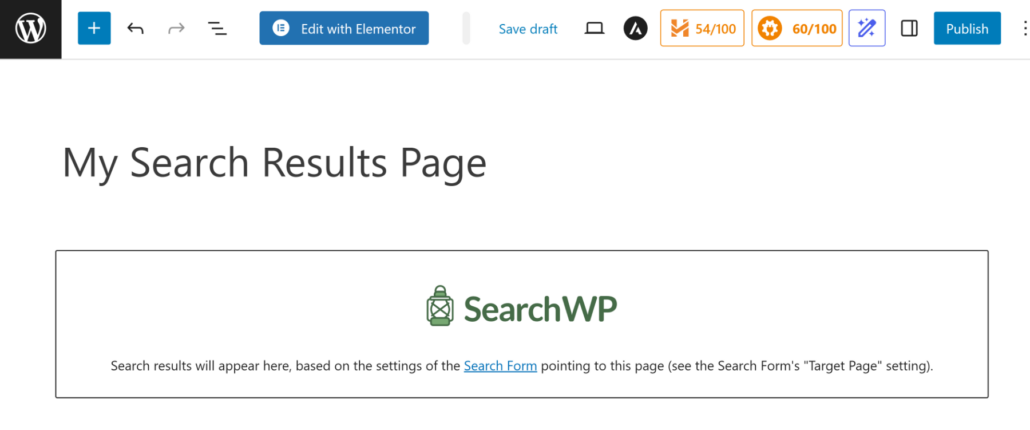
On the next screen, you’ll see the SearchWP Results block in the WordPress content editor.
You can simply click the Publish button at the top.
Step 3: Edit Search Form Settings
Next, you’ll need to change the search form settings in SearchWP and ensure that the form points to the newly created results page.
To start, you’ll need to go to SearchWP » Search Forms from the WordPress dashboard. Now, you can create a new form or edit an existing one.
For this tutorial, we’ll edit an existing form on our demo site.
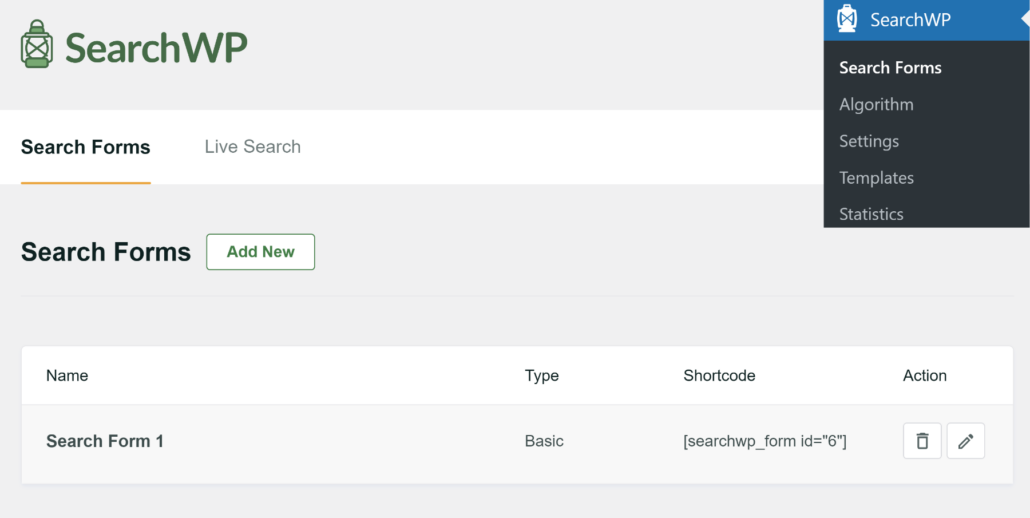
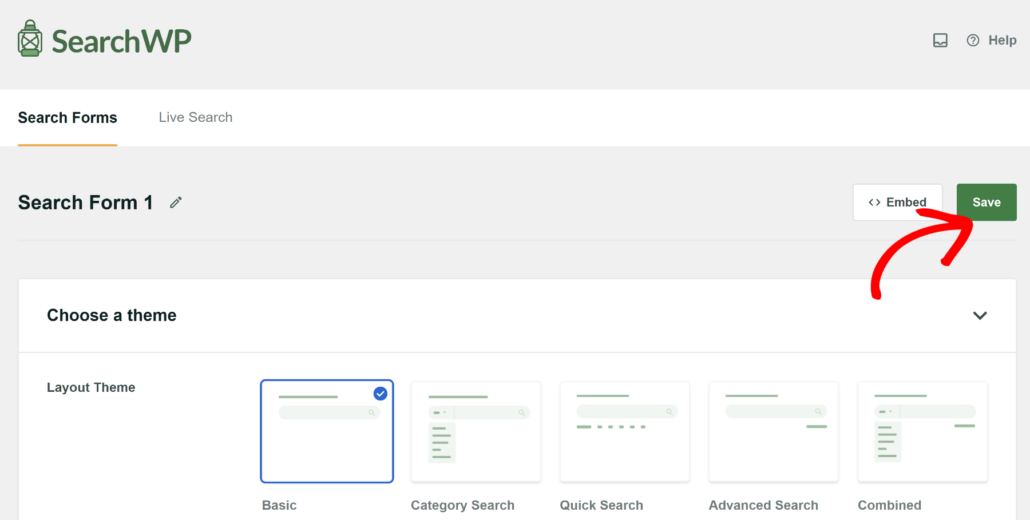
After that, you will see options to edit the search form. For instance, you can choose a theme and customize it using other options.
For more details, please see our guide on how to create a custom search form in WordPress.
Next, you can scroll down to the ‘Custom Styling’ section. From here, you’ll need to change the ‘Results Page’ to SearchWP and ‘Target Page’ to the search results template you created earlier.
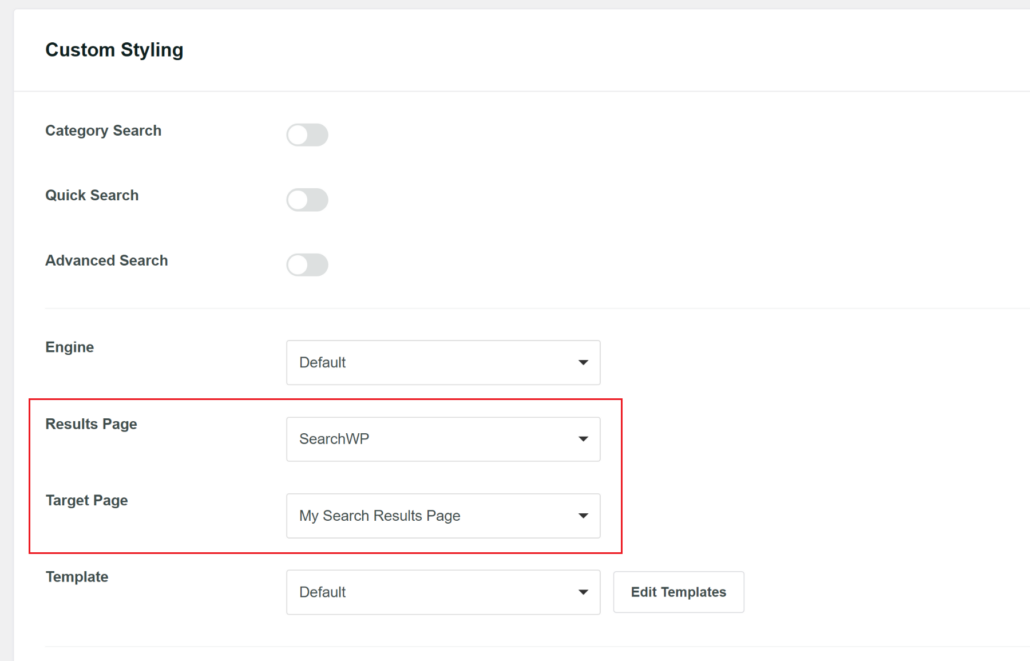
Besides that, you also get options change the Engine and also choose a Template.
When you’re done, simply scroll to the top and click the Save button.
Step 4: Test Your New Search Page
Now, let’s test our new search page, enhanced with SearchWP.
For instance, we have multiple posts on WooCommerce. Let’s try to search for it and see how it looks on the new search results page.

As you can see, we successfully found the posts using the search term.
Plus, the new search results template also works perfectly.

Method 2: Create a Search Page With SeedProd
If you want to create a fancier search page and want more customization options, then you can use SeedProd.
It is the best WordPress website builder plugin, that offers an AI-power website builder, prebuilt templates, and lots of customization options.

SeedProd comes with an easy-to-use and powerful drag-and-drop editor that allows you to build different page types – without writing a single line of code.
It is fully compatible with popular WordPress themes so that you can easily integrate your new pages into your current design.
All pages you create with this plugin are optimized for fast loading, SEO-ready, and fully responsive.
The best part? SeedProd comes with a lot of ready-made templates so you can start building your page right off the bat and grow your business faster. No need to be an expert designer!
Let’s see how you can use SeedProd to create a beautiful search page that will encourage your visitors to explore more of your content.
Step 1: Install SeedProd on Your Site
To get started, you can go to the SeedProd website and grab your copy of SeedProd.
Once that’s done, simple install and activate the plugin on your site.
If you need help, then please see this guide on how to install a WordPress plugin.
Step 2: Create a New Page
Once done, you can navigate to SeedProd » Landing Pages from your WordPress dashboard.
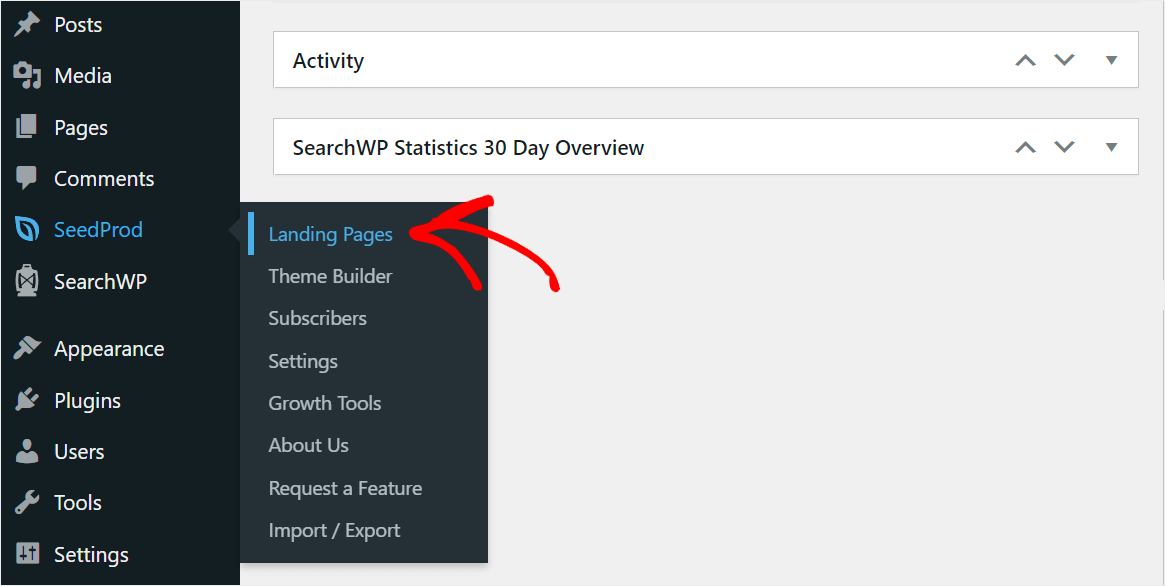
On the next screen, you will see pre-built pages like coming soon mode, maintenance mode, login page, and 404 error page.
From here, you can press the Add New Landing Page button.
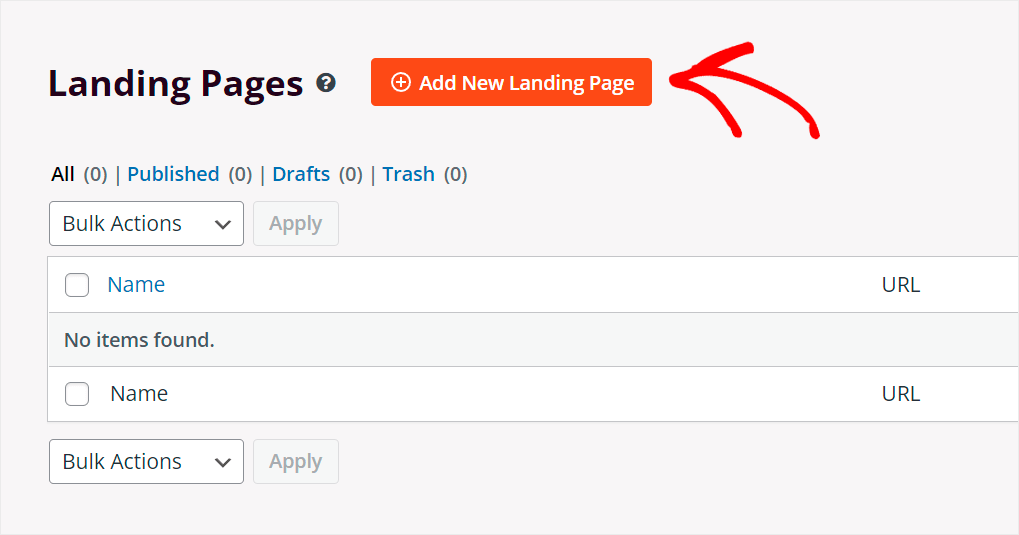
In the next step, you can select one of the ready-made SeedProd page templates.
There are different templates to choose from, depending on the type of page you want to create.

For this tutorial, we’ll create a search page from scratch.
To get started, point a cursor over the Blank Template and click the checkmark icon.

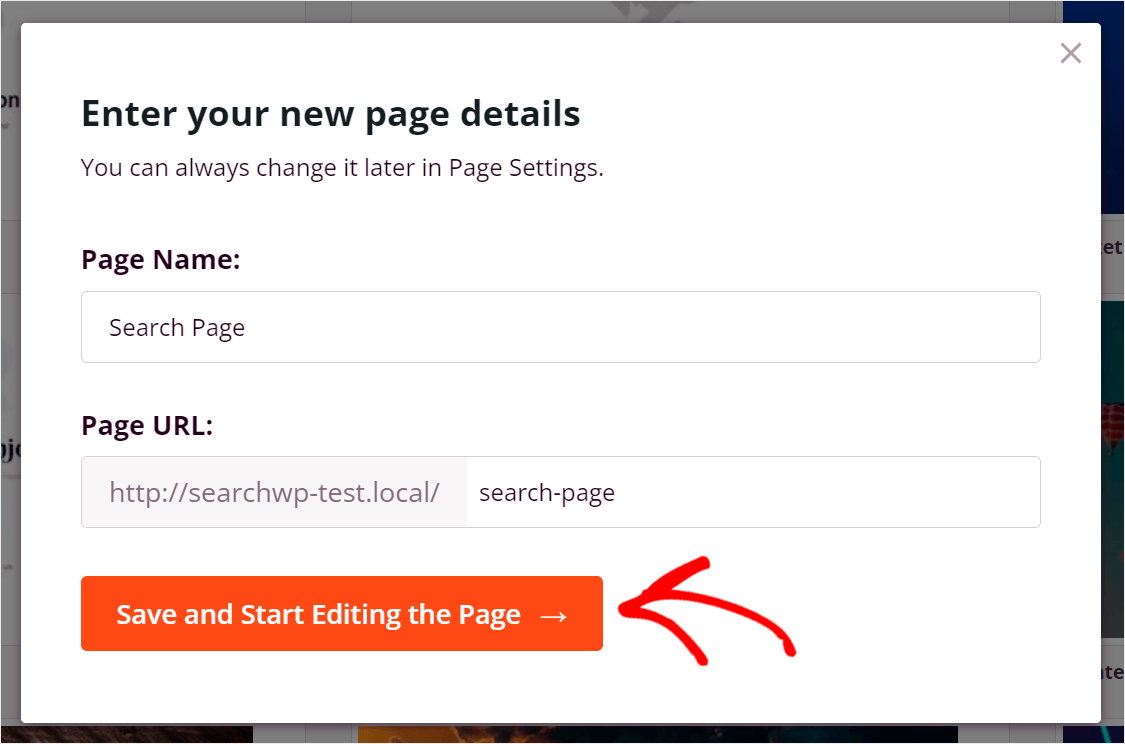
Next, you will see a new a window where you can name your page and set its URL or web address.
Simply enter the page’s name and URL and click Save and Start Editing the Page.
Step 3: Choose a Layout for Your Search Page
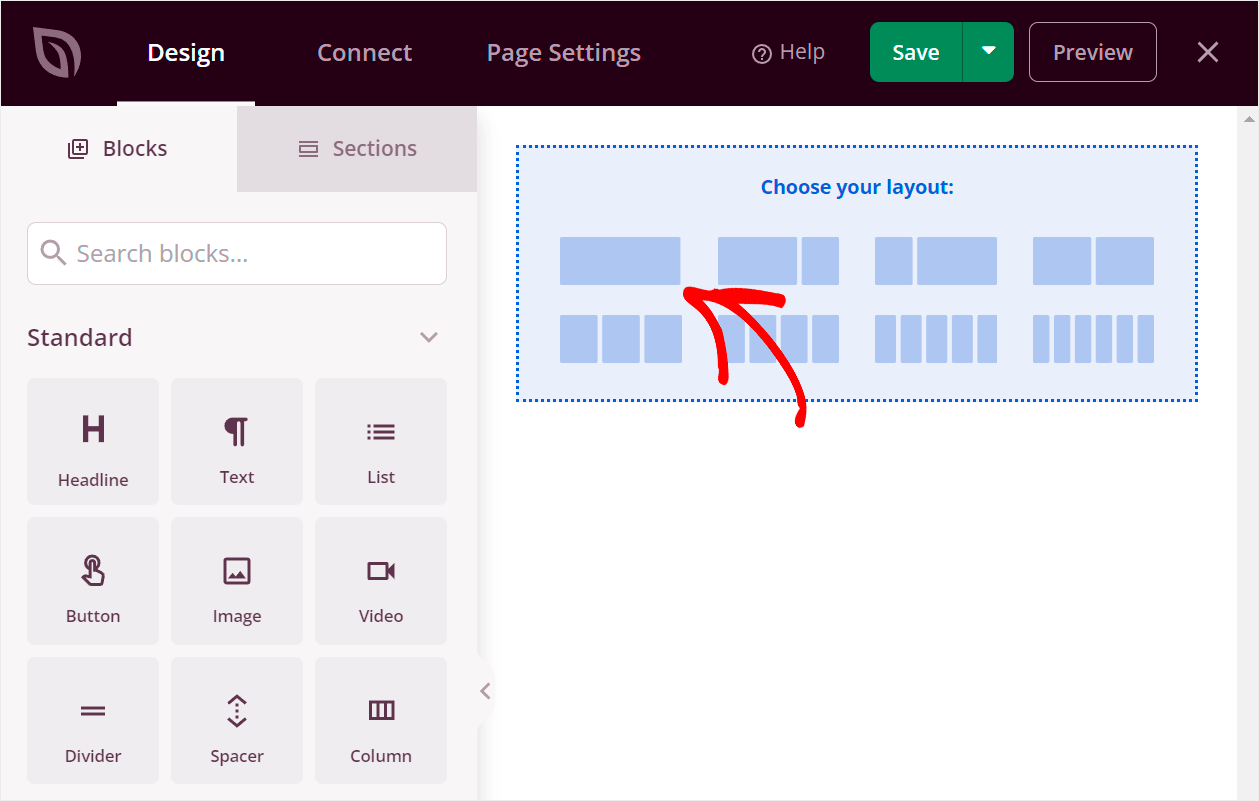
To start creating a new search page, you first need to select its layout.
To do that, just click on the layout that suits you. For example, we’ll choose the first one by simply clicking on it.
Step 4: Add a Heading to Your WordPress Search Page
Now you can start adding blocks to your page. Let’s first add the headline.
To add a new block to the page, drag it from the left panel. You can see how we do that below:
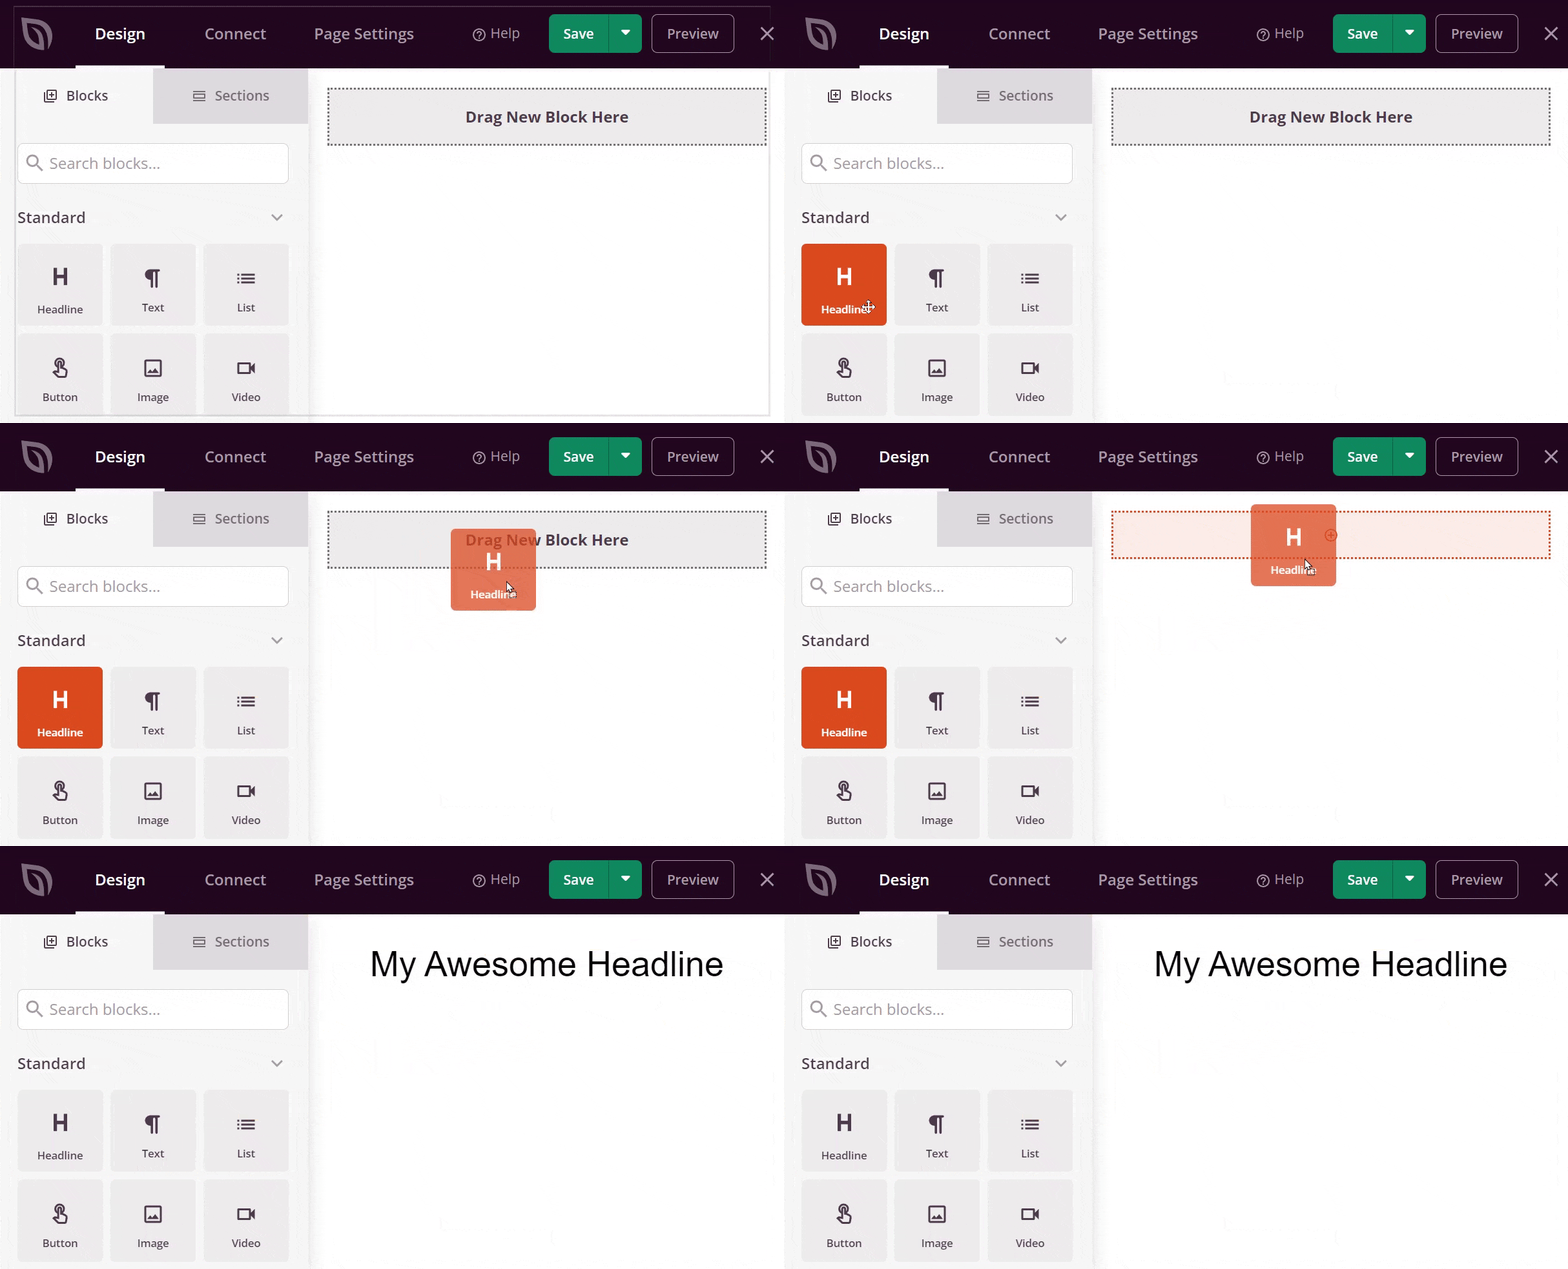
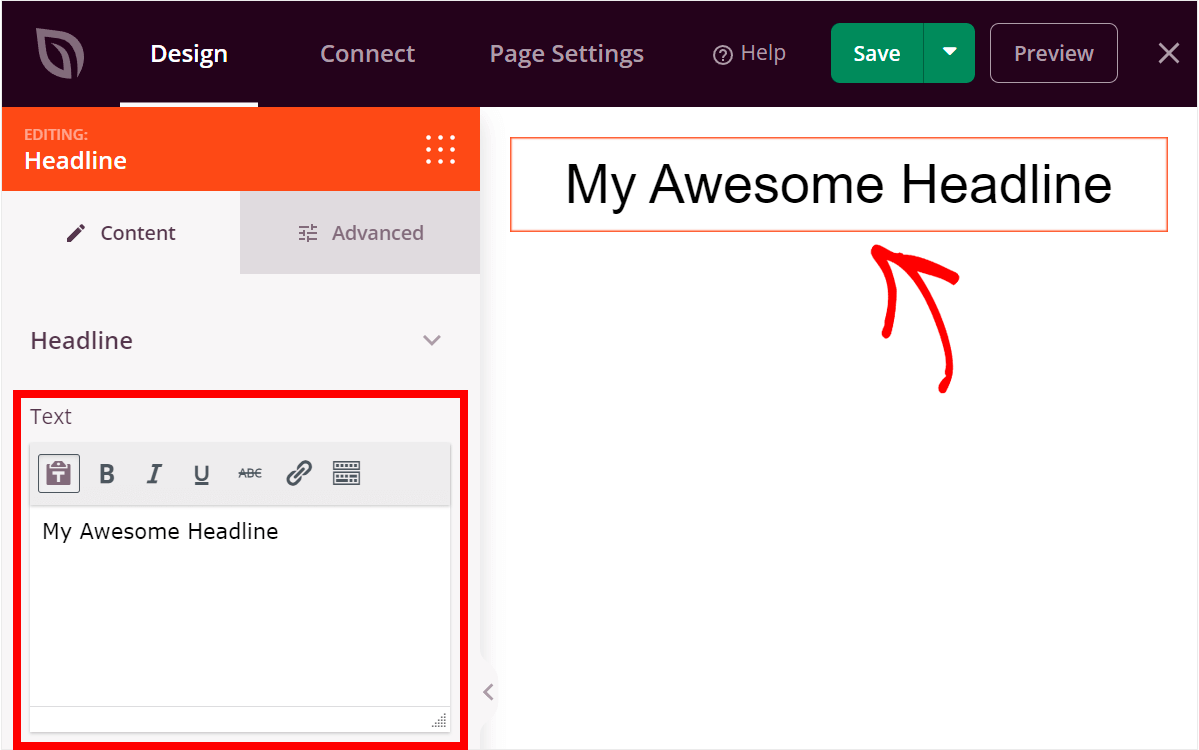
To customize the headline, click it and enter the text you want.
For example, we’ll change it to “What are you looking for?”.
Step 5: Add a Search Form to Your WordPress Search Page
The next step is to add a search form to your search page.
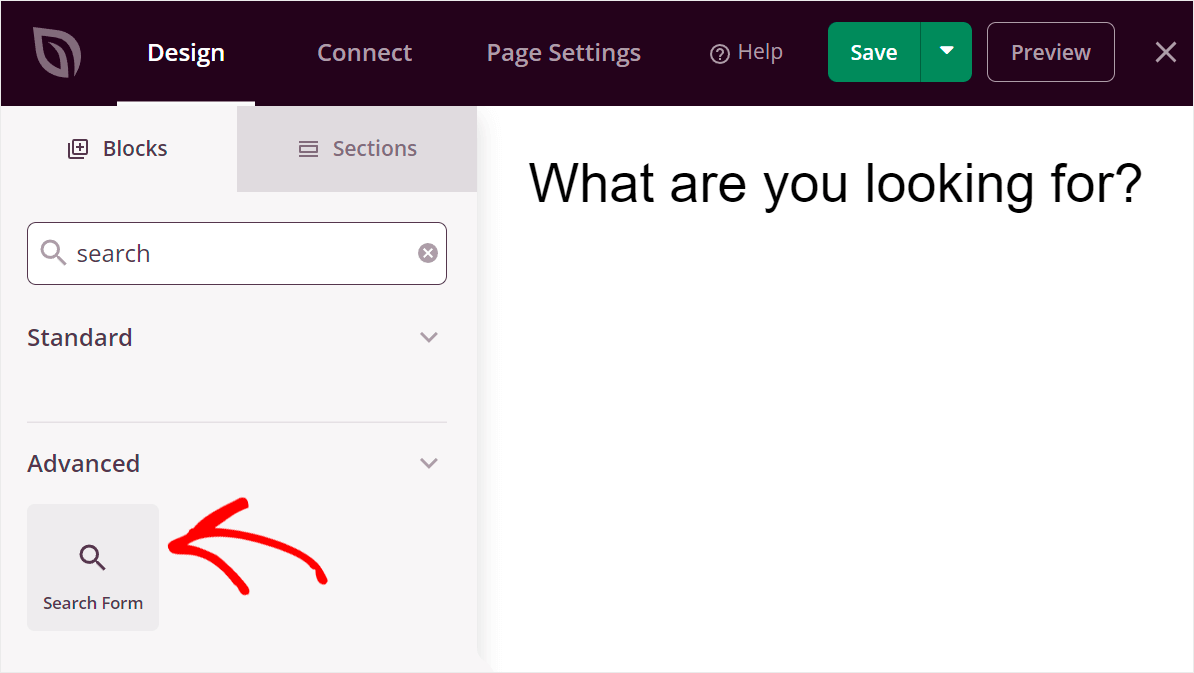
First, search for the Search Form box under Blocks and drag it to your page under the headline.
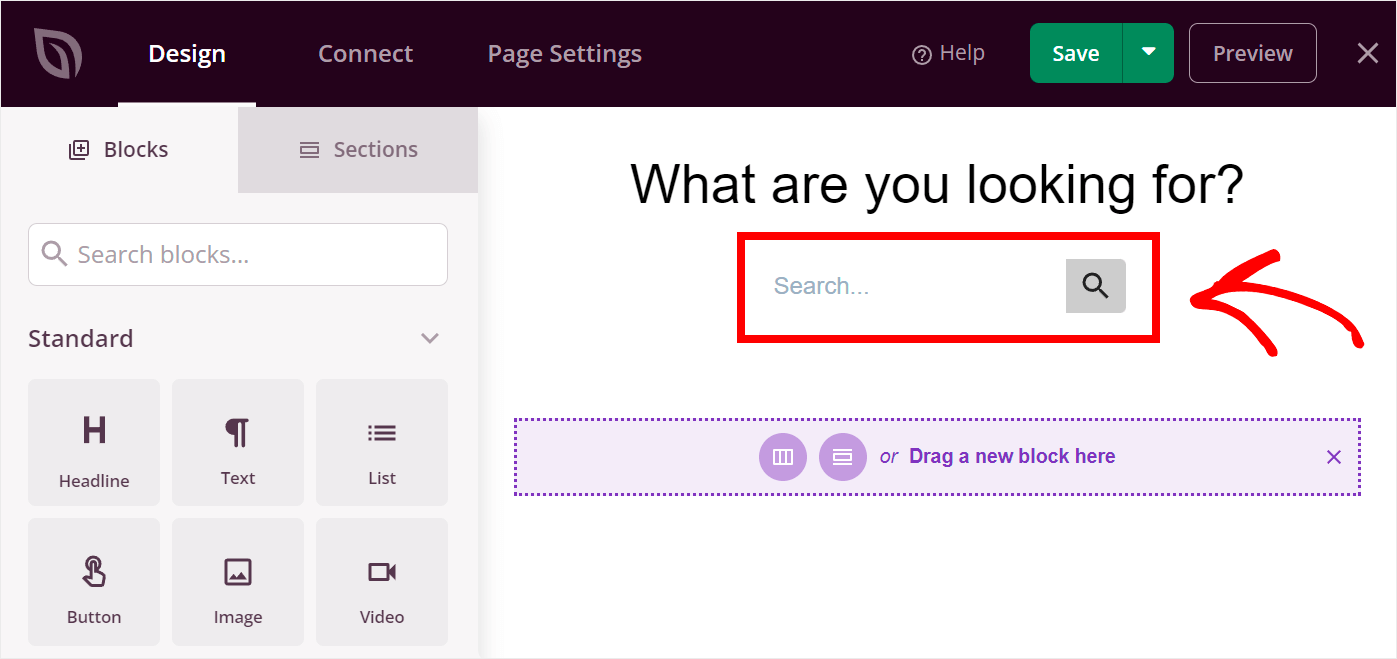
Once you add the search form block, you can further customize its appearance in SeedProd.
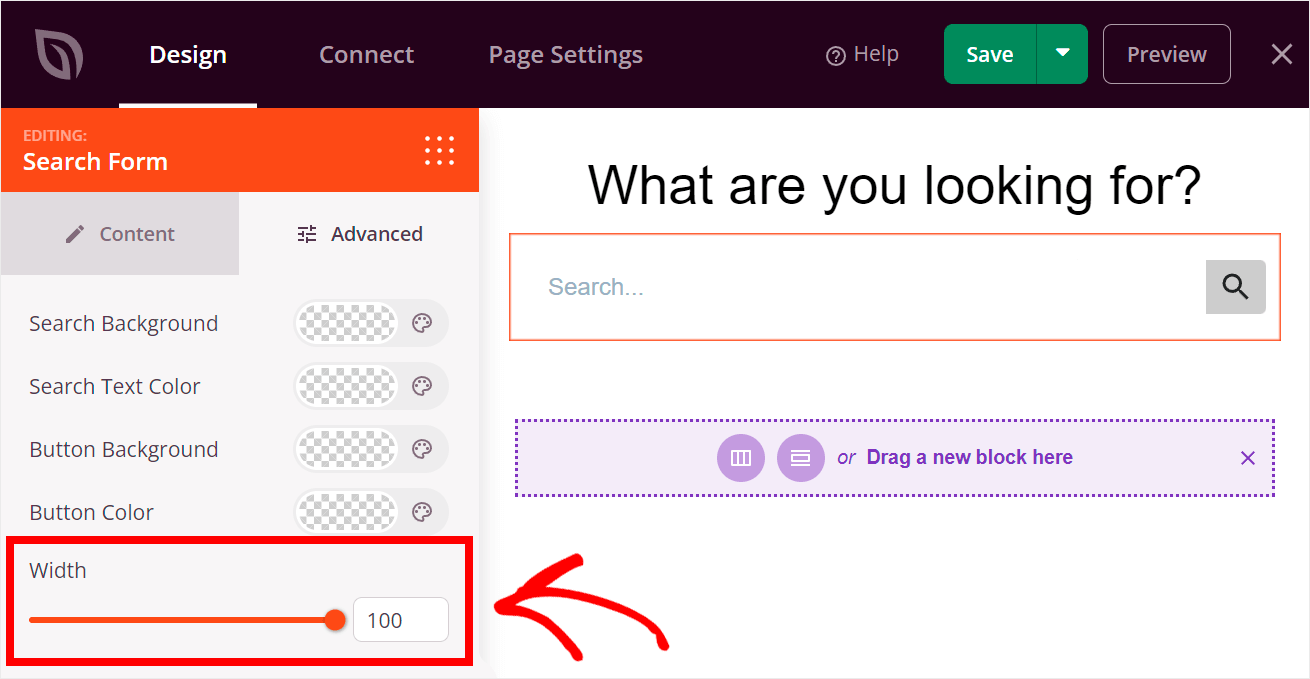
As you can see, the default search form has a relatively small width.
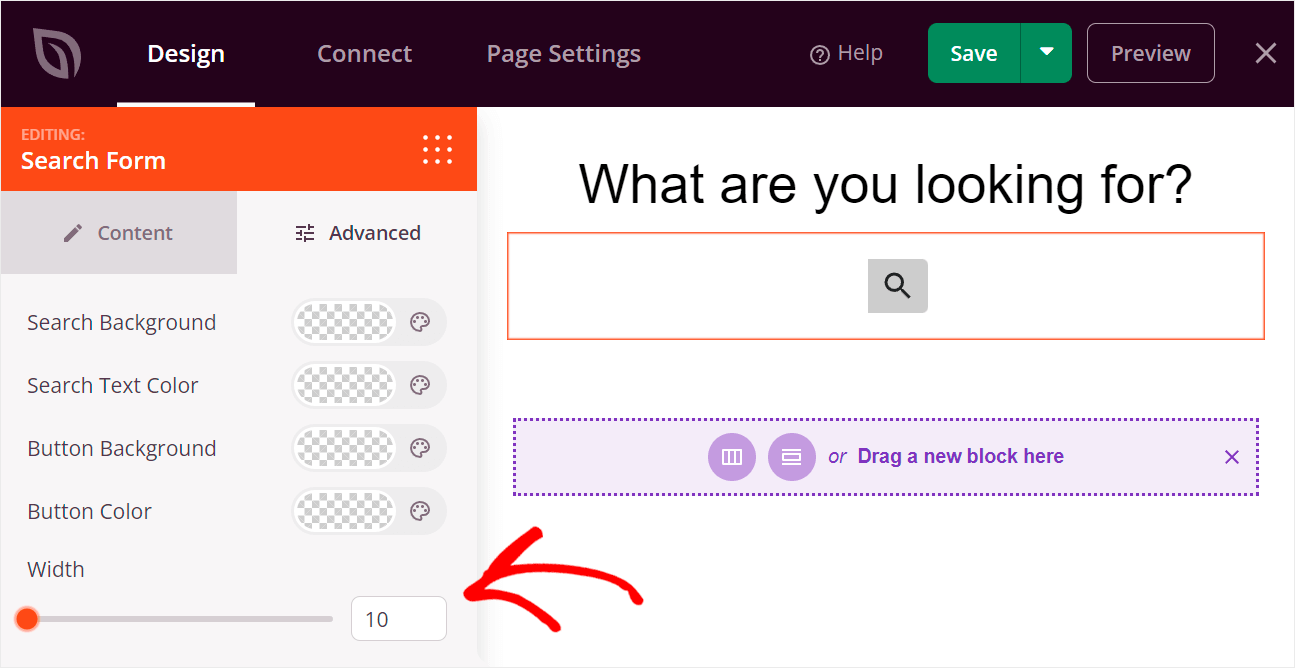
To make it wider, click on the search form, and go to the Advanced tab in the left panel.
Here you can adjust the width of your search form by moving the Width slider left or right.
Let’s say we want to make it full page width.
To do that, move the Width slider all the way right.
Step 6: Add Recent Posts to Your Search Page
Now let’s also add recent posts to our search page. By doing this, you can promote the posts you’d like and get more traffic to your site.
To get started, search for the Posts block and drag it to the search page.
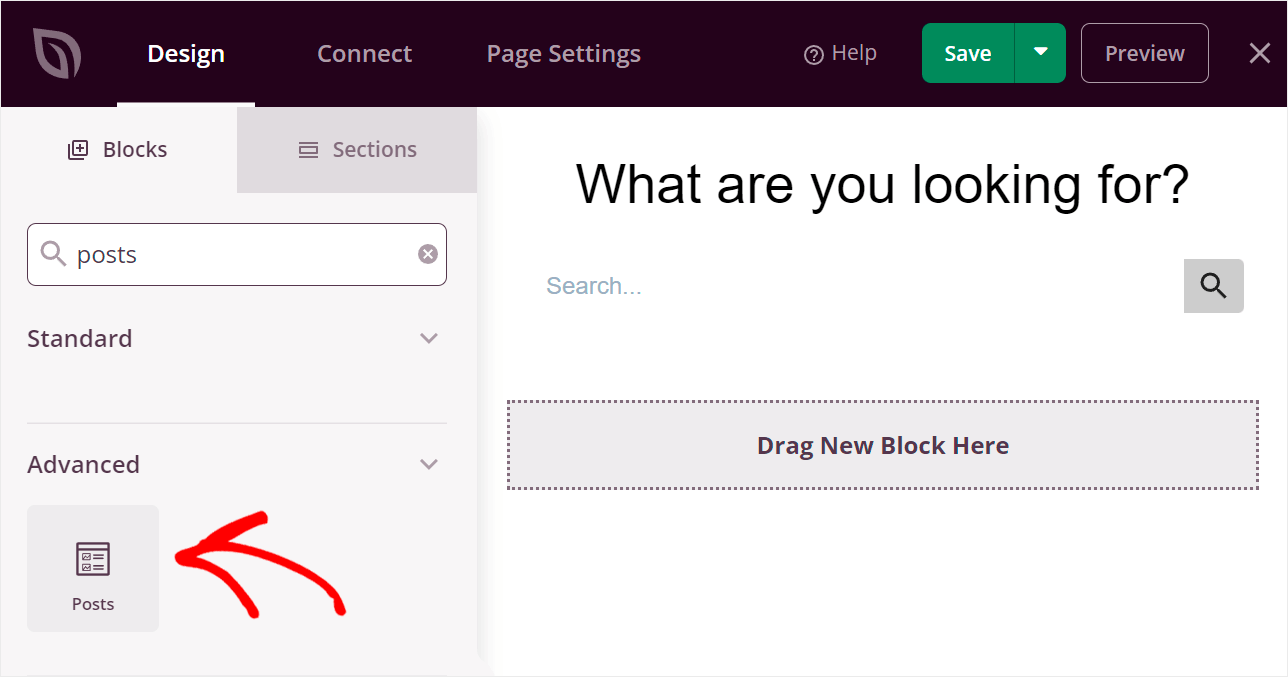
To customize the Posts block, click on it.
On the left panel, you can specify the categories from which you want to show posts, change the number of posts per page, customize the block title settings, and more.
For example, we will reduce the number of posts on our page to 3, so we don’t distract visitors too much.

When you’re happy with how your Posts block looks, let’s also add a headline above it.
Simply drag the ‘Headline’ block onto the page.
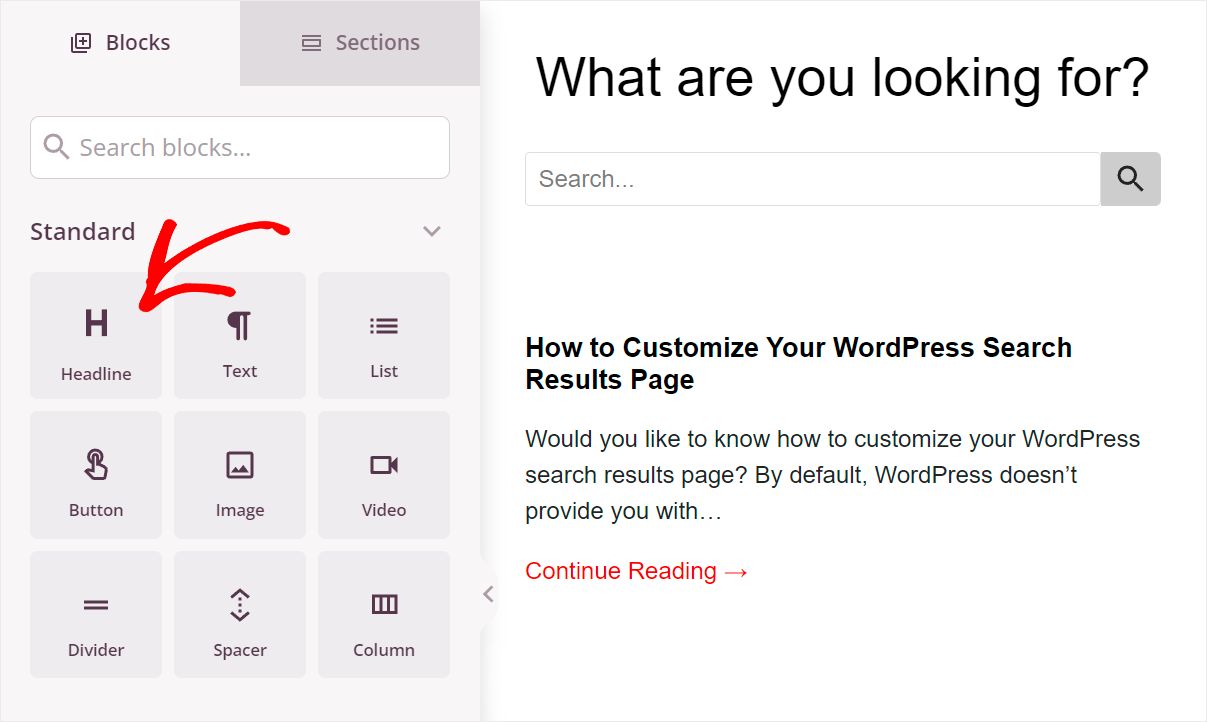
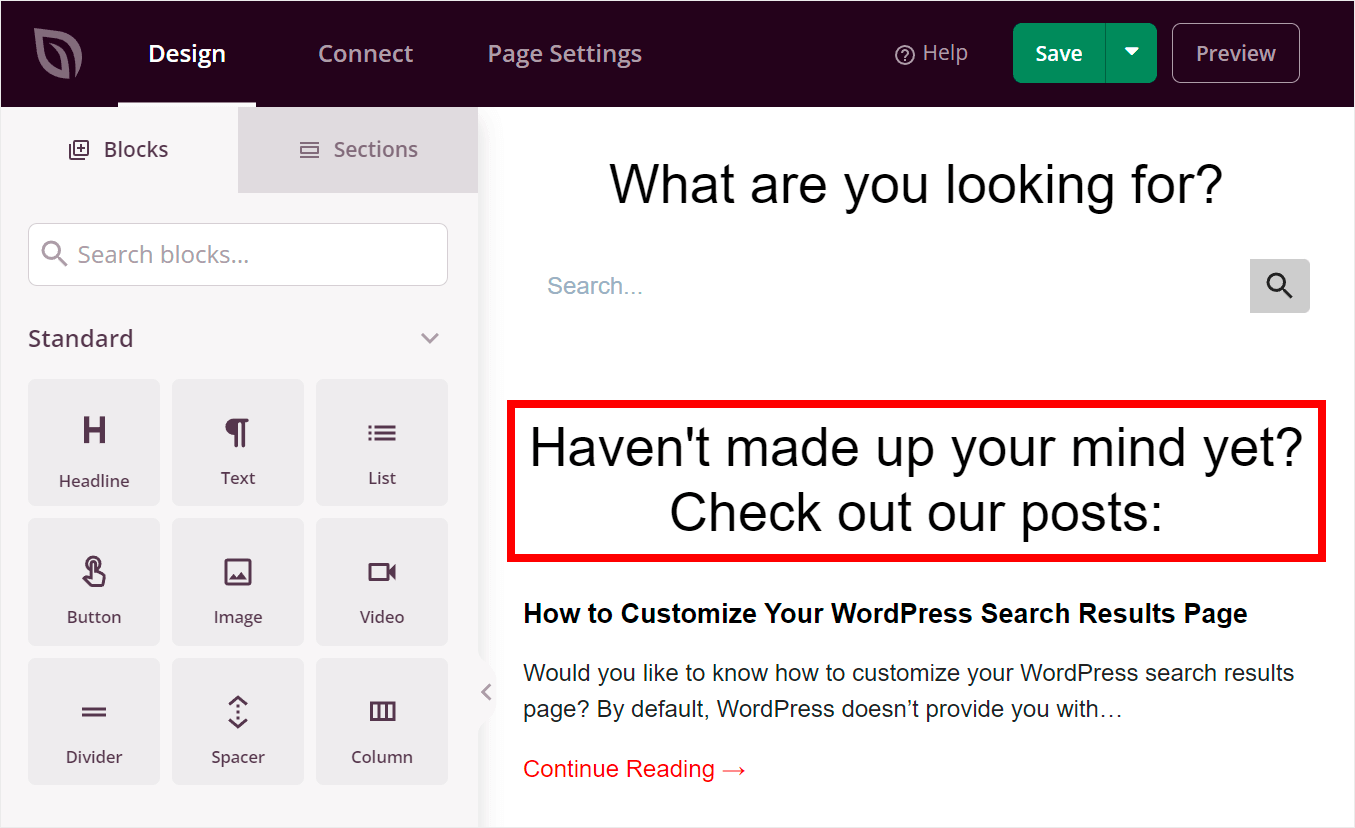
Then you can change the headline text to something that will attract your users.
For example, we’ll replace it with “Haven’t made up your mind yet? Check out our posts:”.
Step 7: Add a Subscription Form to Your Search Page
Let’s add a newsletter subscription form to our search page as a finishing touch. With this, you can collect additional email addresses of your visitors so you can grow your email list.
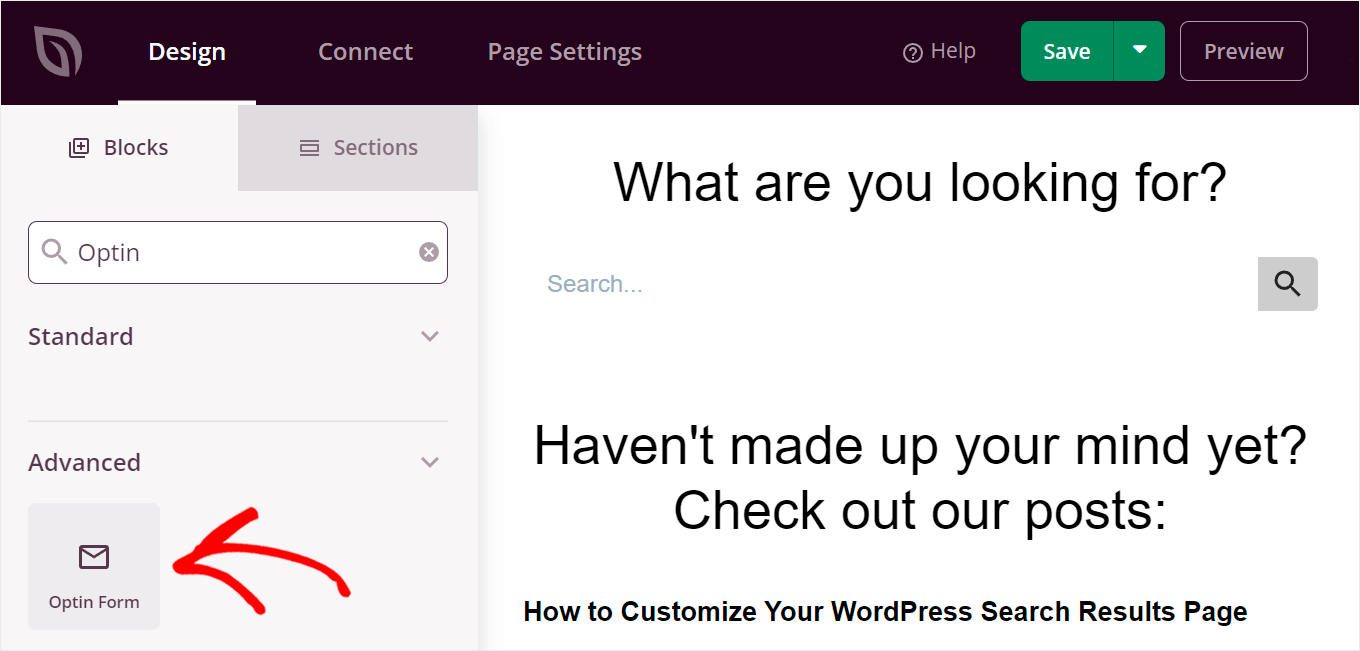
To get started, find the Optin Form block on the left panel and drag it to your page.
If you click on the block, you can customize its fields, style, button text, and many more.
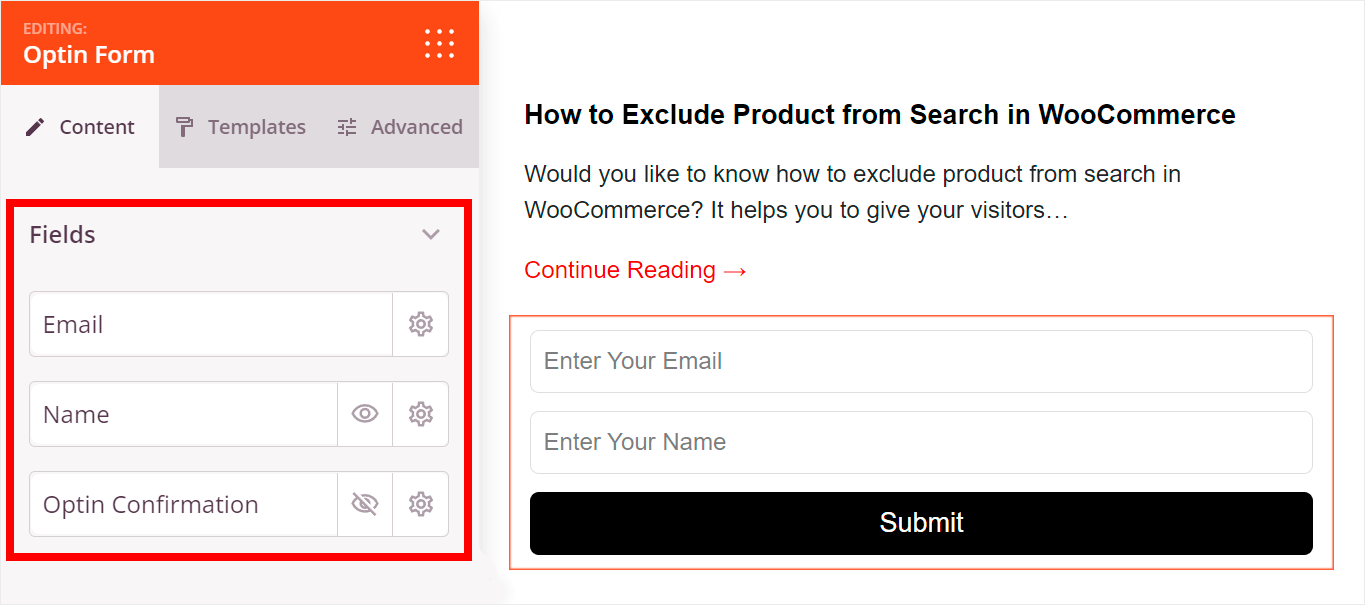
SeedProd has seamless integration with the most popular email marketing services, so you can collect new emails using your favorite one.
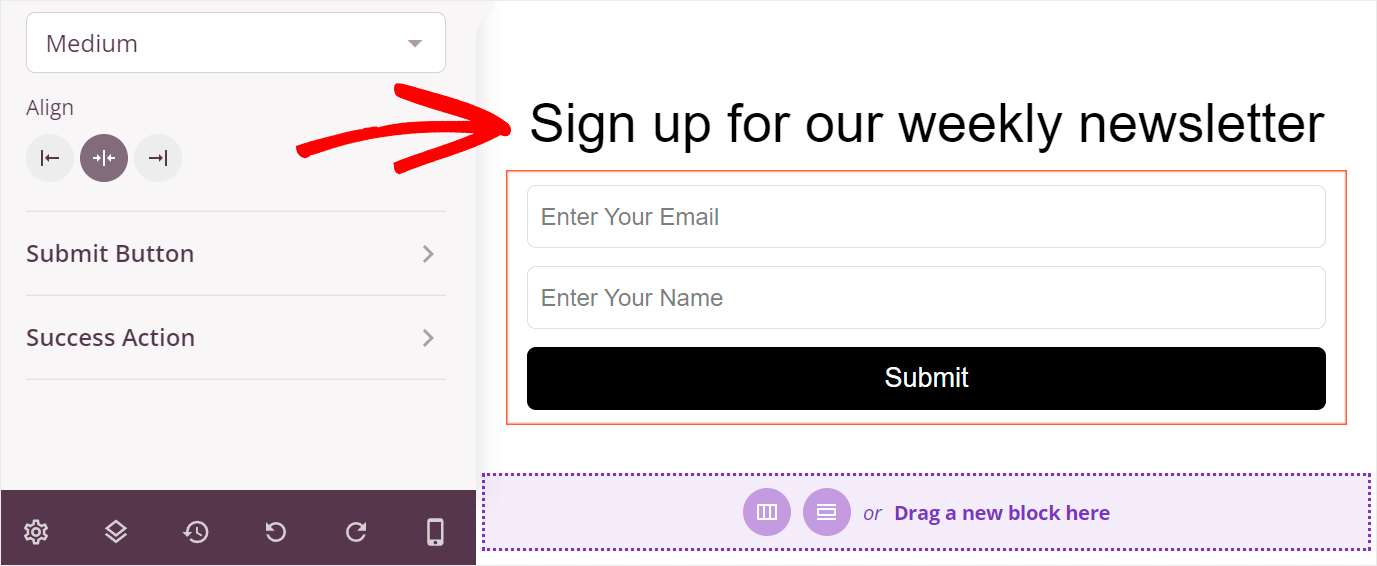
The final step is to add a headline above our subscription form. Let’s call it “Sign up for our weekly newsletter”.
Step 8: Publish Your Search Page
When you’re satisfied with how your search page looks, it’s time to publish the page.
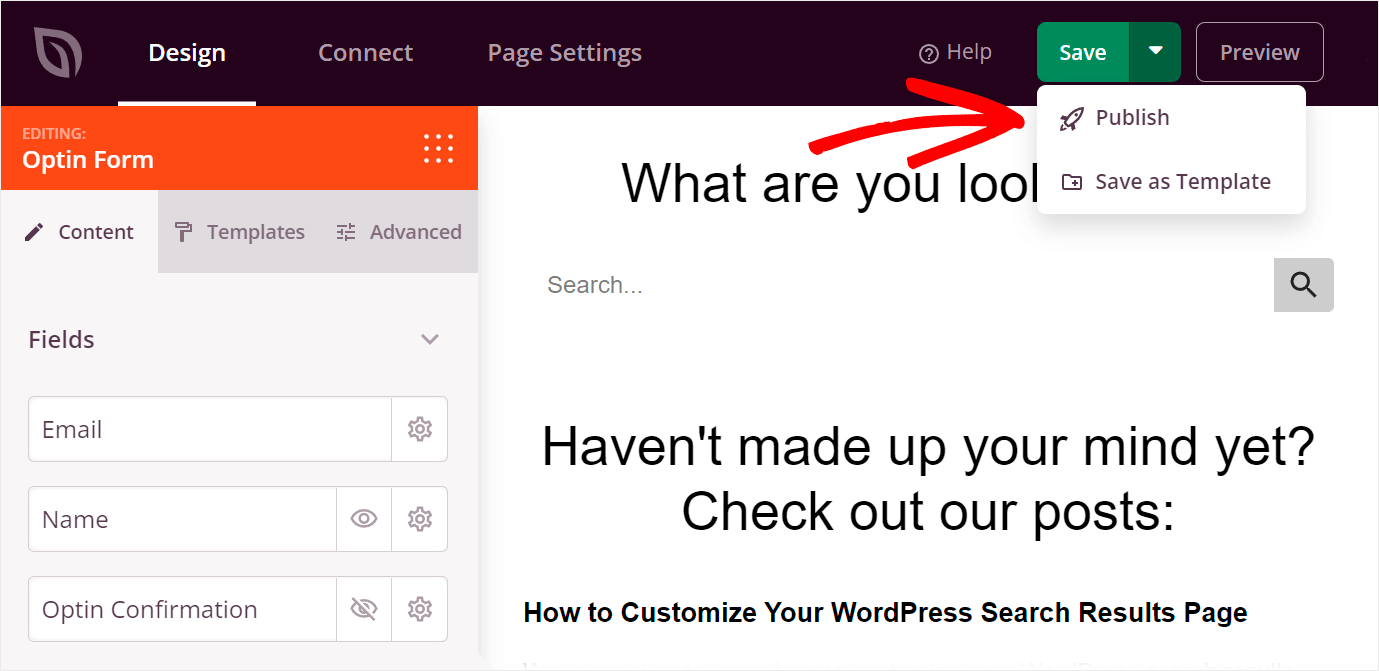
To do that, click the down arrow next to the Save button in the upper right corner and select the Publish option.
A new window will popup.
You can click See Live Page in the window.

Next, you can visit your SeedProd search page on your website.
Here’s what our search page created with SeedProd looks like on our test site:

What’s Next…
Creating a custom search page makes it easier for your visitors to find the content they’re looking for.
Plus, it allows you to get more pageviews so you can increase your income and grow your business.
We hope this article helped you learn how to create a search page in WordPress. You may also want to see our guide on how to customize your WordPress search results page and how to create a Divi search results page template.
If you’re ready to create a smart search page on your site, you can get started with SearchWP here.
