


A single search on a busy WordPress site can turn up blog posts, pages, and products in one long list. When you filter search results by post type, visitors get to pick the kind of content they came for, right on the results page.
Your site already tags every post, page, and product with its type, so there’s nothing new to set up behind the scenes. WPFilters, built by the same team behind SearchWP, turns those types into a clickable list beside your results without any code.
In this article, we’ll show you how to filter search results by post type in WordPress, step by step, so visitors can narrow any search in one click.
What Is a Post Type Filter for Search Results?
A post type filter is a set of options beside your search results, with one choice for each kind of content on your site.
Depending on your site, that could be Posts, Pages, Products, or a custom post type like Recipes or Courses.
You can show those choices as checkboxes, radio buttons, or a dropdown, and when a visitor picks one, the results update to show only that type of content, without a new search.
WordPress’s built-in search returns every searchable post type together in one list. It doesn’t come with a way for visitors to narrow that list by type.
A filter is also different from limiting your search to certain post types.
Limiting search removes a post type for everyone, so nobody can find it through search. A filter keeps everything searchable and lets each visitor decide what to see.
It’s different from a post type dropdown on the search form, too. Visitors set that dropdown before they search, while a filter works afterward, once they can see what came back.
Why Filter Search Results by Post Type?
From our experience, visitors who search a site with lots of different content rarely want every kind of result at once.
- Mixed results bury what visitors came for. A shopper looking for a product has to scroll past blog posts and help pages that happen to share the same keyword.
- Limiting search helps one visitor and hurts the next. Taking pages out of search might help shoppers, but then a visitor looking for your returns policy finds nothing.
- Counts show where the answers are. Seeing a count beside Products and another beside Posts tells visitors which option is worth clicking before they open anything.
- Custom post types get their own space. Recipes, courses, or listings stop competing with blog posts for the top spots in your results.
Think of it like the section signs in a library.
Every book is still on the shelves, but readers can walk straight to the section they came for.
Next, let’s look at the easiest way to add a post type filter to your search results.
How to Filter Search Results by Post Type With WPFilters
We recommend WPFilters as the easiest way to filter search results by post type.

WPFilters is the best filtering plugin for WordPress, built by the same team behind SearchWP.
It lets you build filters from the post types, categories, tags, and custom fields your site already has, without writing code.
Here are some of the features that make WPFilters a good fit for search results pages:
- Built-in post type data source. The Post Type option builds its list from your site’s public content types, including custom post types, with no extra setup.
- Counts beside each option. With Item Count turned on, each option shows how many matching results it holds when the page loads. When SearchWP powers your search, the counts also update as visitors filter.
- Several ways to show the choices. You can display post types as a Checkbox, Radio, Dropdown, or Dropdown (Multiselect) element, depending on how you’d like visitors to pick.
- No page reloads. When a visitor picks a post type, WPFilters uses AJAX to update the results in place.
With that, let’s see how you can use WPFilters to filter search results by post type.
Step 1: Install and Activate WPFilters
To start, you can sign up for a WPFilters plan on the SearchWP website.
After signing up, head to the Downloads tab in your account dashboard.
From there, download the WPFilters plugin ZIP file and copy your license key, since you’ll need it in a moment.
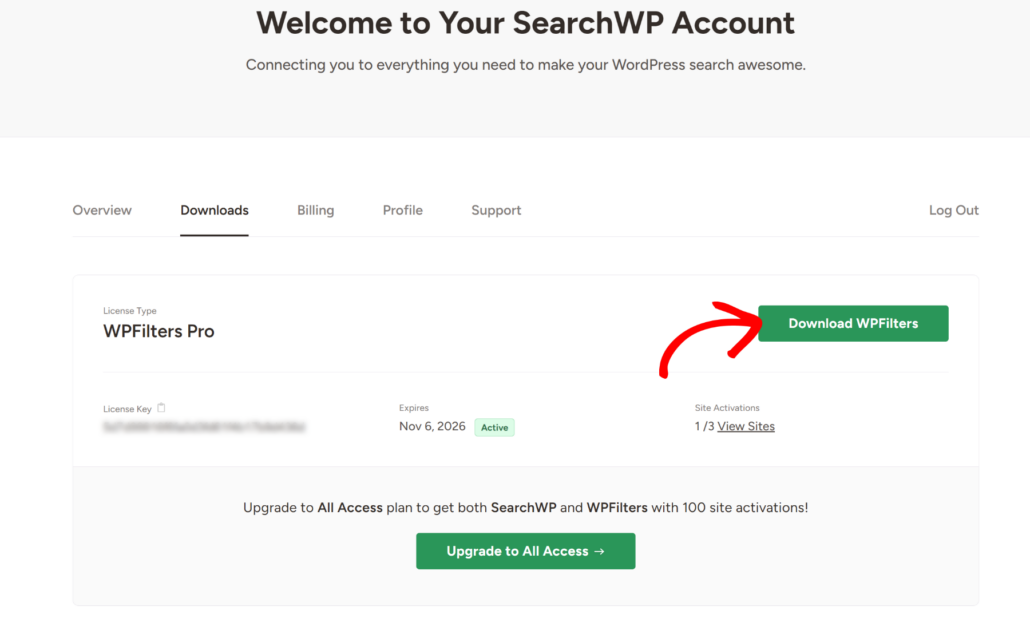
Next, you can upload and install the plugin on your WordPress site.
If you need help with this part, you can follow WPBeginner’s guide on how to install a WordPress plugin.
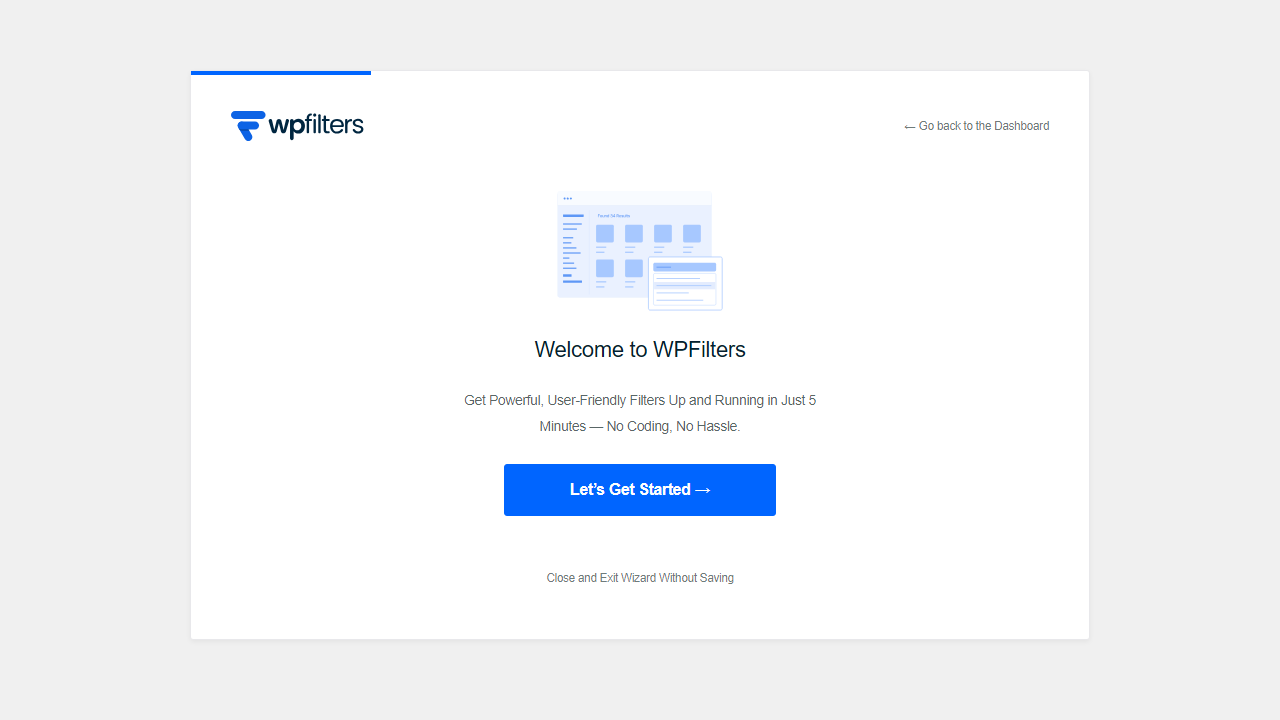
Once the plugin is active, the WPFilters setup wizard opens on its own.
Go ahead and click Let’s Get Started, then follow the onscreen prompts to enter your license key.
Note: WPFilters needs an active license to show filters on your site, and without one it only lets you save a single filter element. Adding your key now means the filter displays and you can build more later, like a category or reset filter for the same results page.
With your license active, you’re ready to build the post type filter.
Step 2: Create a Post Type Filter Element
To create the filter, you can head to WPFilters » Elements from your WordPress dashboard. Next, click the Add New button.
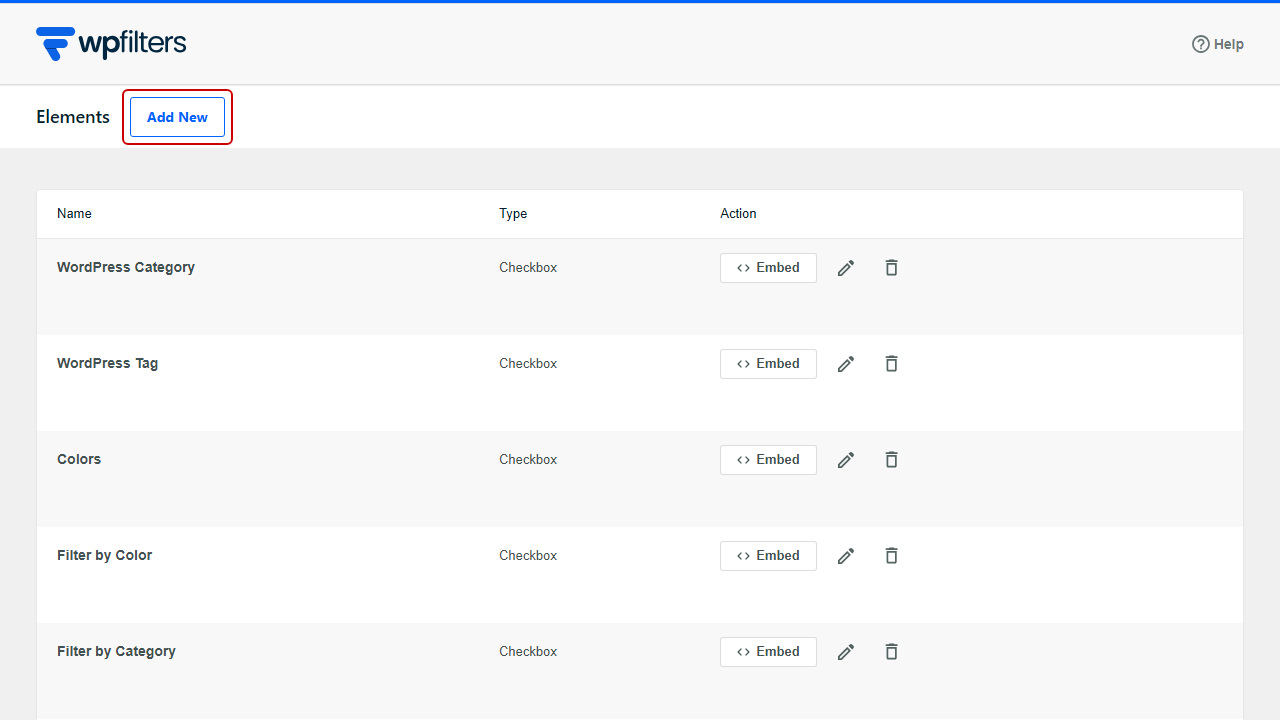
At the top of the builder, give your filter a name that visitors will understand, like “Content Type.”
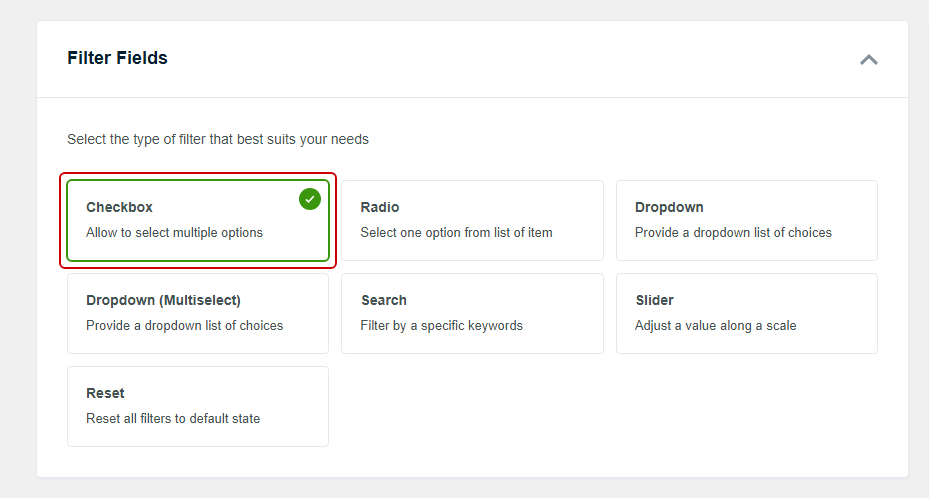
After that, look for the Filter Fields section and select Checkbox.
We like Checkbox here because visitors can untick an option to get back to all their results. A Radio element works too, but visitors can’t untick a radio button, so it’s best paired with a reset button.
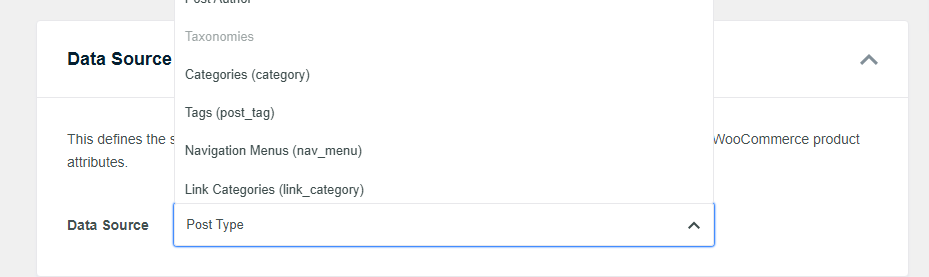
From there, scroll down to the Data Source section and open the dropdown.
The list is grouped into Posts, Taxonomies, and Custom Fields.
Go ahead and select Post Type, which sits inside the Posts group, right above Post Author.
Step 3: Customize the Post Type Filter
Next, you can choose how the filter looks on your results page.
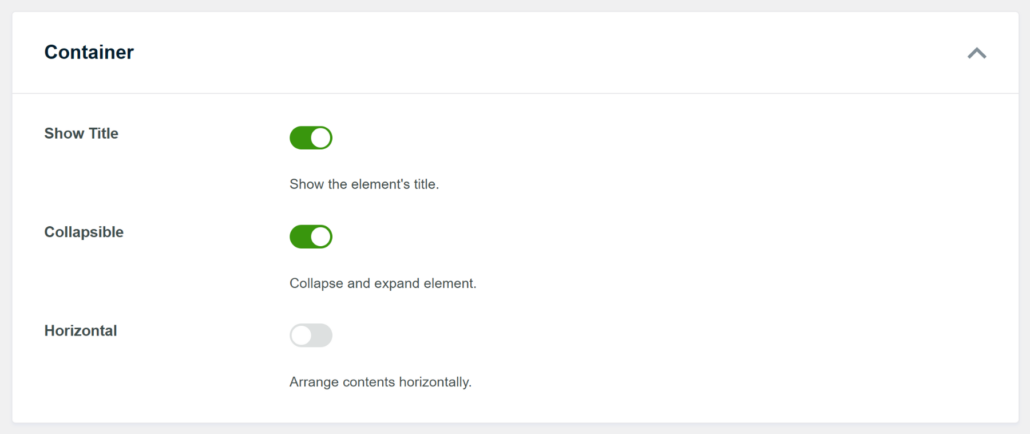
Under Container, the Show Title toggle displays your filter’s name, “Content Type,” above the list of options.
You can also turn on Collapsible if you’d like visitors to be able to fold the filter away.
Under Items, we recommend turning on Item Count, which shows a count beside each post type so visitors can see where the results are. With WordPress’s built-in search, the counts switch to site-wide totals once a visitor starts filtering, while SearchWP keeps them matched to the search.
Before you save, decide whether to turn on Show Empty. With it turned off, the filter leaves out post types that have nothing to show.
If SearchWP powers your search, the other options also drop out once a visitor ticks one, until they untick it.
If SearchWP powers your search and you want visitors to combine types, like Posts and Pages together, turn Show Empty on instead. Every post type then stays in the list, including ones with zero matching results.
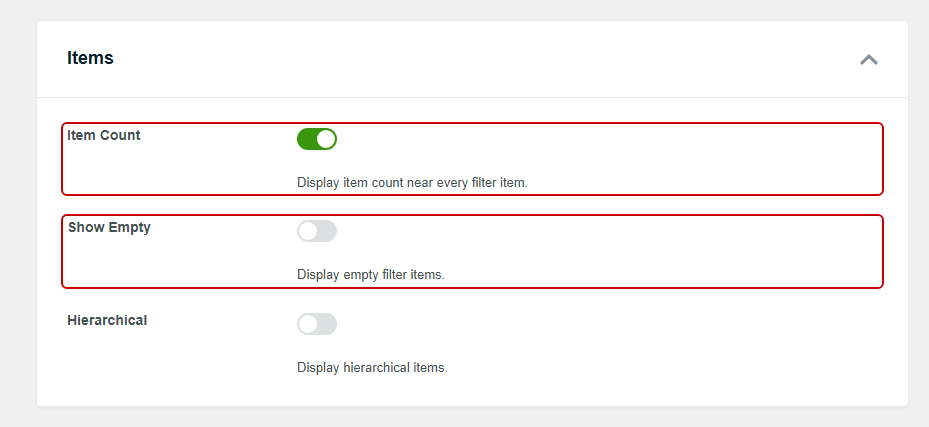
As you make changes, the Live Preview panel on the right shows your filter with your site’s real post types.
Once it looks right, click Save.
Note: Each option uses the post type’s plural name, like “Posts” or “Recipes.” You might also see Media in the list, since WordPress treats your Media Library as a public post type.
To keep a type out of the filter, it’s easiest to remove it from search entirely, which we cover in our guide on how to limit search to specific post types.
Step 4: Add the Filter to Your Search Results Page
Where you place the filter depends on what powers your site’s search.
If you use SearchWP, the filter goes on SearchWP’s own results page.
To set that up, head to SearchWP » Templates and open the results template your search form uses.
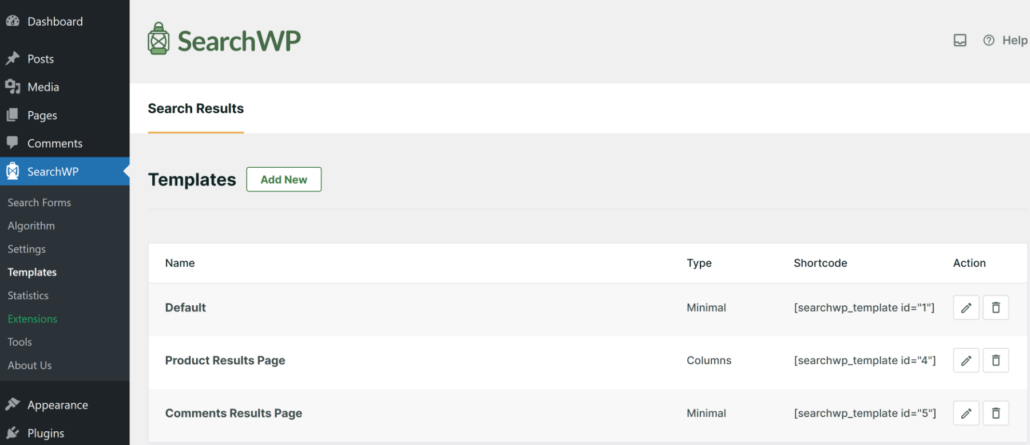
Next, scroll down to the Custom Styling section and find WPFilters Integration.
Turn on the Enable WPFilters toggle, then save the template.

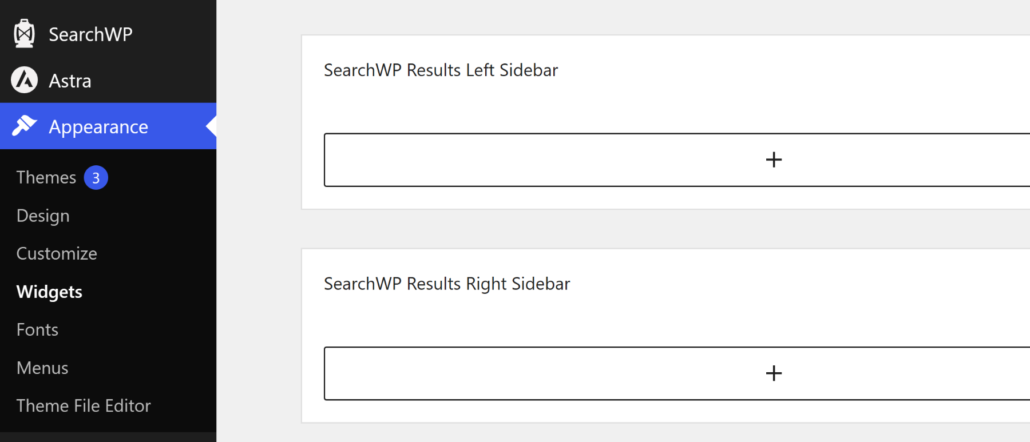
This shows the SearchWP Results Left Sidebar and SearchWP Results Right Sidebar on SearchWP’s results page. Your search form also needs to send visitors to that page, which we cover step by step in our guide on how to add a filter sidebar to WordPress search results.
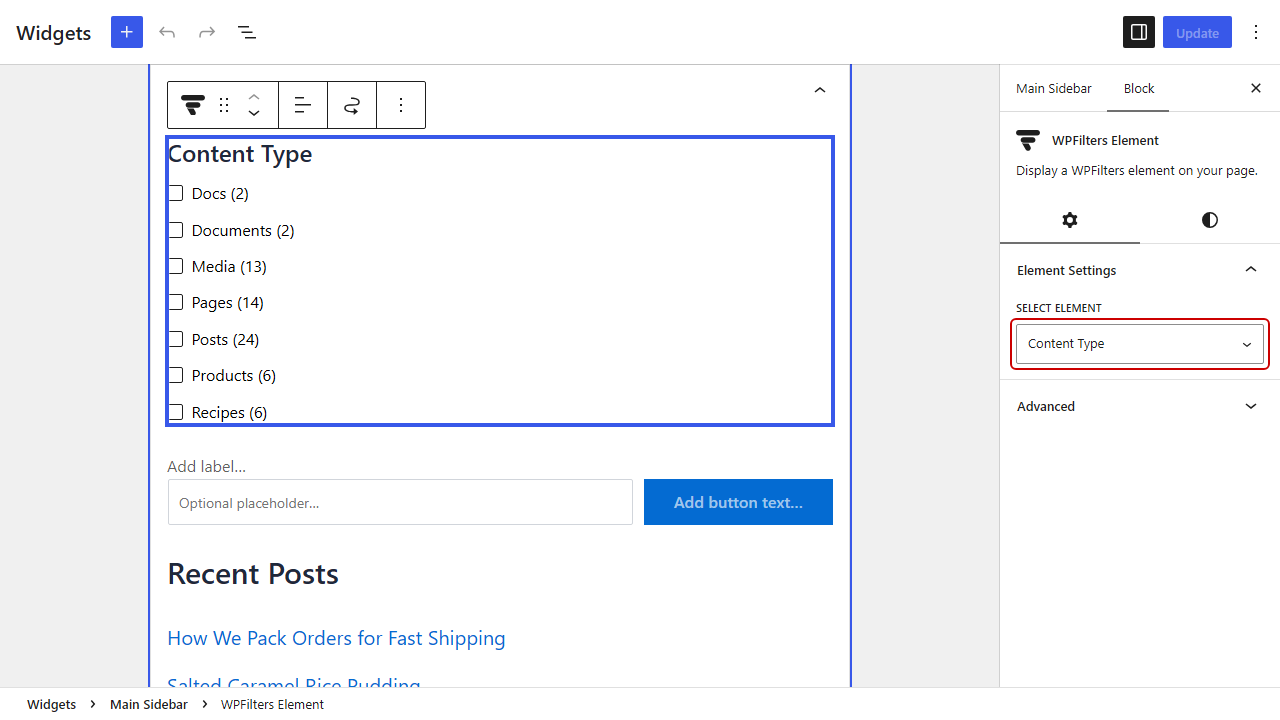
After that, go to Appearance » Widgets, open the SearchWP Results Right Sidebar, and add the WPFilters Element block. Choose “Content Type” from the Select Element dropdown, then click Update.
Note: While SearchWP runs your search, WPFilters doesn’t refresh the results on your theme’s own search page. That’s why SearchWP users should place the filter on SearchWP’s results page instead.
If you use WordPress’s built-in search, the filter goes in your theme’s own search results layout.
If your site uses a classic theme, head to Appearance » Widgets and open the sidebar that shows on your search results page.
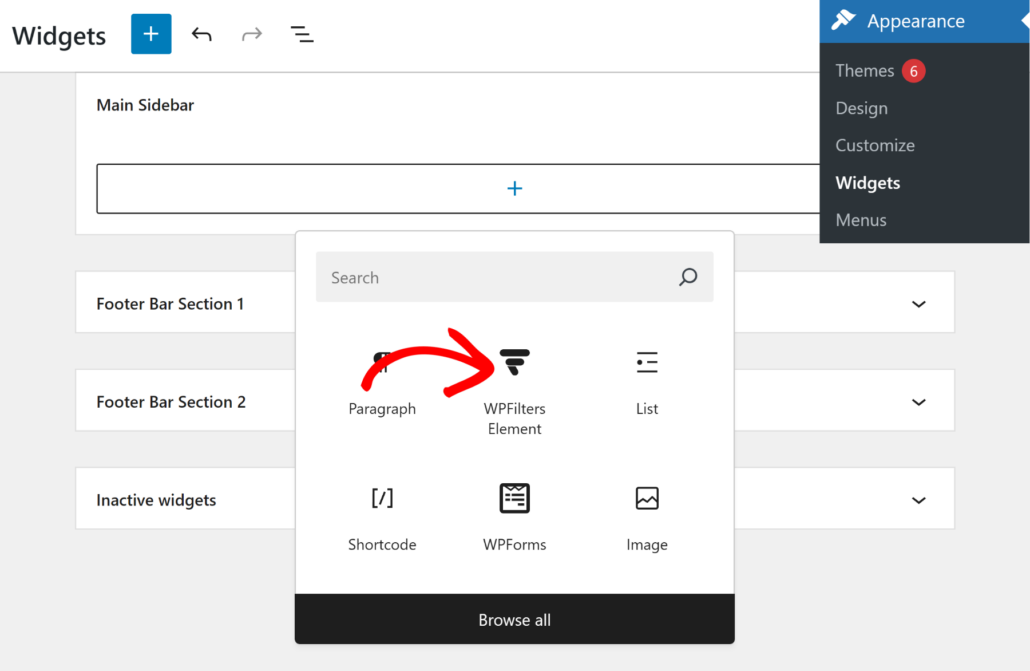
Next, click the + icon, search for “WPFilters,” and add the WPFilters Element block.
From there, choose your “Content Type” filter from the Select Element dropdown in the block settings, then click Update.
Step 5: Test Your Post Type Filter
With the filter in place, you can open your site in a new browser tab and run a search.
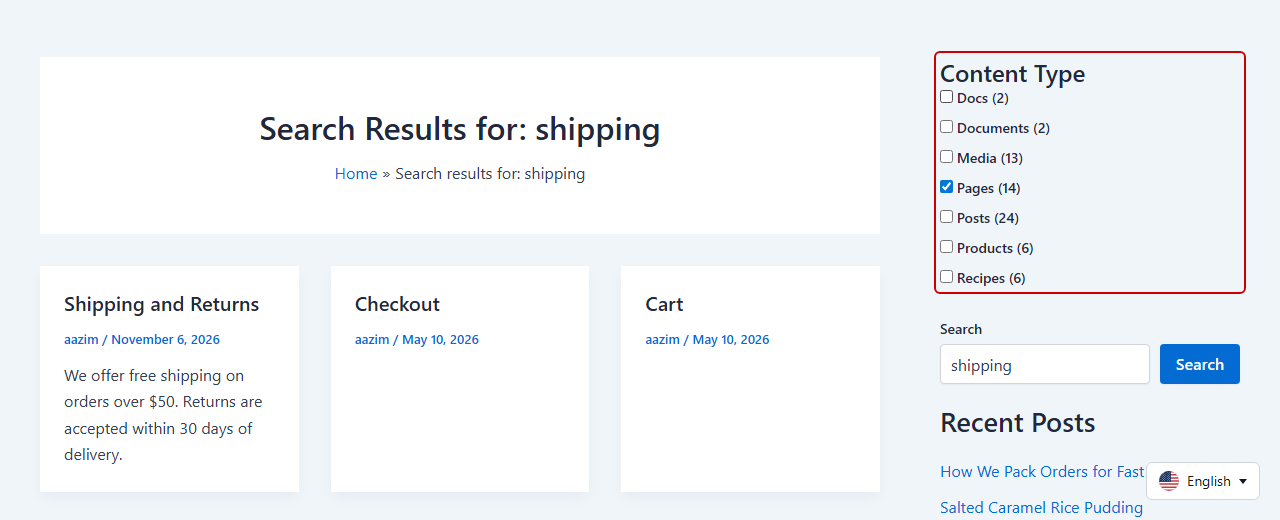
For the first test, search for a word that appears in both your posts and your pages, like “shipping.”
Then tick Pages in the “Content Type” filter.
The results should update in a moment, without a page reload, and show only your pages.
For the second test, untick Pages.
The full list of results should come back, along with the other post types in the filter. If you use WordPress’s built-in search, or turned on Show Empty with SearchWP, you can also tick Posts and Pages together and check that both kinds of results appear.
You’ll also notice the page URL changes as you tick options. You can share that URL, and anyone who opens it will see the same filtered results.
Bonus: Pair Your Post Type Filter With SearchWP
Your search plugin controls which content shows up in the results before visitors ever filter them.
SearchWP lets you choose which post types are searchable and how much weight each one gets, so the results visitors filter are more relevant to begin with. If a custom post type isn’t showing up in your results at all, our guide on how to fix custom post type search not working in WordPress walks through the fix.
With SearchWP, the post type filter also keeps its counts matched to each search as visitors filter.
WPFilters is included with the SearchWP All Access plan, so you can get both plugins with one license.
Frequently Asked Questions
1. Can visitors filter WordPress search results by post type without a plugin?
WordPress’s built-in search doesn’t include a post type filter for visitors.
You can add one with custom code that changes the search query using the pre_get_posts hook, or use a filter plugin like WPFilters to add one without code.
2. What’s the difference between limiting search to a post type and filtering by post type?
Limiting search removes a post type from your search results for every visitor, so nobody can find that content through search.
Filtering by post type keeps all your content searchable and lets each visitor pick which types to see on the results page.
3. Why does Media show up in my post type filter?
Media can appear in the filter because WordPress treats your Media Library as a public post type.
With SearchWP, it shows up when your engine searches media files. With WordPress’s built-in search, the filter lists every public post type once visitors start filtering, so Media appears there too.
4. Do I need SearchWP to filter search results by post type?
WPFilters works with WordPress’s built-in search, so you can add a post type filter without SearchWP.
Adding SearchWP gives visitors more relevant results to filter. With SearchWP, you place the filter on SearchWP’s results page by turning on Enable WPFilters under SearchWP » Templates.
5. How do I hide one post type from the filter?
WPFilters doesn’t have a setting to hide a single post type, but turning off Show Empty already hides types with no matching content.
To keep a type out of the filter completely, you can remove it from your search, or a developer can use the wpfilters\elements\options filter to remove that option.
Next steps…
You now have a post type filter on your search results page, so visitors can narrow any search to the kind of content they came for.
You may also want to see our guides on how to customize the WordPress search results page and filter blog posts by author in WordPress.
Ready to help visitors find the right content faster? You can get started with WPFilters here. Every plan comes with a 14-day money-back guarantee.