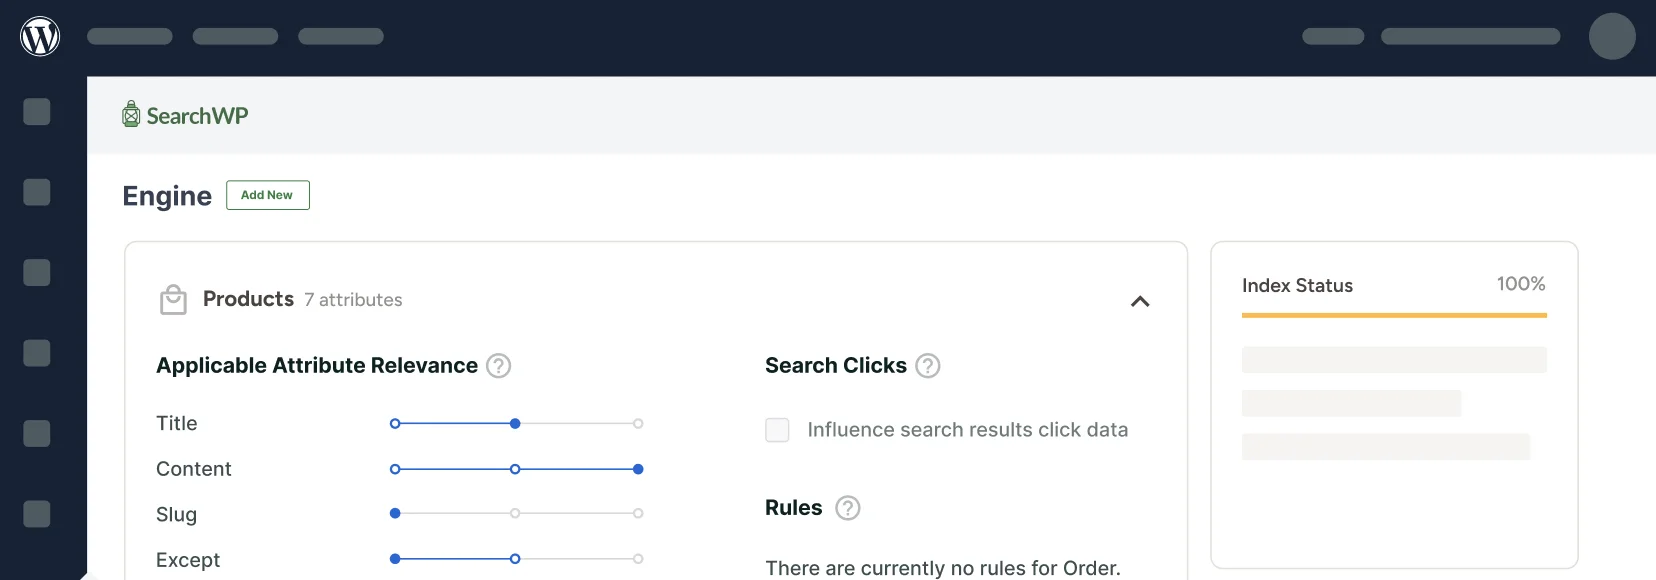
Building WordPress sites for years reveals one consistent problem with the default search function.
Visitors type in keywords for content that clearly exists on the site, but they get completely unrelated results or no results at all.
The standard WordPress search only looks at post titles and content in a very basic way. It doesn’t understand context, can’t search custom fields, and often misses the mark entirely.
However, if you combine SearchWP with site builder like Oxygen, you can create a much smarter search system and design a search box that looks professional.
In this tutorial, we’ll show you how to add a search box using Oxygen visual builder.
What is Oxygen Visual Site Builder?
Oxygen is a visual page builder plugin for WordPress that works differently from most other builders.
Instead of adding content on top of your existing theme, Oxygen replaces your theme entirely and gives you complete control over every aspect of your site’s design.
The builder includes advanced features like custom post type integration, dynamic content capabilities, and the ability to create reusable templates.
Now, if you create a search box using the default WordPress search, then it has many limitations.
It only examines post titles and basic content, while completely ignoring custom fields, product attributes, and other important data that your visitors might be looking for.
This is where SearchWP solves these issues by creating a more intelligent search system. When combined with Oxygen’s design flexibility, you get both powerful search functionality and complete control over how the search experience looks and feels to your visitors.
Now, let’s see how you can create a smart search for your WordPress site.
Adding a Search Form in WordPress Using Oxygen
The best way to make your website search more powerful and better is by using SearchWP.
It is the best WordPress search plugin that’s trusted by over 50,000 business owners.

SearchWP helps you move beyond WordPress’s basic search limitations. You can include data from custom fields, taxonomies, product information, and other content types into your search functionality.
The plugin’s strength lies in its compatibility with leading page builders like Oxygen. It offers pre-built functionality that you can easily integrate into your custom templates to display search forms and results.
SearchWP works seamlessly with other popular builders too, including Elementor, Divi, WPBakery, Breakdance, and more.
Other key features that SearchWP offers include:
- Track visitor search behavior: Access comprehensive analytics to understand what users are looking for and gain valuable insights into their needs.
- Enable real-time search suggestions: Display instant results while users type, helping them discover content faster and creating a smoother browsing experience.
- Control result prioritization: Manage how search results are ranked to highlight important content and support your business objectives.
- Exclude content from searches: Keep certain pages or posts out of search results to maintain a streamlined user experience.
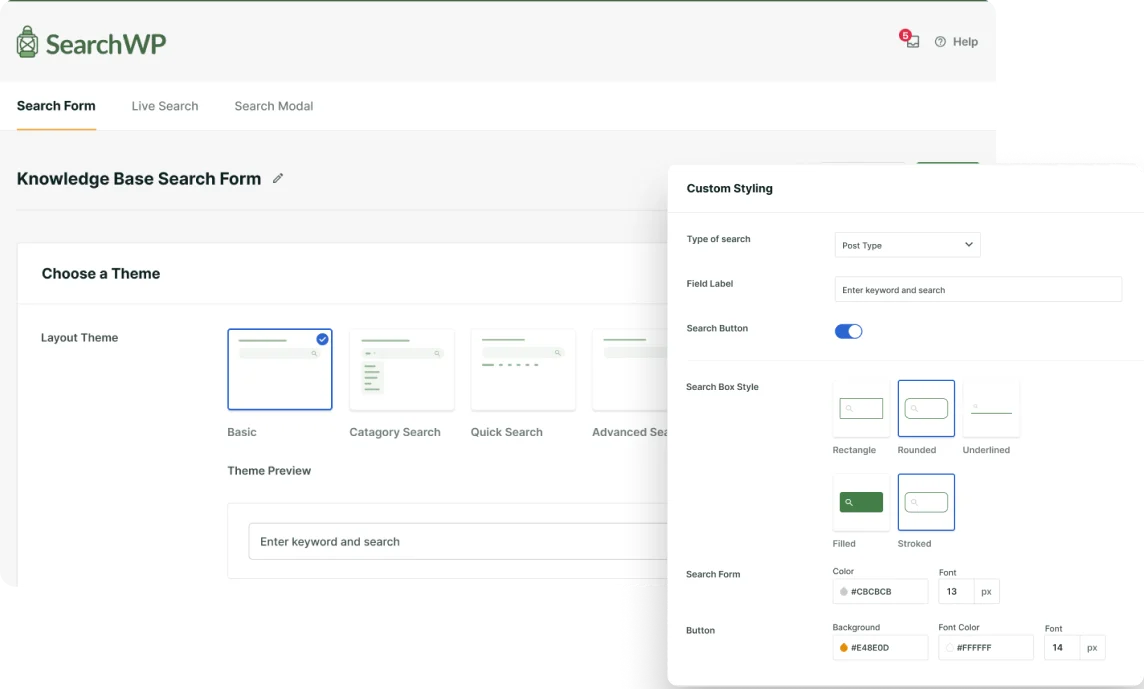
- Create custom search forms: Easily create custom search forms and results page from pre-built templates in SearchWP.
Now, let’s look at the steps you can follow to change search settings and add a search box using the Oxygen site builder.
Step 1: Install and Activate SearchWP
First, you’ll need to sign up for a new account by visiting the SearchWP official website.
Once that’s done, simply head to the ‘Downloads’ tab in SearchWP account area and click the Download SearchWP button.

Next, you can save the plugin files on your computer. We also recommend copying the License Key, as you’ll need it later in the setup process.
From here, you’ll need to upload the plugin files to your WordPress site. If you need help, then please follow this how to install a WordPress plugin step-by-step guide.
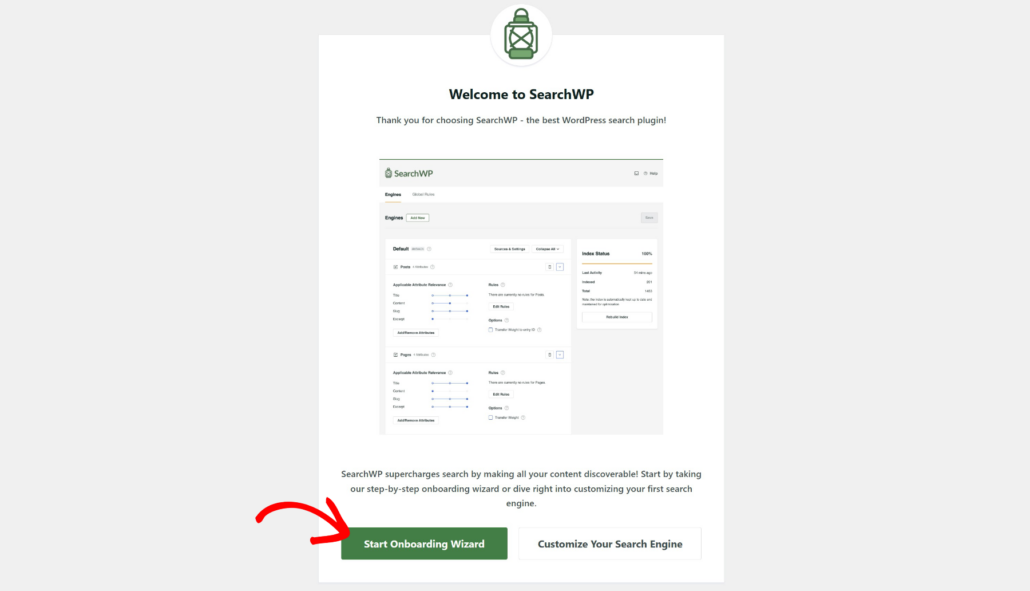
Once the plugin is active, you will see the SearchWP welcome screen and setup wizard. Go ahead and click the ‘Start Onboarding Wizard’ button and follow the onscreen instructions.
Step 2: Customize Your Search Engine
Next, you can edit the search engine in SearchWP and improve the overall search experience.
With SearchWP, you can include different sources, like products if you have an eCommerce store. Plus, you can also make additional data documents, product details, custom fields, categories, tags, and more searchable.
To start, you’ll need to go SearchWP » Algorithm from your WordPress dashboard and press the Sources & Settings button.
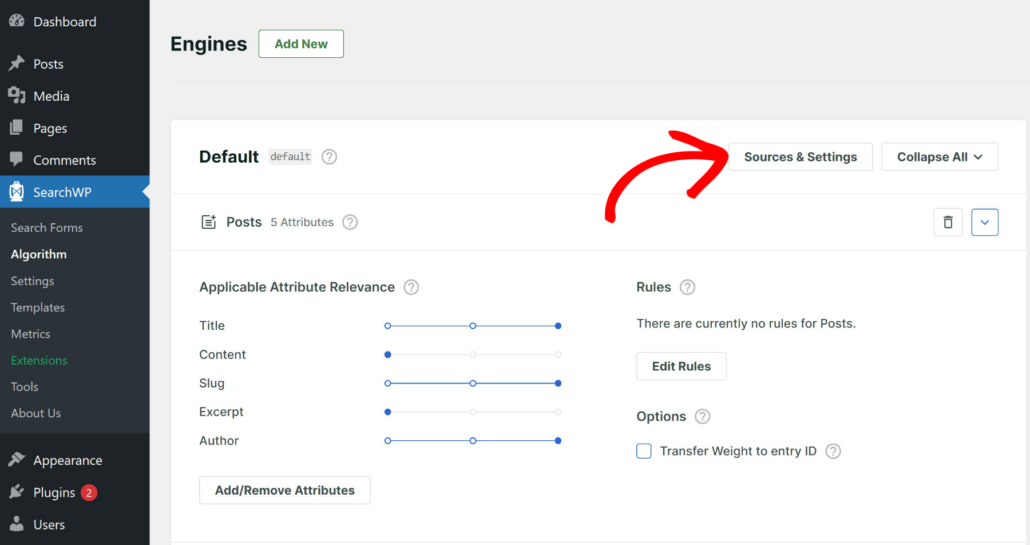
Next, a new window will open where you can manage sources for your engine.
For instance, the default sources will include Posts, Pages, and Media.
However, you can also select other sources like Products for your eCommerce store.
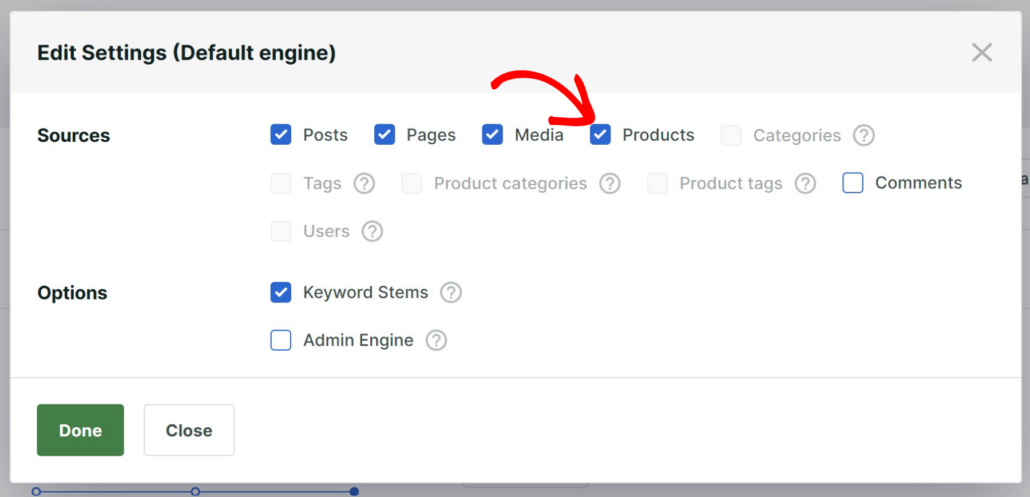
Besides that, you can also edit the attributes for each source and include more information in the search process.
For example, there are options to include custom fields that store product details like color, size, SKU, brand, and more. Or include different product categories, tags, type, and shipping classes.
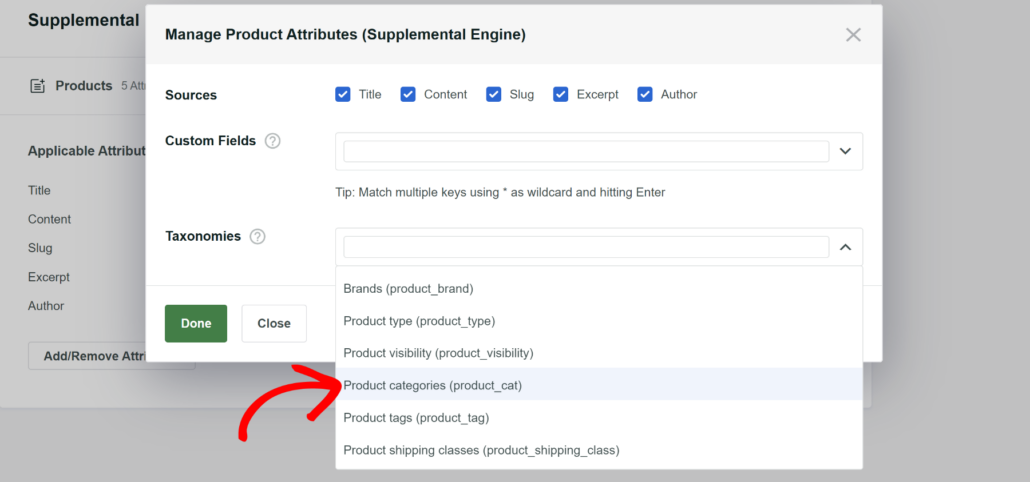
To learn more about customizing the search engine, you can see our guide on how to change the default WordPress search settings.
Step 3: Add a Search Form in SearchWP
Now, you’re ready to create a search form in SearchWP.
Simply go to SearchWP » Search Forms from the WordPress dashboard and then create a new form or edit an existing one.
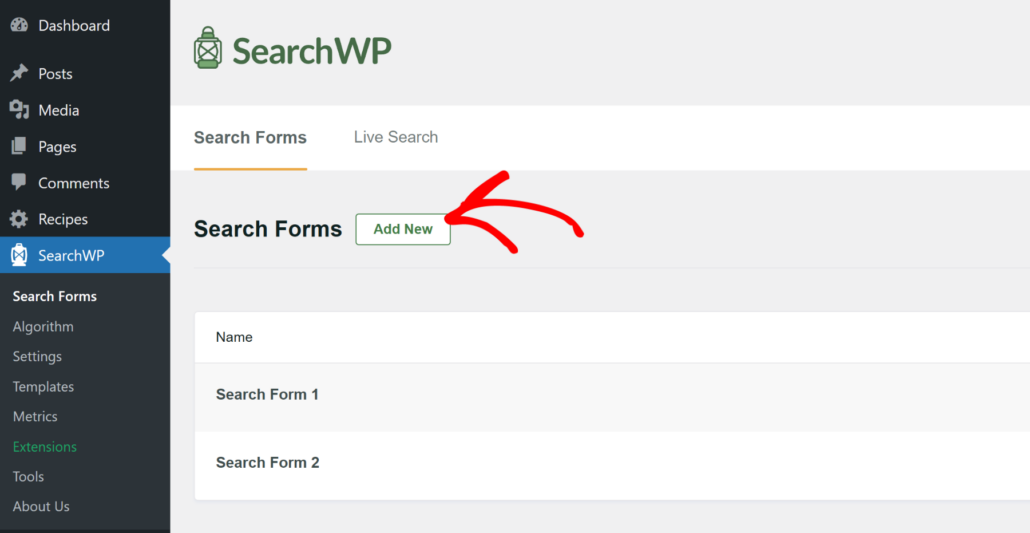
Next, you can choose from pre-built templates in SearchWP and customize the form.
Plus, you also get more options to further edit the form, like change its styling, modify the button settings, link a specific engine to the form, and more.
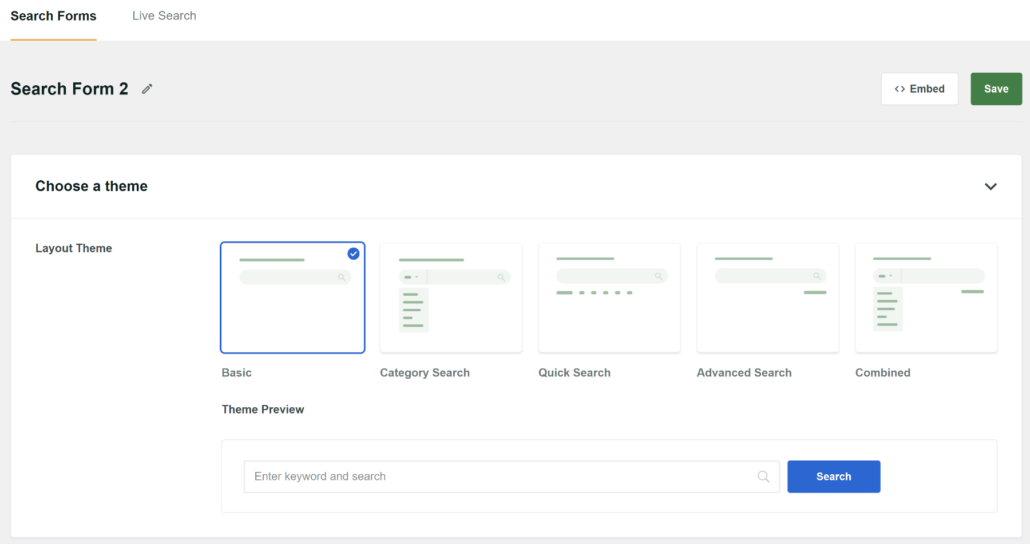
You can follow our detailed guide on how to create a custom search form in WordPress for more details.
Step 4: Add a Search Box in Oxygen Visual Builder
Now that you’ve customized the search engine and linked it to a form, the next step is to add a search box using the Oxygen visual page builder.
First, you will need to go to Pages » All Pages in your WordPress dashboard. From here, you can edit an existing page or add a new one.
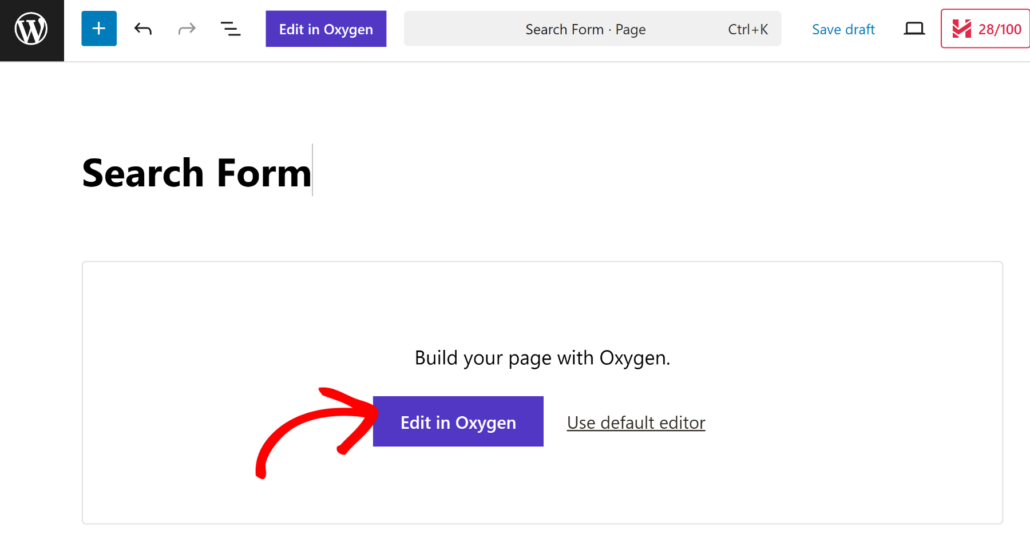
Once you’re in the WordPress content editor, simply click the Edit in Oxygen button.
On the next screen, you will see the Oxygen visual site builder.
Go ahead and click the + button to add elements to your page.
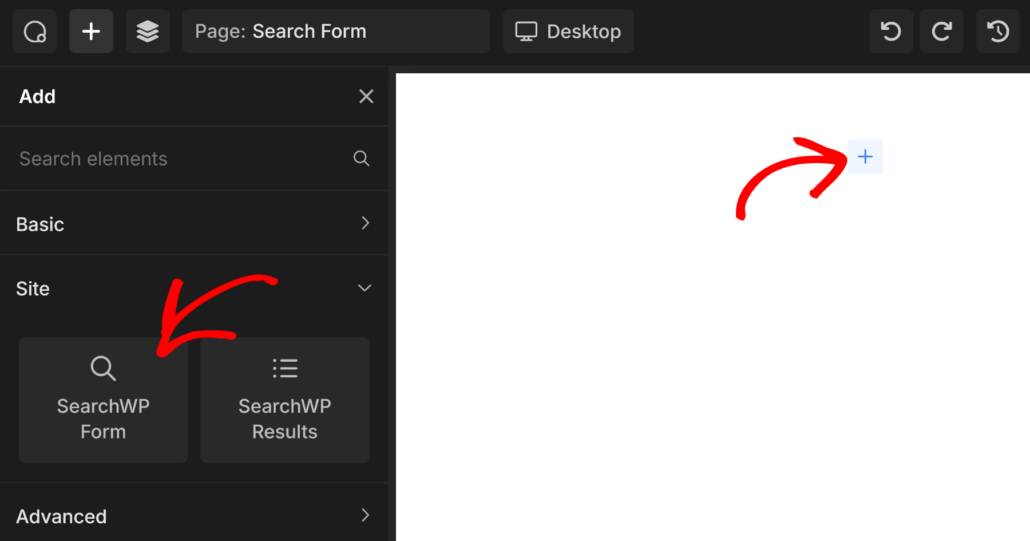
From here, you can add the SearchWP Form element from the panel on the left under the ‘Site’ category. Simply click on it or drag and drop the element onto your page.
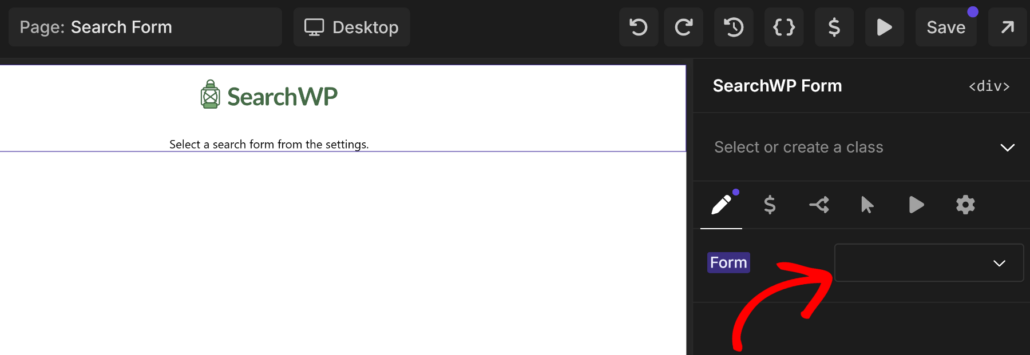
After that, you’ll need to select the search form you created in the previous step.
Simply click the Form dropdown menu in Oxygen and select your form.
When you’re done, simply click the ‘Save’ button at the top.
Now, you can exit the Oxygen page builder and visit your page to see the new search box in action.
Here’s how the search box appeared on our demo site.
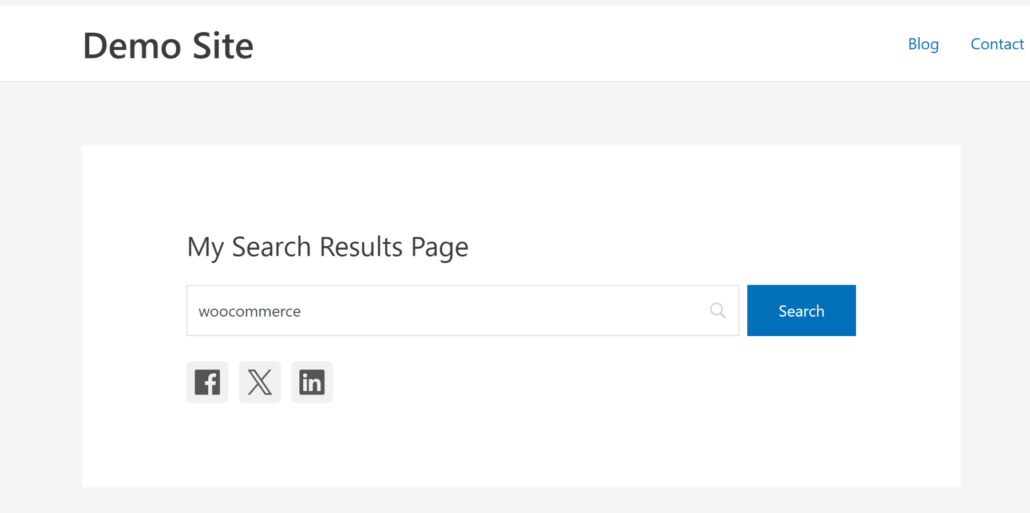
With SearchWP and Oxygen combined, you’ll have a search box that not only looks great, but actually helps your visitors find what they’re looking for.
We hope this article helped you learn how to add a search box using Oxygen visual builder in WordPress. You may also want to see our guides on how to create a search form in Breakdance and our list of the best WordPress backup plugins.
If you’re ready to create a smart search page on your site, you can get started with SearchWP here.
