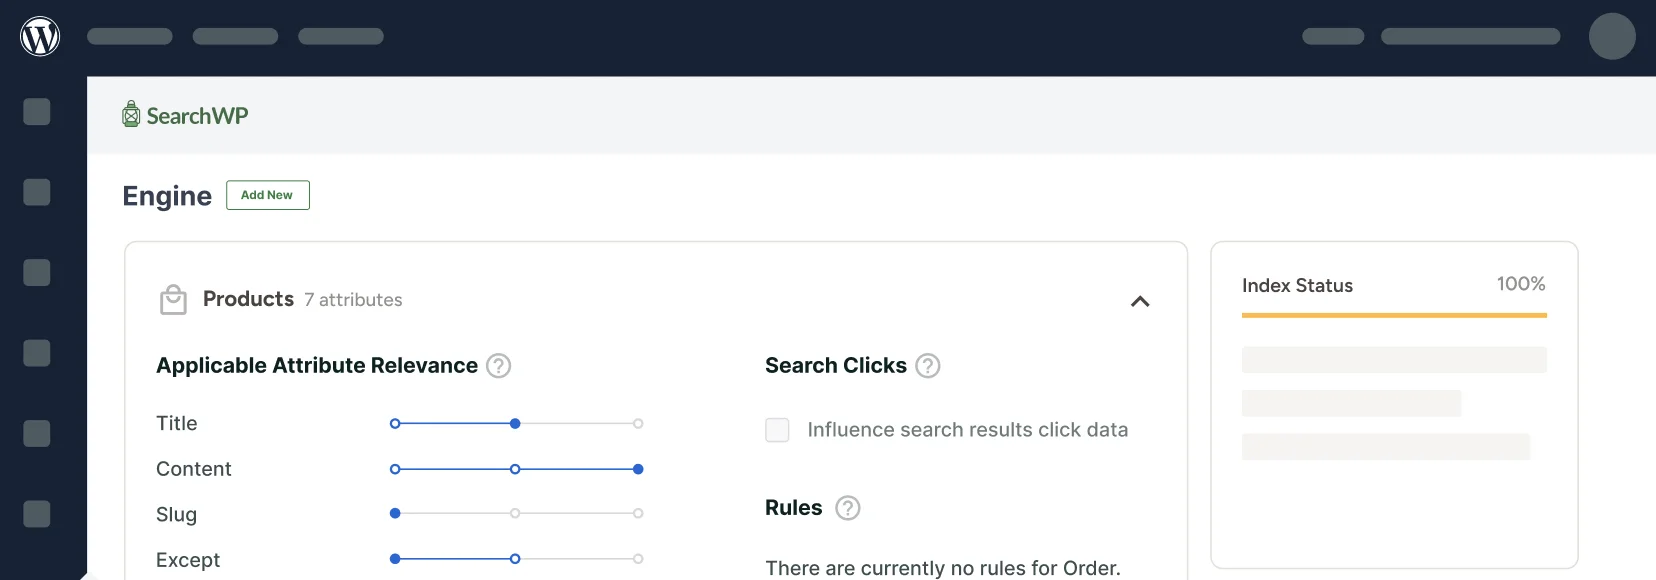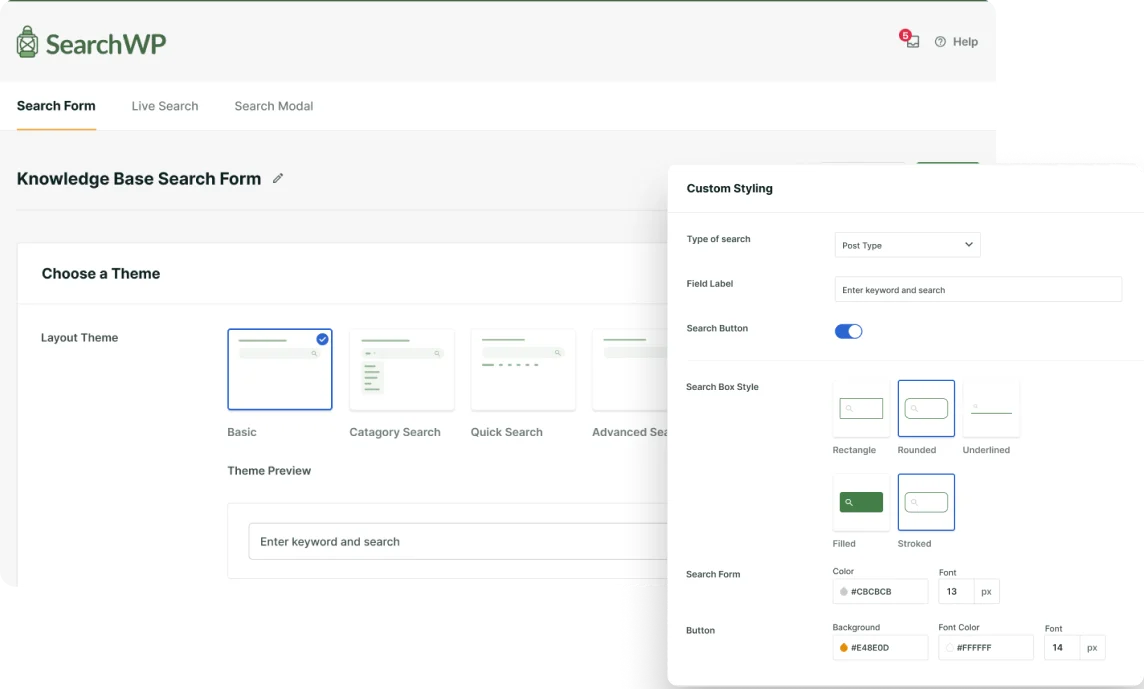
Adding a search form to your WordPress site with Bricks Visual Builder is surprisingly simple.
However, the real magic happens when you combine Bricks with SearchWP. While Bricks handles the visual design of your search form, SearchWP powers up the search functionality to find content that WordPress normally misses.
SearchWP searches through custom fields, categories, tags, and even file attachments. This means your visitors get accurate results and have a positive search experience.
In this article, we’ll show you how to add search forms in WordPress using the Bricks visual builder.
Why Use Bricks Visual Builder for Your Search Forms?
Bricks is a visual page builder that lets you create custom WordPress themes and landing pages without writing any code.
Unlike other page builders, Bricks generates clean, lightweight code that doesn’t slow down your website.
The plugin gives you complete control over every element on your pages. For example, you can add search forms to your site’s theme that match your brand perfectly.
When you pair Bricks with SearchWP, you get the best of both worlds. Bricks handles the visual design and layout of your search forms, while SearchWP powers the intelligent search functionality behind the scenes.
SearchWP searches through custom fields, categories, tags, and even file attachments that regular WordPress search ignores. Your visitors get accurate, relevant results every time they search.
This combination creates search experiences where visitors can find exactly what they’re looking for quickly, which keeps them engaged with your content longer.
That said, let’s look at the steps you can follow to add a search form to your site using Bricks visual builder.
Adding a Search Form in WordPress Using Bricks
Before adding a search form in Bricks visual builder, you can first use SearchWP to enhance the search feature on your site.
SearchWP is the best search plugin for WordPress and is trusted by over 50,000 website owners.

SearchWP gives you total control to build a smarter, more effective search for your visitors, no coding required.
You get to decide exactly what’s searchable. For instance, you can easily hide a specific page from results or make sure your custom fields are included.
The result is a much better experience for your users, who can find what they’re looking for faster.
What makes SearchWP stand out is its SearchWP Forms and SearchWP Results blocks. You can simply add them inside the site builder and display your search forms and custom results templates.
Besides Bricks, SearchWP supports other popular site builders, such as Elementor, Divi, Beaver Builder, WPBakery, Breakdance, and Oxygen.
Here are more key features offered by SearchWP:
- Advanced Customization: Make custom fields searchable, exclude specific pages or categories, and fine-tune result weighting.
- Search Analytics: Understand user intent by tracking and analyzing what visitors search for on your site.
- Live AJAX Search: Provide an interactive experience by displaying search results instantly as users type.
- Manual Result Reordering: Gain complete control by manually adjusting the order of search results to feature specific content.
- Multiple Search Engines: Create and manage several unique search configurations, each assignable to different search forms on your site.
Now, let’s see how you can quickly set up SearchWP and use it to customize search on your site.
Step 1: Install and Activate SearchWP
First, you’ll need to visit the SearchWP website and grab your copy of SearchWP.
Once done, simply log into your SearchWP account and go to the Downloads page.
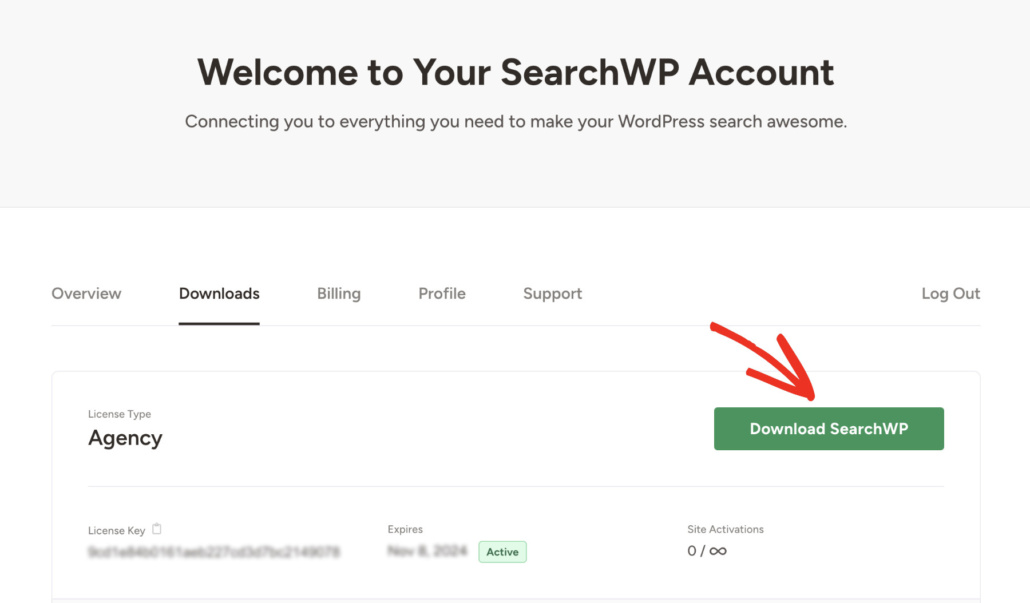
Next, you can click Download SearchWP and save the plugin’s ZIP file to your computer.
After downloading, we recommend also copying your SearchWP license key on the same page.
Now, the next step is to install SearchWP on your site. To do that, you’ll need to upload the plugin’s ZIP file to your site.
If you need help, then please follow this how to install a WordPress plugin step-by-step guide.
Upon activation, you’ll see the SearchWP welcome screen and setup wizard. Go ahead and click the ‘Start Onboarding Wizard’ button and follow the onscreen instructions.
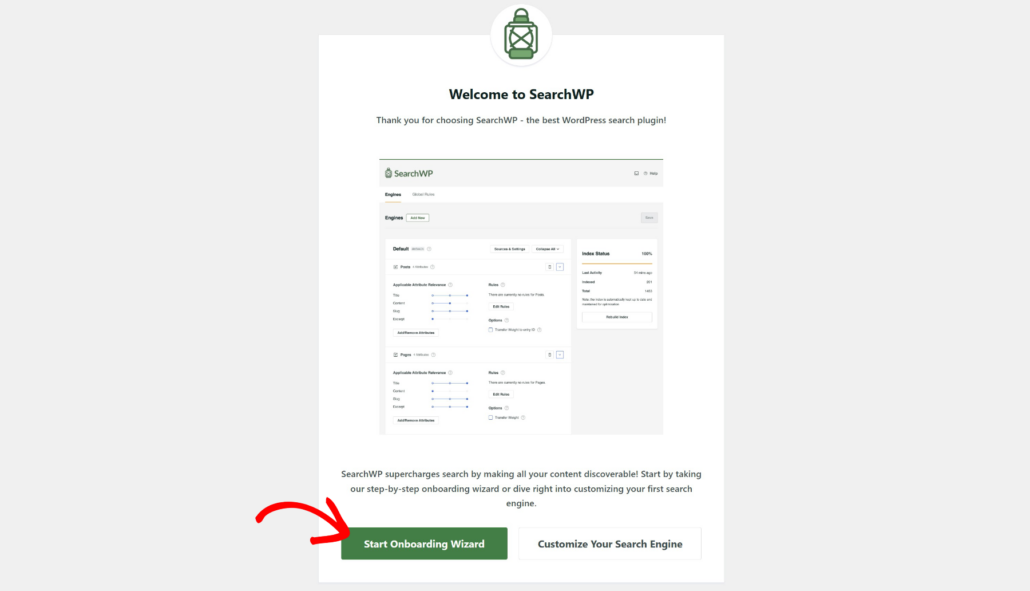
Once SearchWP is up and running, you can use it to create custom search engines and search forms.
Step 2: Customize or Add a New Search Engine
With SearchWP, you can edit the default engine on your site and also add new ones.
A search engine contains a set of rules that SearchWP follows when performing a search.
By customizing the engine, you can select which sources to include, set up rules to exclude certain content, make custom fields, categories, tags, and more searchable.
To begin, head to SearchWP » Algorithm from your WordPress dashboard and press the Sources & Settings button.
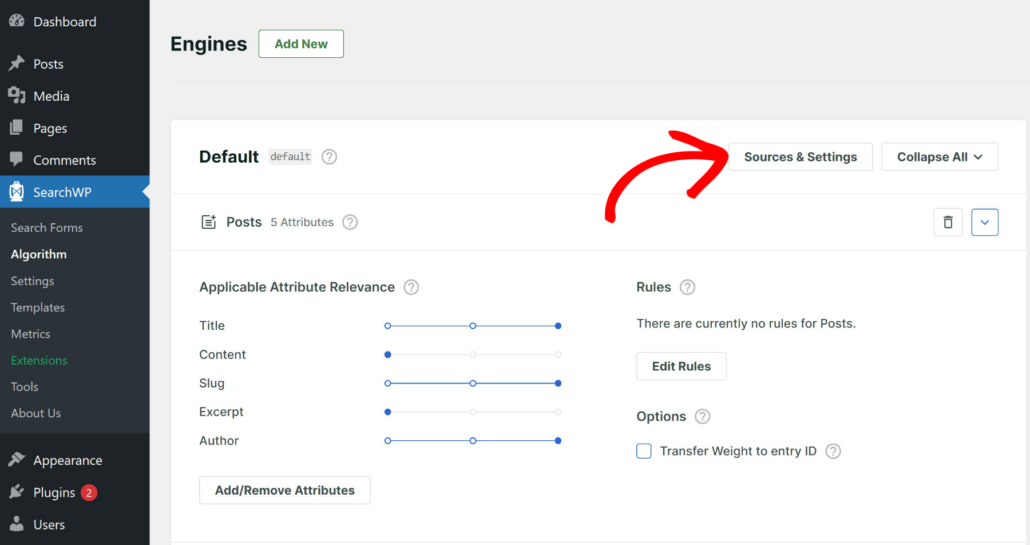
From here, simply select search sources you want to consider when performing searches on the pop-up window.
By default, SearchWP will include Posts, Pages, and Media sources. However, you can include more source.
For example, let’s say you have an eCommerce store, then you can also include Products as a source.
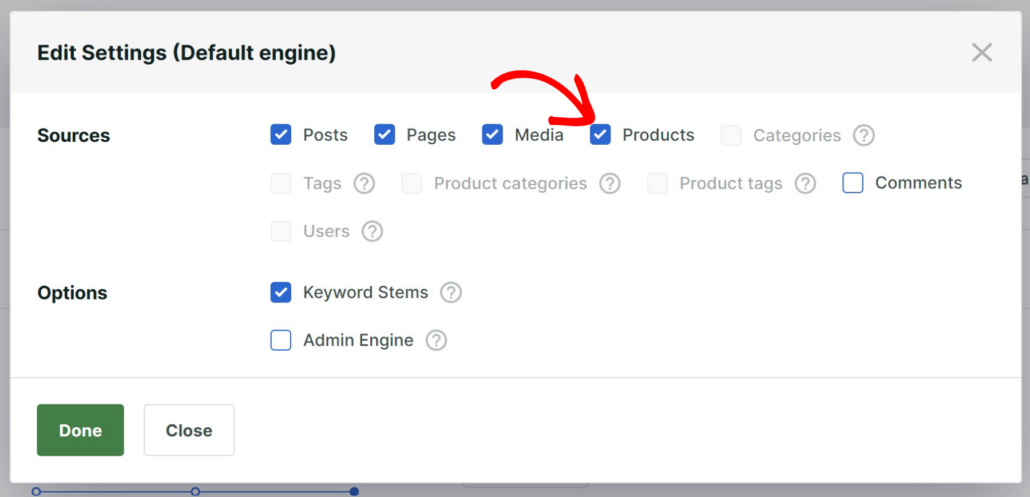
When you’re finished, click the ‘Done’ button.
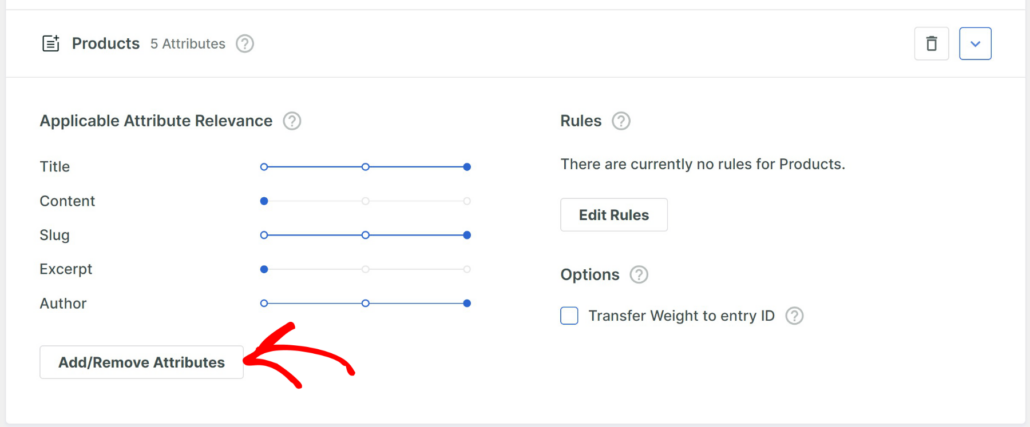
Besides that, SearchWP also lets you edit the source attributes. This allows you to include custom fields and taxonomies in the search process.
You can simply click the Add/Remove Attributes button.
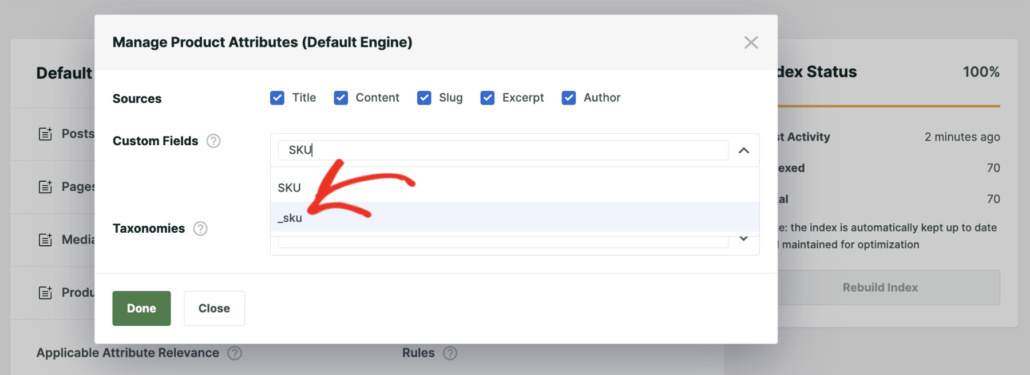
Next, you can click the ‘Custom Fields’ dropdown menu to add additional information, like SKU or any other product detail.
Similarly, if you want to make categories and tags searchable, then simply click the ‘Taxonomies’ dropdown menu to add them.
To learn more, you may want to see our guide on how to change the default WordPress search settings.
Step 3: Create a Search Form in SearchWP
The next step is to create a search form in SearchWP that you can place on your site using Bricks.
To start, you’ll need to go to SearchWP » Search Forms from the WordPress dashboard. Now, you can create a new form or edit an existing one.
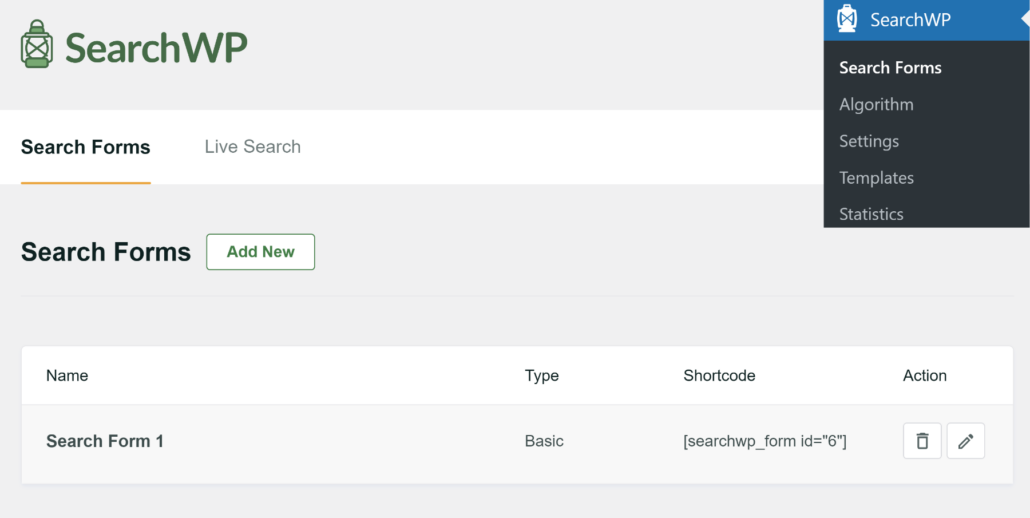
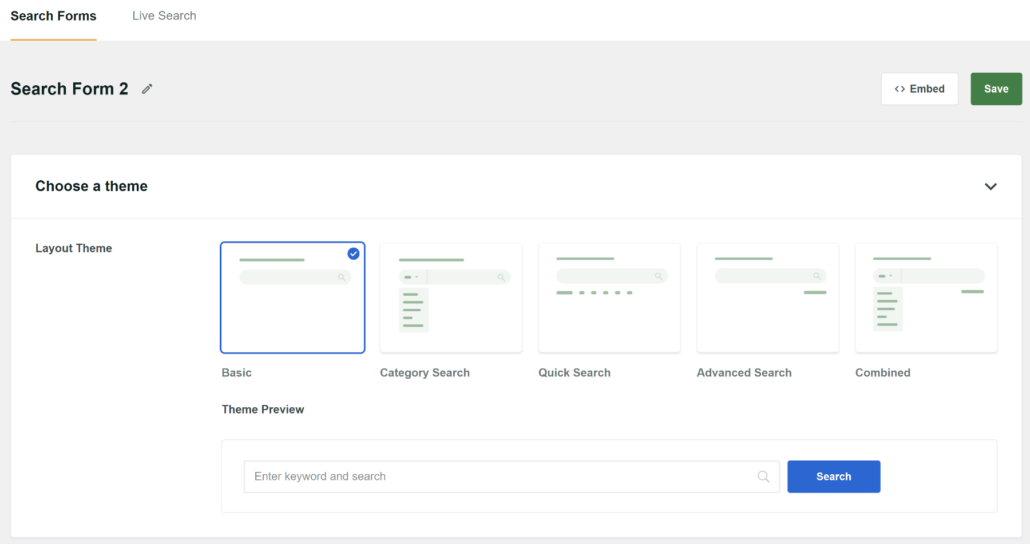
After that, you will see options to edit the search form. To start, you can change the form name at the top.
Next, you can choose a layout theme and customize it according to your needs.
SearchWP offers 5 prebuilt themes to choose from and also shows a preview for each style.
Next, you can scroll down to view more editing options.
Here, SearchWP lets you customize your selected theme layout, select the engine you just created, edit form and button style, and more.

To learn more, please see our guide on how to create a custom search form in WordPress.
Step 4: Add Search Forms Using Bricks
Next, you can add the search form to a landing page using Bricks.
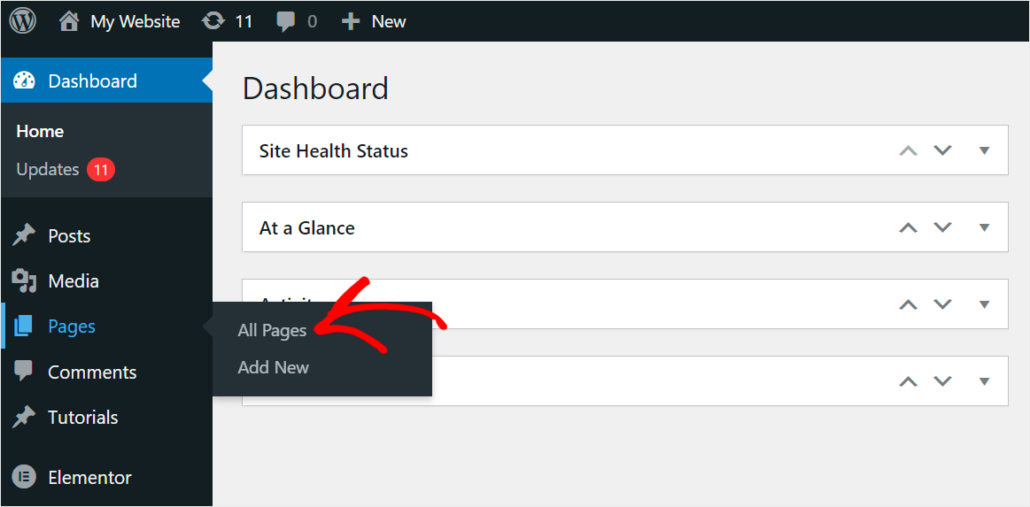
To get started, navigate to Pages » All Pages in your WordPress dashboard. From here, you can edit an existing page or add a new one.
Next, you will see the WordPress content editor.
Go ahead and click the Edit with Bricks button at the top.

On the next screen, you will see the Bricks visual editor.
Here, you can drag and drop different Elements from the panel on the left onto the landing page.
Simply navigate to SearchWP from the left-panel and add the Search Form element.
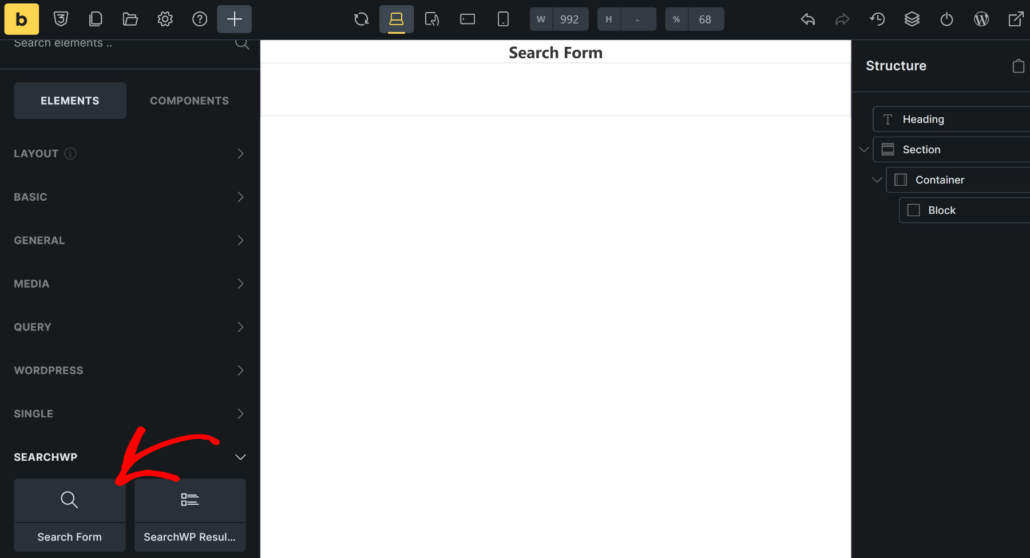
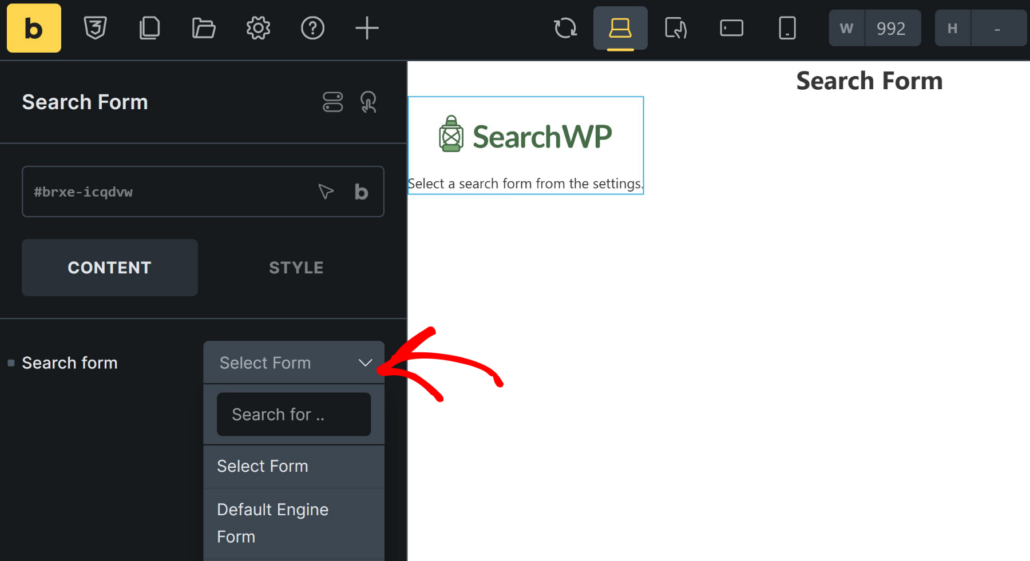
After adding the Search Form element, go ahead and select it.
You’ll now see options to select a search form from the panel on the left. Simply click the dropdown menu and select the search form you created earlier.
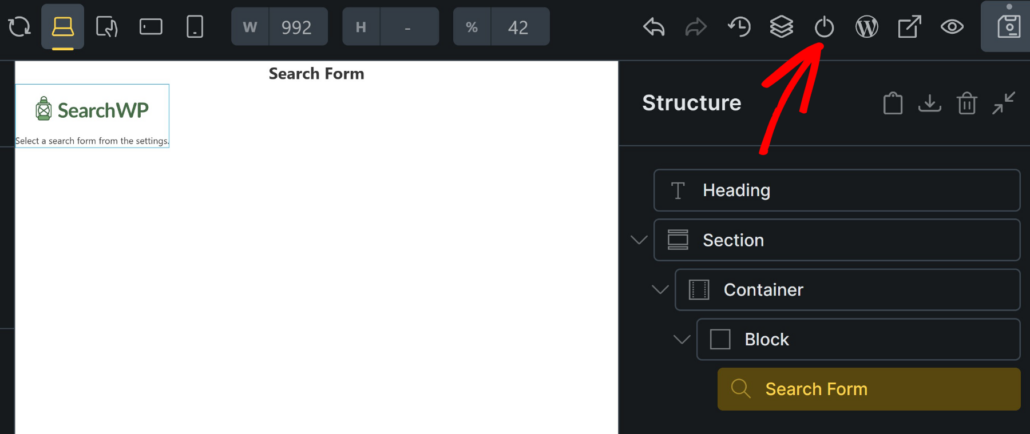
Once that’s done, you can publish or update the landing page.
Go ahead and click the power icon at the top to publish your page.
Step 5: Preview Your Search Form
Next, you can visit your visit and head to the newly created landing page with Bricks.
From here, simply enter a search term in the search form to test if it’s working properly.

For example, you can try searching the categories and tags you configured when settings up the search engine.
Or if you have a WooCommerce store, then you can search for product details and other attributes.
We hope this article helped you learn how to add search forms in WordPress using Bricks. You may also want to see our guide on how to create a professional-looking search page on your site and how to add a search box to Elementor pages.
If you’re ready to create a smart search page on your site, you can get started with SearchWP here.
