Do you want to know how to search by category in WooCommerce?
It can be handy if you have a WordPress eCommerce site with plenty of products and categories. But, WooCommerce doesn’t support that feature by default.
In this article, we’ll show you 2 ways to enable category search in WooCommerce.
Here is a table of contents to help you navigate:
- How to Create a Search Form Limited to a Specific Category
- How to Create a Category Select Search Form
Why Search by Category in WooCommerce
By default, WooCommerce search results display products from all the existing categories.
That’s not a problem if you have an online store with a small number of products.
But when it comes to a huge store with thousands of products and tons of categories, it could become a hassle to search.
Have you ever searched for a specific product and gotten a massive number of search results that didn’t even contain what you are looking for? Then you know how frustrating this can be.
If your online store visitors couldn’t find the product they came for, they most likely would leave immediately.
It not only affects your income but also increases the bounce rate of your site.
As the bounce rate is one of the crucial ranking factors in Google, it’s better to keep it as low as possible if you want to succeed in getting traffic from search engines.
There are 2 methods to let your visitors search by WooCommerce categories.
The first one is to create a search form limited to a specific category. And the second one is to create a search form that allows visitors to choose which category they want to search in.
Let’s break each of them down in order.
Method 1: Create a Search Form Limited to a Specific Category
The easiest way to create a search bar that searches in a specific WooCommerce category is to use a plugin like SearchWP.
It’s the best WordPress search plugin, trusted by over 30,000 websites around the world.
Apart from searching by WooCommerce categories, SearchWP allows you to make searchable product attributes, tags, and reviews.
It will make it much easier for your visitors to find the products they want, increasing sales and providing a better user experience.
Also, SearchWP has seamless WooCommerce integration and automatically integrates to any existing search bars on your site.
SearchWP can also boost your WordPress search by:
- PDF and Office Document Indexing: By default, WordPress doesn’t index any text within the documents you have on your site. SearchWP allows you to include PDF and office documents into search results in just a few clicks.
- Keyword Stemming: The native WordPress search engine doesn’t understand that different keyword variations, such as “hat” and “hats,” essentially refer to the same product. Using SearchWP, you can enable keyword stemming and solve this issue.
- Search tracking: Have you ever been curious about what visitors are searching for on your website? SearchWP allows you to collect all the on-site search activity data. Using this valuable information, you can better understand your customers’ needs.
Now let’s look at how to add a search bar bound to a specific WooCommerce category using SearchWP.
Step 1: Install and Activate SearchWP
The first step is to grab your copy of SearchWP here.
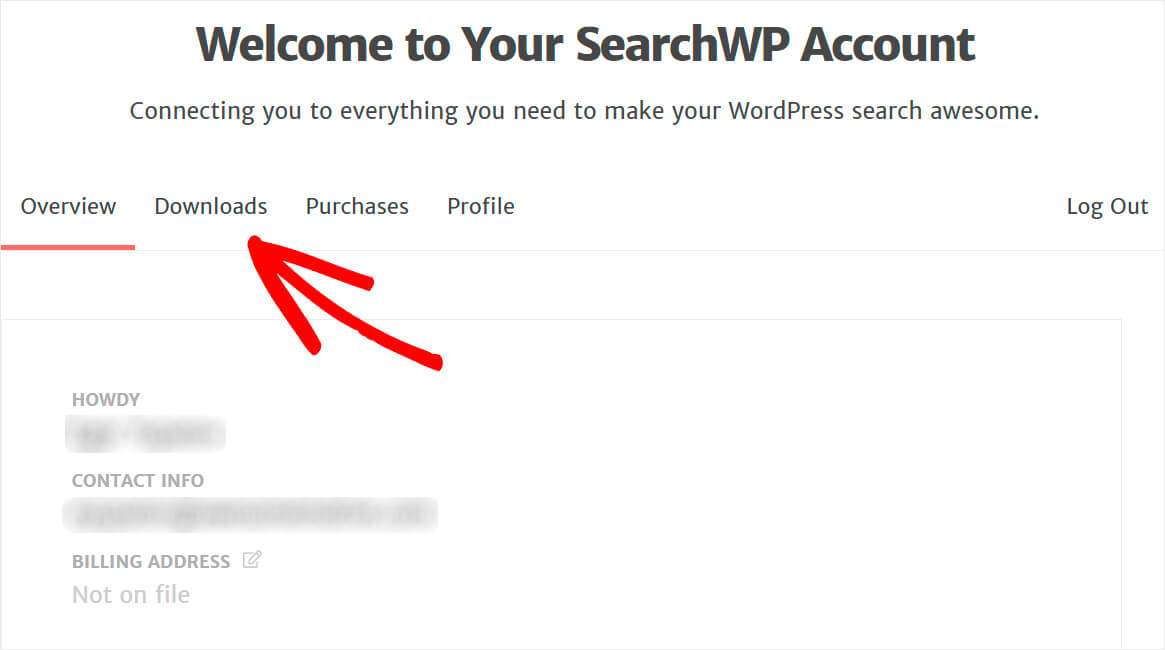
Then, go to your SearchWP account and open the Downloads tab.
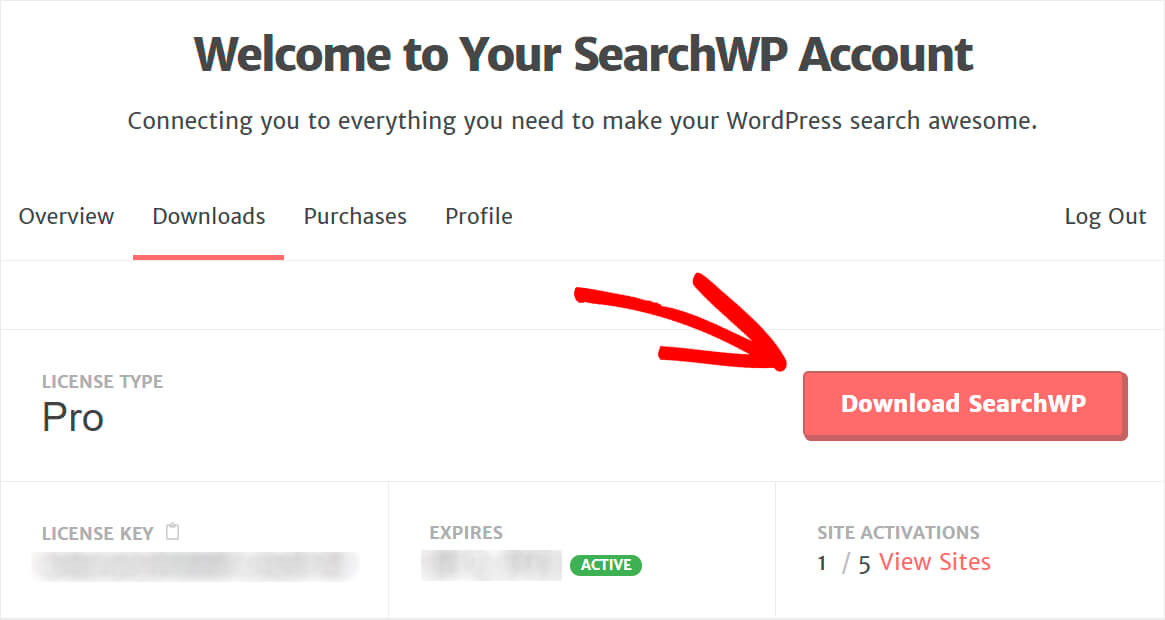
Once there, press the Download SearchWP button and save the plugin to your computer.
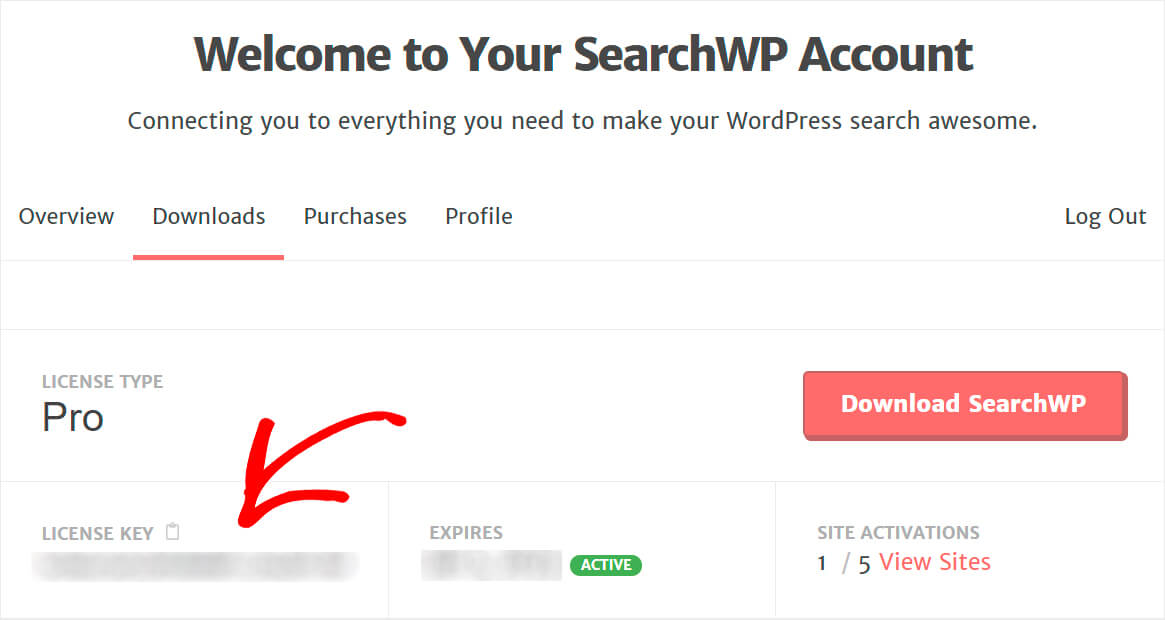
Copy your license key, as you’ll need it soon to activate the plugin.
The next step is to upload the SearchWP plugin ZIP file to your WordPress site.
Need a refresher on how to do that? Check out this step-by-step tutorial on how to install a WordPress plugin.
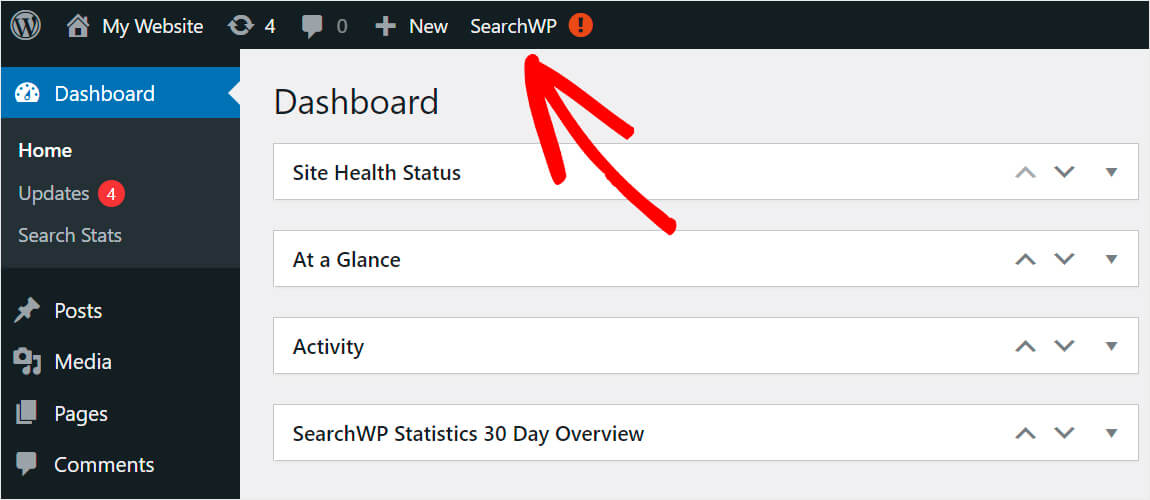
Once you’ve installed SearchWP, click the SearchWP button that appears on the top bar of your WordPress dashboard.
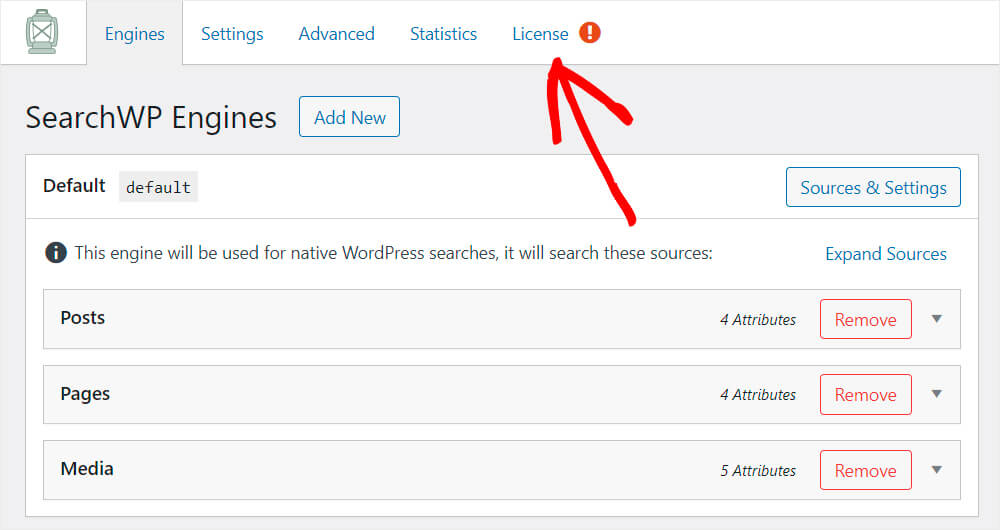
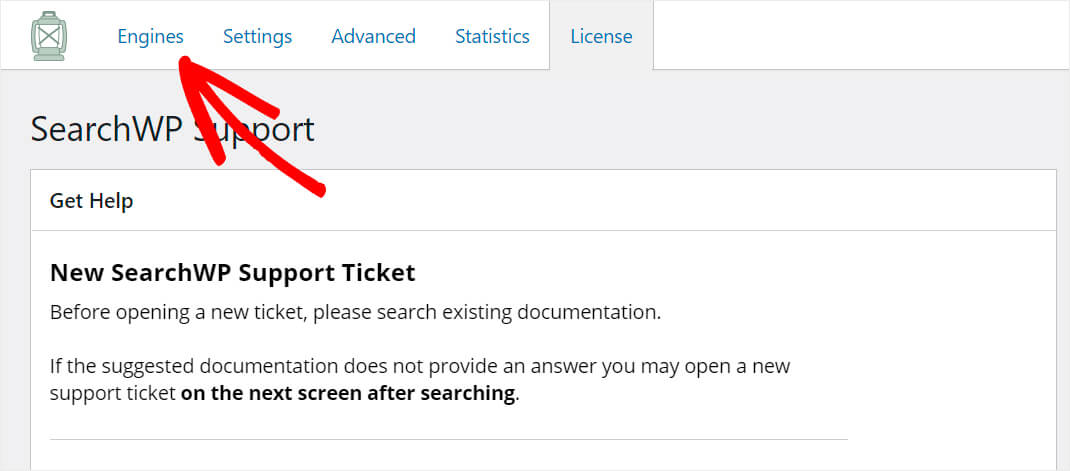
Then, go over to the License tab.
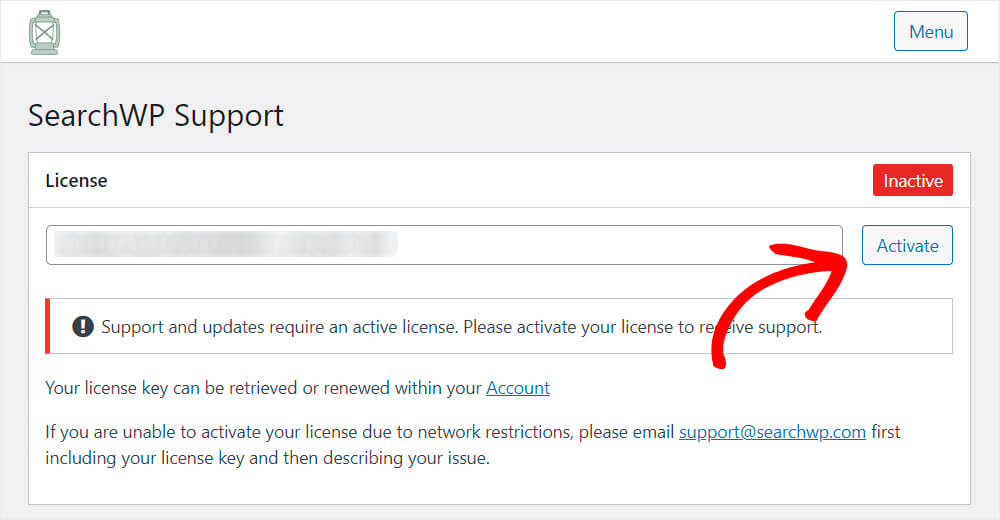
Paste your plugin license key into the appropriate field and click Activate.
Congratulations. You’ve successfully activated your copy of SearchWP and are ready to go to the next step.
Step 2: Download and Install the WooCommerce Integration Extension
The next step is to install the WooCommerce integration extension.
It ensures seamless integration of SearchWP with WooCommerce, providing your visitors with the best possible user experience.
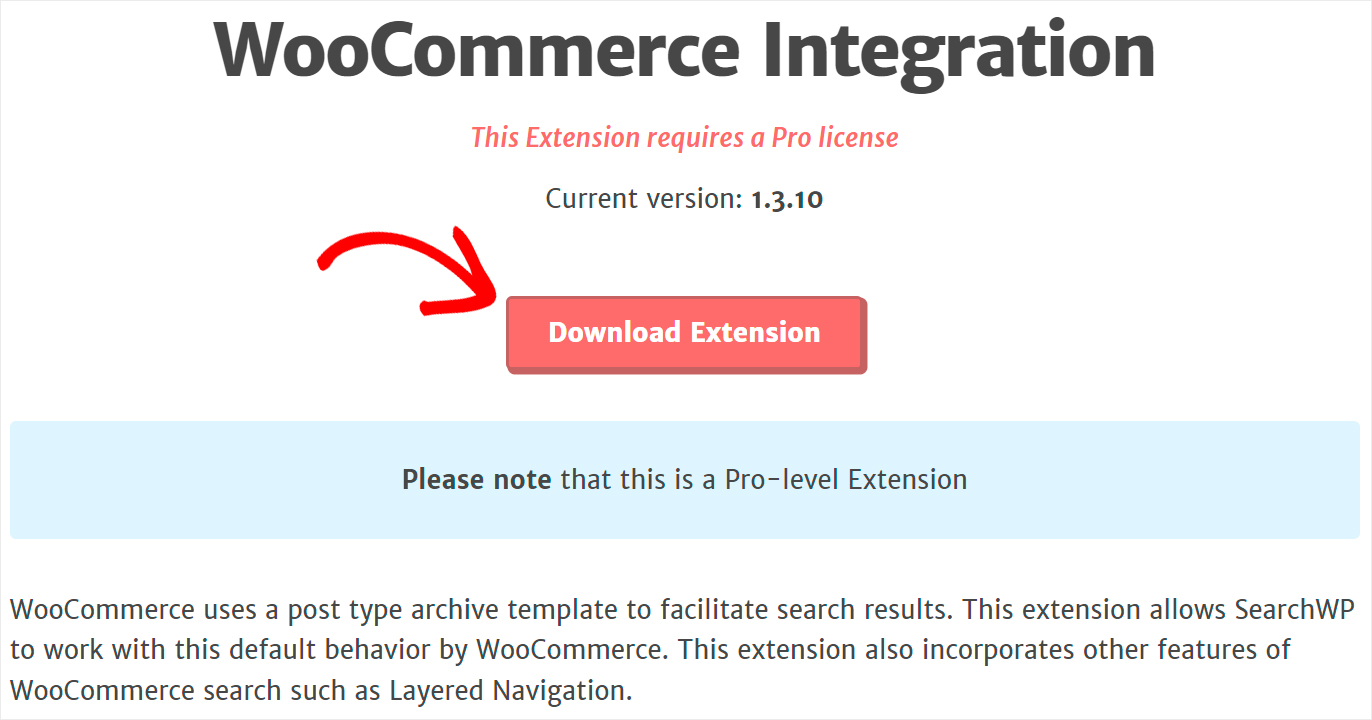
You can grab it at the WooCommerce Integration extension download page.
Once you get there, click the Download Extension button and save it to your computer.
When the download is finished, simply install and activate it the same way as SearchWP.
Step 3: Create a New Search Engine
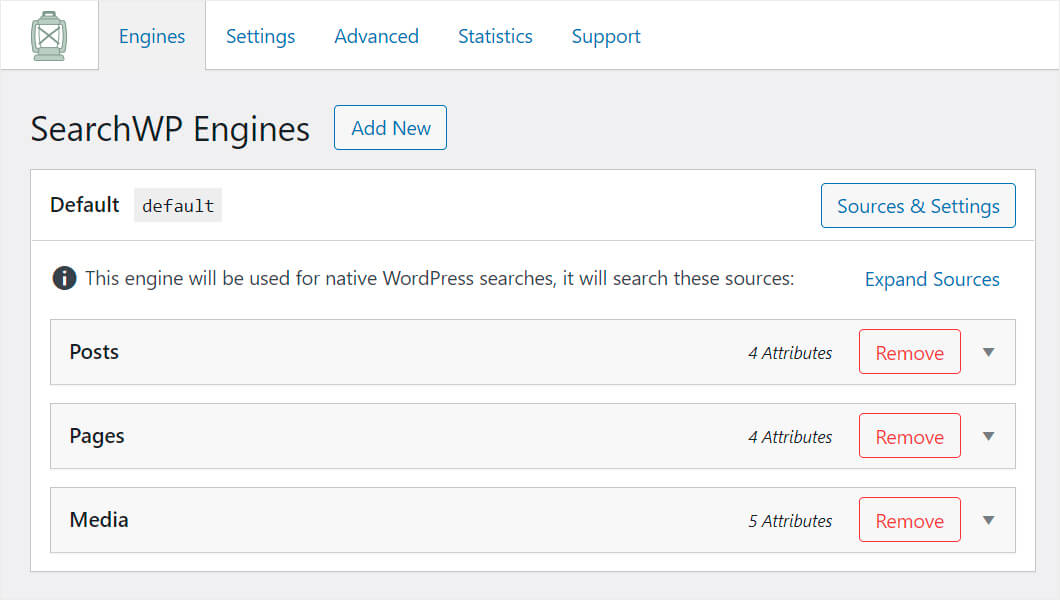
The next step is to create a new search engine. To do so, go over to the Engines tab in SearchWP settings.
Here you’ll see the list of search engines you currently have, customize them, and add new ones.
You can think of a search engine as a set of rules that WordPress follows when performing searches. By editing them, you can completely customize the way search works on your site.
For example, you can exclude specific posts or pages from search results, add any custom post types as search sources, and many more.
For now, we only have the Default search engine that applies to the whole website.
As we want to create a custom search form that searches only by a specific WooCommerce category, we’ll add a new search engine for it.
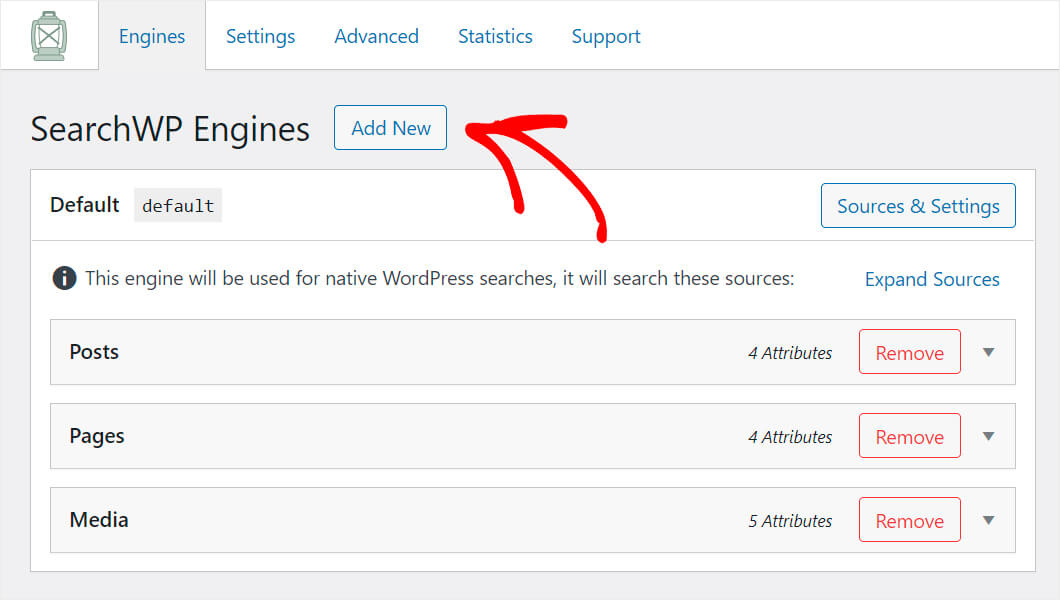
To do so, click the Add New button.
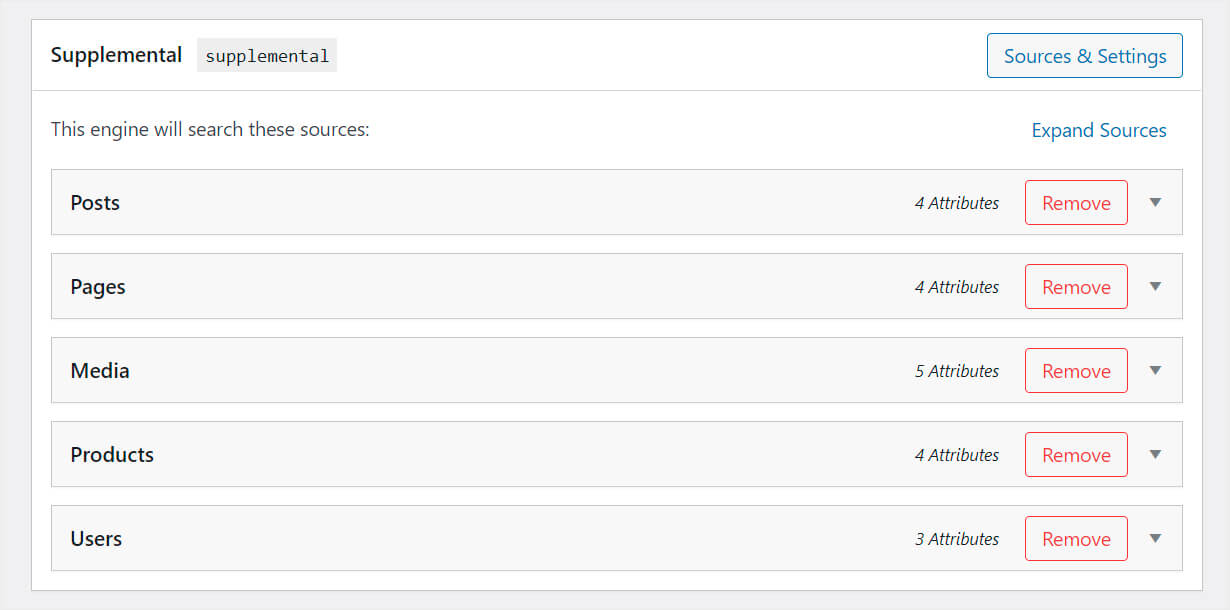
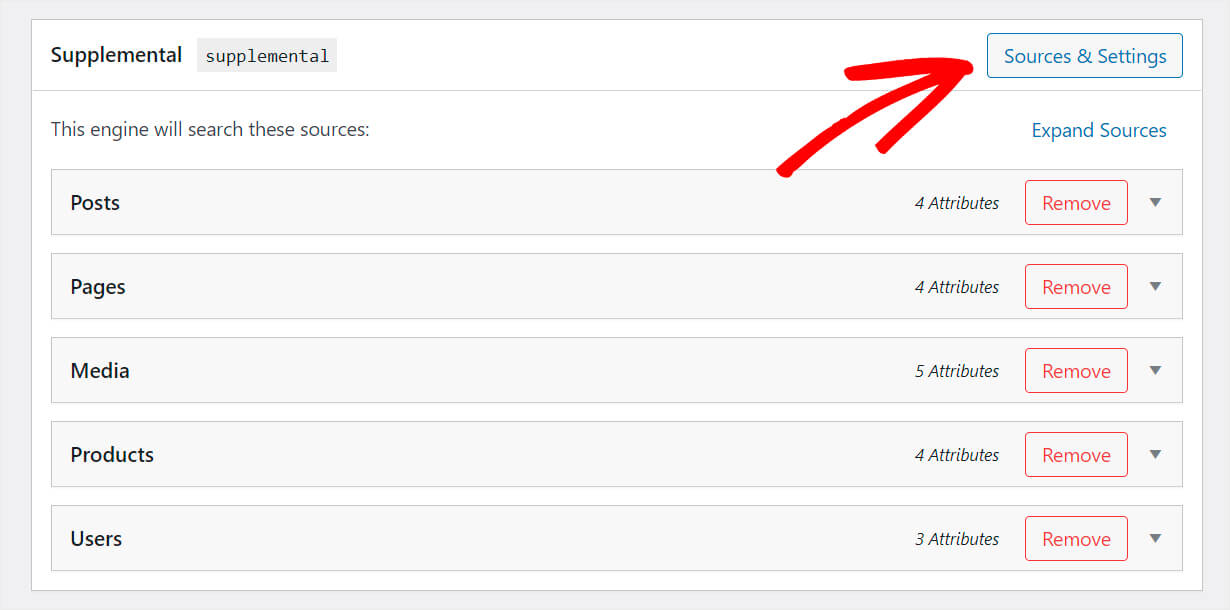
After that, the Supplemental search engine will appear.
As you can see, in our case, it has 5 search sources: posts, pages, media, products, and users.
The number of sources may depend on the number of plugins installed on your site.
For example, the Products and Users sources were automatically added as we have the WooCommerce plugin installed.
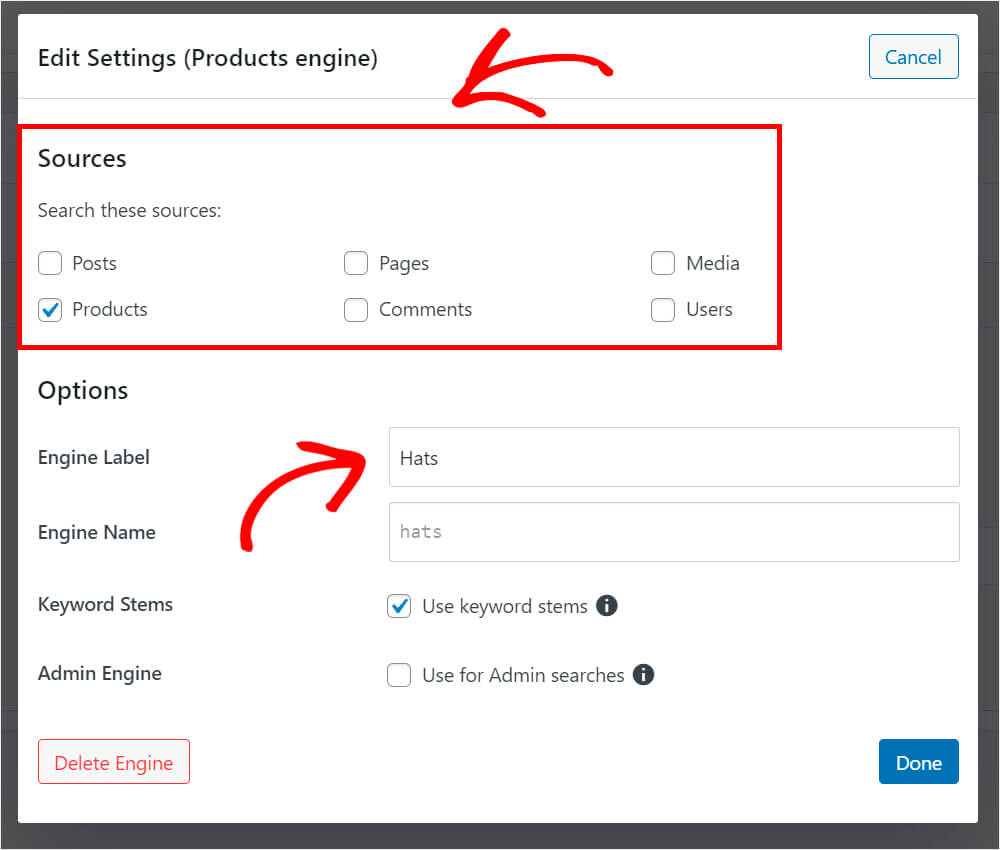
Since we want this search engine to search solely among WooCommerce products, we’ll remove all other sources except Products.
To do so, click Sources & Settings at the top right.
Uncheck all the boxes except for Products and rename your engine label to something more recognizable.
Let’s say we want to create a search engine for the “Hats” product category, so we’ll call it Hats.
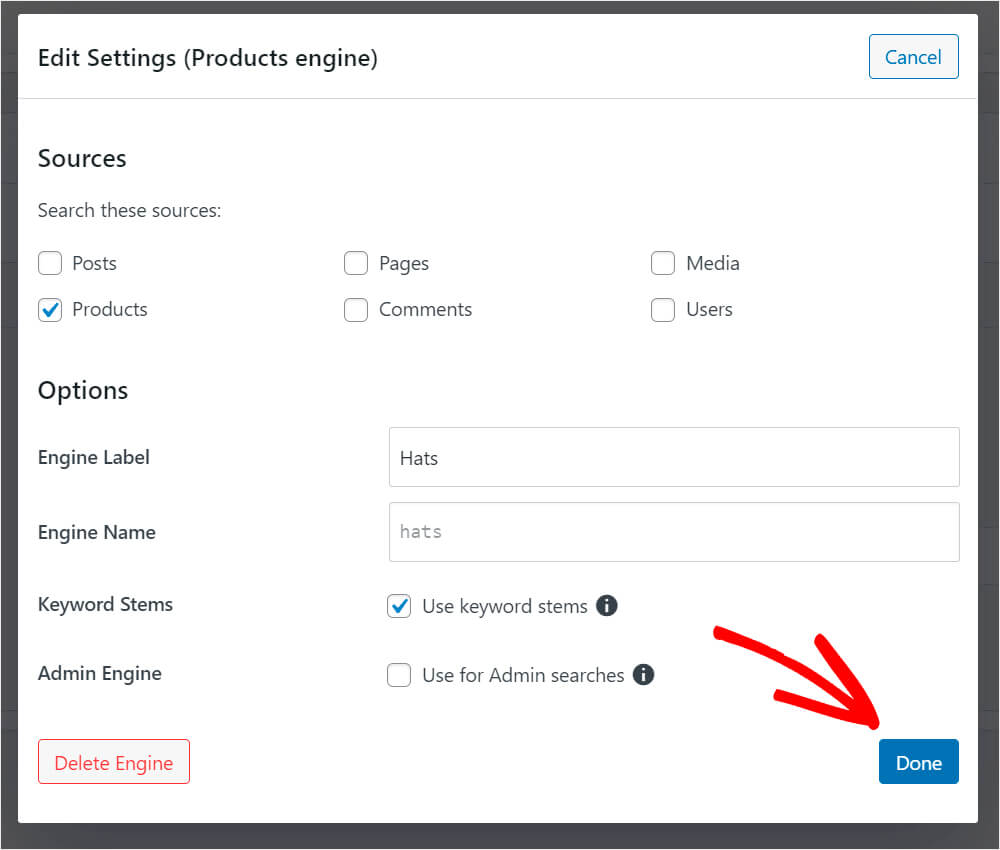
When you’re finished, press Done.
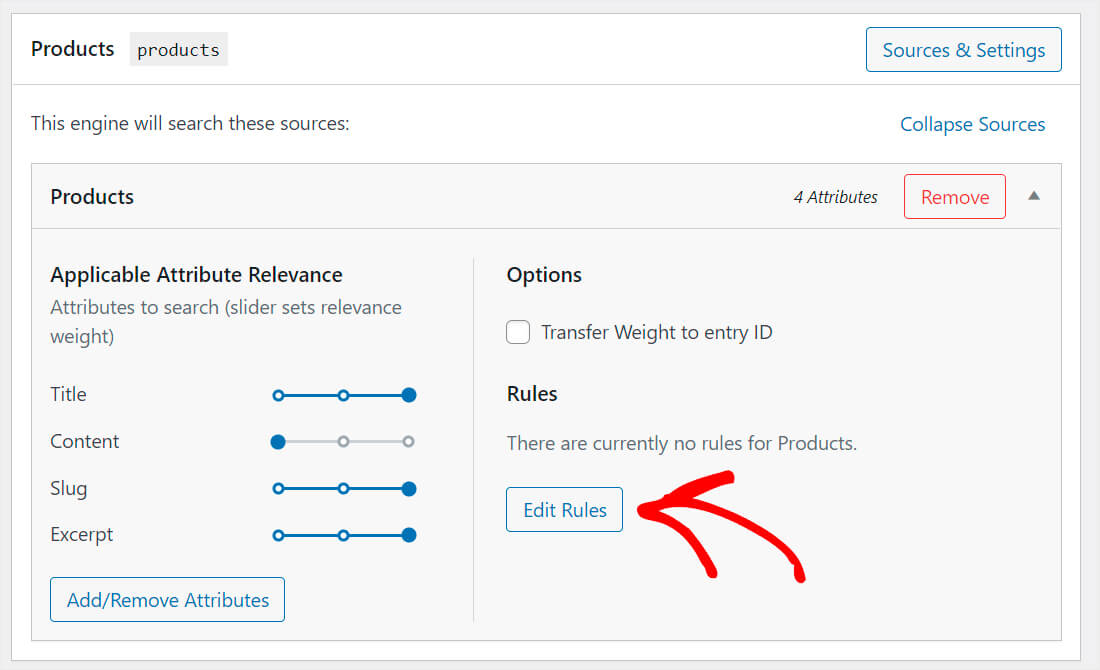
The next step is to specify which product category we want our new search engine to search for.
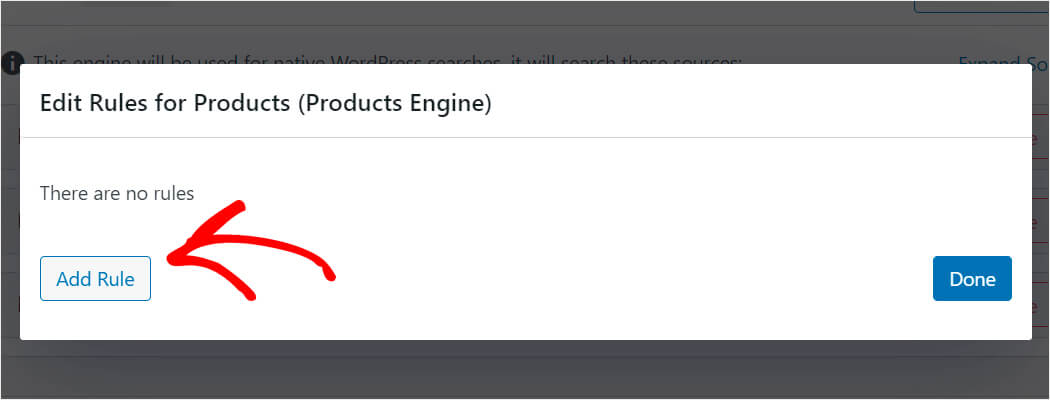
To do so, click Edit Rules.
Then, click Add Rule.
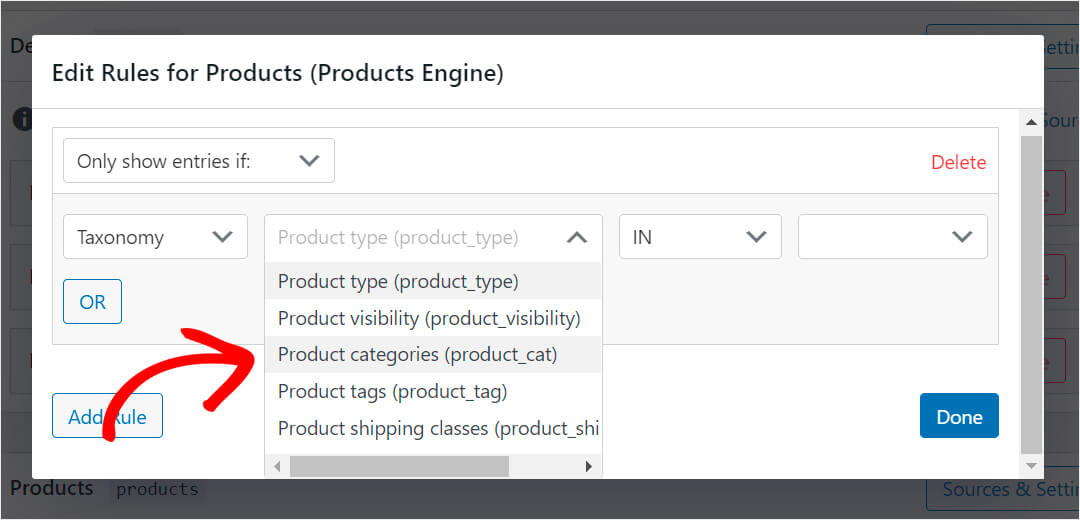
Select the Product categories taxonomy from the drop-down list.
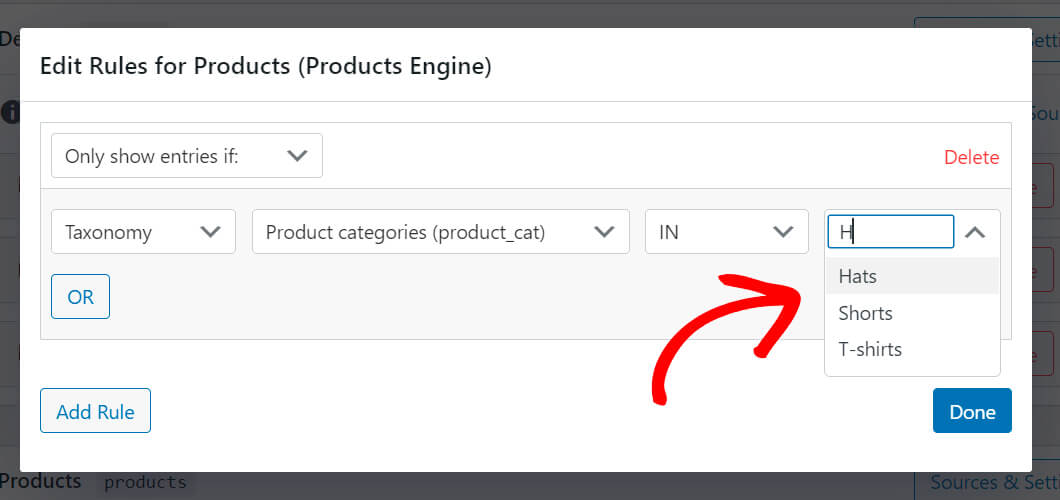
Then, choose a specific category you want the Products Search Engine to stick to.
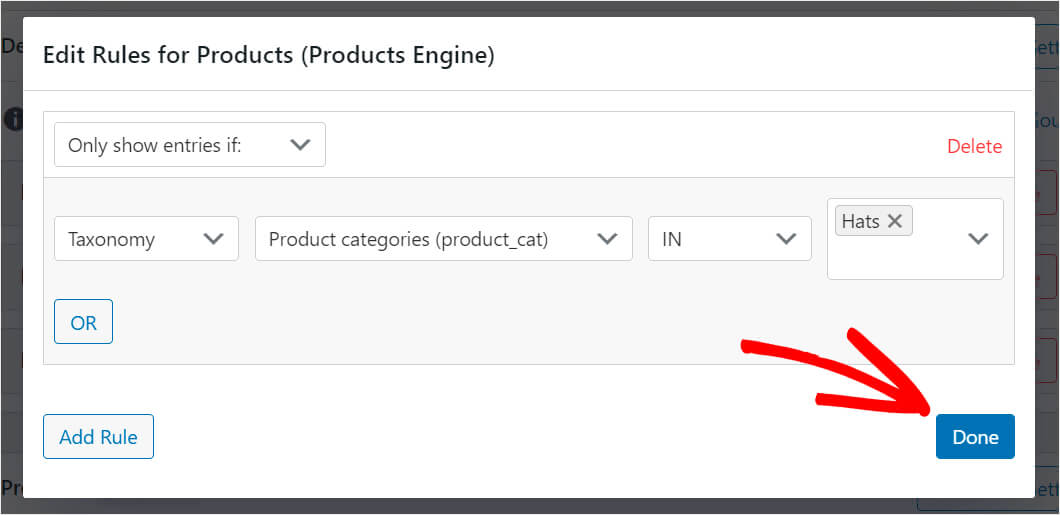
In our case, we’ll choose the Hats category. When you’re finished, press Done.
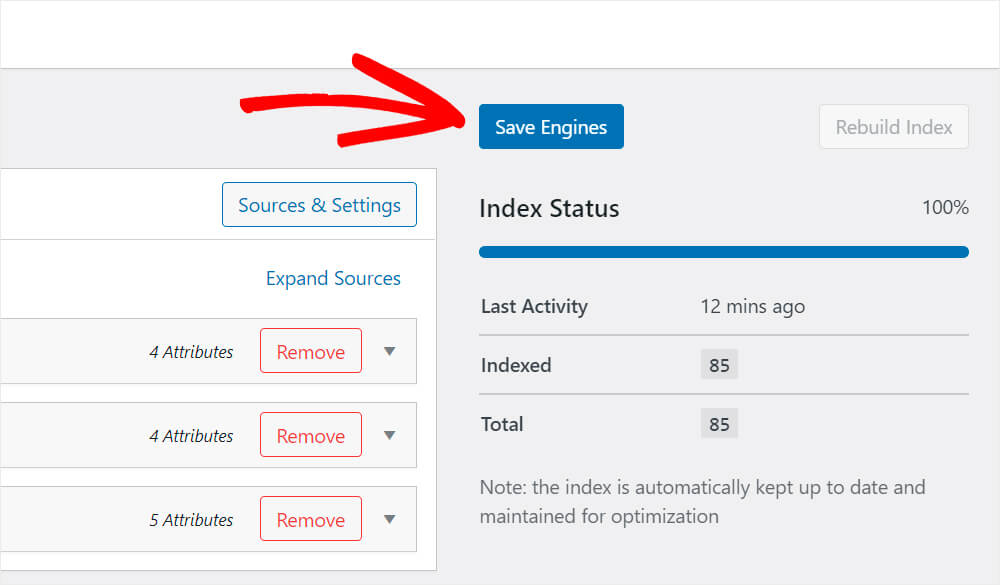
To save the changes you’ve just done, click Save Engines at the top right.
That’s it. You’ve successfully created a new search engine that searches only by Hats WooCommerce product category.
Step 4: Download and Install the Shortcodes Extension
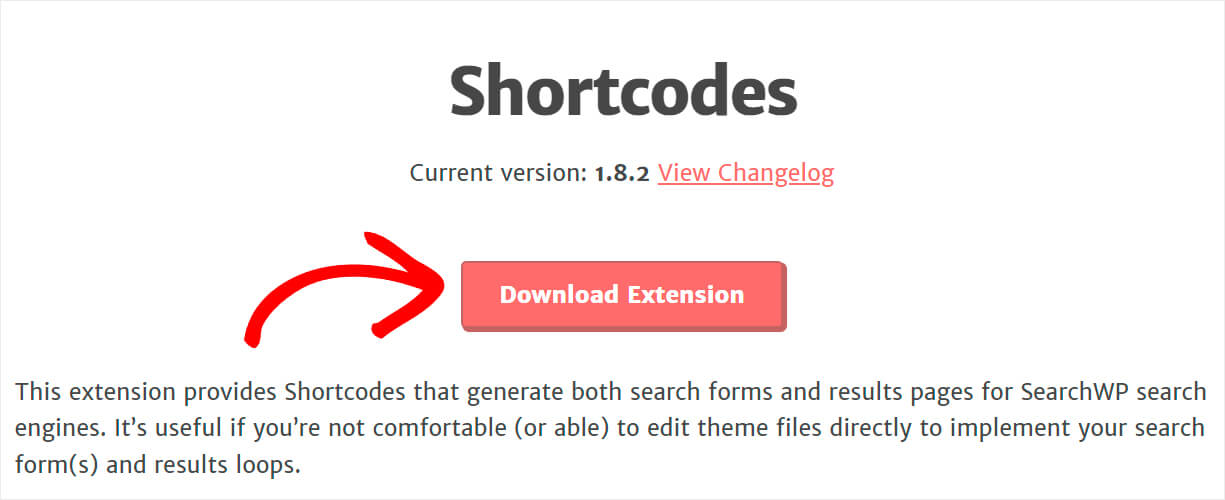
Now we’ll need to download the Shortcodes SearchWP extension. This extension allows you to add a search bar with a shortcode to any place in a post or page.
You can grab it at the Shortcodes extension download page.
Once you get there, press the Download Extension button.
Then install and activate the extension in the same way as SearchWP.
Step 5: Create a New Search Form Page
The next step is to create a separate page. We’ll put a search bar linked to the newly created Products search engine on it.
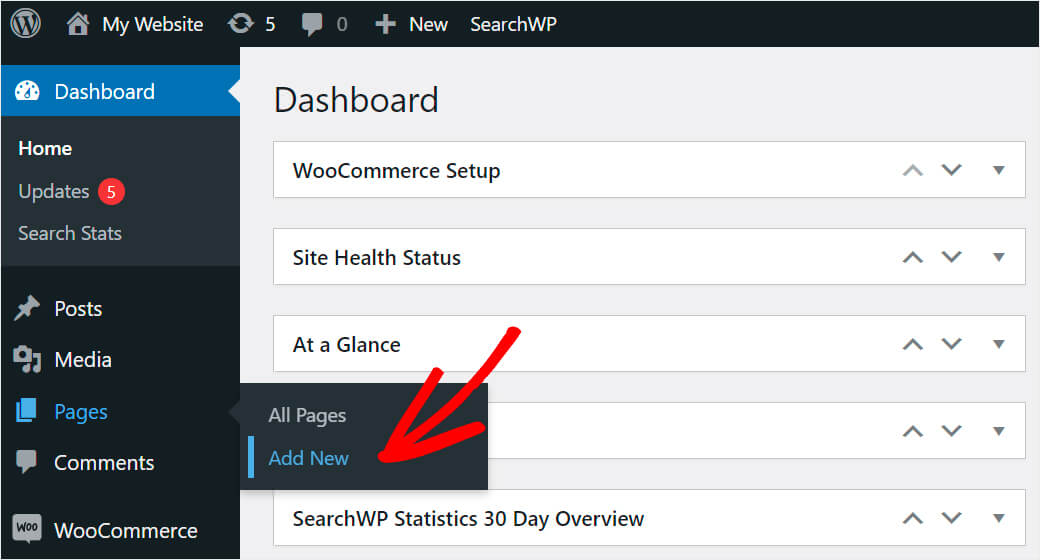
To do so, click Add New under Pages at your WordPress dashboard.
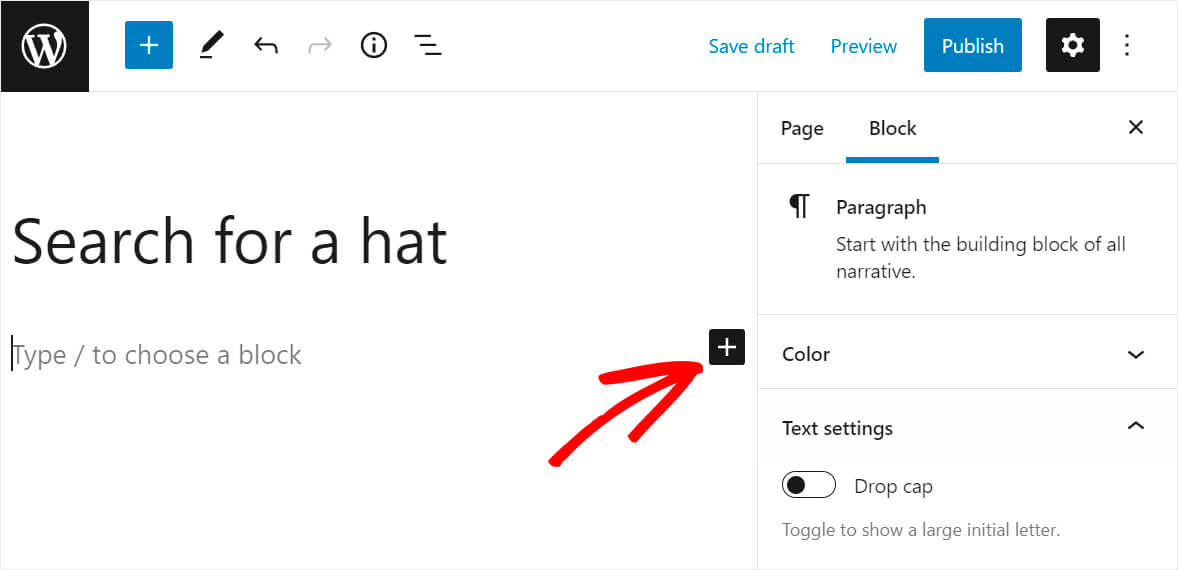
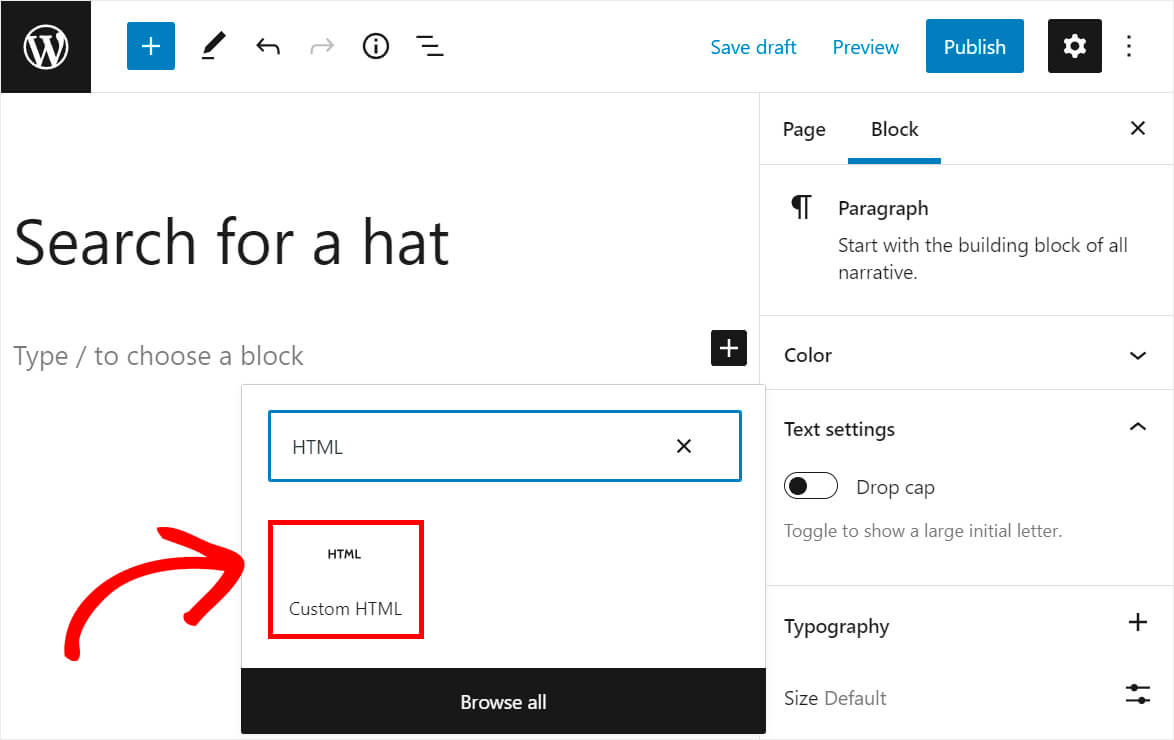
Then, give your page a title and click Plus to add a new block to it.
Find the Custom HTML block and click on it.
Then copy the code below and paste it into the Custom HTML block you’ve just added:
[searchwp_search_form engine="hats" var="searchvar" button_text="Find Results"]

<div class="search-results-wrapper">
 [searchwp_search_results engine="hats" var="searchvar" posts_per_page=4]
  <h2>[searchwp_search_result_link direct="true"]</h2>
  [searchwp_search_result_excerpt]
 [/searchwp_search_results]
</div>

<div class="no-search-results-found">
 [searchwp_search_results_none]
 No results found, please search again.
 [/searchwp_search_results_none]
</div>

<div class="search-results-pagination">
 [searchwp_search_results_pagination direction="prev" link_text="Previous" var="searchvar" engine="hats"]
 [searchwp_search_results_pagination direction="next" link_text="Next" var="searchvar" engine="hats"]
</div>
Note that if you named your search engine something other than Hats, you need to replace its name in 4 places in the above code.
This code outputs a search form linked to the Hats search engine. This means that it searches exclusively by the “Hats” WooCommerce category.
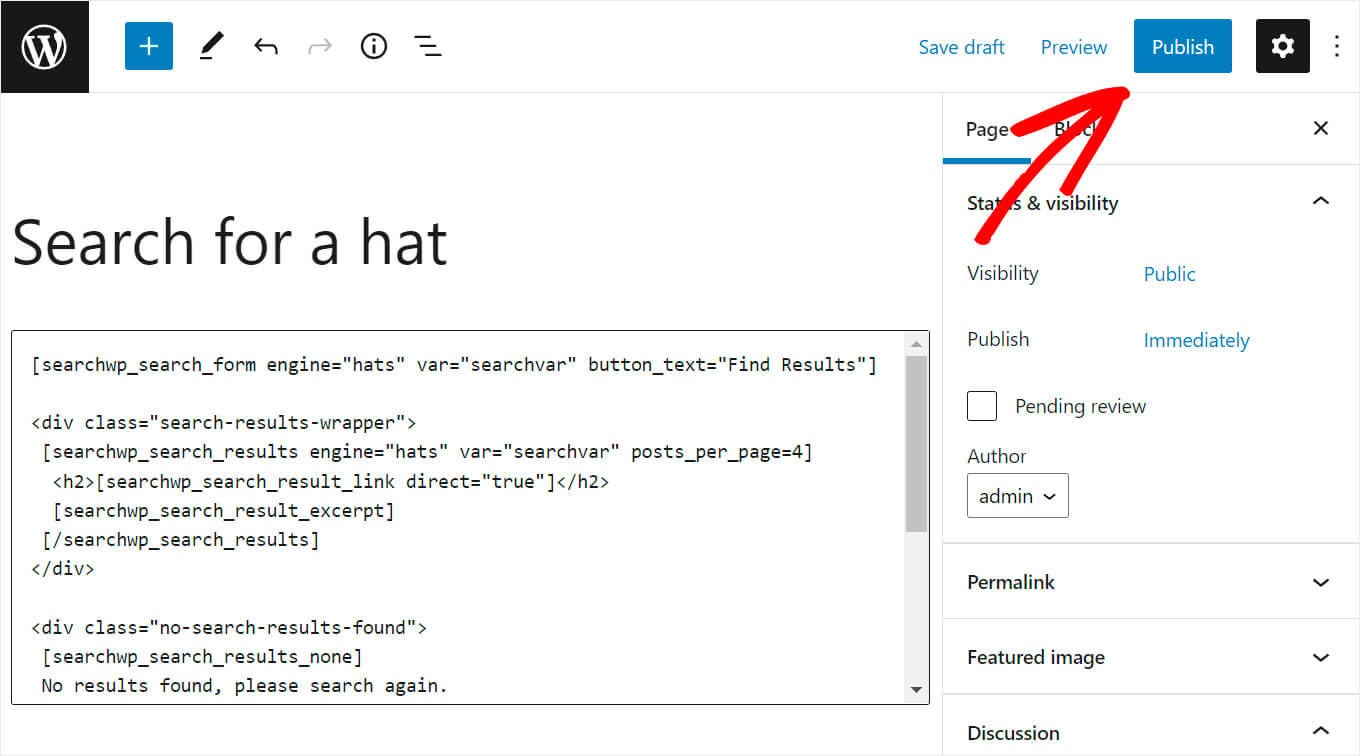
Once finished, press the Publish button at the top right to publish your new page.
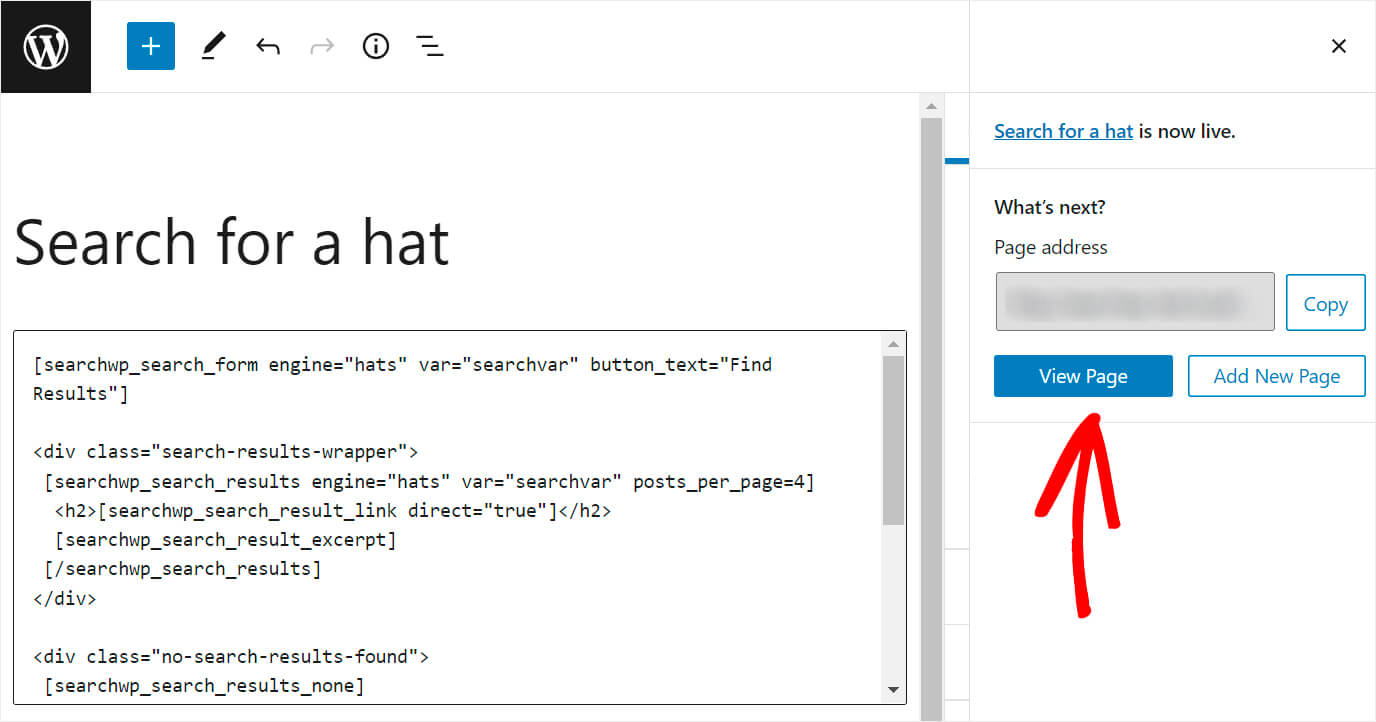
Then click View Page as on the next step, we’ll be testing our new search box.
Step 6: Test Your New Search
We created 2 products to test the new search box: a red hat and a red t-shirt. Both of them are assigned to the appropriate categories.
Let’s see what happens if we enter the “red” search term into the search form.
As you can see, the product “red t-shirt” does not appear in the search results. Only the “red hat” appears. It means we’ve successfully limited this search box to the hats product category.
Congratulations, you just learned how to create a search bar that’s limited to a specific category in WooCommerce.
Method 2: Create a Category Select Search Form
But what if you want to let your visitors choose in which category they want to search? The best way to do so is to add a category select search form.
Step 1: Install and Activate SearchWP
The first step is to install and activate the SearchWP plugin. If you haven’t done it yet, you can grab your copy of SearchWP here.
Earlier in this article, we’ve already described in detail how to install SearchWP on your website, so feel free to check out that tutorial.
Step 2: Create a Child Theme
Once you get SearchWP installed and activated, the next step is to create a child theme of the current theme you’re using on your site.
It’s crucial as this method involves making changes to your theme code.
The thing is, when you edit a code of a child theme, changes are kept separate from the parent theme’s files.
So even if you make a critical mistake while editing code that causes your site to crash, you can simply switch back to the parent theme.
Besides, if you make changes directly to the parent theme, you will lose them as soon as you decide to update it.
That’s why having a child theme is essential if you’re going to edit the WordPress theme code.
If you need a refresher on how to create a child theme, check out this how to create a child theme tutorial.
Step 3: Make Changes to The Functions.php File
Once you’ve created a child theme, the next step is to open the functions.php file.
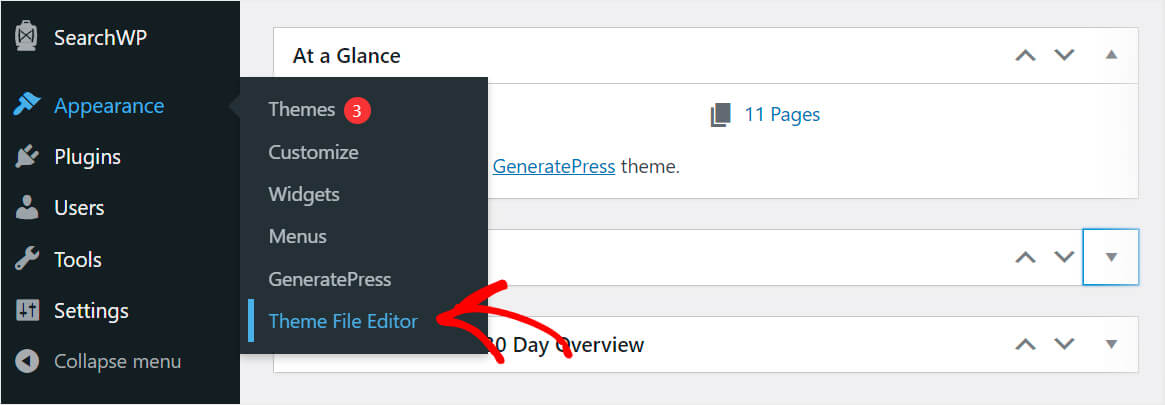
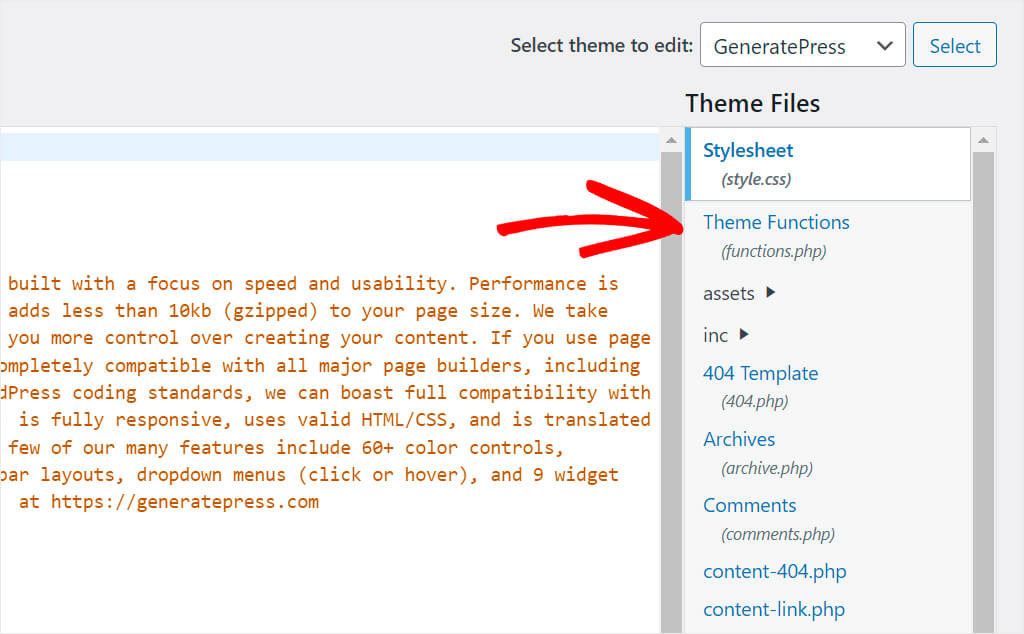
To do so, navigate to Appearance » Theme File Editor in your WordPress dashboard.
Then, find the functions.php file at the right panel and click on it.
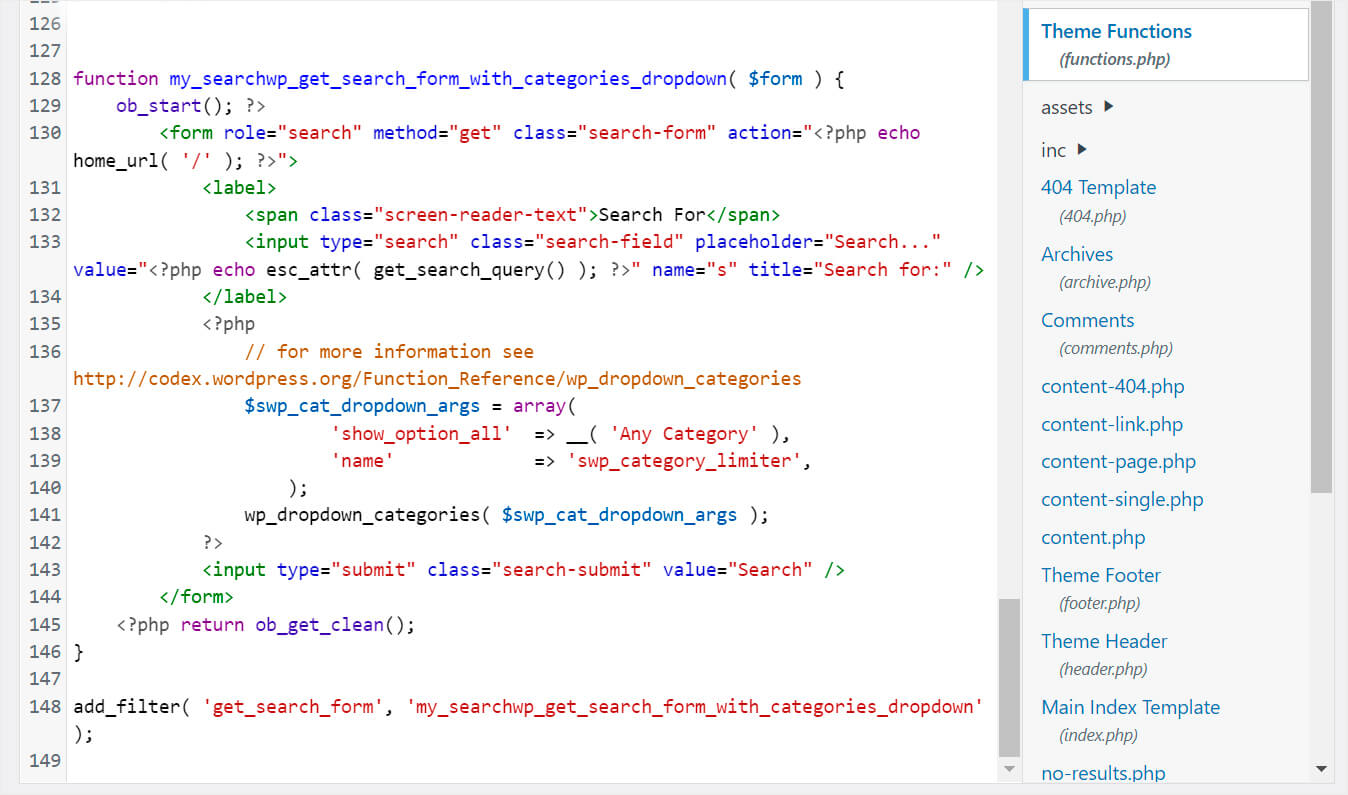
Once you open it, copy and paste the following code to the very bottom of the file:
function my_searchwp_get_search_form_with_categories_dropdown( $form ) {
    ob_start(); ?>
        <form role="search" method="get" class="search-form" action="<?php echo home_url( '/' ); ?>">
            <label>
                <span class="screen-reader-text">Search For</span>
                <input type="search" class="search-field" placeholder="Search..." value="<?php echo esc_attr( get_search_query() ); ?>" name="s" title="Search for:" />
            </label>
            <?php
                // for more information see http://codex.wordpress.org/Function_Reference/wp_dropdown_categories
                $swp_cat_dropdown_args = array(
                        'show_option_all'  => __( 'Any Category' ),
                        'name'             => 'swp_category_limiter',
                    );
                wp_dropdown_categories( $swp_cat_dropdown_args );
            ?>
            <input type="submit" class="search-submit" value="Search" />
        </form>
    <?php return ob_get_clean();
}

add_filter( 'get_search_form', 'my_searchwp_get_search_form_with_categories_dropdown' );
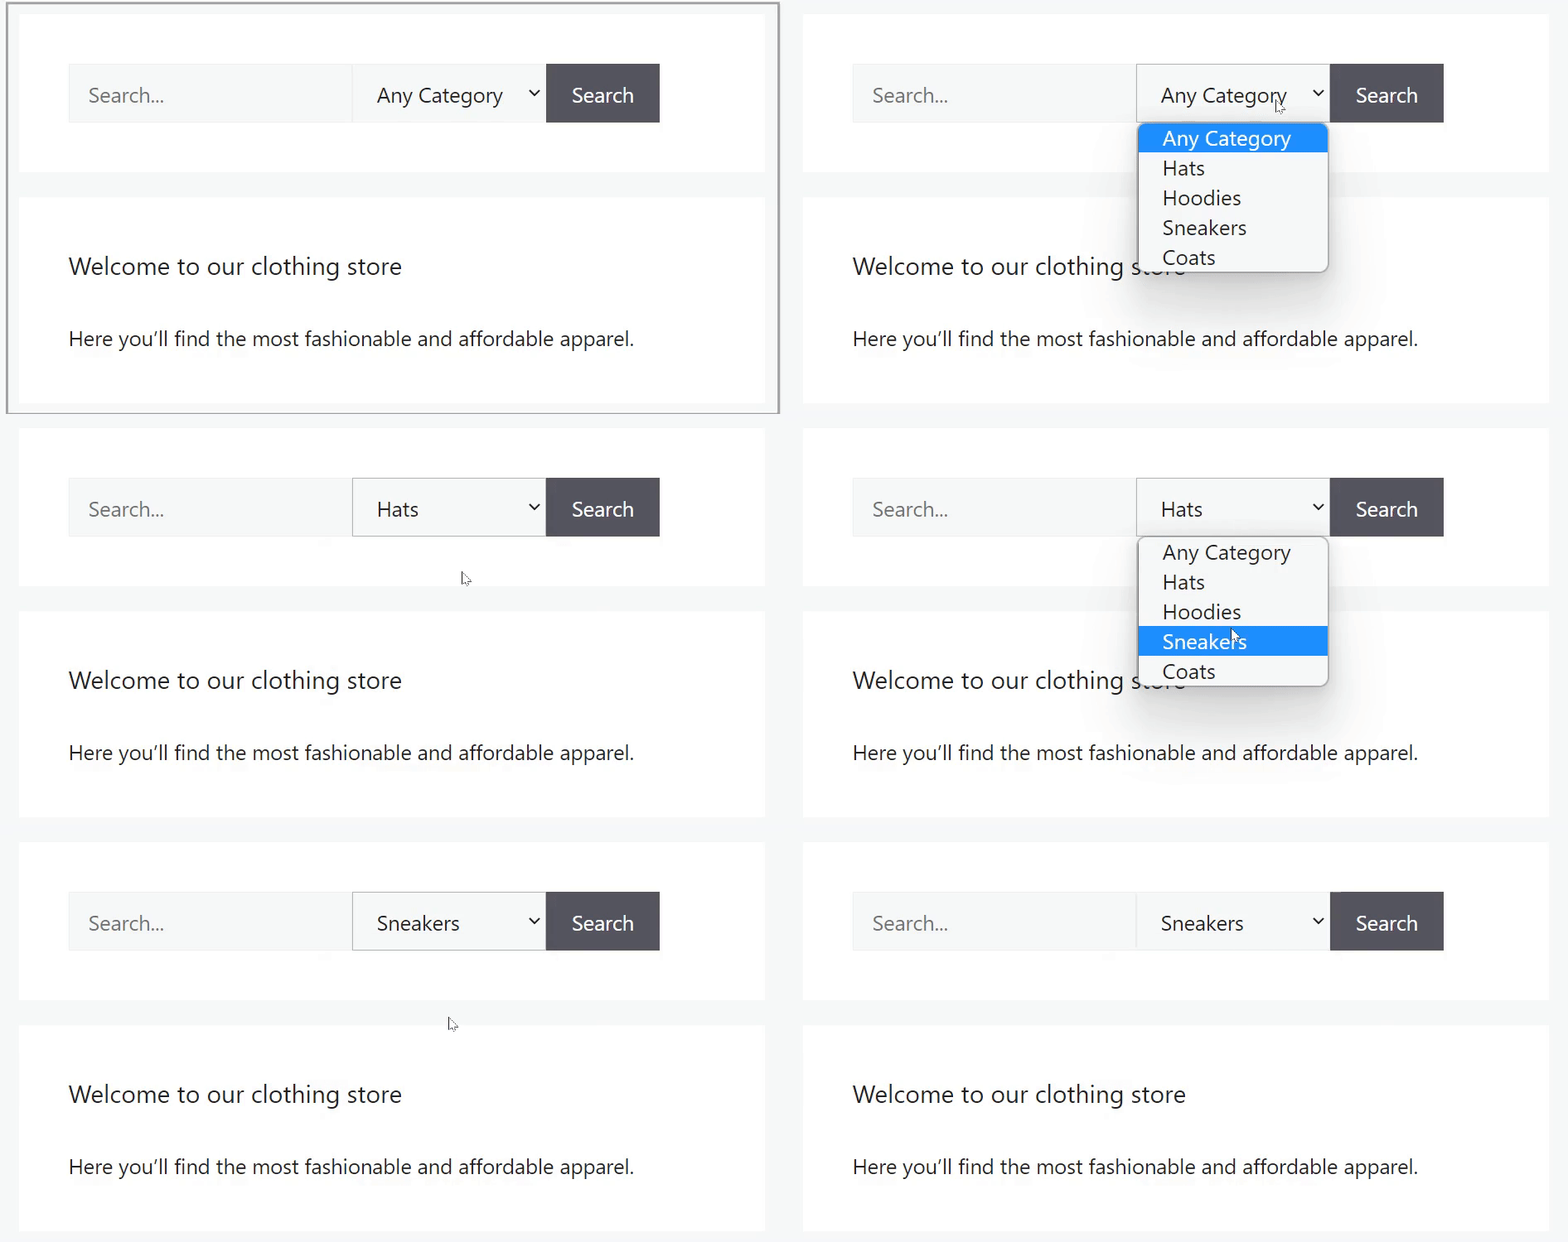
Here is how it looks on our test site:
This code adds a category drop-down menu next to each existing search bar on your site. It lets your visitors choose which category they want to search by.
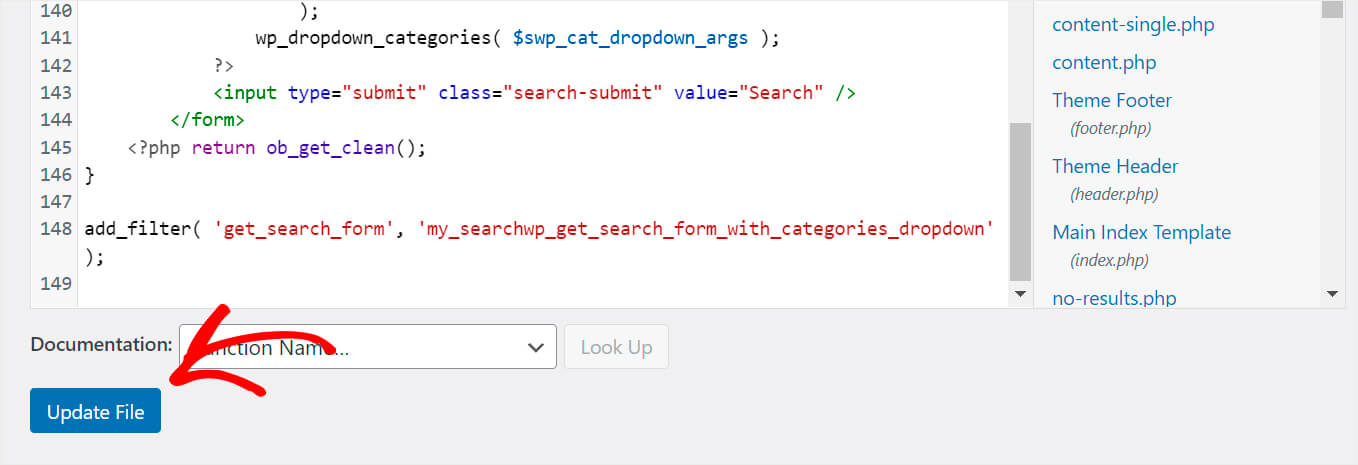
After you’ve added the code, don’t forget to press the Update File button at the bottom of the page to save your changes.
Once done, you’re ready to proceed to the last step and test your new search.
Step 4: Test Your New Search
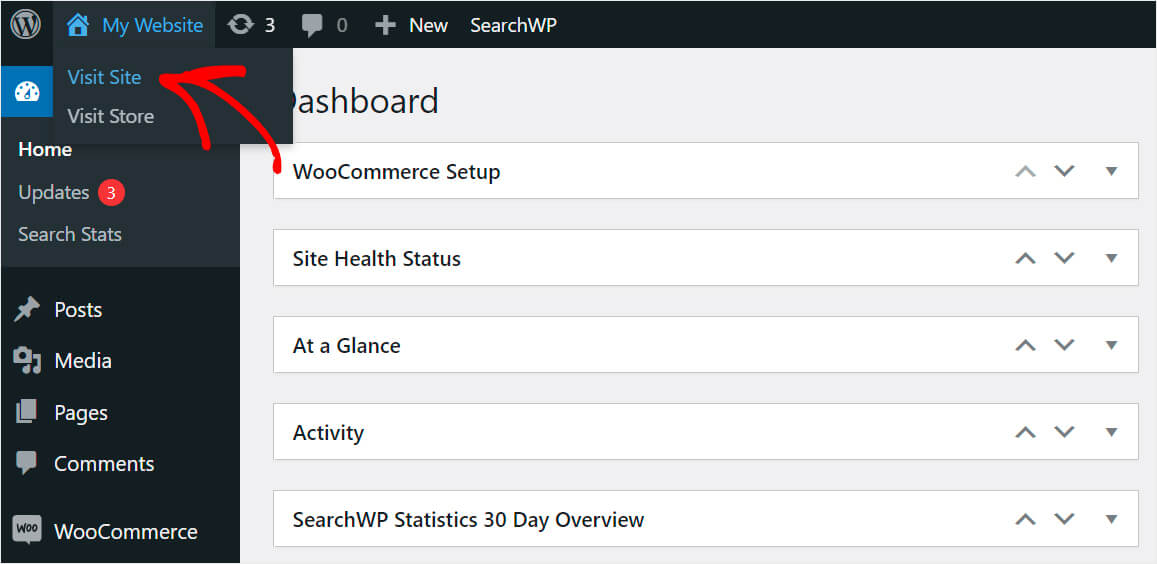
To do so, click the Visit Site button under your site’s name at the top left of the WordPress dashboard.
Now, if you look at any of your search forms, you’ll see a category dropdown menu next to it.
In this article, you learned 2 methods on how to create a search form that searches by WooCommerce categories.
If you’re ready to create category-specific forms, you can grab your copy of SearchWP here.
Do you want to remove a specific page from search results? Check out this step-by-step guide on how to exclude pages from site search results in WordPress.
Wonder how to add a search bar to your site? Then you might be interested in how to add a search bar in WordPress with 4 different ways tutorial.
