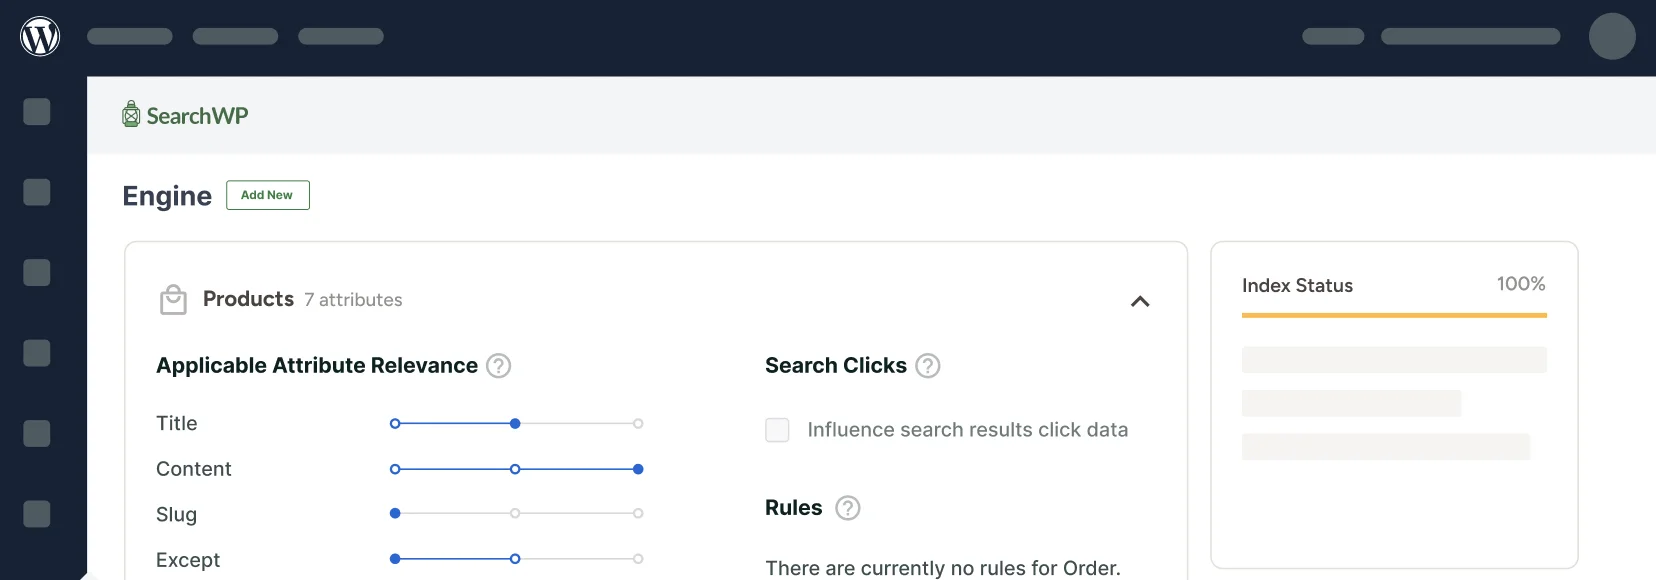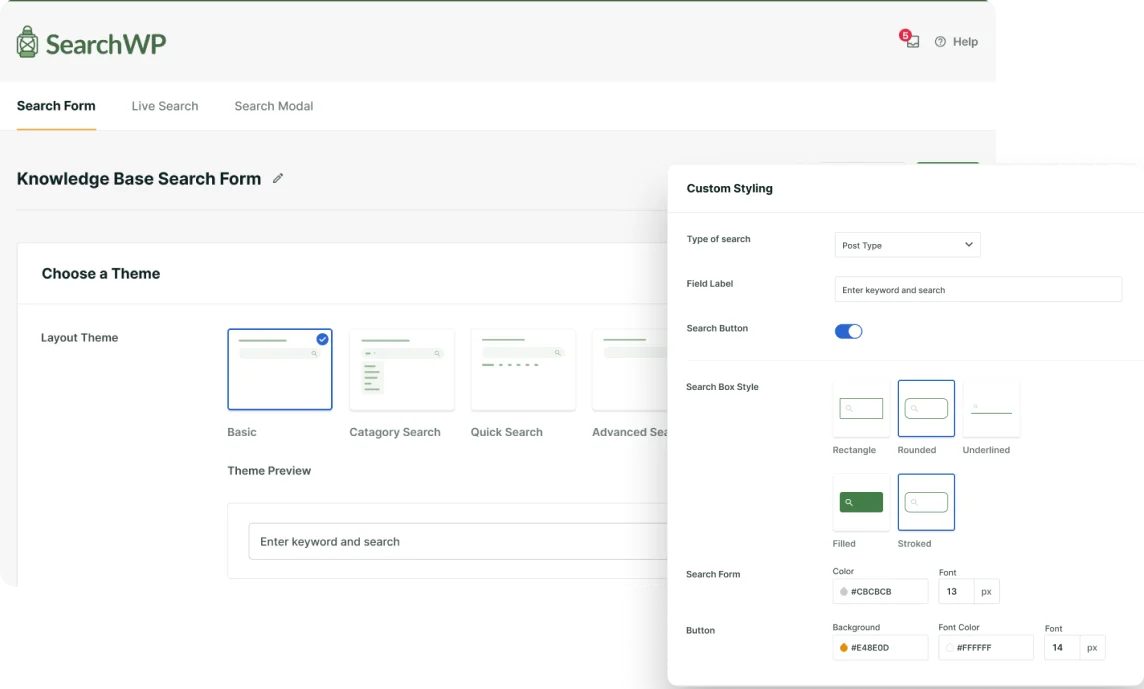
Do you want to customize the search widget in WordPress?
The default WordPress search feature is not great at finding content. If you want to help your customers find what they need faster, you can customize your search widget. This will boost your site’s average visit duration and grow your brand reputation.
In this article, we’ll show you how to customize your WordPress site’s search widget using a plugin.
This plugin gives you complete control over how site visitors search your site. You don’t need to write any code to do this.
Let’s get started!
Why Customize Your WordPress Search Widget?
Site search is an important feature people use to navigate websites. In WordPress, you can add a search widget to different locations of your site. Your site visitors can then type into these search forms to find what they need.
However, the default WordPress search widget is not very good at finding site content. It is slow and only indexes certain content types like posts, pages, and media content. Your users can’t find a match using other attributes like tags, categories, or custom fields.
This means your site search may exclude relevant results sometimes. Once your site visitors can’t find what they’re looking for, they’ll have to check elsewhere.
Customizing your WordPress search widget will help you avoid losing potential site traffic and sales. Your site visitors can now search everything on your site the way you want them to. They will also be able to do so faster.
A custom WordPress search widget allows you to control how your site looks for search results. You can choose to rank one content attribute higher than the other when searching your site.
For example, you can rank a PDF file’s excerpt higher than the document content. So, when the user searches for a keyword, WordPress will first look for matches in the excerpts before checking the document content.
If you have a WooCommerce store, customizing your search widget has lots of benefits too. For example, shoppers can now find matches in product attributes like categories, tags, and shipping classes.
The easiest way to customize your WordPress search widget is to use a plugin. This method has a lot of benefits over adding custom code to your site. Using a WordPress plugin takes less time and you don’t need to be a nerd to make it work.
Let’s see how to customize the WordPress search widget without writing any code.
How to Customize WordPress Search Widget
Are you a WordPress newbie? Do you want to fully customize your WordPress search widget without hiring a developer? The easiest way to do this is to use a WordPress plugin like SearchWP.
As the best WordPress search plugin, SearchWP’s features make it easy to customize your WordPress search widget. You can choose where you want your site to look for search results and which content attributes to check first.
The plugin presently powers over 30,000 sites. Website owners use the tool to improve site search in different ways.
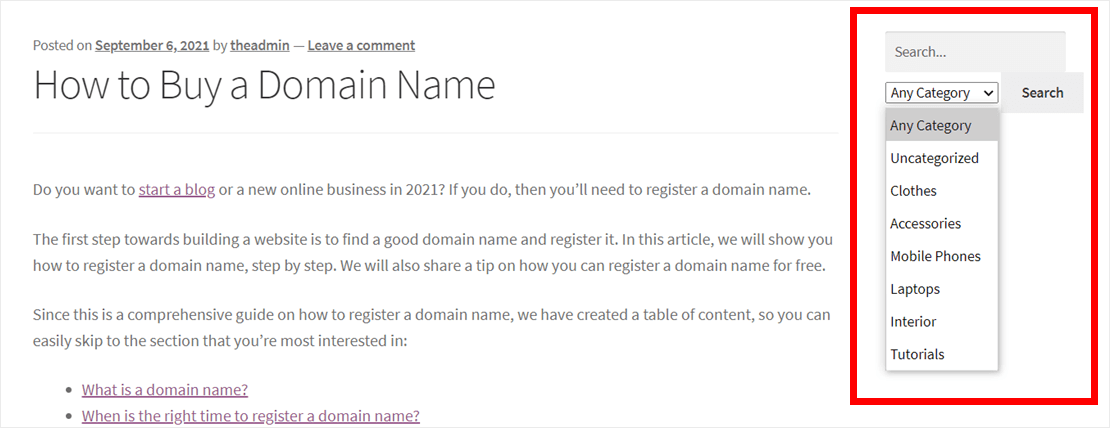
For example, you can use the plugin to add search by category to your WordPress site. So, site visitors can now find results faster by searching a specific section of your site.
Here are some other interesting features you get:
- PDF and Office document indexing. SearchWP lets your site users search the content of your PDF files and other text-based documents. This can come in handy if you own a bookstore or any site with lots of documents.
- WooCommerce integration. WooCommerce stores are not left out either. The SearchWP WooCommerce add-on can index product attributes like categories, tags, and shipping classes. This way, your site visitors can find the products they need even faster.
- Custom fields support. Custom fields help you store extra data about your site content. Unlike the default WordPress search, SearchWP can search custom fields.
Looking for the easiest way to customize your WordPress search widget? With SearchWP, you can do this by following 3 simple steps.
Let’s show you how to do it!
Step 1: Install and Activate SearchWP
Ready to create your first WordPress custom search widget? You can get started by grabbing your copy of SearchWP here.
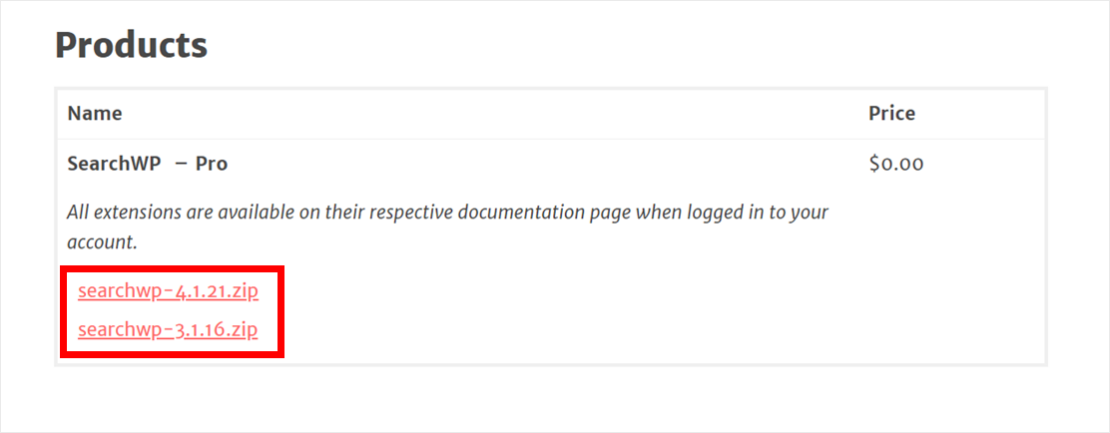
After getting SearchWP, there’ll be 2 versions of the plugin for you to choose from.
You can click any of the links available to download the tool. If you want the best performance possible, we recommend the latest version.
After getting the plugin, you’ll receive an email with a license key from SearchWP. Save this key to a notepad where you can find it later. You’ll use it to activate the plugin in your WordPress dashboard later.
Next, log into your WordPress admin area and upload SearchWP to your site.
For more details, follow the step-by-step instructions in this guide on how to install a WordPress plugin.
Now that you’ve installed and activated SearchWP, it’s time to activate the product license.
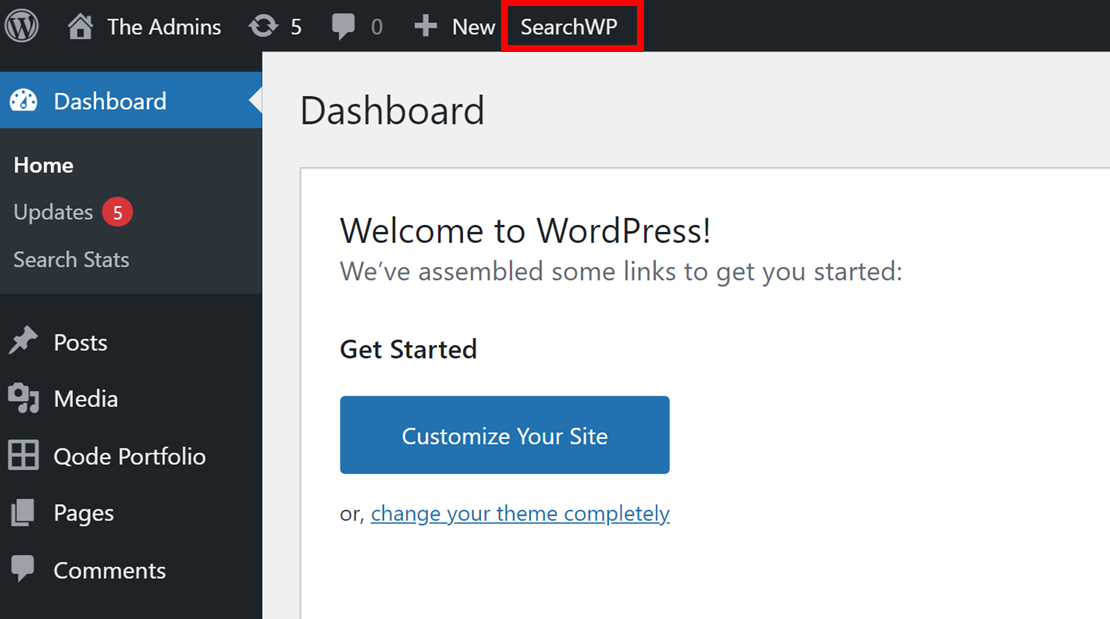
After installation, SearchWP adds a new navigation button to the top panel of your WordPress dashboard. Click this SearchWP button to go to the plugin’s settings page.
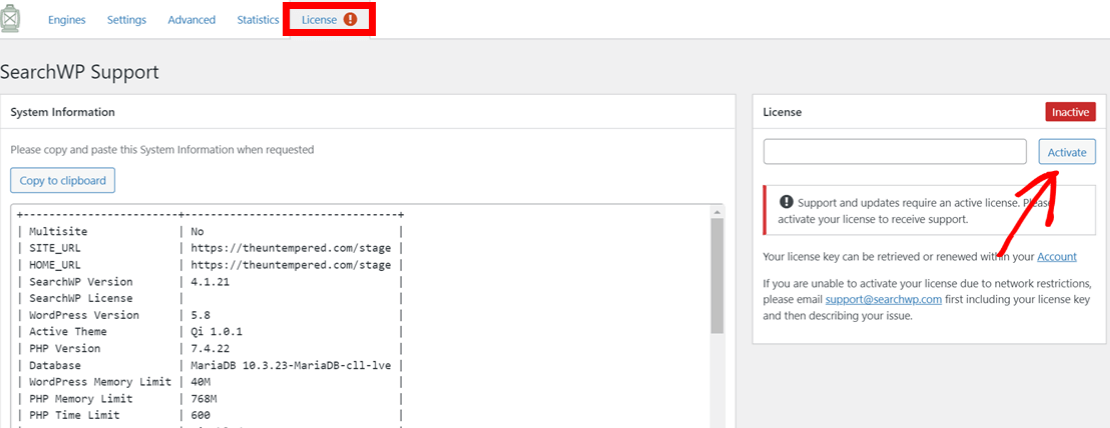
Next, navigate to the License tab of your SearchWP settings page. In this tab, enter the license key from the previous email and click Activate.
Congratulations! You’ve just activated SearchWP and you can now use it to customize your WordPress search widget.
The next step is to adjust your search engine settings.
Step 2: Set Up Your Search Engine
SearchWP allows you to control how your site looks for search results. You can choose from different content sources like posts, pages, products, and the media library. You can also decide how relevant you want each content attribute like title and description to be.
To configure these settings, we’ll set up a search engine. The search engine gives you full control over your site search behavior. It’s like setting up a small Google search algorithm for your entire site.
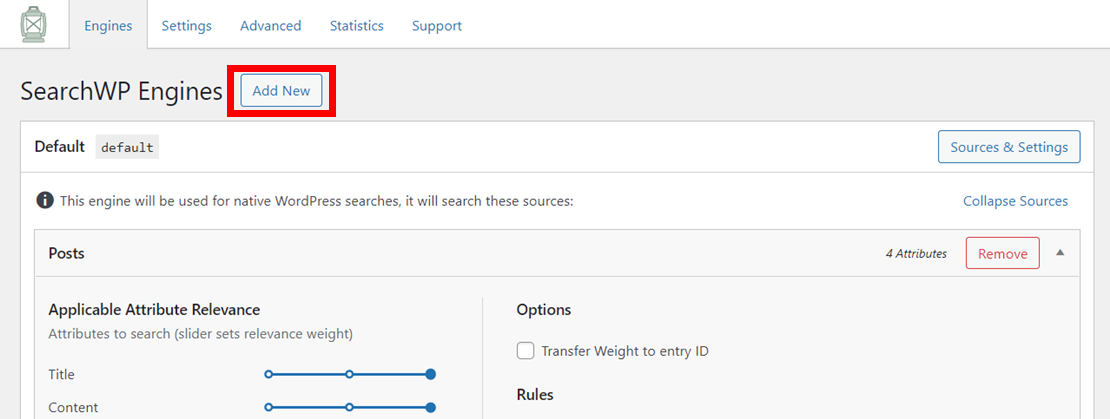
You can either set up a new search engine in SearchWP or edit the default engine. To do this, click the SearchWP button at the top of your WordPress dashboard to go to the settings page.
If you want to set up a new search engine, click Add New on this page.
One of the benefits of using SearchWP is that you can set up more than 1 search engine for 1 site. This means you can display different search bars in different locations on your site.
For example, you can add a search form that looks for products only to your shop page. You can then add another custom search form that searches your entire site to the sidebar.
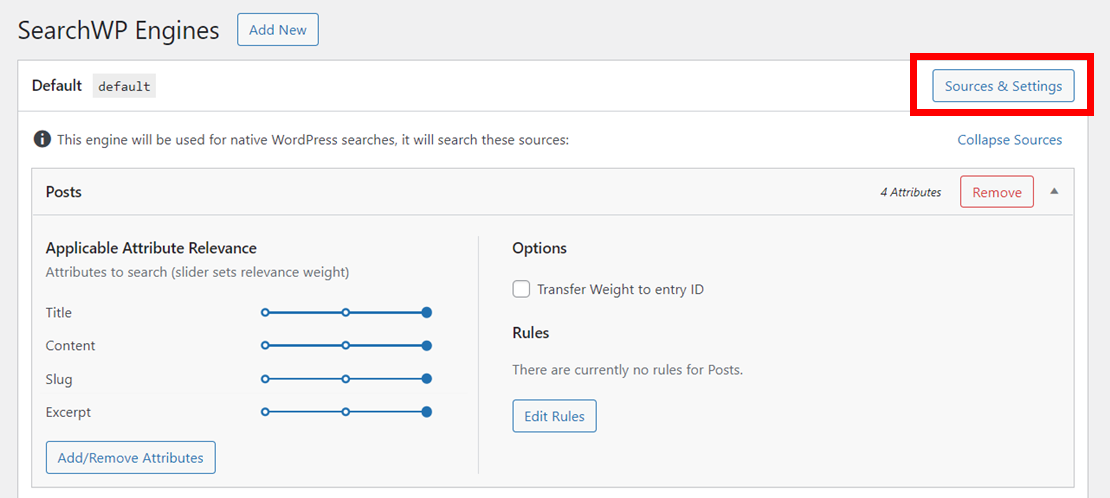
To do this, we’ll first select where you want SearchWP to check when looking for search for results. Choose from the available options by clicking Sources & Settings.
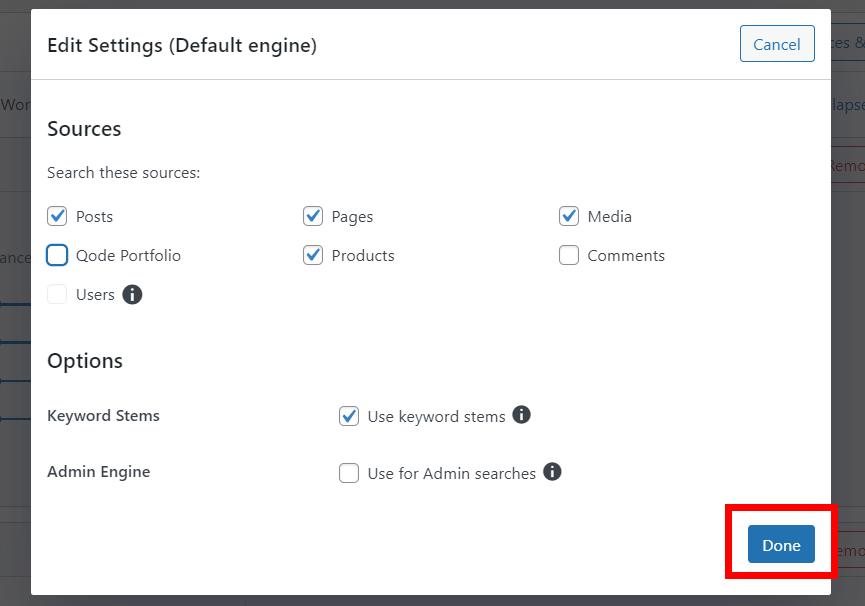
Next, you’ll see a pop-up with a list of sources and additional options. You can choose from sources like posts, products, comments, and media files. The available options may vary from site to site, based on the plugins on your site.
After choosing your settings, you can also select some additional options. For example, you can enable keyword stemming.
Keyword stemming helps your site to search for words similar to what the user is looking for. If it’s enabled, your site will also search for words like “running” when the user types “run”. After choosing the options you want, click Done.
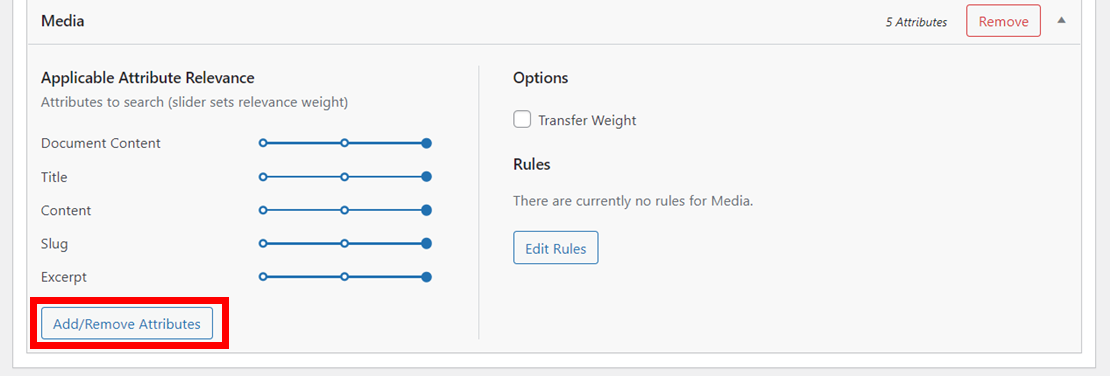
Now, it’s time to decide which content attributes you want your site to consider when searching for content. You can adjust these settings for each source you’ve added to the search engine. Scroll to the source you want to edit and click Add/Remove Attributes.
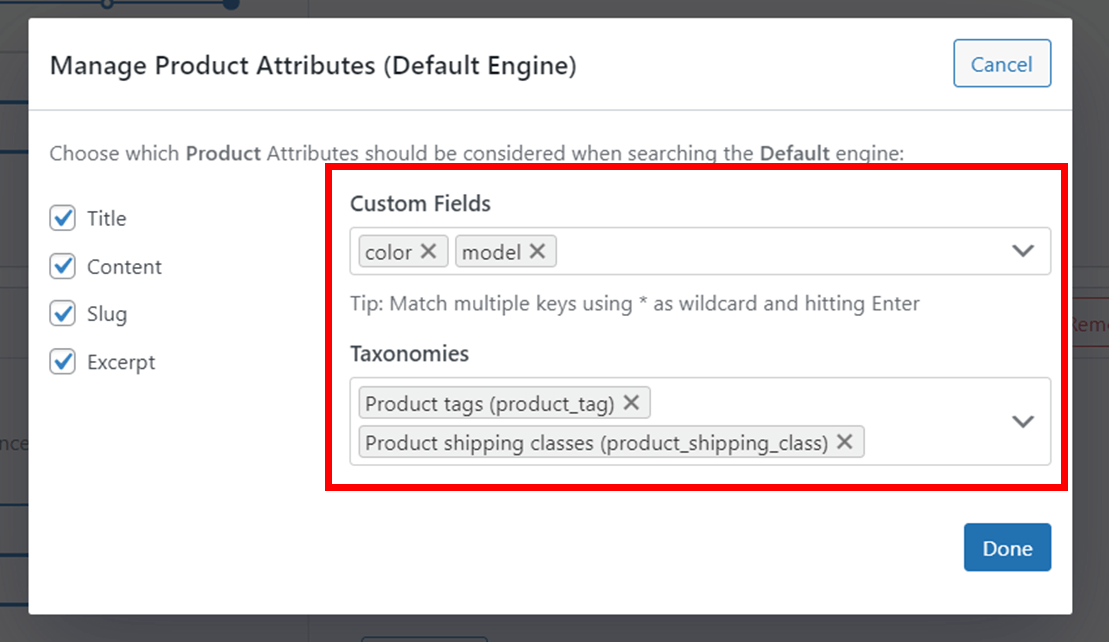
You’ll now see a pop-up with a list of attributes for each source. By default, SearchWP will look for results in the title, content, slug, and description.
You can remove any of these attributes by unchecking the box next to it. Or you can add other advanced attributes like custom fields and taxonomies. These attributes can be categories, tags, or even product variations like color and model.
If you select these attributes, your site visitors can now find products easily by simply typing any attribute into the search bar.
Click Done after selecting the attributes you want.
The next thing is to add other specific rules to your search engine settings. For example, you can decide to only search for pages published after a particular date.
To do this, click Edit Rules.
On the next page, adjust the rule’s settings based on your needs. Now, click Add Rule then Done.
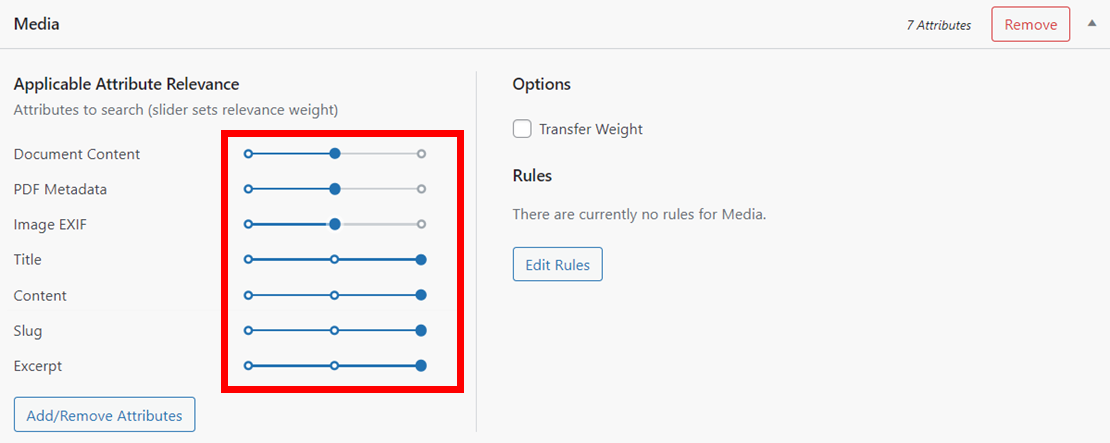
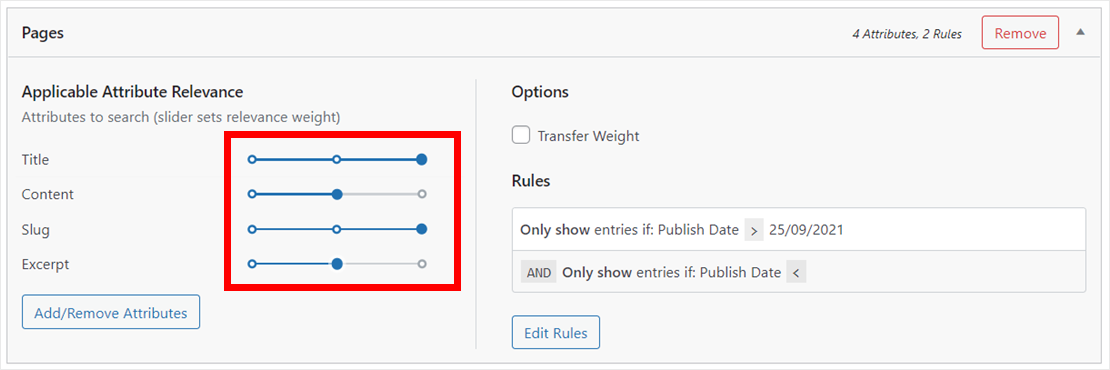
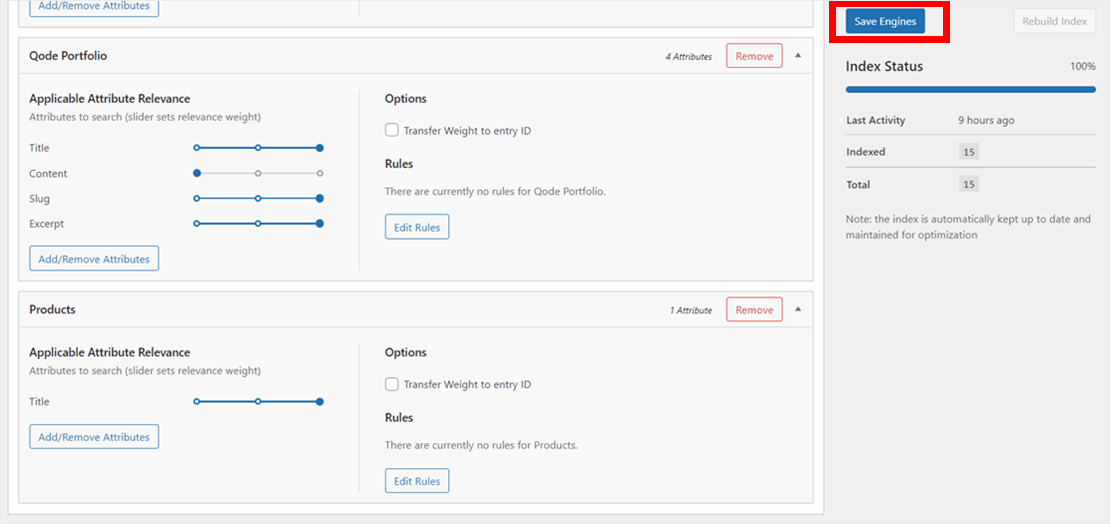
Finally, it’s time to adjust how your search engine ranks each of the content attributes you added earlier. For example, you can choose to rank a page’s slug higher than the excerpt. When SearchWP is looking for search results, it’ll first check the slug before checking the excerpt.
Each attribute has its own slider. Adjust each of them to determine the attribute’s relevance.
At this point, you’ve successfully chosen your content sources, added attributes, and adjusted their relevance. You can now click Save Engines to apply your new settings. SearchWP will also start building a new search index.
After customizing your WordPress search settings, the last step is to add a widget to your site.
Step 3: Add a Search Widget to Your Site
You can add your new custom search widget to different locations of your WordPress site.
Some WordPress themes have a search widget in some locations by default. In this tutorial, we’ll show you how to add one to your sidebar. It’s easy for site visitors to find the widget in this location.
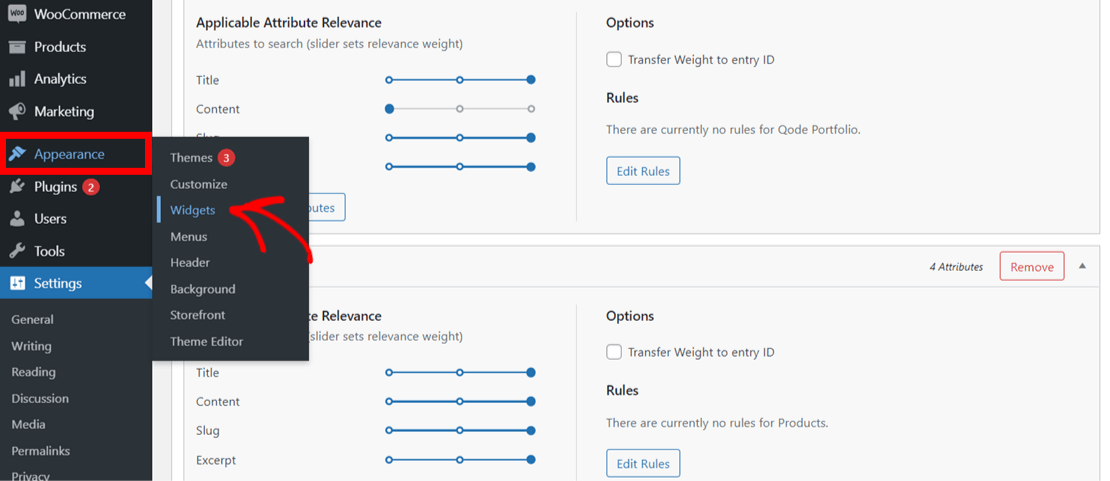
You can add a new widget to your site by going to Appearance » Widgets in your WordPress dashboard.
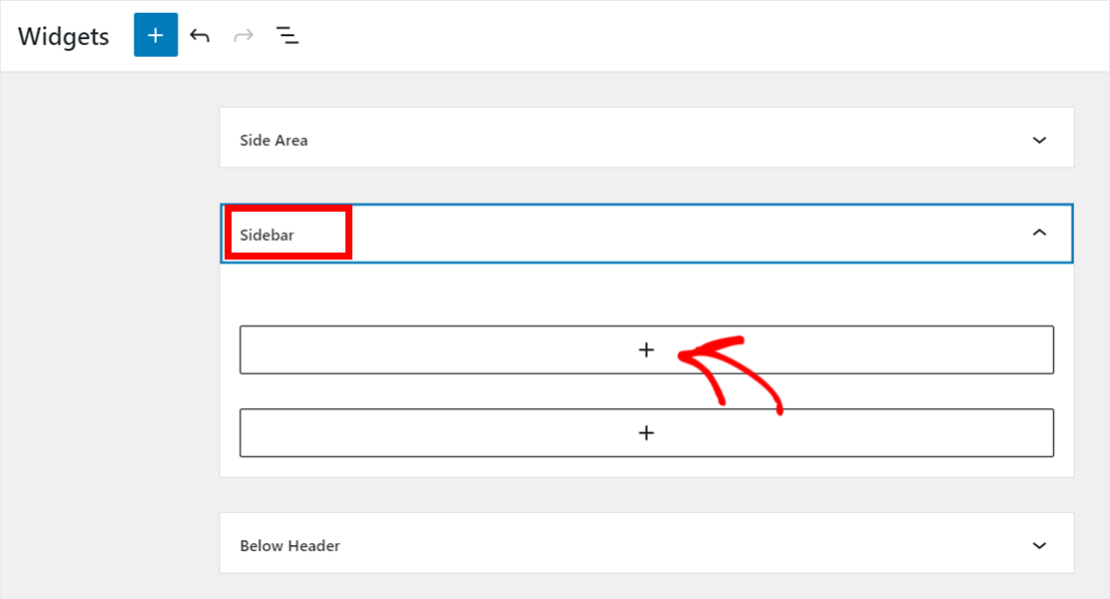
Next, choose where to add the widget and click the + icon. We’ll select the Sidebar for this tutorial.
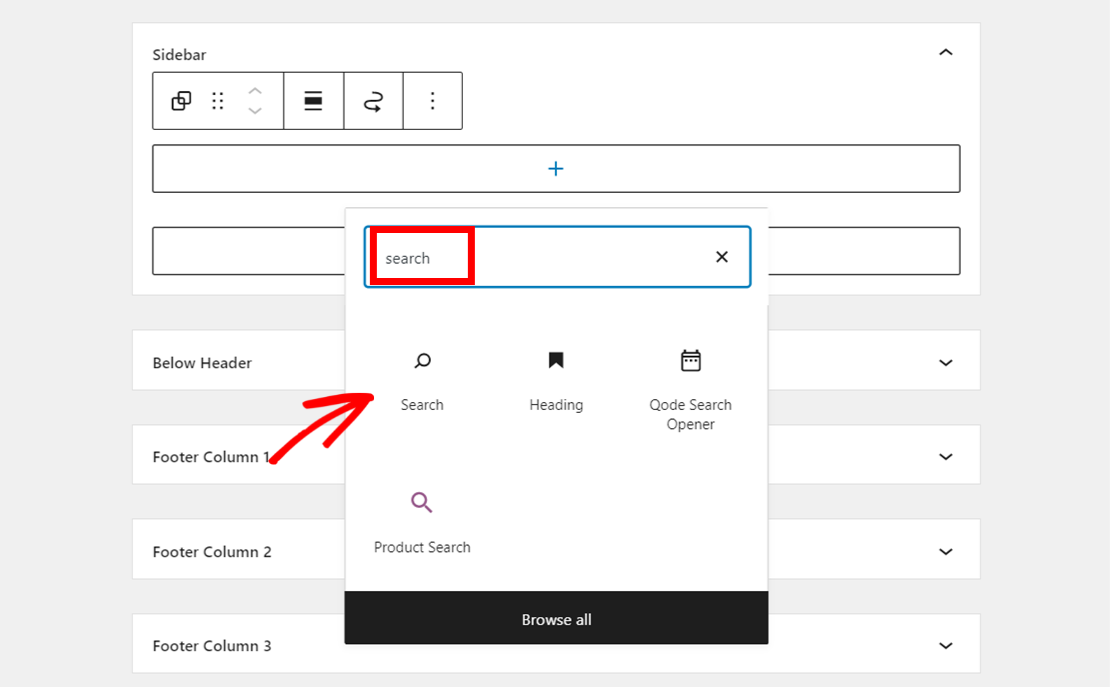
Type search into the search bar that pops up. Then choose the Search icon.
Now, click Update in the top right corner to save all your changes.
Now, when visitors go to your pages or posts, they’ll see your new custom search widget. This widget will search your site based on your new custom settings.
In this article, you’ve learned how to customize the search widget in WordPress.
With this custom widget, you can determine how you want your site users to search your site and help them find your site content faster.
Looking to customize your WordPress search widget? Get started by getting your copy of SearchWP here.
You can also check out our guides on how to add a custom WooCommerce search widget and how to add autocomplete search to your site.
