You might have seen search forms on many eCommerce sites, but they don’t always provide relevant results.
That’s because the default search function in WordPress is quite limited and ignores important information while searching.
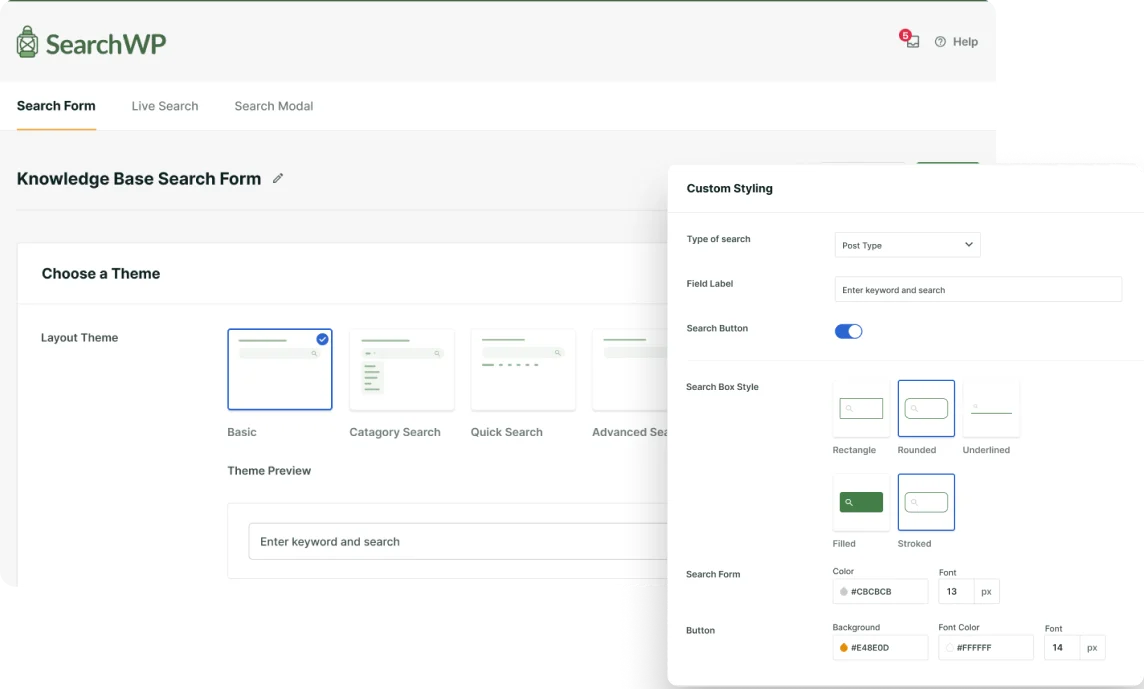
Adding a powerful search form to your shop page will help your site visitors navigate your store faster and get the results they’re looking for. You can easily get more sales and boost customer satisfaction this way.
In this article, we’ll show you how to add a search form to your WooCommerce shop page.
Why Add a Search Form to Your Shop Page?
Site search is a common feature online shoppers use to navigate eCommerce websites. At least 30% of your store visitors are using the search box if your site already offers one. Adding a search form to your shop page will help them find your products even faster.
These days, site search is an important part of every successful eCommerce strategy. It’s a major source of revenue, as shoppers who use search are more likely to buy from you than those who don’t.
Site search is often more difficult in larger stores. Site visitors tend to spend more time looking for the products they need. You can make things easier by adding search to specific locations of your store. This will help you increase your conversion rates.
You can add a search form to different locations of your site like the sidebar and the header. But adding one to your shop page (especially at the top) makes it easier to find.

On most mobile devices, your users will need to scroll for a while to find the sidebar. A search form in the header or menu can also go unnoticed in some cases. If you want to make your search form more accessible, you should consider adding it to your shop page.
Adding a search form to your shop page isn’t enough — you also have to make sure your search form is fast and functional.
WooCommerce offers a search feature by default. But if you have a medium or large site, you’ll need a better solution. The default WooCommerce search is slow and doesn’t always give relevant results. This means most of your site users won’t be able to find what they’re looking for.
Want to add a powerful and fast search form to your WooCommerce shop page, even if you’re not tech-savvy?
Below, we’ll show you how to easily do this without writing a single line of code.
How to Add a Search Form to Your WooCommerce Shop Page
Do you want to add a fully featured WooCommerce search form to your shop page?
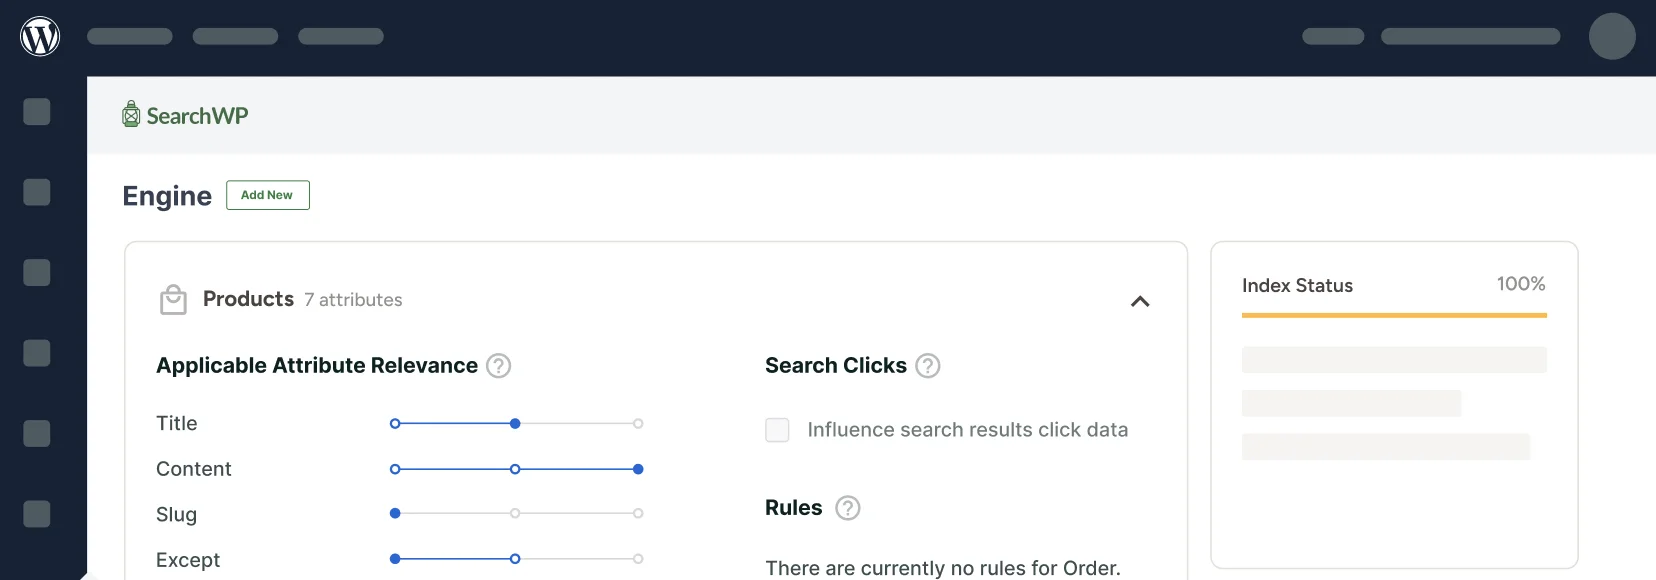
You can use a WordPress plugin like SearchWP. This method lets you offer your users a lot of functionalities without the need to write any code.

It is a leading WordPress search plugin. It has all the search features your WooCommerce site users need. Unlike the default WooCommerce search, they can use it to find any product or post.
SearchWP indexes all your product attributes like variations, categories, and tags. This means your users can now find a product by simply typing any of its attributes in the search bar.
Other awesome features you get include:
- Exclude attributes in results. If you choose, you can exclude certain product attributes so SearchWP doesn’t show results for them.
- Search insights and statistics. With SearchWP, you can now log searches. This way, you’ll learn what your users are searching for. You can then use the statistics gathered to serve them better.
- Search advanced custom fields. Custom fields are good for storing more information about your site content. Your search engine will no longer ignore them when visitors use the search feature.
Once you install and activate the plugin, it automatically integrates with the native WooCommerce search. So, you can easily add a search bar to any location on your site with the block editor.
We’ll show you how to do this now.
Step 1: Install and Activate SearchWP
The first step to adding a search form to your WooCommerce shop page is to grab a copy of SearchWP by visiting the website and creating a new account.
Next, you can go to your SearchWP account and navigate to the Downloads tab. Once there, press the Download SearchWP button to start downloading the plugin ZIP file to your computer.

After that, you need to log into your WordPress admin dashboard to upload and set up the plugin.
If you need some help doing this, then check out this detailed guide on how to install a WordPress plugin.
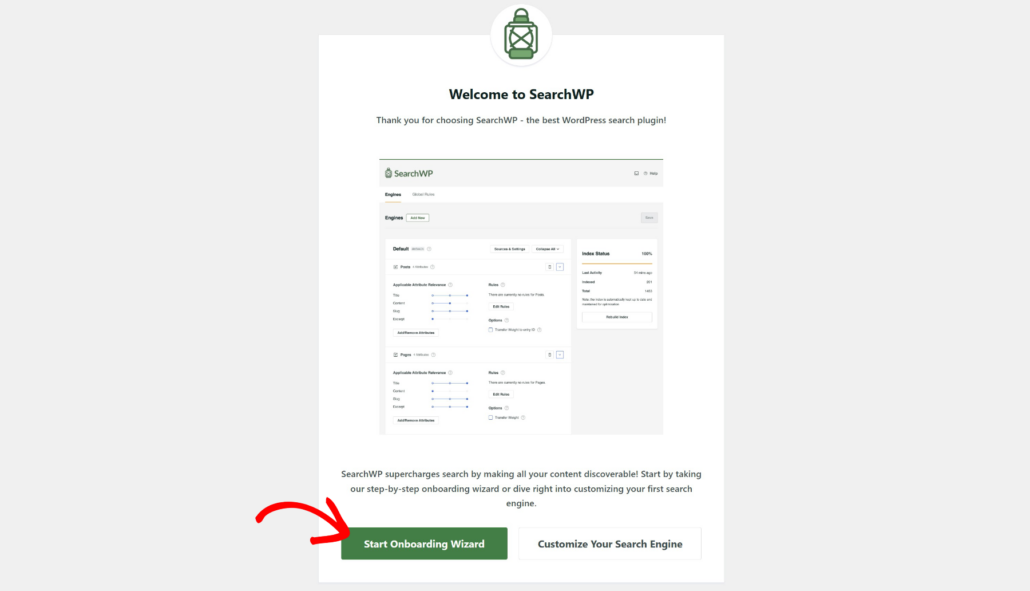
Upon activation, the welcome screen will appear along with the setup wizard. Simply click the ‘Start Onboarding Wizard’ button and follow the onscreen instructions.
Congrats! Your SearchWP plugin is now ready for use.
Now, let’s look at how to use it to power your WooCommerce search.
Step 2: Install and Activate the SearchWP WooCommerce Extension
The SearchWP WooCommerce extension helps customers find products on your store.
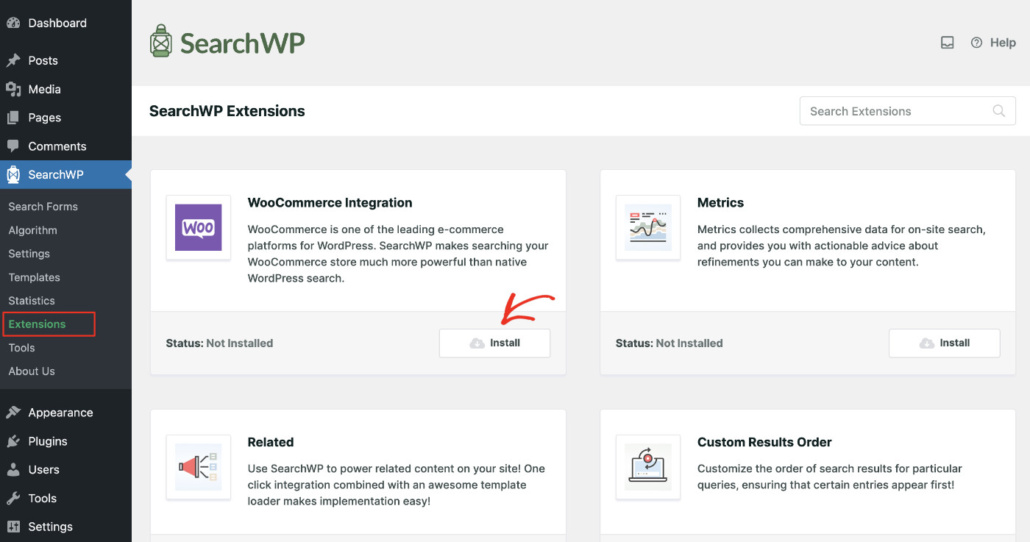
First, you will need to go to SearchWP » Extensions from the WordPress dashboard. Then head to WooCommerce Integration and click the Install button.
The next thing you need to do is set up your first SearchWP search engine.
Step 3: Set Up a New SearchWP Search Engine
SearchWP gives you a lot of control over how your users look for content on your site. You can select from a list of sources and adjust the relevance of each attribute.
To make sure your store visitors can find products on your shop page, you need to add products as a source in the search engine.
To do this, you will need to go to the SearchWP » Algorithm page from your WordPress dashboard.
Here, you get the option to edit the default search engine or create a new one. For this tutorial, we will edit the default WordPress engine.
Go ahead and click the Sources & Settings button.
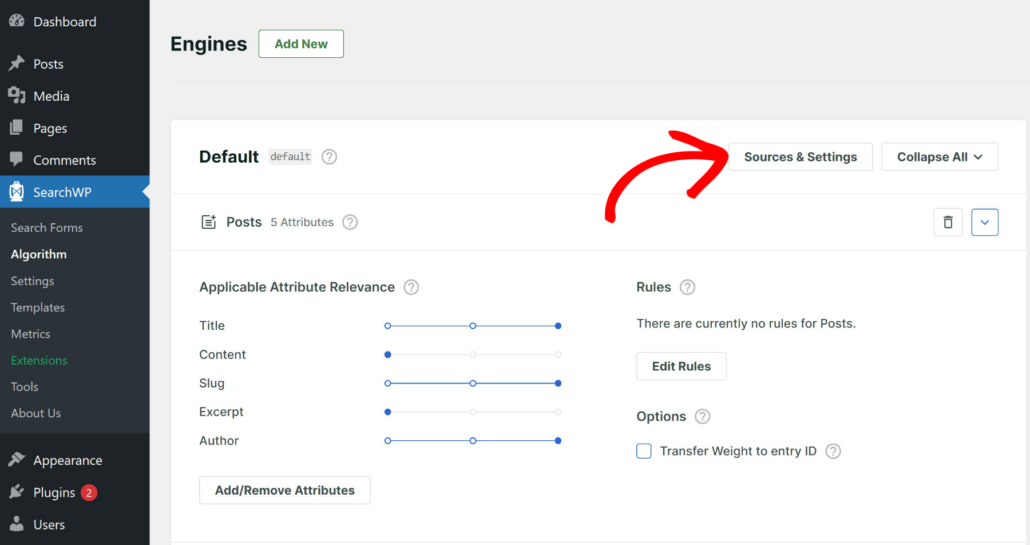
Next, you’ll see different sources that the default engine will use.
Make sure to tick the Products box from the list of sources available.
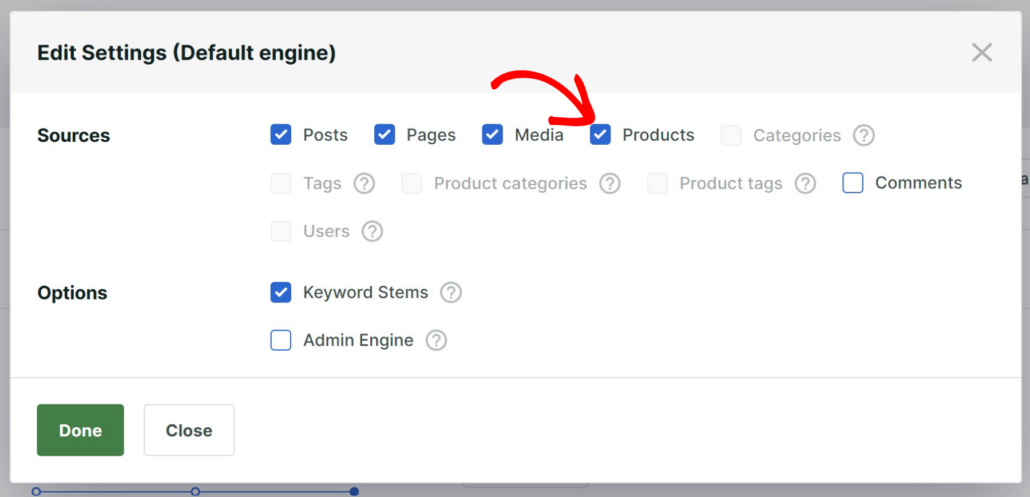
When you’re finished, simply click the ‘Done’ button.
After selecting products as a source, scroll down to the newly added Products tab and click Add/Remove Attributes.
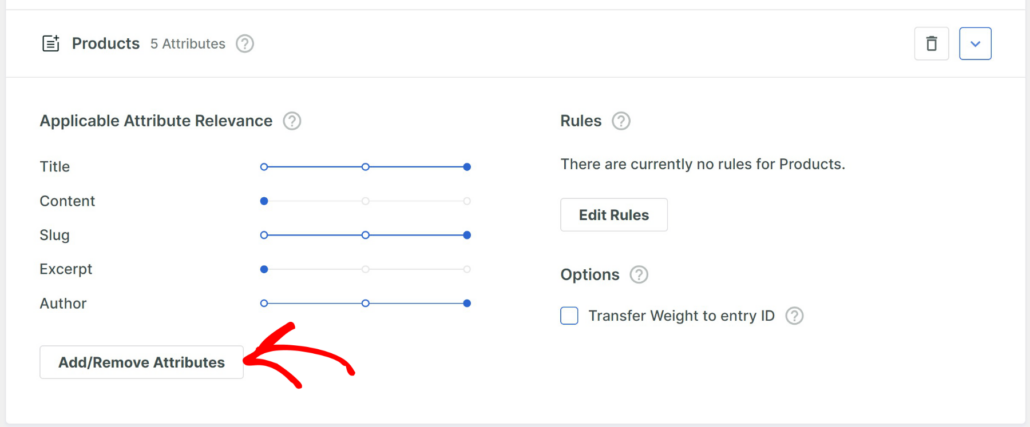
Here, you can choose to index any product attribute like the title, content, slug, excerpt, and author.
You can further improve your WooCommerce search with custom fields and taxonomies. This will let your users find products with attributes like colors, tags, variations, categories, and shipping classes.
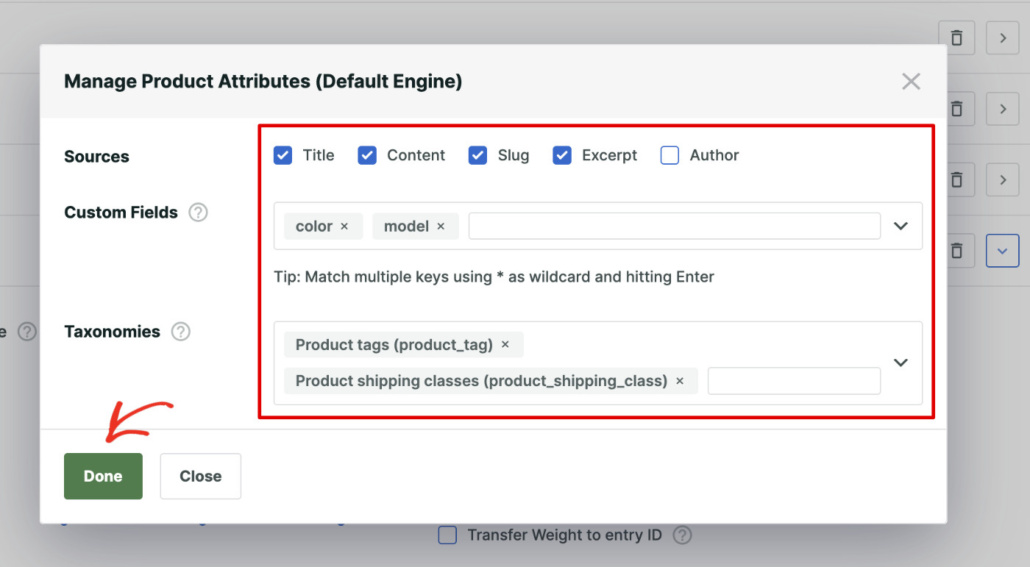
Once you’re done selecting product attributes, click Done.
Next, you can scroll to the top and click Save. SearchWP will now apply the new settings.
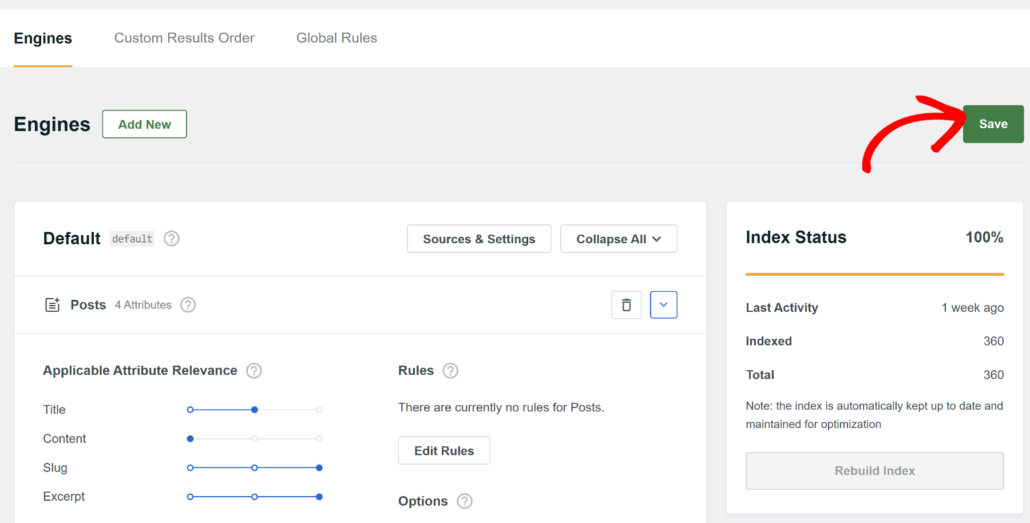
Next, let’s add the search form to your shop page.
Step 4: Add a Search Form to Your Shop Page
Using the block editor, you can add a search form to any page in your WordPress site. We’ll add one to your shop page now.
First you need to find your shop page by going to Pages » All Pages.

Next, you can navigate to the Shop page.
From here, hover over it with your mouse and click Edit.

Once you are in the WordPress content editor, you can add a new Search block to show a WooCommerce search form.
Simply click the + icon at the top and select the Product Search block.
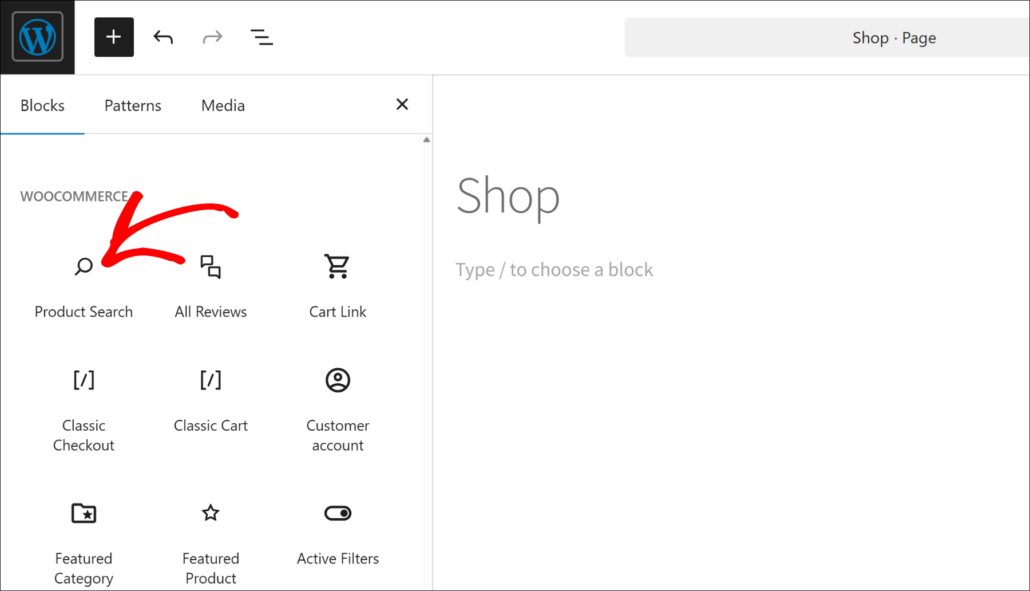
Next, you’ll see a preview of the search form in the content editor.
From here, you can simply update or publish your product page.
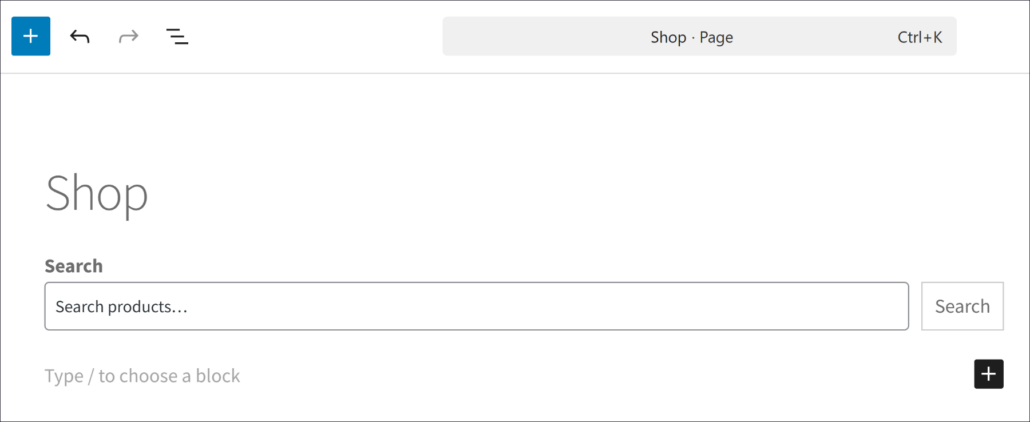
You’ve successfully added a WooCommerce search form to the store page.
Now, when your users visit your shop page, they can easily search for the products they want.

We hope this article helped you learn how to add a search form to your WooCommerce search page. You may also want to see our guide on how to add a custom WooCommerce search widget and how to customize the WooCommerce search results page.
If you’re ready to add a search form to your shop page, then start by getting your copy of SearchWP.
