Elementor is one of the most popular website builders in the market. However, if you’re scratching your head, why the search results page isn’t working.
Well, you’re not alone. There are several reasons that can cause problems with a search results page created with Elementor.
In this guide, we’ll look at the most popular of these reasons, find out why they occur, and talk about how to fix them.
Here is a table of contents to help you navigate through this article:
- Fix Elementor Search Results Page Not Working
Let’s begin!
Reasons Why Elementor Search Results Page Not Working
Let’s look at the 2 most common situations when you might have problems with your Elementor search results page.
1. Picking the Wrong Page Template
The most popular reason why your Elementor search results page isn’t working is that you chose the wrong page template.
The thing is, there are 2 different Elementor search page templates. The first is for regular blog posts and pages, and the second is for WooCommerce products.
So if you’re a WooCommerce store owner, and you don’t see search results on your Elementor search page, the chances are that you’ve chosen the wrong template.
2. The Default WordPress Search is Weak
Another popular reason your Elementor search page doesn’t show any results is that WordPress hasn’t found any relevant matches.
In this case, you may think that the search on your site is broken, especially if you’re a beginner who just created your first page with Elementor.
But the actual reason is that the default WordPress search engine is far from perfect.
For example, it doesn’t consider post custom fields, tags, categories, and other valuable data when performing a search.
It also doesn’t correct mistakes in search queries, so if you make a typo, you won’t get any results.
Thankfully, this problem is easy to fix. We’ll show you how to customize your search results page to make it smarter further in this article.
Fix Elementor Search Results Page Not Working
After you’ve learned the most popular reasons that can lead to an Elementor search results page not working, let’s look at how you can fix them.
How to Choose the Right Search Results Page Template
The first step is to check if you chose the right template when you created the Elementor search results page.
Step 1: Check Out What Template You Chose
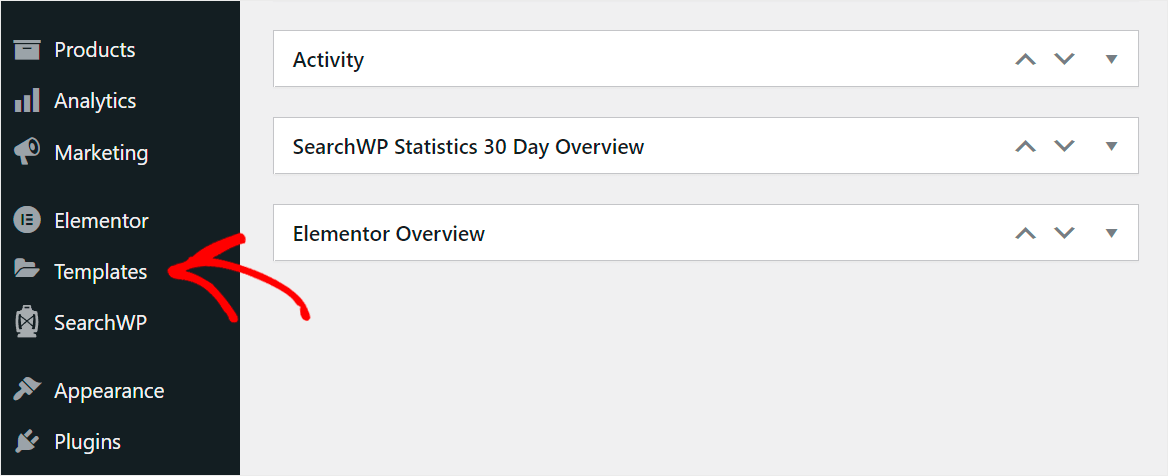
To get started, navigate to the Templates tab in your WordPress dashboard.
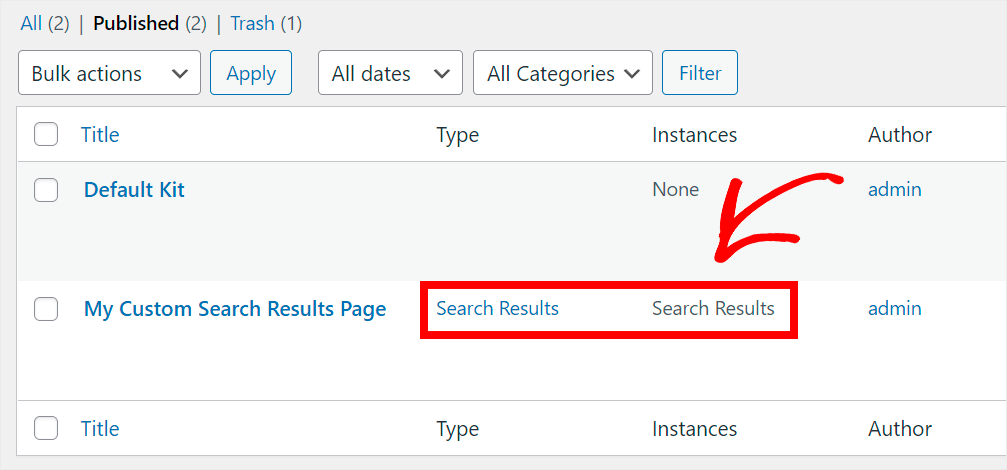
Then, find the search results page you created and check out its Type.
If it’s set to the Search Results type, you’ll see only regular blog posts and pages among your site’s search results.
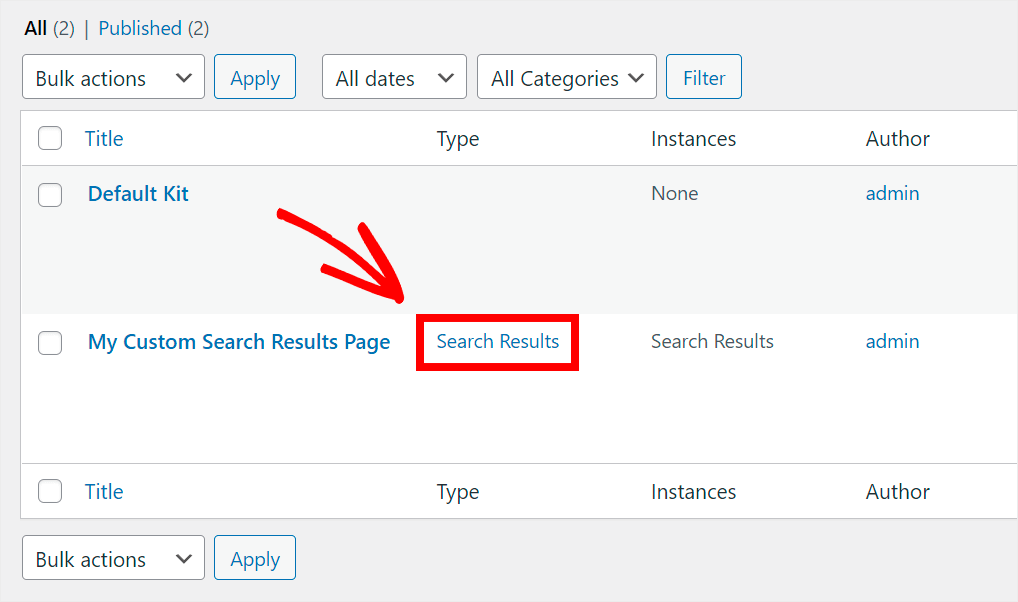
If you want WooCommerce products to appear on your Elementor search results page, you’ll need to create a page with another type.
Let’s see how you can do that in the next step below.
Step 2: Create the Search Results Page Using the Right Template
To get started, navigate to Templates » Add New in your WordPress dashboard.
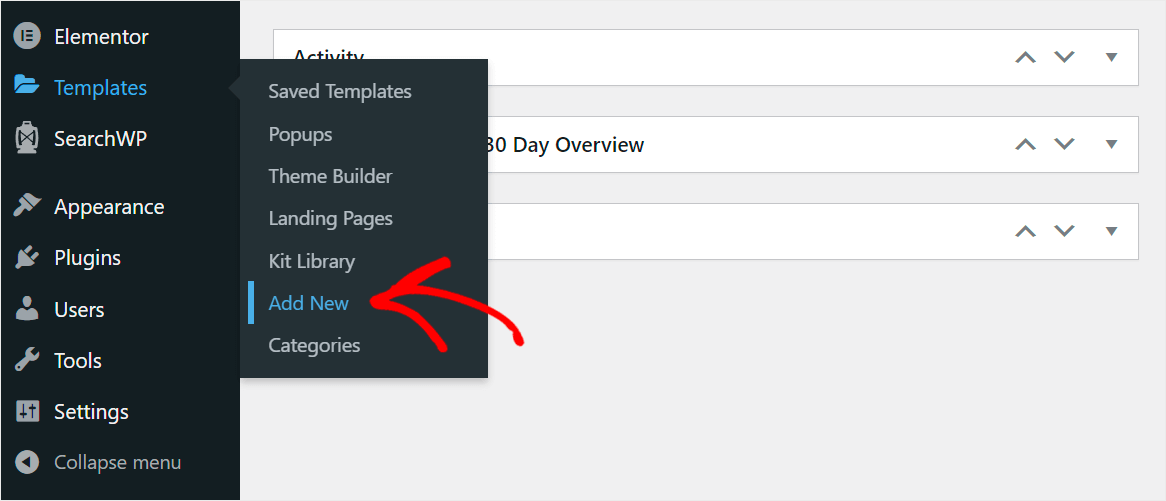
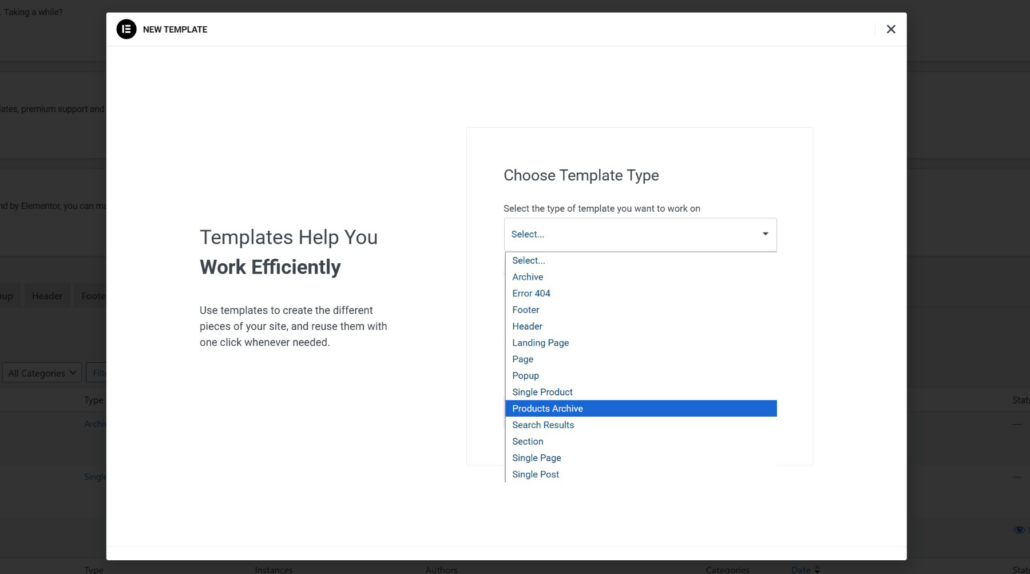
In the next step, you can choose the type of page template you want to create.
For example, to create a search page for WooCommerce products, click on the dropdown menu and choose the Products Archive type.
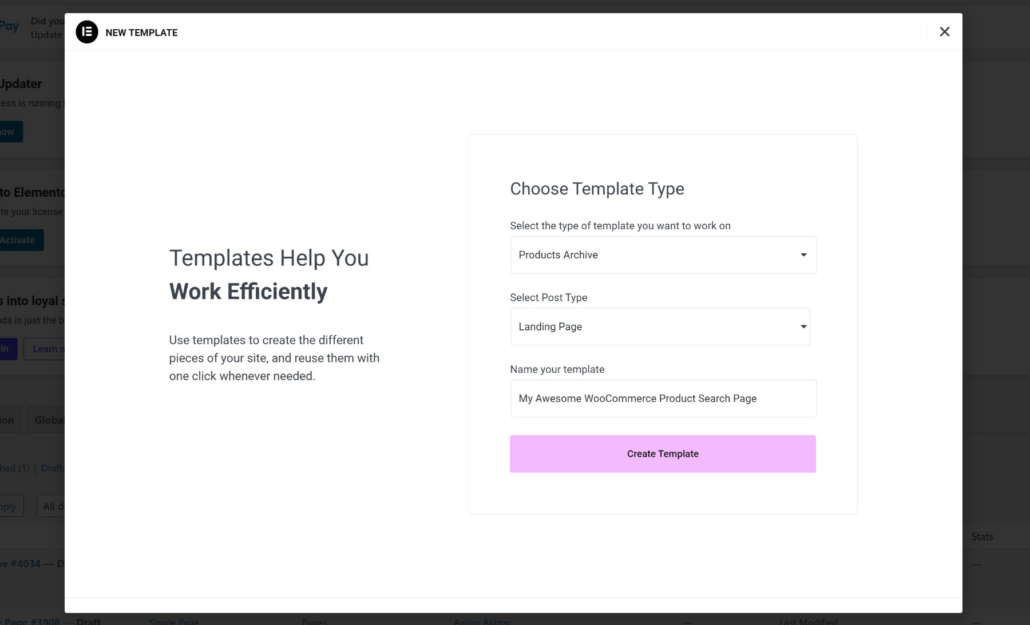
Then, you’ll also need to select the Post Type from the dropdown menu.
After that, simply enter the name of your template and press the Create Template button.
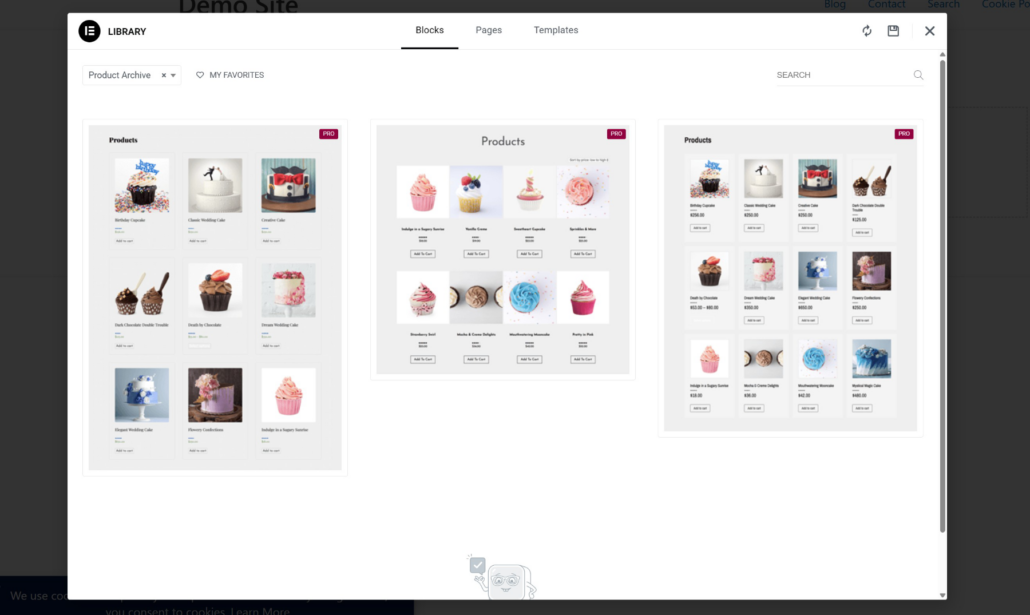
Step 3: Choose One of the Ready-Made Product Archive Pages
Next, Elementor will offer you a selection of ready-made product archive pages to choose from.
Simply hover your mouse over the template that suits you best and insert it.
Step 4: Publish Your Template and Add a Condition
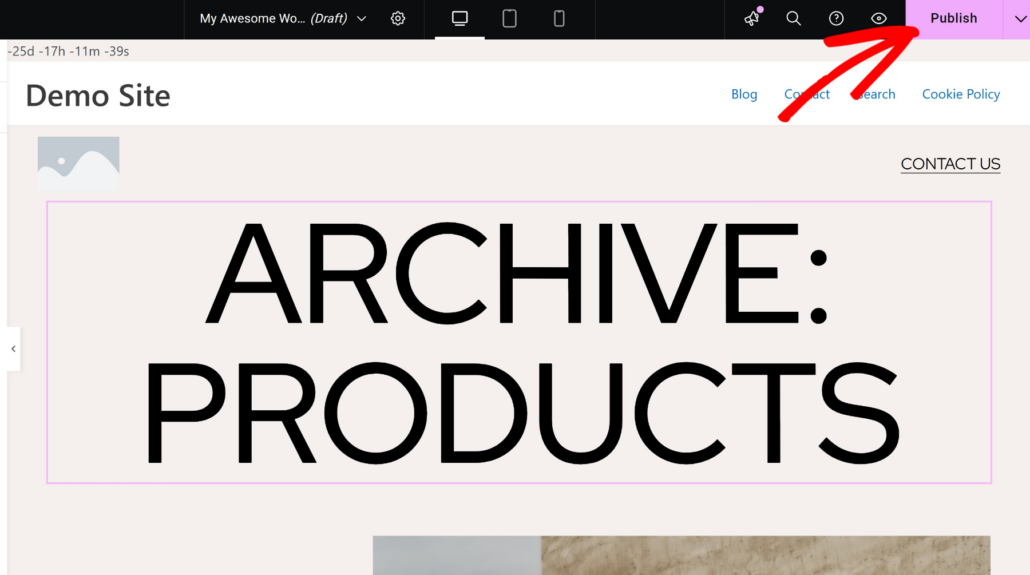
After choosing a template, you can customize your WooCommerce product search results page just like any other page you customize with Elementor.
When you’re happy with how it looks, click Publish in the top right corner of your page.
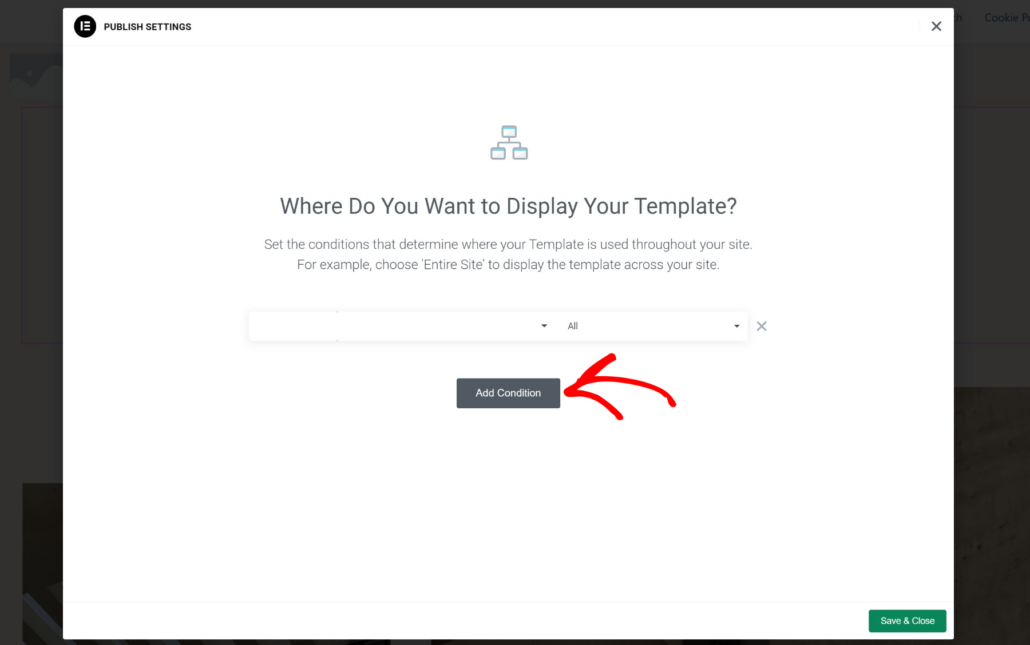
In the next step, you can add a condition to your template. A condition specifies where your template is used on your site.
To get started, you can click the Add Condition button.
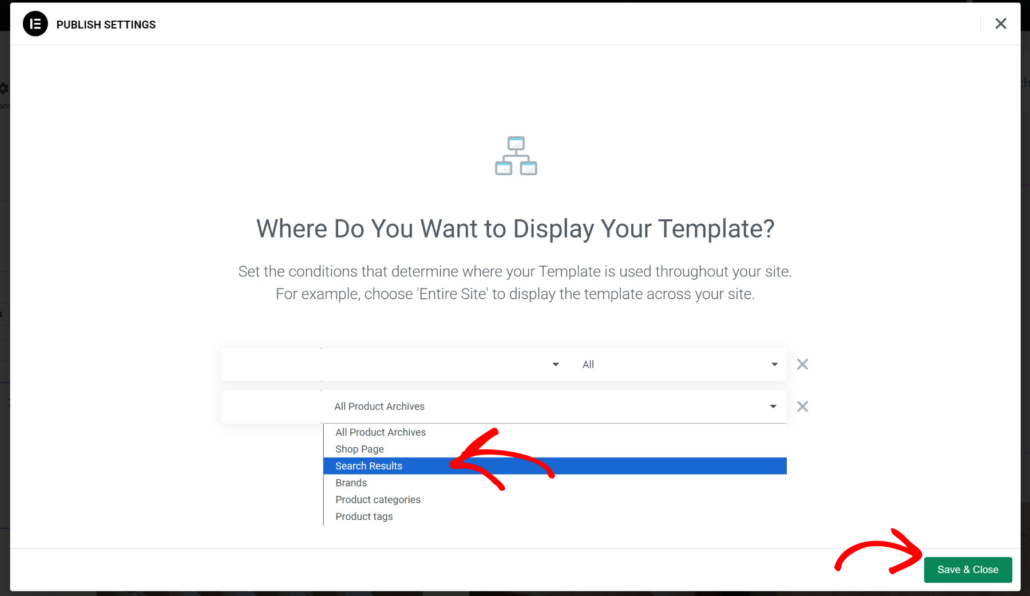
Then select the Search Results option from the dropdown menu.
When you’re finished, simply click Save & Close in the bottom right corner to save the condition.
That’s it. You’ll now see the search results page you created every time you search for WooCommerce products on your site.
How to Customize Your Search Results Page
The second reason your Elementor search results page is not working is that the default WordPress search is weak.
The easiest way to make your search results page smarter is to use a plugin like SearchWP.

This is the best WordPress search plugin trusted by over 50,000 site owners worldwide.
After installing it, you get complete control over how search works on your site and can customize it to meet your needs.
For instance, SearchWP allows you to add multiple search forms to your site, change the order of search results, and much more.
This way, you can help your visitors find what they’re looking for on your site faster and improve their user experience.
Here is a quick overview of how else you can use SearchWP to grow your business:
- Show search results in live mode: Display search results on your site in real-time without writing a single line of code.
- Exclude specific pages from search: Hide any page on your site from appearing on search results in a few clicks.
- Create custom search fields: Add custom search fields to your site to deliver more relevant results to your visitors.
- Track searches of your visitors: Collect data on what visitors are looking for on your site and use it to get new content ideas.
Now that you know how SearchWP can help you improve your search results page, let’s see how to install and configure this plugin.
Step 1: Install and Activate SearchWP
The first step, you’ll need to grab your copy of SearchWP by visiting the website and signing up for a new account.
After that, you can navigate to your SearchWP account dashboard and click Downloads.
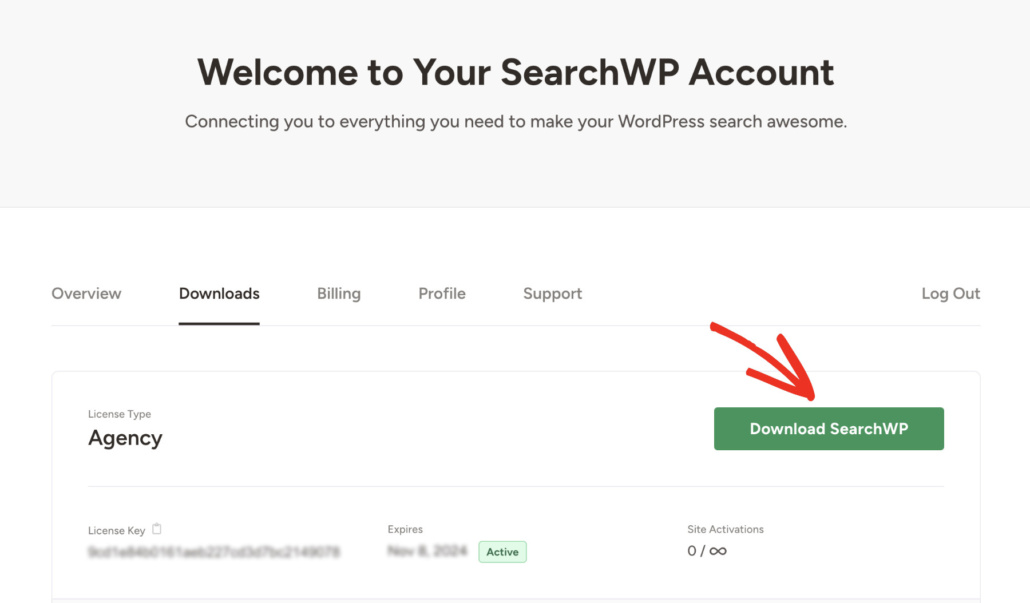
Once you get to the Downloads page, press the Download SearchWP button to start downloading the plugin to your computer.
When you finish downloading, you should also copy the SearchWP license key on the same page. You’ll need it further to activate your copy of the plugin.
The next step is to install SearchWP. To do that, you’ll need to upload the downloaded file to your site. If you need help with that, you can check out this how to install a WordPress plugin detailed step-by-step tutorial.
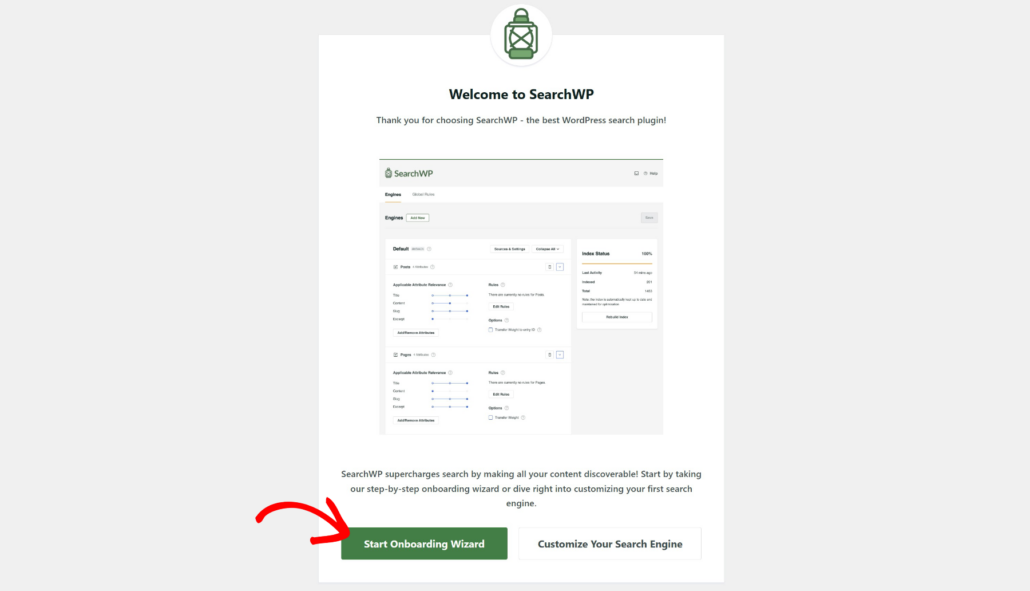
Upon activation, you’ll see the setup wizard. Simply click the ‘Start Onboarding Wizard’ button to configure the plugin.
Now that SearchWP is up and running on your site, you can customize the WordPress search.
To learn more, please see our guide on 11 ways to improve WordPress search.
Step 2: Customize Your Elementor Search Results Page
Using SearchWP and Elementor, you can completely customize the search results page on your site.
SearchWP offers pre-built templates that you can use for your results page.
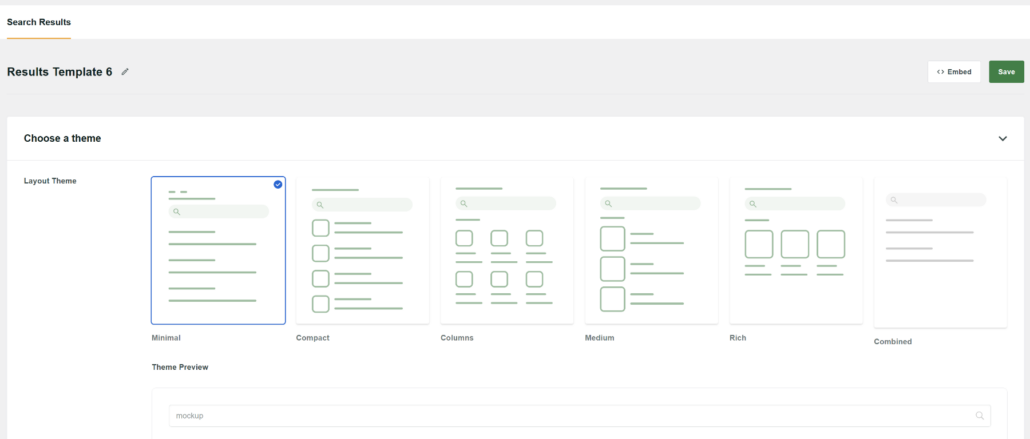
It also offers lots of customization options, which give you more control over how search results appear on your site.
For more details, please see our guide on how to create a search page in WordPress.
The best part is that you can easily add the search results template in Elementor using the SearchWP Results widget.
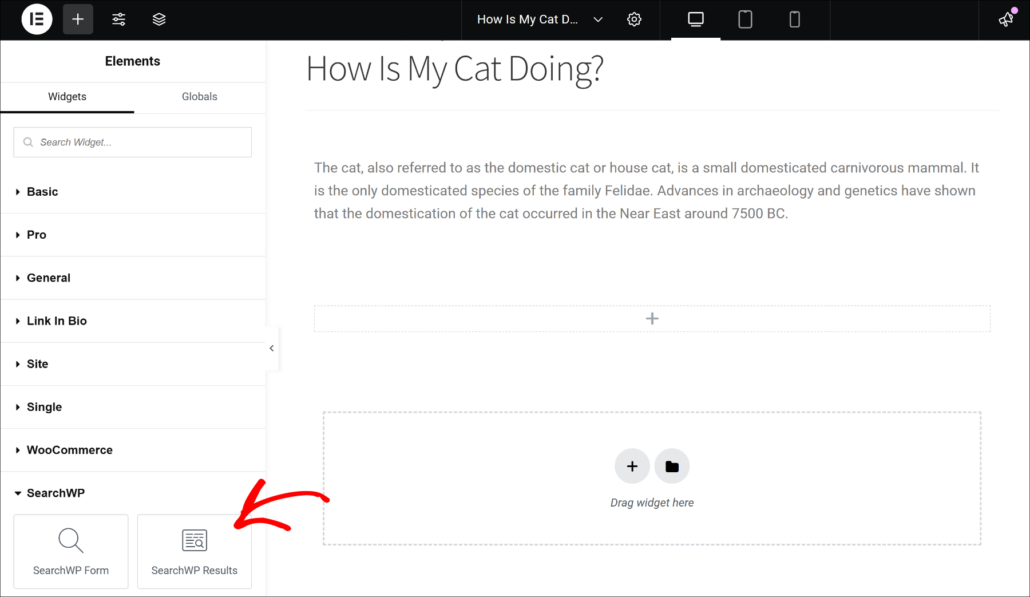
For more details, check out our guide on how to customize your Elementor search results page step-by-step tutorial.
By following the steps in this guide, you’ll be able to easily tackle any possible problems with Elementor search results pages and give the best user experience to your visitors.
We hope this article helped you learn how to fix the Elementor search results page that isn’t working on your site. You may also want to see our guide on how to fix WooCommerce product search not working and how to find out why your Elementor search form not working.
If you’re ready to empower search on your site and grow your business, you can get started with SearchWP here.
