Do you want to know how to add a search box to a WordPress page?
It’ll encourage your visitors to perform a search, boost your content discoverability, and increase the number of pageviews you get.
From this guide, you’ll learn how to add a search box to your pages in a few clicks, even if you’re a complete newbie to WordPress.
Let’s begin!
Benefits of Adding a Search Box to a WordPress Page
Adding a search bar to your pages will help you:
- Get more pageviews: When visitors see a search bar in a blog post or page, there is a great chance they’ll use it, especially if you motivate them to do that.
- Boost your content discoverability: Give your content with low view counts another chance to be discovered.
- Deliver more relevant search results: Help your visitors faster find what they’re looking for by limiting your search boxes to specific content types or categories.
- Increase the average session duration: The more of your content visitors explore, the longer they stay on your site.
- Rank higher in search engines: A high average session duration is a strong signal to Google that your site is worth getting better positions in search results.
With that, let’s see how you can add a search box to a page in WordPress.
How to Add a Custom Search Bar in WordPress
The easiest way to add a custom search bar to your WordPress pages is to use a plugin like SearchWP.

This is the most beginner-friendly WordPress search plugin that comes with a ton of useful features.
With SearchWP, you can completely customize the work of search on your site to meet your business goals.
For example, you can change the order of search results, limit search to only posts, add live autocomplete search, and many more.
And that’s just a short list of the plugin’s features!
SearchWP also allows you to:
- Track searches of your visitors: This way, you can find out what your audience is interested in and give them the content they want.
- Add multiple search forms to your site: It allows you to create custom search forms for specific needs and place them across your site.
- Highlight search terms in search results: It makes it easier for your visitors to recognize if they’ve found what they’re looking for in your search results.
- Enable fuzzy search on your site: Due to that, your visitors will find the right content, even if they make a typo in a search query.
Over 50,000 website owners already use SearchWP to enhance their search and deliver more relevant search results to their visitors.
Ready to join them? Then, let’s see how you can use this plugin to add a search box to your pages.
Step 1: Install SearchWP
To get started, you’ll need to get your copy of SearchWP by visiting the website and signing up for a new account.
Once done, simply head over to your SearchWP account and go to the Downloads tab.

Next, you can press the Download SearchWP button and save the plugin’s ZIP file to your computer.
After downloading, copy the license key in the bottom left corner.
The next step is to install and activate the SearchWP plugin on your WordPress website.
First, you’ll need to upload the downloaded ZIP file to your site. You can check out the how to install a WordPress plugin tutorial if you need help with that.
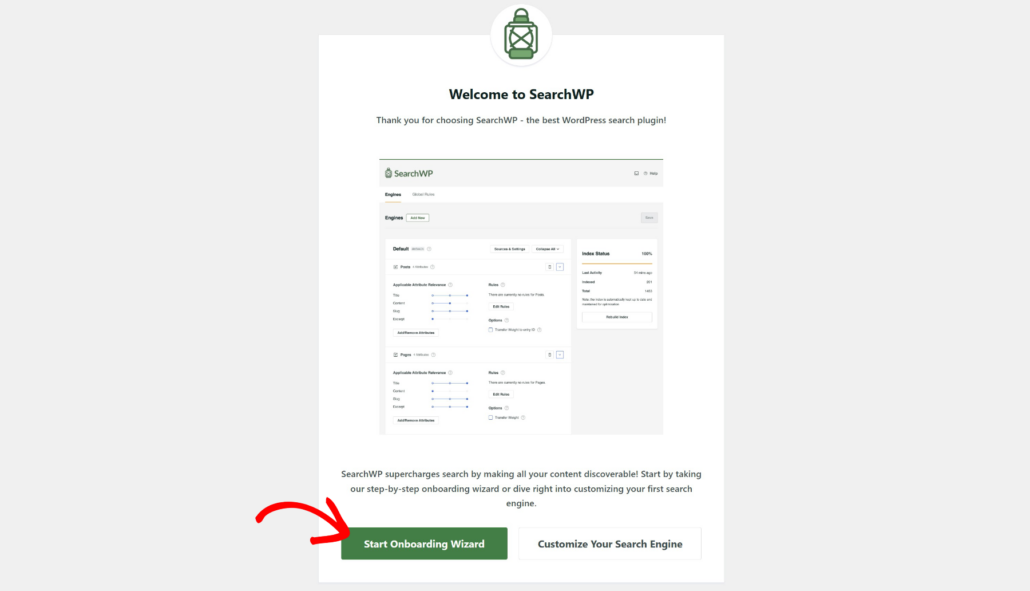
After that, you will see the SearchWP welcome screen and setup wizard. Go ahead and click the ‘Start Onboarding Wizard’ button and follow the onscreen instructions.
After installing SearchWP, navigate to your WordPress dashboard, point your cursor over the SearchWP button at the top bar and click Activate License.
Now, you’re ready to customize your search engine.
Step 2: Customize Your Search Engine
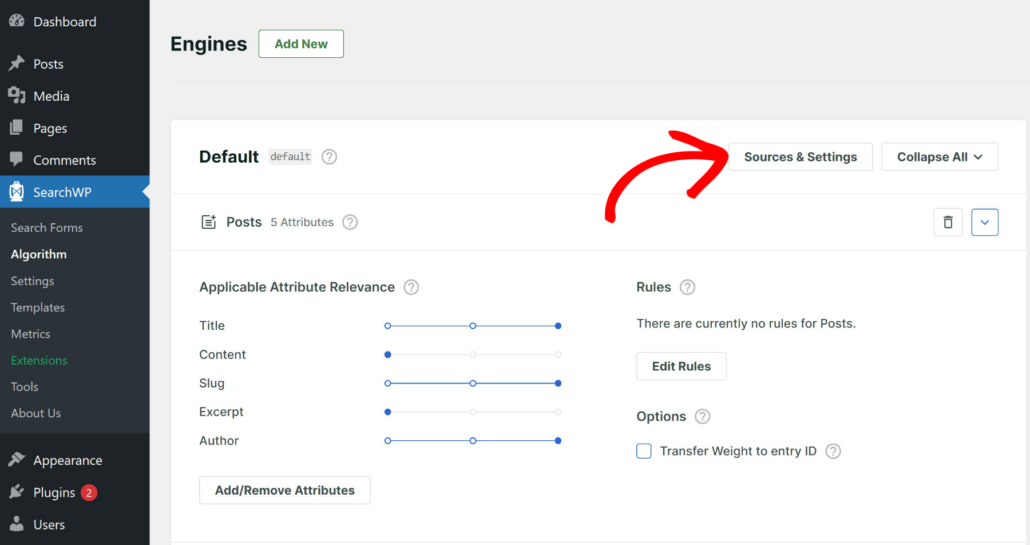
Next, you can head to SearchWP » Algorithm from your WordPress dashboard to customize the search engine.
You can consider search engines as a set of rules that they follow when performing a search. By customizing these rules, you can change how search works on your site.
For example, you can include custom fields, exclude specific pages from search results, enable search by post tags, and many more.
To get started, click the Sources & Settings button.
Next, a popup window will open where you can select the sources for your search engine.
As you can see, there are 4 search sources: Posts, Pages, Media, and Users.
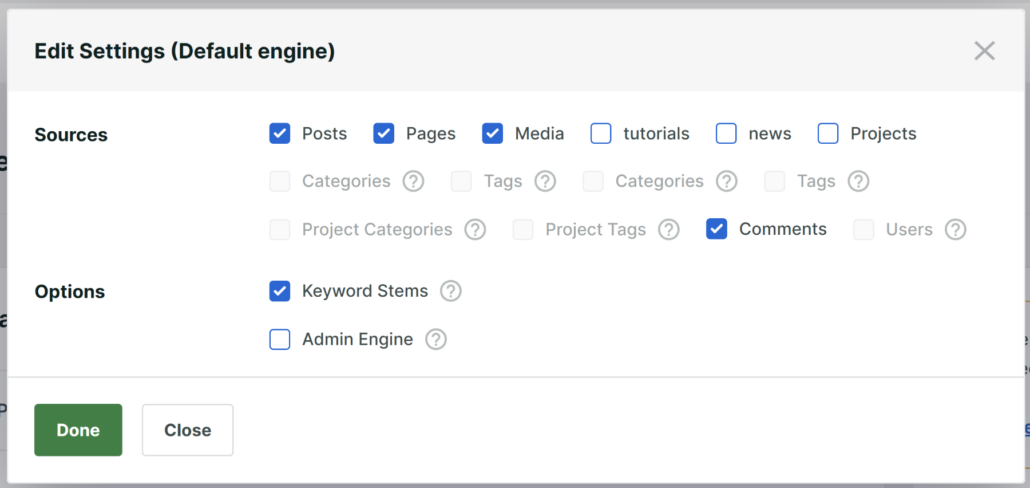
Let’s say you want this search engine to search only among posts. This way, we can clean up search results on our site and help our visitors find the right content faster.
Then, uncheck all search sources except Posts.
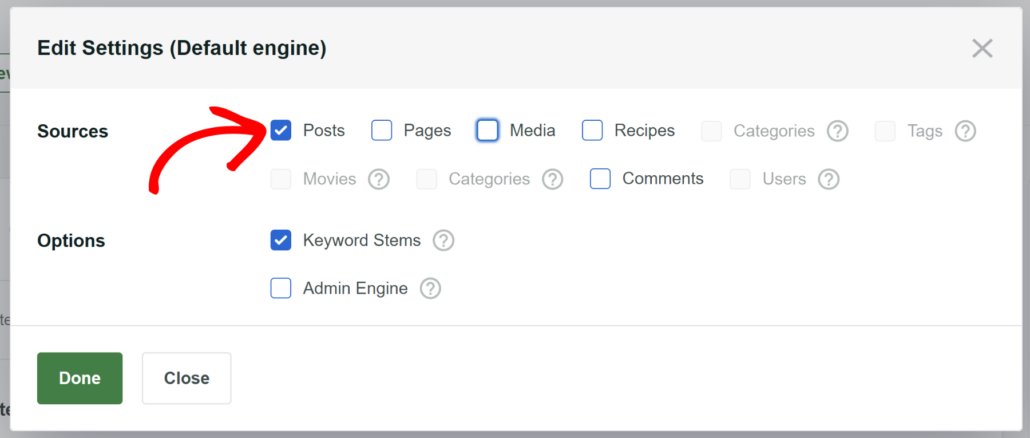
When you’re finished customizing your search engine settings, press Done.
Next, you can also give our visitors the ability to search for posts by tags and custom fields.
To get started, simply head to the Posts section and click the Add/Remove Attributes button.

Next, a new window will popup, where you can specify what custom fields and taxonomies you want to consider when performing a search.
For example, let’s say you have a real estate website. You can include a custom field like number of bedrooms in the search process.
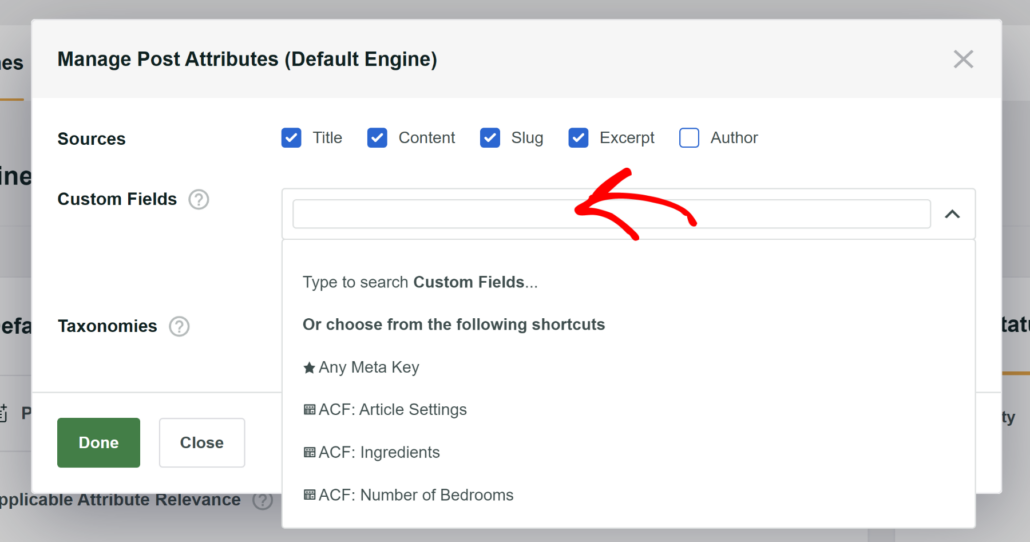
Next, you can also allow search by post tags and categories.
First, click on the Taxonomies field and then select ‘Tags (post_tag)’ or ‘Categories (category)’ from the dropdown menu.
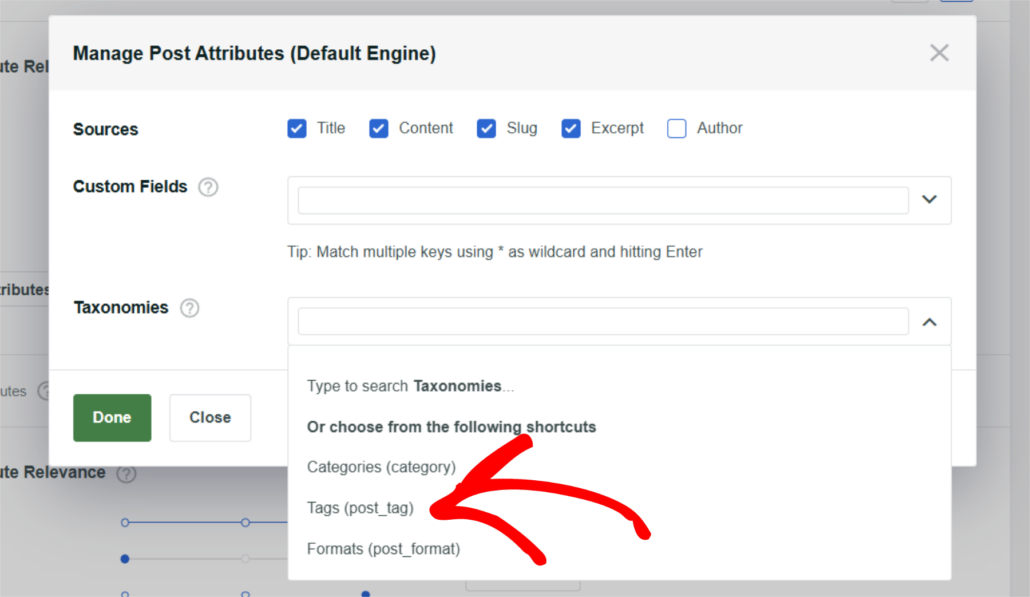
Next, find the Tags taxonomy and click on it.
Now visitors of our site can search for posts by their tags and custom fields.
When you’re finished managing the attributes, press Done to save the changes.
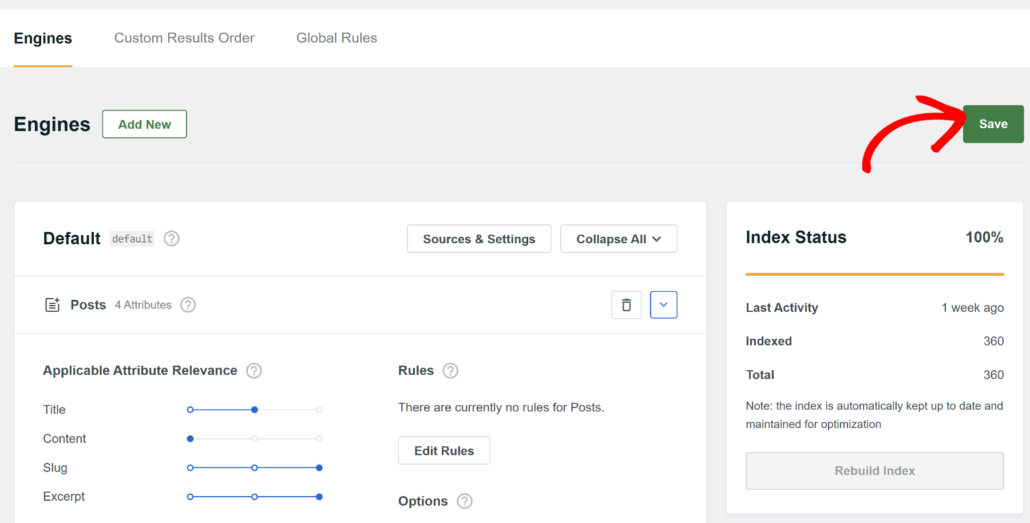
The final step is to save your search engine. To do that, click the Save Engines button in the upper right corner.
Step 3: Create a Search Form
Now that you’ve customized the search form, the next step is to create a new search form.
First, you can head to SearchWP » Algorithm from your WordPress dashboard and then click the ‘Add New’ button.

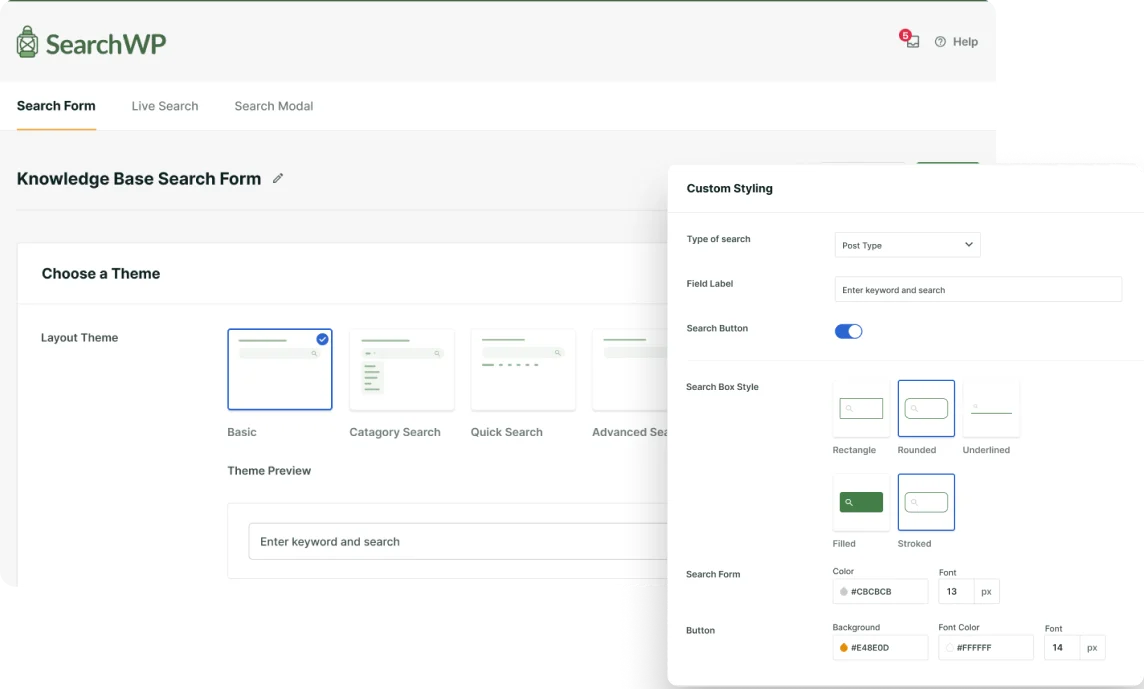
On the next screen, you can change the name of the form at the top.
After that, SearchWP offers different theme layouts to choose from.
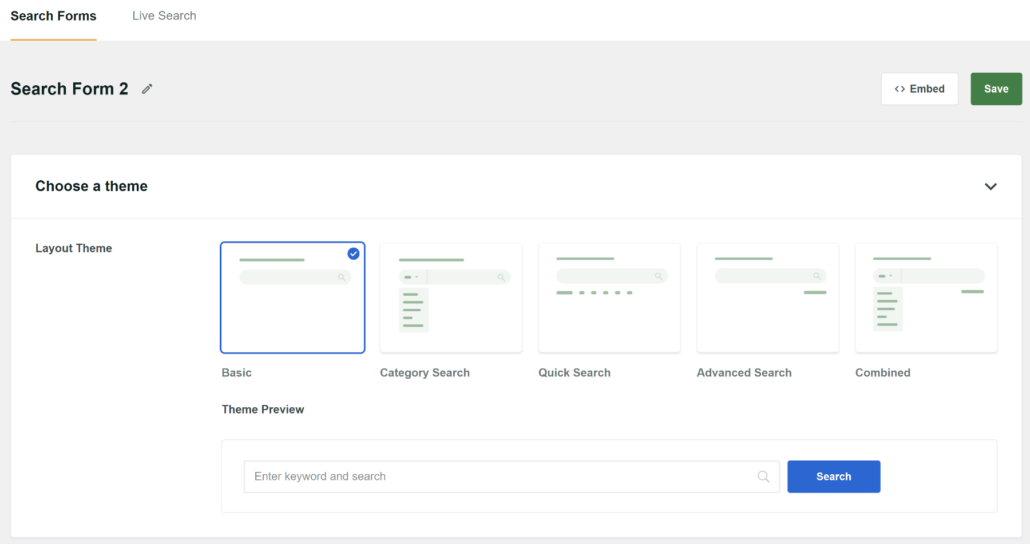
If you scroll down, then you’ll see more options to customize the form.
Plus, you get to select which engine, results page, and more for your form.

To learn more, you can see our guide on how to create a custom search form in WordPress.
Step 4: Add a Search Bar to Your WordPress Page
Now, SearchWP also offers an option to automatically embed the search form on any page.
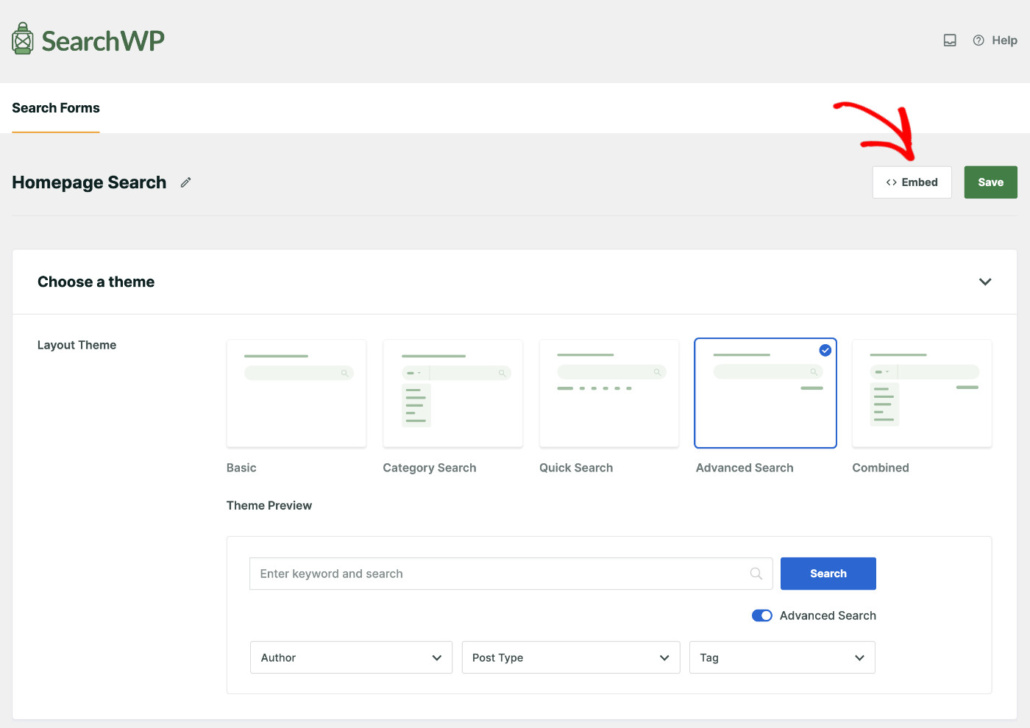
You can simply click the Embed button in the Search Form page.
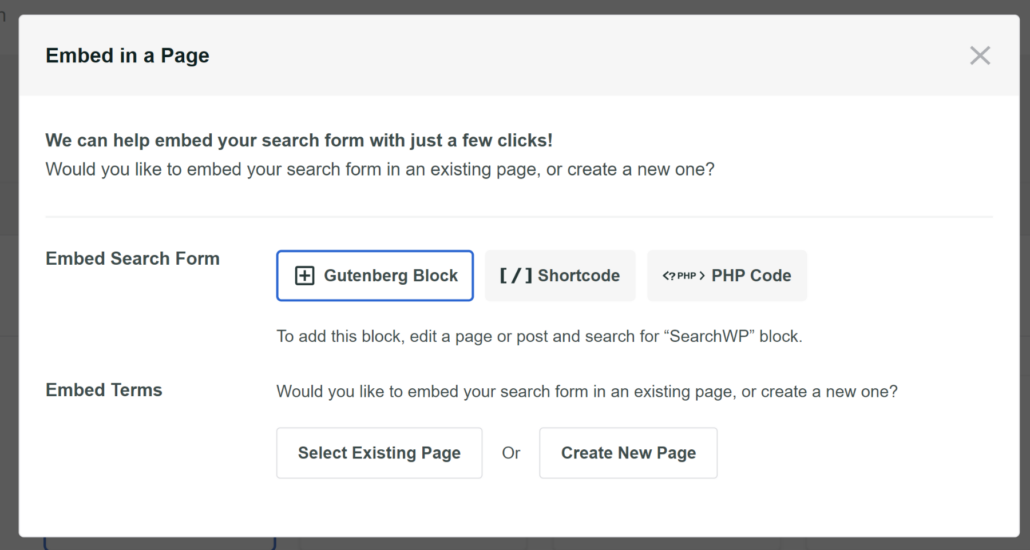
Next, a new window will open with different embed options, which includes Gutenberg Block, Shortcode, or PHP code.
For this tutorial, we’ll select the ‘Gutenberg Block’ and add it to a new page.
Alternatively, you can also add a SearchWP block to any page and display a search box.
To get started, navigate to Pages » Add New in your WordPress dashboard.

After you get to the page editor, click the + button to add a new block.
Simply navigate to the SearchWP Form block and add it your page.
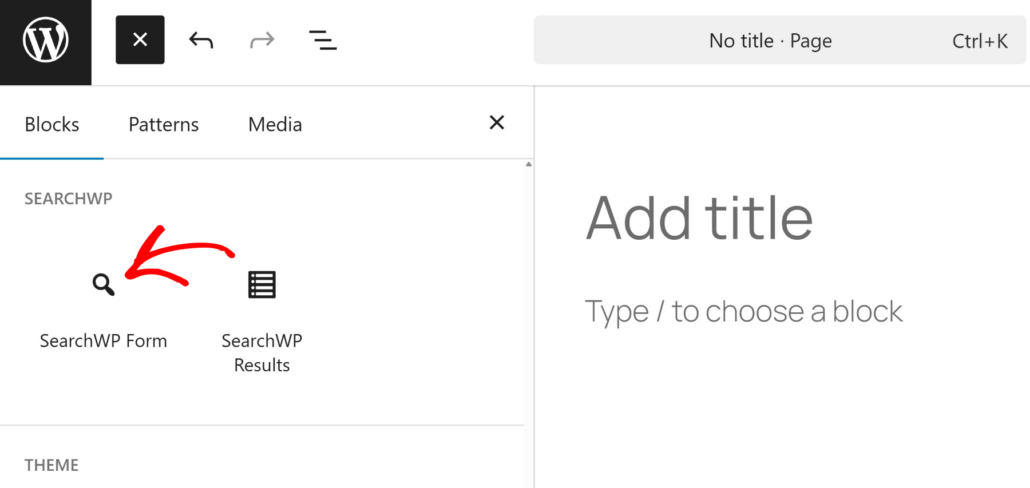
After that, you will need to select your search form.
Simply click the dropdown menu in the SearchWP Form block and choose the form.
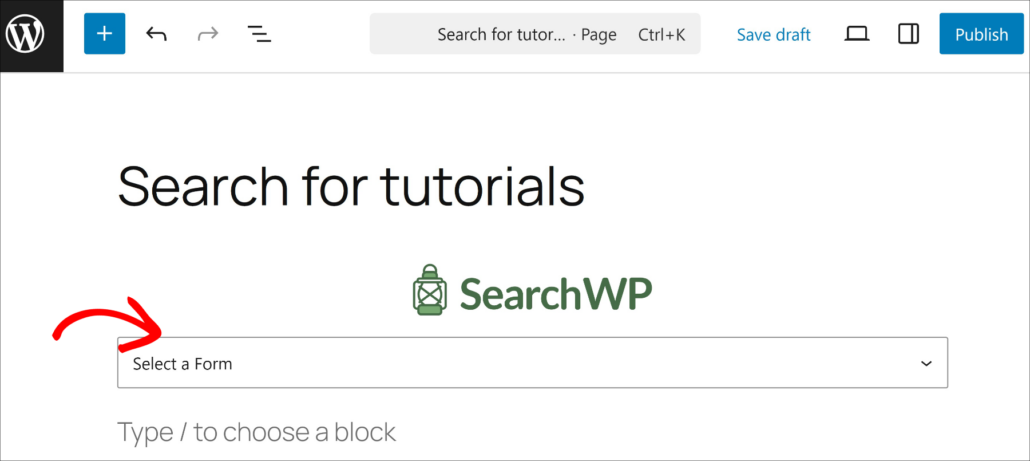
When you’re done, go ahead and click the Publish button.
Once the page is live, you can check out your new search page.
Here is how this page looks on our test site:

Let’s also test our search box to make sure it works correctly.
We have many posts on our site related to WordPress in various categories, but only one of them is attached to the Tutorials category.
Let’s see what results we’ll get by searching for WordPress.

As you can see, we only find our single post that’s placed within the Tutorials category.
It means that our search box works the way it’s supposed to.

Add Search Box to WordPress Page Builders
The best part about using SearchWP is that you get to add the search form to some of the most popular WordPress website and landing page builders.
Let’s look at how you can easily add a search box to each of them.
1. Oxygen Builder
Oxygen is a robust visual site builder that gives you granular control over your site’s design.
If you are using Oxygen to build your layout, you can easily integrate a search form using the SearchWP Form element.
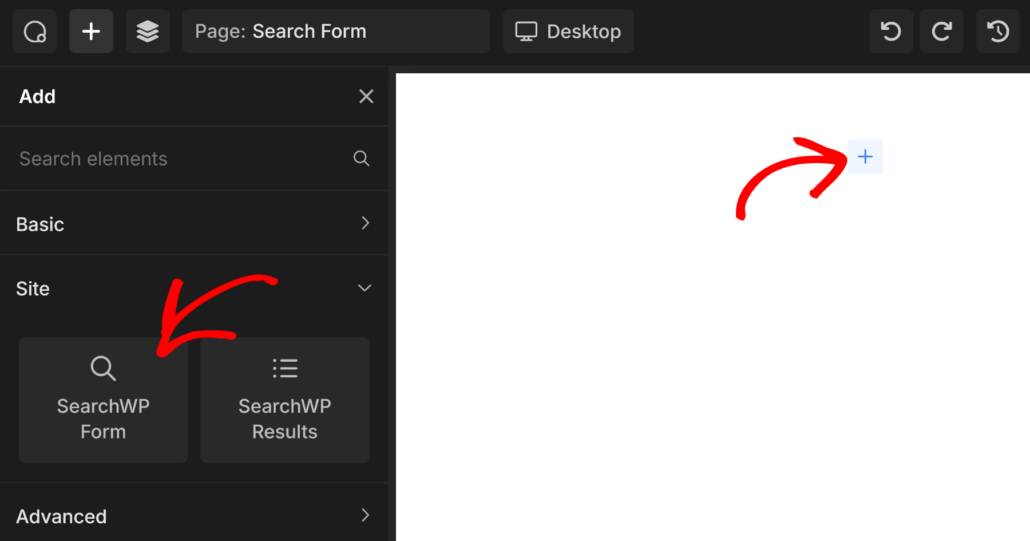
Simply add the element and pick your form from the dropdown menu. There is also a SearchWP results element that you can add to your landing page.
For more details, please see our guide on how to add a search box using Oxygen visual site builder.
2. Elementor
As one of the most popular page builders in WordPress, Elementor makes dragging and dropping elements simple.
SearchWP integrates seamlessly with Elementor, allowing you to place a search widget anywhere on your page.
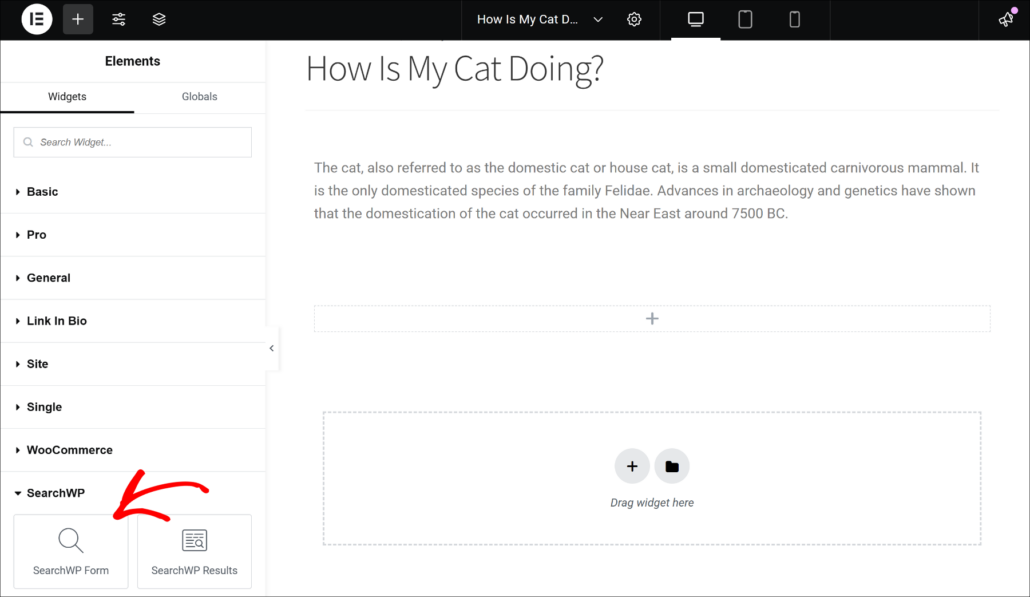
This way, you can add powerful search forms to your stunning landing pages in Elementor.
You can find more details in our guide on how to add a search box to an Elementor page.
3. WPBakery
WPBakery Page Builder remains a popular choice for many WordPress sites, offering both front-end and back-end editing capabilities.
You can utilize specific content elements to place a search form within your WPBakery rows and columns.
To add a search form in WPBakery, you can simply add the SearchWP Form element anywhere on the page.
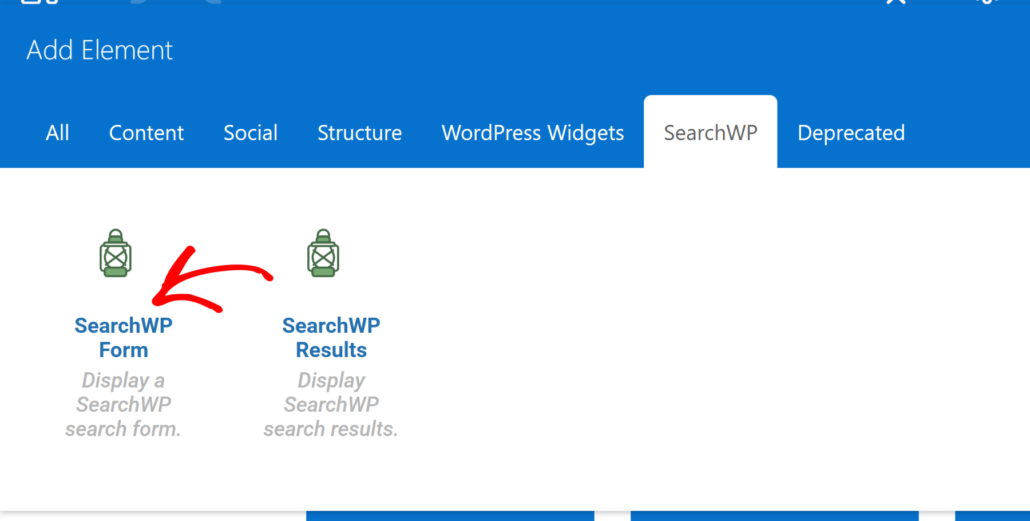
For step-by-step instructions, please see our guide on how to add a search box in WPBakery page builder.
4. Breakdance
Breakdance is a modern builder known for its speed and user-friendly workflow.
Adding a functional search form to your Breakdance design is a straightforward process that ensures your visitors can find exactly what they need.
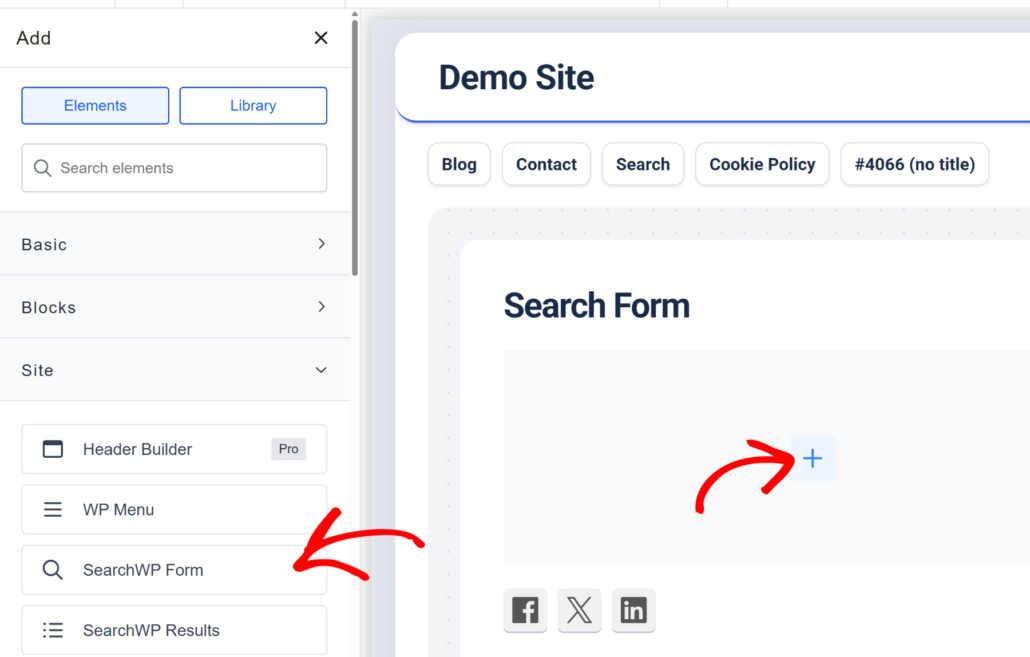
You can learn more by following this guide: how to create a search form in Breakdance.
5. Beaver Builder
Beaver Builder is one of the most popular page builders and provides a reliable and clean interface for constructing your pages.
If this is your preferred tool, you can use the built-in modules to display a search form that is fully compatible with SearchWP.
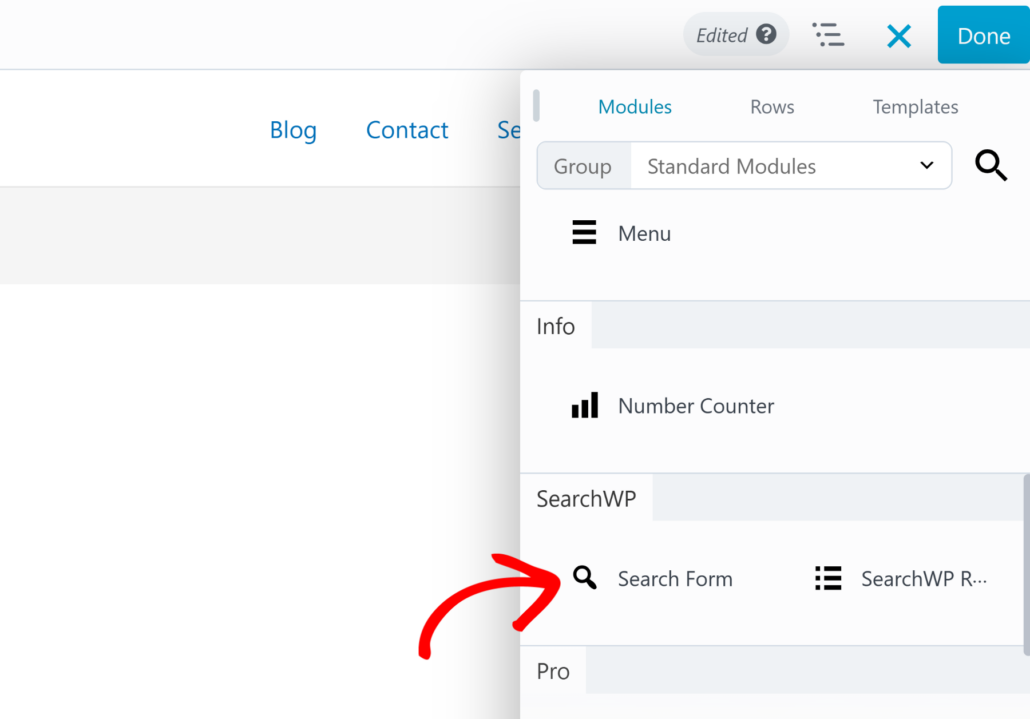
You can follow this guide for all the details on how to add a search form using Beaver Builder.
6. Bricks Builder
Bricks is a performance-focused builder that is gaining popularity among developers.
You can easily insert search forms into your Bricks templates to improve site navigation and user experience.
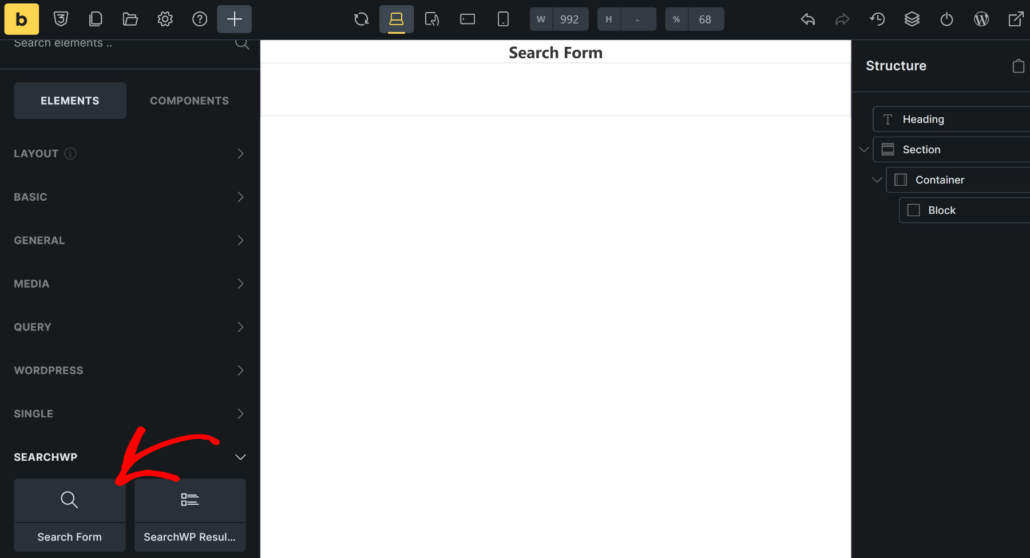
For more details, you can follow our guide on how to add search forms in WordPress using Bricks.
7. Divi
Divi is a powerful visual builder that allows for extensive customization of your site’s theme.
Beyond just adding a search bar, SearchWP helps you customize the experience all the way through to the search results page.
You can simply add the SearchWP Form module anywhere on the page and quickly pick your search form.
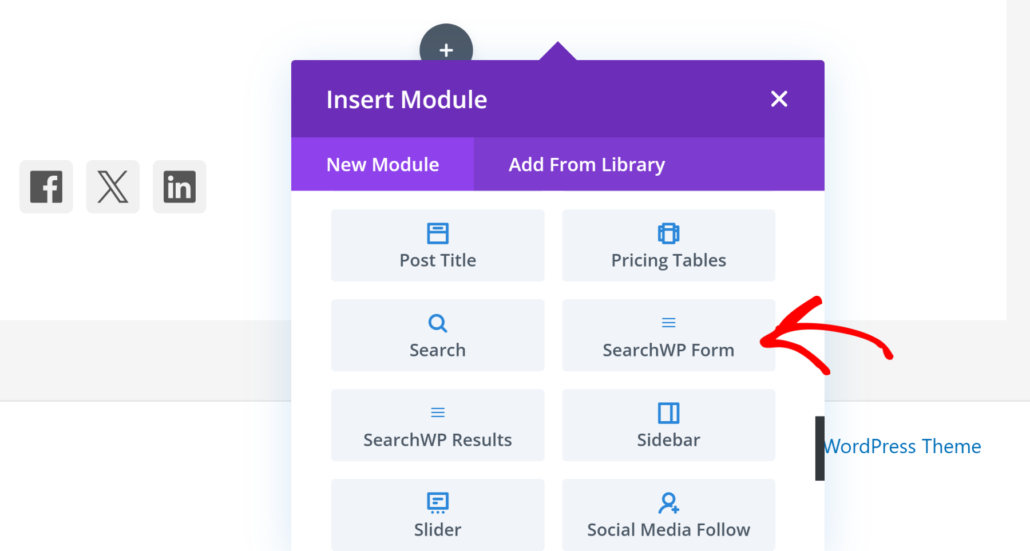
You can find all the instructions in our guide on how to create a Divi search results page template.
Bonus: Add a Search Box to WordPress Navigation Menu
You can also add a search box to the navigational menu of your site.
It makes it more visible for your visitors and encourages them to perform a search.

For more details, check out the step-by-step tutorial on how to add a search bar to WordPress menu.
We hope it’ll help you deliver a more convenient way for your visitors to search for content on your site.
We hope this article helped you learn how to easily add a search box to a page. You may also want to see our guides on how to add a search box to the Elementor page and how to make WordPress search in post content.
Ready to create a smart search box and add it to your pages? You can get started with SearchWP here.
