Would you like to know how to add fuzzy search to WordPress sites?
It can make it easier for your visitors to find the content they’re looking for, even if they make mistakes! Sounds unbelievable, isn’t it?
In this guide, you’ll learn how to enable fuzzy search on your site in a few easy steps without writing a single line of code.
Let’s dive in!
Key Takeaways:
- What is fuzzy search, and why it’s necessary.
- How to add fuzzy search to WordPress sites without coding.
- How to test if the fuzzy search is working properly.
What Is Fuzzy Search & Why Enable It?
Fuzzy search is a search feature that you can use to expand search results on your site.
It can be best described with an example. When a fuzzy search is enabled, the search term “socker” (even though misspelled) will include results for “soccer” (which is the correct spelling).
In other words, fuzzy matching provides search results that are phonetically similar. It allows your visitors to find the right content even if they make typos or misspellings in the search query.
Unfortunately, WordPress does not support fuzzy search by default.
So, if your visitors type a word or a product name incorrectly, they won’t get any results and will leave your site unsatisfied.
This is where fuzzy search comes to the rescue.
Fuzzy search allows you to keep visitors on your site and increase the number of pageviews you get.
Now that you’ve learned what fuzzy search is and what are the benefits of adding it to your site, let’s see how you can utilize it below.
How To Add Fuzzy Search To WordPress Sites
The easiest way to add fuzzy search to WordPress sites without writing code is to use SearchWP – the #1 WordPress search plugin on the market, trusted by over 50,000 site owners worldwide.
It allows you to get complete control over your site search and easily customize it to meet your needs.
For example, with SearchWP, you can create custom search fields, limit search to specific categories, and much more.
The best thing is that this plugin is super easy to use, so you can easily set it up even if you’re a WordPress newbie.
Here are some other things SearchWP lets you do with just a couple of clicks:
- Show search results in live mode. Install the SearchWP Live Search extension, and all the search fields on your site will automatically start displaying search results in real time to your visitors.
- Change the order of search results. Don’t like the current order of search results on your site? Using SearchWP, you can completely customize it the way you want.
- Exclude pages from search results. Want to hide some pages from displaying in search results? With SearchWP, you can exclude both individual pages and groups of pages from the search to make it easier for your visitors to find what they came for.
- Make WordPress index PDF files. Upload PDFs or other documents to your site? Make these files searchable with SearchWP so that your visitors can quickly find them using a search bar.
Now that you know why SearchWP is the best WordPress search plugin, let’s see how you can add fuzzy search to WordPress sites using it.
Step 1: Install & Activate SearchWP
The first step is to get the SearchWP package that suits you best.
After that, go to the Downloads tab of your SearchWP account.
Once there, press the Download SearchWP button to start downloading the plugin to your computer.
When the download is complete, copy the plugin license key on the same page.
The next step is to install SearchWP. You can follow this guide on installing a WordPress plugin if you need help.
After installing the SearchWP plugin, you’ll need to activate it with your license key.
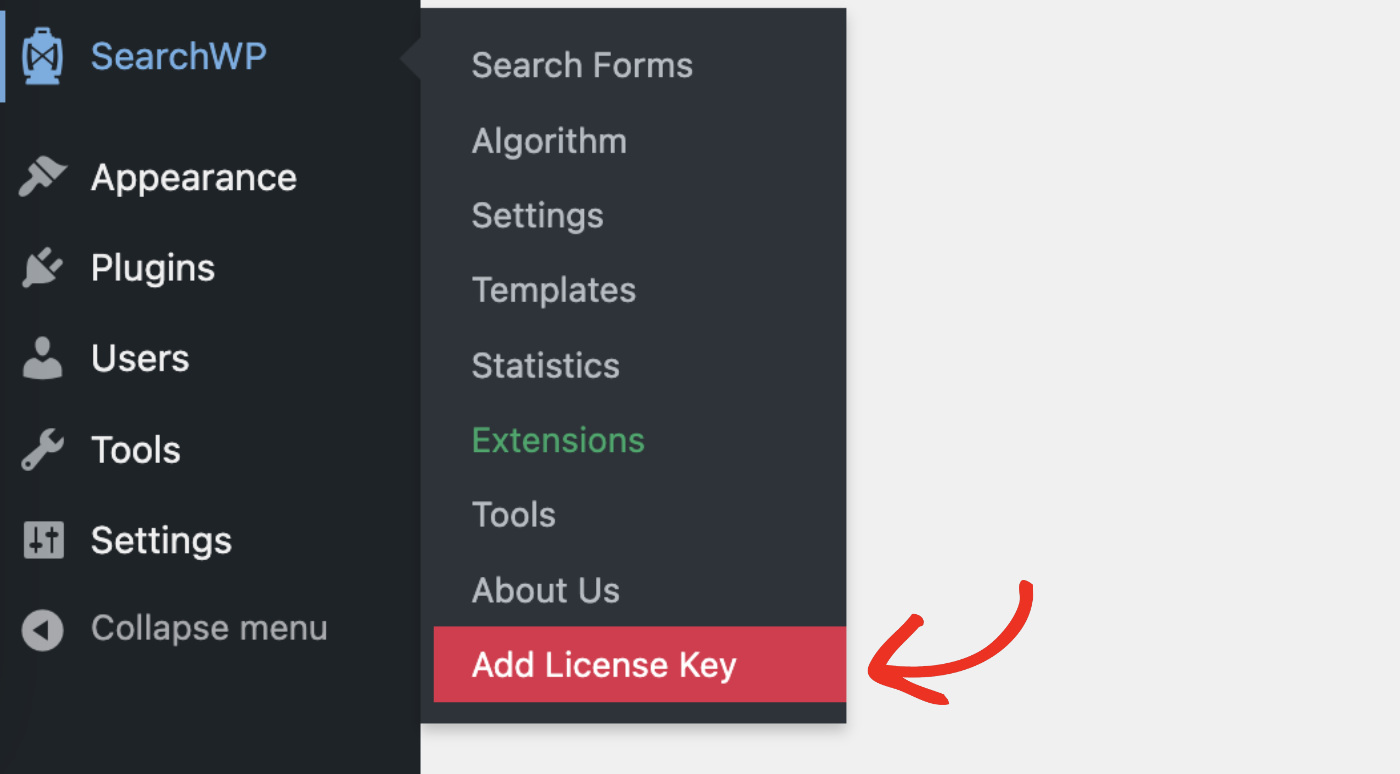
To do that, go to your WordPress dashboard and navigate to SearchWP > Add License Key.
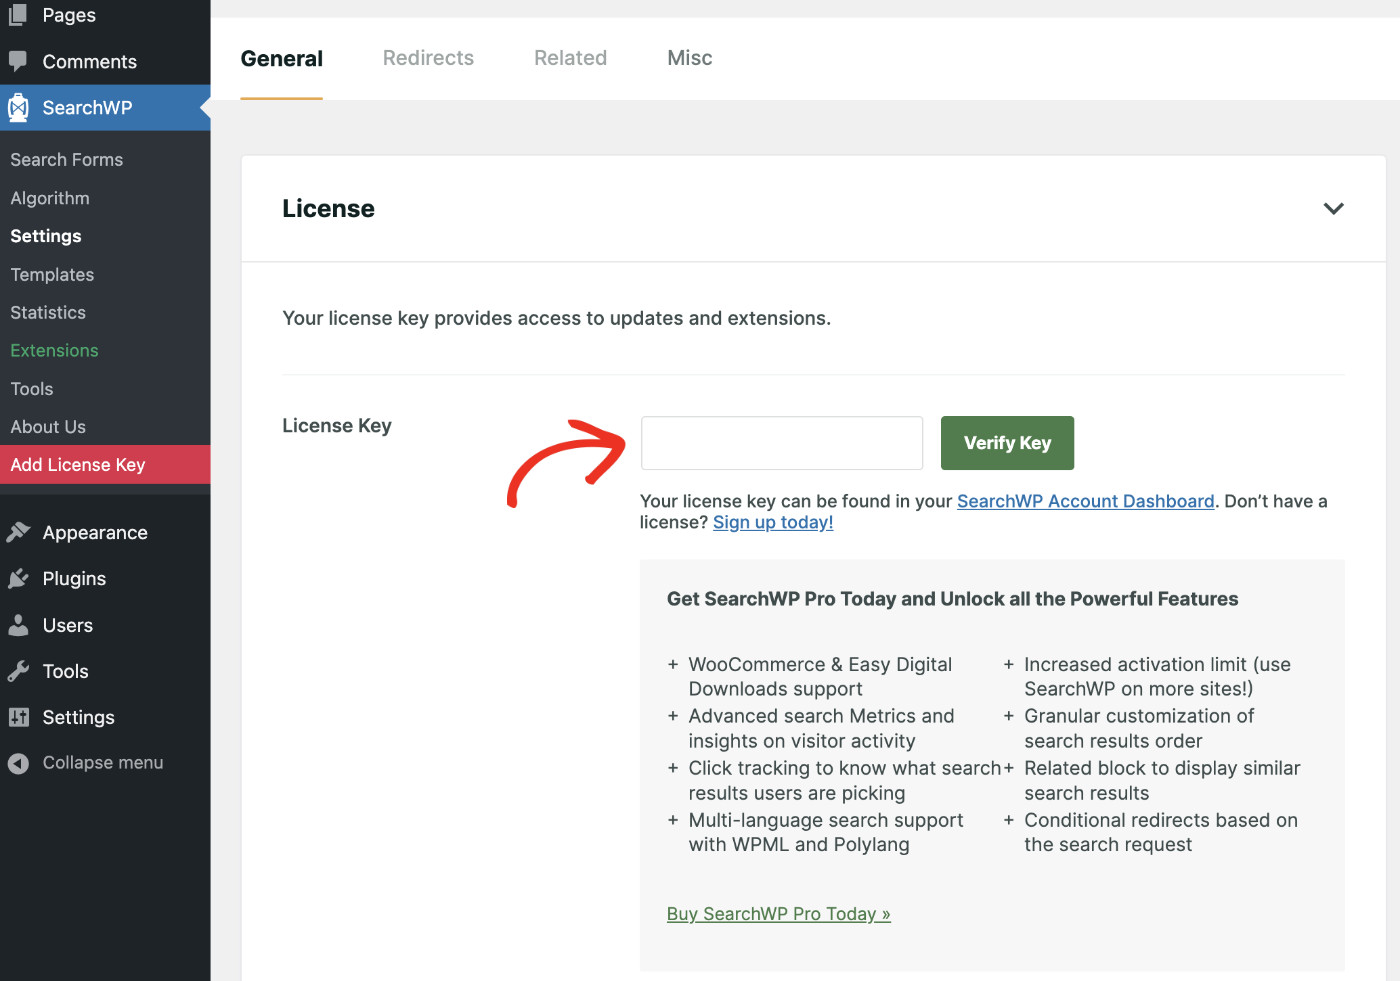
Then, paste the license key in its respective field and click Verify Key.
You should now see your license information as the confirmation of your successful activation.
SearchWP is all set! You’re ready to enable the fuzzy search feature on your site.
Step 2: How To Add Fuzzy Search To WordPress With SearchWP
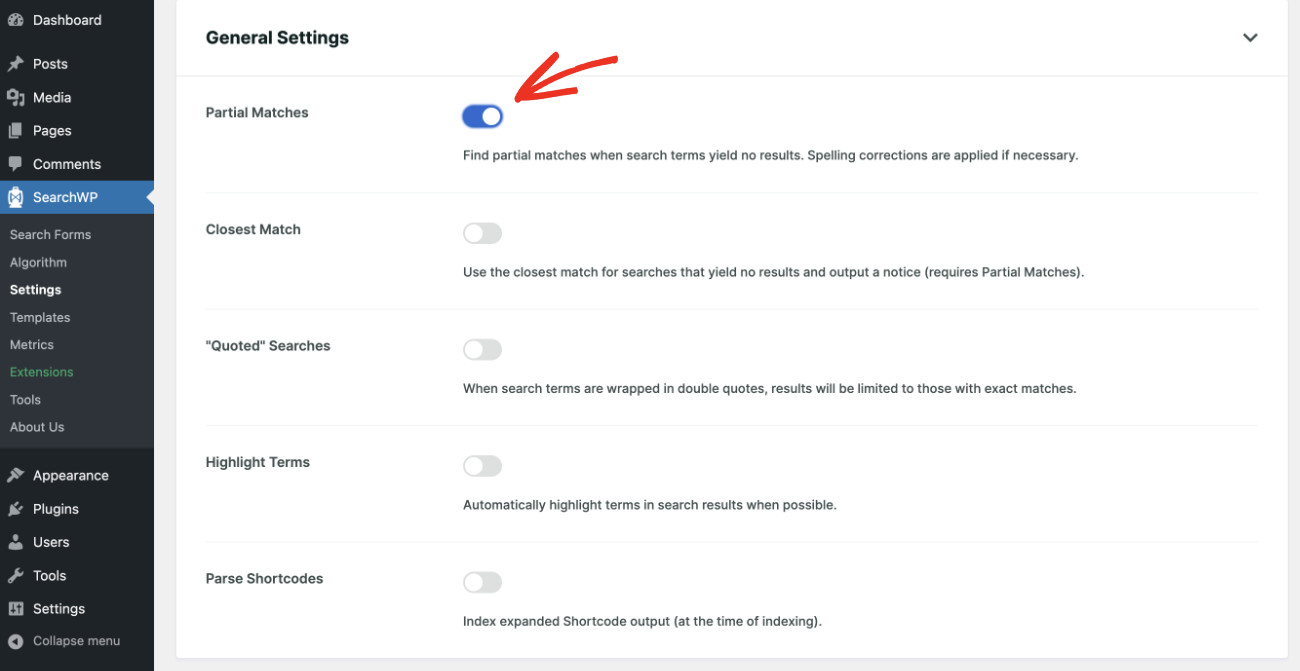
You just need to do one simple step to add a fuzzy search to your WordPress site. Here’s how to do it: navigate to SearchWP > Settings. Now, from the General Settings section, turn on Partial Matches.
This will enable SearchWP to show partially matched content if the exact search term cannot be found.
Which means if somebody searches for ball when no exact match is found, from now on, the search engine will include suffixes for ball, such as balloon, ballet, and ballroom. These are examples of partial matches.
Now, if the search term entered by your visitor does not return an exact match or partial match, in that case, SearchWP will look for content that sounds similar, taking misspellings into account. For instance, if someone searches for socker, SearchWP will show results for soccer.
Fuzzy search works as the last resort when neither exact match nor partial match yields any result. However, if you wish to enable fuzzy search along with partial search, please visit this complete guide.
Step 3: Test Your New Search
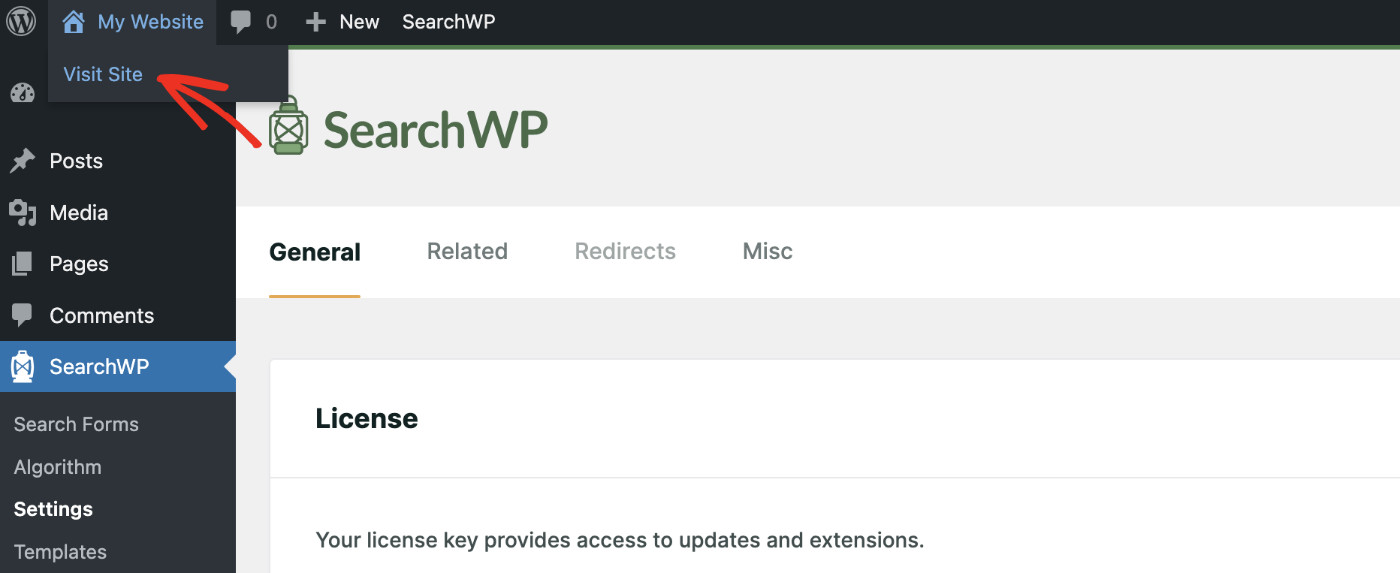
To do that, you’ll need to go over to your site from the WordPress dashboard.
The fastest way to do that is to click the Visit Site button under your site’s name at the top left corner.
Once you get to your site, enter a search term containing a typo into a search box to check if a fuzzy search works.
For example, we have a blog article titled How to Install a WordPress Theme on our test site.
Let’s see if we can find it using the intentionally misspelled search term – “wortpress theame”.
As you can see, we found the post even though there were a considerable number of typos in our search query.
Or, here is another example. Let’s try to search for – “e mail makreting”.
We also had no problem finding a post on email marketing because the fuzzy search is enabled on our test site.
In this article, you learned how to add fuzzy search to WordPress sites.
It’ll help your visitors find the content they’re looking for, even if they make spelling mistakes. It’ll provide a better user experience and increase the time spent on your website so that you can grow your business faster.
Get SearchWP now if you are tired of typos that steal your visitors!
You might also be interested in our tutorial on how to optimize your WordPress search results page.
Looking for a way to add an advanced search bar to a post on your site? Check out the step-by-step guide on how to add a search bar in WordPress without writing any code!

