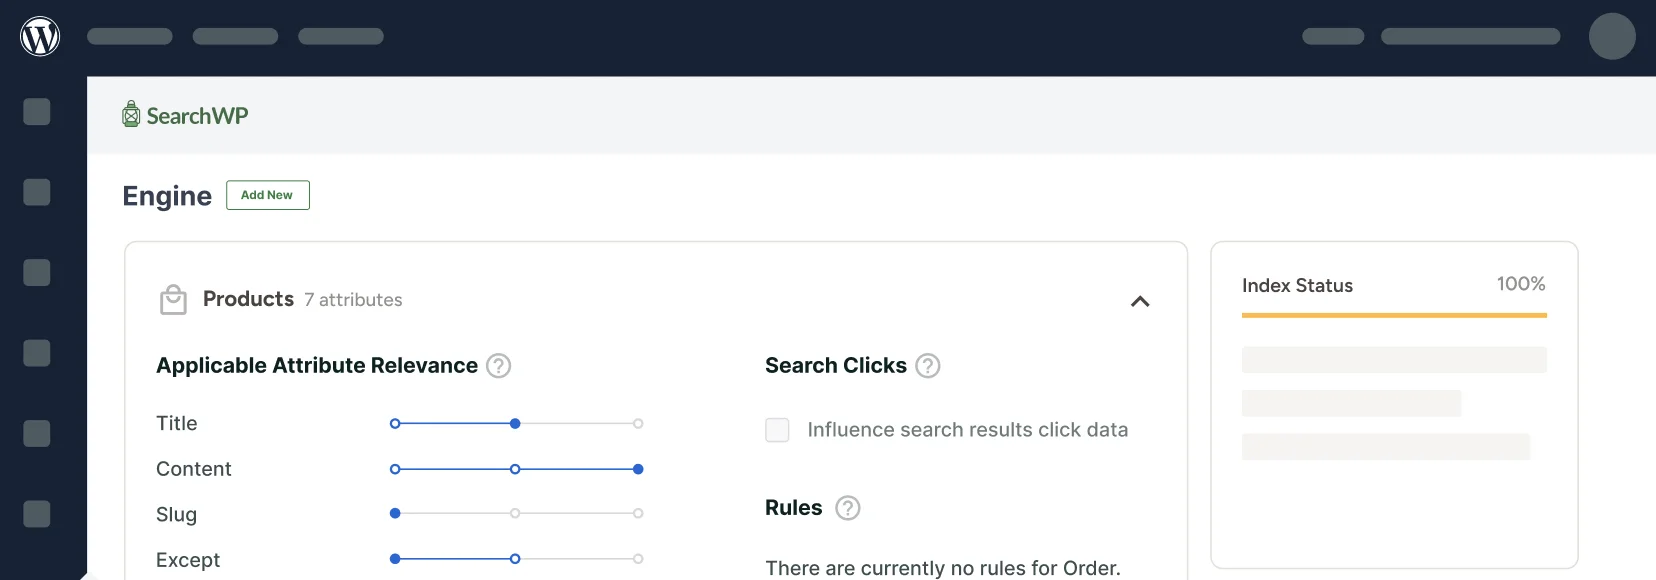
Beaver Builder is a popular landing page and website builder for WordPress. It offers a drag-and-drop page builder that makes it incredibly easy to design professional layouts that look exactly how you want them.
But here’s something we discovered while using Beaver Builder. Even the most beautiful website becomes frustrating when visitors can’t find what they’re looking for.
The default WordPress search function often returns irrelevant results or completely misses important content. We’ve watched users type in search terms, get poor results, and then leave the site without finding the information they needed.
That’s why combining Beaver Builder’s design flexibility with SearchWP’s powerful search capabilities helps deliver the results our visitors expect.
In this article, we’ll show you how to add a search form using Beaver Builder in WordPress.
Why Add a Custom Search Form in Beaver Builder?
Beaver Builder is a visual page builder that lets us create custom WordPress layouts without coding.
We’ve used it in the past to build everything from simple business pages to complex landing pages. The drag-and-drop interface makes it easy to add elements, adjust layouts, and create professional designs that look exactly how we want them.
Now, here’s the issue we encountered with the default search on countless websites. The default WordPress search has some serious limitations that affect user experience.
It only searches post titles and content, completely ignoring custom fields, categories, and other important data. We’ve seen users search for products by brand name, only to get zero results because that information was stored in custom fields.
Integrating SearchWP with Beaver Builder and creating a custom search forms solve these problems. It gives you control over what gets searched and how results are displayed.
That said, let’s look at how you can easily customize the search and add a search form using Beaver Builder.
Adding a Search Form Using Beaver Builder
When it comes to improving the default search on your site, SearchWP is the best solution.

It is a leading WordPress search plugin that is used on over 50,000 websites to create better search experiences.
Its beginner-friendly interface and powerful features allow you to fully customize your search.
With SearchWP, you can manage where your website search should look for matches, limit it to specific content types, and enable search by taxonomies and custom fields.
The best thing is that you can do most of these things in just a few clicks.
Here are some key features that make SearchWP stand out:
- Live AJAX Search: Display search results instantly as users type, creating an interactive experience that helps visitors find content faster.
- Search Analytics: Track what visitors are searching for on your site, which results get the most clicks, and other valuable user behavior data.
- Advanced Customization: Make custom fields searchable, exclude specific pages or categories, and fine-tune relevance weights for different content attributes.
- Manual Result Reordering: Take complete control by manually adjusting the order of search results to feature your most important content.
What makes SearchWP perfect for our Beaver Builder project is its seamless integration with popular page builders. It offers customizable SearchWP Forms and Results blocks that work effortlessly within Beaver Builder’s drag-and-drop interface.
Now, look at the steps you can follow to get started.
Step 1: Install and Activate SearchWP
First, you’ll need to visit the SearchWP website and sign up for a new account.
After that, you can log in to your SearchWP account and click the Downloads tab in the dashboard.

Once that’s done, you can save the SearchWP plugin files on your computer. We also suggest copying the License Key, as you’ll need it later when setting up SearchWP.
Next, you can install SearchWP on your site, upload the plugin’s ZIP file and activate it. If you need assistance, please follow this step-by-step guide on how to install a WordPress plugin.
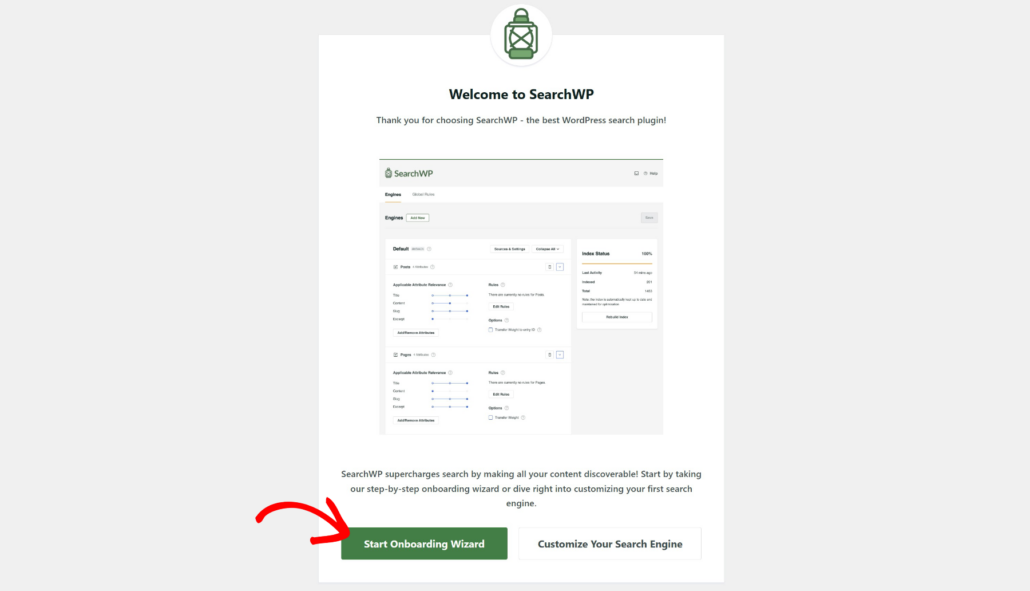
Upon activation, you’ll see the setup wizard. Simply click the ‘Start Onboarding Wizard’ button and follow the setup wizard to get started.
Step 2: Edit Search Engine in SearchWP
Now the next step is to customize the search engine in SearchWP and specify what to look for. The best part is that you can link each engine to a specific search form on your site.
For example, you can select which sources to include, exclude content from the searching process, make product details searchable, ensure information in custom fields is available, and more.
First, you can head to SearchWP » Algorithm from the WordPress dashboard. This is where you can manage your search engines created with this plugin.
Initially, there will already be the Default search engine, which SearchWP automatically creates after installation. You can customize the default engine or add new ones.
Next, you can edit the sources by clicking the Sources & Settings button.
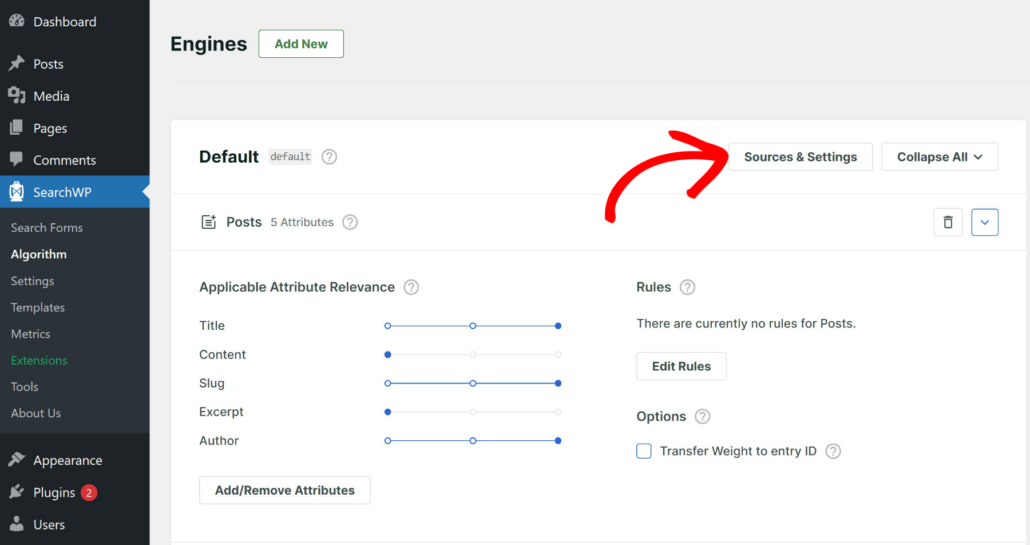
When a new popup window opens, you can select which sources to include.
For instance, the default sources will include Posts, Pages, and Media. But if you have a WooCommerce store, then you can include Products or include Downloads if you have an Easy Digital Downloads site.
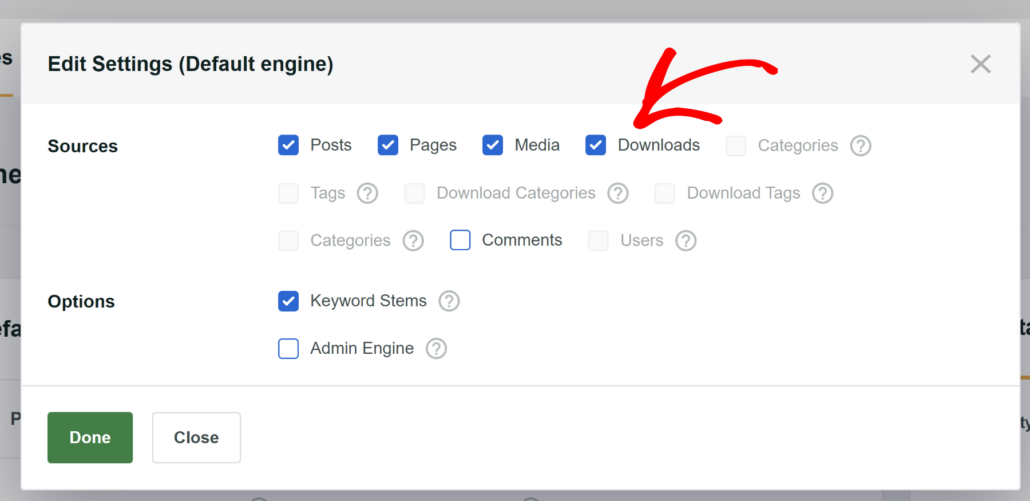
When you’re finished, simply click the ‘Done’ button.
Next, you can also edit the attributes for each source. These are additional details you’d like to include in the search process, like title, content, slug, excerpt, and author.
To get started, simply click the Add/Remove Attributes button under the search source section.
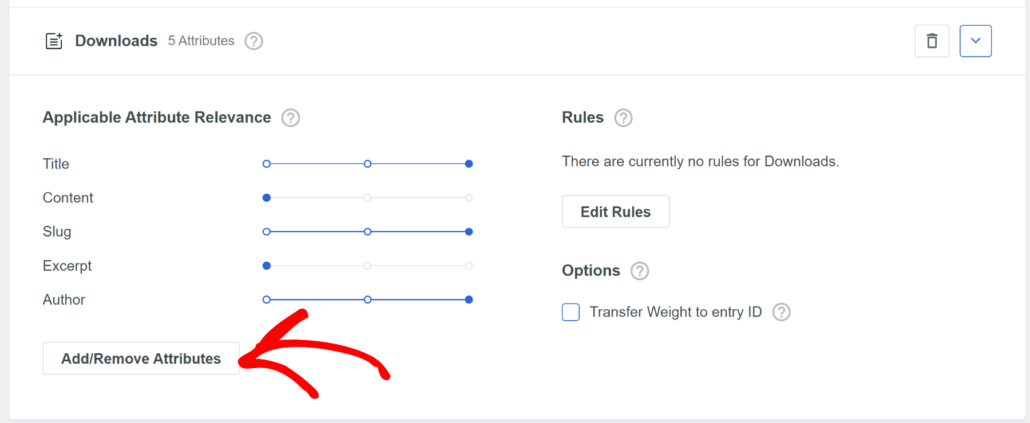
From here, you can add taxonomies such as categories and tags for your source.
Similarly, if you’re using custom fields, then you can also include them in the search process.
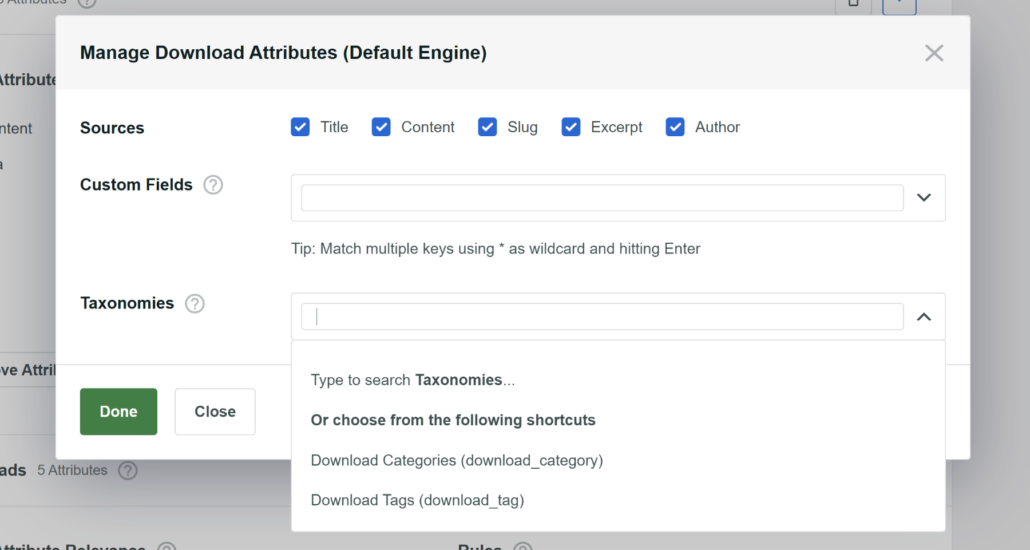
Once you’re finished, click the Done button.
Lastly, you will need to scroll to the top and Save your engine.
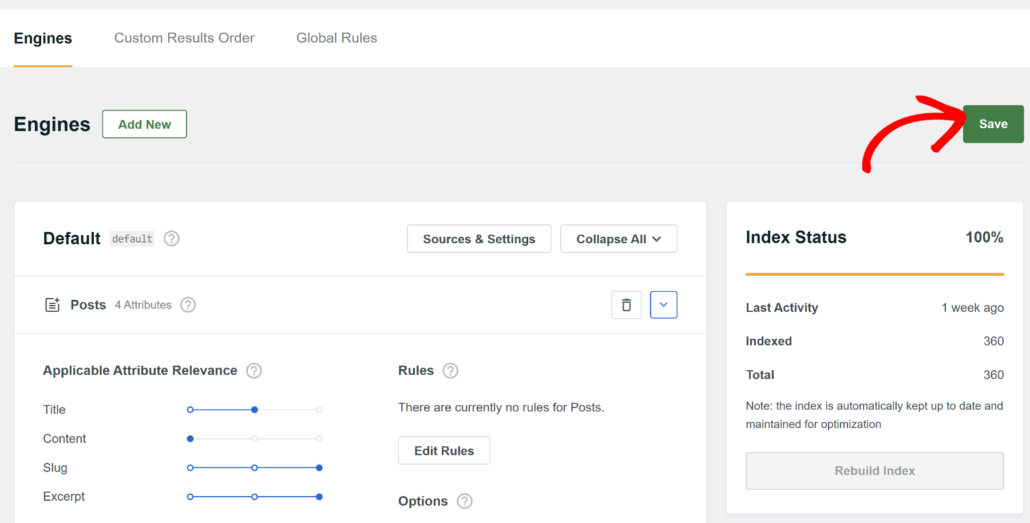
For more information, please see our detailed guide on how to change your WordPress site’s default search settings.
Step 3: Create a Custom Search Form in SearchWP
Now that you’ve customized the search engine, you can also create a custom search form in SearchWP.
To create a search form, you can head to SearchWP » Search Forms from the WordPress dashboard.
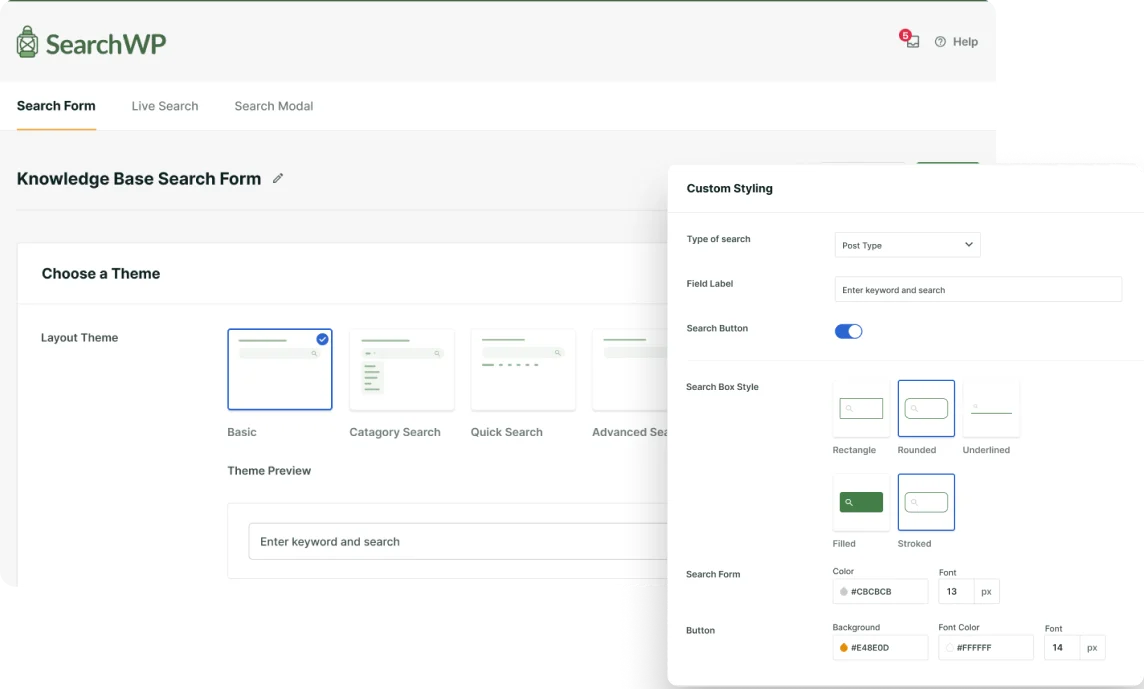
Here, you can create or edit a form, customize its layout and features, and select your newly created engine.

From here, you can select theme for your search form.
SearchWP offers multiple pre-built templates to choose from and offers lots of customization options.
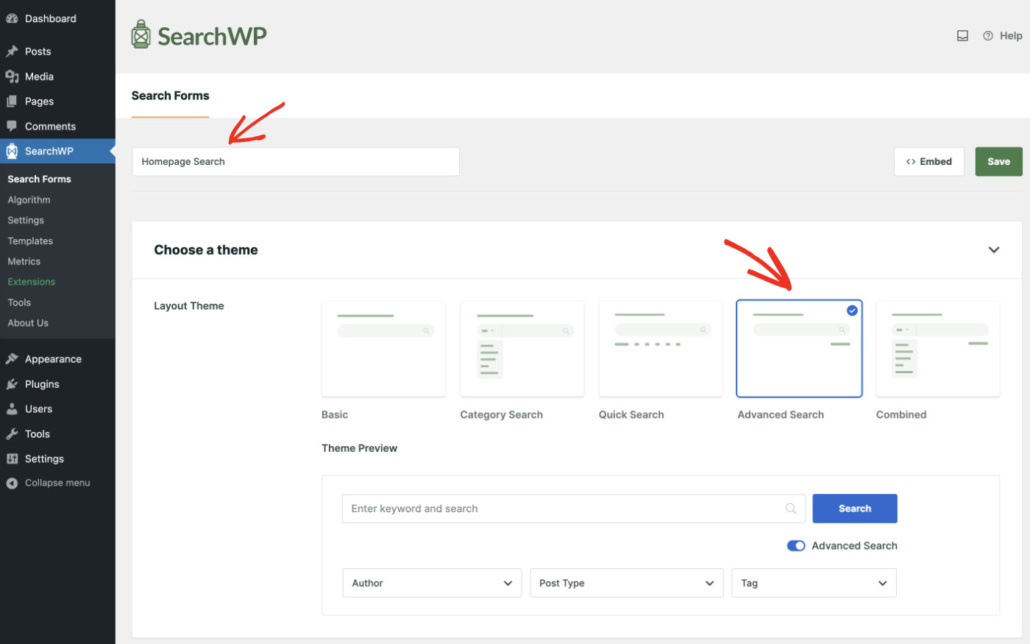
To learn more, you can see our guide on how to create a custom search form in WordPress.
Step 4: Add Search Box Using Beaver Builder
Now, the next step is to add your SearchWP form to a landing page using Beaver Builder.
Simply go to Pages » All Pages in your WordPress dashboard and edit a page or add a new one.
Once you’re in the WordPress content editor, simply click the Convert to Beaver Builder button.
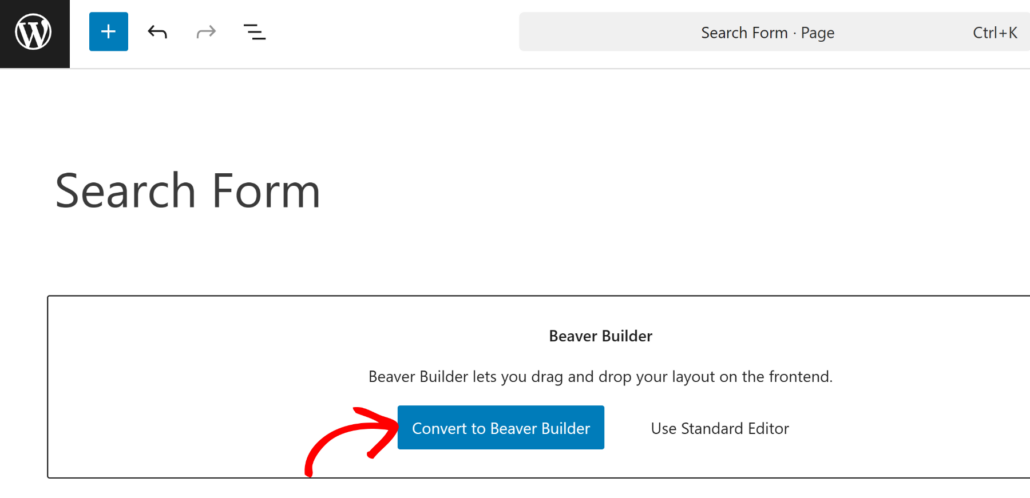
This will launch the drag and drop page builder by Beaver Builder.
Go ahead and click the + button in the top right corner to add modules.

Next, you can scroll down to the SearchWP section.
From here, simply drag the Search Form module and place it onto your page.
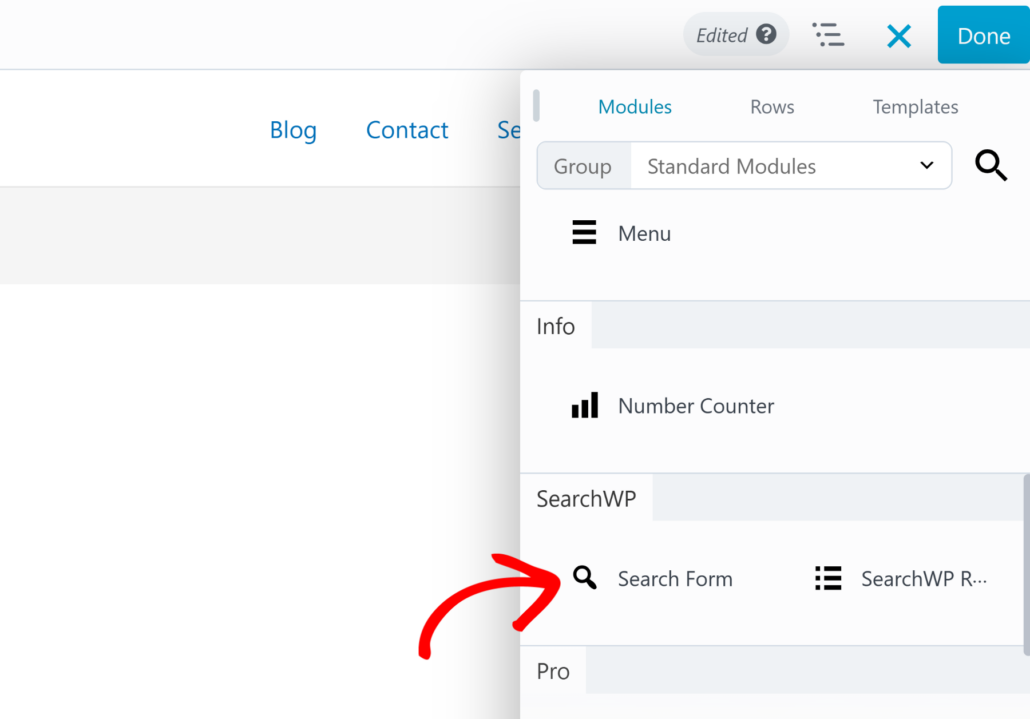
After that, you will need to select your search form.
Go ahead and click the dropdown menu and select the form you created in the previous step.
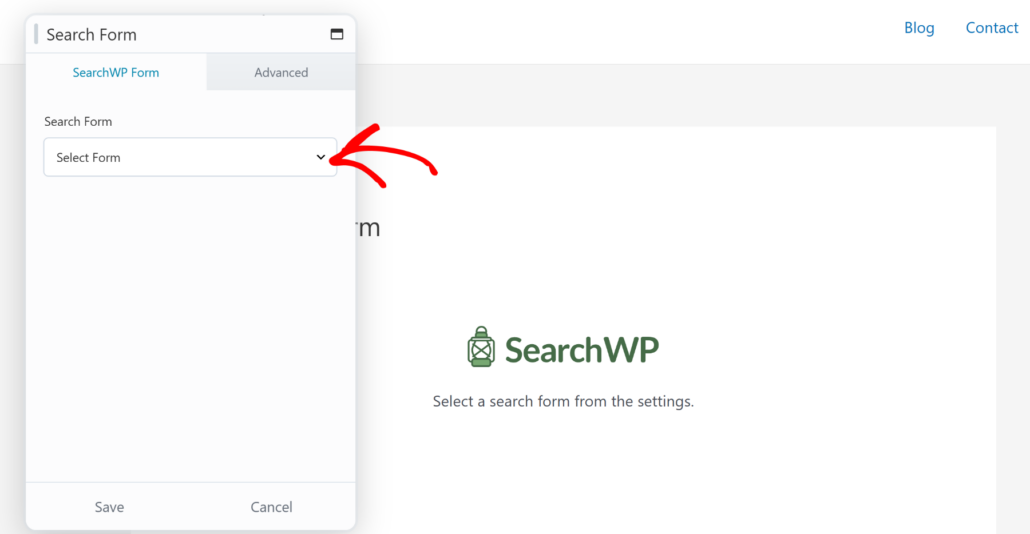
When you’re done, simply click the Save button.
Now simply click the ‘Done’ button in the top right corner and then hit Publish.

That’s it! You’ve successfully created a search form and added it to a landing page using Beaver Builder.
You can now visit your site to see it in action.

If you want, you can also test the search form and see if it is working according to your requirements.
For example, is it finding the right products or download files, showing content from specified categories, and more.
We hope this article helped you learn how to add a search box using Beaver Builder in WordPress. You may also want to see our guide on how to add a search box in WPBakery page builder and how to enable search by WooCommerce product tags.
If you’re ready to create a smart search page on your site, you can get started with SearchWP here.
