If you manage a blog website that has a lot of content or an online store with many products, then it’s very important to provide a great search experience to your visitors.
When users can find valuable information and products on your site with ease, they are likely to spend more time reading articles and purchasing items. As a result, you’ll boost engagement and conversions.
Sadly, the default WordPress search is quite limited. It is slow and doesn’t always give relevant results. But you can improve your site’s search experience by changing the default search settings.
In this post, we’ll show you how to change your WordPress site’s default search settings. You can do this by following 3 simple steps.
Why Change Default WordPress Search?
The default WordPress search may be enough for some websites, even though it’s limited.
But if you have a large site with lots of content or an eCommerce site with thousands of products, then you may need to customize your search settings.
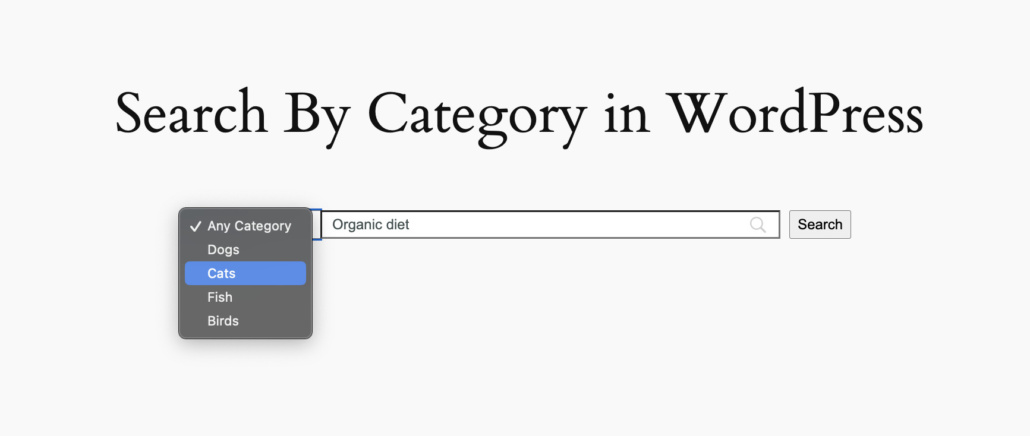
For example, you may want to allow users to search by category on your site, like this:
Customizing the search feature in WordPress helps you:
- Make Your Site Search Faster: As your site content increases, the default search starts to slow down. This can negatively impact your user experience.
- Control How Your Site Looks for Results: You can control how your site looks for search results. For example, you may want to restrict your WooCommerce product search to title only or even add search by tags to your site.
- Add Extra Features to Your Site Search: You can boost the search experience by including custom fields, comments, and PDF document content.
- Make Site Search More Efficient: Changes to your default search can help you fix common WordPress search errors like the search box not appearing and make the overall search more efficient.
- Get Search Statistics: The default search in WordPress doesn’t provide any data on what people are searching for. But with the right plugin, you can get search statistics and get insights about your users’ behavior.
You can change your default search settings by either adding code to your site or using a WordPress plugin. Using a plugin is very easy and will save you a lot of time.
That said, let’s show you how to change your default search settings in WordPress.
How to Change the Default WordPress Search Settings
The easiest and fastest way to change your default WordPress search settings is to use a WordPress plugin called SearchWP. The plugin helps you to customize your WordPress search without writing any code.

As the best WordPress search plugin, SearchWP gives you a lot of control over your site search. With the tool, you can add so many search features to your site. It makes your site search faster and also gives more relevant search results.
Here are some of the most important features you’ll get to enjoy:
- Search Everything On Your Site: Is your site not returning the search results you expect? SearchWP improves your site search. With the plugin, your site will now look for search results in comments, reviews, taxonomies, and even custom fields.
- Advanced eCommerce Product Search: The tool also integrates seamlessly with WooCommerce, Easy Digital Downloads, and BigCommerce. So, if you own an eCommerce store, then your site visitors can now find your products faster. SearchWP includes your products using attributes like tags, categories, SKUs, shipping classes, and other details in the search process.
- Site Search Insights: One way you can improve your business is by making data-backed decisions. SearchWP tracks your site searches and shows you what your users are looking for. You can use these insights to satisfy their needs better.
SearchWP still packs lots more features. The good thing is once you install the plugin, you can make a lot of changes to your search settings. And you don’t need any prior experience to do this.
Let’s show you the 3 easy steps to follow to do this.
Step 1: Install and Activate SearchWP
You can start by visiting the SearchWP website and signing up for an account.
After you’ve subscribed to a pricing plan and created a new account, the next step is to download the plugin files.
You can find the plugin by logging into your SearchWP account area. Simply go over to the ‘Downloads’ tab and click the ‘Download SearchWP’ button.
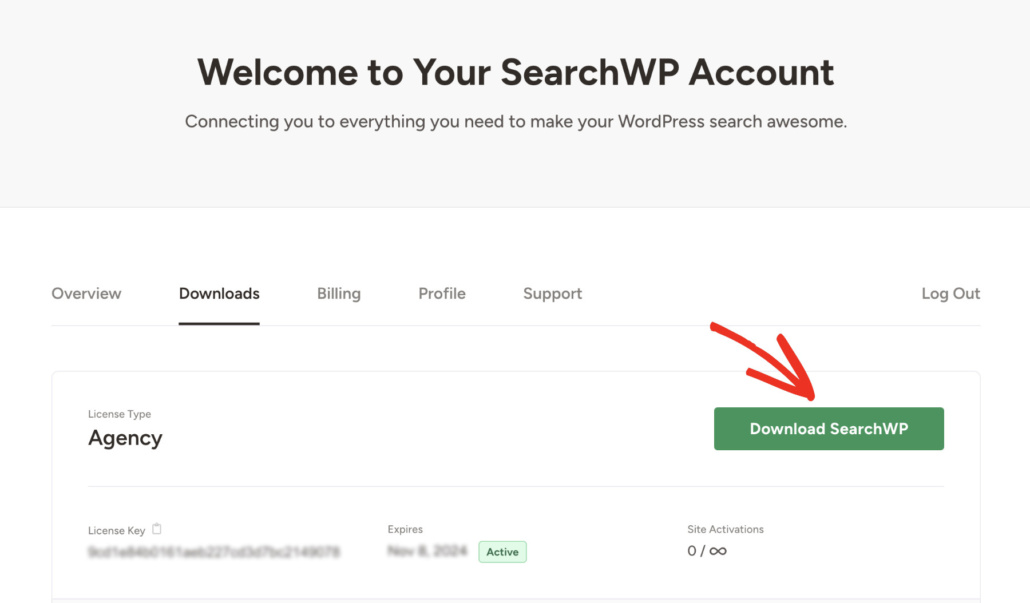
Now, it’s time to log into your WordPress admin area and upload SearchWP to your site.
Need help doing this? You can follow this guide on how to install a WordPress plugin.
Next, you will see the SearchWP welcome screen and setup wizard. Go ahead and click the ‘Start Onboarding Wizard’ button and follow the onscreen instructions.
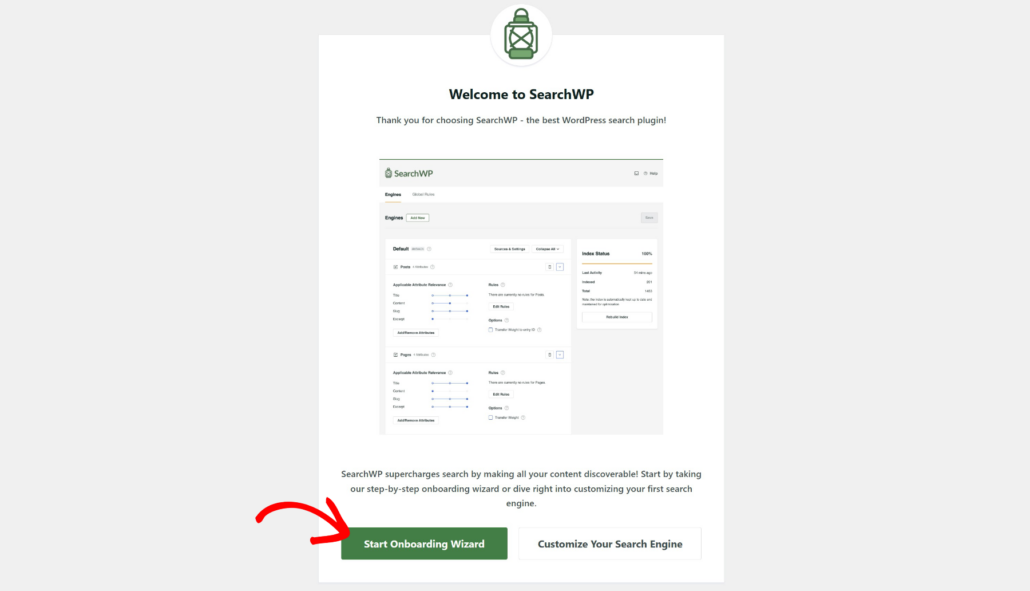
You’ve now fully set up the SearchWP plugin, the next step is to customize your site’s search engine.
Step 2: Set Up Your Search Engine
Want to change your default search settings? You can set up a new search engine or edit the default engine in WordPress.
The cool thing with SearchWP is that it supports multiple search engines on 1 site. This way, your users can search for things in different ways in different site locations.
First, you will need to go to SearchWP » Algorithm from the WordPress dashboard
After that, you can click the ‘Sources & Settings’ button.
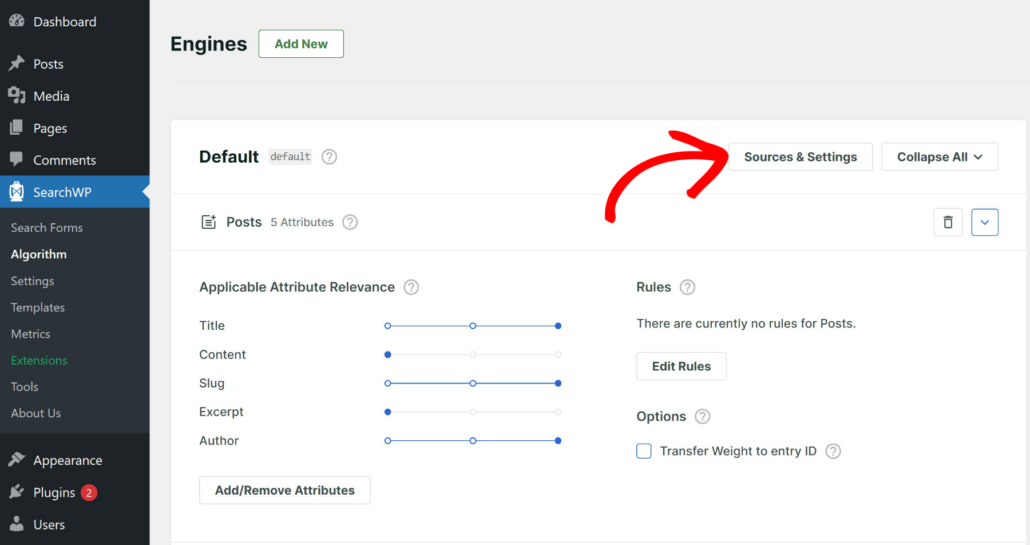
You’ll now see a new window with the default sources for the search engine, which include posts, pages, and media.
You can simply select which sources SearchWP should consider when finding content or products on your site. For example, if you want to limit search to specific post types, then you can only choose ‘Posts’ as the source.
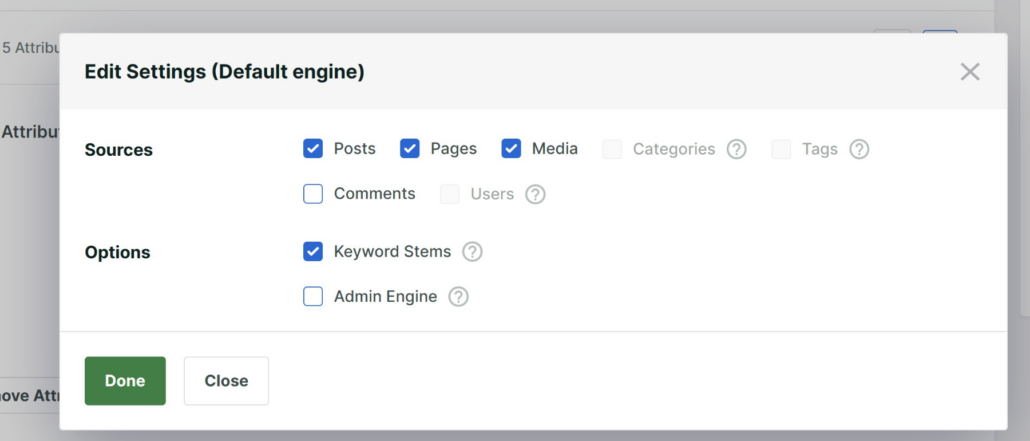
When you’re finished, simply click the ‘Done’ button.
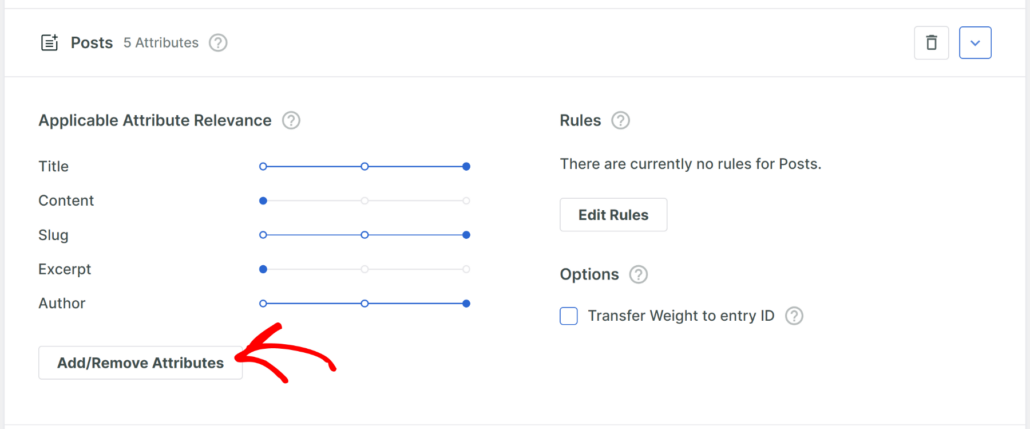
After that, you can add different attributes to each source in the search engine. Attributes are the fields you want to search for a given source, such as title, content, excerpt, slug, custom fields, taxonomy, and author.
Simply click the ‘Add/Remove Attributes’ button to continue.
Next, you will see a new popup open where you can manage the search attributes.
Here, you can add custom fields and taxonomies as attributes. For example, let’s say you have an ACF custom field for ‘Reading Time’ which you’d like to include when searching blog posts.
Similarly, if you have different categories and tags on your site, then you can also make them searchable by selecting them from the ‘Taxonomies’ dropdown menu.
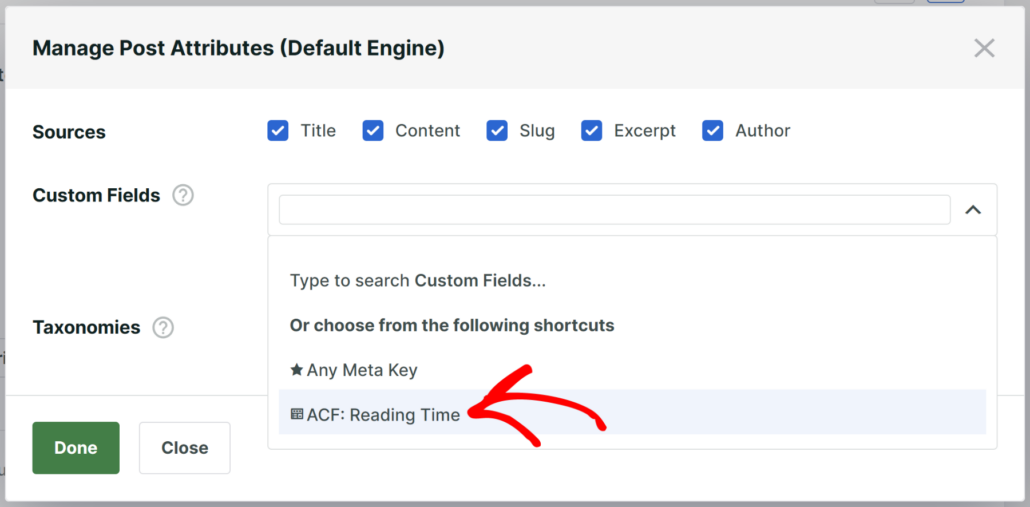
Go ahead and click the ‘Done’ button when you’re finished.
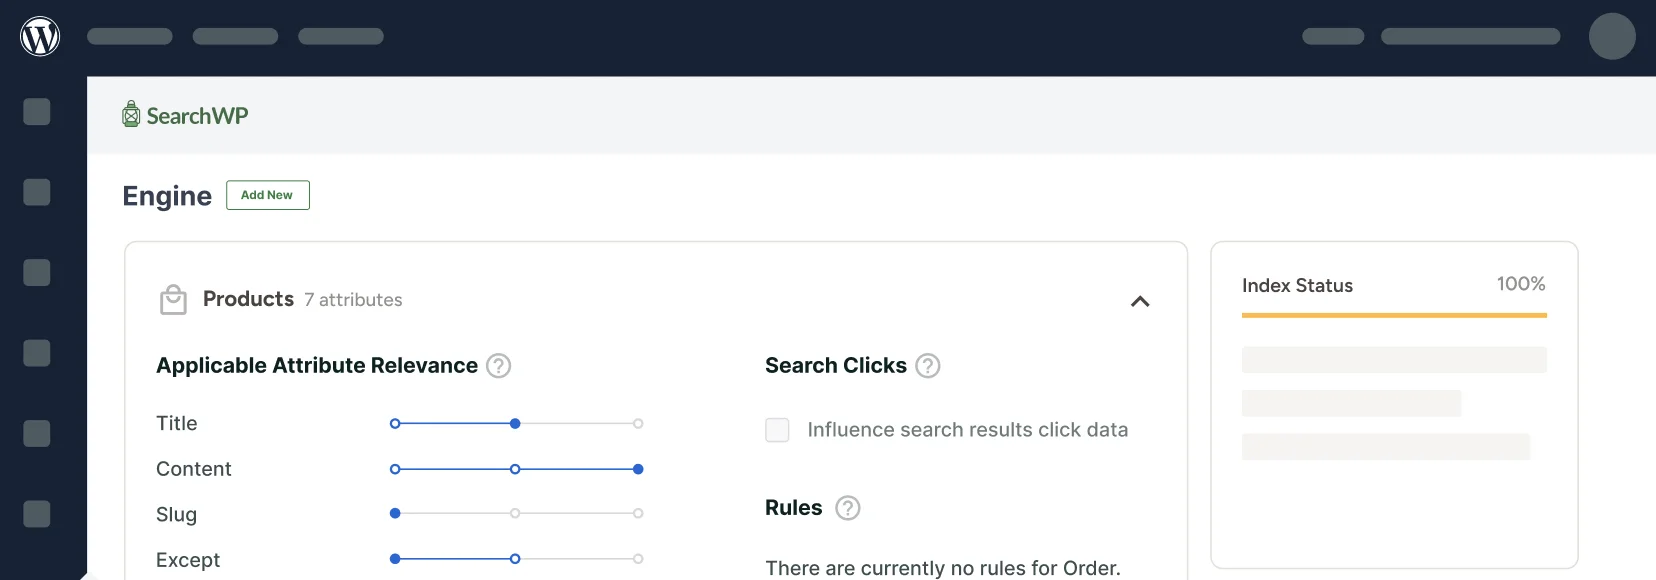
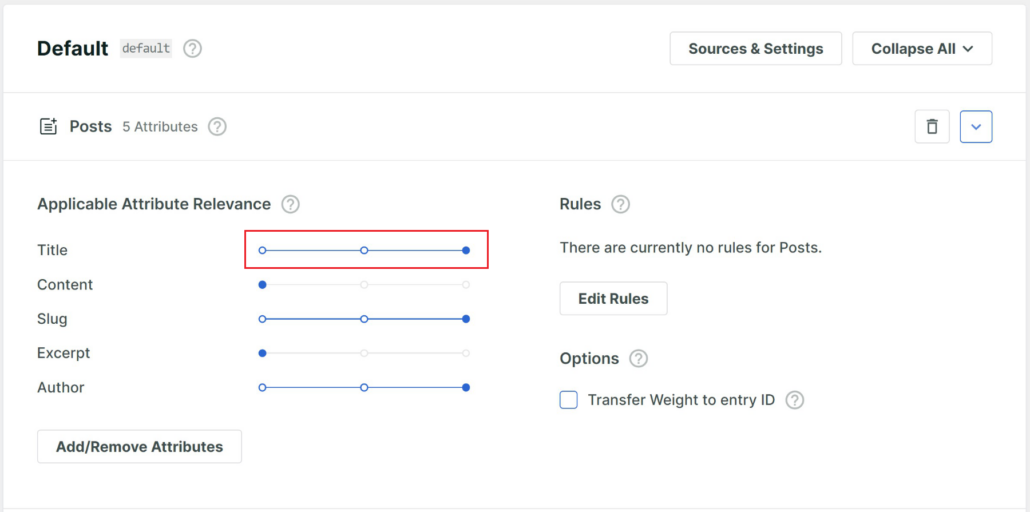
Next, you can change the weights assigned to each attribute for different post types by moving the slider.
Finally, you can also add extra rules to your custom WordPress search.
For instance, let’s say you don’t want users to find content that’s old and outdated. You can simply set up a condition to show entries after a specific date.
To do this, simply click the Edit Rules button.
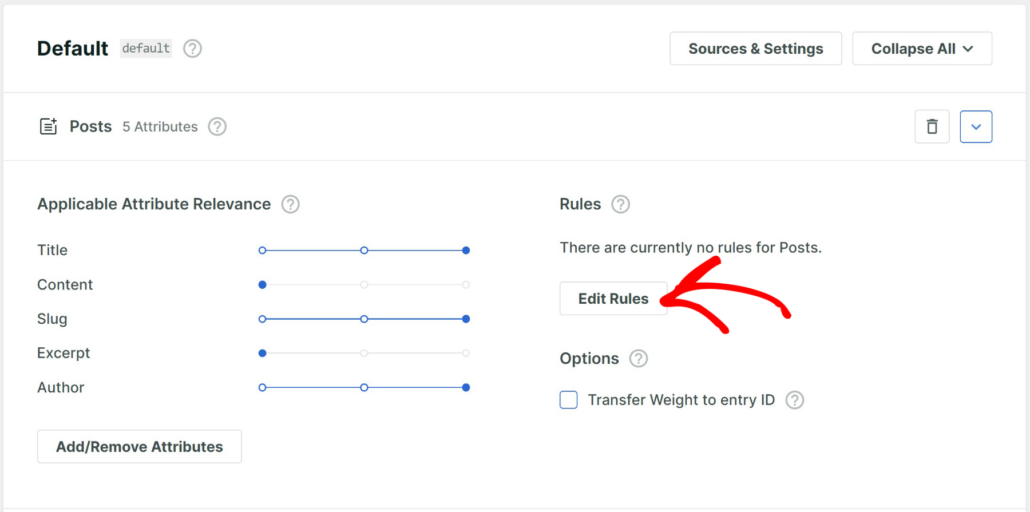
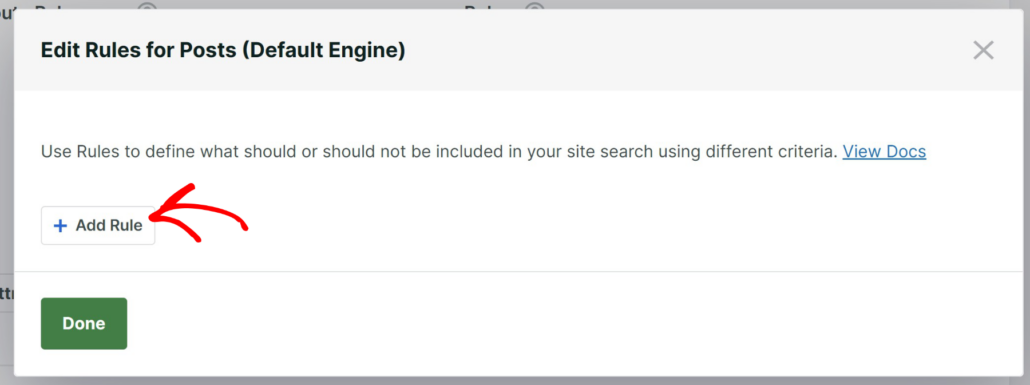
Next, a new popup window will open where you can edit the rules.
Go ahead and click the ‘Add Rule’ button.
After that, you can enter the conditions for your new rule.
For instance, you’ll need to select whether to show or exclude entries for posts published before a certain date, display results from specific categories, or enter post IDs to filter content.
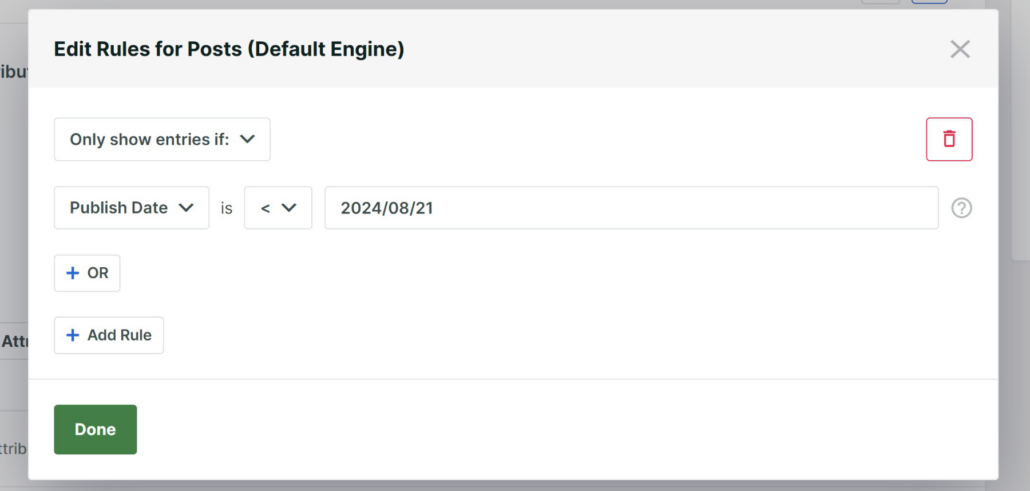
Simply click the ‘Done’ button after entering the rules. Your visitors will now see search results based on the conditional logic rules you’ve set.
Next, you will need to click the Save button to store the changes to the default search engine, and then click the ‘Rebuild Index’ button.
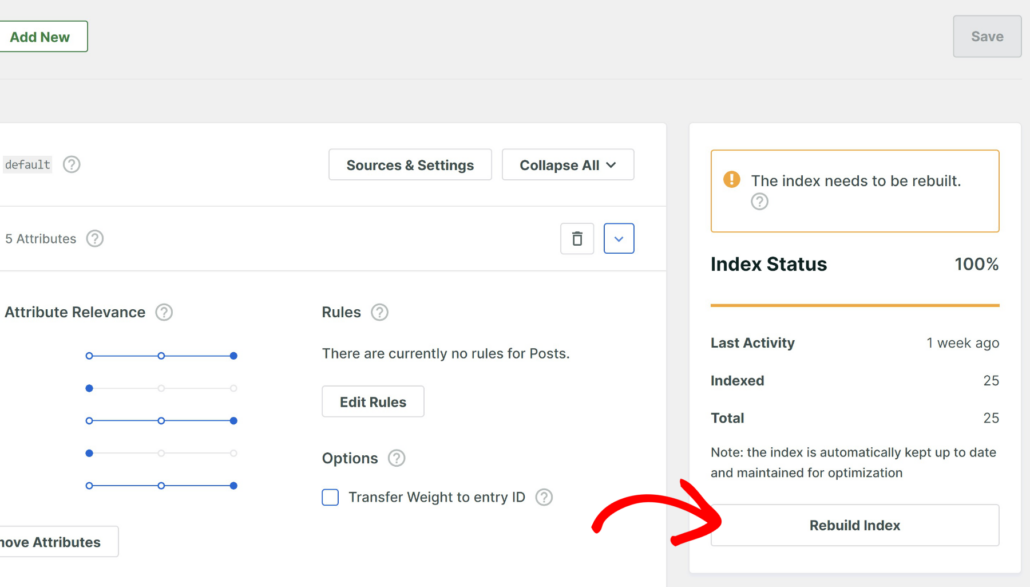
SearchWP will automatically start building a new search index for your site.
Congratulations! You’ve successfully changed your default WordPress search settings.
There are some additional options offered by SearchWP to fine tune your search engine.
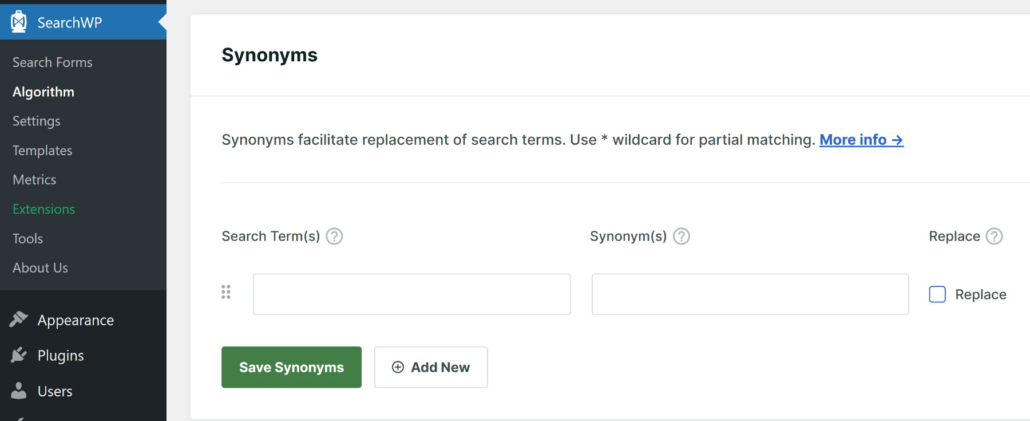
For instance, if you switch to the ‘Global Rules’ tab in the Algorithm page, then you can add synonyms and stopwords.
Adding synonyms will help users find relevant content when they enter search terms related to topics on your site. Simply click the ‘Add New’ button and then enter the search terms and their synonyms. When you’re done, simply click the ‘Save Synonyms’ button.
If you scroll down to the ‘Stopwords’ section, then you can add common words that are not helpful when searching and do not carry significant meaning in identifying the content. These include words like is, the, an, a, in, at, and if.
Now, SearchWP will already have a library of different stopwords which it will ignore when performing a search. However, you can add more stopwords to improve your search experience.
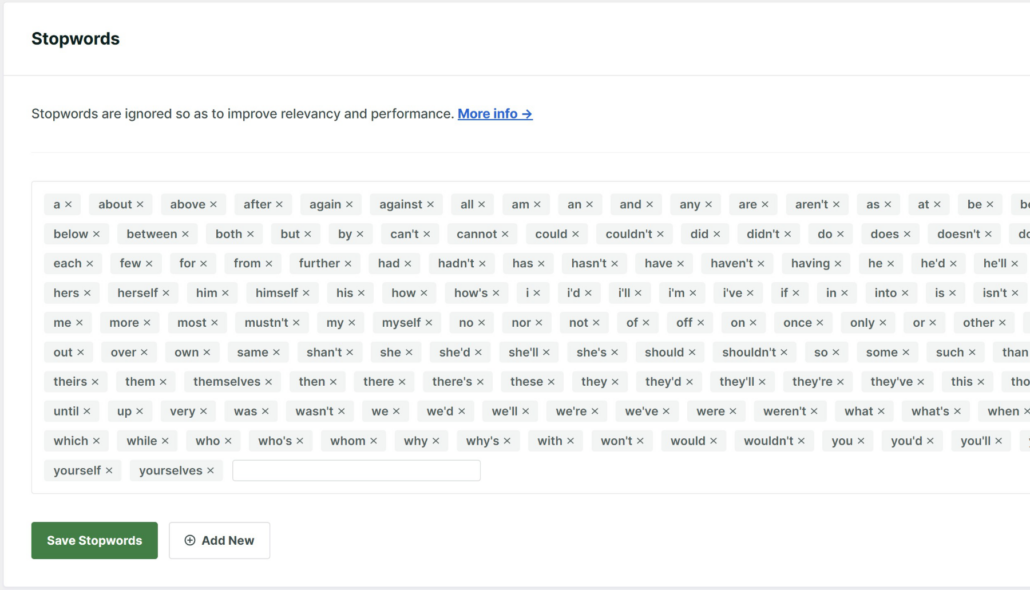
When you’re done, simply click the ‘Save Stopwords’ button.
The final step is to make sure your site search works as you want on the front-end.
Step 3: Test Your New Settings
o test your new changes, you can visit your website and type a search term into the search bar and click Search.
From here, you can confirm if the search results reflect your new changes to the default WordPress search settings.
For example, WordPress may still be showing posts published before the specific date we set. In this case, go back to the search engine settings to make sure you saved all your settings properly.

What’s Next…
Now that you know how to easily change the default search settings in WordPress, you can go an extra step and enhance the search experience for your visitors.
Here are some helpful guides that will help you improve the WordPress search:
- How To Add Filters To WordPress Search
- How To Exclude Pages or Posts From Site Search Results
- How To Create A Custom Search Form In WordPress
- How To Add Live Search To WordPress For Free
- How To Highlight Search Terms In WordPress (Without Coding)
We hope this article helped you learn how to change your default WordPress search settings. You may also want to see our guide on how to see search metrics in WordPress and how to make WooCommerce product documents searchable.
Ready to create a better and more personalized WordPress search experience? Get started with SearchWP today!
