Have you ever found yourself browsing through a bunch of websites and wished you could just perform a multisite search across all of them at once?
It’s a common challenge, especially if you’re using WordPress Multisite network. The regular WordPress search only works for individual sites, which makes it a real pain for your website visitors to find that specific piece in your network.
However, with the right plugin like SearchWP, you can easily set up a search functionality across multiple sites in the network. Plus, you also get to create custom search engines and replace the default WordPress search for better user experience.
In this article, we’ll show you how to perform multisite search in WordPress.
What is WordPress Multisite?
A WordPress multisite is a fantastic feature that allows you to create and manage a network of websites from a single WordPress installation.
Think of it like having a central control panel where you can manage many websites, all sharing the same core WordPress files, plugins, and themes.
This can save you a lot of time and server resources. Plus, it lets you manage users across multiple sites from the admin network, which is a great way to scale a network.
For example, let’s say you run a university website with different departments or campuses. Or your business has several products, services, or branches. You can set up a WordPress multisite network for each department, product, or campus instead of creating separate sites.
If you want to learn more about multisite, then please see this guide on how to install and setup WordPress multisite network.
Why Set Up a Multisite Search in WordPress?
Imagine you have a network of 20+ sites. If someone wants to find something across the entire network, they’d have to search each site individually. Frustrating, right?
That’s where a multisite search comes to the rescue.
- Improved User Experience: Visitors get instant access to information across your entire network. No more clicking through multiple sites. It’s all in one place, making it fast and efficient.
- Enhanced Content Discovery: Users often stumble upon relevant content they never knew existed. A multisite search increases the chance that they’ll discover new content and engage with your network more.
- Efficiency for Network Managers: As a network manager, finding your content, pages, and articles across the network should be easy. A unified search allows you to find things quickly and easily, allowing for better site management.
- Consistency and Branding: A shared search will give a consistent branding experience to your users as they move across your network.
That said, let’s look at how you can easily add a multisite search to your network without editing code.
Setting Up a WordPress Multisite Search
The easiest way to add a multisite search feature to WordPress is by using SearchWP. It is the best search plugin for WordPress that indexes content, custom fields, and taxonomies across your entire network or individual sub-sites.
With SearchWP, you can also create a custom search engine, live search, exclude pages and posts, get search analytics, create custom search forms, and much more.
To get started, you’ll need to visit the SearchWP website and sign up for an account.

After creating an account, the next thing you’ll need to do is download the SearchWP plugin.
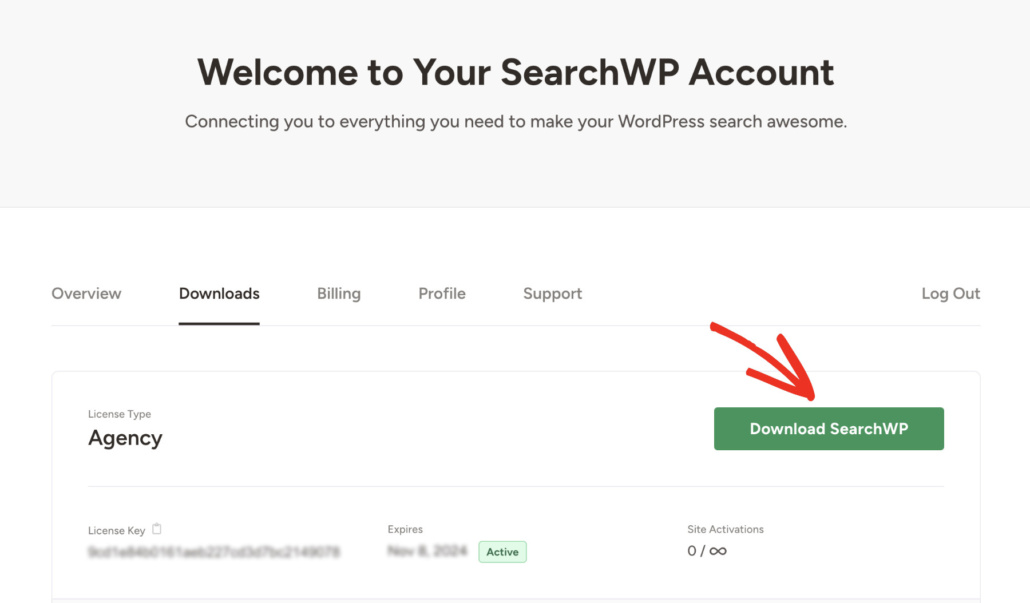
Simply head to your account area and switch to the Downloads tab. From here, you can click the ‘Download SearchWP’ button and save the plugin file to your computer.
Next, you will need to install and activate the plugin on the multisite network.
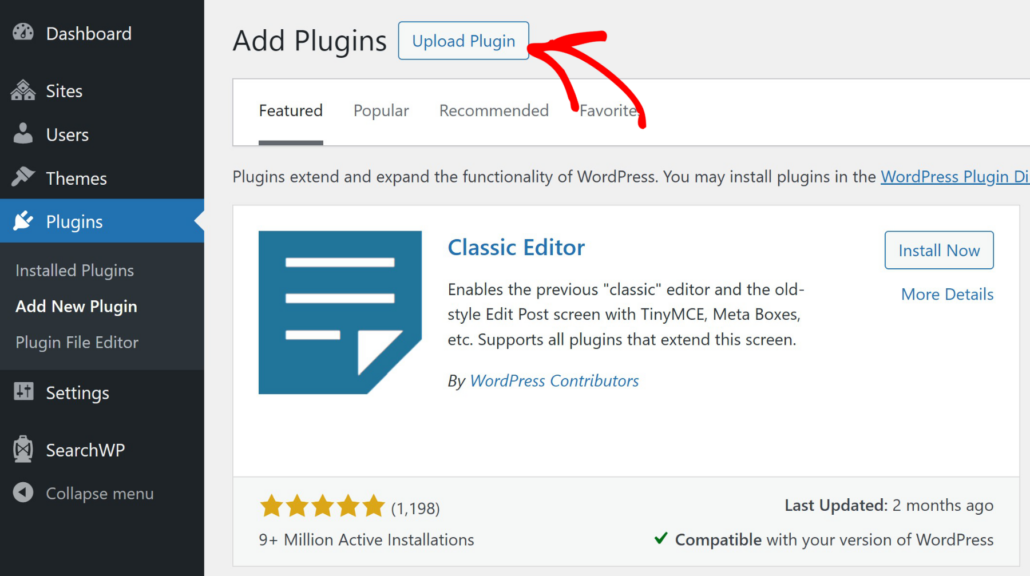
To do that, simply open the Network Admin dashboard and then head to Plugins » Add New Plugin. From here, you can click the ‘Upload Plugin’ button at the top.
After that, you will see an option to upload your new plugin.
Go ahead and click the ‘Choose File’ button and then select the plugin files on your computer.
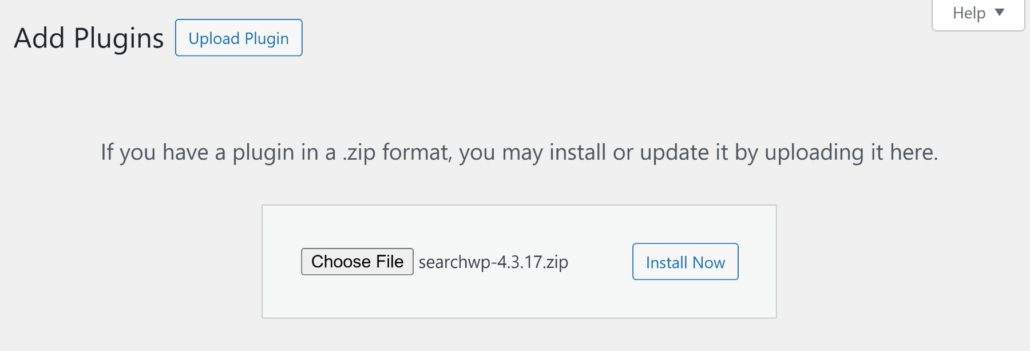
Once that’s done, you can click the ‘Install Now’ button.
On the next screen, you will need to click the ‘Network Activate’ button. This will activate the SearchWP plugin on your multisite network.
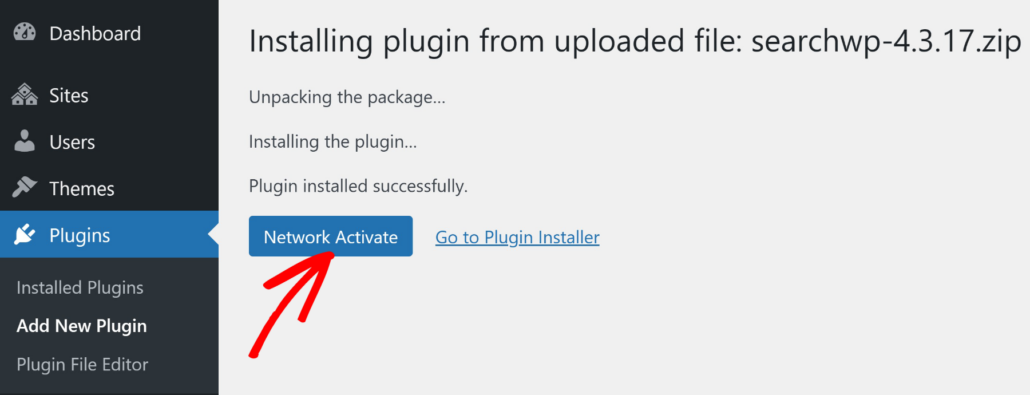
After that, you will need to activate the SearchWP license on all the sites in the multisite network.
To do that, simply go to the SearchWP » Settings from the WordPress dashboard and enter the license key.
You can find the license key in your SearchWP account area. Go ahead and click the ‘Verify Key’ button to continue.
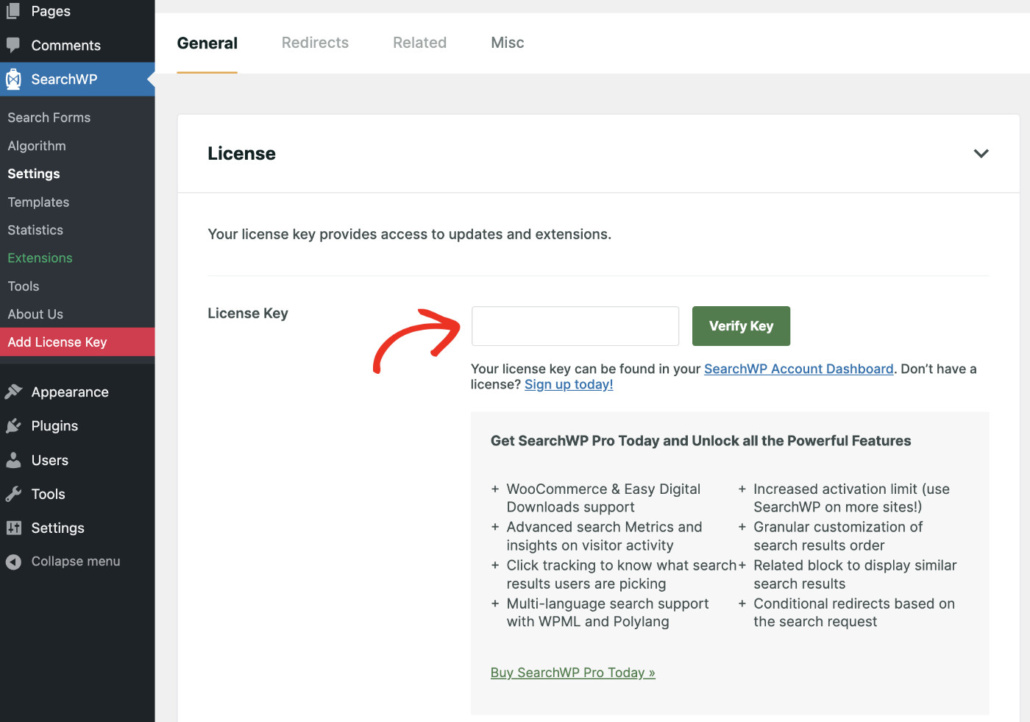
Now, SearchWP will be active on your sub-sites in your WordPress multisite network.
Enable Cross-Site Searching in Multisite Network
Next, you will need to enable multisite search by customizing the behavior of SearchWP.
By default, SearchWP will only search for posts, pages, and media on a specific sub-site instead of the multisite network. In order to make it search cross-sites, you will need to modify its behavior.
To do that, you can create a custom plugin called SearchWP Customizations plugin and add hooks.
Hooks are functions that integrate with SearchWP and allow unique customizations without the need to edit the core plugin files. Plus, your new features will remain in place when you update SearchWP or your website theme.
First, you’ll need to create your own plugin by simply open a Notepad or TextEdit file on your computer and enter the following code:
<?php
/*
Plugin Name: SearchWP Customizations
Description: Customizations for SearchWP
Version: 1.0.0
*/

// Add all hooks and custom code here.
After that, you can save the file and name it ‘searchwp-customizations.php’.
It will look something like this:
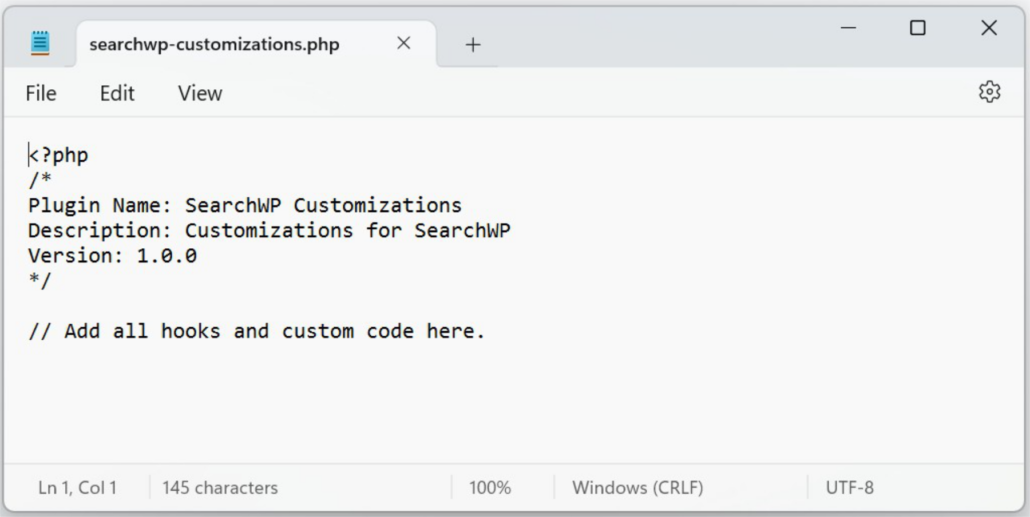
Next, you can add the hook in the plugin file you just created.
Simply enter the following code under the ‘Add all hooks and custom code here’ section.
<?php

// @link https://searchwp.com/documentation/multisite/
// Tell SearchWP to search the entire Multisite network when searching on the main site.
add_filter( 'searchwp\query\args', function( $args, $query ) {
	// If this is not site 1, bail out.
	if ( 1 !== get_current_blog_id() ) {
	  return $args;
	}

	// Search sites with ID 1, 2, 3.
	$args['site'] = [1,2,3];

	// Retain site info in results.
	$args['fields'] = 'default';

	return $args;
}, 10, 2 );
Now go ahead and save the file on your computer.
Another way of adding code on your WordPress site is by using WPCode. It is the best code snippet plugin for WordPress and makes it super easy to manage and insert custom code on your website.
It should look something like this:
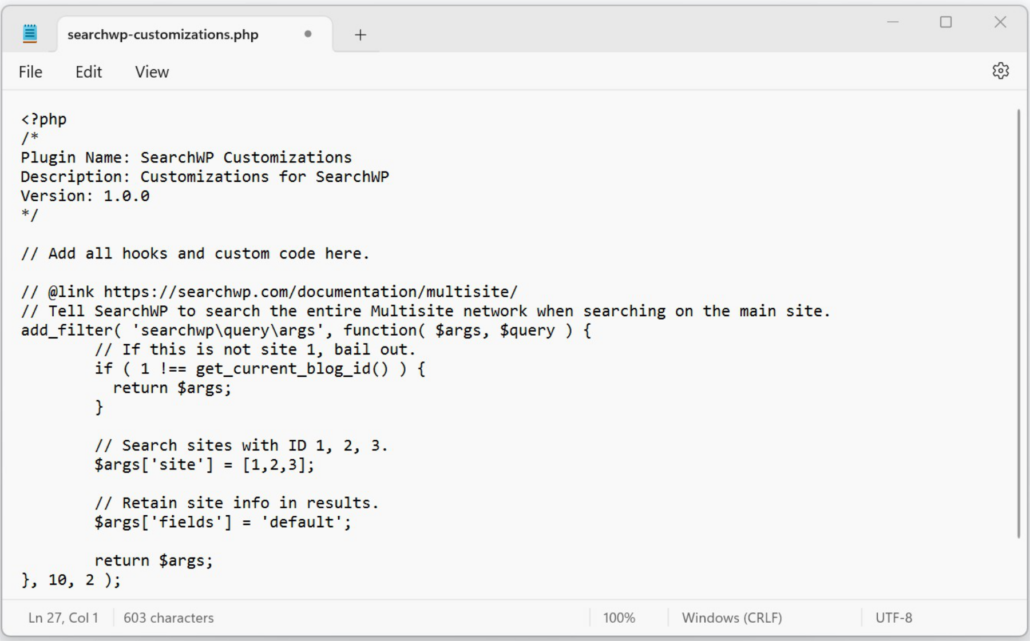
After that, you’ll need to compress this file and save it in the ZIP format. That’s because WordPress only allows .zip files to be uploaded as plugins.
To do that, simply navigate to the location of ‘searchwp-customizations.php’ plugin on your computer. From here, you can right-click the file and click the ‘Compress to’ option (just ensure you choose the ZIP File option).
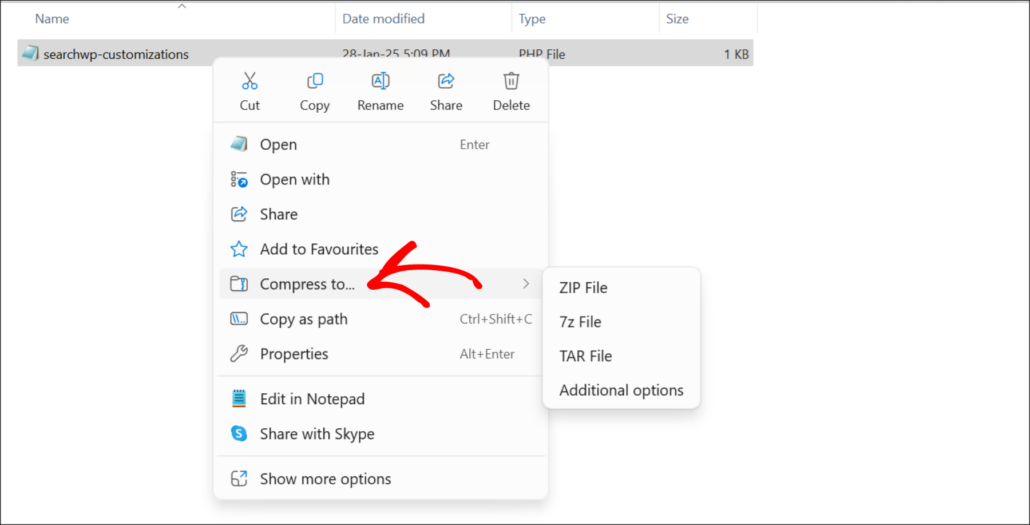
Once that’s done, the next step is to upload the plugin to your WordPress Multisite network and after that install and activate it.
To do that, simply open the Network Admin dashboard and then head to Plugins » Add New Plugin. From here, you can click the ‘Upload Plugin’ button at the top.

Next, you will see an option to upload your new plugin.
Go ahead and click the ‘Choose File’ button and then select the plugin files on your computer.

From here, you can click the ‘Install Now’ button.
On the next screen, you will need to click the ‘Network Activate’ button. This will activate the SearchWP Customizations plugin on your multisite network.
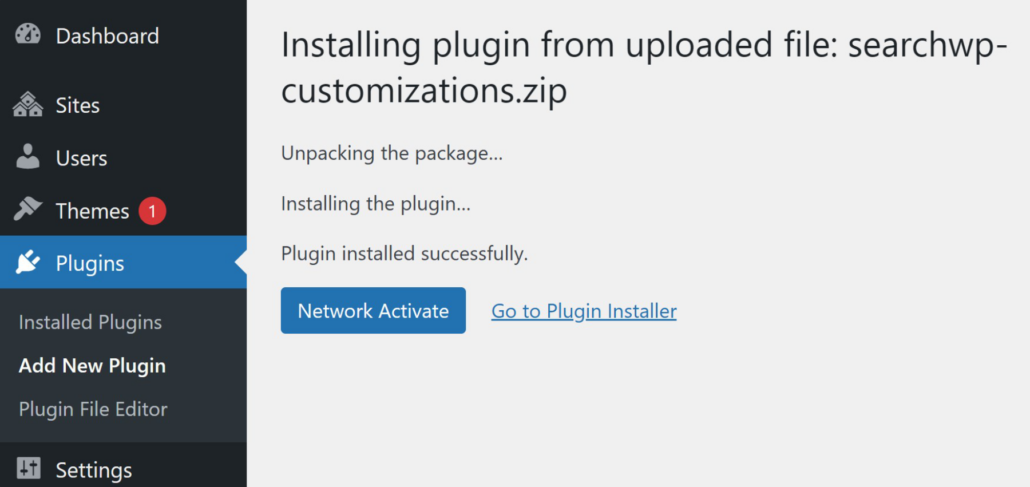
You’ve now successfully overridden the default search behavior of SearchWP and enabled multisite site search.
Customize the Search Engine for Multisite Network
Next, you can customize the search engines settings in SearchWP and select which sources to include for cross-site searches.
Note: SearchWP’s Engines control what is indexed on each sub-site. If the search engine you are using to perform the search has different Sources or Attributes than the engine on the sub-sites you are searching, then the results may not be accurate.
For example, if you’ve added ‘Posts’ to a search engine you are using for the search, but a search engine on a sub-site does not have Posts enabled, then that sub-site will not return any Posts in the search results.
To customize the search engine, simply visit the SearchWP » Algorithm page from your WordPress dashboard on any of the sites in the network. With SearchWP, you can create unlimited search engines and link them to individual search forms.
For this tutorial, we’ll edit the default engine. Go ahead and click the ‘Sources & Settings’ button.
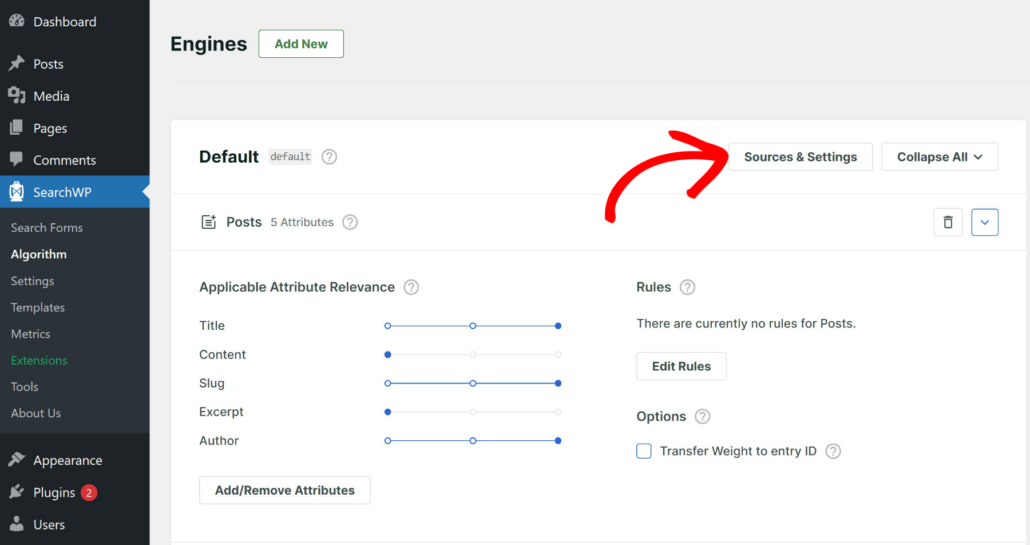
A popup window will now appear with the default sources.
These include posts, pages, and media. You can also enable comments and make them searchable across sub-sites.
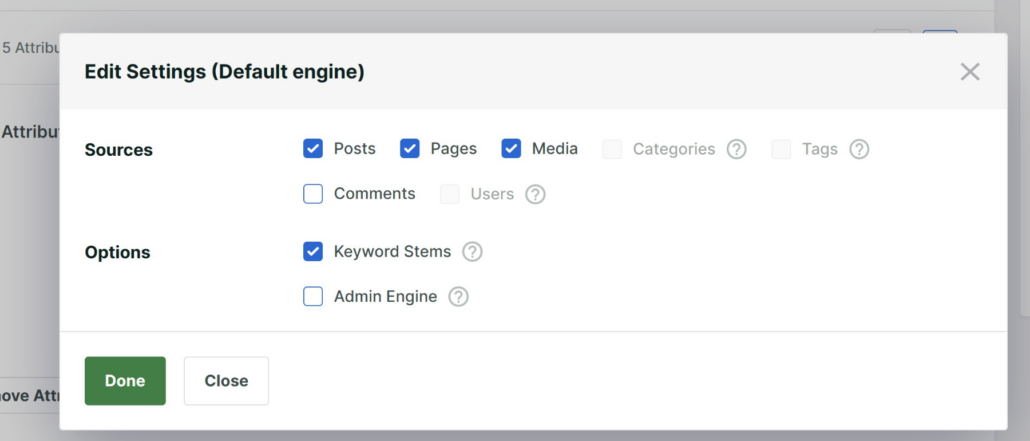
After selecting the sources, go ahead and click the ‘Done’ button.
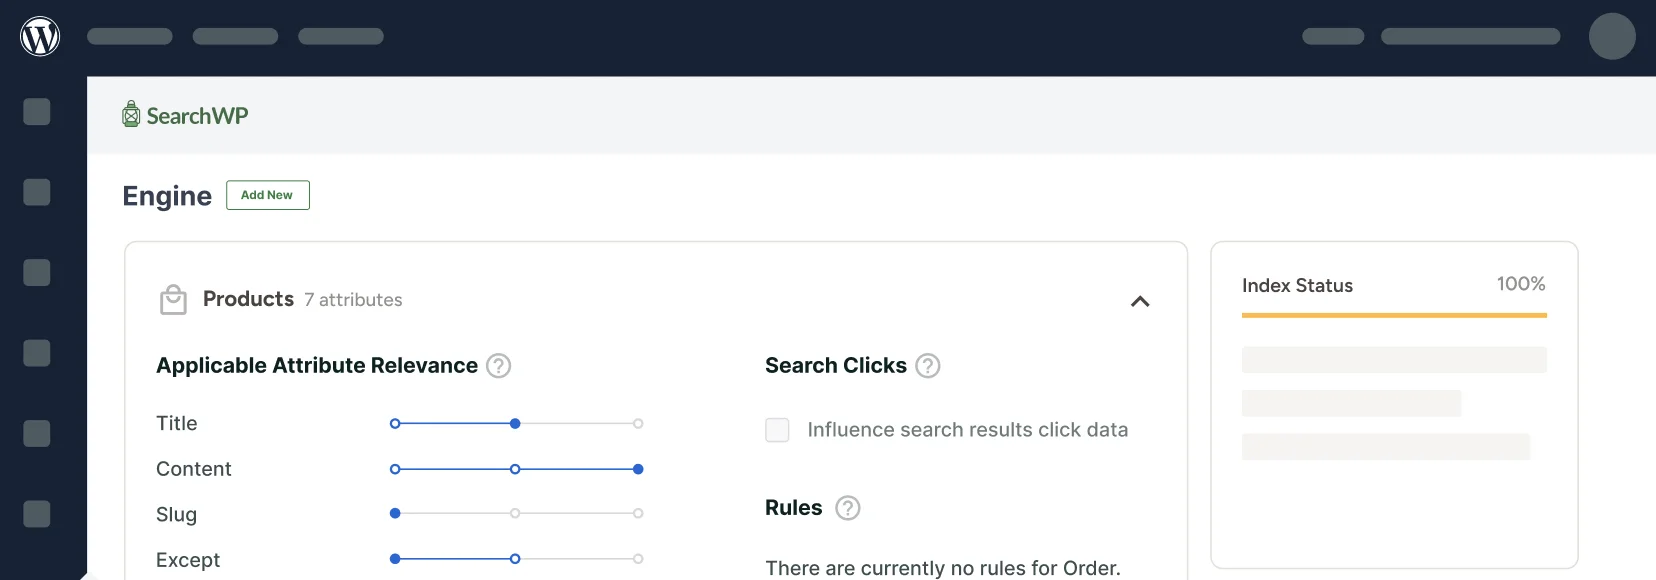
Next, you can adjust the weights assigned to each attribute by moving the slider.
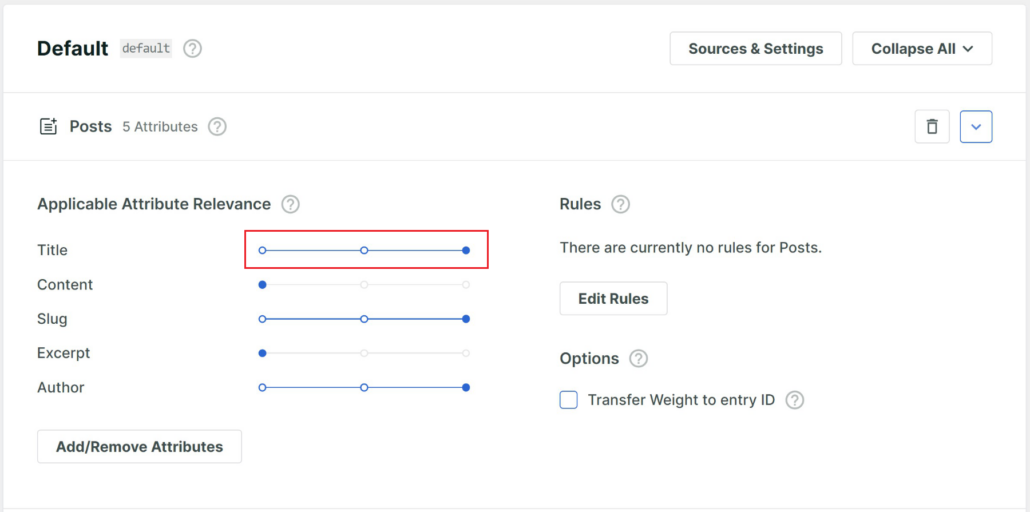
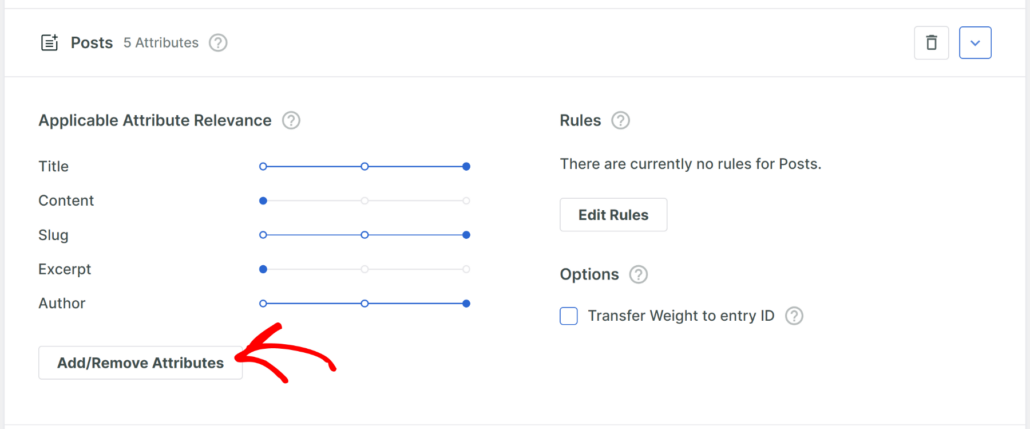
After that, you can add or remove attributes from each Source in the engine. For example, in the Posts source, SearchWP will use title, content, slug, excerpt, and author as attributes.
You can click the ‘Add/Remove Attribute’ button to include custom fields and taxonomies in the search process.
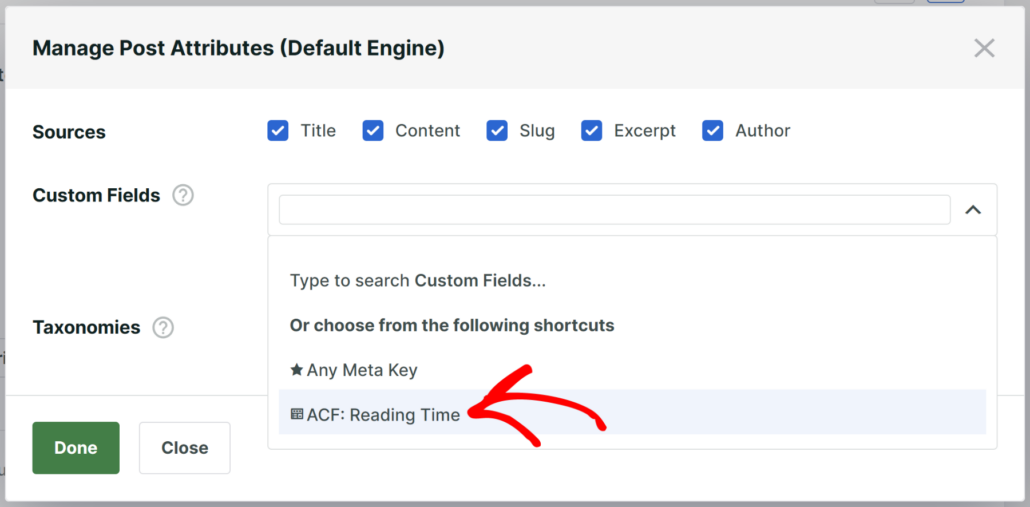
You will now see a new popup open where you can manage the search attributes.
For instance, if you’re using Advanced Custom Fields (ACF) on your site, then you can click the Custom Fields dropdown menu and select ACF fields.
On the other hand, you can also include categories and tags when searching for posts on your multisite network.
Simply click the ‘Taxonomies’ dropdown menu and select an attribute.
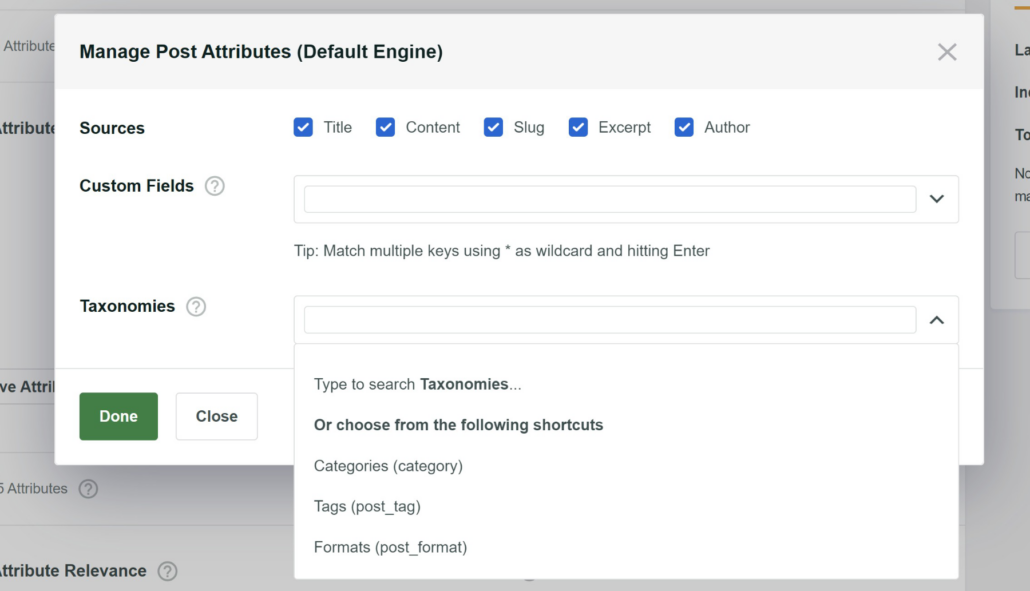
When you’re finished managing the attributes, simply press Done to save your changes.
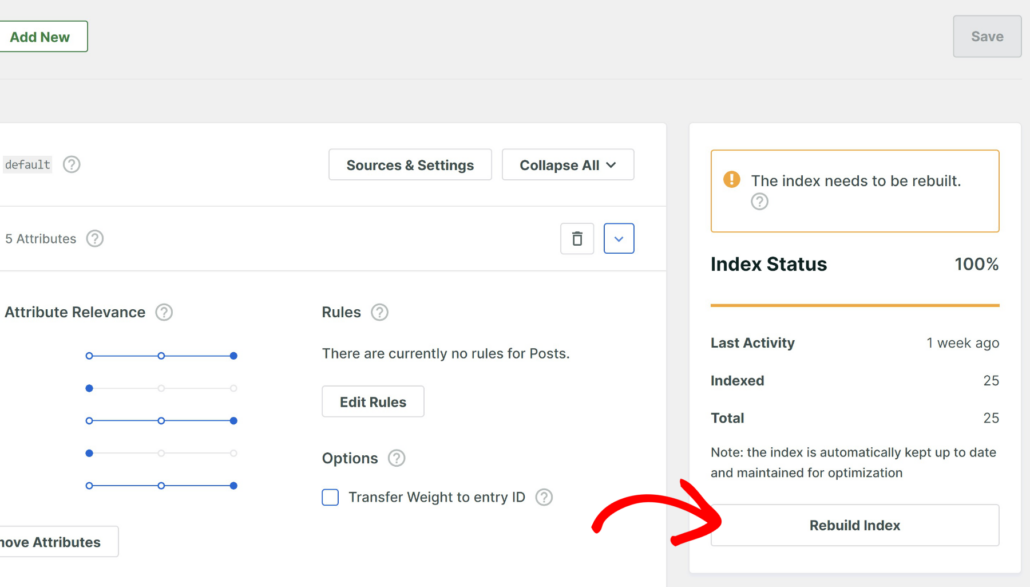
Now the last step is to click the ‘Save’ button at the top to store your changes. After that, you will also need to click the Rebuild Index button next so SearchWP indexes all your content on the multisite network.
Next, you can also specify synonyms and stopwords to improve search accuracy.
Simply head to SearchWP » Algorithm from the WordPress admin panel and then go to the ‘Global Rules’ tab.
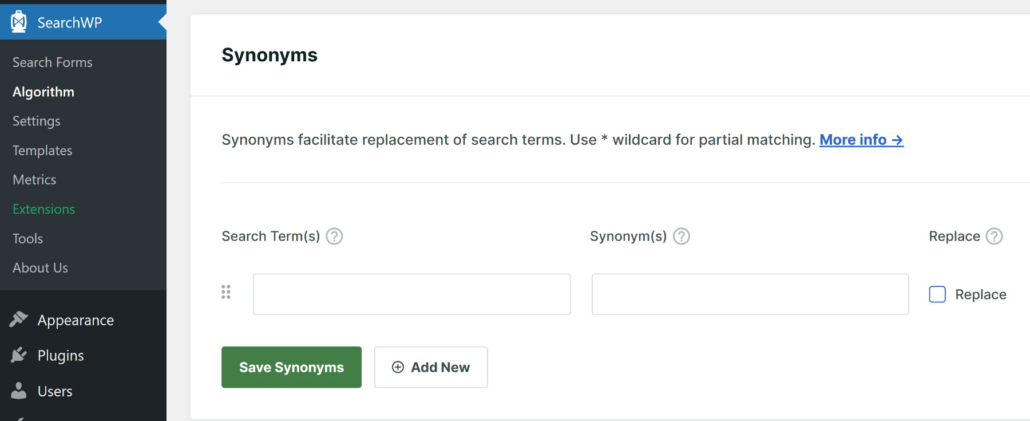
From here, you can click the ‘Add New’ button and then enter the search terms and their synonyms. When you’re done, simply click the ‘Save Synonyms’ button.
After that, scroll down to the Stopwords section and omit certain words to streamline the searching process. Stopwords are common words (like is, the, an, a, in, at, and if) that are not helpful when searching and do not carry significant meaning in identifying the content.
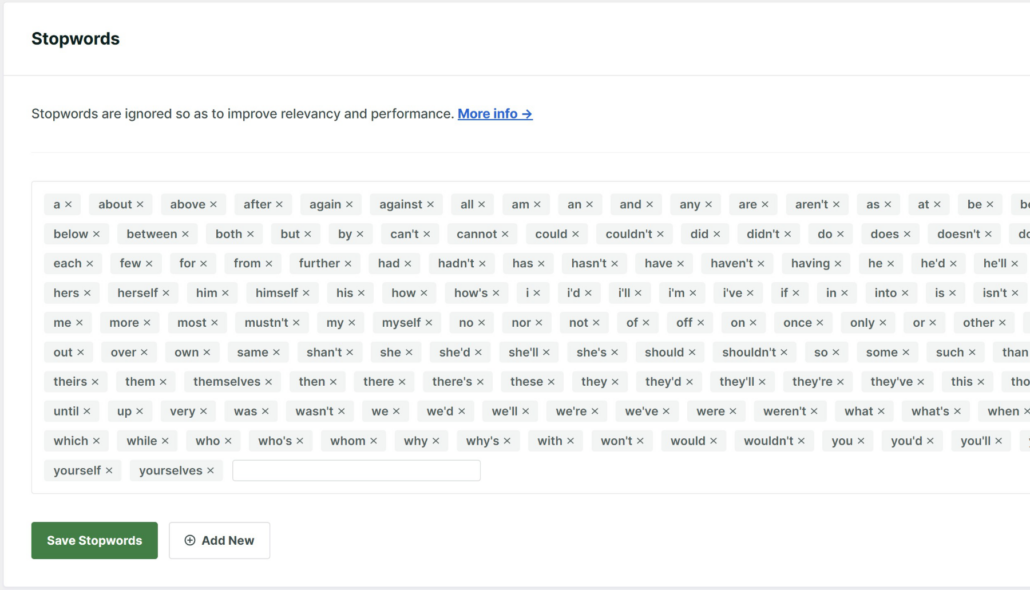
SearchWP will already have a list of stopwords added to the library. But you can add more words and then click the ‘Save Stopwords’ button.
Once this is done, you will need to repeat all these steps on all the sites in the multisite network to create custom search engines or edit the default engine’s settings.
Just ensure that all the sub-sites have the same sources and attributes in the search engines. This way, you can perform a search on any site in the network and get accurate cross-site results.
Update Search Results Template with Custom Search Form
Next, you will need to update the search results template to account for site changes. This way, SearchWP will show results from across the network.
To start, you will need to go to SearchWP » Search Forms from the WordPress dashboard and click the ‘Add New’ button.
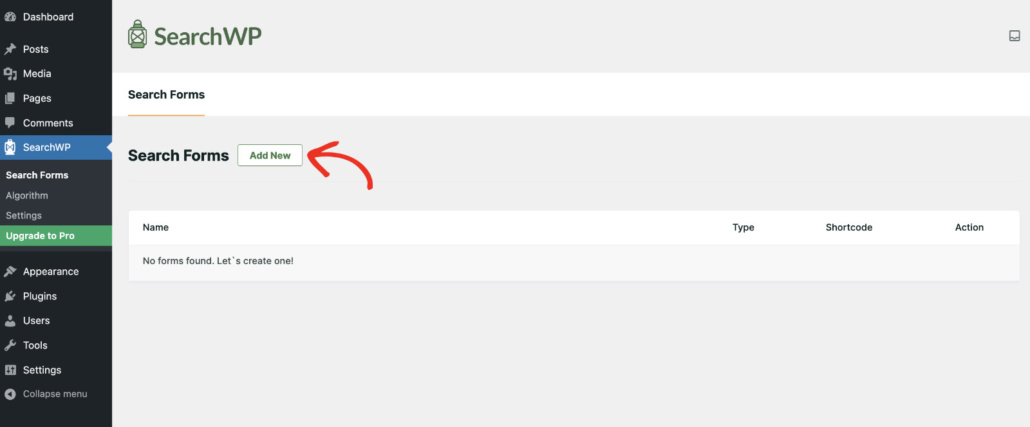
One of the advantages of using SearchWP is that you get to create custom search forms for each website in the multisite network. This makes it very easy to customize the appearance of search forms on your sites without editing code.
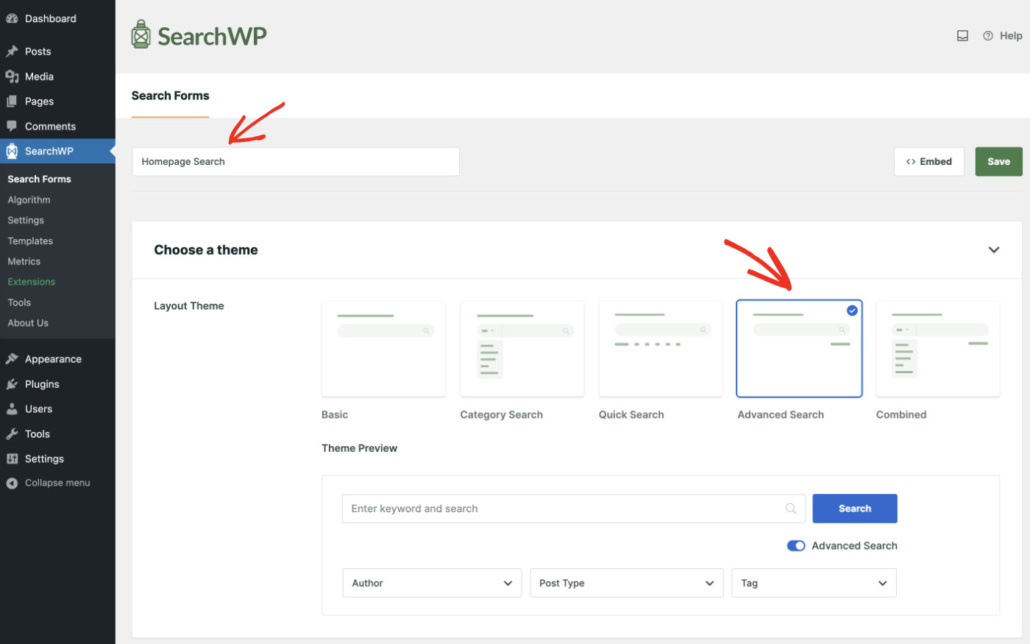
Go ahead and enter a name for your search form at the top.
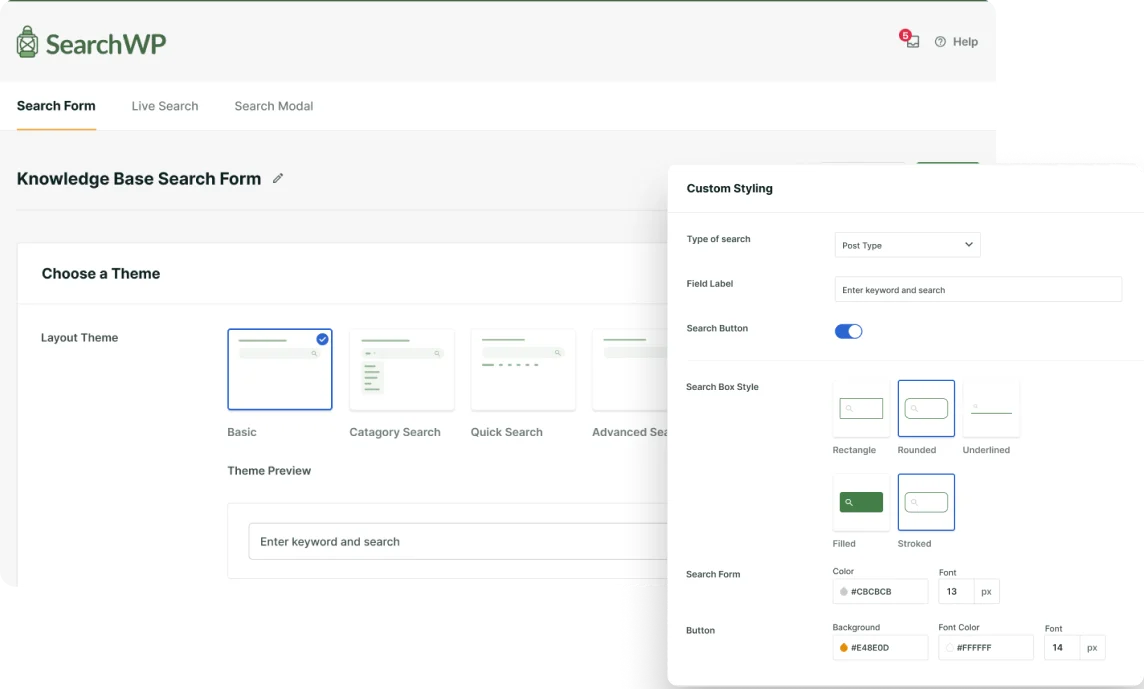
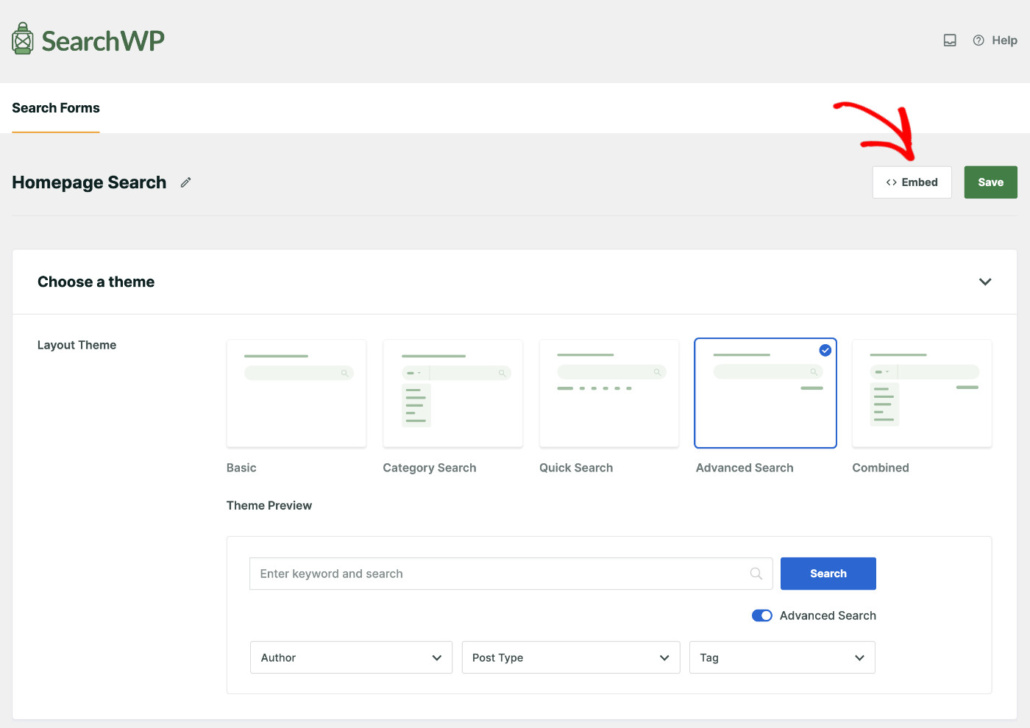
After that, you can select a Layout Theme for your form. The plugin offers prebuilt layouts which includes a basic layout, category search, advanced search, or a combination.
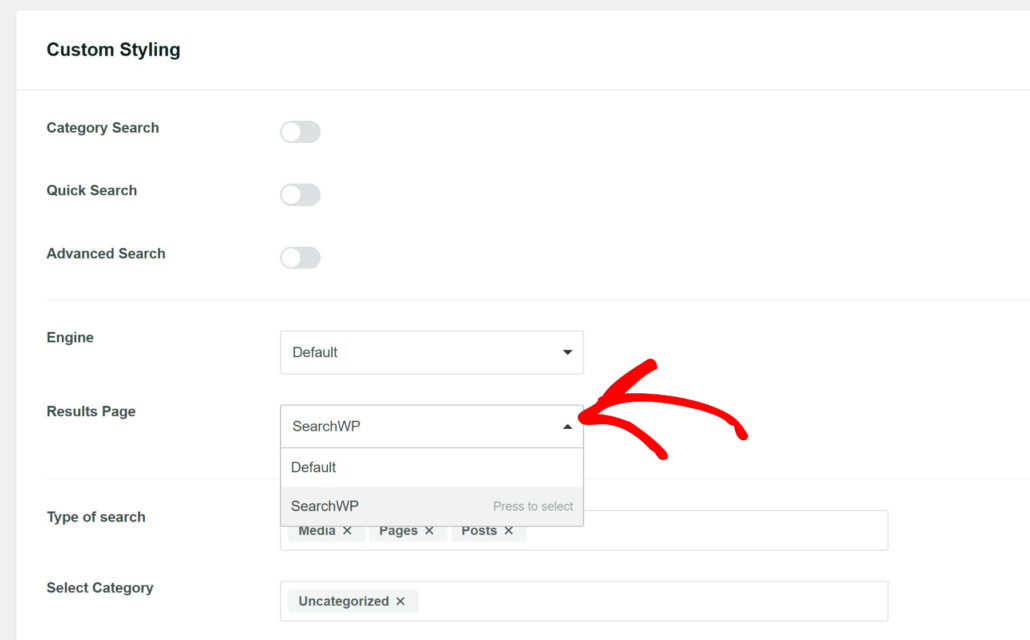
Next, you can scroll down to the Custom Styling section.
Here, you’ll need to change the Results Page from Default to SearchWP.
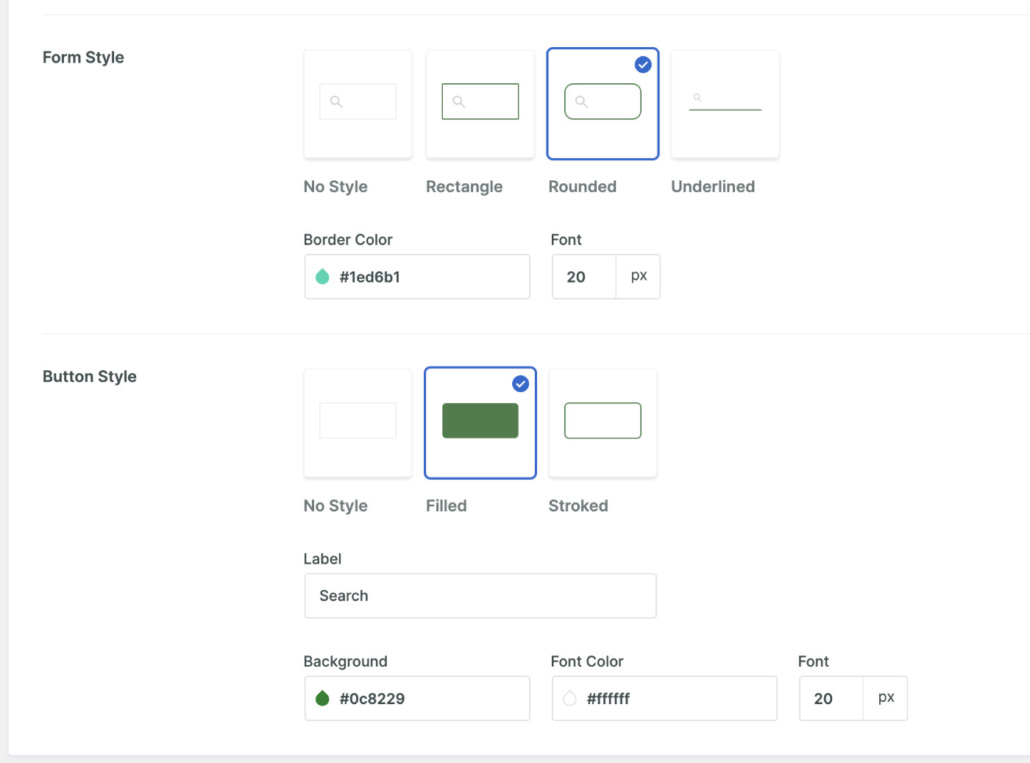
Besides that, you can also customize the form and button appearance according to your requirements.
For instance, there are options to change the search form style, edit the color, change the button style, and alter the label.
When you’re done customizing your search form, simply scroll to the top and click the ‘Save’ button.
After that, you can click the ‘Embed’ button to add your search form anywhere on the website.
A popup window will now open where you’ll see different options for adding your form to WordPress.
SearchWP lets you embed the form using a Gutenberg block, shortcode, or PHP code. There is also an option to embed the search form to an existing page or create a new page.
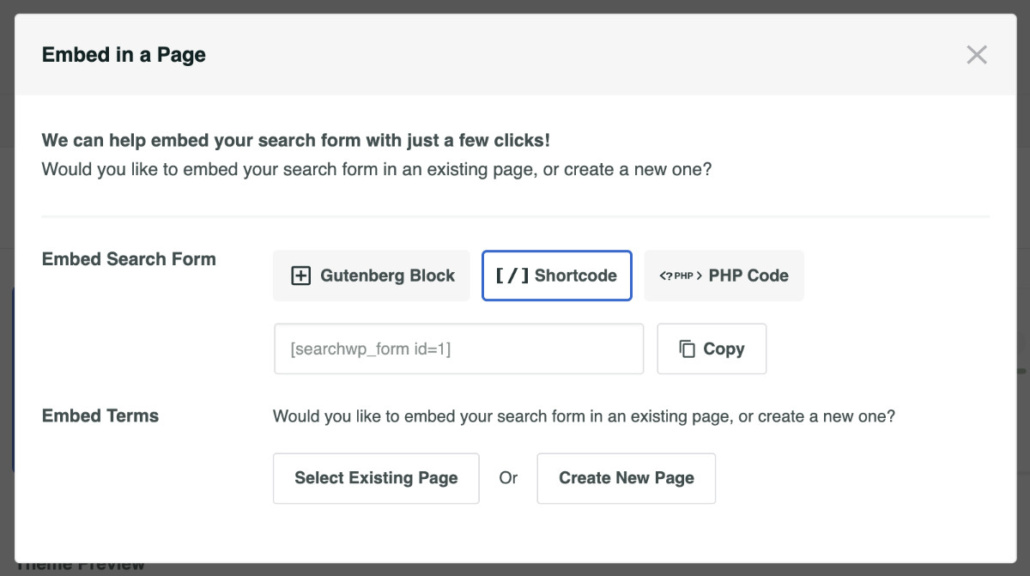
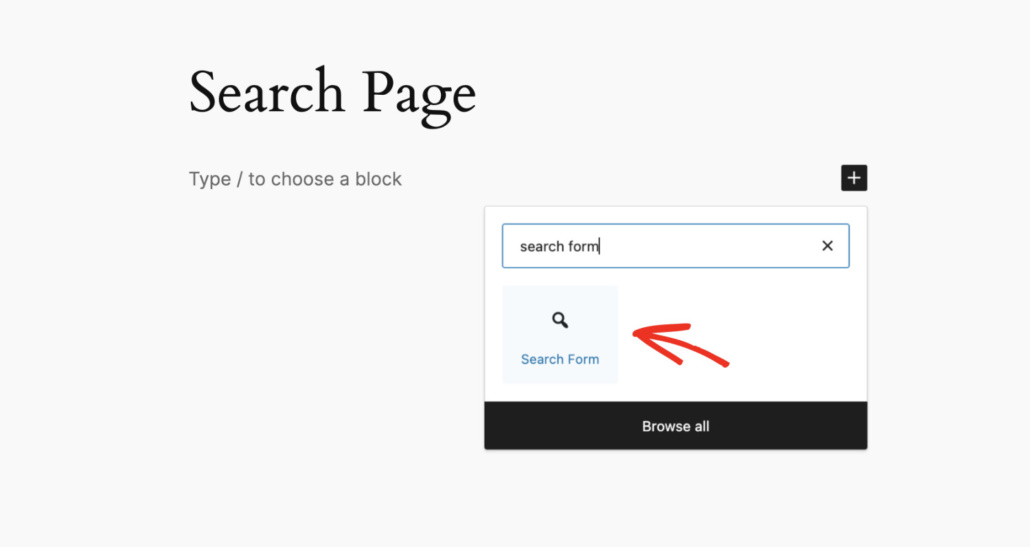
For this tutorial, we will embed it to a new page using the Gutenberg block.
Simply head to the new page and click the ‘+’ icon to add a new block. Simply enter ‘search form’ in the search bar and select the ‘Search Form’ block.
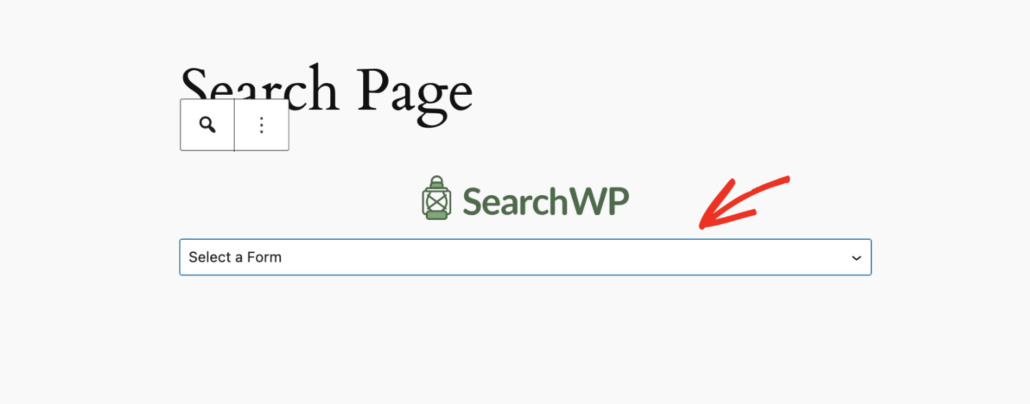
Next, you will see the SearchWP block added to the content editor.
Go ahead and click the dropdown menu and select your search form.
You should now see a preview of the search form in the block editor.
Go ahead and click the Publish or Update button.
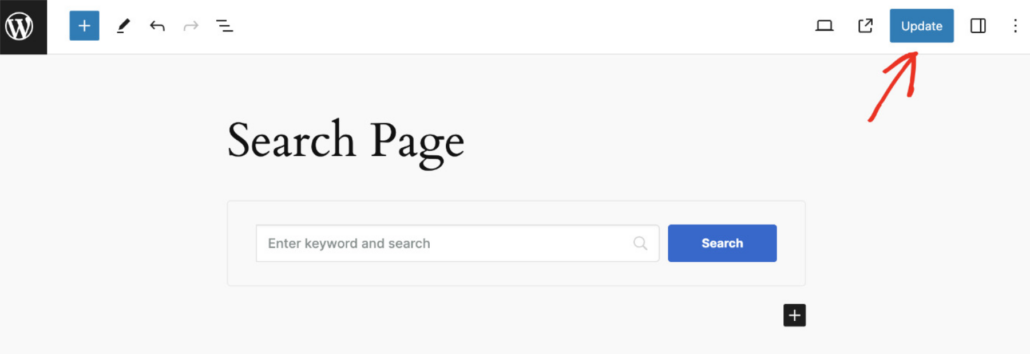
Now visit the page with the search form and try searching for content across the multisite network.
With SearchWP, you can also create separate search engines for each sub-site in the multisite network and assign them to each search form.
If you want to learn more, then please see our guide on how to create a custom search form in WordPress.
That’s it, you’ve successfully added a multisite search feature in WordPress.
With that, we hope you learned how to perform a multisite search in WordPress without coding. You may also want to see our guide on how to set up WordPress search settings for best results and how to redirect search results in WordPress.
Ready to create a better and more personalized WordPress search experience? Get started with SearchWP today!
