When we started building websites with WPBakery Page Builder, we quickly discovered a frustrating problem. The default WordPress search feature was letting our visitors down.
People would search for content we knew existed on our sites, but they’d get irrelevant results or no results at all.
We watched potential customers leave our sites because they couldn’t find what they were looking for. The default WordPress search misses important details that make results truly helpful.
In this guide, we’ll show you how to add a search box in WPBakery Page Builder and customize the search experience.
What is WPBakery Page Builder?
WPBakery Page Builder is one of the most popular drag-and-drop page builders for WordPress. It comes with dozens of prebuilt content elements, from basic text and images to complex pricing tables and testimonials.
Plus, you get to choose from a template library and start customizing your page in an instant.
WPBakery also offers an AI website building assistant that helps you create stunning pages using prompts.
Now, why should you add a search box in WPBakery?
WordPress’s built-in search works like a basic keyword matcher that only scratches the surface. When visitors search your site, they often get confused by results that don’t match what they’re actually looking for.
Poor search results create a domino effect that hurts your business. Frustrated visitors spend less time on your site and are more likely to leave without converting.
When people can’t find what they need quickly, they assume you don’t have it and go somewhere else.
That said, let’s look at how you can easily add a search box in WordPress using WPBakery page builder.
Adding a Search Box in WPBakery Page Builder
Before integrating a search form using WPBakery Page Builder, you can first enhance your website’s search functionality with SearchWP.
SearchWP is the leading search plugin for WordPress, trusted by over 50,000 website owners.

With SearchWP, you can create a smarter, more effective search experience without any coding skills required.
It allows you to decide exactly what’s searchable, such as easily excluding specific pages from results or ensuring your custom fields are included.
This results in an improved user experience, making it easier for your visitors to find what they’re looking for.
Besides that, SearchWP offers customizable SearchWP Forms and SearchWP Results blocks, which you can effortlessly add within the WPBakery builder to display your search forms and custom results templates.
In addition to WPBakery Page Builder, SearchWP supports other popular site builders like Elementor, Divi, Beaver Builder, Bricks, Breakdance, and Oxygen.
Here are more key features offered by SearchWP:
- Search Analytics: Understand user intent by tracking and analyzing what visitors search for on your site.
- Live AJAX Search: Provide an interactive experience by displaying search results instantly as users type.
- Advanced Customization: Make custom fields searchable, exclude specific pages or categories, and fine-tune relevance weights for attributes.
- Manual Result Reordering: Gain complete control by manually adjusting the order of search results to feature specific content.
- Multiple Search Engines: Create and manage different search configurations, each assignable to various search forms on your site.
Now, let’s see how you can quickly set up SearchWP and use it to customize search on your site.
Step 1: Install and Activate SearchWP
First, you’ll need to visit the SearchWP website to get your copy of the plugin.
Once that’s done, simply log in to your SearchWP account, navigate to the ‘Downloads’ tab, and click the Download SearchWP button.

Next, you will need to save the plugin ZIP files on your computer.
From here, you can install SearchWP on your site, upload the plugin’s ZIP file and activate it. If you need assistance, please follow this step-by-step guide on how to install a WordPress plugin.
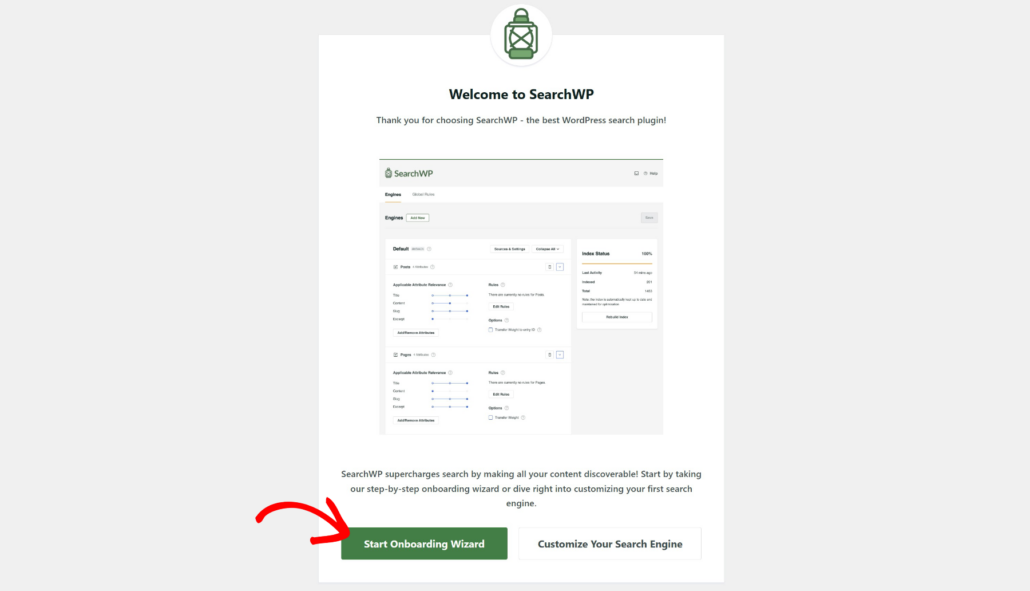
Upon activation, you’ll see the setup wizard. Simply click the ‘Start Onboarding Wizard’ button and follow the setup wizard to get started.
Step 2: Customize or Add a New Search Engine
SearchWP also lets you edit the default engine on your site and add new ones, defining rules for searches.
This way, you can customize which sources to include in the search process, which content to exclude, and more.
To start, you can head to SearchWP » Algorithm from your WordPress dashboard. From here, simply click the ‘Sources & Settings’ button, and choose your preferred search sources.
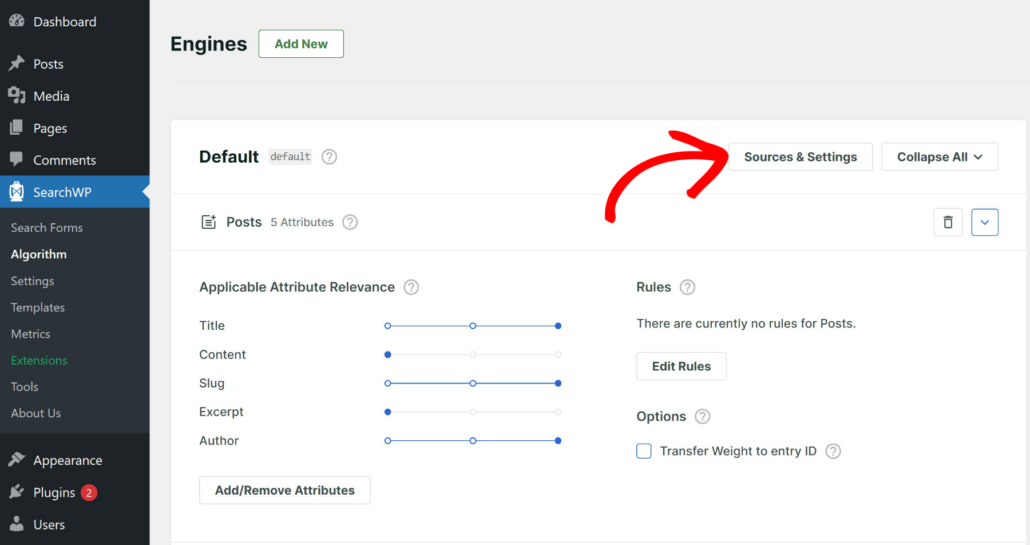
By default, Posts, Pages, and Media sources will be already included, but you can add more depending on your needs.
For example, if you want to hide specific content, then you can simply uncheck that particular source.

SearchWP also lets you edit the attributes for each source. Attributes are types of content within each Source, such as title, content, custom field, category, tag, and more.
Simply click the Add/Remove Attributes button under any source.
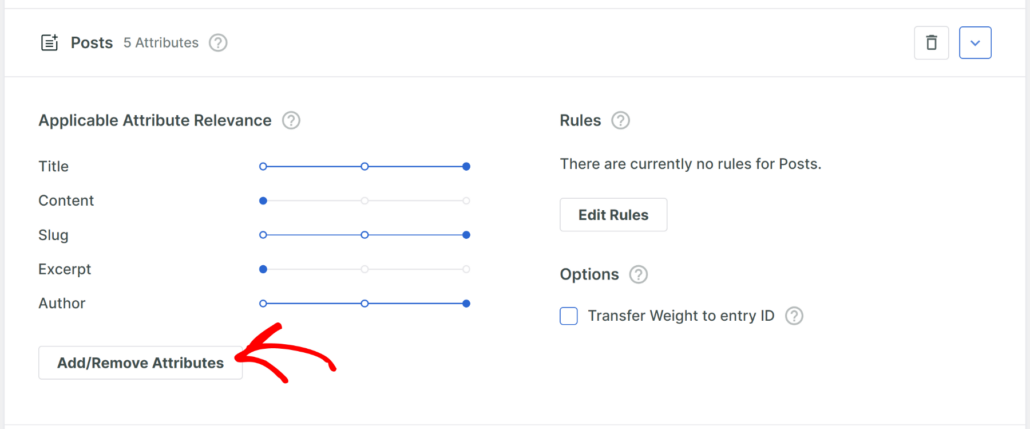
On the next screen, you can choose which attributes to include.
For example, you can add custom fields like real estate listings or ingredients, post categories like tutorials, product details like SKUs, and more.
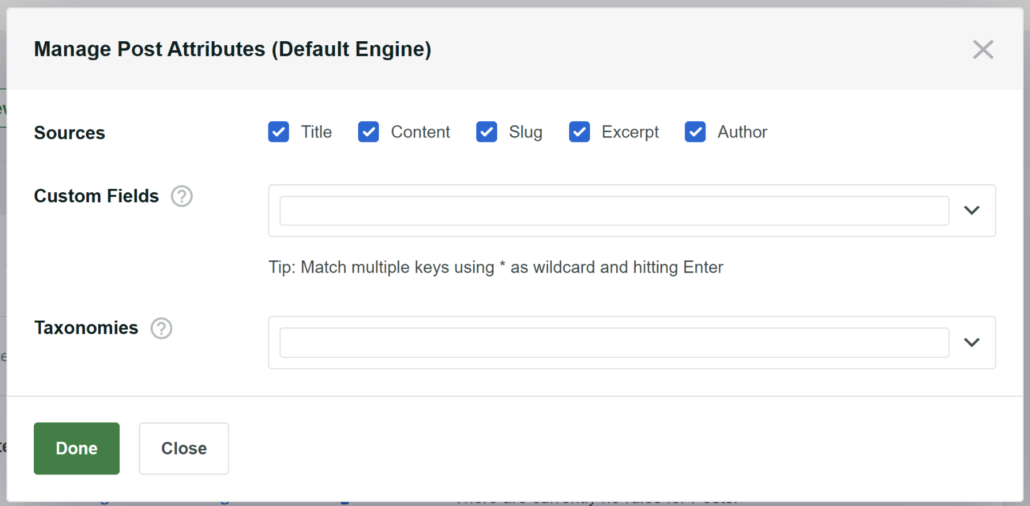
To learn more, please see our detailed guide on how to change your WordPress site’s default search settings.
Step 3: Create a Search Form in SearchWP
Next, SearchWP also lets you create custom search forms that you can easily connect with the search engine.
To create a search form that you can use with WPBakery Page Builder, you can navigate to SearchWP » Search Forms from the WordPress dashboard.
You can create or edit a form, customize its layout and features, and select your newly created engine.

On the next screen, you can start by editing the name of the form at the top.
After that, SearchWP lets you choose a layout for your form.
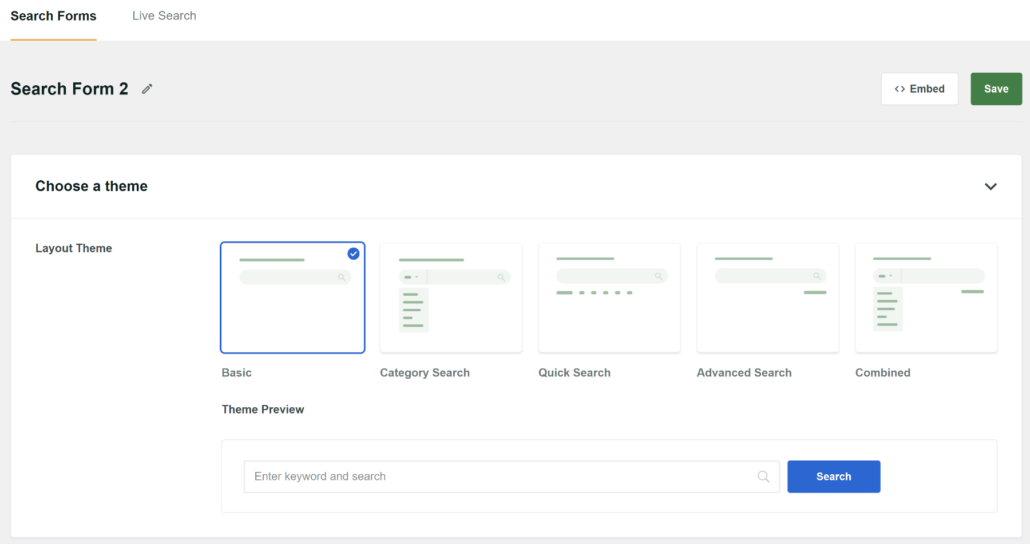
Besides that, you also get more options to edit the form.
For example, you can change the form style, button style, colors, select an engine and results page, and more.

For more details, please see our guide on how to create a custom search form in WordPress.
Step 4: Add Search Box Using WPBakery Page Builder
Now, you can add the search form to a page using WPBakery Page Builder.
Simply go to Pages » All Pages in your WordPress dashboard and edit a page or add a new one.
When you’re in the content editor, click the WPBakery Page Builder button.

Next, you will be taken to the WPBakery Page Builder, where a popup message will appear.
You can simply click the ‘Got It’ button to continue.
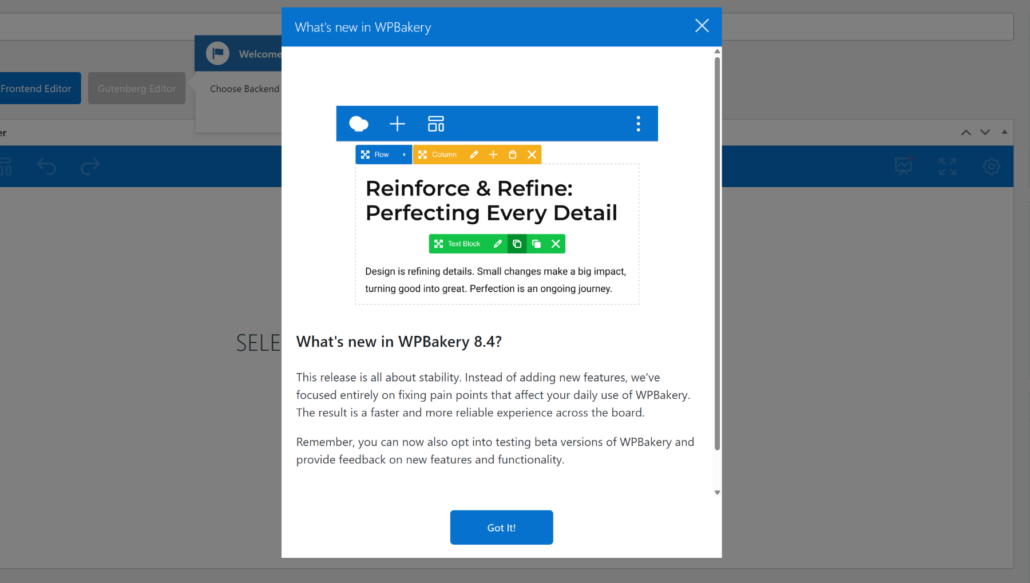
After that, you can start editing the page using WPBakery.
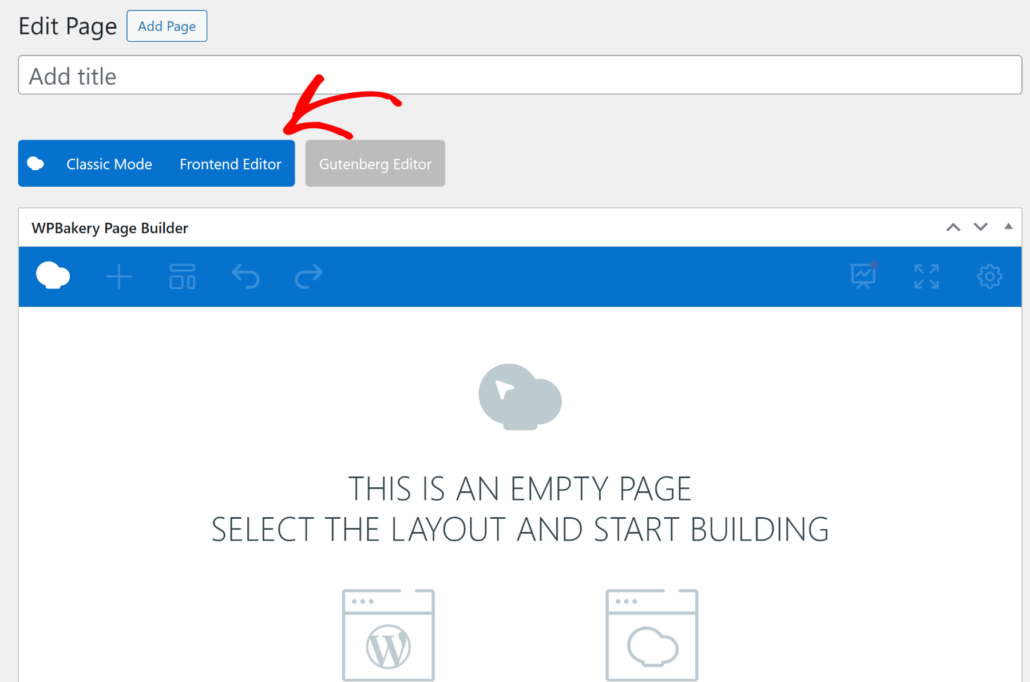
By default, the page builder will open the Classic Mode. However, you can switch to Frontend Editor or Gutenberg Editor as well.
For this tutorial, we’ll use the Frontend Editor and see how the search form will appear on the website in real time.
Next, you will need to select a layout for your page.
You can choose between the default WordPress theme layout or a blank page layout by WPBakery.

For instance, we will use the ‘Blank Page Layout by WPBakery’ option.
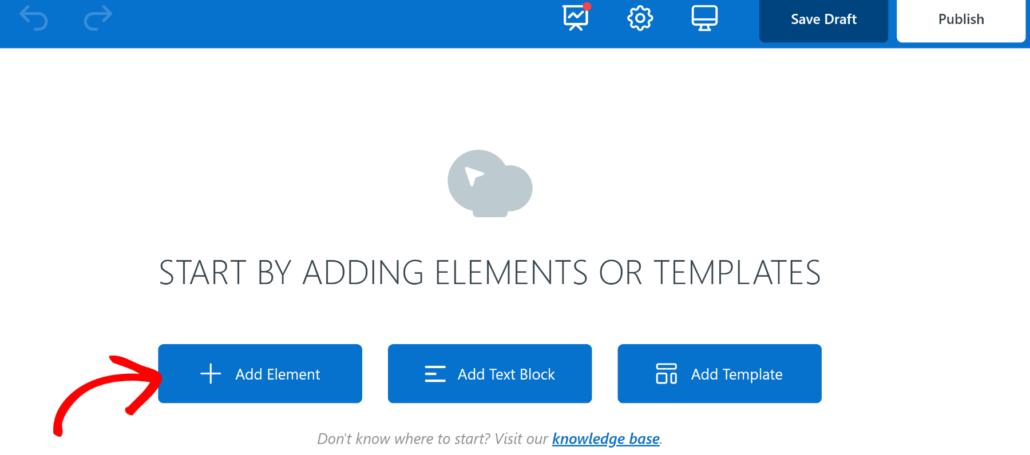
Next, you can click the ‘+ Add Element’ button.
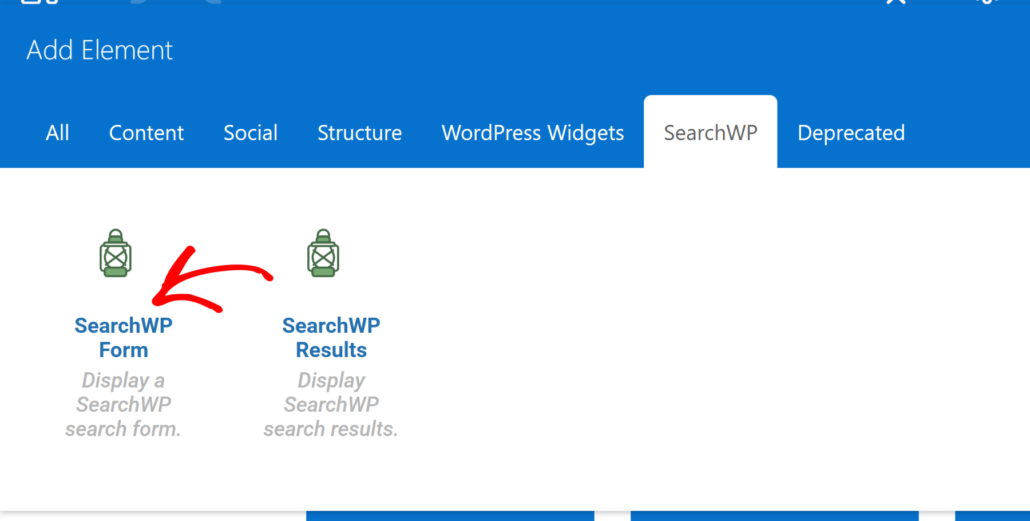
After that, you will see a list of elements to add. First, you need to switch to the ‘SearchWP’ tab at the top.
From here, simply add the SearchWP Form element.
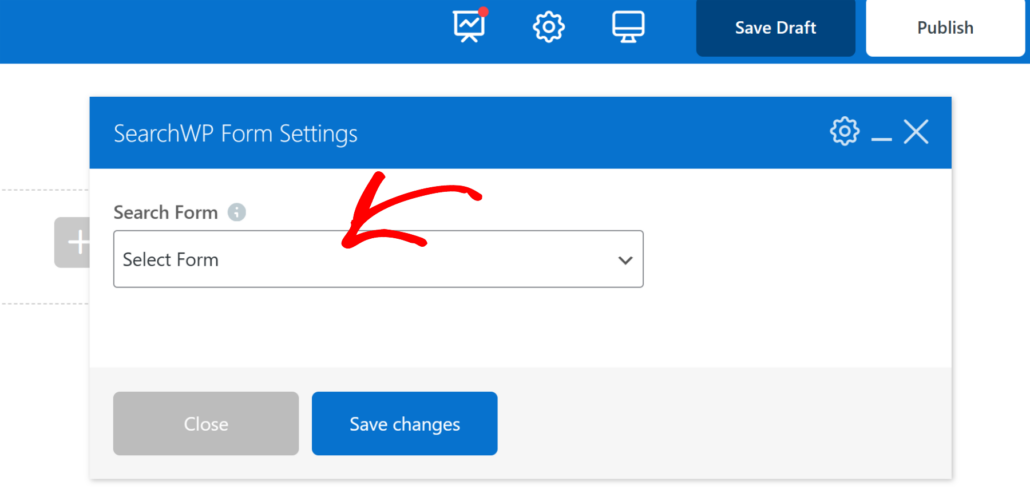
Next, WPBakery will ask you to select your SearchWP search form.
Go ahead and click the dropdown menu to pick a form and then click the ‘Save Changes’ button.
Once that’s done, go ahead and click the Publish button at the top.
Next, you can close the page builder and visit the page to see the search box in action.

Now, try searching for categories, custom fields, tags, or any other information that you made searchable while customizing the search engine for your respective form.
We hope this article helped you learn how to add a search box in WPBakery page builder. You may also want to see our guide on how to use SearchWP with Elementor and the best WordPress backup plugins.
If you’re ready to create a smart search page on your site, you can get started with SearchWP here.
