Are your users struggling to find helpful content quickly on your site?
Many visitors to your site may need help finding the content they are looking for, even with a search bar.
This can happen for one of two reasons: users may not always know what to search for or which terms will yield the best results.
This can lead to frustration, lost opportunities, and users leaving the site prematurely.
However, if you display clickable keywords below the search bar in WordPress, you can easily solve this problem.
Key Takeaways:
- Many users are unaware of what they want or need from your website.
- Displaying popular keywords right below the search bar will solve this problem.
- SearchWP lets you add this feature to your site without needing to write any line of code!
Why Display Clickable Keywords Below Search Bar In Your Site
When you display clickable keywords below your WordPress search bar, you are nudging your users to explore key content without them needing to type in a query.
These pre-selected keyword prompts allow you to guide visitors toward specific products, services, or blog posts that align with your business goals.
It eliminates the guesswork for your visitors, making it easier for them to access valuable content. It also allows you to promote specific topics or products and boost your business.
For instance, if you run an online store, you could display keywords like “Summer Sale,” “New Arrivals,” or “Best Sellers” under the search bar. This draws attention to high-priority categories or promotions without the user having to search for them manually.
Similarly, for a blog, you might promote keywords such as “Top Tips,” “How-To Guides,” or “Beginner’s Guide,” directing visitors to cornerstone content that’s proven to drive traffic and engagement.
Now that we have a good idea of when to display clickable keywords below the search bar in WordPress. Let’s see how to do it easily!
How To Display Clickable Keywords Below Search Bar In WordPress
SearchWP is one of the most powerful search plugins available for WordPress. It allows you to easily display clickable keywords below the search bar in WordPress.
While the default WordPress search is functional, it covers only the basics. On the other hand, SearchWP allows you to control how your search algorithm works, making it possible to promote specific content, keywords, and post types.
Here are a few key features of SearchWP:
- Customizable Search Algorithms: With SearchWP, you can adjust how search results are ranked, giving you the power to boost the visibility of content with specific keywords.
- Keyword Stemming: SearchWP understands the relationship between words, so if a user searches for “run,” they’ll also see results for “running” and “ran.”
- Detailed Analytics: It gives you insights into what your users are searching for and which results are being clicked on, allowing you to refine your strategy continuously.
- Custom Search Results Page: SearchWP provides a fully customizable search results page, enabling you to modify its appearance and blend it with your site.
- Related Content Suggestion: With SearchWP, you can add a related section to every page, post, or custom post type, such as eCommerce products or documentation.
Now, let’s show you how to display clickable keywords below the search bar in WordPress using SearchWP.
Step 1: Configure SearchWP For Your Site
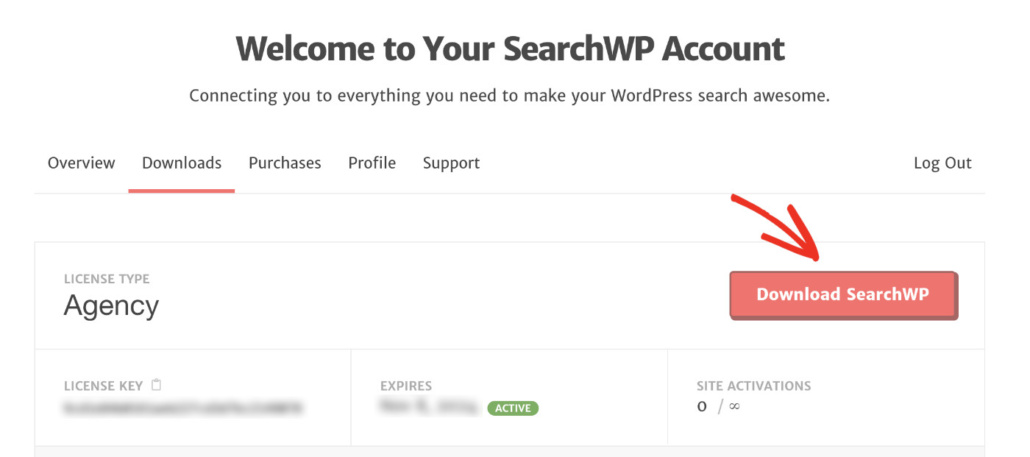
First, please select a SearchWP package that meets your needs. Then, download the plugin file from the “Downloads” tab of your Account page.
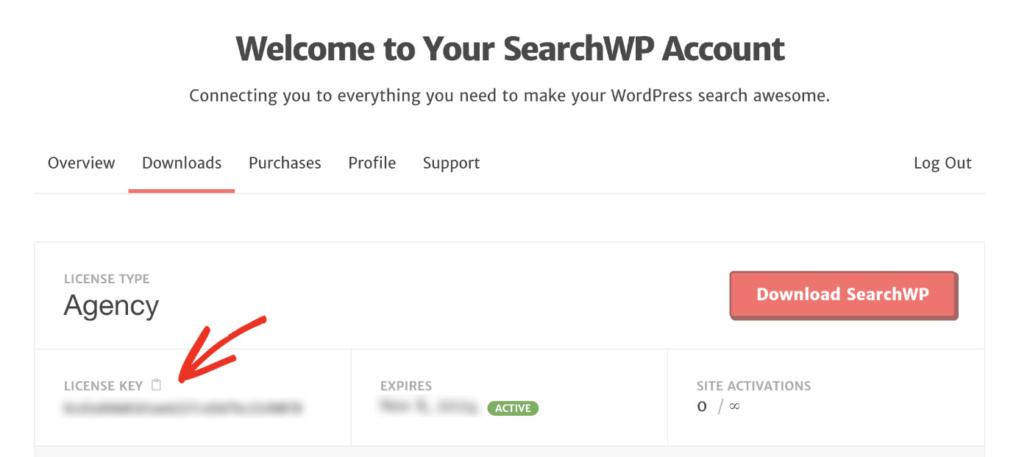
From the same page, please copy the license key as we’ll need it later to activate the plugin.
You can easily install and activate SearchWP just like any other WordPress plugin.
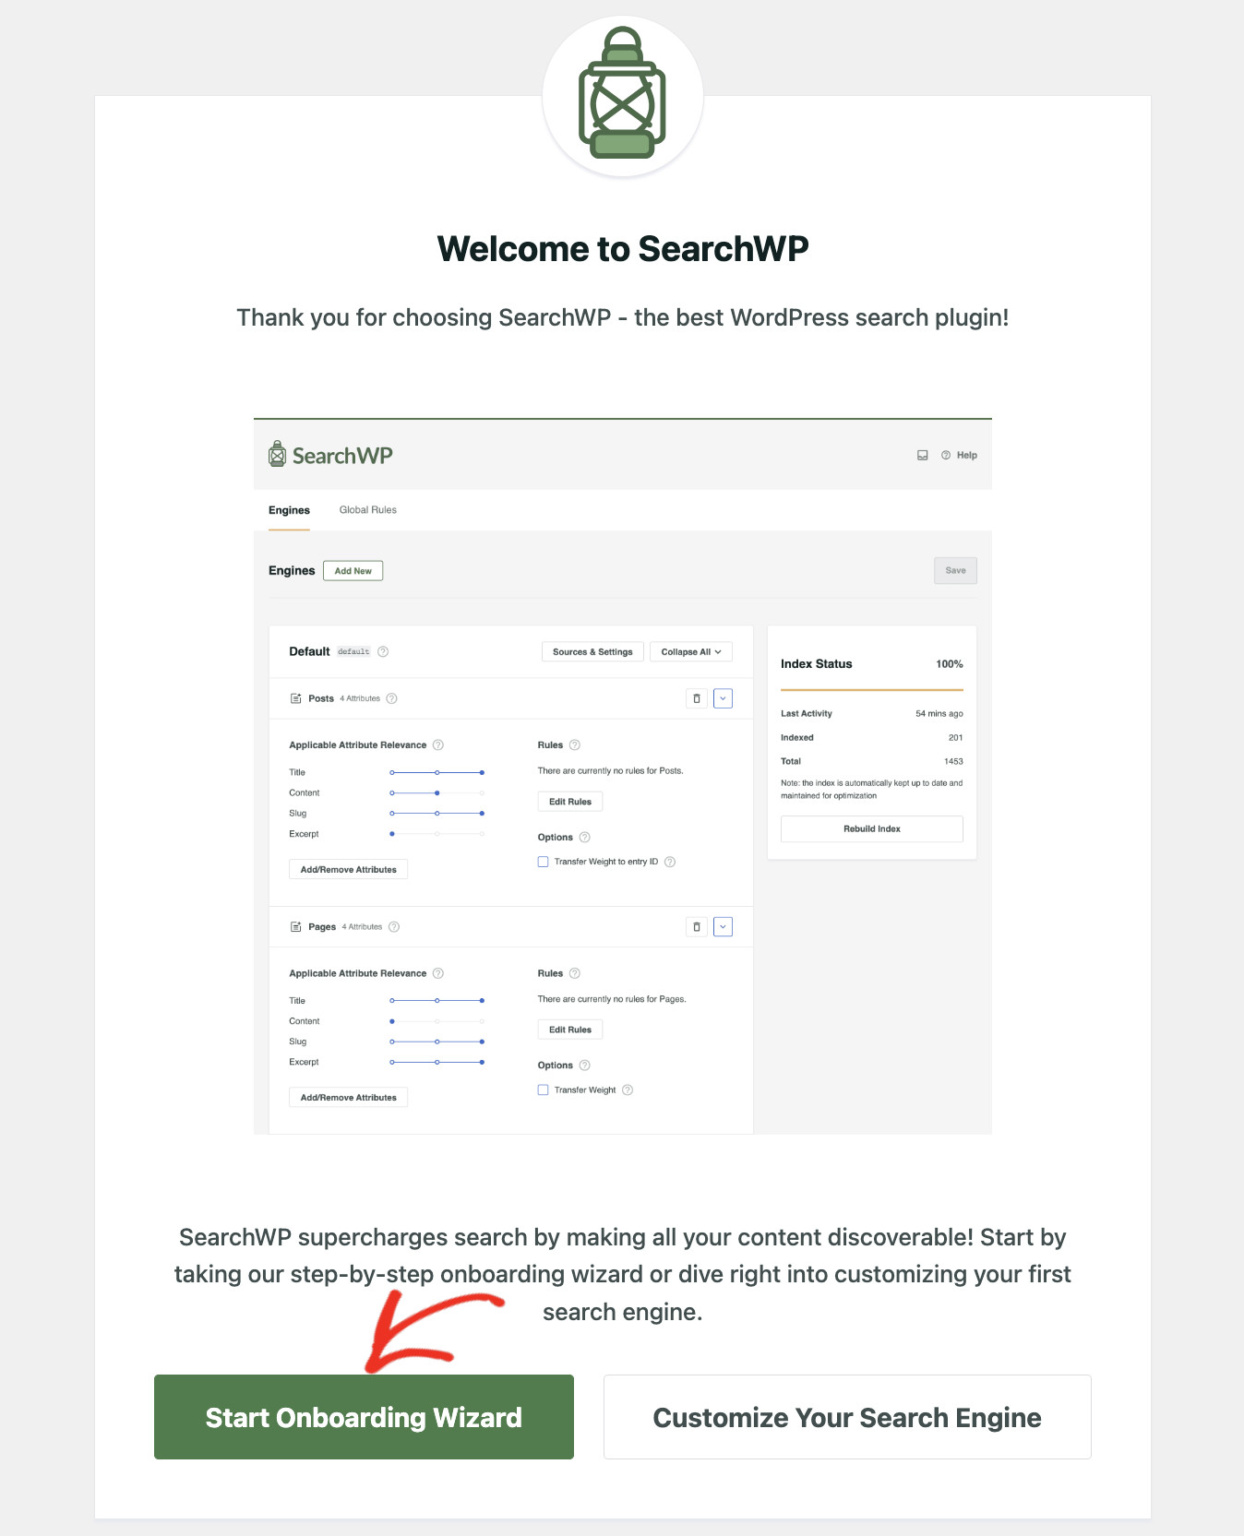
Once activated, you can follow the step-by-step setup guide by clicking the “Start Onboarding Wizard” button.
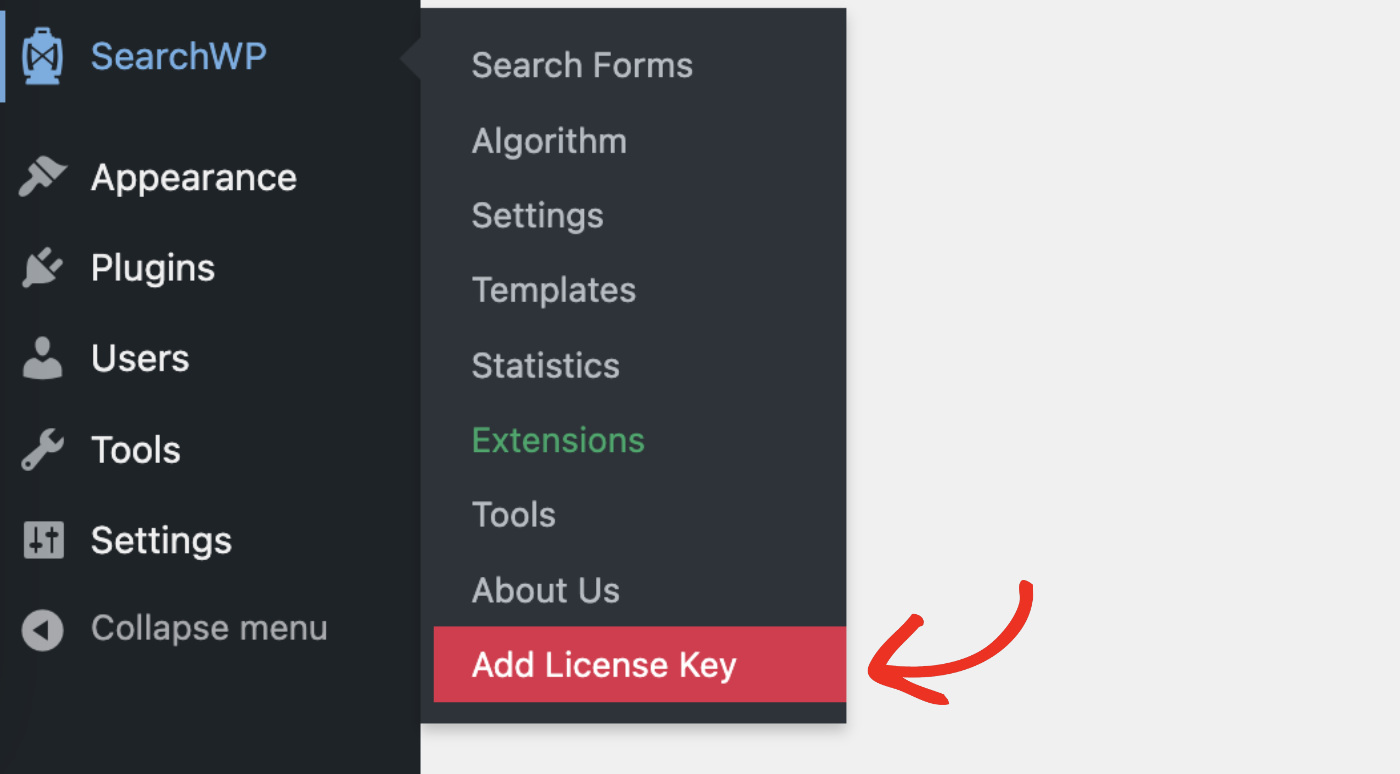
Alternatively, you can manually activate the plugin by going to SearchWP > Add License Key.
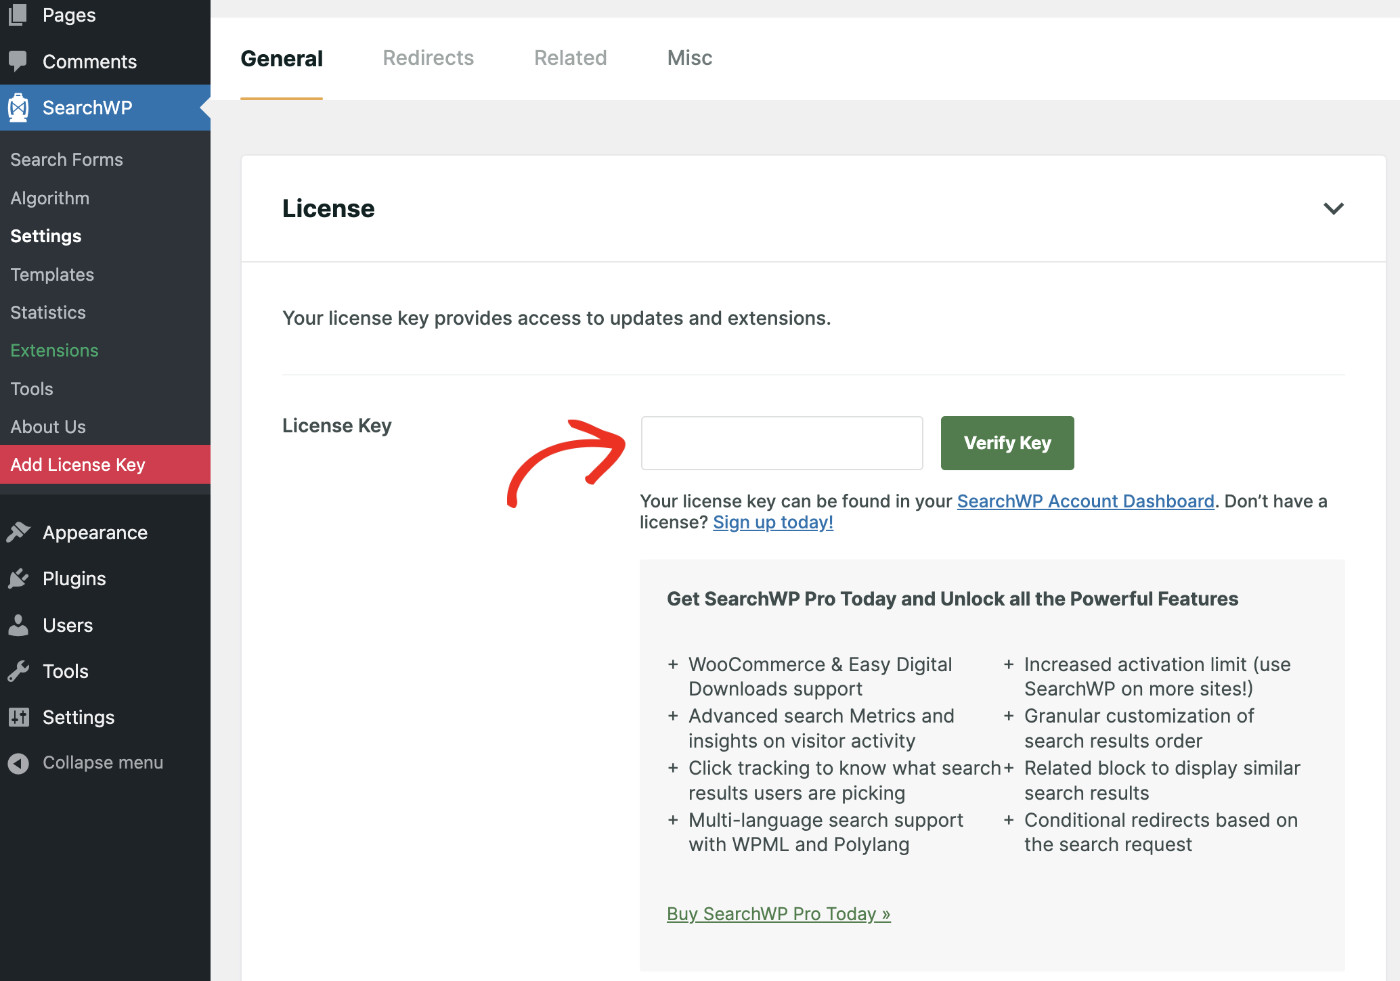
Then, paste the license key you copied earlier and click “Verify Key” to finalize the activation.
When the verification is successful, your licensing details will appear below.
Now, we are ready to display clickable keywords below the search bar in WordPress.
Step 2: Configure The SearchWP Engine
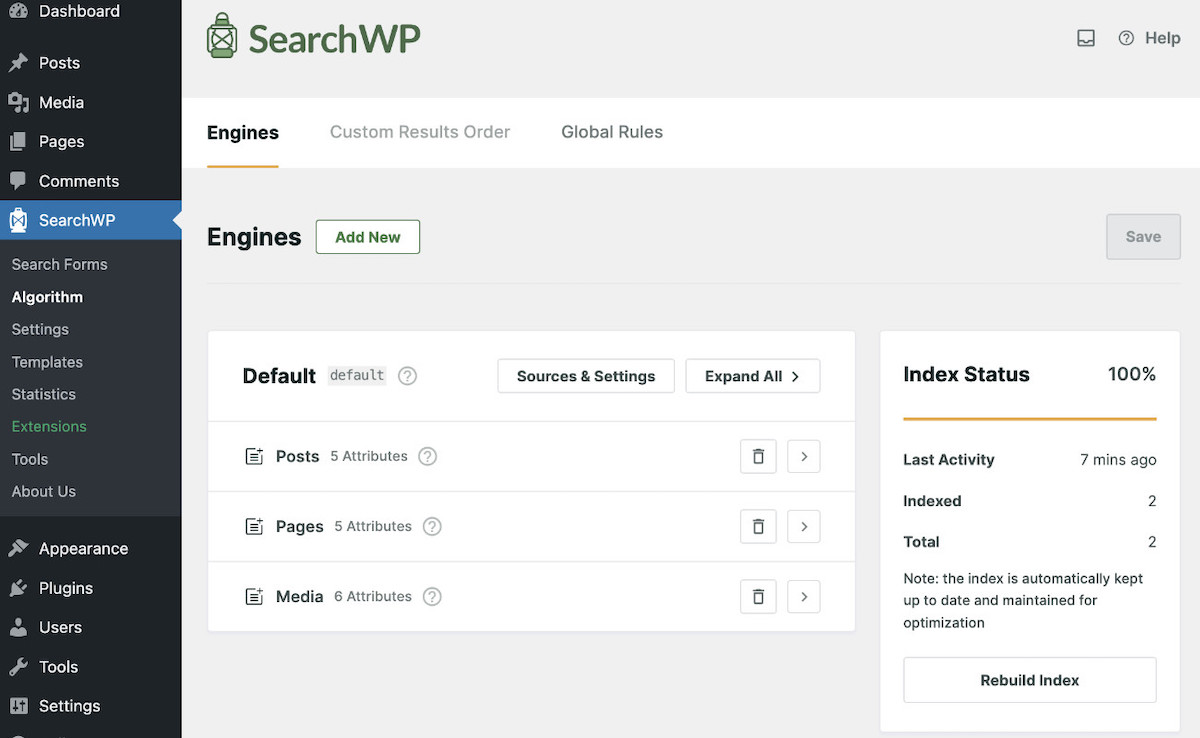
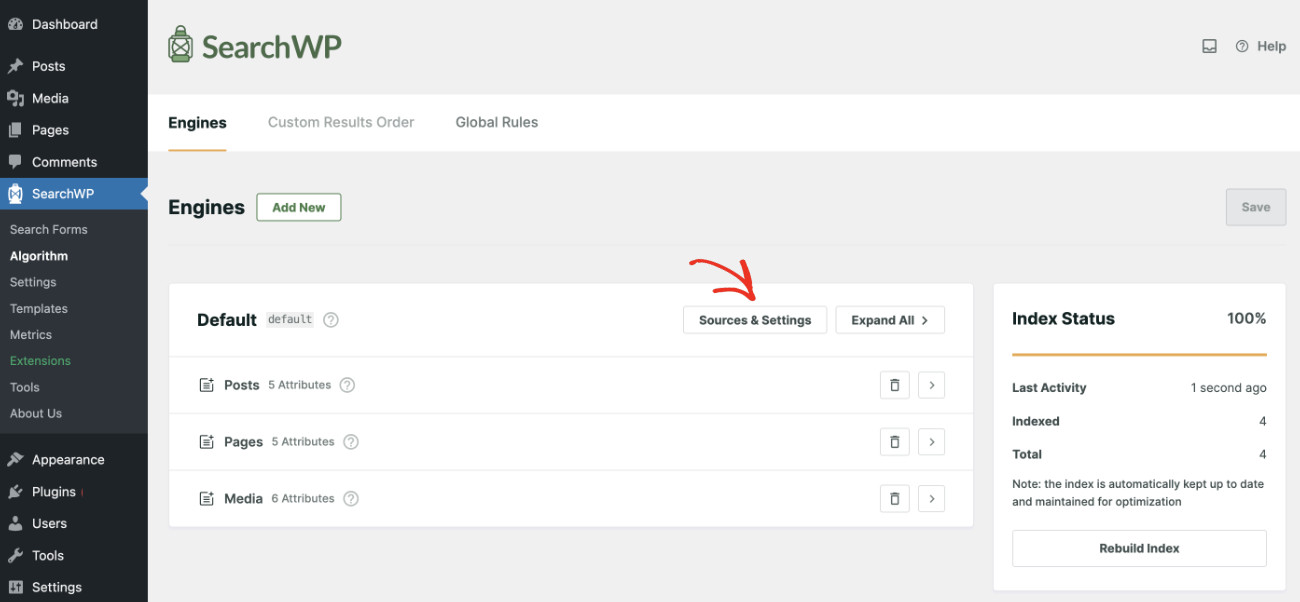
When you activate SearchWP, it immediately begins indexing your site’s content. However, you can have full control over the search engine settings. To manually adjust the search algorithm, go to SearchWP > Algorithm.
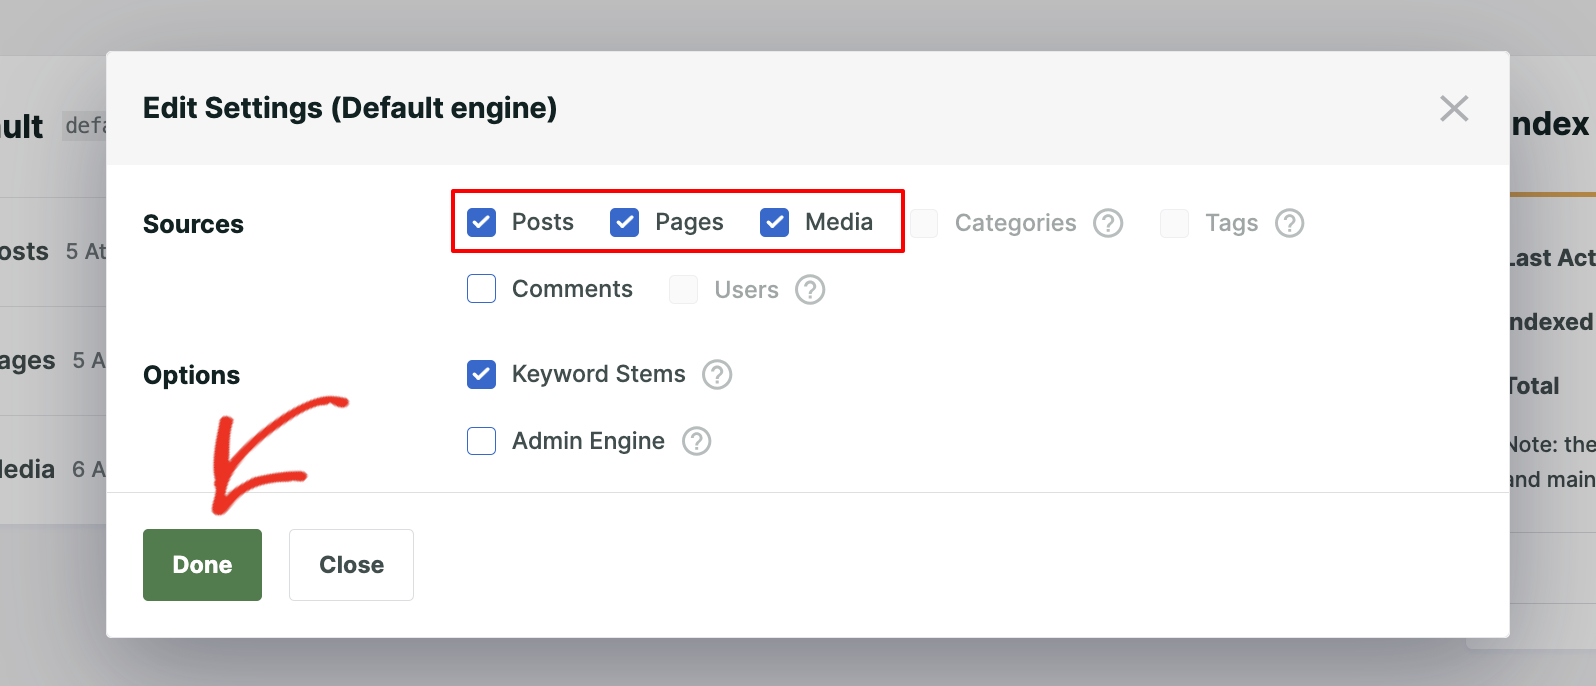
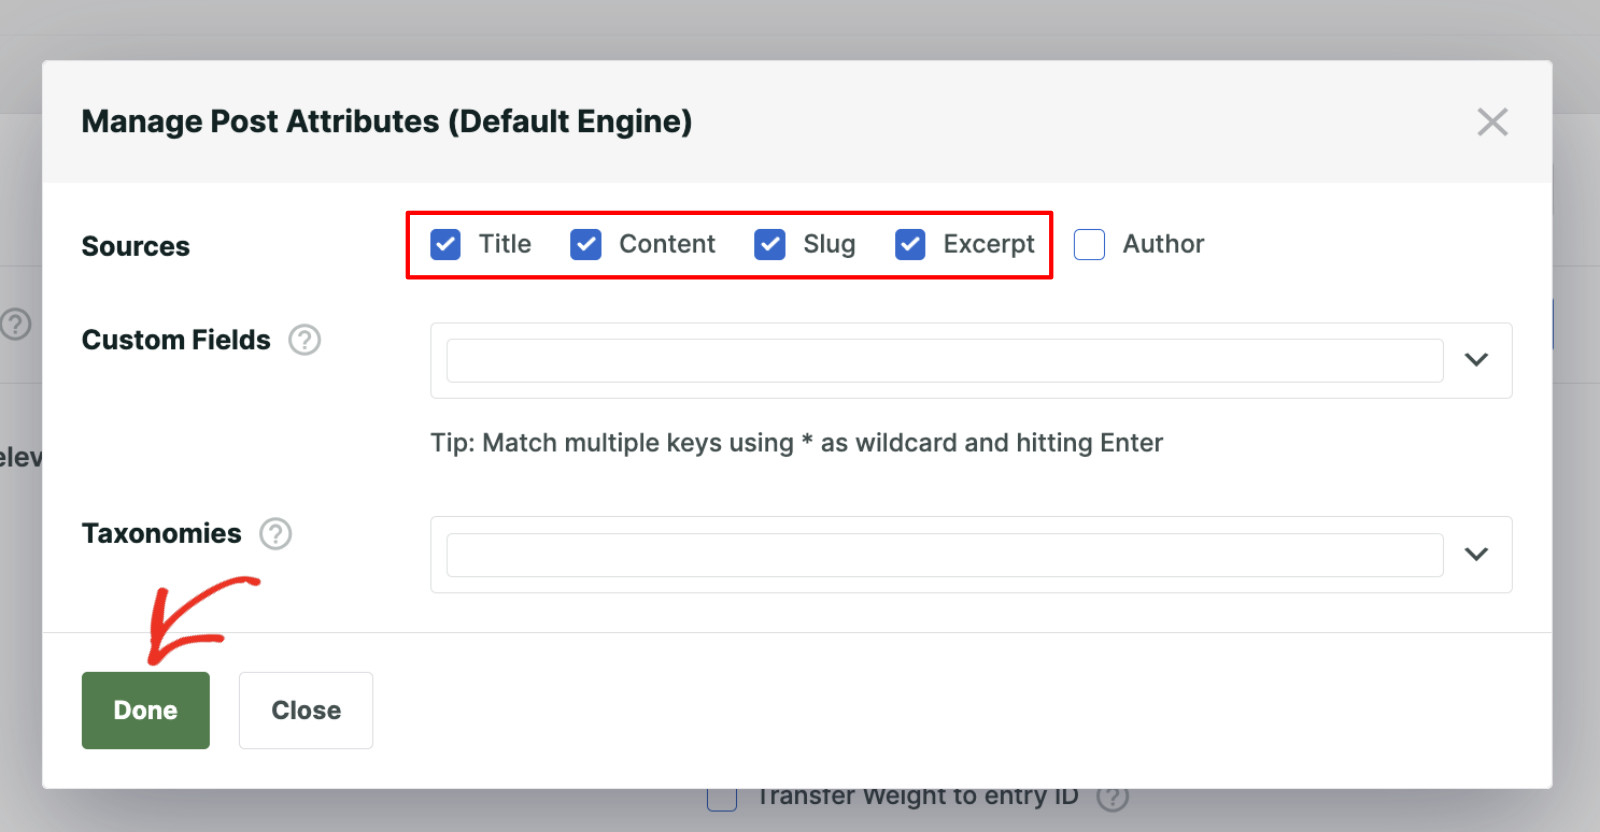
By default, SearchWP indexes Posts, Pages, and Media files. You can customize the content sources by clicking on the “Source & Settings” button.
Pro tip: You can create specific search engines for different content types or conditions using Supplemental Engines.
After selecting the content sources you want to include in the search, click “Done” to confirm the changes.
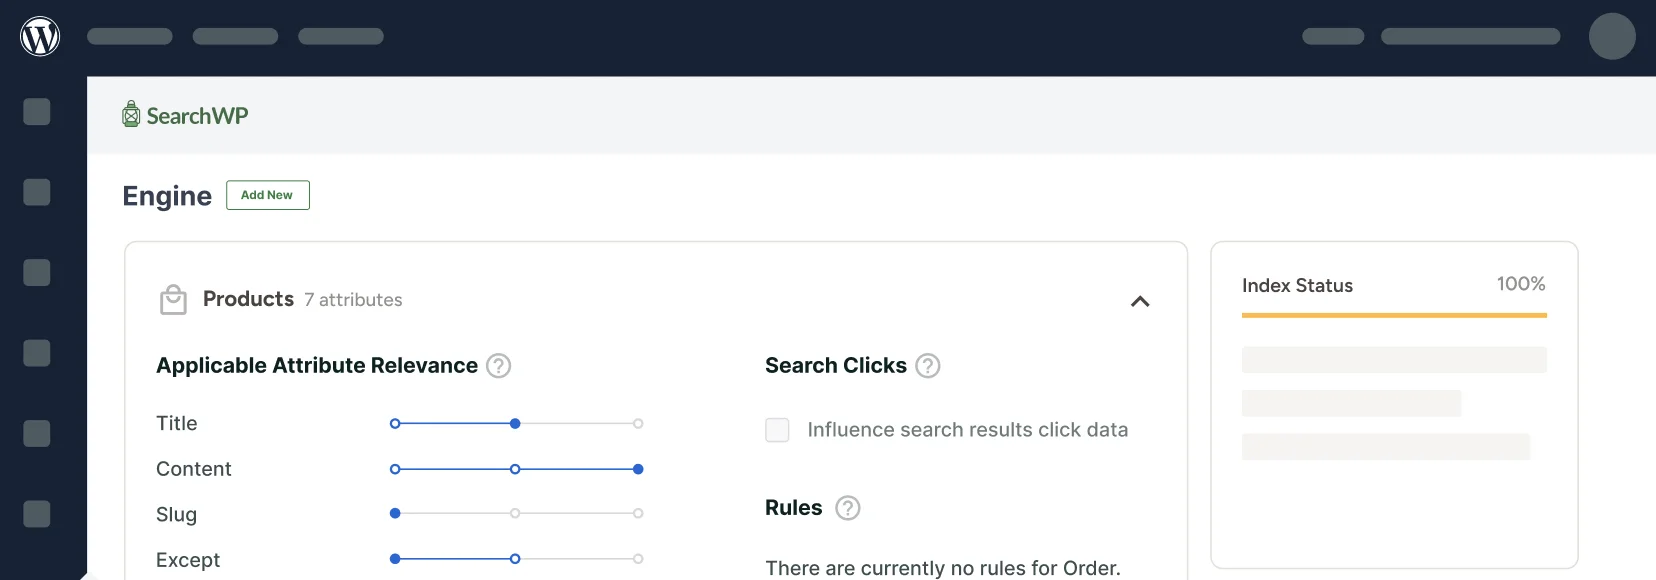
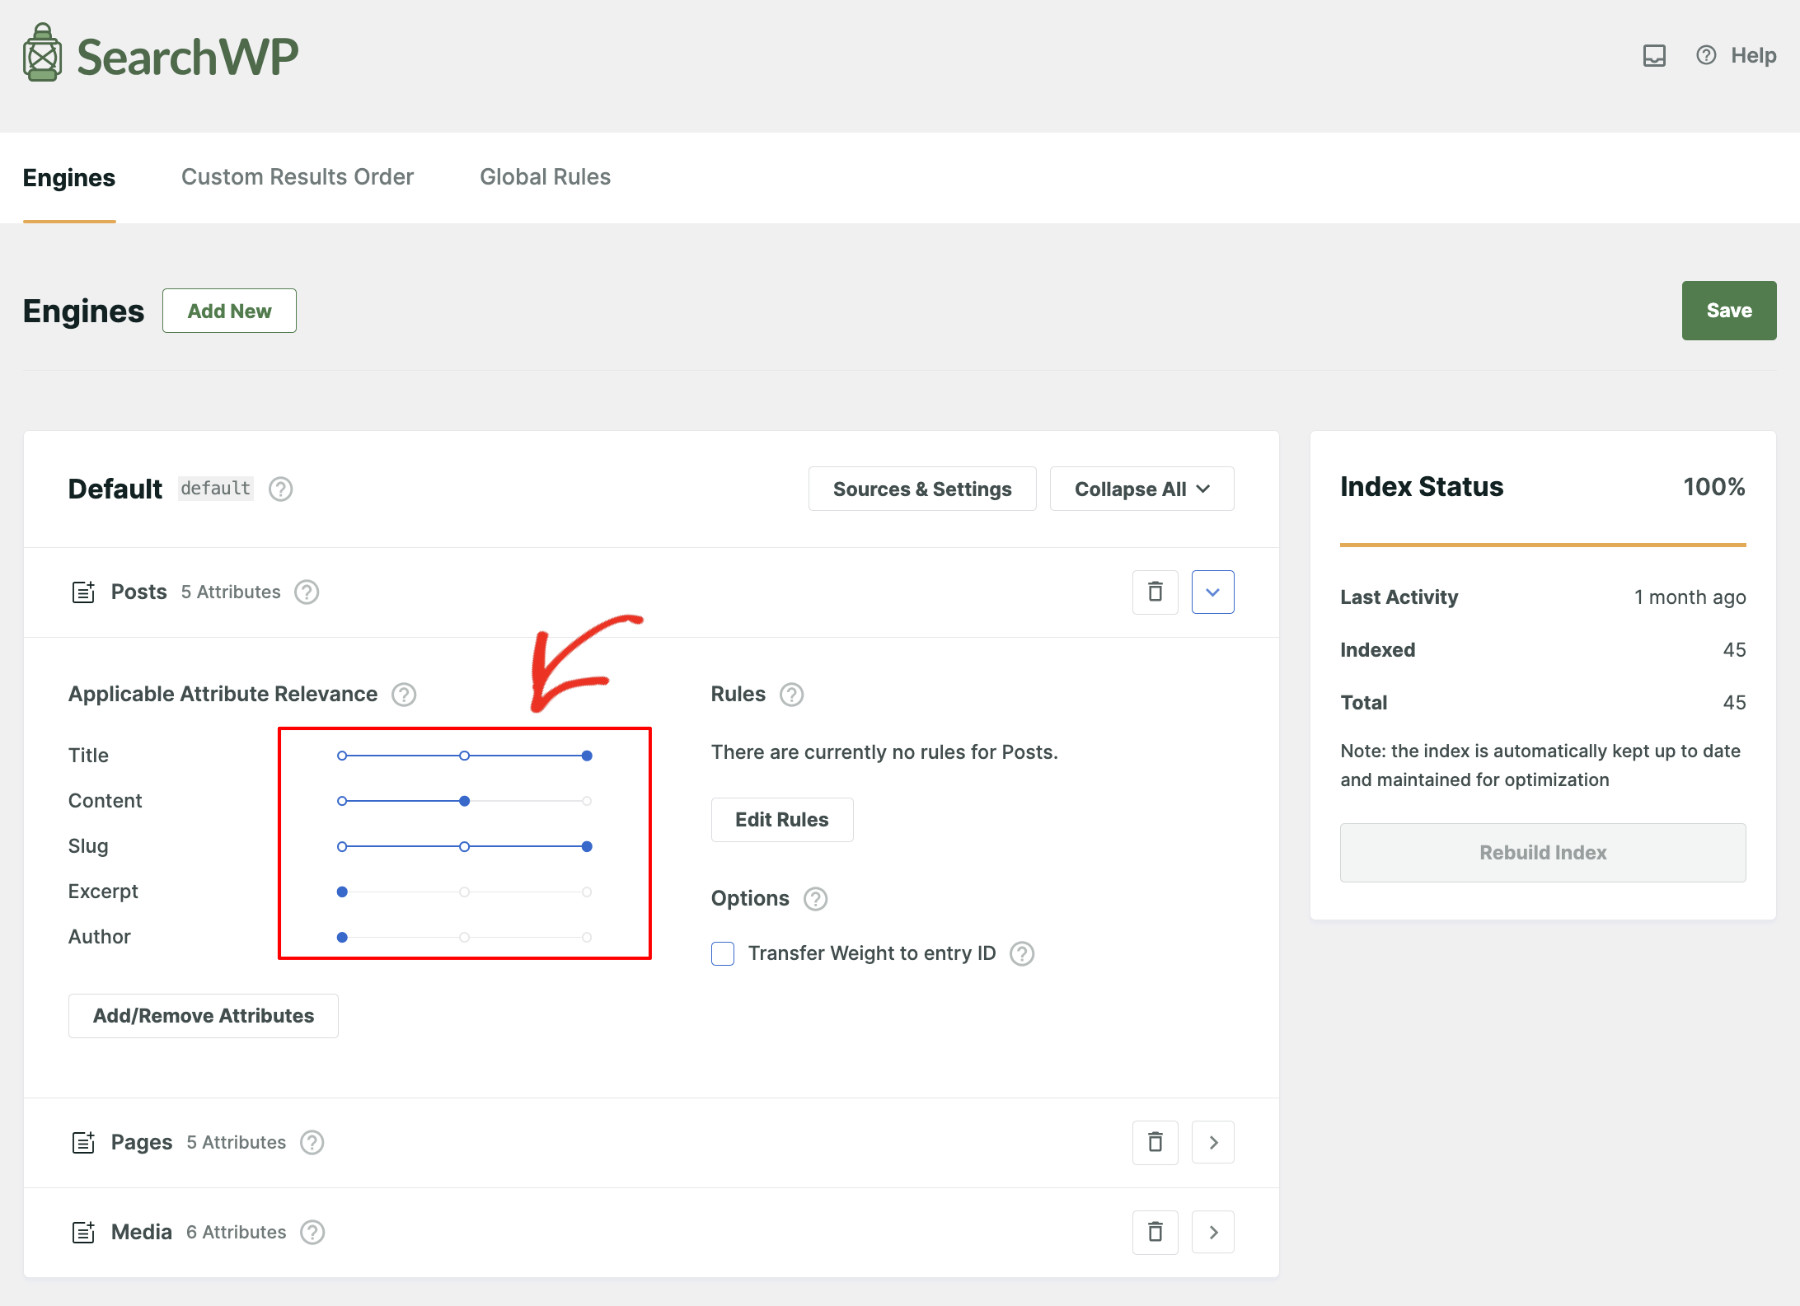
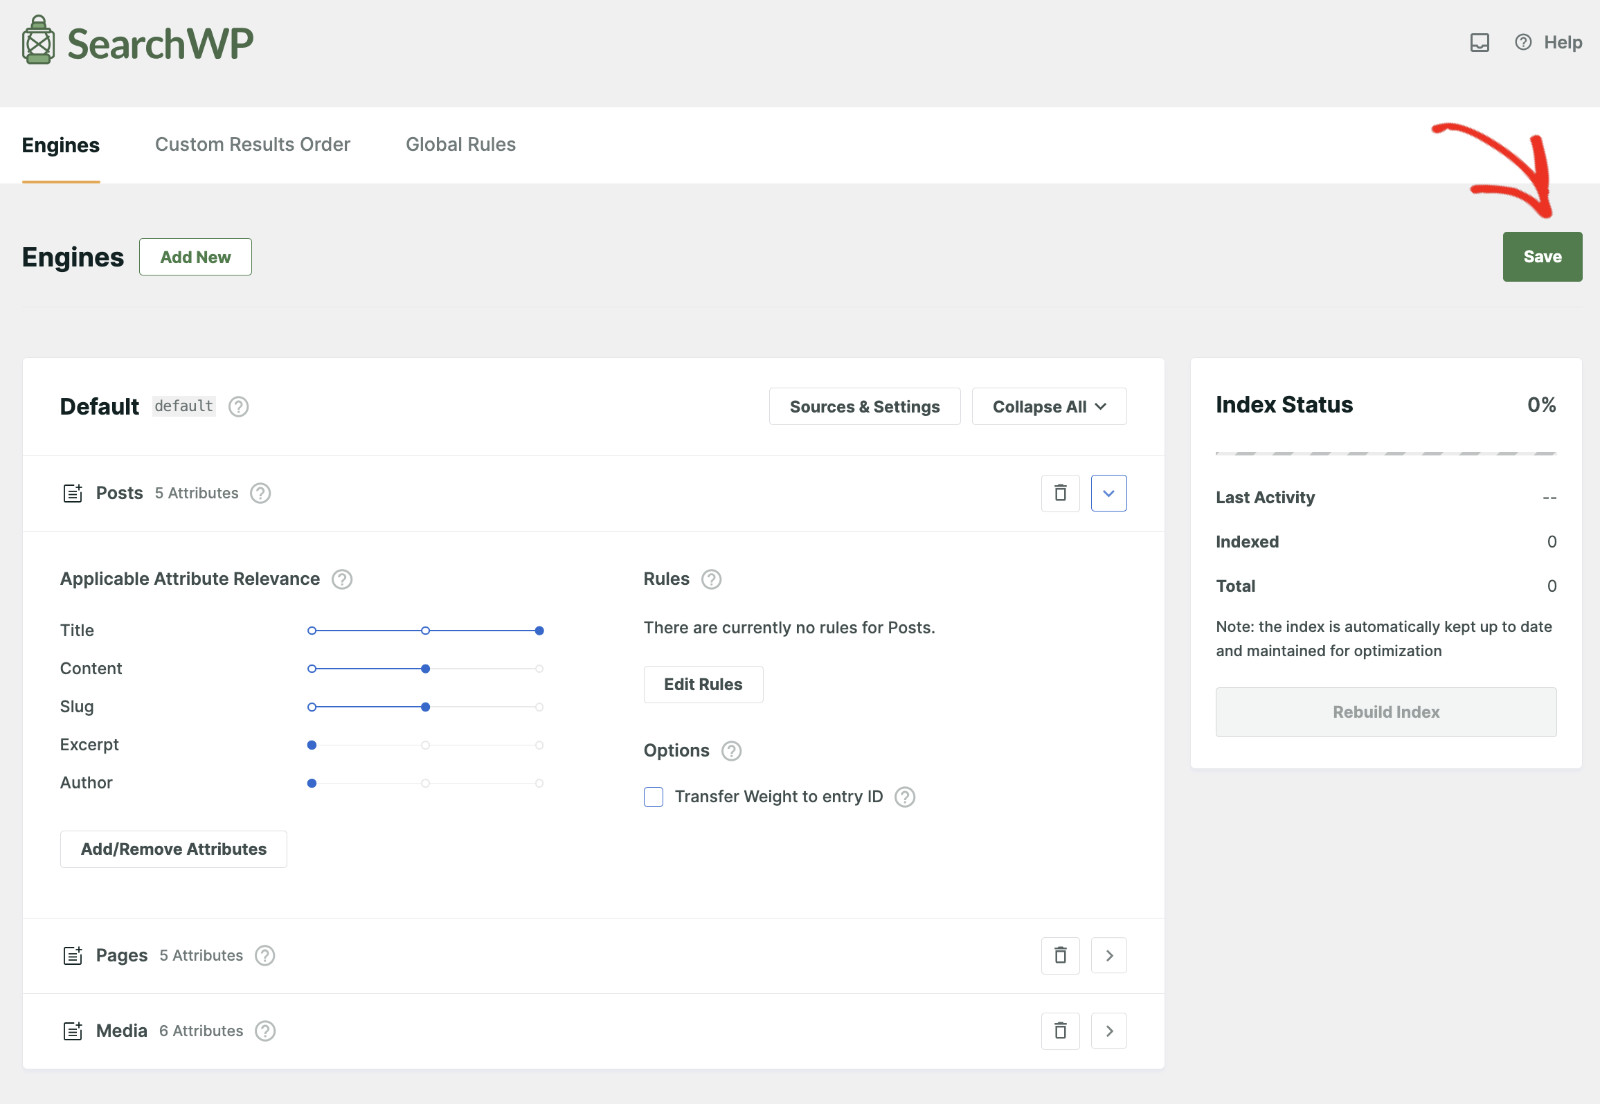
You can refine how search results are displayed by adjusting the Application Attribute Relevance.
Use the sliders next to each attribute to control how much weight it holds in the search results. Moving the slider to the right gives that attribute more importance while sliding it to the left reduces its impact. This lets you fine-tune the relevance of search results on your site.
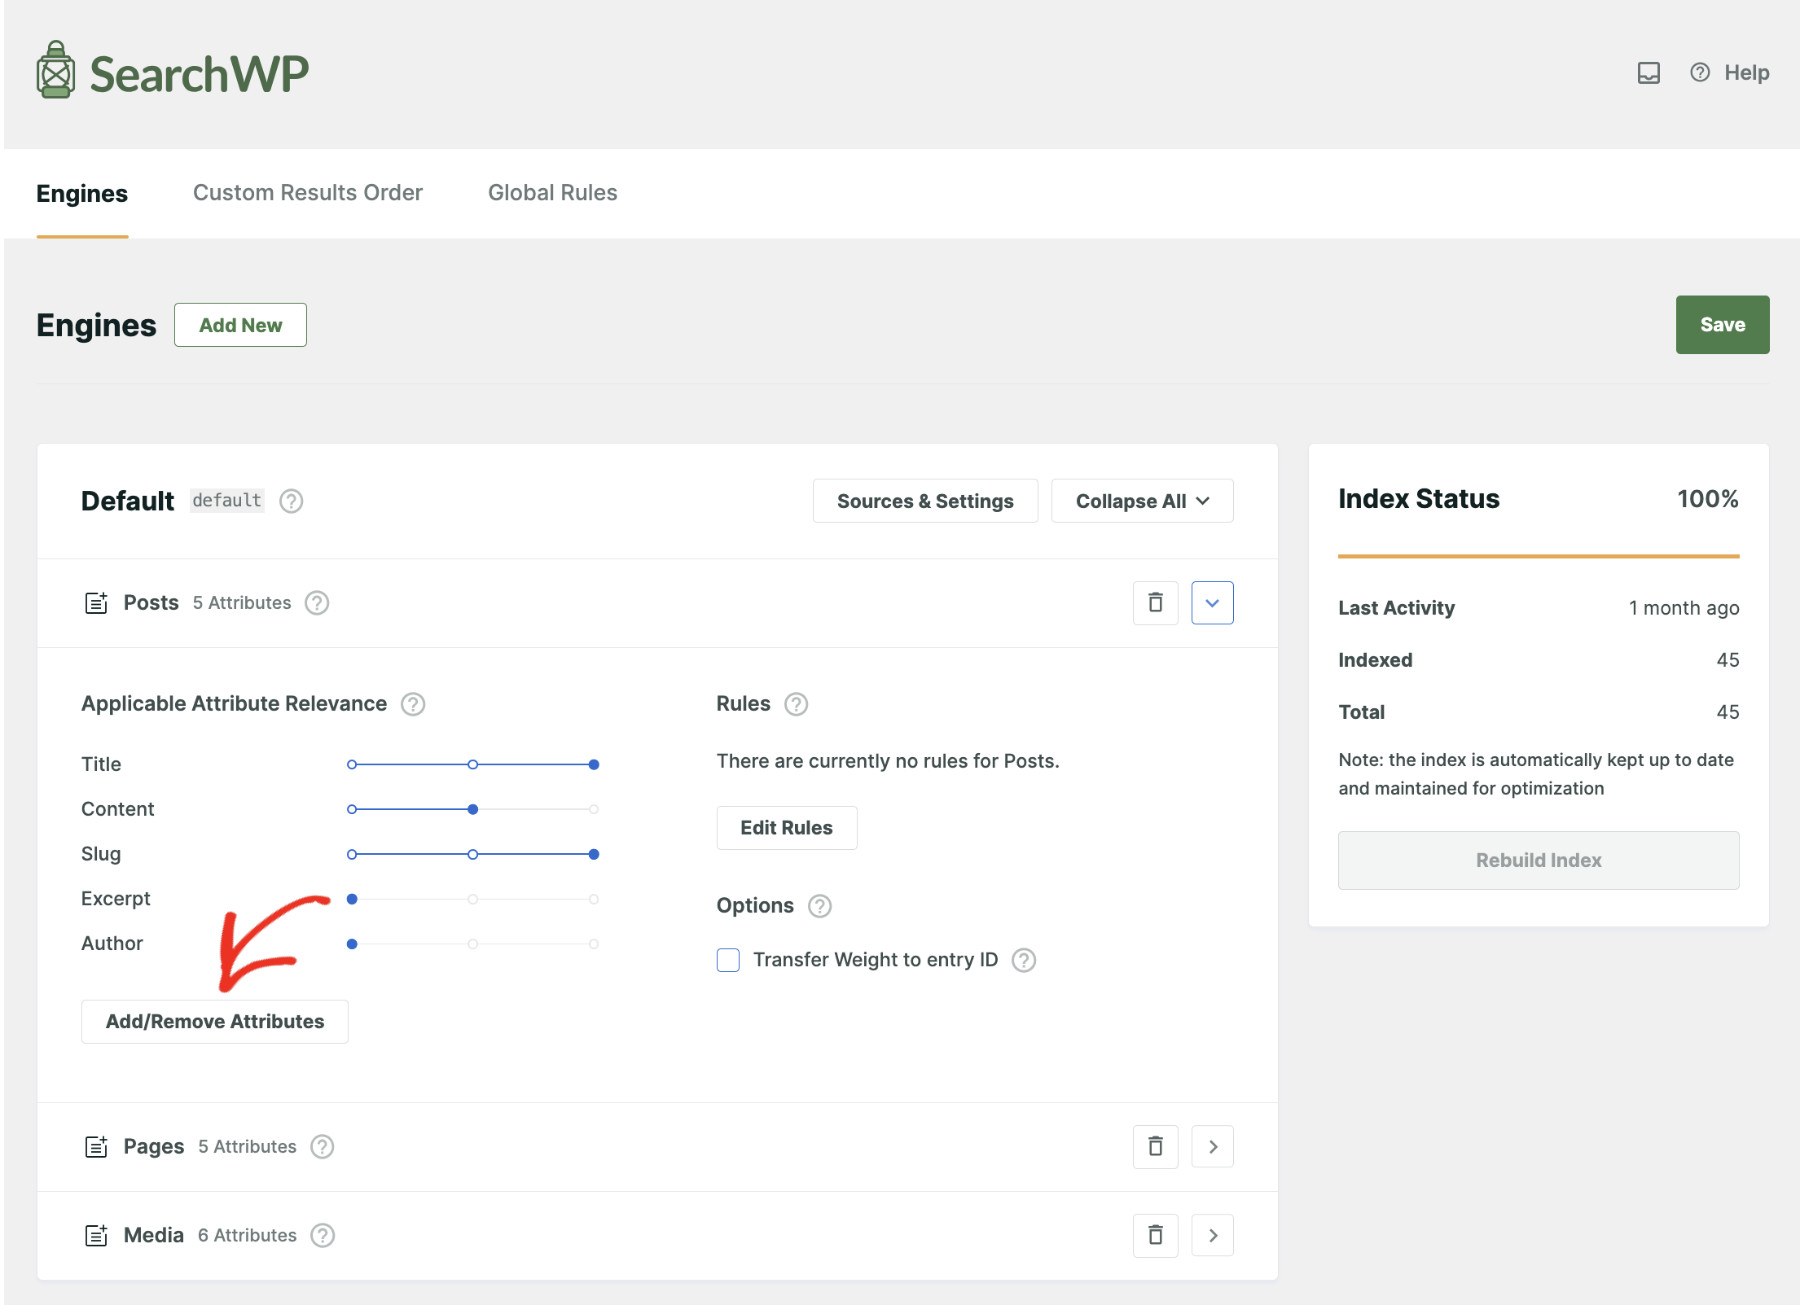
If you want to exclude any attributes from influencing the search, click the “Add/Remove Attributes” button.
Simply uncheck the attributes you wish to exclude, then click “Done” to save your choices.
When you’re happy with your settings, click “Save” to finalize your search engine configuration.
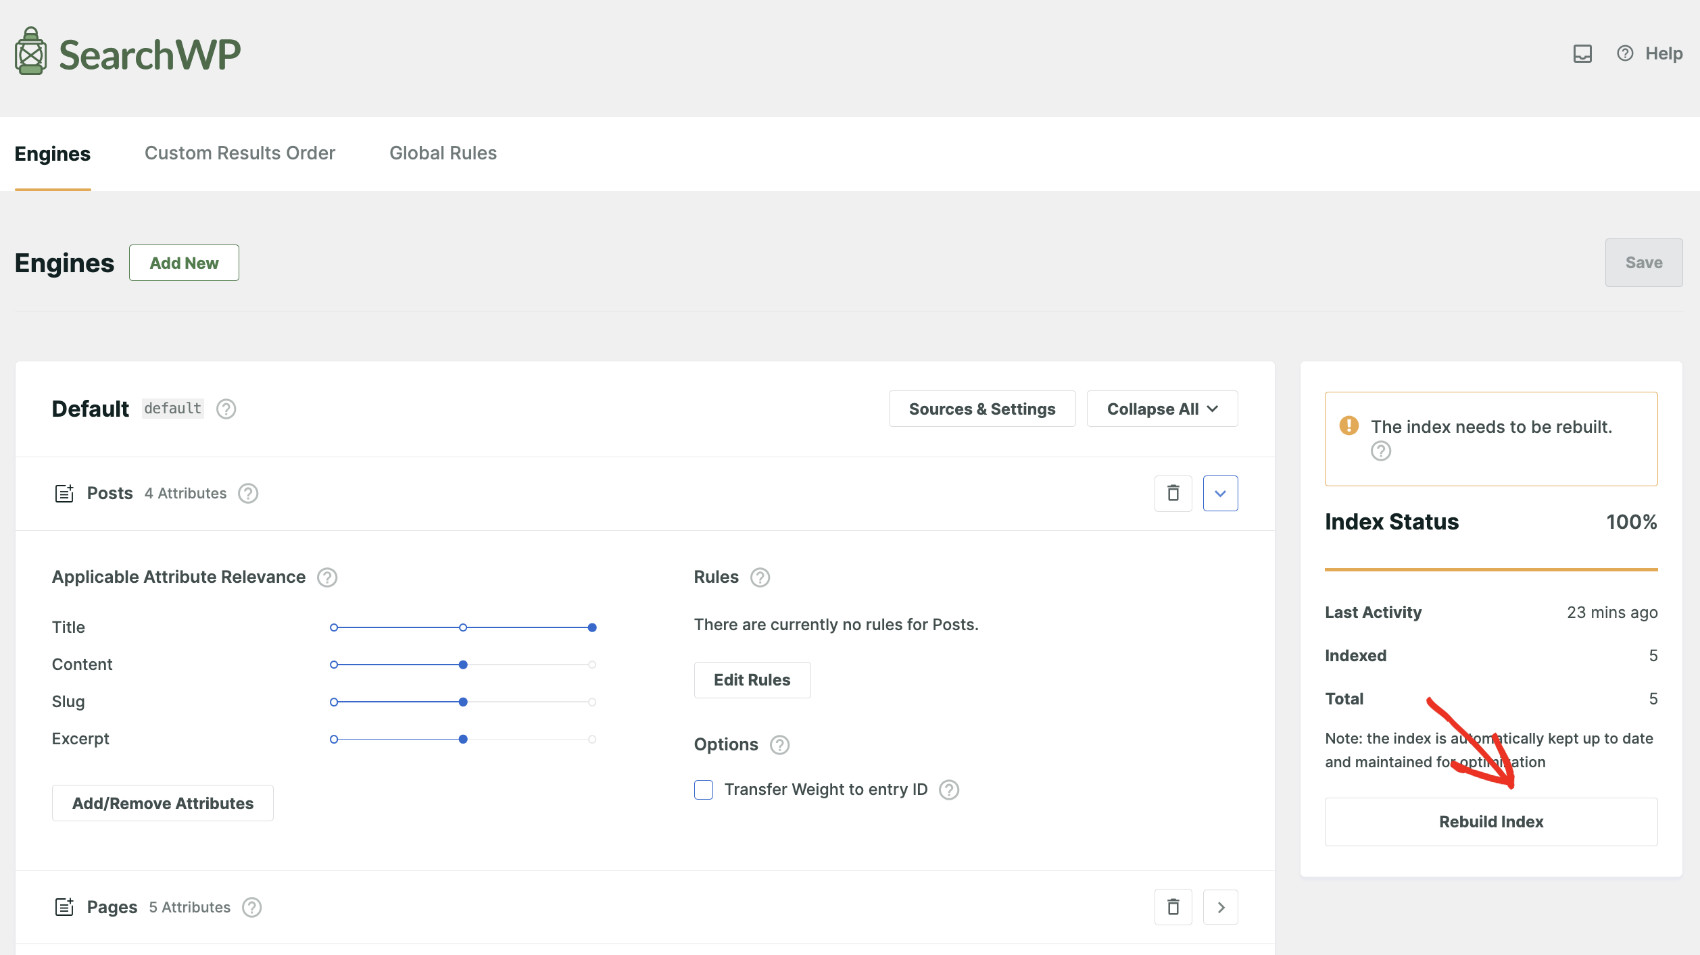
SearchWP automatically syncs index to keep it up to date with your sites changes. However, if you ever see a message prompting you to rebuild the index, click Rebuild Index to trigger a manual re-indexing.
Step 3: Create A Search Bar That’ll Display Clickable Keywords Below
Now that the stage is set. Let’s create a search form to display clickable keywords below the search bar.
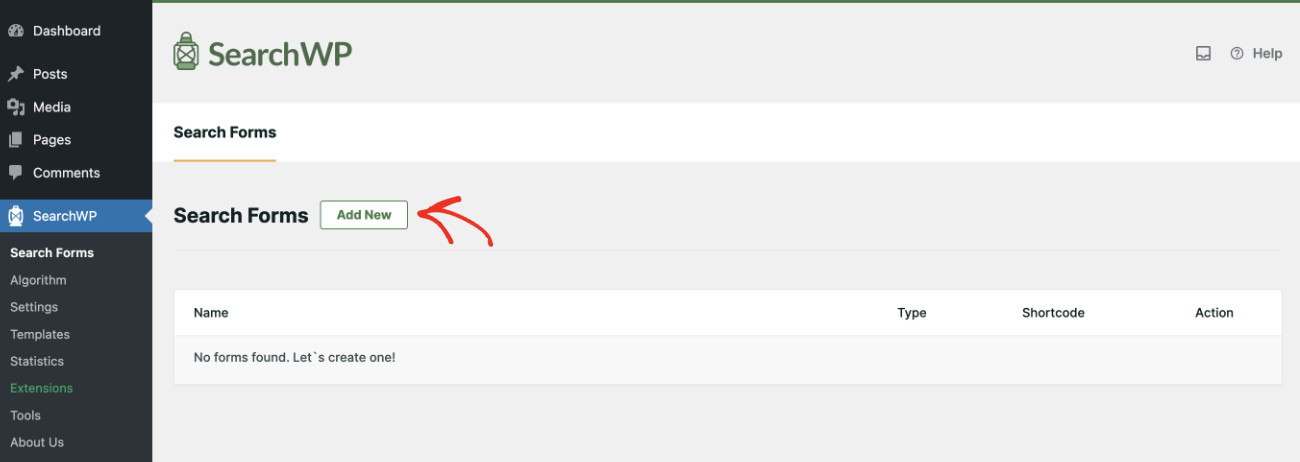
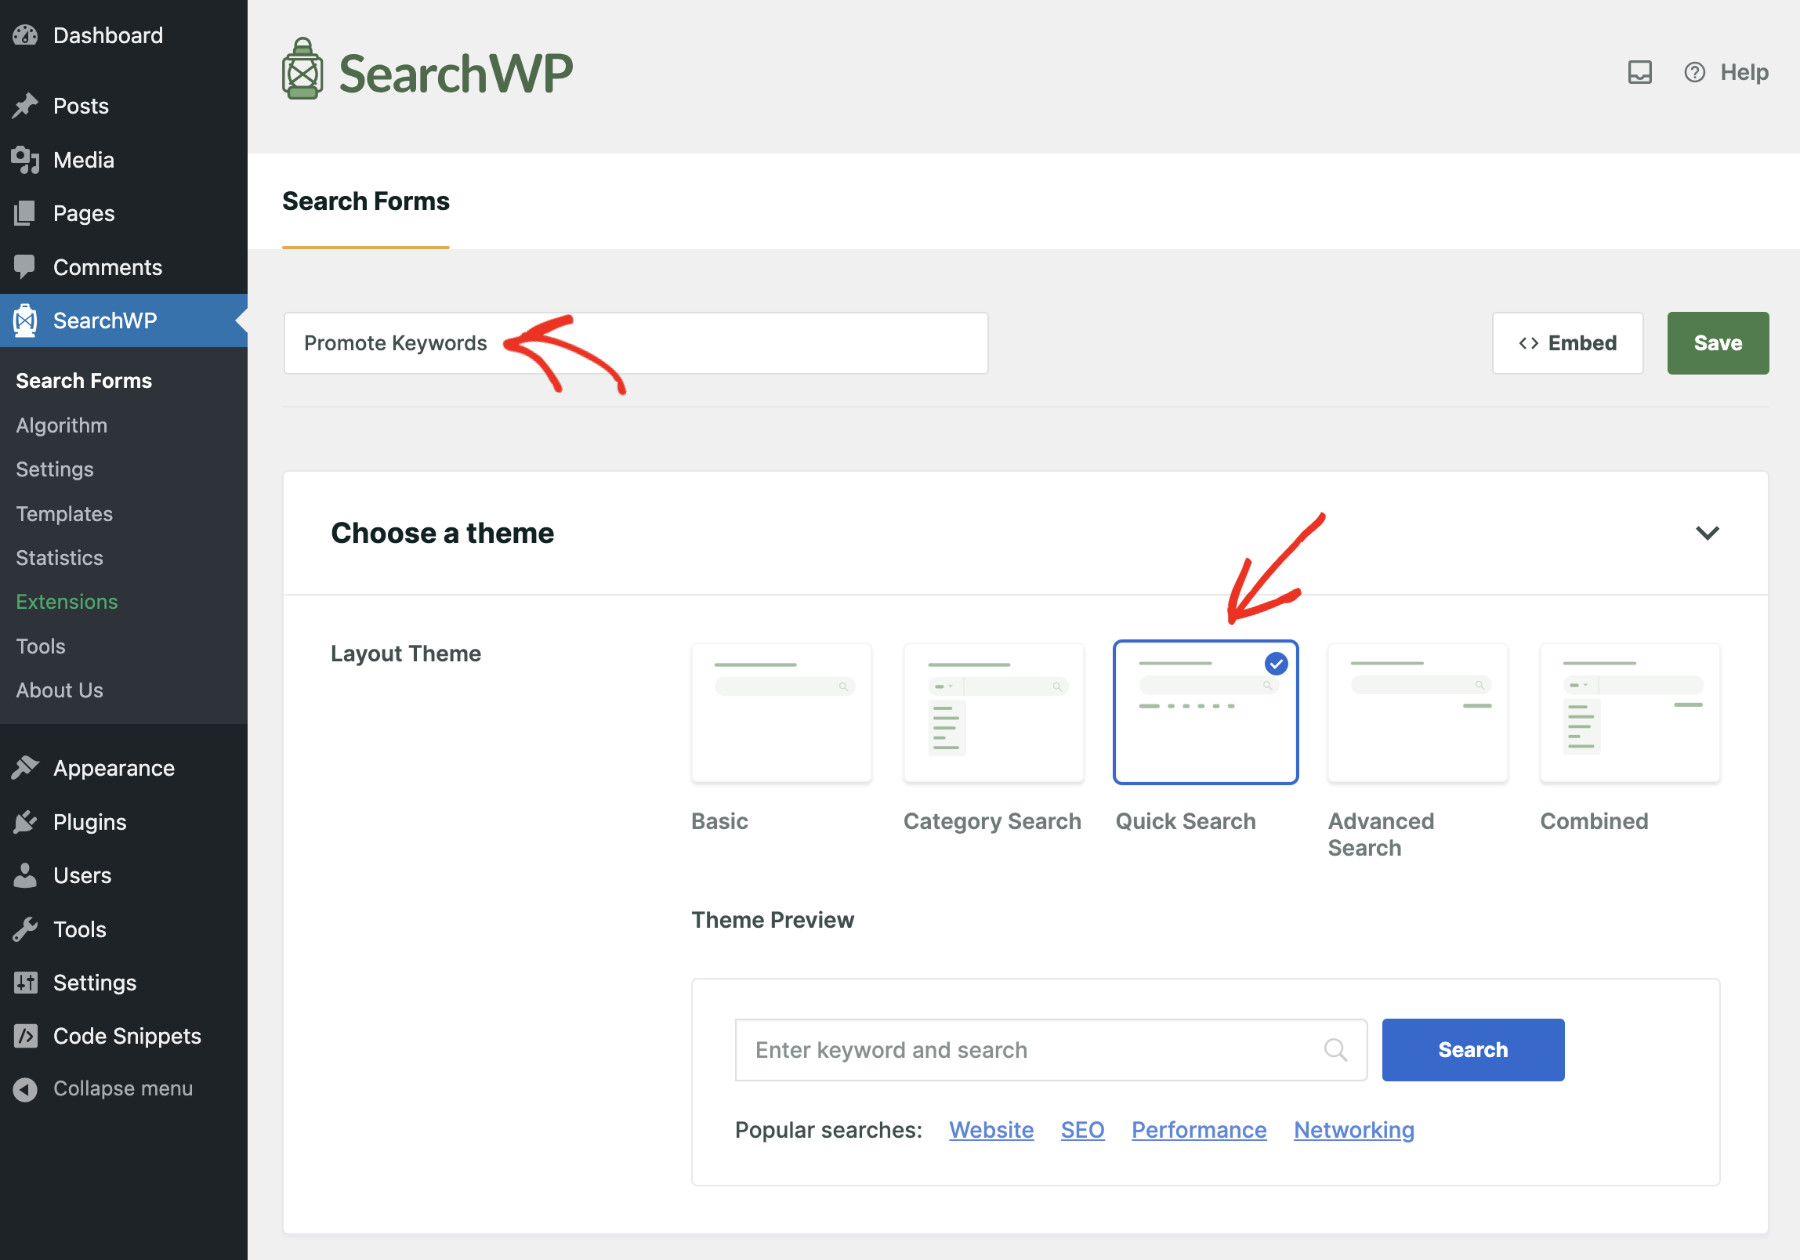
To do that, navigate to SearchWP > Search Forms and click the “Add New” button.
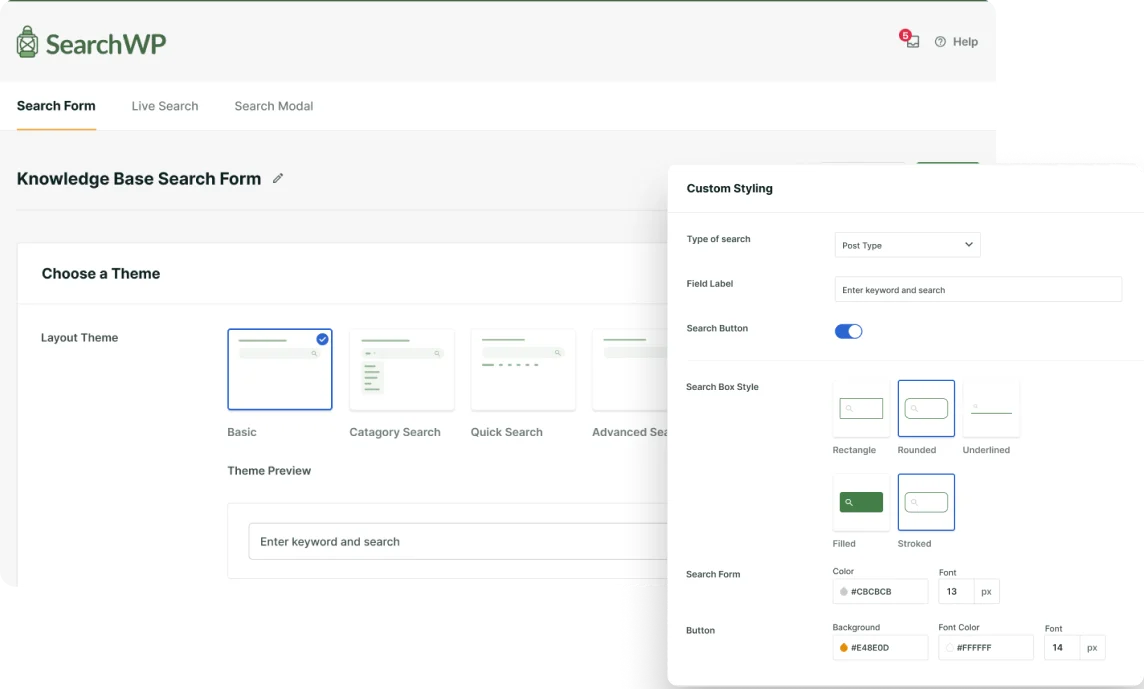
Give your search bar an appropriate name that will help you easily recognize it later, and select “Quick Search” as the layout theme.
Now, in the following section, you need to add the keywords that you want to display below the search bar. Write these keywords in the “Quick Search Items” field. After you write each keyword, press “Enter” to save these keywords.
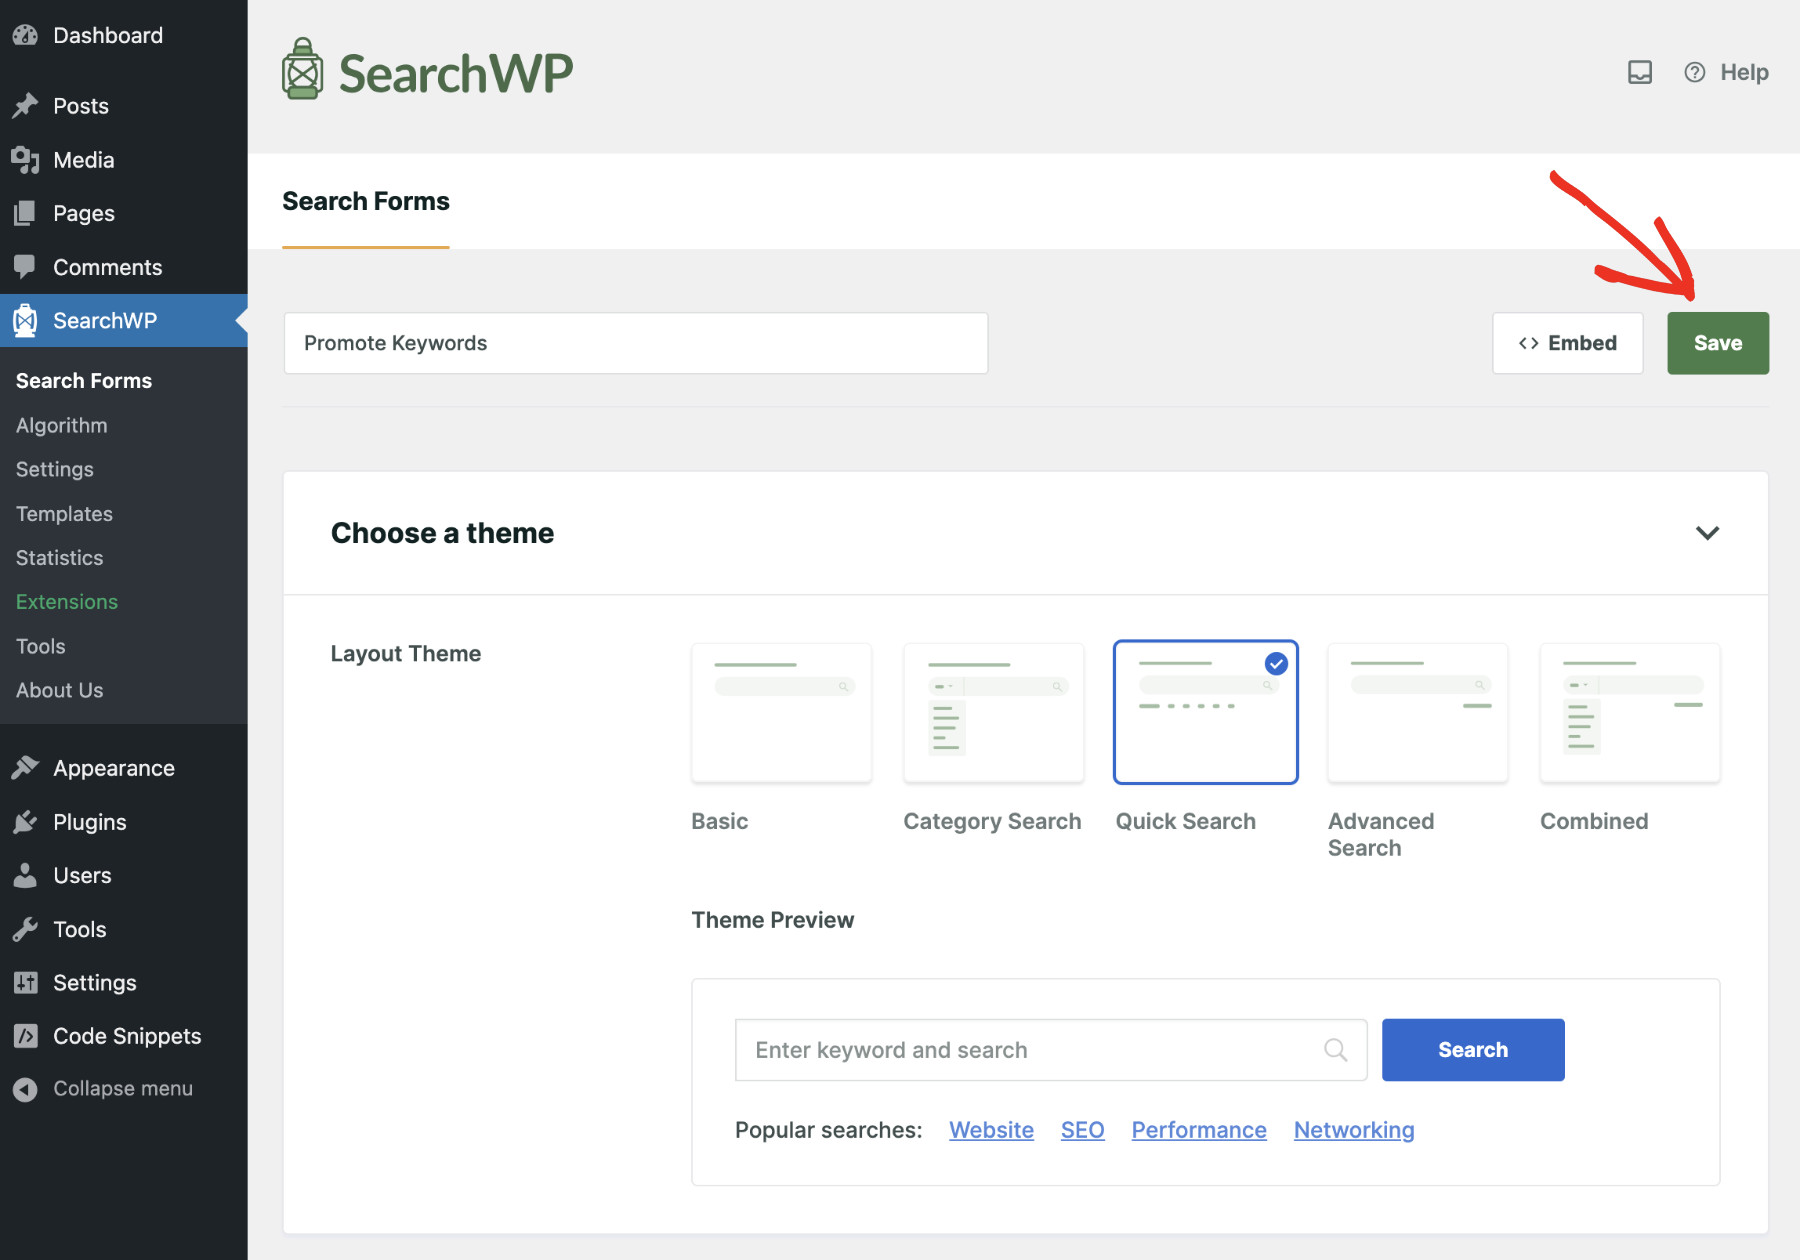
You can configure the rest of the settings according to your needs. When you’re done, click “Save” to apply your changes.
Step 4: Add The Search Bar To Your Desired Location
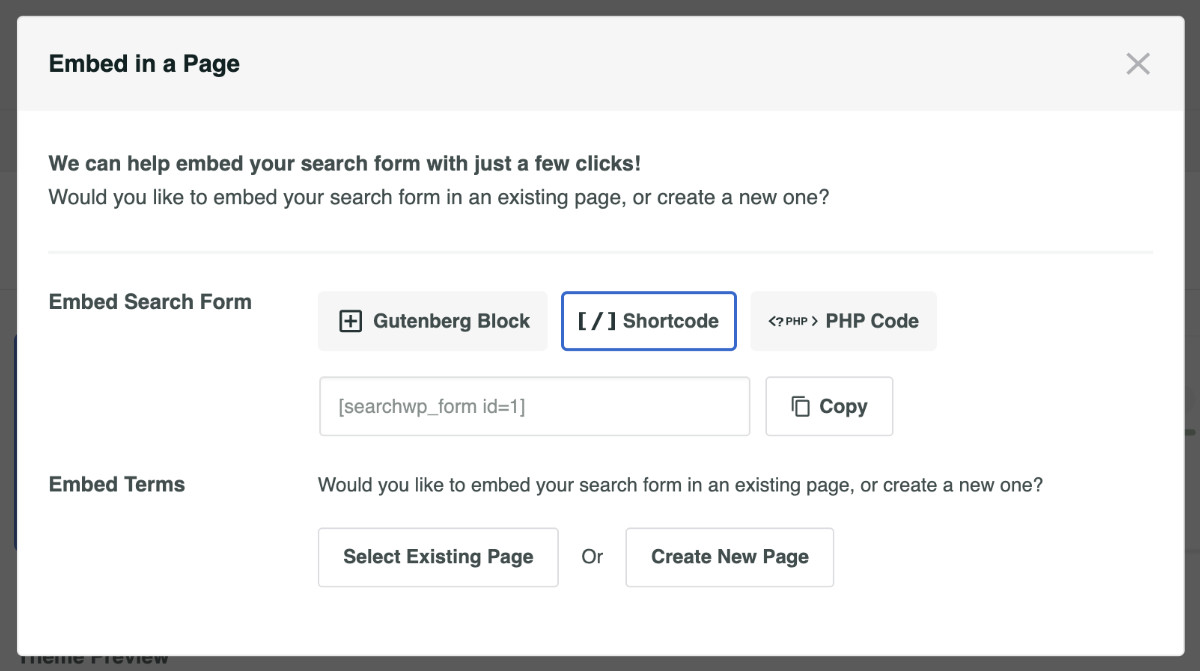
You can insert this search bar anywhere on your website. There are multiple ways to do that; click the “Embed” button next to “Save” on the search form settings page, and you’ll see the instructions.
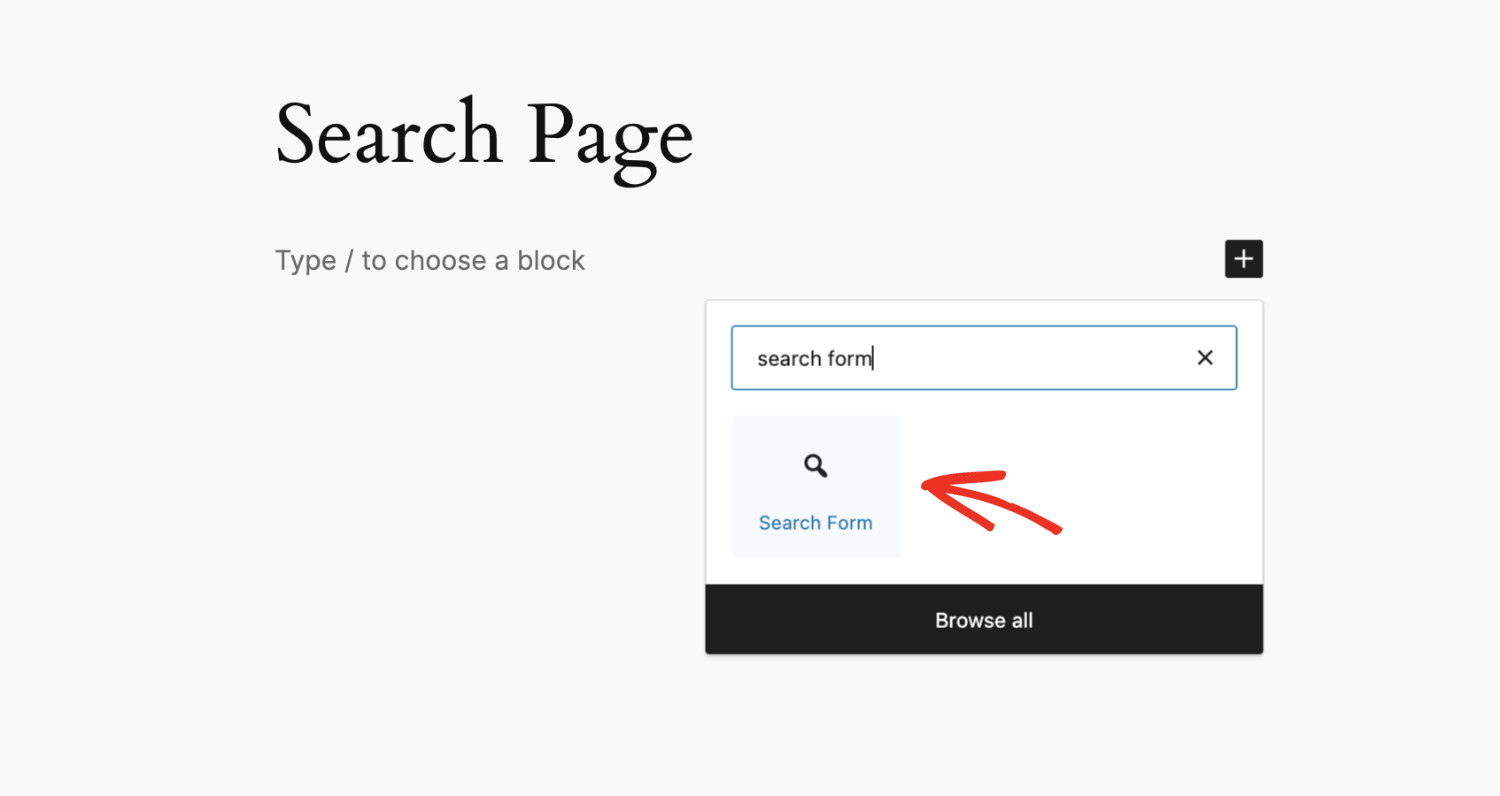
For the purpose of this tutorial, let’s add a search bar using a Gutenberg Block. To do that, open the page/post where you want to place the search bar in Edit mode and click the “+ Add block” icon.
Find and select “Search Form” from the list.
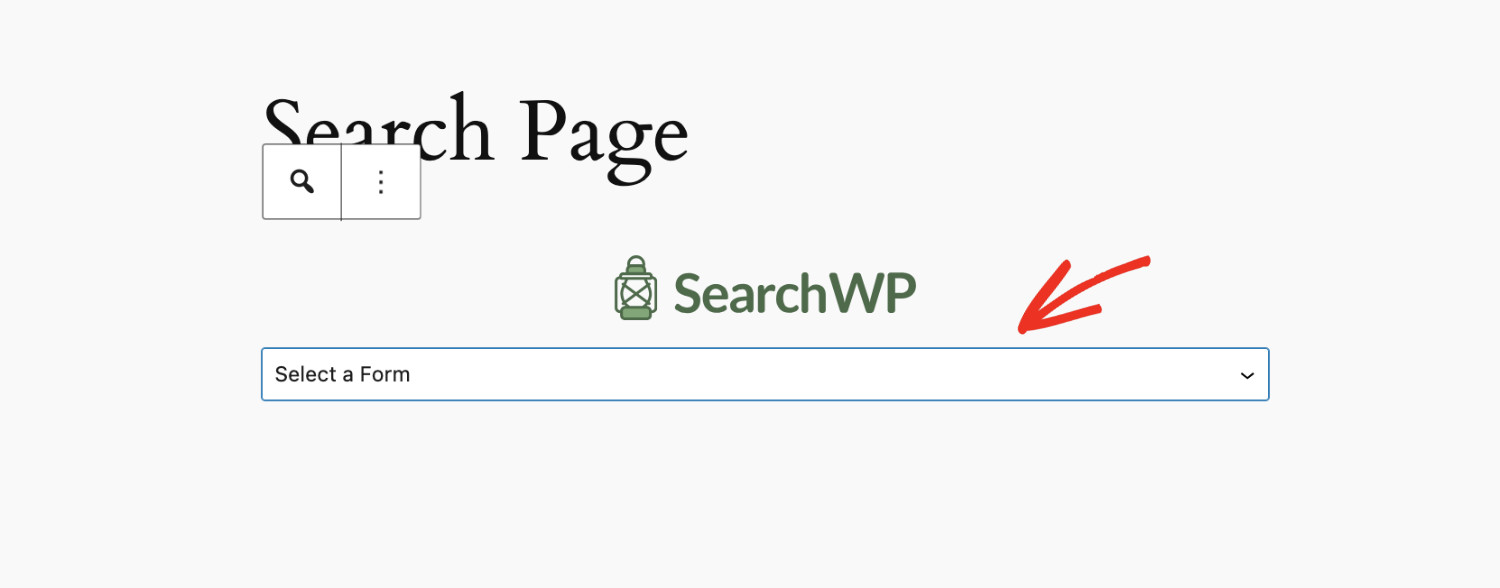
Then, select your newly created search bar from the dropdown to display on this location.
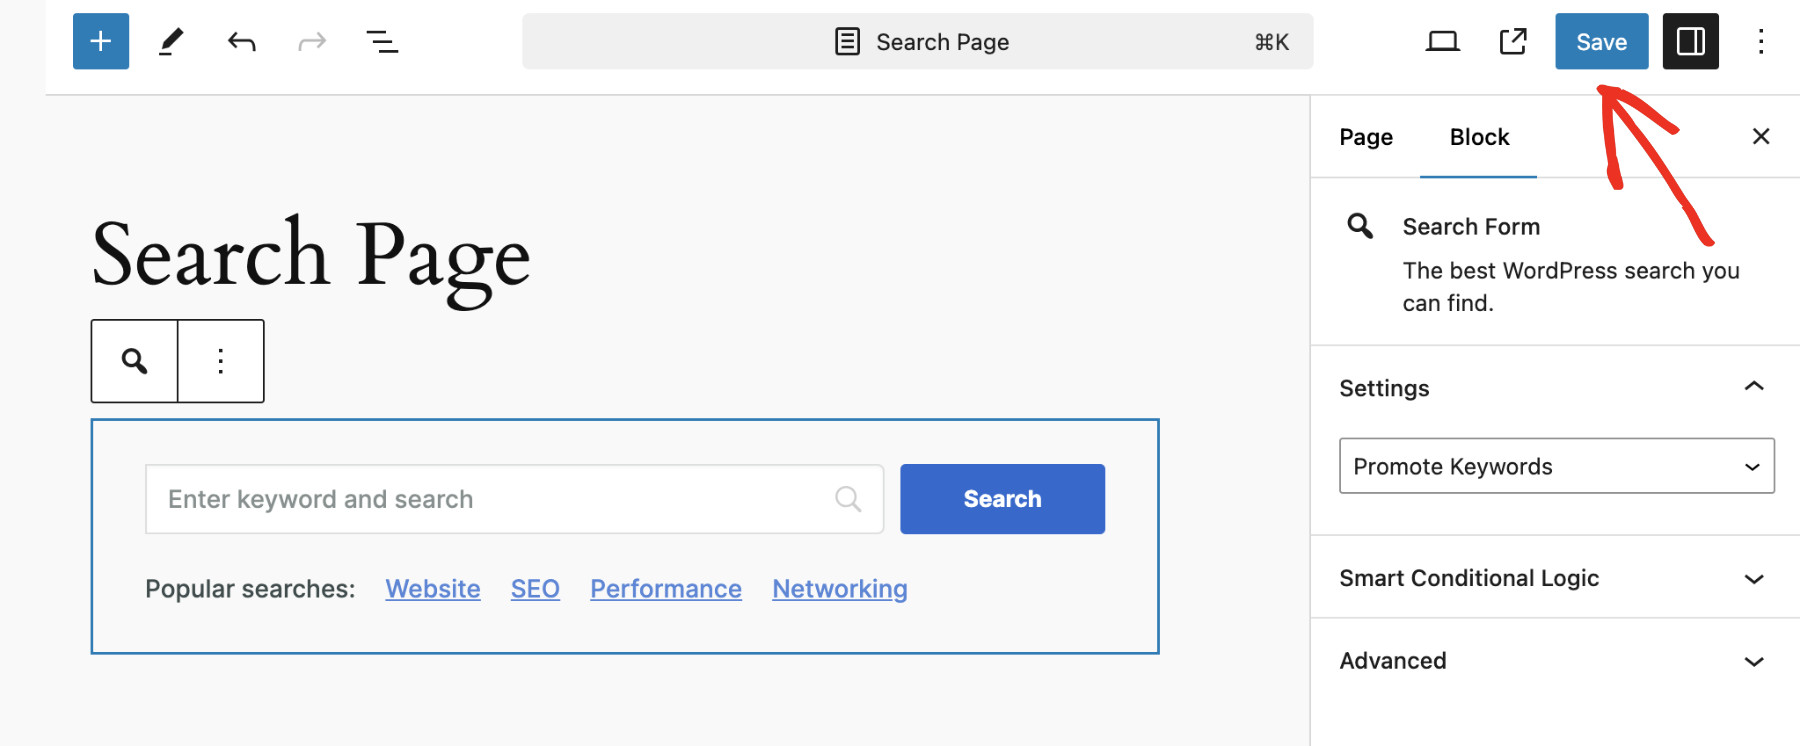
Click “Publish/Save” depending on your case, and that’s it! You’ve successfully added the search bar to your WordPress site.
Now, open the page on the front end and you’ll see the following search bar with the keywords that you added a few moments ago.
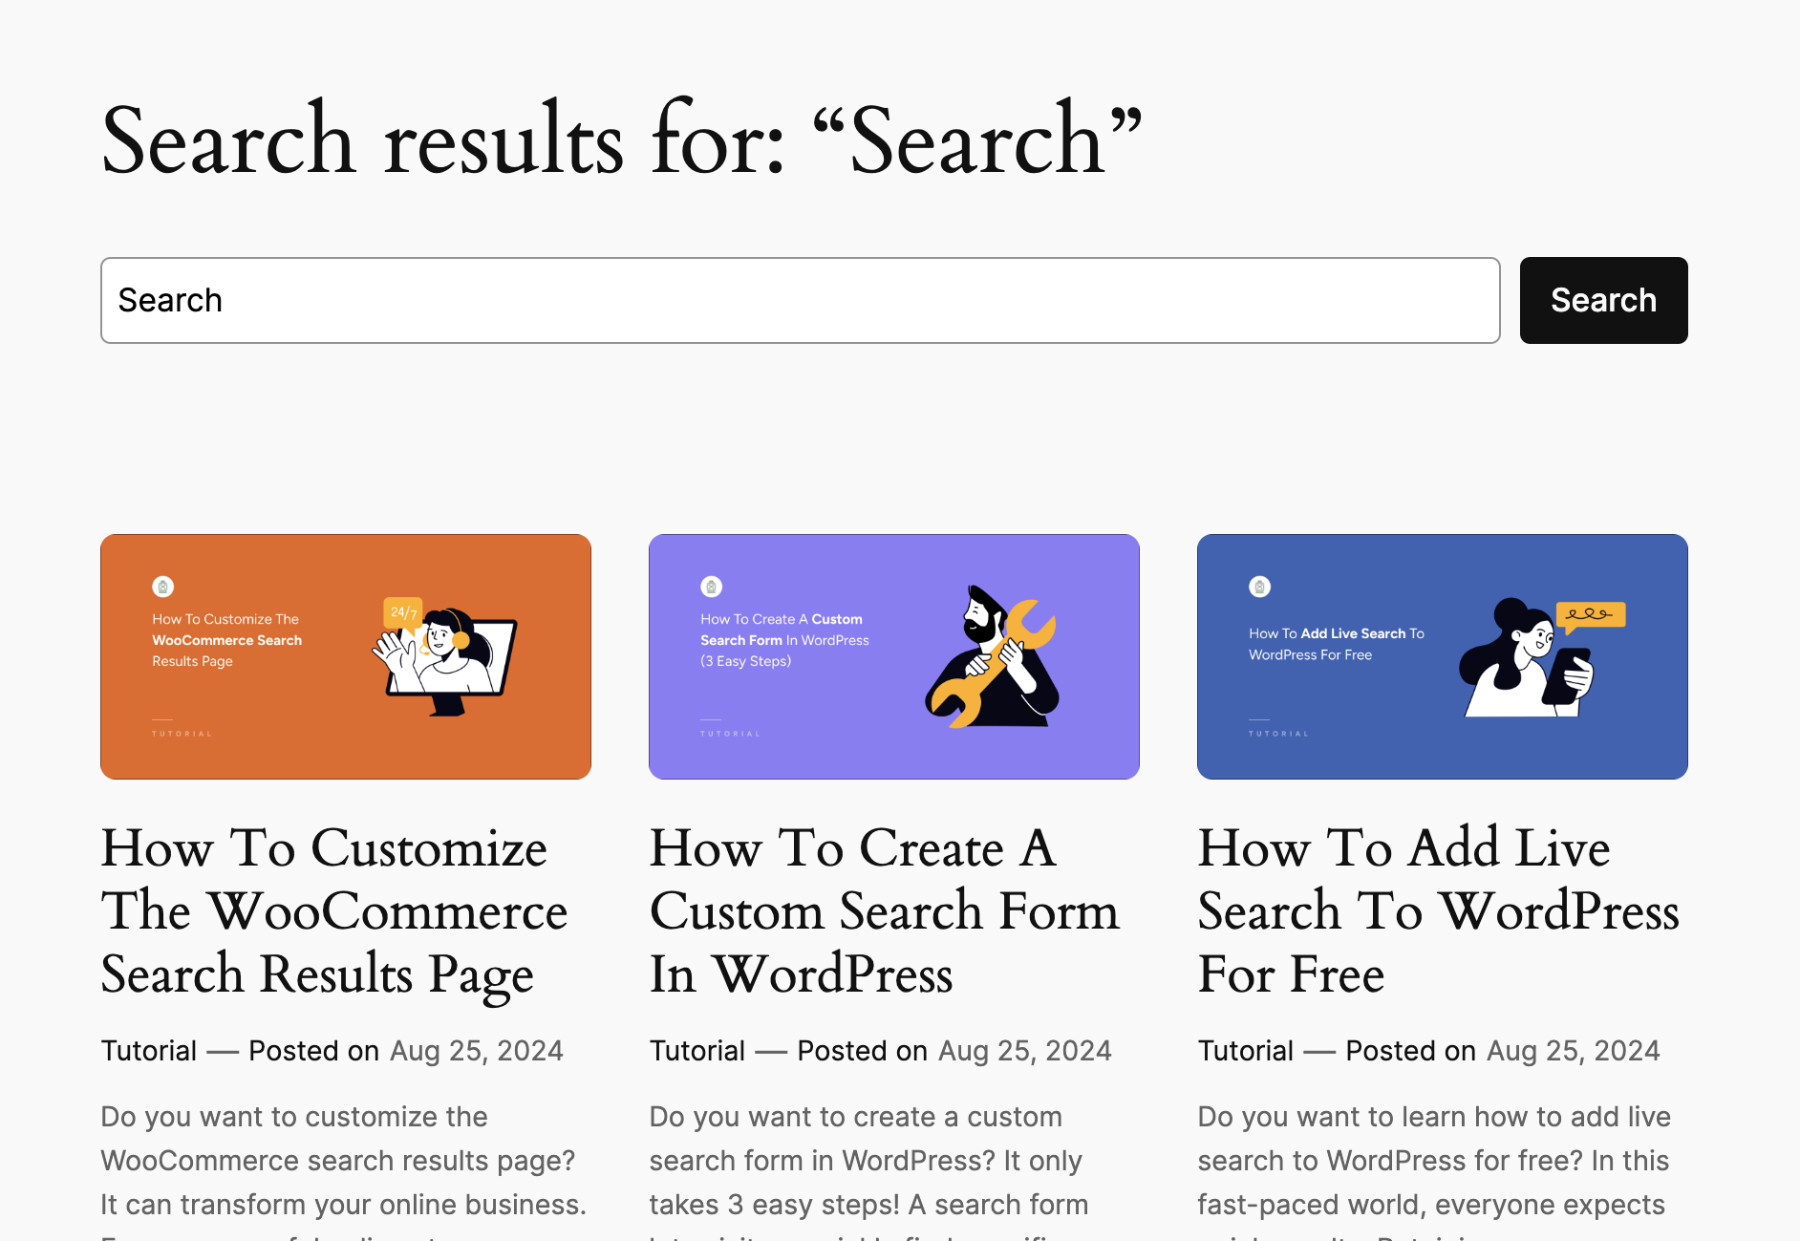
When a visitor clicks on any of these keywords, the search results will appear instantly.
Conclusion
Displaying clickable keywords below your WordPress search bar is a powerful way to improve user experience, drive more traffic to essential content, and ultimately increase conversions. SearchWP gives you full control over the search algorithm, allowing you to prioritize the keywords that matter most to your business.
Get SearchWP now to enhance your WordPress search dramatically and stay ahead of your competitors!
