Understanding which keywords your visitors use on your WordPress site is like having a direct line to their thoughts.
Instead of guessing what content to create next or which products to sell, you can see exactly what your audience is looking for, and deliver exactly what they need. It also helps you improve user experience and even boost sales on your site.
Now, there are several ways you can uncover which search terms users use to find your site and which keywords they use on your site to locate different content.
In this article, we’ll show you how to track the most popular search keywords on your site using multiple methods.
What is Keyword Tracking?
To begin with, let’s talk about what keywords are.
Keywords are search terms that people enter into a search form or search engine when they search for content or products.
Keyword tracking can be divided into 2 parts:
- On-site tracking – Lets you know what keywords visitors are using when searching on your site.
- Off-site tracking – Lets you find out what keywords visitors use to find your site in search engines.
Below, we’ll show you how to perform both types of keyword tracking and explain in detail why keyword tracking is essential for everyone who wants to succeed online.
Why You Should Track Your Site’s Keywords
Off-site keyword tracking helps you can get valuable insight into how your site performs in search engines. It lets you find out what keywords people use to find your site and how much traffic specific keywords bring to it.
It’s important to regularly monitor the keywords your site ranks for to see points of potential traffic growth. Using this information, you can figure out what articles on your site are the most successful and adjust your content marketing strategy as needed.
The case is a little different with on-site keyword tracking.
If a visitor uses the search form on your site, it usually means they couldn’t find the right content right away, or they wanted to consume even more of your content.
Both are great opportunities to find out what’s missing from your site and to reach your audience’s needs.
Now that we’ve figured out the importance of keyword tracking, let’s take a look at how you can enable it on your site.
How to Track Keywords People Use to Find Your Site
There are 2 ways to track keywords people use to find your site. Let’s talk about both methods below.
Method 1: Track Keywords Using Google Search Console
The first way is to use Google Search Console. This free online tool allows you to measure your site’s overall performance on the search engine and fix issues that might be preventing your site from appearing in Google.
To start using it, you need to add your WordPress site to Google Search Console. If you haven’t done it yet, then simply follow this guide on how to add your WordPress site to Google Search Console.
Once you’ve added your site to Google Search Console, simply go over to the Performance tab.
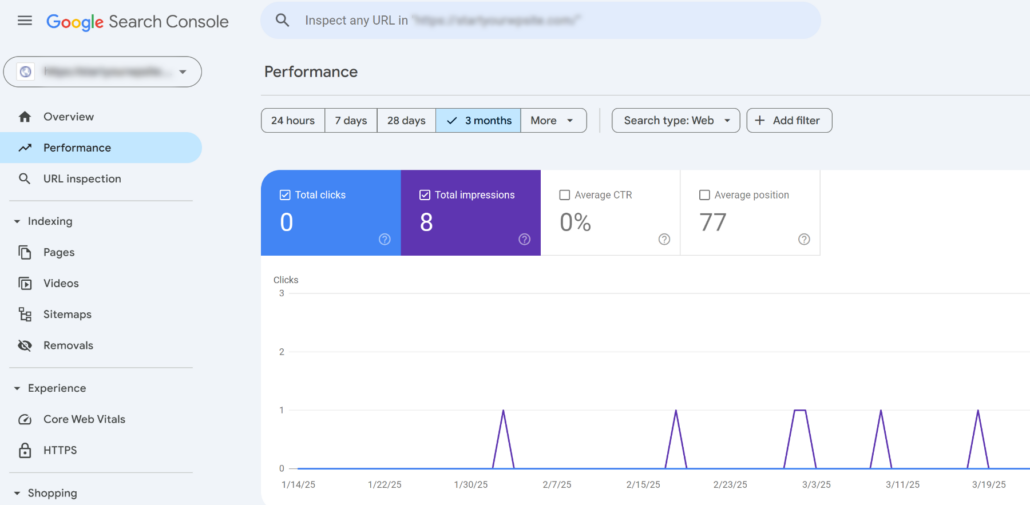
Here you’ll find different reports to see how your site is performing on Google.
If you scroll down under Queries, you’ll see the list of keywords your website ranks for, along with their impressions and clicks.
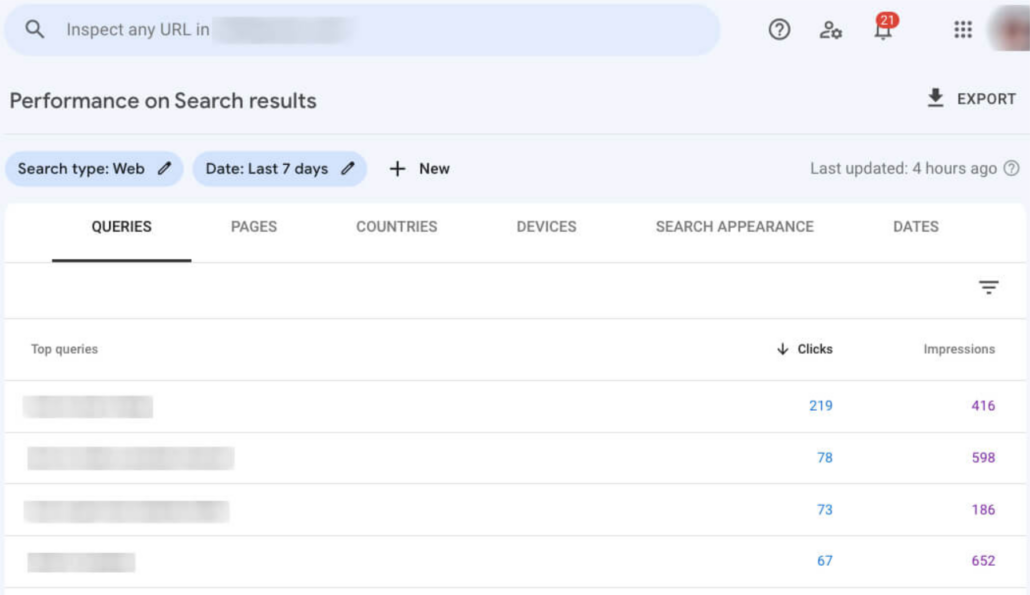
Note that if you have just added your site to the Google Search Console, collecting the data will take some time.
Google Search Console is a nice and powerful online tool. But its main job is to give you reports about your site’s health and performance.
That’s why, you can get only basic information on keywords your site ranks for.
If you’re looking for advanced analytics, you’re better off using the second method.
Method 2: Track Search Terms Using MonsterInsights
The best way to get a comprehensive report on what keywords people use to find your site is to use a plugin like MonsterInsights.
As the best Google Analytics plugin for WordPress, MonsterInsights ensures seamless integration of your site with Google Analytics – even if you’re not tech-savvy.
Usually, when you’re adding your site to Google Analytics, you need to edit the code of your theme. It’s challenging for beginners and requires advanced WordPress knowledge.
Using MonsterInsights, you can connect your site with Google Analytics in just a few clicks, no coding needed.
Plus, MonsterInsights allows you to see the Google Analytics dashboard right inside WordPress. You don’t even need to leave your site to check your traffic report!
The first step is to grab your copy of the MonsterInsights plugin. Do note that you’ll need the MonsterInsights Pro version to view the Search Console report.
Once done, you can navigate to your MonsterInsights account and head to the Downloads tab. From here, click Download MonsterInsights and save the plugin’s ZIP file to your computer.
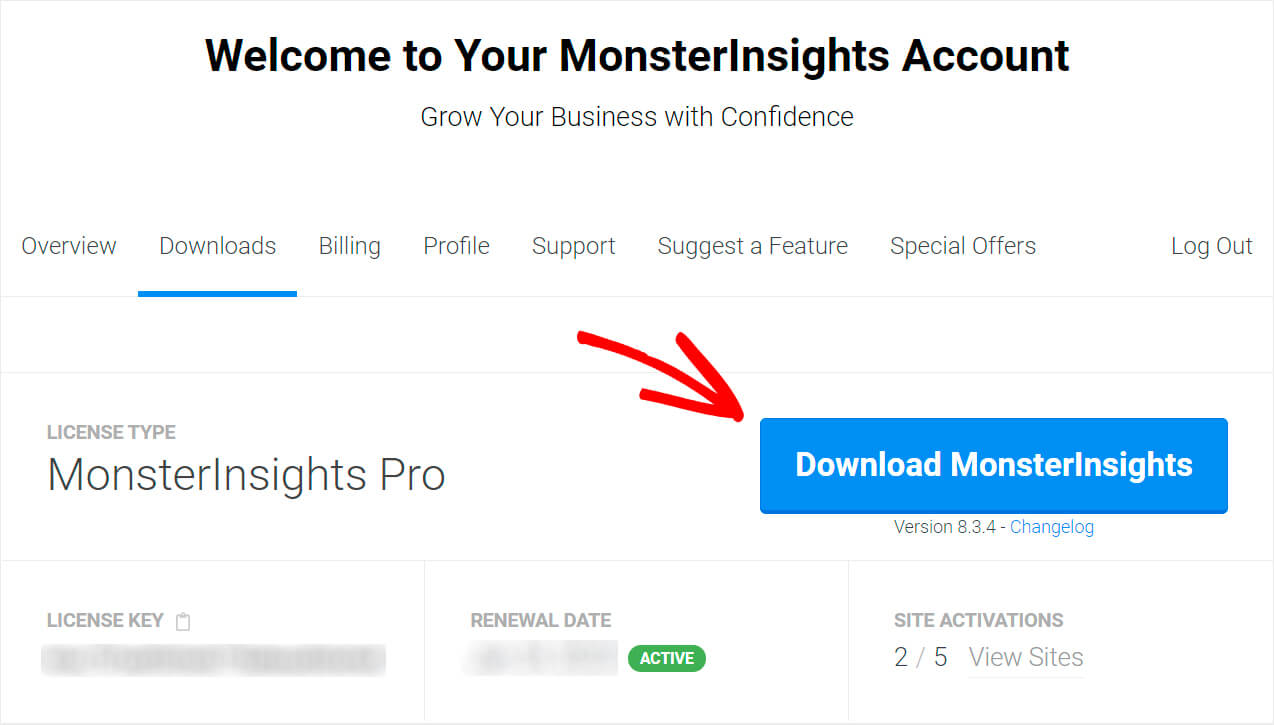
You can also copy your license key, as you’ll need it to activate the plugin later.
Once you’ve finished downloading, go to your WordPress site dashboard and upload the MonsterInsights plugin ZIP file.
Need any help on how to do that? Check out this step-by-step tutorial on how to install a WordPress plugin.
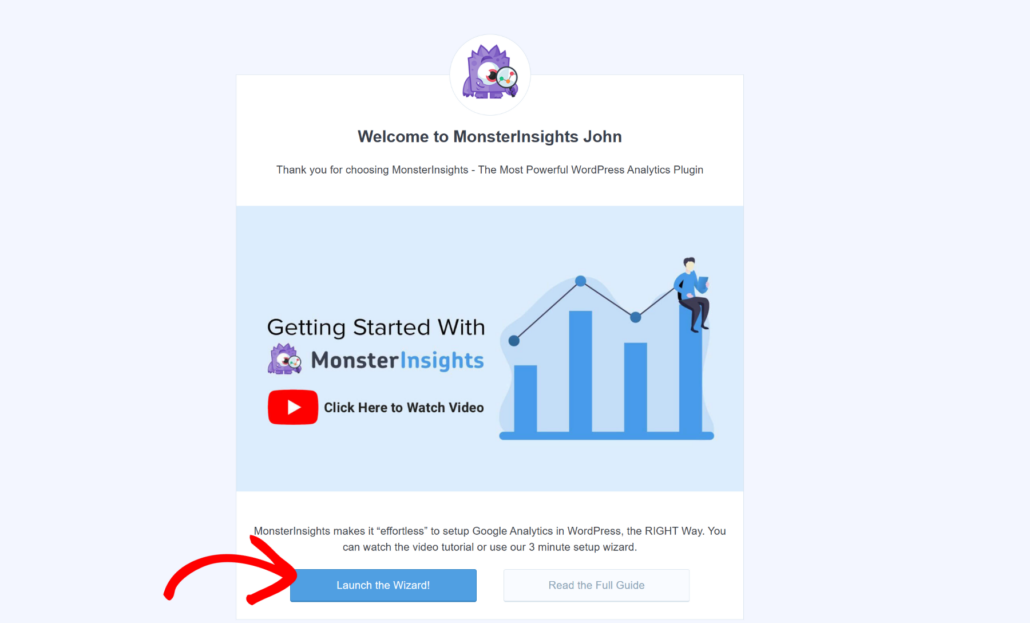
After you installed and activated MonsterInsights, you will see the setup wizard. Simply click the ‘Launch the Wizard’ button and follow the onscreen instructions to connect your site with Google Analytics.
If you require help, then please see this guide on how to install Google Analytics in WordPress for complete step-by-step instructions.
Once you’ve connected Google Analytics to your site, the next step is to add it to Google Search Console.
Feel free to check out the how to add a WordPress site to Google Search Console step-by-step tutorial for more details.
To see your site search terms data, simply navigate to the Insights » Reports page in your WordPress dashboard. From here, simply switch to the Search Console tab.
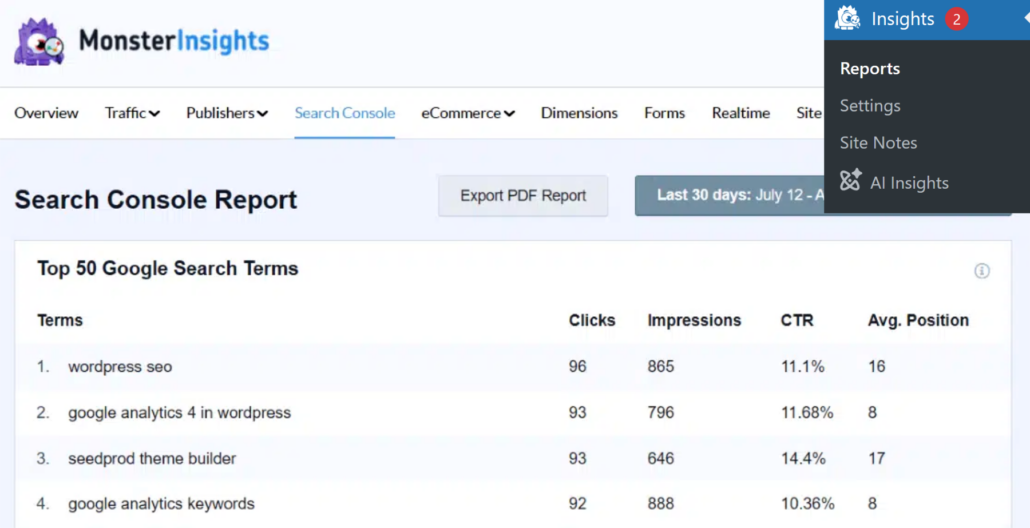
Here you’ll find a list of the top 50 search terms for your site with the number of clicks, CTR, and average positions in the search results.
It’s very easy to check the most popular keywords for which your site ranks without even leaving the WordPress dashboard.
If you also want to see the keywords people use to find your site via Google Analytics, go to the next step below.
How to Find Out What People Are Searching For on Your Site
The easiest way to find out what people are searching for on your site is to use a plugin like SearchWP.

This is the best WordPress search plugin that brings tons of useful features to enhance your site’s search capabilities.
Over 30,000 site owners already use it to provide their visitors with relevant search results and increase content discoverability.
Beyond the ability to track keywords on your site, you can also use SearchWP to:
- Display search results in live mode: Would you like to show search results on your site in a real-time mode? Turn it on in SearchWP settings to provide visitors with a better user experience.
- Make custom post types searchable: Have you published a new custom post type, but it doesn’t appear in search results? Using SearchWP, you can make custom post types searchable in a few clicks.
- Enable fuzzy search: Want your visitors to find the right content even if they make a typo? Enable fuzzy search with SearchWP and improve the discoverability of your content.
Now, let’s take a look at how you can find out what people are searching for on your site using SearchWP.
Step 1: Install and Activate the SearchWP Plugin
The first step is to grab your copy of the SearchWP plugin and create a new account.
Once done, you can go to your SearchWP account area and navigate to the Downloads tab. From here, simply press the Download SearchWP button and save the plugin’s ZIP file to your computer.
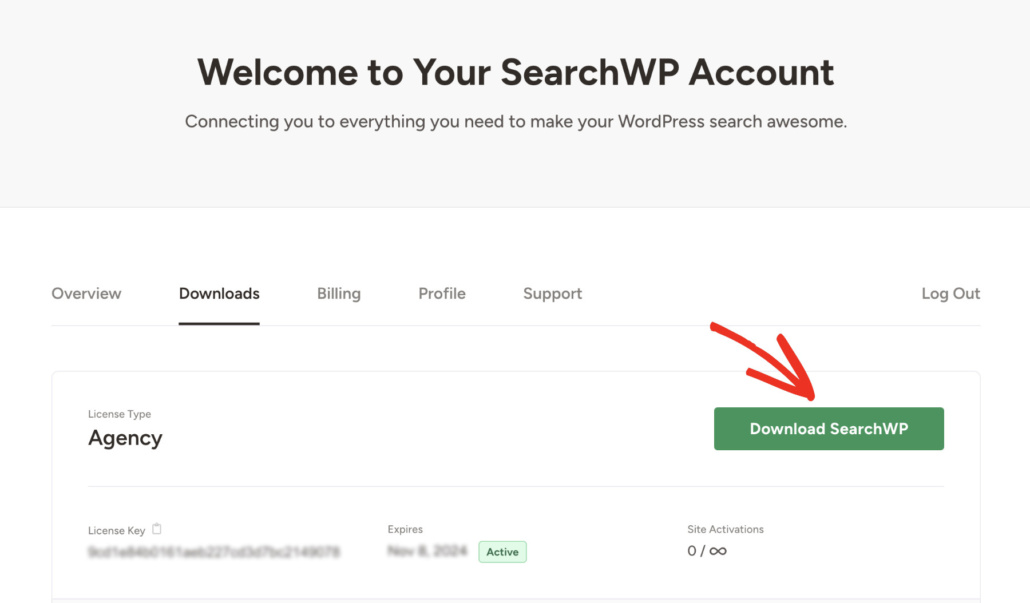
You can also copy the license key at the same tab, as you’ll need it to activate your copy of SearchWP further on.
Once you’ve downloaded the plugin, the next step is to upload it to your site.
Need a refresher on how to do that? Follow this detailed guide on how to install a WordPress plugin.
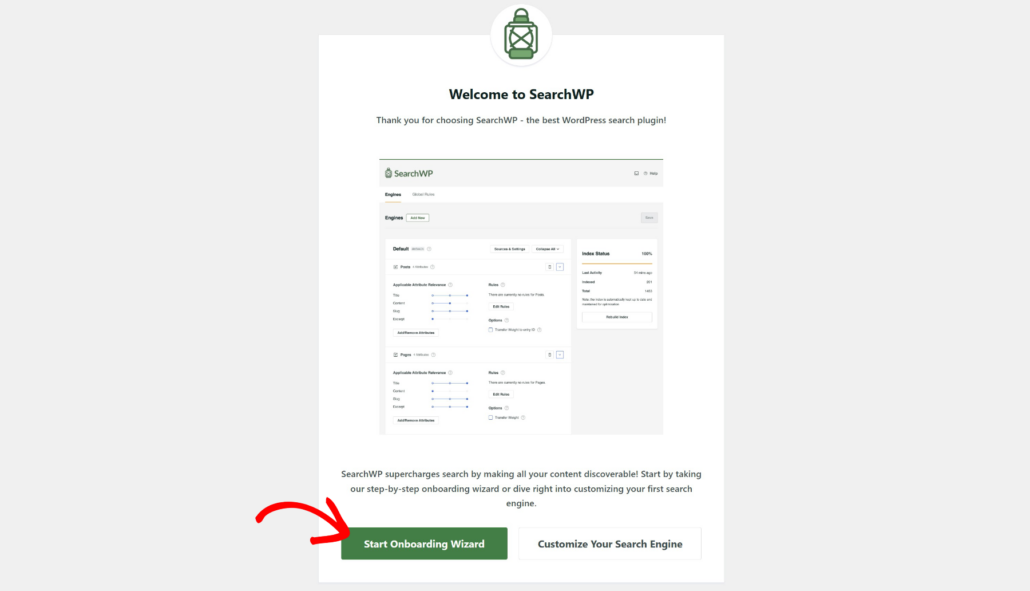
Upon activation, you’ll see a welcome screen and the setup wizard. Go ahead and click the ‘Start Onboarding Wizard’ button and follow the onscreen instructions.
Once that’s done, the next step is to install and activate the Metrics extension.
Step 2: Install and Activate the Metrics Extension
The SearchWP Metrics extension gives you a detailed report on your visitors’ on-site search activity.
You can use it to find out what people are looking for most often on your site, how much they click on search results, and much more.
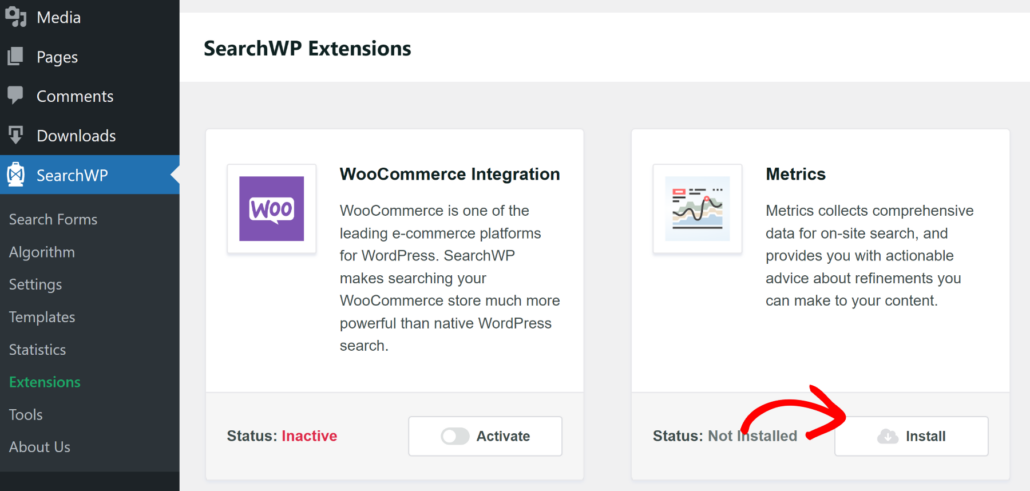
Simply head to SearchWP » Extensions from the WordPress dashboard and navigate to the ‘Metrics’ extension. From here, you can click the Install button.
Step 3: Check Out the Search Activity on Your Site
Once done, you can go to SearchWP » Metrics from your WordPress dashboard.
Here you’ll find data on all search queries that visitors have made on your site.
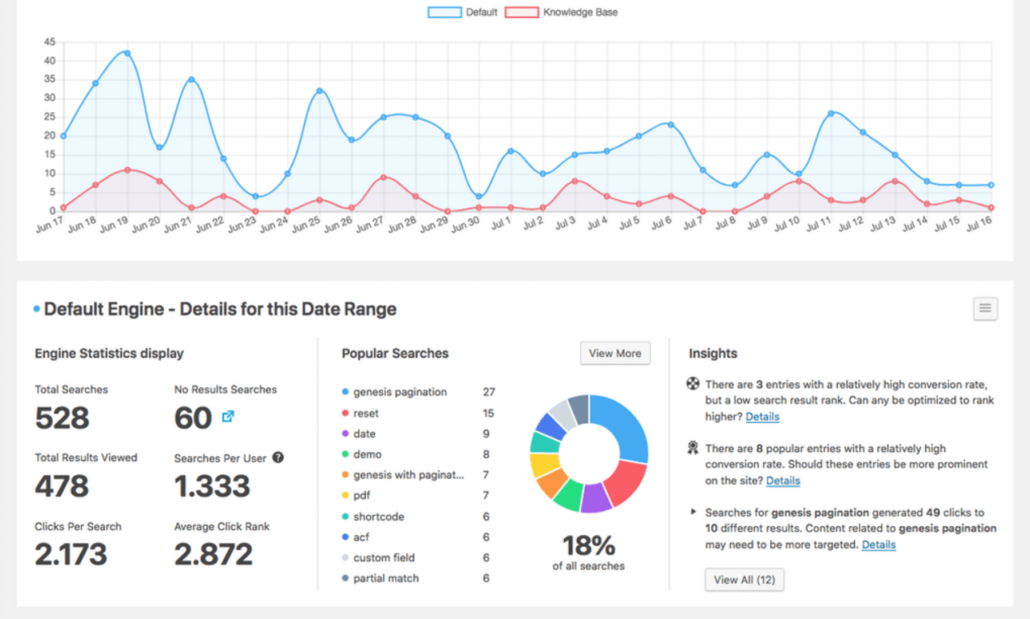
If you scroll down to the ‘Popular Searches’ section, you’ll see the search terms people use on your website.
That’s valuable information that can help you get to know your audience better, come up with new content ideas, and improve conversions.
Another advantage of using SearchWP is that you get actionable insights as well. For instance, it will highlight queries with high conversion rate, so you can optimize them across your site.
We hope this article helped you learn how to track keywords that visitors entered on your site and how to find out what keywords they used to find it in search engines. You may also want to see our guide on how to exclude pages from site search results in WordPress and how to fix WordPress search not working.
If you’re ready to start tracking keywords that visitors search for on your site, then you can grab your copy of SearchWP here.
