


If you’re looking to provide an exceptional user experience, then WordPress search plays a vital role. A clunky search experience can leave users lost and abandoning your site in a flash.
The default WordPress search has very limited features and doesn’t provide full control. However, with the right settings and plugin, you can improve your visitors’ searching experience.
In this article, we will show you how to set up WordPress search settings for best results.
Why Change WordPress Search Settings?
Think of your WordPress website’s search function as a friendly guide. It helps users navigate your content quickly and efficiently.
By fine-tuning the search settings, you can enhance the user experience. A seamless search experience keeps users engaged and encourages them to come back for more.
It also helps users find evergreen and valuable content on your site. Imagine writing a great blog post, but nobody can find it when they search for it on your site.
With the right search settings, you can make the process more efficient and provide visitors with relevant results.
That said, let’s look at how to configure WordPress search for best results.
1. Replace Default WordPress Search with SearchWP
While the default WordPress search might be good enough for small businesses and personal websites, it might not be the right fit for large websites that have lots of content or online products.
The default search has limited features and customization options.
For instance, the default search only covers post titles, content, and excerpts. It does not include additional information such as categories, tags, user comments, custom fields, documents, or details like SKUs and product attributes from WooCommerce products.
Plus, you can’t customize the default search settings from the WordPress dashboard. You’d have to edit code or hire a developer, which can be tricky and expensive for beginners.
This is where you can replace the default search with SearchWP. It is the best search plugin for WordPress and helps provide more accurate search results to visitors.
You can set up custom search engines for your website and include additional information in the search process without touching a single line of code.
First, you’ll need to visit the SearchWP website and sign up for an account. Simply click the ‘Get SearchWP Now’ button to get started.

After signing up for a new account, go ahead and download the SearchWP plugin
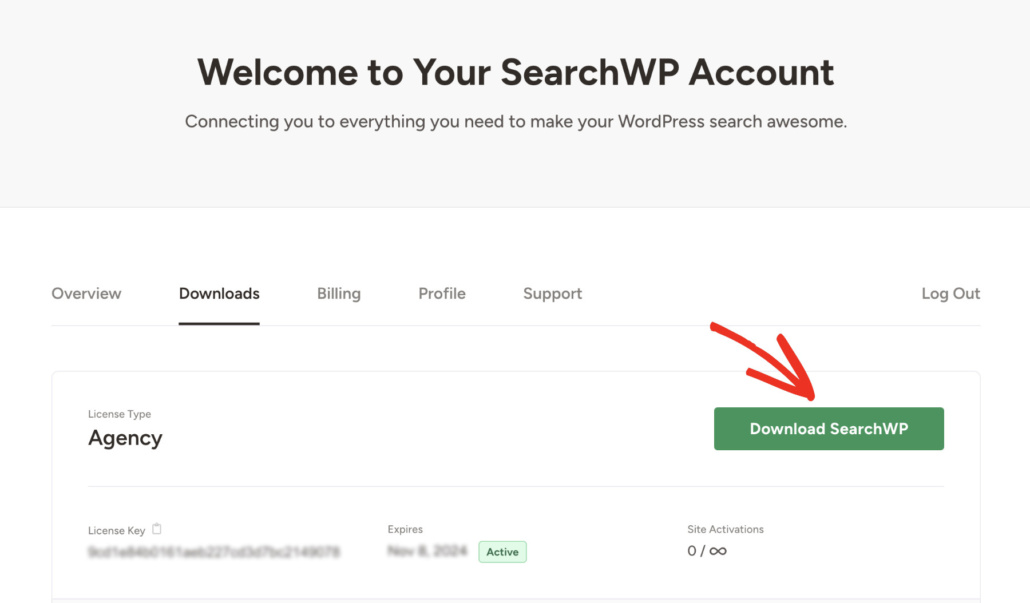
You can find the plugin in your SearchWP account area under the ‘Downloads’ tab. Simply click the ‘Download SearchWP’ button and save the file on your computer.
From here, you can install and activate the plugin on your site. If you need help, then please see this guide on how to install a WordPress plugin.
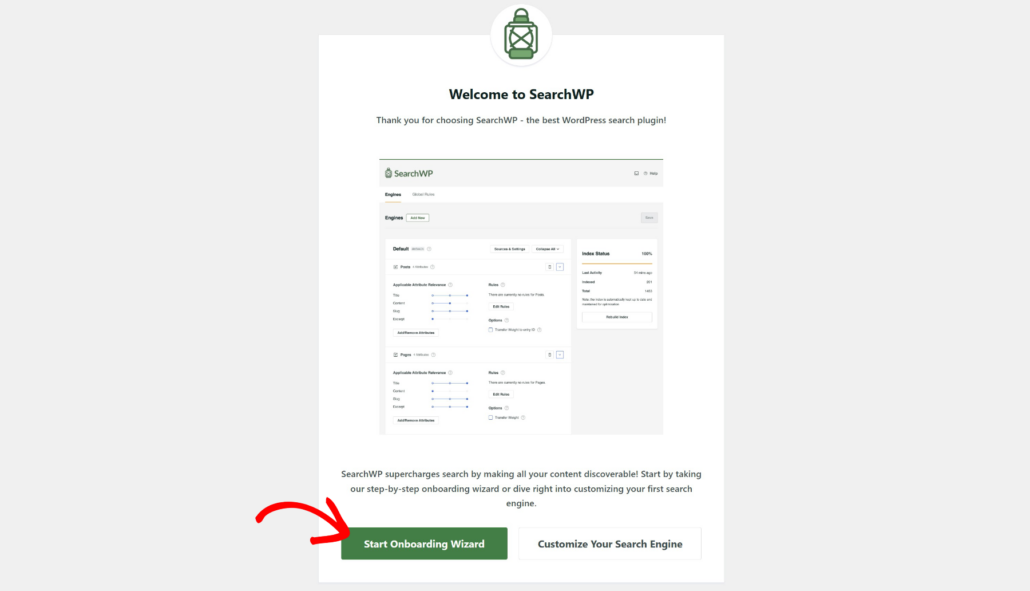
Once the plugin is active, you’ll see the SearchWP welcome screen and setup wizard. Go ahead and click the ‘Start Onboarding Wizard’ button and follow the onscreen instructions.
2. Add New Sources and Attributes to WordPress Search
Next, you can change WordPress search settings by editing or creating a new search engine.
With SearchWP, you can run multiple search engines on your site and choose additional sources and attributes to find content on your site.
To start, head to SearchWP » Algorithm from the WordPress dashboard. Here, you can edit the existing search engine or add a new one. For this tutorial, we will simply change the default search engine.
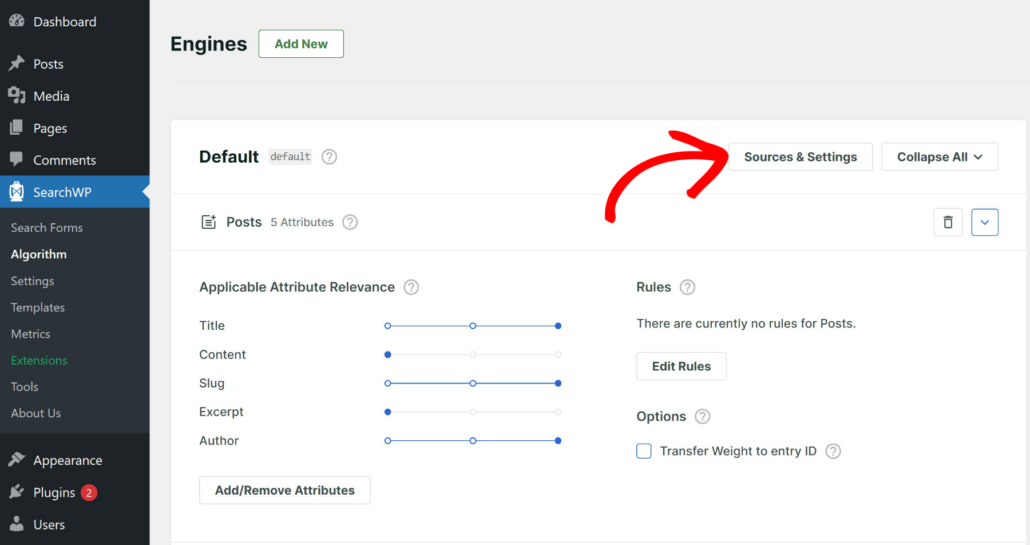
Next, you can click the ‘Sources & Settings’ button at the top. This will allow you to include additional sources for your WordPress search engine.
For example, you can select categories, comments, tags, and users to be included in the search process.
If you’re running an online store, installing the WooCommerce, Easy Digital Downloads, or BigCommerce integration (Pro plan and above) adds your product catalog as a source too.
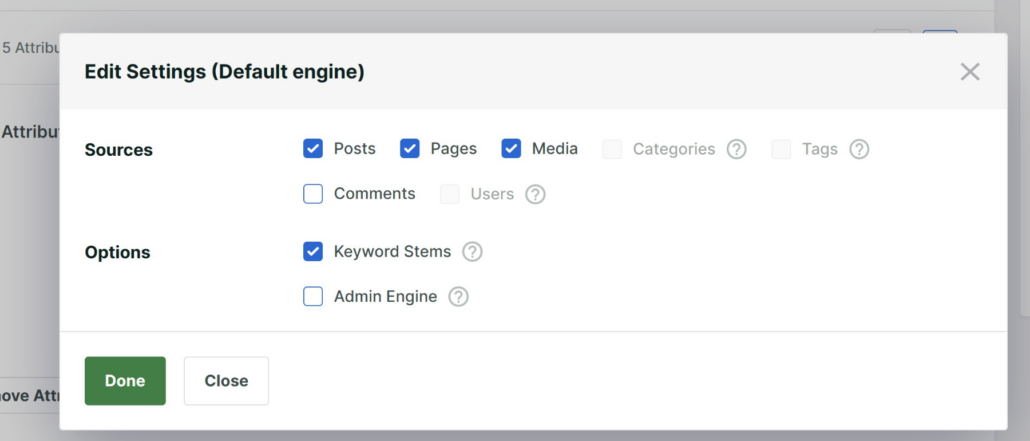
After selecting different sources, simply click the ‘Done’ button.
Next, you can change the weights assigned to each attribute for different post types by moving the slider.
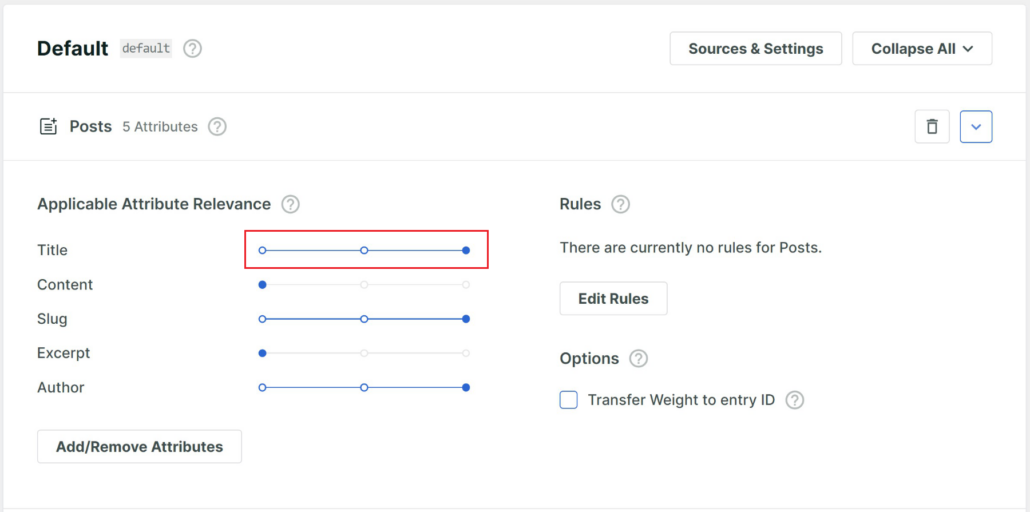
SearchWP also lets you add or remove attributes.
If you click the ‘Add/Remove Attributes’ button under the source, then you’ll see a new popup window with options to manage attributes.
For instance, you can choose different Attribute Sources, select custom fields on your site, and add taxonomies to add to the search process.

3. Add Rules to Get the Best WordPress Search Results
Next, you can also add multiple rules in SearchWP to create custom searches and help users find the best results.
Simply click the ‘Edit Rules’ button for any source in the search algorithm.
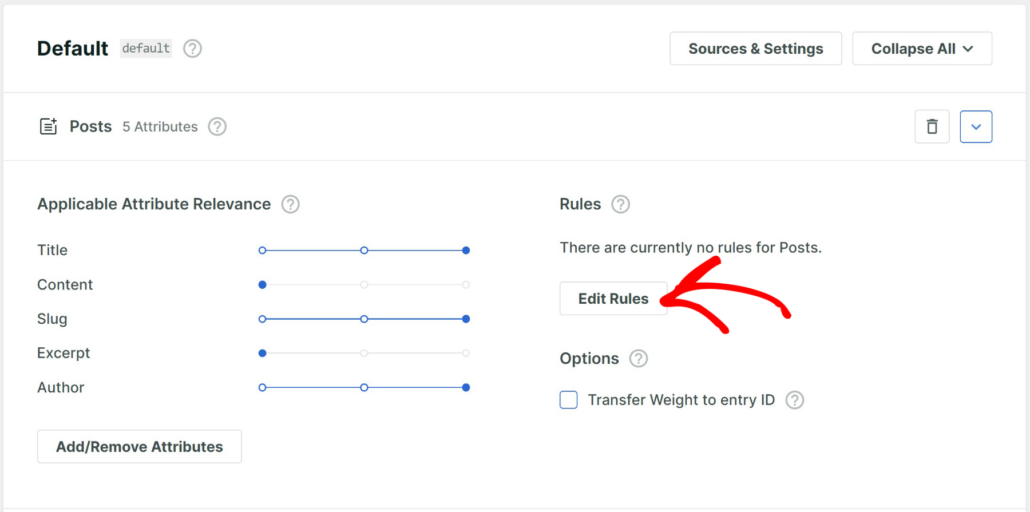
Next, a new popup window will open where you can edit the rules.
Go ahead and click the ‘Add Rule’ button.
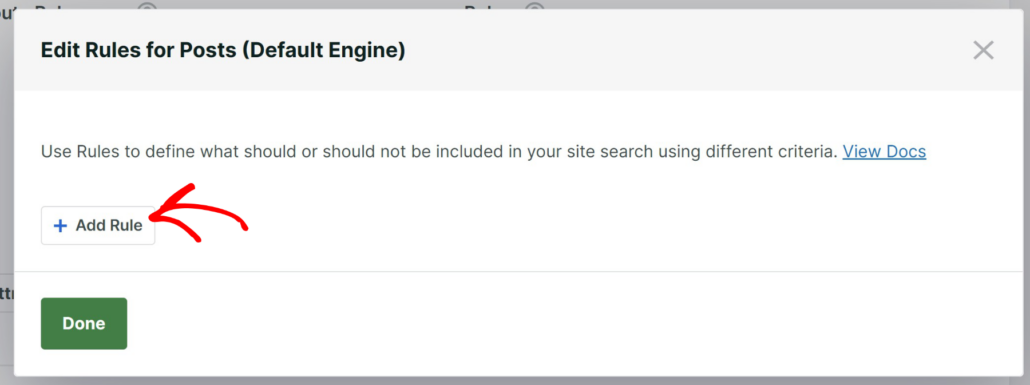
After that, you can enter the conditions for your new rule.
For instance, you can only show search results for posts and pages published before a certain date, display results from specific categories, or enter post IDs to filter content.

When you’re finished, simply click the ‘Done’ button.
Your visitors will now see search results based on the conditional logic rules you’ve set.
4. Add Synonyms and Stopwords to Improve Search Accuracy
Another way you can configure WordPress search settings is by adding synonyms for specific search terms and adding stopwords to enhance search accuracy.
This will help users find relevant content when they enter synonyms for related topics on your site.
In SearchWP, you can easily specify synonyms and stopwords. Simply head to SearchWP » Algorithm from the WordPress admin panel and then go to the ‘Global Rules’ tab.
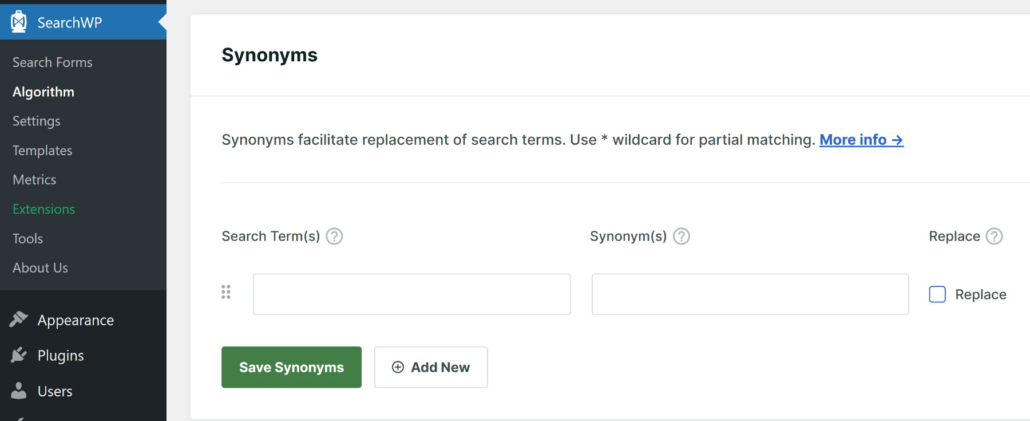
After that, you can click the ‘Add New’ button and then enter the search terms and their synonyms. When you’re done, simply click the ‘Save Synonyms’ button.
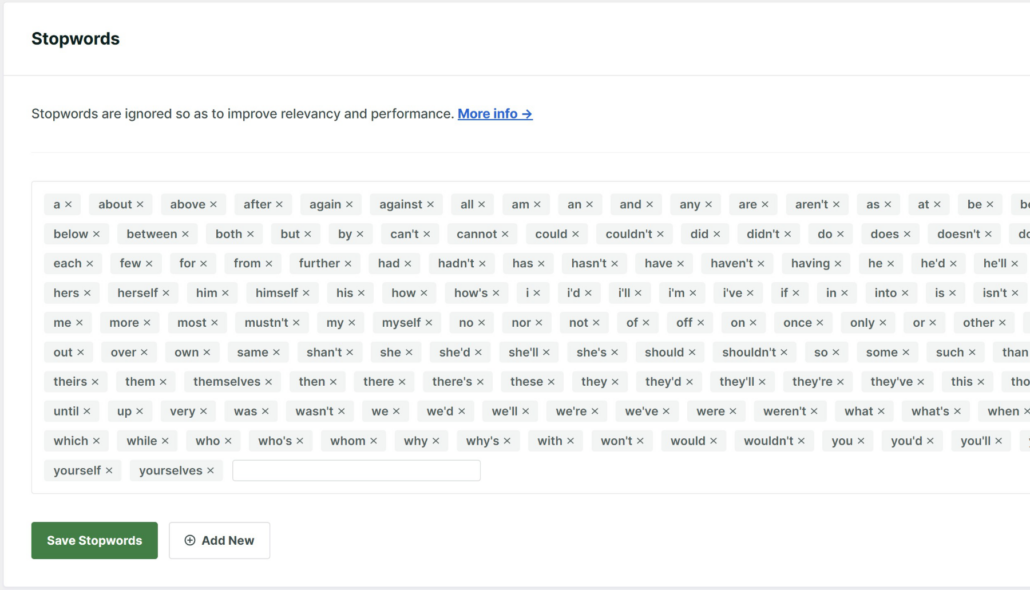
Next, you can scroll down to the Stopwords section and omit certain words to streamline the searching process.
Stopwords are common words (like is, the, an, a, in, at, and if) that are not helpful when searching and do not carry significant meaning in identifying the content.
By default, SearchWP will have a lot of stopwords added to the library and ignore them when searching. But you can also add more to improve search relevancy and performance.
5. Enable Partial and Fuzzy Searches in WordPress
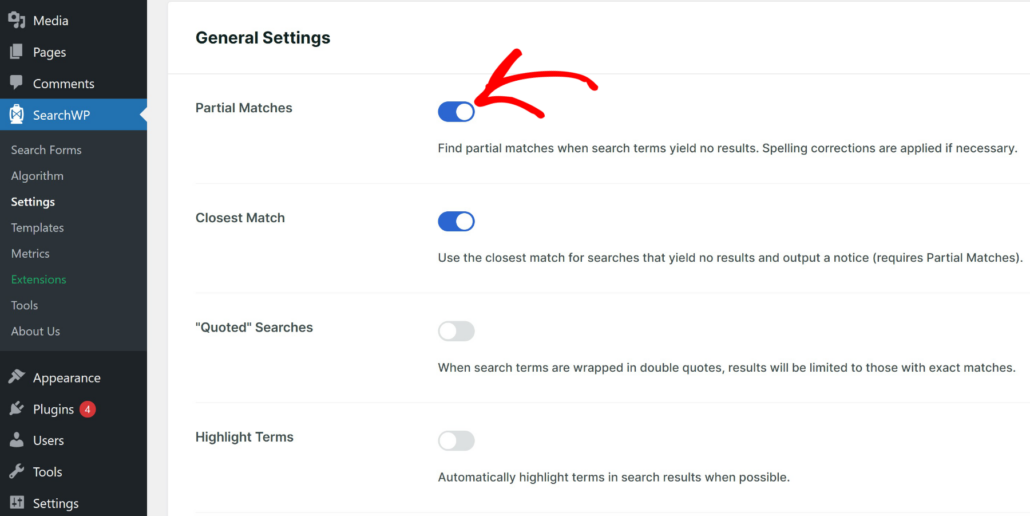
You can further expand WordPress search and show accurate results by enabling partial and fuzzy searches.
Fuzzy search helps provide search results for terms that are phonetically similar. So, if a user enters an incorrect spelling or makes a typo when typing the search term, then they’ll still see the right content.
With SearchWP, you can easily enable partial and fuzzy searches. Simply head to SearchWP » Settings from the WordPress admin panel and go to the ‘General’ tab. From here, scroll down to the General Settings section and click the toggle to enable Partial Matches.
For more details, please see our guide on how to add fuzzy search to WordPress sites.
Bonus: Improve WordPress Search Experience for Visitors
Aside from changing WordPress search settings, you can also improve the overall search experience for your visitors by making small tweaks.
1. Add Live Autocomplete Search
Many popular search engines, like Google, offer an autocomplete feature that guesses what the user is searching for and provides relevant results as the user types.
You can add the same autocomplete feature to your WordPress site and boost the search experience. Users can instantly find the content they’re looking for and also learn about other content on your site.
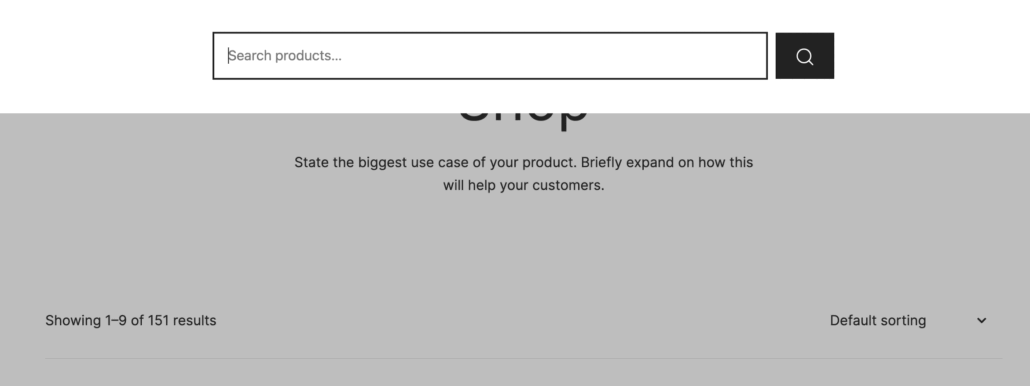
With SearchWP, it’s very easy to add an autocomplete feature to your site’s search. You can learn more by going through our guide on how to add live autocomplete search to WordPress sites.
2. Highlight Search Terms in WordPress
Do you want to point users to the right content quickly and get more clicks?
A simple way to do that is to highlight search terms on the search page. Your visitors can quickly scan the page, find relevant content, and click on the link.
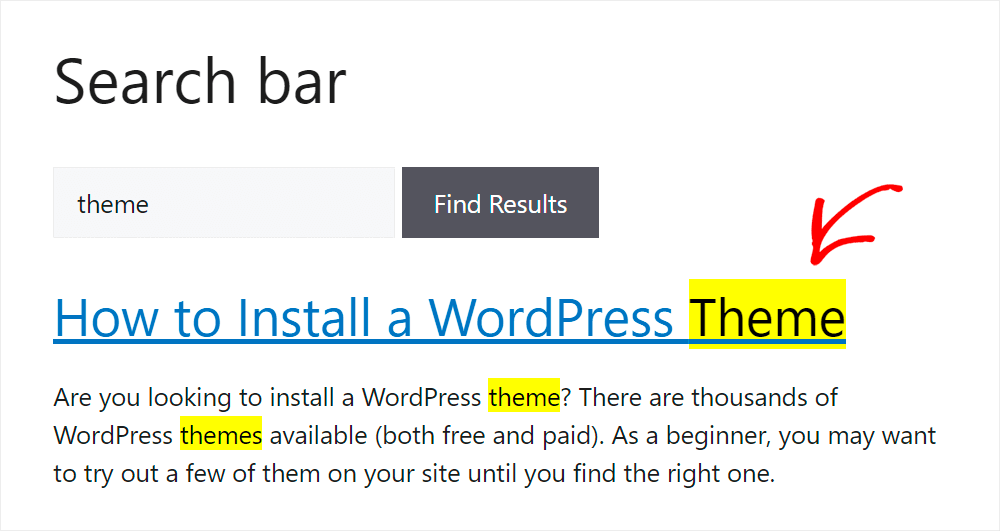
For more details, please see our step-by-step guide on how to highlight search terms in WordPress.
3. Add Filters to WordPress Search (All Access)
If your website has a lot of content or products, then you can add filters to WordPress search and make it easier for users to find what they’re looking for.
For example, you can create filters based on tags, authors, post types, product categories, and more. Your visitors can then use these filters to narrow down their search and quickly find relevant posts and pages.

If you need help setting up filters, then see our guide on how to add filters to WordPress search.
Do note that this requires WPFilters, the best filtering plugin for WordPress. And it is included in the All Access Bundle on SearchWP.
4. Add Voice Search to Your Search Form
Typing out a search query is not always the fastest option, especially for visitors on mobile devices.
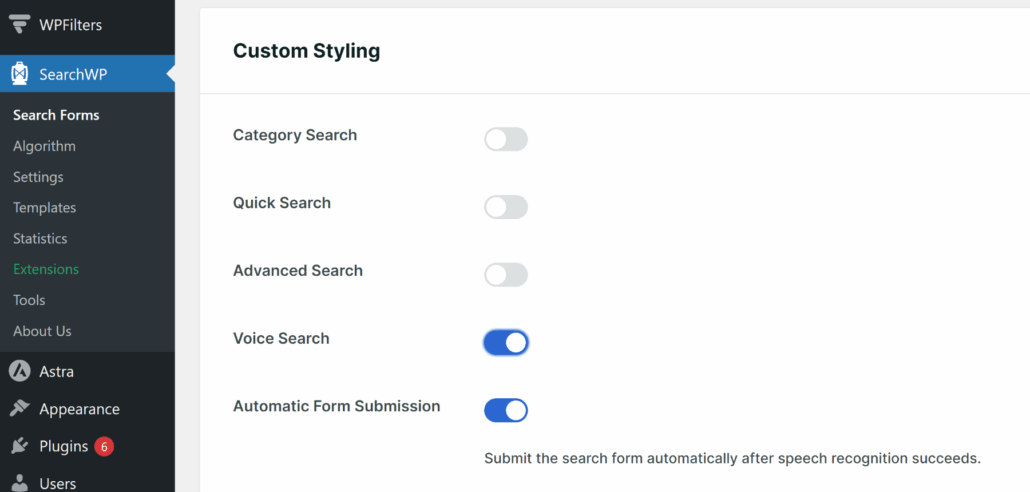
SearchWP lets you add a voice search button to any search form, so visitors can just speak their query instead of typing it.
You can turn this on from SearchWP » Search Forms, opening a form and enabling the Voice Search toggle under Custom Styling.
5. Redirect Common Search Queries to the Right Page
Sometimes visitors search for something that already has a dedicated page on your site, like “contact” or “shipping.”
Instead of making them dig through search results, you can redirect that search query straight to the right page.
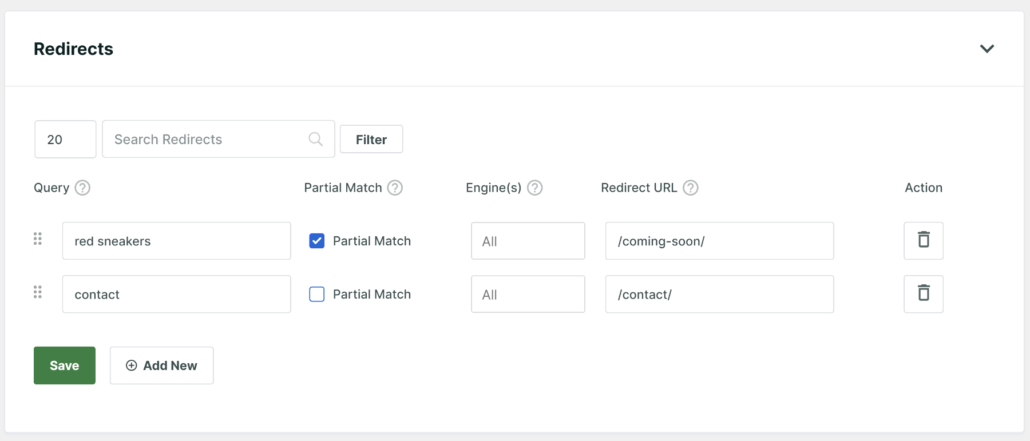
This feature comes with the Redirects extension, available on SearchWP’s Pro plan and above.
For more details, please see our guide on how to redirect search results in WordPress.
Keep Optimizing Your WordPress Search
Once your search settings are dialed in, there’s more you can do to keep improving the experience for your visitors. Here are a few guides worth checking out next.
- Ways to Improve WordPress Search for more quick wins beyond the settings covered here
- How to Optimize the WordPress Search Results Page to customize how your results actually look and feel
- How to Fix WordPress Search Not Working if you run into trouble after changing your settings
- How to Make WordPress Search PDF Files to extend your search sources to document content
- How to Make the Knowledge Base Searchable in WordPress if your site includes a help center or docs
- How to Limit WordPress Search for Custom User Groups to build on the Rules step above
Frequently Asked Questions
Why isn’t WordPress search finding relevant results?
The default WordPress search only looks at post titles, content, and excerpts, so it misses categories, tags, custom fields, and product data entirely. That’s why searches often come back empty or show unrelated posts. Once you set up sources, attributes, and rules in SearchWP, your search engine has a lot more content to draw from and can rank the best matches first.
Do I need to rebuild the index after changing search settings?
Changing engine settings, such as sources and attribute weights, usually triggers SearchWP to rebuild the index in the background. If you don’t see updated results right away, head to SearchWP » Algorithm and use the rebuild option to force a fresh index. We’ve found this clears up most cases where settings changes don’t seem to take effect right away.
What’s the difference between fuzzy search and partial matches?
Fuzzy search catches typos and misspellings by matching terms that are phonetically similar, so a misspelled word still finds the right content. Partial matches work differently, matching just part of a word, so searching “search” can also surface posts containing “searching” or “searched.” We recommend enabling both together for the most forgiving search experience.
Can I limit search results to specific content or user groups?
Yes, SearchWP’s Rules let you filter search results by category, post ID, publish date, and more. You can also restrict a search engine to specific user roles, which is useful for member-only content or internal search tools. We’ve used this to keep private documentation out of public search results on client sites.
How do stopwords and synonyms improve search accuracy?
Stopwords remove common words like “the” or “and” that add noise without helping match meaningful content, which speeds up searches and improves relevancy. Synonyms do the opposite by connecting related terms, so a search for one word can still return posts about a related term. Together, they help visitors find what they’re looking for even when their search terms don’t match your content word for word.
We hope this article helped you learn about how to set up WordPress search settings for the best results. You may also want to see our guide on how to include shortcode results in WordPress search and how to see search metrics in WordPress.
Ready to create a better and more personalized WordPress search experience? Get started with SearchWP today!